_GOTOBOTTOM
Яusso-Soviэt Forum
Russian or Soviet vehicles/armor modeling forum.
Trumpeter BTR-80
tread_geek
Visit this Community
Ontario, Canada
Joined: March 23, 2008
KitMaker: 2,847 posts
Armorama: 2,667 posts
Posted: Tuesday, December 29, 2009 - 08:53 AM UTC
Seasons Greetings to all. I decided to take a break from the frustrations of building my first diorama/vignette and try something simpler. I just submitted my in-box review of the following:


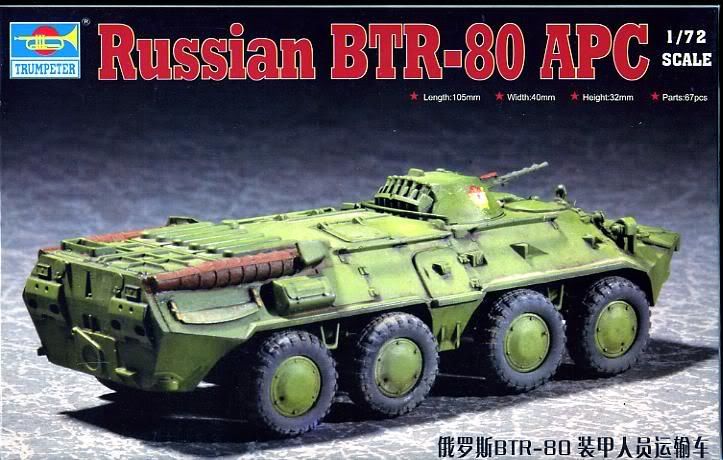
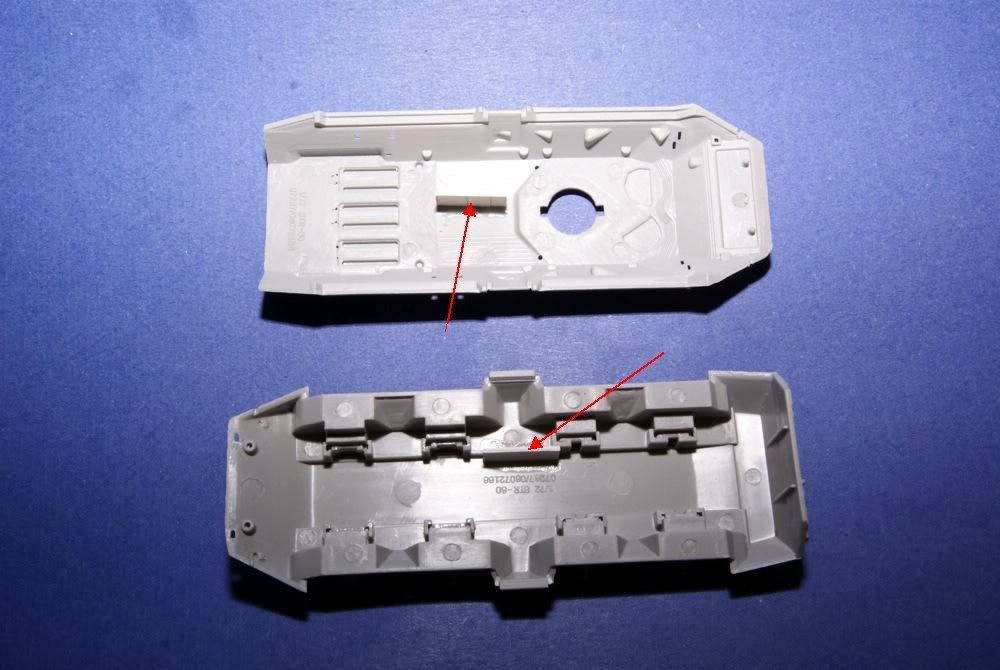
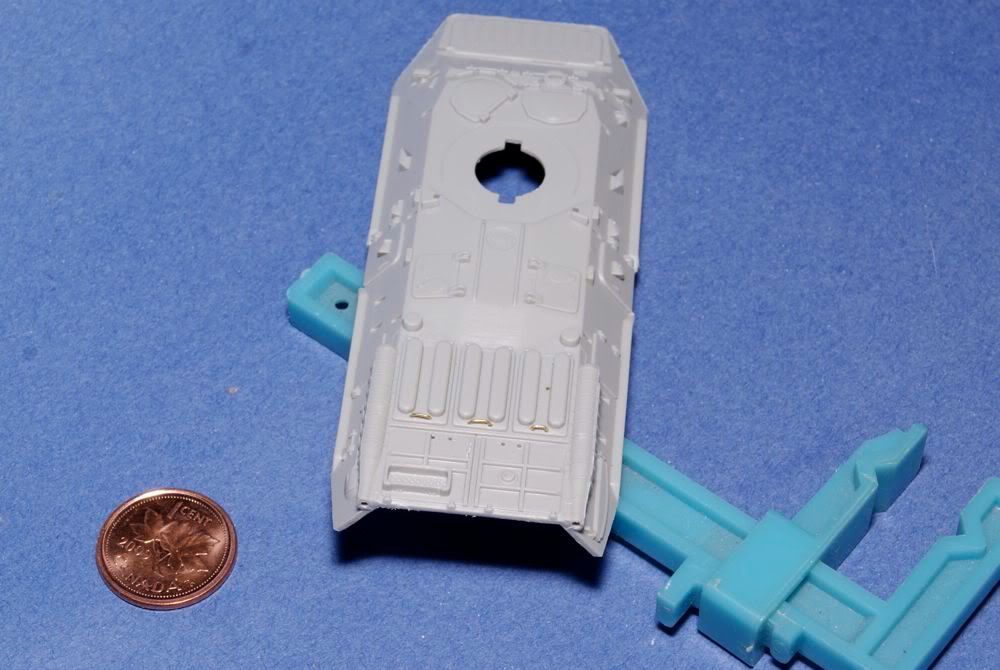
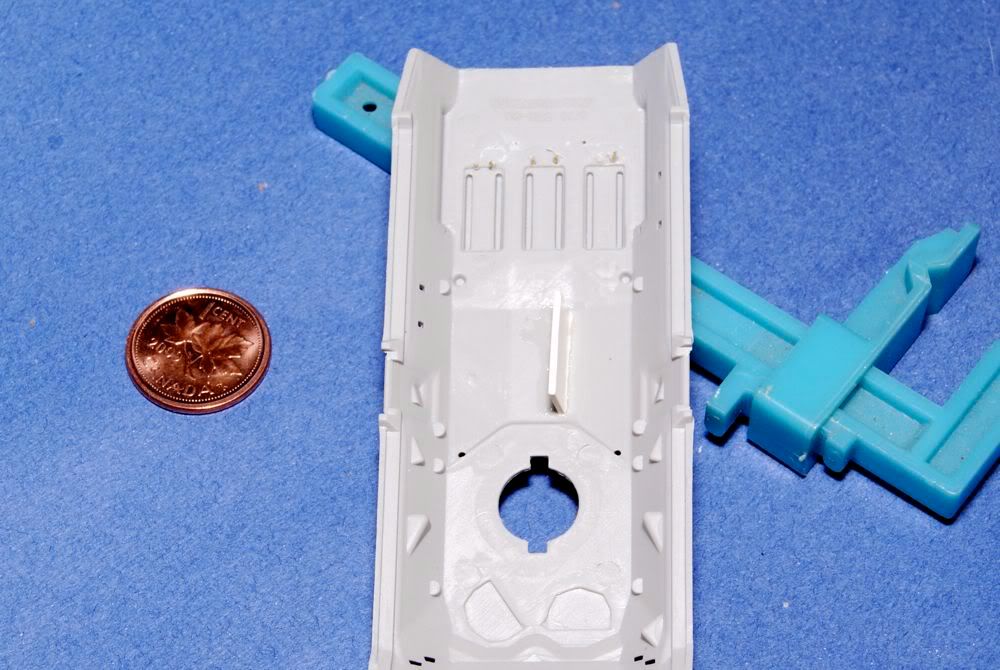
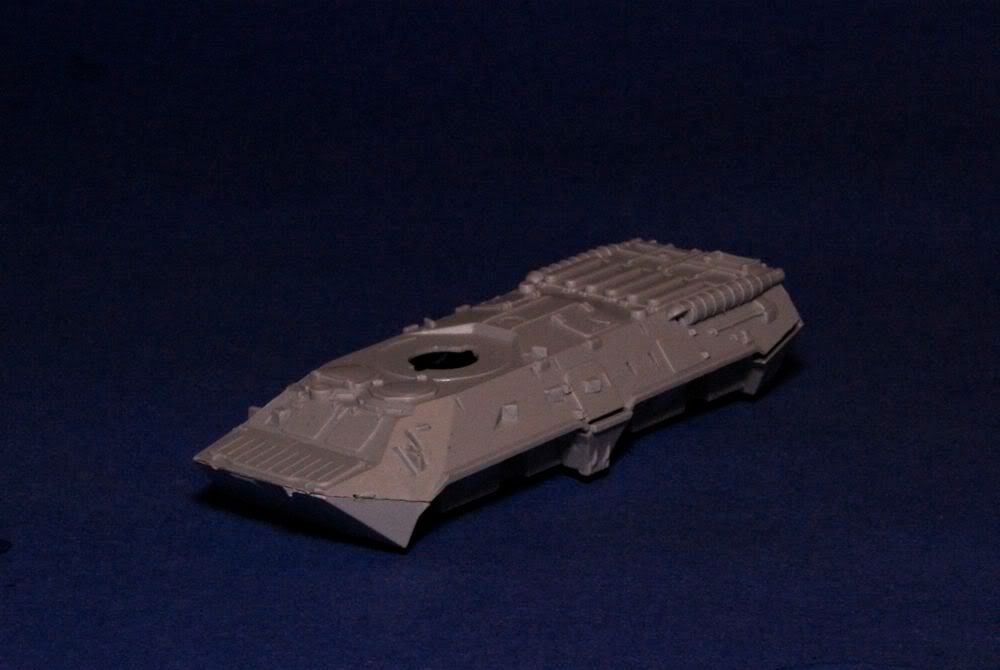
With any luck this Blog will become a build review. While there is only one sprue of parts and this build seemed simple enough, it's proving to have it's own unique challenges. One issue is that the hull top and bottom may need more work than I originally thought. The pieces just don't want to sit properly when I tried a dry fit.


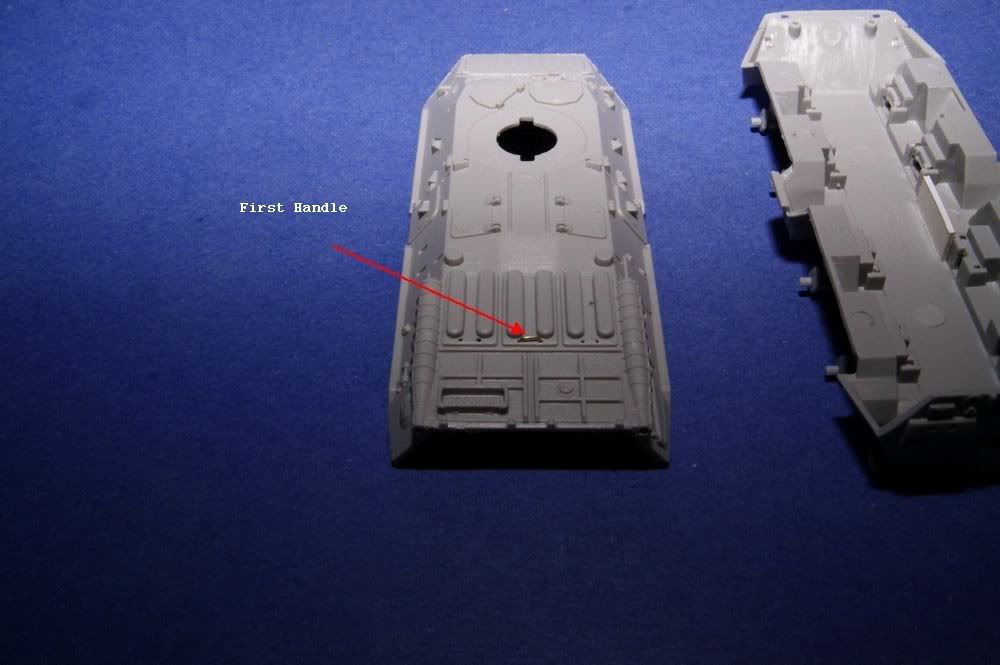
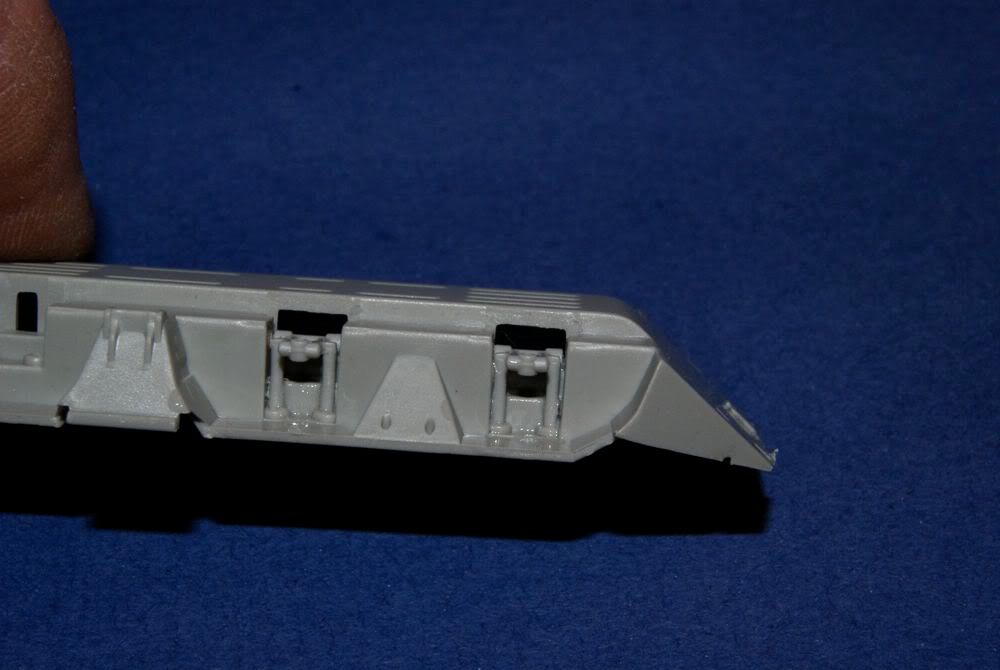
While the suspension seems simple enough in the instructions it's not without issues. Each initial set of suspension arms has these little pegs that jut out at 90 degrees from the main part. Wouldn't you know that the fist one that I cut from the sprue broke. 
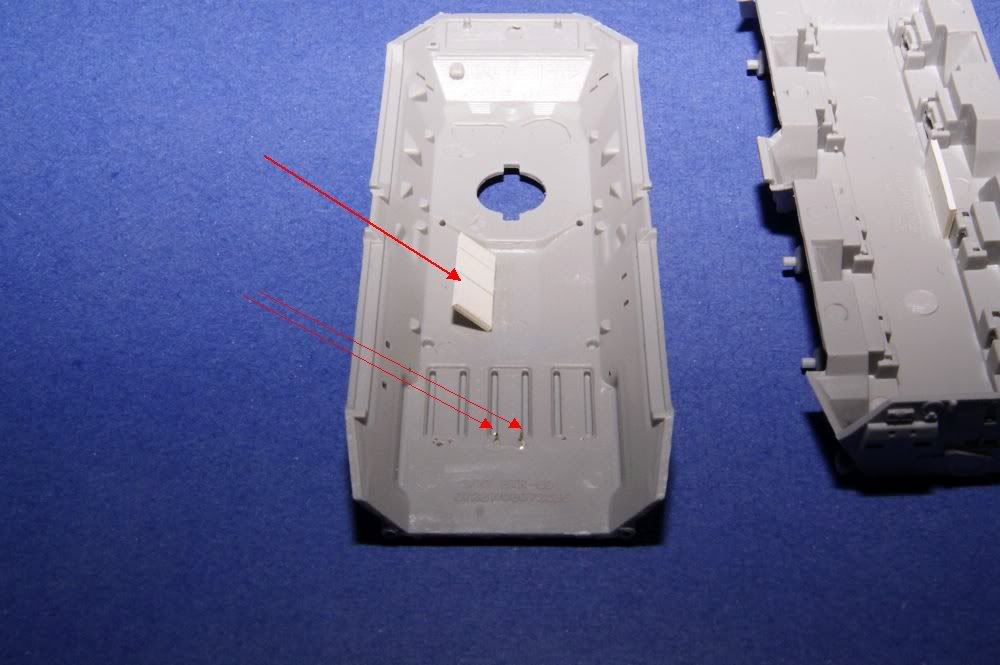
After repairing the damage I took more care with removing the others. I also found that the holes that these pegs are to fit into are too small for the diameter of the peg. Options were to enlarge the holes or sand down the end of the pegs. I chose the former option.


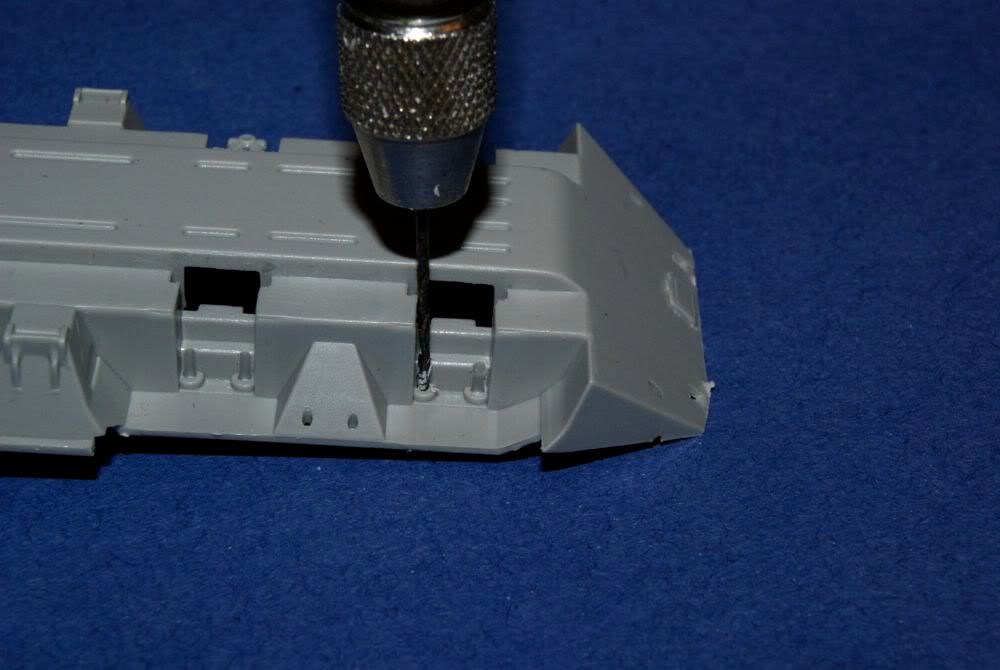
The first suspension pieces.


Moving along. All first pieces in place.


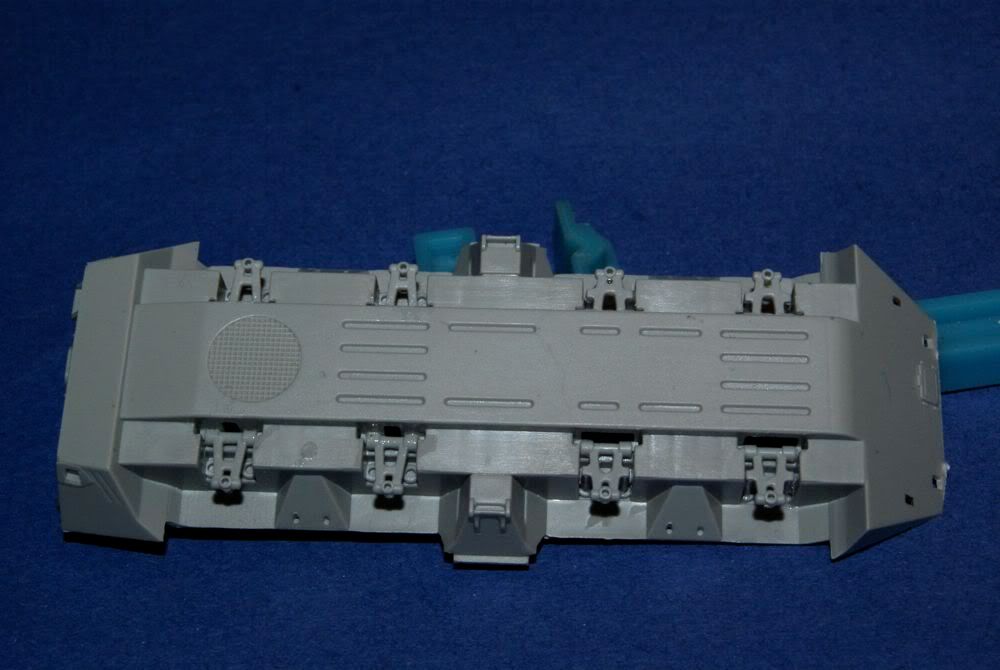
Suspension arms assemblies complete.


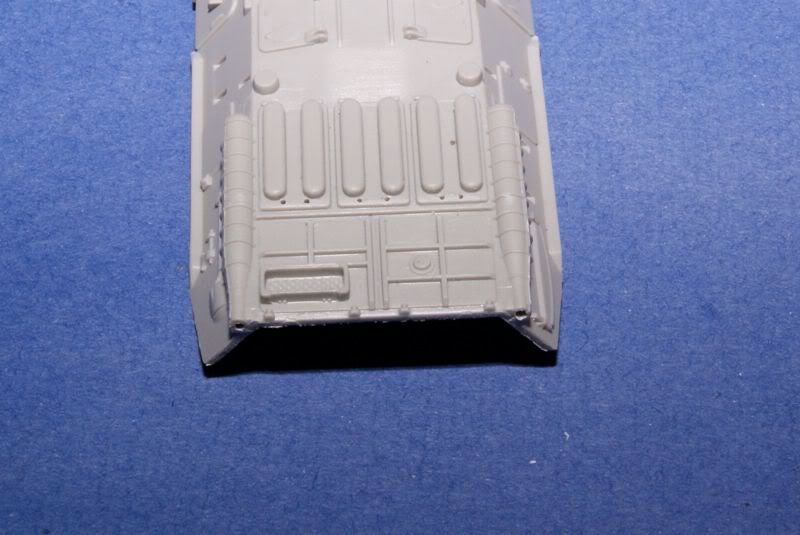
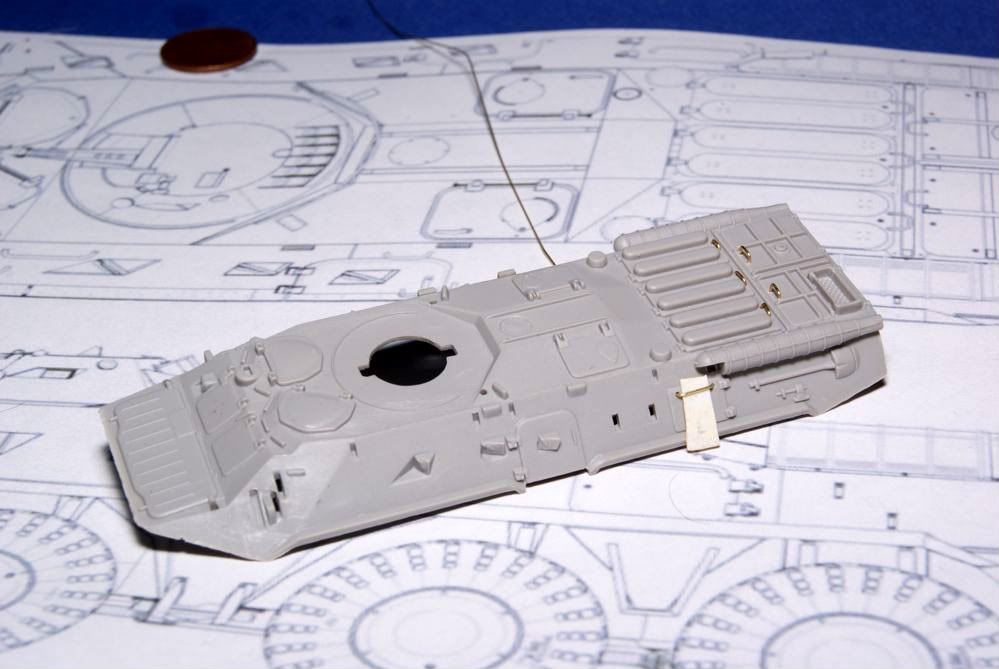
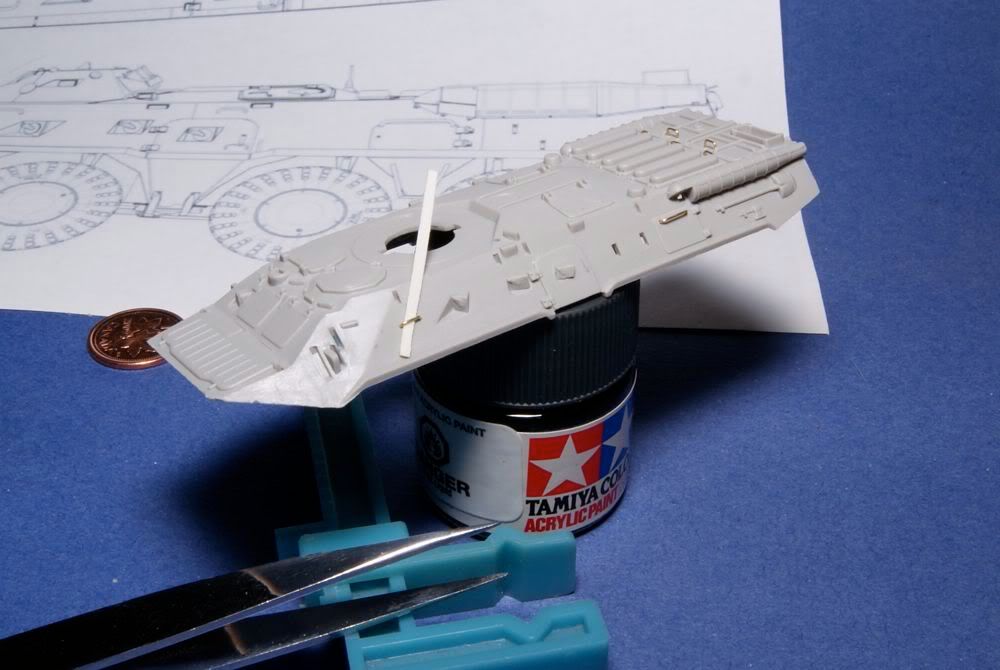
Towing points attached to front and rear hull. No problems here other than a requirement to use very fine jaw tweezers (which the SWMBO got me for Christmas).


The plans called for the attachment of foot rails during the suspension build but as they are very fine and delicate I decided to save them for later.

Thanks for looking,
Jan
sabredog
Visit this Community
Western Australia, Australia
Joined: July 22, 2007
KitMaker: 607 posts
Armorama: 599 posts
Posted: Tuesday, December 29, 2009 - 10:01 AM UTC
Jan

It is a good little kit! I finished mine about a month back and will take some pics shortly. Your build is looking good so far.

Cheers

Mike
tread_geek
Visit this Community
Ontario, Canada
Joined: March 23, 2008
KitMaker: 2,847 posts
Armorama: 2,667 posts
Posted: Wednesday, December 30, 2009 - 04:51 AM UTC
Thanks for the comments, Mike. I reserve judgement on the kit until I see what other hidden gremlins expose themselves. I'll be interested to see pictures of your build. Did you go for the plain green or the camo? I'm leaning toward the camo but wonder if my airbrush skills are up to the task. Back to work on the upper hull, pictures to follow after I make some progress.

Cheers,
Jan
Gorizont
Visit this Community
Sachsen, Germany
Joined: November 28, 2007
KitMaker: 1,462 posts
Armorama: 1,289 posts
Posted: Wednesday, December 30, 2009 - 05:14 AM UTC
Looking good so far!
My idea for this kit was the conversion for the A-variant. But I didn´t found a shop for this set. (here in germany)

greetings...
Soeren
tread_geek
Visit this Community
Ontario, Canada
Joined: March 23, 2008
KitMaker: 2,847 posts
Armorama: 2,667 posts
Posted: Wednesday, December 30, 2009 - 09:11 AM UTC
Thanks for the comments, Soeren. This is only my seventh build since returning to the hobby so I am still relearning things. I was hoping to get more done today but a social event distracted me. Hopefully more pictures tomorrow.

Cheers,
Jan
sabredog
Visit this Community
Western Australia, Australia
Joined: July 22, 2007
KitMaker: 607 posts
Armorama: 599 posts
Posted: Wednesday, December 30, 2009 - 10:41 AM UTC

Quoted Text

Thanks for the comments, Mike. I reserve judgement on the kit until I see what other hidden gremlins expose themselves. I'll be interested to see pictures of your build. Did you go for the plain green or the camo? I'm leaning toward the camo but wonder if my airbrush skills are up to the task. Back to work on the upper hull, pictures to follow after I make some progress.

Cheers,
Jan


Jan

I went for Russian Green as I love trying to achieve different shades of that basic colour
firstcircle
Visit this Community
England - South East, United Kingdom
Joined: November 19, 2008
KitMaker: 2,249 posts
Armorama: 2,007 posts
Posted: Wednesday, December 30, 2009 - 12:03 PM UTC

Quoted Text

I went for Russian Green as I love trying to achieve different shades of that basic colour


I think that means you have to try camo then Jan. . . at that scale, couldn't you go with a hard edge? Some of the finishes, although sprayed, are done so neatly that at 1/72 you'd be hard pushed to replicate what soft edge there is no matter how good your airbrush skills are. You could in that case try the toothpaste technique - that way you can plan the camo pattern nice and carefully and take less care with the a/b.
tread_geek
Visit this Community
Ontario, Canada
Joined: March 23, 2008
KitMaker: 2,847 posts
Armorama: 2,667 posts
Posted: Thursday, December 31, 2009 - 08:38 AM UTC

Quoted Text


Quoted Text

I went for Russian Green as I love trying to achieve different shades of that basic colour


I think that means you have to try camo then Jan. . . at that scale, couldn't you go with a hard edge? Some of the finishes, although sprayed, are done so neatly that at 1/72 you'd be hard pushed to replicate what soft edge there is no matter how good your airbrush skills are. You could in that case try the toothpaste technique - that way you can plan the camo pattern nice and carefully and take less care with the a/b.


Matthew thank you for your comments. I understand the reasoning that if Michael has done the green why not do the other scheme. I personally am prone to like camo vehicles/equipment but this subject does present some unique challenges. Unlike many Second World War subjects or indeed your Mk I there are a plethora of tiny/fiddley pieces protruding from the finished vehicle. Also my original intention was to replicate all the missing grab rails in wire. I have considered various methods for doing the camo from paper templates to using "Silly Putty" but each has it's drawbacks.

Your toothpaste method used on the Mk I seems to have worked admirably and I will probably give it a try on some older build. Now for some questions. Do you use the toothpaste in it's original consistency or did you dilute it? did you wait for it to dry or was it still "wet" when you sprayed?

Thanks,
Jan
tread_geek
Visit this Community
Ontario, Canada
Joined: March 23, 2008
KitMaker: 2,847 posts
Armorama: 2,667 posts
Posted: Friday, January 01, 2010 - 08:43 AM UTC
Happy New Year all. In a case of the best laid plans...I didn't get as much done as I expected. Festivities seemed to pop out of nowhere and I was obliged to attend. From looking at various pictures of the BTR on the Net, Trumpeter could have provided a few more grab handles. Not only along the hull sides but also on the engine deck. I've decided to correct this omission by drilling holes for home made brass wire replacements. Also, I bored out the exhausts as they were just solid plastic. Now if you have ever used a small (tiny) pin vice and drill you can appreciate the effort involved. Now add to this the fact that my smallest pin vice decided to give out after only two holes were made and with the LHS closed today I had to improvise. I modified the jaws of a slightly larger pin vice and tried using that. It somewhat works but after four or five turns the jaws need to be retightened, thus prolonging the drilling process.

So here is a picture of the results of an hour and a half labour.


Yippee, only about twenty more holes to go and I can start bending wire.

Cheers,
Jan
madmax5510
Visit this Community
Hunedoara, Romania
Joined: May 06, 2008
KitMaker: 354 posts
Armorama: 343 posts
Posted: Friday, January 01, 2010 - 11:46 AM UTC
A happy new year,Jan!

It seems that you have started a new build...i expect to see your Fehrmann Gruppe Tiger completed...

Cheers!
Boggie
Visit this Community
Newfoundland, Canada
Joined: December 08, 2005
KitMaker: 1,370 posts
Armorama: 1,331 posts
Posted: Friday, January 01, 2010 - 12:11 PM UTC
Jan
Thought you might like these two images
Photobucket
and to complicate this tiny BTR 80 you can add some slat armour!
Photobucket
Regards and Happy New Years
Bill
Braille
#135
Visit this Community
California, United States
Joined: August 05, 2007
KitMaker: 1,501 posts
Armorama: 1,485 posts
Posted: Friday, January 01, 2010 - 09:46 PM UTC
Jan,

Been trying to catch up with current events here on Armorama so I'm a little late on this one . . . sorry! Just found your most recent build log here and I'm going to be tagging along for the ride. Your off to an interesting start with excellent company to help aid you with some good information, drawings and current modifications for your modern armor build.

Happy New Year to you and wife.

-Eddy
tread_geek
Visit this Community
Ontario, Canada
Joined: March 23, 2008
KitMaker: 2,847 posts
Armorama: 2,667 posts
Posted: Saturday, January 02, 2010 - 06:56 AM UTC
@Dani I had to suspend my Tiger I build as I ran into some serious problems with the suspension (despite a lot of help from Eddy). Another problem is that my attempts at the camouflage turned out disastrous. I was making so little progress that I thought that I'd make something a little simpler for the Mighty Wheels campaign.

@Bill Thanks for the drawing and picture. I've looked at scores of pictures of BTR-80's and there seems to be odd unique variations on the grab/hand rails. The main ones that come with the Trumpeter kit appear to be pretty standard but some pictures have the long upper hull ones replaced with much shorter ones. I don't know if it's a local modification or a version variation. That picture of the improvised slat armour is interesting. From what I see it looks to be made from angle iron. HO scale angle iron? Darn you, you've got me thinking.

@Eddy There is absolutely nothing to apologize for, Eddy. I find it fascinating what people will comment on or what catches their interest. As you might have read above, I had to back out of the 88 Campaign due to the problems mentioned. BTW, thanks for your help with the Tiger idler problem.

In another case of the best laid plans running amuck , we were supposed to get a few snow flurries today. Well the weatherman definitely got it wrong big time. Were currently experiencing a pretty nasty blizzard so I guess a trip to the LHS for a new pin vice is out. I'll just have to fumble along with my modified one and just be careful.

Cheers,
Jan
Boggie
Visit this Community
Newfoundland, Canada
Joined: December 08, 2005
KitMaker: 1,370 posts
Armorama: 1,331 posts
Posted: Saturday, January 02, 2010 - 07:22 AM UTC
Jan
Here are some shorter grab rails.
Bill
Photobucket
Gorizont
Visit this Community
Sachsen, Germany
Joined: November 28, 2007
KitMaker: 1,462 posts
Armorama: 1,289 posts
Posted: Saturday, January 02, 2010 - 09:00 AM UTC
Hi William, thank you very much for the BTR-80 drawings!
Some years ago I built a 1/35 variant from Dragon only "out of box".
But some of the wheels broke; they were made of rubber.

Happy new year to all!
Soeren
Boggie
Visit this Community
Newfoundland, Canada
Joined: December 08, 2005
KitMaker: 1,370 posts
Armorama: 1,331 posts
Posted: Saturday, January 02, 2010 - 03:30 PM UTC
Soeren
You are welcome, but the real thanks has to go to Frenchy who so kindly shared them with me. I am in the midst of a 1/35th scale BTR 70 and I have a BTR 80 in the wings...it may take a while as there is a lot to fix.
Regards
Bill
tread_geek
Visit this Community
Ontario, Canada
Joined: March 23, 2008
KitMaker: 2,847 posts
Armorama: 2,667 posts
Posted: Sunday, January 03, 2010 - 08:58 AM UTC
A small update after some experimenting at creating the miniscule handles for the engine compartment hatches. First up, someone PMed me asking to see pictures of the hull interior pieces. I'm sure they have their reasons (scratching an interior). The white styrene tabs are glued there for use as clamping points for the painting process.


The first handle in place. Dimension wise it's just over 1/16 " wide or overall dimensions in metric of a little less than 3 mm wide and stands about 1 mm high. After flubbing a good inch and a half of wire (37 mm) I finally broke down and created a small styrene jig for bending. The camera was set on "super macro" and although the handle looks a little off in the picture I asure you that under a 5X magnifier it is quite straight.


Just for curiosity sake here's a picture of the handle from the inside. Note that I damaged the clamping point strip but it was repaired after the picture was taken.


I still have more holes to drill and hopefully will finish the engine deck handles today. If my eyesight and nerves hold out.

Thanks for looking,
Jan
Gorizont
Visit this Community
Sachsen, Germany
Joined: November 28, 2007
KitMaker: 1,462 posts
Armorama: 1,289 posts
Posted: Sunday, January 03, 2010 - 09:16 AM UTC
Wow, building/ adding such small parts (the handles) is very nice!

I also have some very small parts for one of my in-progress models. These are 84 small "teeth" (in 1/48 scale), which are ca. 1,25 mm long and ca. 0,9mm wide.
Also some more small parts were made using plastic-parts "from scratch".

greetings and good luck with the handles and more small parts.
Boggie
Visit this Community
Newfoundland, Canada
Joined: December 08, 2005
KitMaker: 1,370 posts
Armorama: 1,331 posts
Posted: Monday, January 04, 2010 - 11:51 AM UTC
Here is something that may help with the detail under the smoke poppers.
Photobucket
Regards
Bill
c5flies
Visit this Community
California, United States
Joined: October 21, 2007
KitMaker: 3,684 posts
Armorama: 2,938 posts
Posted: Tuesday, January 05, 2010 - 12:08 PM UTC
Fine looking build so far Jan, as well as an excellent review. I added the link and moved this to over here. Looking forward to seeing this one progress
tread_geek
Visit this Community
Ontario, Canada
Joined: March 23, 2008
KitMaker: 2,847 posts
Armorama: 2,667 posts
Posted: Monday, January 11, 2010 - 07:56 AM UTC
Well, life has a way of disrupting the best laid plans. I hoped to be much farther along by now but the afore mentioned excuse and a broken pin vice intervened. I'm taking some time today to play catch up.

A couple of not so exciting pictures. The handles for the main engine covers are done and in place. The holes for the radiator cover handles are drilled.


Hoping to have the rest of the handles/rails in place today and move on to more fun stuff.

Cheers,
Jan
tread_geek
Visit this Community
Ontario, Canada
Joined: March 23, 2008
KitMaker: 2,847 posts
Armorama: 2,667 posts
Posted: Thursday, January 14, 2010 - 06:15 AM UTC
I finally got my pin vice working and made some more progress on the little BTR. The exact positioning of the grab handles/rails can be trying at best but thanks to the drawings Bill (Boggie) provided I can measure and locate them fairly accurately. The process is rather tedious but I anticipate the end result will be worth the time and effort.

The engine compartment handles are done so next up was the upper hull side doors. Here you see the first handle on the left door, The piece of styrene is temporarily placed under the wire to act as a spacer while the glue sets.


Next up was the forward handles.


As far as I can tell there are only four more grab bars to locate on and about the upper part of the troop doors. You can see them in the picture below.


These will be a bit tricky as they will be positively tiny in this scale. Once those are done I'll prime the metal parts with oil based paints, do some preshading and then on to the kits plastic parts.

Thanks for looking and any comments or questions are welcome.

Cheers,
Jan
sabredog
Visit this Community
Western Australia, Australia
Joined: July 22, 2007
KitMaker: 607 posts
Armorama: 599 posts
Posted: Thursday, January 14, 2010 - 10:06 PM UTC
Looking good so far Jan. I did ot add the extra grab handles to my build. Wish I had now

Got another kit in the stash so perhaps when that is dragged onto the work bench!

Cheers

Mike
Dmitriy_Dregval
Visit this Community
Respublika Krym, Ukraine / Україна
Joined: January 15, 2010
KitMaker: 43 posts
Armorama: 42 posts
Posted: Friday, January 15, 2010 - 05:48 AM UTC
I would be glad if it helps in building a model.

http://news.hobby.net.ua/forum/index.php?showtopic=1354
tread_geek
Visit this Community
Ontario, Canada
Joined: March 23, 2008
KitMaker: 2,847 posts
Armorama: 2,667 posts
Posted: Friday, January 15, 2010 - 06:38 AM UTC
@Michael Thanks for your comments, they are always appreciated. I added some handles on my Stryker build and I believe that they did add to the overall effect. After being exposed to this kit I am sorry I didn't get another when they had them. With some effort I can see opening up a troop door and perhaps one of the hull top hatches. Replacements for them would have to be scratch built but then one could create a rudimentary interior and have it viewable through the openings. I've seen an interior for one of these in a larger scale and it is fairly simple and Spartan. Nothing that can't be duplicated with styrene sheet and some imagination.

@ Dmitriy_Dregval Thank you for your interest but the page you link to does not show anything. I had Google translate it and it appears the page is "dead" or moved.

Cheers,
Jan
 _GOTOTOP