Campaigns
Where Armorama group builds can be discussed, organized, and updates posted.
Sherman Campaign
MrDrummy
Visit this Community
Texas, United States
Joined: October 17, 2009
KitMaker: 86 posts
Armorama: 82 posts
Posted: Wednesday, August 04, 2010 - 09:06 AM UTC
Thanks to everyone for the comments on my figure. I added a strap for the binoculars, and will be building up the lenses with Future while I continue my build!


Anyone ever order from TankRatsAFV? I can't seem to get in contact with the guy, and it's been two weeks since I placed my order. Hasn't even shipped yet....

@ Ian - I think that Sherman looks great. I'm still new to armor, so I'm not sure how much criticism I can level at a guy! If anything, the color looks a little too dark to me, but what do I know? What matters is that you've got your modeling juices flowing again. Keep it up!

@ Eric- Thanks for the mud tip. I think that I'm going to try another experiment on a JS-2 Stalin that I'm building using white glue, extremely fine dirt, and the cut up grass. I think that should give me the "mud" look, as it really will be mud. We'll see what happens!
barkingdigger
Staff MemberAssociate Editor
ARMORAMA
#013
Visit this Community
England - East Anglia, United Kingdom
Joined: June 20, 2008
KitMaker: 3,981 posts
Armorama: 3,403 posts
Posted: Wednesday, August 04, 2010 - 11:39 AM UTC
Stefan,

The M36B1 is kinda on hold at the moment - I reached the point where spraying was necessary and then hit lots of "real life" turbulance that put complex modelling on a back burner. In the meantime I did some small-scale plastic surgery on the tractor, and I've thrown together a Stug IV for the Workhorse campaign. I'll get back into the M36B1 in the near future, but I want to push a few simpler builds through first while hobby-time-eating issues like our upcoming model club show are sorted out. Eventually though I still like the idea of turning the M36 builds into a Feature. So many projects, so little time!

Justin, that figure is so cool! Sorry to hear you've ordered from Tankrat - there are lots of complaint threads about the guy...

Tom
ppawlak1
Visit this Community
Victoria, Australia
Joined: March 14, 2006
KitMaker: 1,973 posts
Armorama: 1,843 posts
Posted: Wednesday, August 04, 2010 - 08:20 PM UTC
@ Michael - looking forward to seeing the M4A3 build - Welcome !!

@ Martin - Mmmmmmm Jumbo - Yummy !! That is a cool model, and It looks great so far ! The painting will be very interesting. What markings will you be using ?

@ Stefan - nice progress and thanks for posting the reference shot. I like the mixture of wheels, I will doing the same thing on mine.

@ Justin - The figure looks great, as I said before I bet it looks awesome in the hand. ---------------> Good luck with TankRat, you'll need it

Cheers

Paul
MrDrummy
Visit this Community
Texas, United States
Joined: October 17, 2009
KitMaker: 86 posts
Armorama: 82 posts
Posted: Thursday, August 05, 2010 - 01:54 PM UTC
@All-- I'm hoping that that the IPMS national convention is what's keeping Tank Rat from replying to emails or messages. We'll see next week when it's over.

@ Stefan - Looks like you and I posted at the exact same time yesterday, and I didn't catch your post til now. Your Sherman is looking great. That picture is quite a nice one as well. I'm new to Shermans/armor, so not a lot stands out to me there, but the GI guarding those POW's does. What's he got under his helmet? Something to keep the sun off? Is that army issue? Would be a neat figure, for sure. Also, if it were a voting issue, I think sandbags stacked all over look pretty neat!
Dangeroo
#023
Visit this Community
Zurich, Switzerland
Joined: March 13, 2009
KitMaker: 2,058 posts
Armorama: 1,656 posts
Posted: Thursday, August 05, 2010 - 07:34 PM UTC
Justin, thanks for the comment. Your figure looks great by the way. I noticed that the sandbag armor doesn't really cover the DV parts so I will probably have a go at sandbags (my last effort was about 5 years ago). About the guy in front: to me it looks like he's got a sweater or something stuck under his helmet and the two arms sticking out... Or it could just be a blanket, it seems to be going over his shoulders.

EDIT: Probably more like something to keep the cold out, not the sun off...


Quoted Text

The M36B1 is kinda on hold at the moment - [...]. Eventually though I still like the idea of turning the M36 builds into a Feature. [...]
Tom


Tom, you're on with that feature!

Cheers!
Stefan
Abn-modeller
Visit this Community
Stockholm, Sweden
Joined: July 05, 2009
KitMaker: 76 posts
Armorama: 75 posts
Posted: Friday, August 06, 2010 - 01:29 AM UTC
Hello.. so I'm getting started with my M4A1 DD, building it without the screens and stuff. My base is the Tasca M4A1. I have a little problem though, the only picture of an american DD i have that shows the transmission cover shows the one-piece but it's slightly different. There's two types of one-piece transmission covers, aren't there?


Here's what i mean, to the right is the one with four attachments for hooks(sorry i don't know what these are called!)
So is there a big defference between these?

Secondly I'm making the tgank with the late production low-bustle turret, with a loaders hatch. But the Tasca turret is the standard low-bustle without this. So, how do i know exactly where to make the hatch- cut away the turret roof?
MikeM670
#020
Visit this Community
Illinois, United States
Joined: December 28, 2006
KitMaker: 278 posts
Armorama: 231 posts
Posted: Friday, August 06, 2010 - 10:55 AM UTC
I have started work on the Sherman. First up are the wheel sets. Just thought I would share my technique for wheel painting. I'm sure this technique has already been described but I thought a few pictures might be interesting.

I place each wheel on a bamboo skewer for ease of handling. The wheel is shown with a coat of flat black tamyia paint.


I have placed the wheel and stick through a piece of cardboard which will hold the wheel steady and catch any overspray.


Using a portion of a plastic circle drawing templete that was close to the rim size, ( I sanded it to make it fit properly), I held it down to the wheel with some support from the cardboard and sprayed the drab olive green color.


Here is the finished wheel.


I find that Tamyia Paints rub off easy so I sprayed some Future on them to seal in the paint.


Comments?
thebear
Visit this Community
Quebec, Canada
Joined: November 15, 2002
KitMaker: 3,960 posts
Armorama: 3,579 posts
Posted: Friday, August 06, 2010 - 02:14 PM UTC
Hi Cal...I've been looking around at the few pictures I have of DD tanks and you are right about the transmission cover being the late sharp nose type and that some had the the loaders hatch ...but (you know there is always a but) All the pictures I found were of large hatch later type hulls (I do know there were earlier type hulls used as well but did they have the late cover is anyones guess... Now for the turret.... The late low bustle turret with built in cheek armor and a loader hatch is a very rare thing and I don't think there is one picture out there to prove this turret was ever manufactured..(there were kits provided to add them but I don't think any were done before D-day) The high bustle turret was introduced because of the problem of clearing the large front hatches ...So I think (and this is only my opinion ) That any DD tank with a loaders hatch is probably an early High bustle turret ....
Now if you want to build the later type hull with the large hatches you have other things that need to be done but that's another story ...
Both the late type transmission cover and the early type high bustle turret can be bought from Formation if you want ..

hope this helps
Rick
thebear
Visit this Community
Quebec, Canada
Joined: November 15, 2002
KitMaker: 3,960 posts
Armorama: 3,579 posts
Posted: Friday, August 06, 2010 - 02:34 PM UTC
I'm trying to keep up with all the builds here ...

Ian ...Nice looking firefly and other than what has already been mentioned ...the only thing I might suggest would be to add a bit of variety in the colors of the stowage ..maybe a few browner khaki colors and stuff to break up all that green ...Good job
Paul ..those welds will sharpen up the old Tamiya kit for sure ...
Micheal ...Can't go wrong with that oldy but goody ..Not the most accurate but a great kit to build ..have fun ..
Martin ...I didn't even know Verlinden made a Jumbo conversion ...I don't know how accurate it is but it sure looks like a Jumbo...Good start ...The only thing I've noticed about Jumbos that were up graded with the 76mm gun ,seem to all have an air-cooled 50 cal coaxial MG(in the mantlet) instead of the regular 30 cal...I'm not sure if anyone make that type of 50 cal barrel in 1/35 scale .
Stephan ...excellent work so far ...Love it when you can find something different to make people talk and have a picture to back it up...That should look awesome ...Just remember to make your sand bags small ..People always seem to make them so big it would take 4 men to lift them onto the vehicle ..
If I missed anyone I'm sorry...this campaign is moving so fast..

All the best guys and keep it up ...

Rick
MVisser
Visit this Community
Utrecht, Netherlands
Joined: December 14, 2006
KitMaker: 2,679 posts
Armorama: 313 posts
Posted: Saturday, August 07, 2010 - 05:22 AM UTC
Thanks for the comments all.

@ richard, I've added a Tasca .50 barrel (a spare one) inside the mantel.

I've almost finished the build.

A .50 cal and some figures from verlinden has been added (verlinden tank, verlinden figures )

I've scrached the rear stowage thing and added some spare PE Parts.


Martin
AlanL
Visit this Community
England - East Anglia, United Kingdom
Joined: August 12, 2005
KitMaker: 14,499 posts
Armorama: 11,675 posts
Posted: Saturday, August 07, 2010 - 05:47 AM UTC
Hi Guys,

Great stuff, lots of terrific builds going on here. Don't forget they are looking for photo features and build stories so feel free to share your excellent work with the wider world.

No progress on my M32 yet but I might be able to get back to it this coming week.

Cheers

Al
errains
#045
Visit this Community
South Carolina, United States
Joined: September 23, 2005
KitMaker: 362 posts
Armorama: 350 posts
Posted: Saturday, August 07, 2010 - 08:13 AM UTC
Battlewagon M4A3E8 ETO: Part 6-How About A Lift?

In order to keep my sanity while assembling the tracks, I decided to do some additional work on the upper hull, notably the lifting rings.

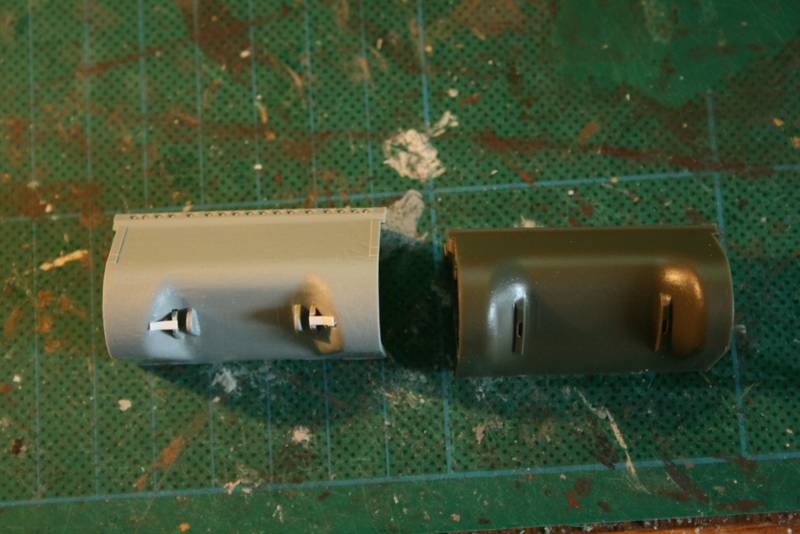
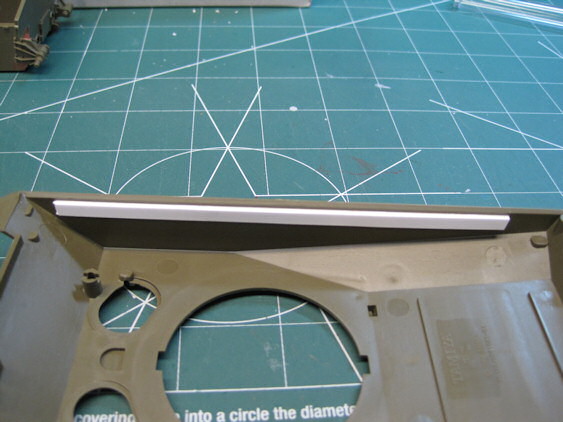
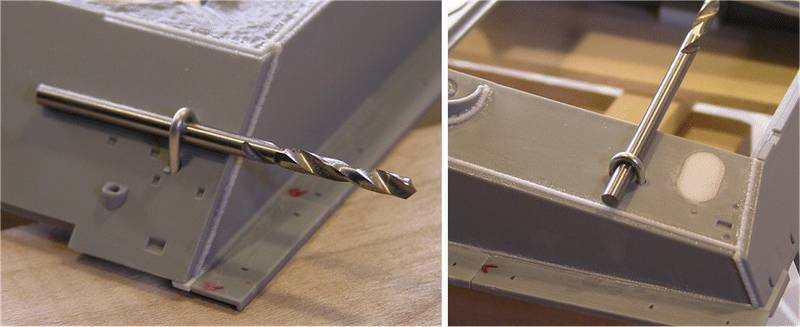
The lifting rings supplied in the kit are satisfactory but look a bit anemic. I decided to replace them with a suitable size wire. After a quick search around the work area, an acceptable product was located, 14gage lead-free silver solder. To determine the correct diameter of the bend for the rings, the original kit parts served as a guide. Select a round object that fits inside the ring to serve as a form, a drill bit works well. Next cut a length of wire/solder, ensure that the wire/solder is straight, and then bend it around the form as shown in the photo.


Using the gluing divots as a guide, drill the appropriate size holes through the plastic. Insert the newly made rings into the holes. Use the form to set the height of the rings as shown below and super glue into place from the inside of the hull.


For the welds, epoxy putty can be used. Roll the putty into a thin thread and wrap around the base of the lifting ring. Using a suitable flat tipped object such as an old #11 hobby knife blade, the back side not the sharp side, texture the putty into a weld pattern.


I think welds turned out ok but maybe a bit over sized and a bit too course. An additional suggestion would be once the epoxy thread is in place, let it sit for a time and harden a bit before applying the weld texture. As usual, practice this a couple of times before doing this to your current build.

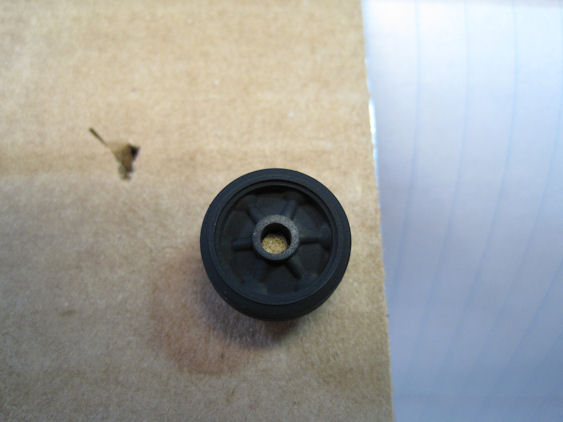
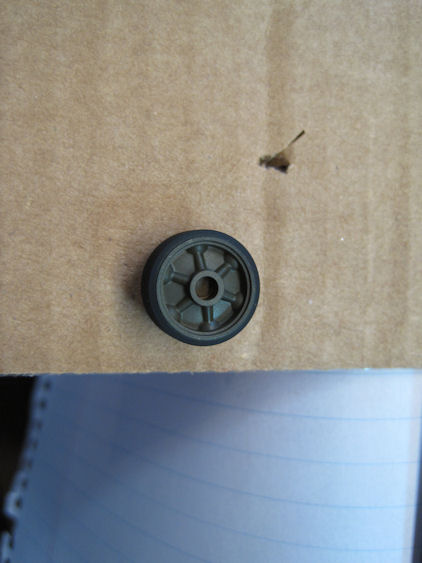
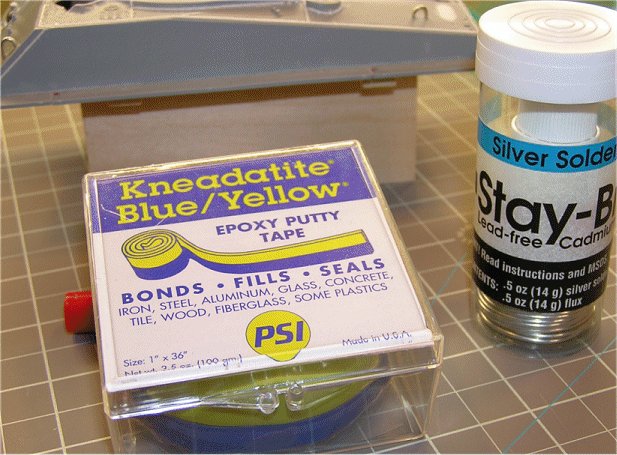
Below are the two products that were used to make the lifting rings.


I hope this helps out for this and future projects and if anyone has additional insights related to this technique please share.

That’s it for this time around. Excellent work by everyone thus far, keep to the updates coming!
MikeM670
#020
Visit this Community
Illinois, United States
Joined: December 28, 2006
KitMaker: 278 posts
Armorama: 231 posts
Posted: Saturday, August 07, 2010 - 04:18 PM UTC
Here is a shot of the completed bogies. I don't think the gap between the two halves with show when attached to the tank. If it shows I will correct the seam.

MrDrummy
Visit this Community
Texas, United States
Joined: October 17, 2009
KitMaker: 86 posts
Armorama: 82 posts
Posted: Saturday, August 07, 2010 - 05:48 PM UTC
Great work around here, as usual!

@ Martin- Your build really looks the biz. The figures really add so much interest. I'm kinda getting bogged down on my build working on all the figure ideas I have. That AND waiting to hear from TankRat!

@ Eric- Cool idea on the lifting rings! I was tempted to replace mine as well, but wasn't sure what the best way to go about it was. Now I just may... Again, cool step by step instructions!

@ Martin- I like the progress on the bogies. I painted mine first, assembled them, and then cleaned up the seam and did the touch-ups necessary to blend my work back in. I really do feel like those seams will show once they're on the kit- make it easy on yourself and deal with them while they're still unattached! Also-- when it comes to Tamiya paint, I agree. It scratches off really easily. One way to make it stick really well is to use a coat of Mr. Surfacer 1000 on your parts, and you'll never have it scratching off again!
ppawlak1
Visit this Community
Victoria, Australia
Joined: March 14, 2006
KitMaker: 1,973 posts
Armorama: 1,843 posts
Posted: Saturday, August 07, 2010 - 08:02 PM UTC
@ Michael - thanks for the post on how you paint your wheels, I normally do the same thing, although on my M4A3 I'll try painting the tires after the base coat (in assembled boggies).
As mentioned I think I'd be a good idea to clean those seams on the boggie body and skid. I find it's a good habit to clean almost all seam lines on parts as soon as they are cut off the sprue.

@ Martin - the figures really add a lot to your Jumbo, you have put a lot of thought into them and they look great !

@ Eric - Thanks for the tutorial on the lifting rings That is a great idea, and the method for doing the welds is first class !! Thanks again - must try that sometime :_

Oddballs Sherman is progressing - I'll take some pics and post later tonight

Keep up the great work guys !

Cheers

Paul
ppawlak1
Visit this Community
Victoria, Australia
Joined: March 14, 2006
KitMaker: 1,973 posts
Armorama: 1,843 posts
Posted: Saturday, August 07, 2010 - 10:16 PM UTC
Hey Guys !

Here is where I'm at with Oddball's Sherman

** Basic (pre worked) welds on the upper hull. I'll mark the beads in the next few days and drill drainage holes.

** Formations Late Single Piece Cast Transmission used to replace the kit Transmission.

** Upper hull attached to the lower Hull.

** Formations Armored Exhaust deflector added, including Turnbuckles and styrene Filler plates (I scratched these instead of using the resin ones).

** Formations Sponson filler plates used to fill those big holes under the sponsons

** Bogies assembled with Formations wheels sets and skids.

Now Oddballs Sherman is indeed an 'Odd' Beast. There is a scene in the movie during the fight at the railroad tunnel where the tank rolls past the camera and you can see all the wheels on the left side of the tank. On that side alone there are both the smooth dish and the welded mixed in with three or four of the spoked stamped. wheels.

From front to rear on the left I came up with :

Spoked stamped, dished, dished, welded, spoked stamped, spoked stamped.

So that is what I have done on that side. The Right side is slightly different

Some progress pics (the bogies are 'tacked on' with Blu-Tac) :


'Woof, Woof '

Paul
RedwingNev
Visit this Community
England - East Midlands, United Kingdom
Joined: February 07, 2004
KitMaker: 911 posts
Armorama: 348 posts
Posted: Sunday, August 08, 2010 - 02:40 AM UTC
Martin - loving how yours is shaping up. Looking forward to seeing some paint on those figures
barkingdigger
Staff MemberAssociate Editor
ARMORAMA
#013
Visit this Community
England - East Anglia, United Kingdom
Joined: June 20, 2008
KitMaker: 3,981 posts
Armorama: 3,403 posts
Posted: Sunday, August 08, 2010 - 04:26 AM UTC
Paul,

Oddball's ride is looking good! Does the Formations set come with those "custom" paint-filled shells for the 75?

On the bogies, I put them together first and then use a flat file & knife blade across the joint to match the two sides so the seams disappear. (I find if I trim each half separately they don't necessarily line up on assembly...) And, on Italeri or Tamiya bogies I usually glue up the units without any wheels, then I cut the axles to leave just a rounded stump each side so I can "snap" the wheels into place later once everything is painted. I'll post some pics as soon as I can get to take a few. (This does not work on Tasca bogies where each arm is a separate unit held together by only the axle and bearing...) The trick is to make sure the axle end is glued firmly into place before cutting it, and has had plenty of time to harden.

Oh, and I "stole" that wheel-snapping idea from somebody on this site in the previous Shermans campaign! See, campaigning really is a learning experience...

Tom
MikeM670
#020
Visit this Community
Illinois, United States
Joined: December 28, 2006
KitMaker: 278 posts
Armorama: 231 posts
Posted: Sunday, August 08, 2010 - 05:26 AM UTC
@ Justin - Thanks for the kind comments on the bogies. Looks like I will go back and clean up those seams.

I tried shooting Mr. Surfacer once and it just clogged and got stringy all over the model. I probably did not thin it enough to shoot. But it was such a horrible experiance that I am hesitant to try it again.

@ Paul - Your comments got me thinking on a way to assemble the entire bogie without the wheels. Once the frame was completed put the wheels back on. Instead of the molded on tube for the wheels, one could slide a tube in from the back side into a hole on the front frame to secure the wheel.

MikeM670
#020
Visit this Community
Illinois, United States
Joined: December 28, 2006
KitMaker: 278 posts
Armorama: 231 posts
Posted: Sunday, August 08, 2010 - 05:59 AM UTC
Here are some images of the hull. After assembling the hull it there were gaps in the hull. I certainly hoping I assembled the hull correctly!!!. Well I did not like the gaps so I fill them in with some pieces of styrene and followed that up with some Bondo filler.


Next up was the huge open space under the track fender in which you could see right inside the tank body. Having no reference material and spending an hour or so looking at images online I just decided to cut a piece of styrene to fit this gap. I have no idea if this is correct but it has to look a lot better than being left open.

Prior to attaching the panel I glued a brace on the outer side of the fender to attach the panel too.


Precut Panels waiting to be added.


Panel attached to underside of one panel
.


Abn-modeller
Visit this Community
Stockholm, Sweden
Joined: July 05, 2009
KitMaker: 76 posts
Armorama: 75 posts
Posted: Sunday, August 08, 2010 - 07:18 AM UTC
Great looking shermans everyone!

@Richard- Thank you for the help! Maybe you're right about the turret, however in Steve Zaloga's "modelling the M4 sherman" it says that there were late production low bustle turrets and that some were used on DD shermans.... i don't think it says wether ithey had the loaders hatch or not....
MrDrummy
Visit this Community
Texas, United States
Joined: October 17, 2009
KitMaker: 86 posts
Armorama: 82 posts
Posted: Sunday, August 08, 2010 - 07:54 AM UTC
@ Tom - Dang! Now why didn't I think of that?! Luckily I have only one set of bogies done, so I can use the 'snap' method on the other side.

@ Mike- Yup. Mr. Surfacer needs to be thinned pretty well, and I've found that it needs a little higher pressure to spray it cleanly. I usually do about 30% Mr. Surfacer to 70% lacquer thinner, but I'm sure you could cut it less. The stuff covers like a champ, so it doesn't take long to have a nice, paint ready surface!

Also-- love the scratch built covers. That's pretty much the same thing I did. Yours definitely looks a lot neater!
AgentG
Visit this Community
Nevada, United States
Joined: December 21, 2008
KitMaker: 1,109 posts
Armorama: 1,095 posts
Posted: Sunday, August 08, 2010 - 09:25 AM UTC
Lots of good stuff happening here for sure. What's the "snap" method? I haven't been on the forum all that much.

Naturally the M4A2's bogies are finished but I have two more waiting.

Question: Should the bogies have four holes drilled in the side opposite the return roller? It' s my understanding the were not "handed" left/right.

G
barkingdigger
Staff MemberAssociate Editor
ARMORAMA
#013
Visit this Community
England - East Anglia, United Kingdom
Joined: June 20, 2008
KitMaker: 3,981 posts
Armorama: 3,403 posts
Posted: Sunday, August 08, 2010 - 09:40 AM UTC
Wayne,

I'll hopefully get some pics up tomorrow on the "snap" method.. And yes, there should be four bolt holes on the "front" face of the bogie casting - the return roller bracket could be added to either side of the bogie depending on whether it went on the left or right side of the tank. Again, I'll post pics as soon as possible.

Tom
thebear
Visit this Community
Quebec, Canada
Joined: November 15, 2002
KitMaker: 3,960 posts
Armorama: 3,579 posts
Posted: Sunday, August 08, 2010 - 10:02 AM UTC
Hi Wayne ...you are right about the bogey system on the sherman ...they could be made up to fit either side ,so you need to drill out the 4 holes in the front of each bogey...
Paul ..Good start on your sherman ..Don't forget to add the three bolts on the lower part of each bogey..(well that is if you want to ...
Micheal ..good job cleaning up the hull ...If you want to there are a few bolts you can add where the hull gets thicker ..there were eight bolts on each side that connected the transmission cover to the rest of the hull ...


there is another small plate between the hull and the tranny that has 3 bolts but it is almost hidden but it is there if you want to add it..


Rick