Dioramas: Water Effects
Water! A sometimes intimidating effect.
Hosted by Darren Baker
Tsushima II
Jenseits
Visit this Community
Indre-et-Loire, France
Joined: February 14, 2010
KitMaker: 224 posts
Armorama: 213 posts
Posted: Wednesday, February 24, 2010 - 11:12 PM UTC
The other day I went at a friend's home. he's doing all his walls again and I was surprised to see he put some steel bars on every corner of the inner walls so that the joint could be perfect with plaster.
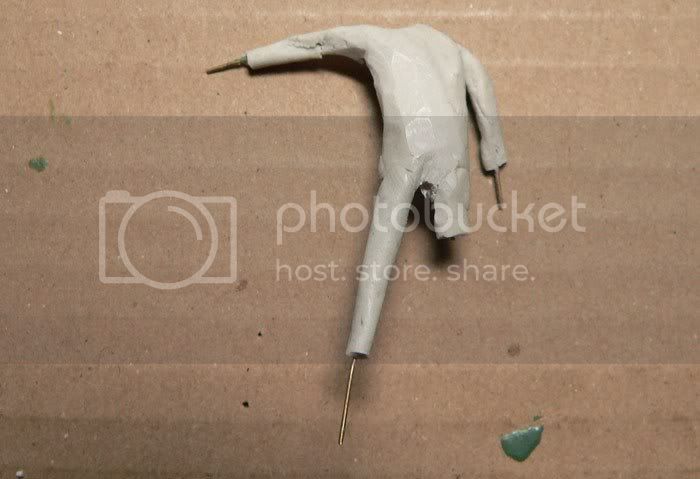
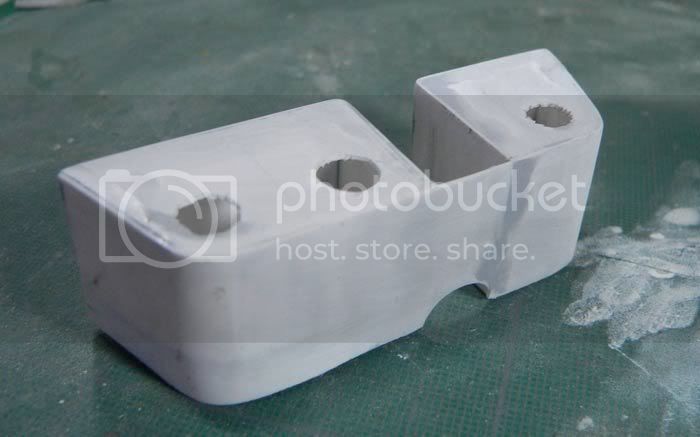
I thought it would be the right way to get a nice angle on the back of my boat. So I glued a brass rod at the tip of the boat and recovered the whole with White squadron putty. i will sand this particular angle later tonight.

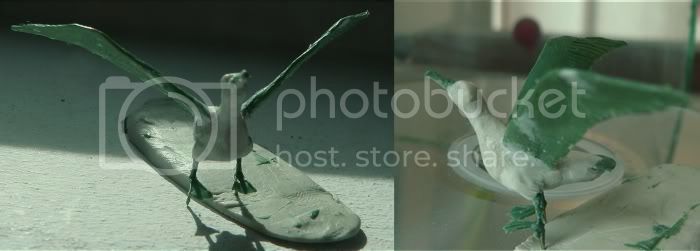
Back to another Albatross, this time in showing different steps in the building.
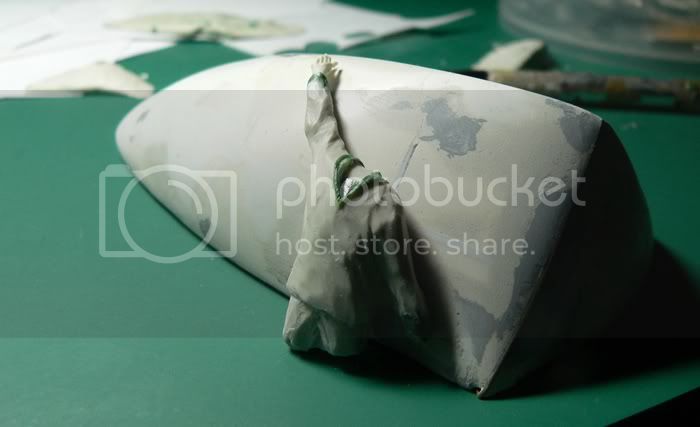
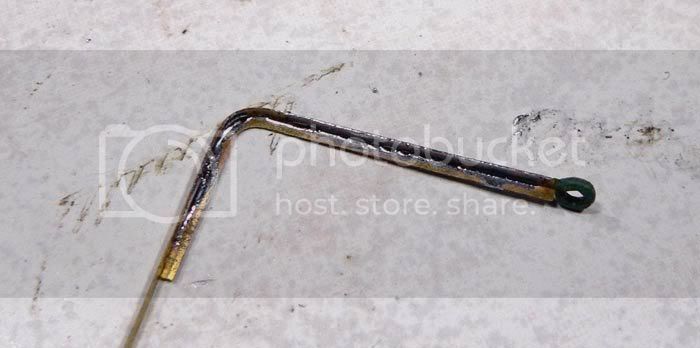
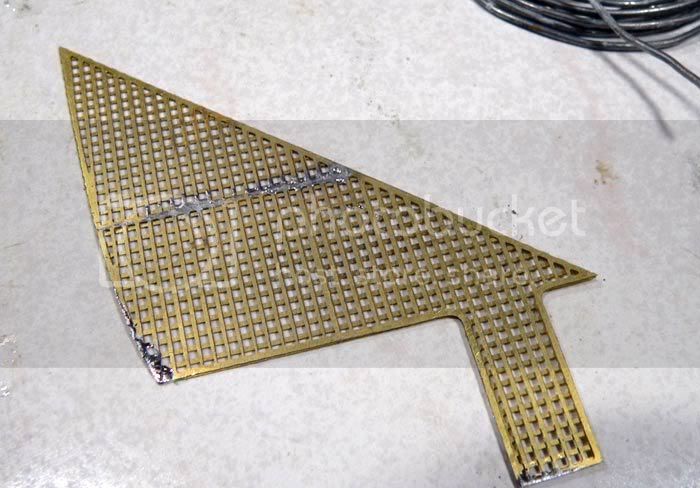
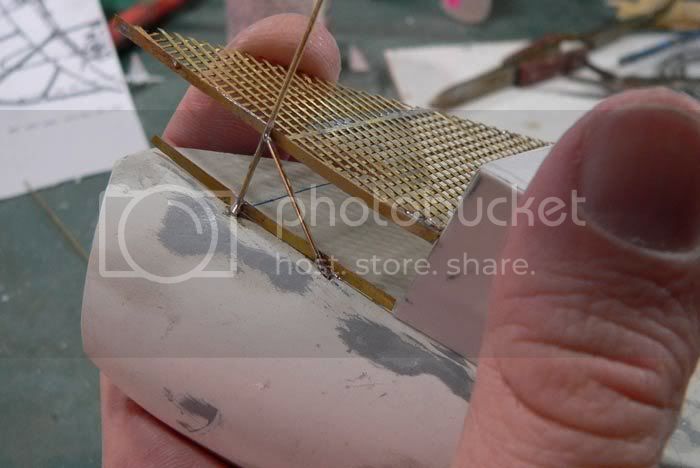
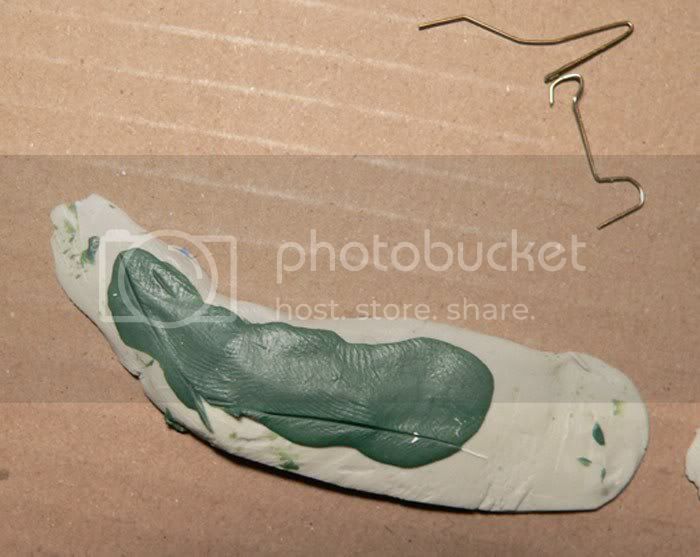
first you have on top of the pic the 2 rods that helped me defining the whole shape, and below the Green stuff has flattened on my template. later I cut the right shape and will shape it better with a modelling knife.

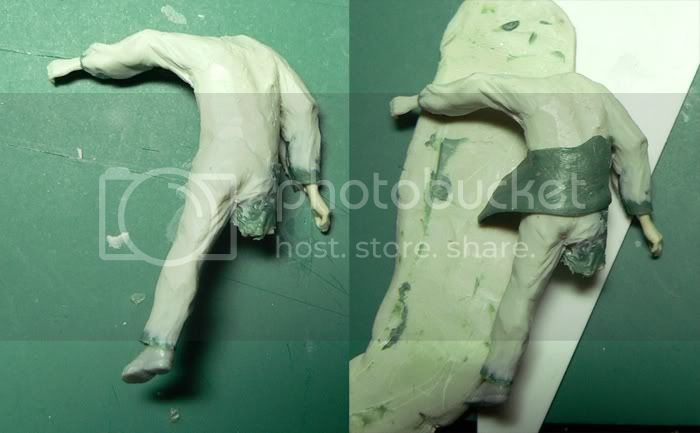
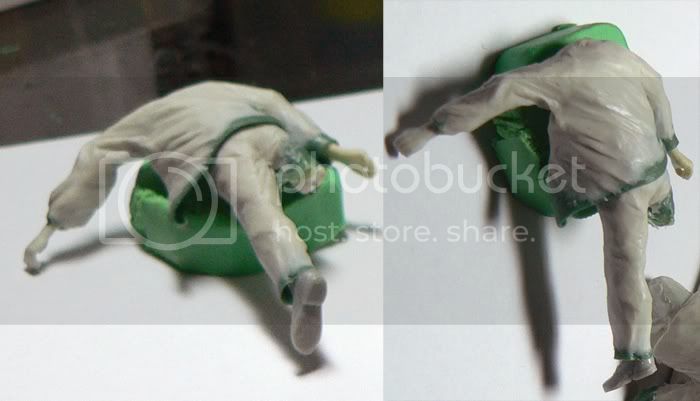
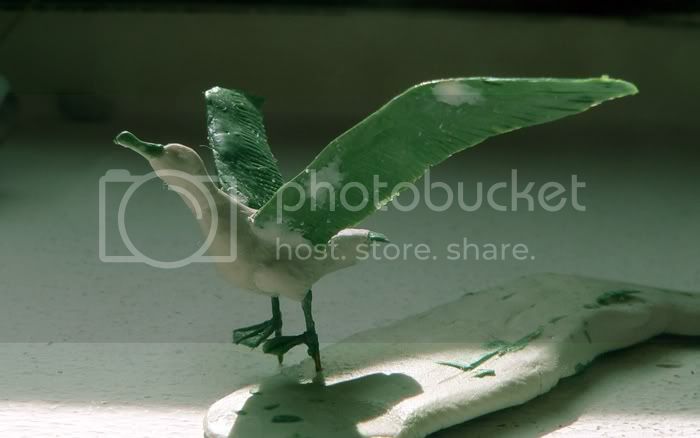
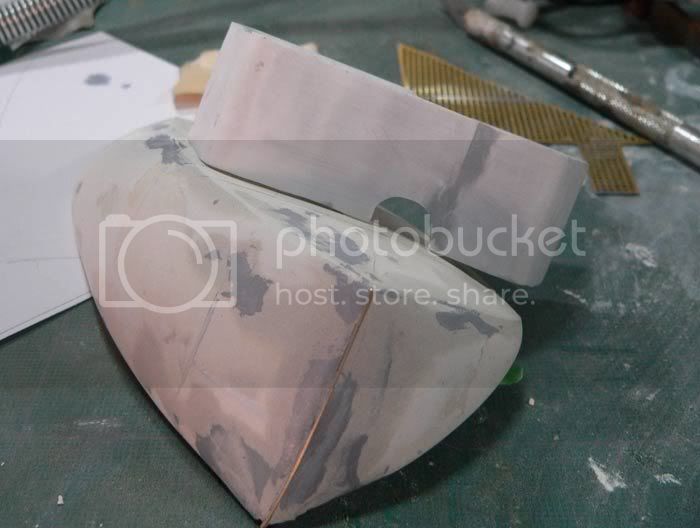
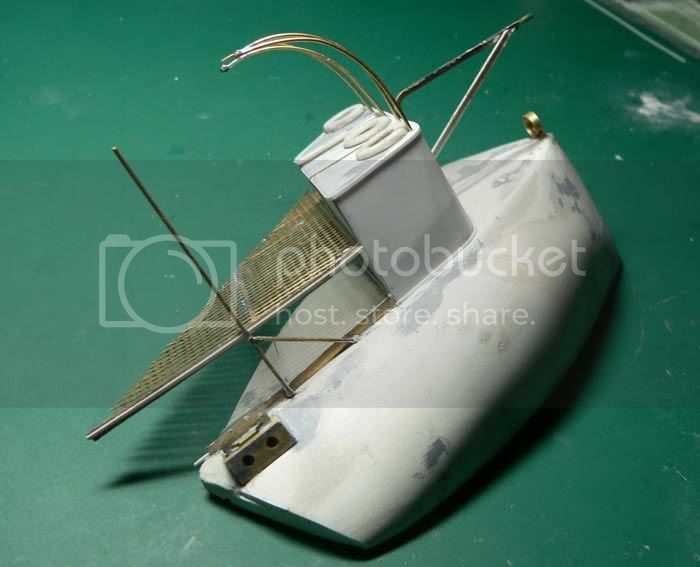
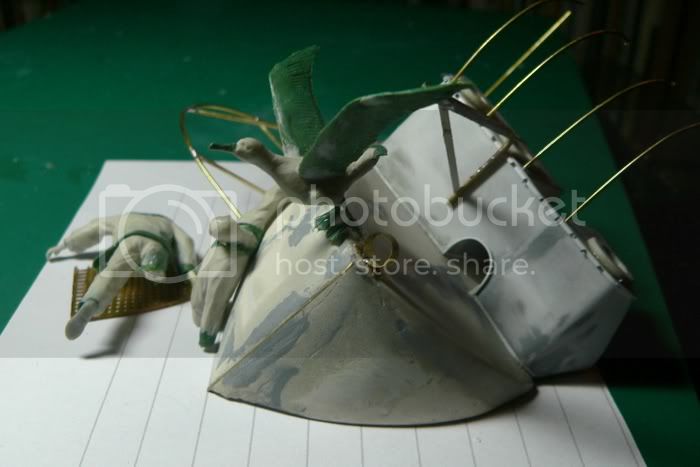
Here are the wings, the tail as well as the body roughly shaped above the wire.

.. and that's it for today!
Jenseits
Visit this Community
Indre-et-Loire, France
Joined: February 14, 2010
KitMaker: 224 posts
Armorama: 213 posts
Posted: Thursday, February 25, 2010 - 08:40 PM UTC
May I present you Alexandre Kaidanovski and Anatoli Solonitsyn?

For some reason, everytime I model Russian, I call my "actors" Alexandre Kaidanovski and Anatoli Solonitsyn, I think giving them names allow to blow up a bit of soul inside my sculpting. Oh well.

They passed their best and they will be in the water.

Now clothes sort of float when they're dipped in the water, this is why I enfolded some Duro Green stuff around the wrists and ankles. You can get much finer folds with this material than with Magic Sculp.

I will sculpt the clothes in MS above those rough shapes. After trimming a bit too.


Jenseits
Visit this Community
Indre-et-Loire, France
Joined: February 14, 2010
KitMaker: 224 posts
Armorama: 213 posts
Posted: Friday, February 26, 2010 - 07:56 PM UTC
Let's work specifically on Alexandre.
As you noticed I added him some Hornet hands -I'm not ready to spend some time scratchbuilding something both generic (to some extent) and readily available in shops (but with too much very hard to remove flash for its price).

So what you will see here was done over a 3 or 4 evening time, because of the drying time before each layer.
First let's model the arms and legs. When this was done, I let some Duro sheet dry in place so that the coat would seem to float around the body


On the following evening I modelled the rest of the shirt


Finally yesterday I added a small Duro sheet near the neck to picture this sort of collar sailors of this time used to wear..
Plasticbattle
#003
Visit this Community
Donegal, Ireland
Joined: May 14, 2002
KitMaker: 9,763 posts
Armorama: 7,444 posts
Posted: Friday, February 26, 2010 - 10:57 PM UTC
Hi Nicolas ... very interesting ... what you´ve done so far. The albatros turned out great. Will be watching
Jenseits
Visit this Community
Indre-et-Loire, France
Joined: February 14, 2010
KitMaker: 224 posts
Armorama: 213 posts
Posted: Saturday, February 27, 2010 - 09:23 PM UTC
Thank you Franck.
No progresses -in-pictures for the albatross yet because I was not happy with those wings I pictured, so I had to create yet new ones, less stiff.
Then it took one evening to do those, another one to sculpt the inside.. Tomorrow I should be able to post a completed Albatross.

Here's Anatoli, All his upper body will be over the water. After building the clothes' fringes with some Duro, I sculpted his shirt in 2 times. First the shirt, then the collar -once more in Duro.


Why such a strange position? That' s because he's got the hand caught in a net.


Now I will have to think seriously of building some faces.
mayvbe I should be inspired by what i read?
bill1
Visit this Community
West-Vlaaderen, Belgium
Joined: August 14, 2005
KitMaker: 3,938 posts
Armorama: 520 posts
Posted: Sunday, February 28, 2010 - 09:08 AM UTC
Yo Nicolas,

Impressive scratch work you show here!

Two of a kind you are with JBA...love you're kind of work.

Keep up, I follow.

Greetz Nico
Jenseits
Visit this Community
Indre-et-Loire, France
Joined: February 14, 2010
KitMaker: 224 posts
Armorama: 213 posts
Posted: Monday, March 01, 2010 - 12:53 AM UTC
Thank you Nico -I sure realize the amount of common points between my work and JBA's

Savonnières, some lovely village near my home town. 10 years ago there used to be a beach on the banks of the river under the buckeyes. I used to sit at the middle of the stream on a small sand beach that was 10 cm below the water level. And after a few minutes, some small fishes come and sort of tried to eat my feet, it tickled!

I have been Googling for pictures of guys staying more than 1 week in the water,and it seems the fishes have their way with everything that protudes.

Here he is, and he is not a pretty sight. I will add some hair and somewhat round his head a bit this evening.


Here is -al long last -the finished Albatross. I ran into some troubles taking some pictures of it. He's quite small now. And on this very special lightning I see that i will have to smooth its wings a little.


exer
Visit this Community
Dublin, Ireland
Joined: November 27, 2004
KitMaker: 6,048 posts
Armorama: 4,619 posts
Posted: Monday, March 01, 2010 - 01:04 AM UTC
Nice but grisly work it brought these lines from Shakespeares "The Tempest" to my mind:

Full fathom five thy father lies;
Of his bones are coral made;
Those are pearls that were his eyes;
Nothing of him that doth fade,
But doth suffer a sea-change
Into something rich and strange.
Sea-nymphs hourly ring his knell:
Ding-dong.
Hark! now I hear them — Ding-dong, bell.
Gorizont
Visit this Community
Sachsen, Germany
Joined: November 28, 2007
KitMaker: 1,462 posts
Armorama: 1,289 posts
Posted: Monday, March 01, 2010 - 04:13 AM UTC
Nice, exciting bird! He looks very natural with its wings in this position!
Great work!

greetings...
Soeren
Jenseits
Visit this Community
Indre-et-Loire, France
Joined: February 14, 2010
KitMaker: 224 posts
Armorama: 213 posts
Posted: Monday, March 01, 2010 - 08:54 PM UTC
Thanks for this Pat, that has got to be one of my preferred answer ever to one of my posts
I love the Tempest since I saw Greenaway's Prospero's Books. I can't make out half of it due to my poor language, but I, like it even better this way.

Thanks Soeren, I have been studying pictures a lot before aiming for a definite position. What's good is that the feet are done of Duro which will allow me to fix them at any angle I want because the material stays really soft even after drying.

Okay. time to open the window a bit and speak about the boat itself while the putty dries.
first if you guys want to know what the whole of the boat looks like, there's no better link than this one here.
http://www.modelwarships.com/reviews/ships/ru/dd/700-Vnimatelni-com-jb/Vnimatelni.html
This is Jim Baumann's model of the Vnimatelni which is a sister ship to this one.

My main source of reference is this picture, which allows me to list every tricky thing i will have to model


hmm. Those letters especially are going to be tricky. there's only one way to get away with those as well as the pierced floor.. Homemade photoetching.
2 hours to model the fret and to print it

2 hours for the insulating and etching process

Rheingold!

Jenseits
Visit this Community
Indre-et-Loire, France
Joined: February 14, 2010
KitMaker: 224 posts
Armorama: 213 posts
Posted: Wednesday, March 03, 2010 - 04:49 AM UTC
Thanks Adam, the plan is one post per day, till I begin the painting.
Work will be slower after that

Now if you refer to the reference picture I posted above, you may have seen I refered to "bouteilles" for the sort of housing at the back of the boat.
What were "bouteilles". it means "bottle" in French.
i thought it was some water supplies or stores of any kind.
but I was wrong and that's one British friend that found that one to me.
Bouteilles are toilets.
Oh dear
One side (2 items) for the sailors, the other side for the officers.
I'm not too fond of toilet humour but it looks l don't have much choice.
The Bouteilles are first being made in plastic.

and then glued in place, as you can see I will have a lot of work for filling the whole -that was alos a good way to see that indeed the curve of the boat was wrong on the right.
Jenseits
Visit this Community
Indre-et-Loire, France
Joined: February 14, 2010
KitMaker: 224 posts
Armorama: 213 posts
Posted: Wednesday, March 03, 2010 - 09:46 PM UTC
Today i will just present a bit of soldering work.
First the thing on the back of the boat -probably to hold the lamp.

I have been adding some thickness on the metal ring at the end with some green stuff.
And then the self draining surface that is roughly at 1,2 cm above the hull itself.
When you read some BRITISH books about Torpedo boats, it is specified that the Brits were the best because their PT boats were FASTER
When you read some FRENCH books about Torpedo boats, it is specified that the Frogs were better because the guns were DRYER and better placed
So there..
Jenseits
Visit this Community
Indre-et-Loire, France
Joined: February 14, 2010
KitMaker: 224 posts
Armorama: 213 posts
Posted: Thursday, March 04, 2010 - 09:28 PM UTC
Well, most of the stuff will be soldered. This will prevent accidents. i won't fix the plate just right now because it might be more difficult later to paint the hull.


Here is now the back of the hull as of today. I still didn't correct the curve at the right of the hull, but it becomes to look like the real thing. Lots of details to add here and there.
You can also notice the sort of "box" on the far left of the hull. more difficult to do than meets the eye as everything must be really square and follow the curve of the hull. It's a device to attach strings to.
Jenseits
Visit this Community
Indre-et-Loire, France
Joined: February 14, 2010
KitMaker: 224 posts
Armorama: 213 posts
Posted: Friday, March 05, 2010 - 08:29 PM UTC
Here is most of the job done on the hull, I soldered some tiny some rings at the end of the metal sheets that make a curve over the bouteilles, put some "seats" on the bouteilles, added the big rind at the end of the hull.. Tomorrow I should present completed hull pictures as I still have some rings to add here and there as well as the big metal protection around the hull -probably to prevent some shocks.


kaiserine
Visit this Community
Rhone, France
Joined: April 14, 2008
KitMaker: 383 posts
Armorama: 320 posts
Posted: Friday, March 05, 2010 - 08:47 PM UTC
Hello Jenseits,

Well, pretty cool job on the hull. This boat seems to have cool curves and shapes.
Can't wait to see the russian PE font, romanov eagle, and of course, some paint on it.
I stay posted.
Regards,
Alexandre.

roudeleiw
Visit this Community
Luxembourg
Joined: January 19, 2004
KitMaker: 2,406 posts
Armorama: 2,224 posts
Posted: Saturday, March 06, 2010 - 03:02 AM UTC
Très fort Nicolas!

Superbe scratchbuilding with selfmade Photoetch! The top!

Cheers
Claude
Jenseits
Visit this Community
Indre-et-Loire, France
Joined: February 14, 2010
KitMaker: 224 posts
Armorama: 213 posts
Posted: Sunday, March 07, 2010 - 04:38 AM UTC
[edit]
Thanks Alex, I know you're a graphic designer, and I had a lot of trouble to find a Cyrillic font matching more or less the one I wanted to use. So well, it's not perfect but you will see below

Appreciated Claude

The boat is now finished. I just had to put that protection railing (more soldering work with some brass tubing) and some Grandt Line rings around the Bouteilles


So now that was another story, the Golden Romanov sign on the back of the boat. So i did first a photoetch template that I bent in shape.
Then I traced some outlines for feathers as well as a couple of details found on internet


Second coat on the second day. Some small bit of platsicard at the centre, and some other details done with Duro
It looks a bit rough but the complete size is 1cm²

The etched letters as well as the sign are now fixed on some tamiya masking tape for priming.
exer
Visit this Community
Dublin, Ireland
Joined: November 27, 2004
KitMaker: 6,048 posts
Armorama: 4,619 posts
Posted: Sunday, March 07, 2010 - 07:41 AM UTC
Superb work Nicolas. It's an absolute delight to watch this coming together.
Jenseits
Visit this Community
Indre-et-Loire, France
Joined: February 14, 2010
KitMaker: 224 posts
Armorama: 213 posts
Posted: Monday, March 08, 2010 - 05:31 AM UTC
Thanks for your support Pat. Now it will be painting time after that single last post..

After Alexander, here comes Anatoli's turn.
He is a middle aged man, bald with a moustache.

Notice how the collar is done of Duro and how his legs are crudely sculpted -because those will be in the water.

If you ask yourselves why he is into such an odd position, well, he is leaning against the hull because his wrist stayed attached to some rope

Gundam-Mecha
Visit this Community
England - South East, United Kingdom
Joined: August 05, 2009
KitMaker: 1,019 posts
Armorama: 933 posts
Posted: Monday, March 08, 2010 - 06:12 AM UTC
Great project and really interesting material. Can't wait to see this progress.

The scratch building is first class.
seb43
Visit this Community
Paris, France
Joined: August 30, 2005
KitMaker: 2,315 posts
Armorama: 2,158 posts
Posted: Monday, March 08, 2010 - 09:22 AM UTC
I didnot know that JBA had a twin Bro.

Excellent work
I hope to see more of your work
Cheers
Seb
CReading
#001
Visit this Community
California, United States
Joined: February 09, 2002
KitMaker: 1,726 posts
Armorama: 892 posts
Posted: Monday, March 08, 2010 - 10:02 AM UTC

Quoted Text

I did not know that JBA had a twin Bro.


It must be something in the French water? Please send some our way.....

Seriously, I've been following this from the beginning and am very impressed and inspired by the work. I love the odd angle of the poor guy that is dangling, stuck by rope to the side of the capsized boat.

Cheers,
Charles
Jenseits
Visit this Community
Indre-et-Loire, France
Joined: February 14, 2010
KitMaker: 224 posts
Armorama: 213 posts
Posted: Wednesday, March 10, 2010 - 07:43 AM UTC
Thank you Jon, I keep an eye on your forthcoming work too

Ah Seb, thanks for your comment. Well, there are some major differences between JBA and me, even though the techniques we use are mostly the same.
There are more figs with me, beyond that, most of my work is centred on grisly fates.
JBA is more ambient and contemplative.

happy you like that one Charles, and yes, there should be others, definitely..

Here are a few test pictures I did for the relative position of each elements.
I have some troubles with my airbrush and my compressor, so i might not be able to post anything new till next week-end.
Oh well..


exer
Visit this Community
Dublin, Ireland
Joined: November 27, 2004
KitMaker: 6,048 posts
Armorama: 4,619 posts
Posted: Wednesday, March 10, 2010 - 08:22 AM UTC
Brilliant I'm really looking forward to seeing the paint go on. I have a small suggestion regarding the composition. I think the scene might look better ifthe figure in the water is placed more to the left so that he is not in front of the hanging figure

bajtur
Visit this Community
Slovenia
Joined: May 20, 2005
KitMaker: 105 posts
Armorama: 97 posts
Posted: Thursday, March 11, 2010 - 10:30 PM UTC
What a great vignette! I have to admire guys like you that scratch build everything and make your own PE.
I do agree with Pat regarding the position of the figure.

Primož