_GOTOBOTTOM
Dioramas: Water Effects
Water! A sometimes intimidating effect.
Hosted by Darren Baker
Tsushima II
Jenseits
Visit this Community
Indre-et-Loire, France
Joined: February 14, 2010
KitMaker: 224 posts
Armorama: 213 posts
Posted: Monday, February 15, 2010 - 08:14 AM UTC
Do you see this map? I picked it on Wikipedia


That's the repartition of the Albatros in the world. Those big birds can't find suitable winds for their big wings to carry them in temperate climates -though at the beginning of the XIXth century they were still reported over Holland.

My luck is that those birds fly close enough to Japan to suit my very special needs.

Albatros eat what they find, fishes, carrion..

so let's start and sculpt an Albatros shall we.
First Google for the beast, print quite a few pictures, and let's twist some brass

The shape by the end of the brass is indeed some sort of handle to help scultping.


slodder
Visit this Community
North Carolina, United States
Joined: February 22, 2002
KitMaker: 11,718 posts
Armorama: 7,138 posts
Posted: Monday, February 15, 2010 - 12:46 PM UTC
Interesting.. You have my attention. Can't wait to see where this goes.
roudeleiw
Visit this Community
Luxembourg
Joined: January 19, 2004
KitMaker: 2,406 posts
Armorama: 2,224 posts
Posted: Monday, February 15, 2010 - 06:50 PM UTC
Nice Introduction

Are you perhaps JBA under a new ID?

Greets

Claude


kaiserine
Visit this Community
Rhone, France
Joined: April 14, 2008
KitMaker: 383 posts
Armorama: 320 posts
Posted: Monday, February 15, 2010 - 07:20 PM UTC
Haha Claude, that's exactly what I thought, when I saw the title.
Nice start for a topic that sounds promising Nicolas,
I'm onboard.

Alexandre.
Jenseits
Visit this Community
Indre-et-Loire, France
Joined: February 14, 2010
KitMaker: 224 posts
Armorama: 213 posts
Posted: Tuesday, February 16, 2010 - 01:01 AM UTC
Thank you Scott, I hope my work will be worth your interest

I am happy about your interest Claude and Alexandre, actually I sure asked JBA for his agreement to take back the Tsushima tag for a diorama.
Despite common interests, my work is a bit different, more figures orientated, of a less nice and dreamy inspiration. I won't be asking for excuses or pretexts to show dead men like he does

Sculpting is of course all about drying time, so the first step was to cover the brass with some Magic Sculp

then as I had some extra time in the evning, I did that :

Magic Sculp templates of the right shape and bending angle that I will grease slightly to design the wings later.
Gorizont
Visit this Community
Sachsen, Germany
Joined: November 28, 2007
KitMaker: 1,462 posts
Armorama: 1,289 posts
Posted: Tuesday, February 16, 2010 - 01:46 AM UTC
That´s an interesting project! I take a look at it.

greetings...
Soeren
bill1
Visit this Community
West-Vlaaderen, Belgium
Joined: August 14, 2005
KitMaker: 3,938 posts
Armorama: 520 posts
Posted: Tuesday, February 16, 2010 - 06:34 AM UTC
Yo Nicolas,

Very interesting project...you have my attention.

Keep up, I follow

Greetz Nico
Jenseits
Visit this Community
Indre-et-Loire, France
Joined: February 14, 2010
KitMaker: 224 posts
Armorama: 213 posts
Posted: Tuesday, February 16, 2010 - 11:50 PM UTC
I'm happy to have your attention Soeren and Nico, i hope I won't disapoint anybody.

First let's grease slightly my Magic Sculp form and sculpt a tail from Green Stuff. Why Gren Stuff? well this stuff handles details much better than Magic Sculp and also stays more bendable -ideal to resist to shocks.


Once this tail is dry, let's embed it in the body of the bird, and then trim the whole body.
Albatross are roughly shaped like this, with a short stock body and very long wings.


Next face detailing and wings..
Jenseits
Visit this Community
Indre-et-Loire, France
Joined: February 14, 2010
KitMaker: 224 posts
Armorama: 213 posts
Posted: Wednesday, February 17, 2010 - 09:04 PM UTC
Now it's the time to create the wings out of green stuff. I did my MS templates so that they could be bent in their last third while drying
Once more only Green Stuff is able to hold details so well -at least to my knowledge


Sorry for the bad quality of the picture, but here are the bird's feet. They're rather small and are done in 3 steps
1/ do the membranes between each of the 3 "toes" which is the step I show here...
slodder
Visit this Community
North Carolina, United States
Joined: February 22, 2002
KitMaker: 11,718 posts
Armorama: 7,138 posts
Posted: Wednesday, February 17, 2010 - 11:06 PM UTC
Nice detailed sculpting.
What's your plan for having the bird in the air - wire or something else. I'd like to suggest a clear styrene rod. I've done both and each has its own advantages.
Removed by original poster on 02/18/10 - 11:20:29 (GMT).
jba
Visit this Community
Rhone, France
Joined: November 04, 2005
KitMaker: 1,845 posts
Armorama: 777 posts
Posted: Wednesday, February 17, 2010 - 11:21 PM UTC
It sure looks like a good job for the moment. I wonder about the thickness of the wings.
Jenseits
Visit this Community
Indre-et-Loire, France
Joined: February 14, 2010
KitMaker: 224 posts
Armorama: 213 posts
Posted: Wednesday, February 17, 2010 - 11:23 PM UTC

Quoted Text

Nice detailed sculpting.
What's your plan for having the bird in the air - wire or something else. I'd like to suggest a clear styrene rod. I've done both and each has its own advantages.


Nope Scott. The albatross will have both feet on the "ground", he's just extending his wings just like we do when we get out of bed in the morning,
here is the reference I use.


JBA actually the thickness is okay for the moment, I noticed those wings were actually THICK as you can see on the picture.
I will also embed a wire at the base of the wings to help gluing those to the body.

Thanks for the interest
Jenseits
Visit this Community
Indre-et-Loire, France
Joined: February 14, 2010
KitMaker: 224 posts
Armorama: 213 posts
Posted: Thursday, February 18, 2010 - 08:43 PM UTC
Once the outside of the wings is dried, let's sculpt the inside -the muscles of the wings must be visible somehow


Then the bird's feet
I let a brass sheet go through the foot so that I can later fix it on some surface, and I tie the whole with some Green Stuff that I will trim down later, when it's dry.


Let's sculpt the face of the bird, the beak is done of green stuff too. it's quite a detailed beak btw, with a complex shape and some openings on each side -the bird actually drinks sea water and ejects the salt through those openings if I understood well -clever beast
Jenseits
Visit this Community
Indre-et-Loire, France
Joined: February 14, 2010
KitMaker: 224 posts
Armorama: 213 posts
Posted: Saturday, February 20, 2010 - 04:06 AM UTC
Completed Albatross, wow, looks like the real thing..
but it's 1cm too big in scale!! I will have to redo it "off camera" while doing other things oh dear.


jagd654
Visit this Community
Singapore / 新加坡
Joined: July 14, 2008
KitMaker: 296 posts
Armorama: 280 posts
Posted: Saturday, February 20, 2010 - 04:48 AM UTC
GOOD JOB, Nicolas !!!!!!! I'm onboard and looking forward to the next update . Cheers !
Kenneth .
Gorizont
Visit this Community
Sachsen, Germany
Joined: November 28, 2007
KitMaker: 1,462 posts
Armorama: 1,289 posts
Posted: Saturday, February 20, 2010 - 06:33 AM UTC
WOW, this bird looks very good to me!
It´s to big in size? I didn´t saw that.
The details and "uniqueness" will give your work a special touch!!!

I also tried a building-test with "modelling-mass" (?), but not magic-sculp or something like this.
But my results were very "poor" for me.
I tried to make a special landscape. (a lava-field)

greetings..
Soeren.
Jenseits
Visit this Community
Indre-et-Loire, France
Joined: February 14, 2010
KitMaker: 224 posts
Armorama: 213 posts
Posted: Sunday, February 21, 2010 - 04:19 AM UTC
Happy to have you on-board Kenneth, I really liked your own diorama with birds

Thanks Soeren. Actually the maximum size for the body should be 2,6cm in 1/35, so that's really 1 cm too much which is enormous. That's being said I got good training for the next one.
"modelling-mass"? I tried to translate this back in German but couldn't find anything that could make sense. For lava I would use..what.. I think layers over layers of diluted plaster would so great, but of course there is so much different kind of lava..


Today I will present the boat I will build.
By the turn of the 20th century Russia was dependant on foreign technology for their boats. they bought loads of them in France and England.
I will model the torpedo boat / destroyer Vynoslivyi ("Выносливый")of the Forelle class built my Normand at le Havre in 1902.
It sort of looks like the Durandal class which was built in France roughly at the same time


I will more particularly behind the 2-3 last meters of the boat, and here is my main reference for this:


I am going to explain this or that when i actually build the boat. It was a lot of fun figuring out some of the details there. Do you see the Romanov eagle at the tip of the boat? yup i'm going to sculpt this..
There is one monograph written in Russian which will provide the plans which I adapted to the great quality ones of the Durandal class boats that I owned from another source.
gariwulf
Visit this Community
Busan, Korea / 대한민국
Joined: May 22, 2008
KitMaker: 40 posts
Armorama: 39 posts
Posted: Sunday, February 21, 2010 - 05:17 AM UTC
HI,

This is very interesting. I like the dios with animals.
Cheers!

Seung-il
Jenseits
Visit this Community
Indre-et-Loire, France
Joined: February 14, 2010
KitMaker: 224 posts
Armorama: 213 posts
Posted: Sunday, February 21, 2010 - 09:26 PM UTC
Thanks Seung-il, appreciated, yet there will be that single animal in that diorama, there will be two sailors though..

As the plans of the Durandal were of a much much better quality than the ones I had of the Vynoslivyi, I decided to base the construction of the hull on those. The grey area figures the size of an A4 page.


I printed the cross sections on some paper and used some white glue to fix those on .7 mm plastic


Here are all the cross sections once cut..
Gorizont
Visit this Community
Sachsen, Germany
Joined: November 28, 2007
KitMaker: 1,462 posts
Armorama: 1,289 posts
Posted: Sunday, February 21, 2010 - 09:53 PM UTC
Ahh, yes... modelling mass. I tried to translate the german into english., but that was not good.
The name on the package is "light modelling compound".

I tried several times building the lava-fields using plaster, but the only useable part (for one diorama) was the extremely smooth backside, which I used for one of the (now completed) landscapes.
Also the venusian landscapes are a bit different to them on earth.
The other landscape will have their own solution in "how to make".

Good luck with your scratchbuild! Yes, this is an interesting project!
Here on armorama, there are some great scratch-modellers... inspired by them, I also tried to build some small parts/ machines for my projects too.

greetings...
Jenseits
Visit this Community
Indre-et-Loire, France
Joined: February 14, 2010
KitMaker: 224 posts
Armorama: 213 posts
Posted: Monday, February 22, 2010 - 10:19 PM UTC
Well Soeren, I can see 2 types of lava, the first would be the agglomerated rocks when it('s dried up. i think you could easily create this with thinned down plaster and rough cat litter -by binding together the big grains with that watery plaster.
If what you want to do is VERY smooth lava, just like when it flows, you must absolutely not touch the plaster with any instrument.
Look at JBA's Spaceman 3 build. at one point he pours some thinned down plaster through a hole in the boat using some paper sheet, you must d o the same and let the diluted plaster spread where it wants to go. And once the first coat is okay, applying an even more diluted coat over the first one to do some other run off etc etc..
the trick is :
-use diluted plaster
-use some device to pour it on your terrain
-DON'T touch it
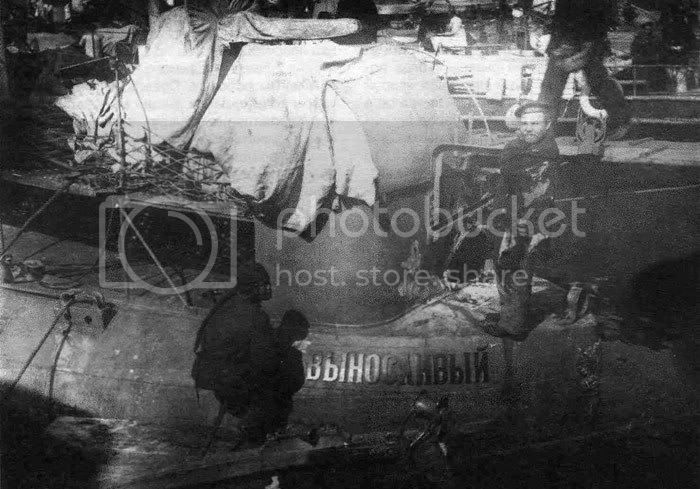
You are pretty right when it comes to the amount of scratch builders here.

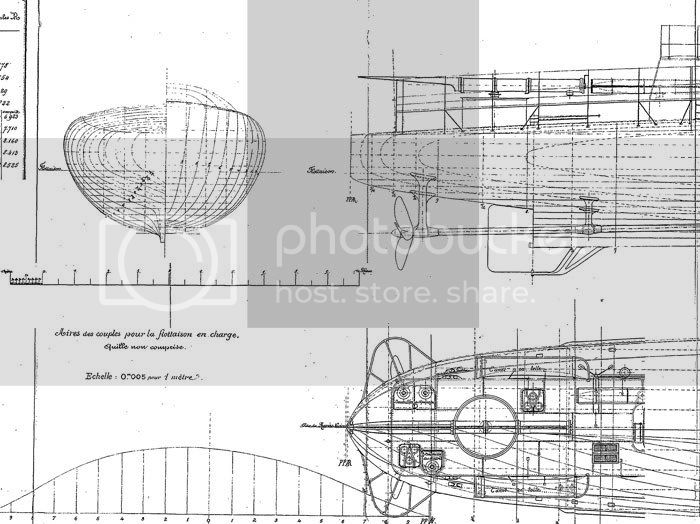
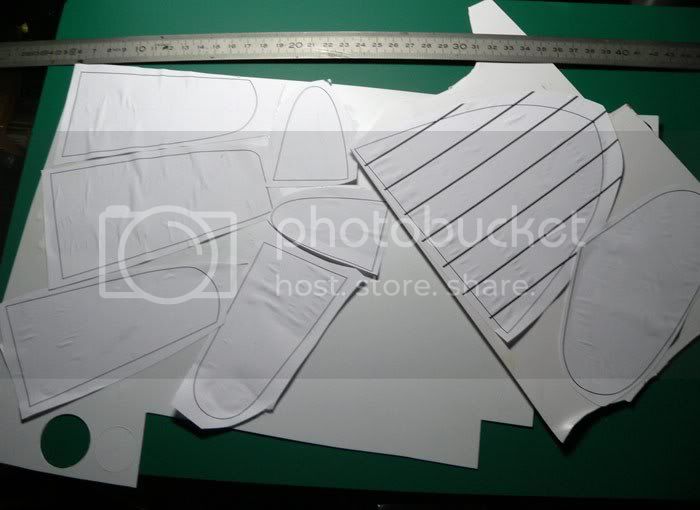
Speaking of which.. it's time to build that round portion of hull.. quite round indeed.
Here is the plastic shape once built. Thanks God for Tenax

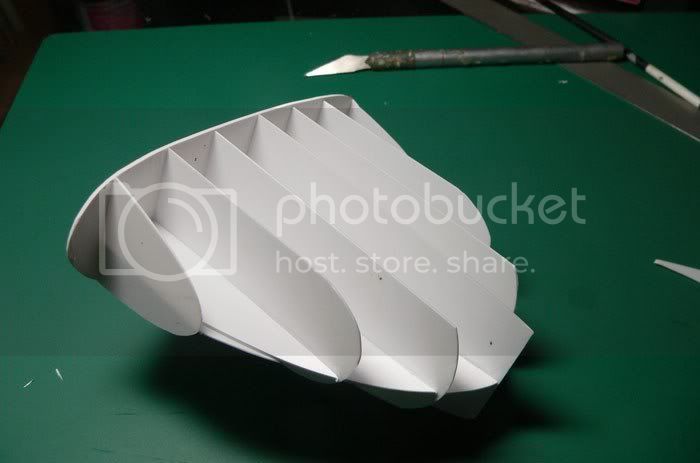
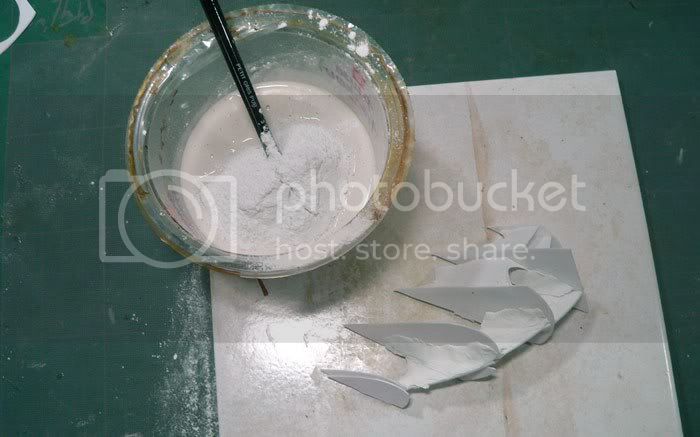
Let's straighten the angles with some magic Sculp. The pmroblem is that the magic Sculp doesn't glue so much to plastic, yet I sanded it roughly so that it would attach better but well no. I had later to use some CA glue to straighten the joints

Well it took me more than 1 hour to trim this thing!
in the end very few of the original shape stays visible.
roudeleiw
Visit this Community
Luxembourg
Joined: January 19, 2004
KitMaker: 2,406 posts
Armorama: 2,224 posts
Posted: Monday, February 22, 2010 - 10:25 PM UTC
Salut Nicolas,

This is some serious scratch building going on here. I am really looking forward o see where this one is heading.

Cheers

Claude
jba
Visit this Community
Rhone, France
Joined: November 04, 2005
KitMaker: 1,845 posts
Armorama: 777 posts
Posted: Tuesday, February 23, 2010 - 07:57 PM UTC
great job so far!
Jenseits
Visit this Community
Indre-et-Loire, France
Joined: February 14, 2010
KitMaker: 224 posts
Armorama: 213 posts
Posted: Tuesday, February 23, 2010 - 08:46 PM UTC
Salut Claude et merci. There is one guy in les Colleurs who has this as a signing "if you can see it you can model it". The whole trick is to believe you can do it, not asking oneself stupid questions and just do it.

Thanks JBA

Time to fill the shape with plaster.
I use only some very good quality plaster as I want a fine grain that I can send thoroughly once dry.
I manage to make a mix plaster/water which would produce a very compact mix.


then let's fill the holes


Trim and trim and trim until the plaster is completely dry, and then perfect the angles with Magic Sculp.

Here is the rough shape. now I will have to sand it once, and then put some finer filler like Squadron White putty and then sand again until the whole is completely smooth.
 _GOTOTOP