England - North West, United Kingdom
Joined: July 26, 2009
KitMaker: 135 posts
Armorama: 134 posts
Posted: Saturday, November 06, 2010 - 06:33 AM UTC
Quoted Text
Nice start Roy! I have the Trumpy DF-21 sitting around waiting to be started, so I'll be watching you move along on yours for added motivation.
Jim
get it out and build it up jim
it really is a nice kit,clean parts and goes together a treat'
Roy
http://roys-russianarmour.blogspot.com/
California, United States
Joined: December 01, 2001
KitMaker: 5,885 posts
Armorama: 3,799 posts
Posted: Saturday, November 06, 2010 - 06:42 AM UTC
Quoted Text
Quoted Text
Nice start Roy! I have the Trumpy DF-21 sitting around waiting to be started, so I'll be watching you move along on yours for added motivation.
Jim
get it out and build it up jim
it really is a nice kit,clean parts and goes together a treat'

- You know - I just might do that! I think there's enough time in this Campaign to give it a go.
I also picked up a short-notice commission to build a Willys M38A1D Truck equipped with the XM-29 Davy Crockett (Light) Atomic Battlegroup Launcher earlier this week, so I have it going alongside my WC-64 KD Ambulance right now. There's always room for one more model on an already overcrowded workbench...
Museum Associate Curator, Military Vehicle Technology Foundation (MVTF), Portola Valley, California
GunTruck Studios
AMPS #1044
IPMS/USA #24551
Grumpyoldman
 Consigliere
Florida, United States
Joined: October 17, 2003
KitMaker: 15,338 posts
Armorama: 7,297 posts
Posted: Saturday, November 06, 2010 - 09:01 AM UTC
Well, I actually got a little done on my project.

Started on the chassis, the cab is just sitting there, not attached yet.

Replaced the little round blob lug nuts with some Tichy Train Parts Hex Nuts.
I'll be starting a blog in Constructive Criticism for anyone who wants to follow this.

Character is what you do when no one is looking.
Few things are harder to put up with than a good example.- Mark Twain
Make yourself an honest man, and then you may be sure that there is one less scoundrel in the world.--Thomas Carlyle
Limburg, Netherlands
Joined: November 18, 2003
KitMaker: 894 posts
Armorama: 643 posts
Posted: Saturday, November 06, 2010 - 09:48 AM UTC
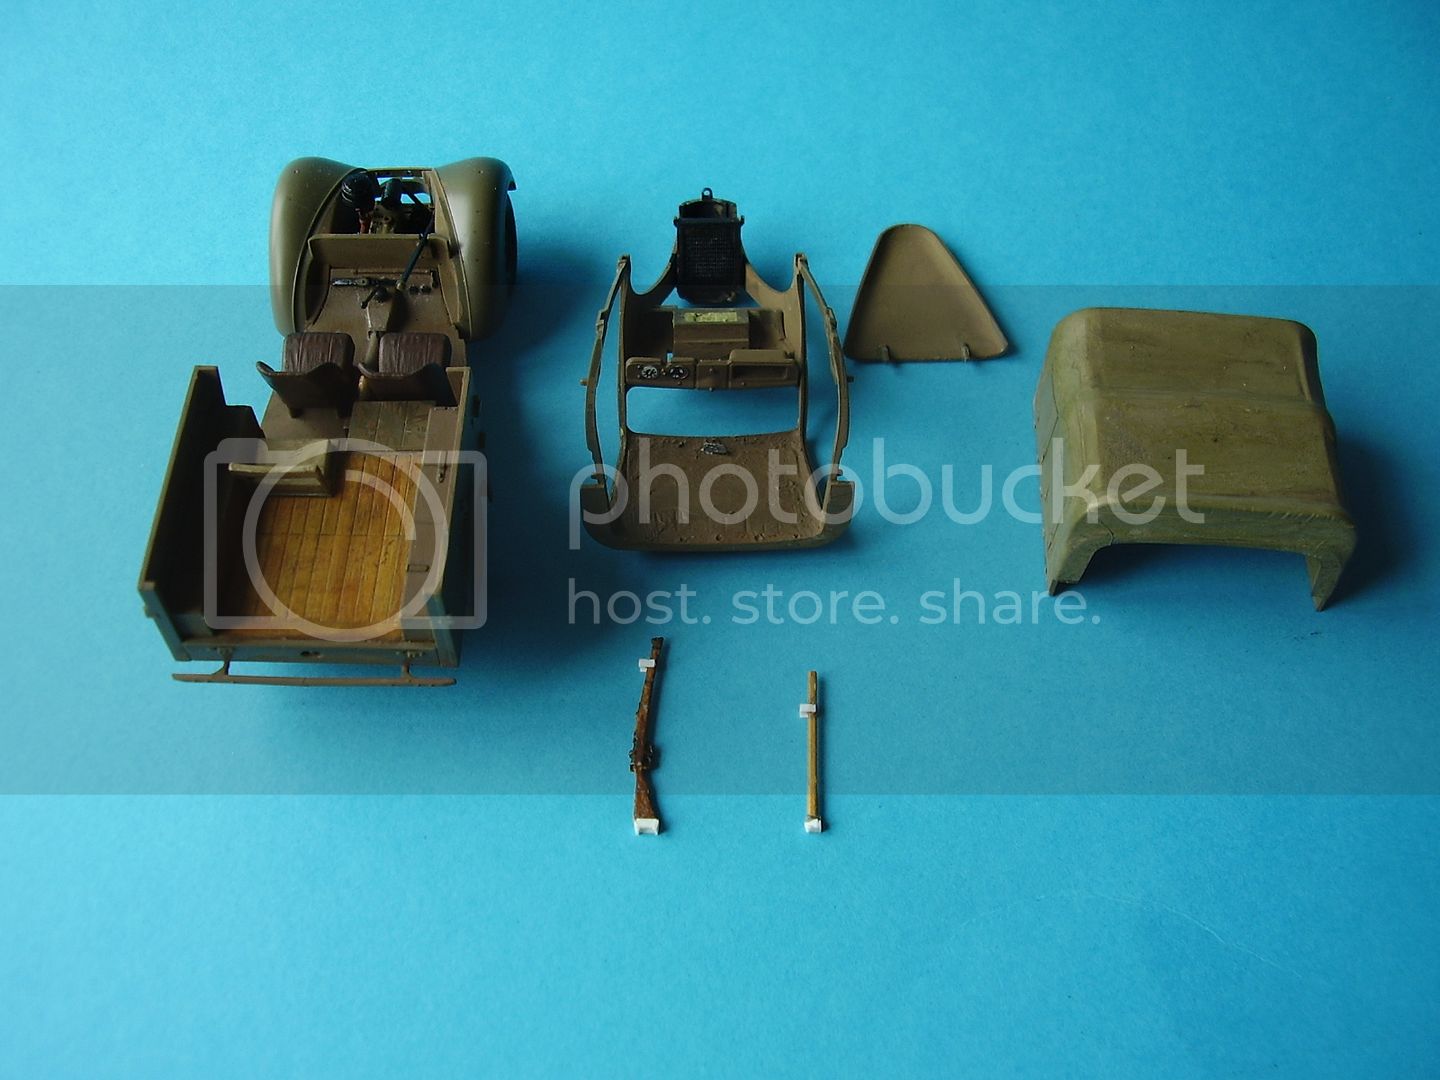
thanks guys!
the kit is from MMK. I also have a matching trailer for this truck, which will not be a part of this campaign but it has exactly the same issues

The good thing is that these kits are not so expensive (for a resin kit) and they are a good way of improving your scratch building skills
"We don't know anything about their race, history, or culture, but one thing's for sure. They stand for everything we stand against."
Zapp Brannigan from the cartoon series "Futurama"
California, United States
Joined: December 01, 2001
KitMaker: 5,885 posts
Armorama: 3,799 posts
Posted: Saturday, November 06, 2010 - 03:25 PM UTC
Okay - I'm up on the board with Project #1.
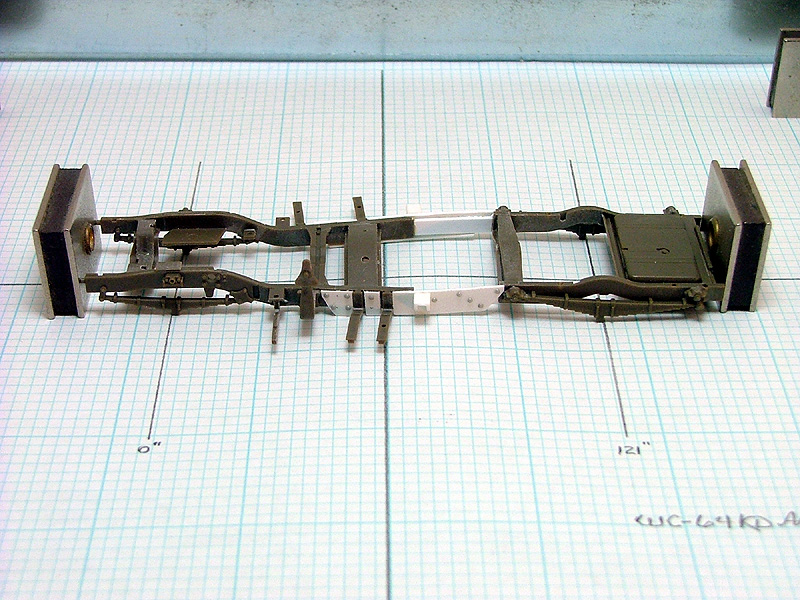
The first thing I set out to do was the chop and lengthen the Skybow WC-51 Beep Frame Rails to the proper length for the WC-64 KD Ambulance. The WC-51 measures out with a 98-inch Wheelbase, which needs to be stretched to the WC-64 KD's 121-inch Wheelbase.

Above, the Frame subassembly is cleaned up and sitting posed in my alignment jig for a photo. I'll glue and set it up later tonight to dry - it is not aligned to the grid yet. The extensions don't exactly match the breadth of the Skybow Frame Rails, I know, but this is not a problem. The WC-64 KD Frame Rails have strengthing plates bolted to this area that will be put on tomorrow.
I'm blogging this on my website - if you wish to follow along - with a whole lot of blabber about this conversion and real vehicle sure to bore you to death as I proceed to completion...
Museum Associate Curator, Military Vehicle Technology Foundation (MVTF), Portola Valley, California
GunTruck Studios
AMPS #1044
IPMS/USA #24551
California, United States
Joined: February 17, 2007
KitMaker: 87 posts
Armorama: 65 posts
Posted: Saturday, November 06, 2010 - 07:09 PM UTC
[quote]Jim, I just noticed you are building the same kit for both this and the 1/48 campaign. A build can only be entered into one campaign. So you will have to choose and then build something else for the other campaign.
Jesper, thanks for the info. I already finished up an Italeri 1/48 AB43 in that campaign, so I will take this one out of there and leave it here.
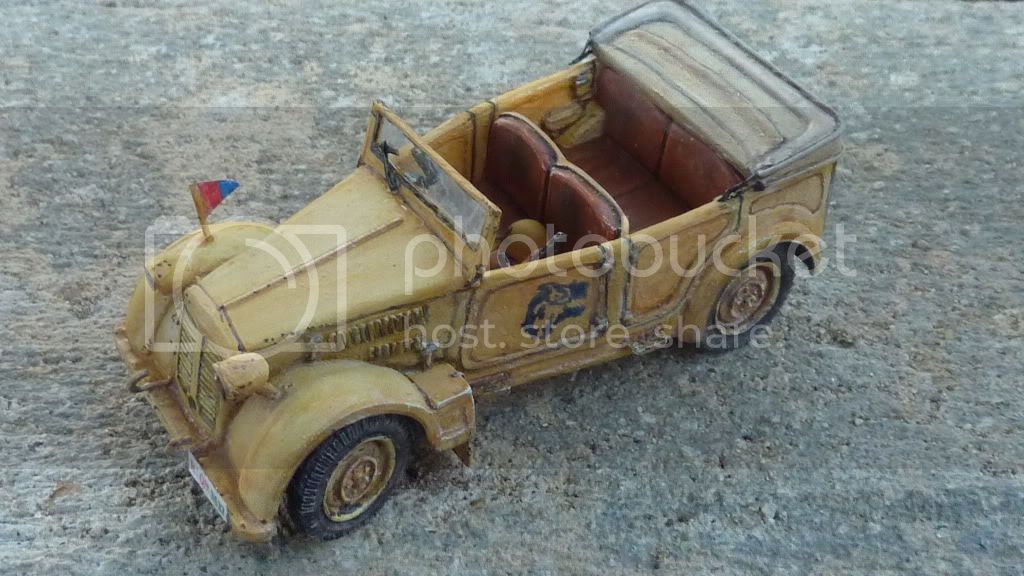
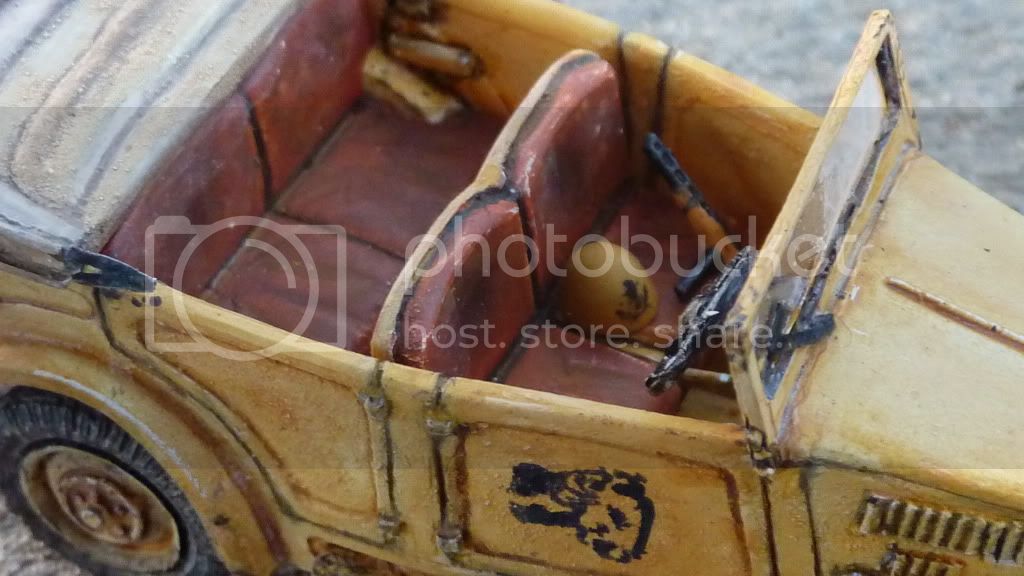
With that said, I finished my little Italian DAK Fiat 508c for the most part:

Jim
England - East Anglia, United Kingdom
Joined: August 12, 2005
KitMaker: 14,499 posts
Armorama: 11,675 posts
Posted: Saturday, November 06, 2010 - 10:07 PM UTC
Hi Dave,
Welcome along, nice start,
Jim 1 and Jim 2 - cool work guys.
Some Tilly progress
Al
'Action this Day'
Winston Spencer Churchill
Limburg, Netherlands
Joined: November 18, 2003
KitMaker: 894 posts
Armorama: 643 posts
Posted: Sunday, November 07, 2010 - 01:46 AM UTC
great progress guys!
here is my last update for this week. I'll be moving to a new house with improved mancave within 2 weeks so I'll be busy with packing stuff.
some added detailing on the front suspension:


I removed the resin straps on the air tanks and exhaust and replaced them with evergreen strips

the bonnet took me 2 hours of work

I cut holes in the top and added louvres made from evergeen, a fiddly job, resulting in a not so straight result. Have to fix it. The side of the bonnet that fits too the cab was not straight. I added a strip of evergreen which I now have to sand off on one side to make the whole thing square again.

the white patch is a massive hole I had to fill with 2 layers of putty

another white patch, this is the 3rd layer of putty on the roof. The dent was impossible to remove with hot water

Cheers,
Matthijs
"We don't know anything about their race, history, or culture, but one thing's for sure. They stand for everything we stand against."
Zapp Brannigan from the cartoon series "Futurama"
England - North West, United Kingdom
Joined: July 26, 2009
KitMaker: 135 posts
Armorama: 134 posts
Posted: Sunday, November 07, 2010 - 11:03 AM UTC
TRUMPY DF-21...update
i mananaged to get the exhausts built,painted and fitted into position

and the front bumper

i have spent tonight building up a few sub assemblys ready for painting, starting with the airfilters and air tanks

then the wheel rims and one of the rear axels

this is the last post from me untill sunday evening next week as i need to get my models ready for the comps and display at Telford Scale model world..Roy
Roy
http://roys-russianarmour.blogspot.com/
California, United States
Joined: December 01, 2001
KitMaker: 5,885 posts
Armorama: 3,799 posts
Posted: Sunday, November 07, 2010 - 11:15 AM UTC
Update for today: I added the Reinforcement Strips found on the WC-64 KD Ambulance Frame Rails while listening to my beloved Cleveland Browns give the New England Patriots all they wanted (and then gave 'em some more) today. Aside from scratchbuilding the Ambulance Body itself - this is the most difficult part of the conversion. Everything sits level and square on the jig - no warping.
Next comes hanging the rest of the Suspension components and mounting the Engine/Drivetrain/Exhaust to the Frame...
Museum Associate Curator, Military Vehicle Technology Foundation (MVTF), Portola Valley, California
GunTruck Studios
AMPS #1044
IPMS/USA #24551
England - North West, United Kingdom
Joined: July 26, 2009
KitMaker: 135 posts
Armorama: 134 posts
Posted: Sunday, November 07, 2010 - 11:27 AM UTC
nice clean,tidy work on that chassie extension jim
what is the donor kit your using an old italeri dodge kit?
Roy
http://roys-russianarmour.blogspot.com/
California, United States
Joined: December 01, 2001
KitMaker: 5,885 posts
Armorama: 3,799 posts
Posted: Sunday, November 07, 2010 - 12:33 PM UTC
Quoted Text
nice clean,tidy work on that chassie extension jim
what is the donor kit your using an old italeri dodge kit?
Thanks Roy! I'm using the Skybow WC-51 Beep as my base kit. Next, I want to do a WC-54 Ambulance using the Skybow kit.
Museum Associate Curator, Military Vehicle Technology Foundation (MVTF), Portola Valley, California
GunTruck Studios
AMPS #1044
IPMS/USA #24551

#020
Illinois, United States
Joined: December 28, 2006
KitMaker: 278 posts
Armorama: 231 posts
Posted: Monday, November 08, 2010 - 03:03 AM UTC
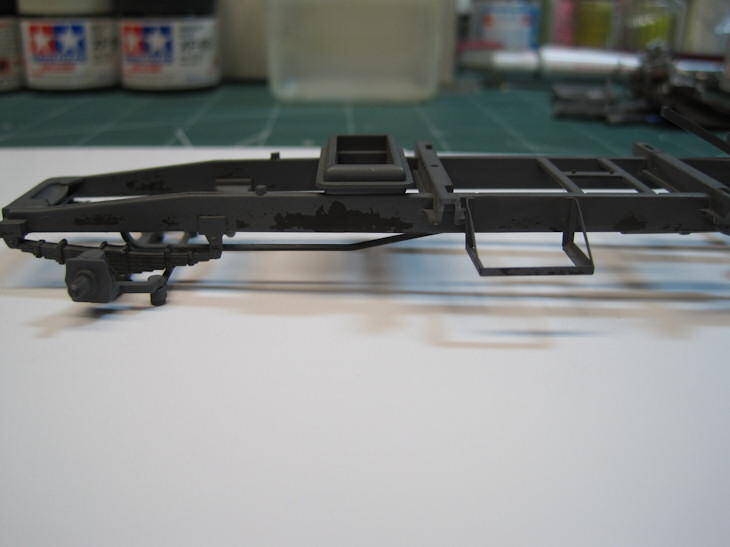
Another update to my build showing the chipping paint effect on the Opel Blitz frame. This is the first time I have tried this and was surprised how easy it was. In case anyone is wondering why I am doing this now it is to allow me to add the engine detail to the frame.
I primed the frame as shown earlier with Tamyia Primer, then sprayed Vallejo acrylic hull red. I left this to dry for several days. Then I decanted some hairspray and let it settle out a bit. Added that to my airbrush and sprayed about three light coats to the frame. Set it aside and cleaned my airbrush. This allowed the hairspray to dry. Mixed up some Tamyia Field Grey and some Deck Tan to soften the color so it had a more faded look. Sprayed that mixture on the frame giving it several coats. Cleaned the airbrush again and after about ten to fifteen minutes I began to work on the chipping. I would wet the frame and rub it down with a stiff paint brush or take my hobby knife and ding the surface a bit to allow the water to penetrate the paint layer into the hairspray. This really allowed the paint to come up much faster.
I tried to not over due the effect. I like the chipping I got but am looking for comments on chip placement or even if I need more or less chipping.
Here are some images of the paint chipping to the frame.


Mike
"The price of freedom is eternal vigilance."
- Thomas Jefferson
England - East Anglia, United Kingdom
Joined: August 12, 2005
KitMaker: 14,499 posts
Armorama: 11,675 posts
Posted: Monday, November 08, 2010 - 03:52 AM UTC
Excellent stuff folks, looking forward to deveopments.
Al
'Action this Day'
Winston Spencer Churchill
New York, United States
Joined: March 08, 2010
KitMaker: 3,662 posts
Armorama: 3,078 posts
Posted: Monday, November 08, 2010 - 06:35 AM UTC
Quoted Text
.
I tried to not over due the effect. I like the chipping I got but am looking for comments on chip placement or even if I need more or less chipping
Mike,
I never tried the hair spray method or a paint chipping effect. But from what I can see it don't look over done, just the right amount, It looks good to me, but from what I have found from my former experience as an auto mechanic, is that when a frame is painted and chips off the resulting under color is a rust color not another layer of paint. Just my $.02
Active Campaigns on the bench:
Operation Fall Gelb - Pz.Kpfw. IV Ausf. C
Engineering the Future - M-26 Recovery Vehicle
115 Campaigns completed
Baden-Württemberg, Germany
Joined: March 14, 2010
KitMaker: 21 posts
Armorama: 20 posts
Posted: Monday, November 08, 2010 - 06:55 AM UTC
Hello everybody,
at last, my goat got some paint. It was done with acrylics from Gunze
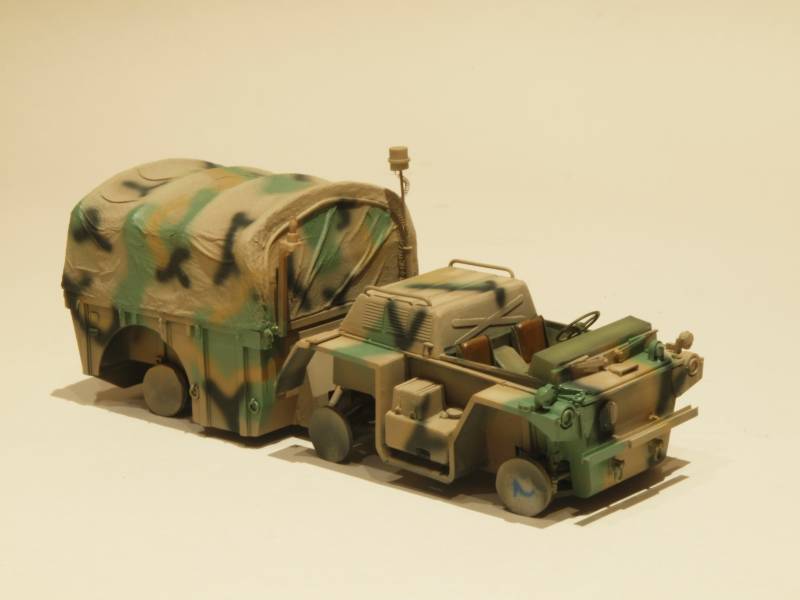

As a reference I found that picture on wikipedia:
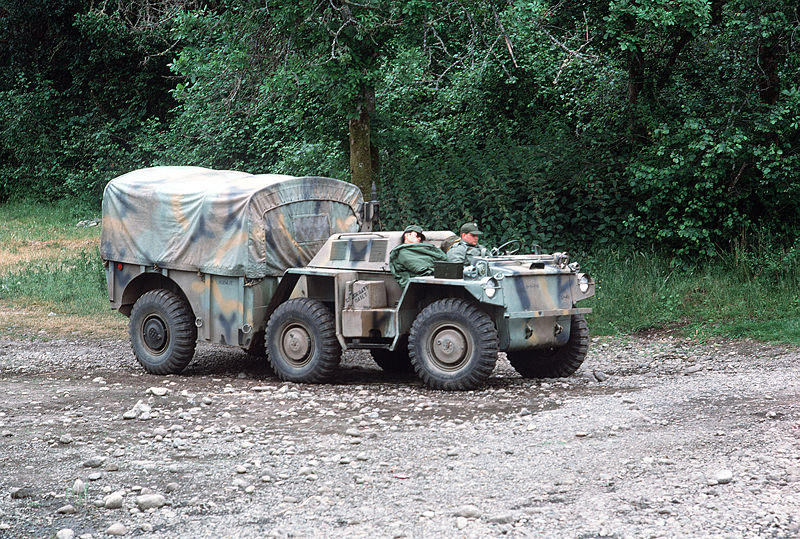
I don't know, if this a real sheme. But it looks quite cool.
Any comments welcome.
Regards
Sven
Limburg, Netherlands
Joined: November 18, 2003
KitMaker: 894 posts
Armorama: 643 posts
Posted: Monday, November 08, 2010 - 08:01 AM UTC
Quoted Text
I don't know, if this a real sheme. But it looks quite cool.
Any comments welcome.
Regards
Sven
Hi Sven,
the scheme is called MERDC and comes in various colour combinations, depending on the location and time of year.
"We don't know anything about their race, history, or culture, but one thing's for sure. They stand for everything we stand against."
Zapp Brannigan from the cartoon series "Futurama"
New York, United States
Joined: March 08, 2010
KitMaker: 3,662 posts
Armorama: 3,078 posts
Posted: Monday, November 08, 2010 - 03:55 PM UTC
Hi Guys,
Some great work going on here with lots of verity. I think I'm finished with this 1 for now, let me know what ya think

I added some black acrylic wash and some black pin wash

I don't want to mud this 1 up because I eventually want to put it in a dio with some figures and I'll mud it up then. I still haven't decided if I'm gonna use the figures that came with it, I primed them up today anyway

Active Campaigns on the bench:
Operation Fall Gelb - Pz.Kpfw. IV Ausf. C
Engineering the Future - M-26 Recovery Vehicle
115 Campaigns completed
#020
Illinois, United States
Joined: December 28, 2006
KitMaker: 278 posts
Armorama: 231 posts
Posted: Monday, November 08, 2010 - 07:08 PM UTC
Sal,
Great job on the staff car. I really like the look of the material for the folding roof. The faded paint job is really well done. I'm sure when you add it to that diorama and weather it up it will really standout!
Mike
"The price of freedom is eternal vigilance."
- Thomas Jefferson
#020
Illinois, United States
Joined: December 28, 2006
KitMaker: 278 posts
Armorama: 231 posts
Posted: Monday, November 08, 2010 - 07:12 PM UTC
Quoted Text
Quoted Text
.
I tried to not over due the effect. I like the chipping I got but am looking for comments on chip placement or even if I need more or less chipping
Mike,
I never tried the hair spray method or a paint chipping effect. But from what I can see it don't look over done, just the right amount, It looks good to me, but from what I have found from my former experience as an auto mechanic, is that when a frame is painted and chips off the resulting under color is a rust color not another layer of paint. Just my $.02
Your right about the frame not showing rust. I wonder if I should of done a three layer approach to the frame. Prime as always! Then add a rust layer, then a undercoat color, which is what you see now and then the top coat. I might be able to add some rust to some of those areas with a small brush. I will think about that one. In any case it probably won't happen until the opel is finished so not to disturb that effect.
Thanks for the feed back!
Mike
"The price of freedom is eternal vigilance."
- Thomas Jefferson
#041
Kobenhavn, Denmark
Joined: July 20, 2006
KitMaker: 10,069 posts
Armorama: 4,677 posts
Posted: Tuesday, November 09, 2010 - 08:47 AM UTC
Nice build, Jim. Nice desert worn finish.
Great camouflage, Sven. Looking forward to see it finished and weathered.
Nice finish, Sal. That final washes really added "depth" to the colour scheme. Looks really good. What is the paint on the top edge of the windows? Was there are metal frame there on the real thing? If there were a metal frame, I would add a little masking and repaint them with straight lines. It looks a little strange now and really disturbs the eye on an otherwise excellent build. Just my two cents.
Campaign'oholic - 252+ campaigns completed
Texas, United States
Joined: February 22, 2008
KitMaker: 5,026 posts
Armorama: 1,604 posts
Posted: Tuesday, November 09, 2010 - 01:41 PM UTC
After viewing all of the nice building going on here I thought that I would join with this kit from RPM.

Bob
If it aint broke dont fix it.
New York, United States
Joined: March 08, 2010
KitMaker: 3,662 posts
Armorama: 3,078 posts
Posted: Tuesday, November 09, 2010 - 02:01 PM UTC
Hi guys,
thanks for the complements there is a brown and black wash on the canvas top. The window has metal trim around them like this 1

I'll try and clean it up a bit tomorrow.
@ Bob that is an interesting looking kit that you have there
Active Campaigns on the bench:
Operation Fall Gelb - Pz.Kpfw. IV Ausf. C
Engineering the Future - M-26 Recovery Vehicle
115 Campaigns completed
Texas, United States
Joined: February 22, 2008
KitMaker: 5,026 posts
Armorama: 1,604 posts
Posted: Tuesday, November 09, 2010 - 02:20 PM UTC
@ Sal: I just ordered it from Squadron for 11.66 USD, should be here in about 6 days. Nice looking vehicle you have there.
Bob
If it aint broke dont fix it.
California, United States
Joined: December 01, 2001
KitMaker: 5,885 posts
Armorama: 3,799 posts
Posted: Wednesday, November 10, 2010 - 09:19 AM UTC
Quoted Text
After viewing all of the nice building going on here I thought that I would join with this kit from RPM.
Bob
Interesting! Does the Figure come with the kit too?
Museum Associate Curator, Military Vehicle Technology Foundation (MVTF), Portola Valley, California
GunTruck Studios
AMPS #1044
IPMS/USA #24551