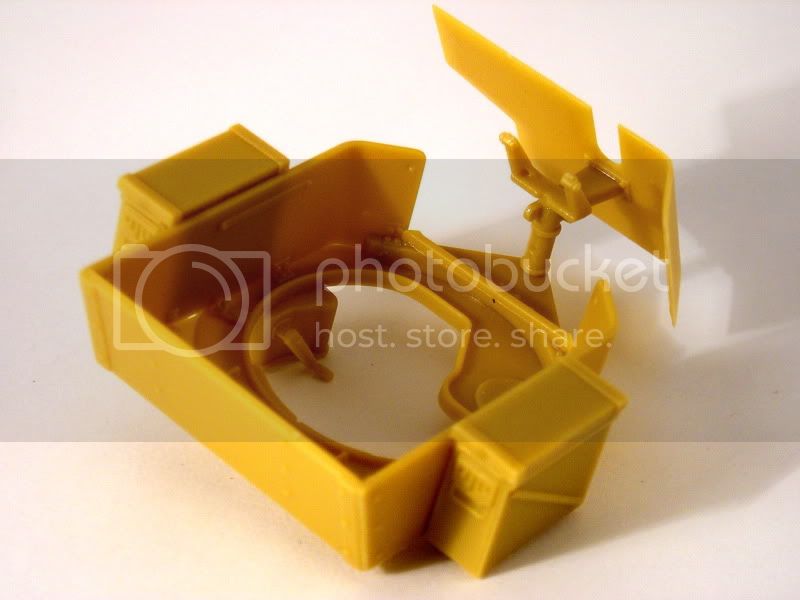
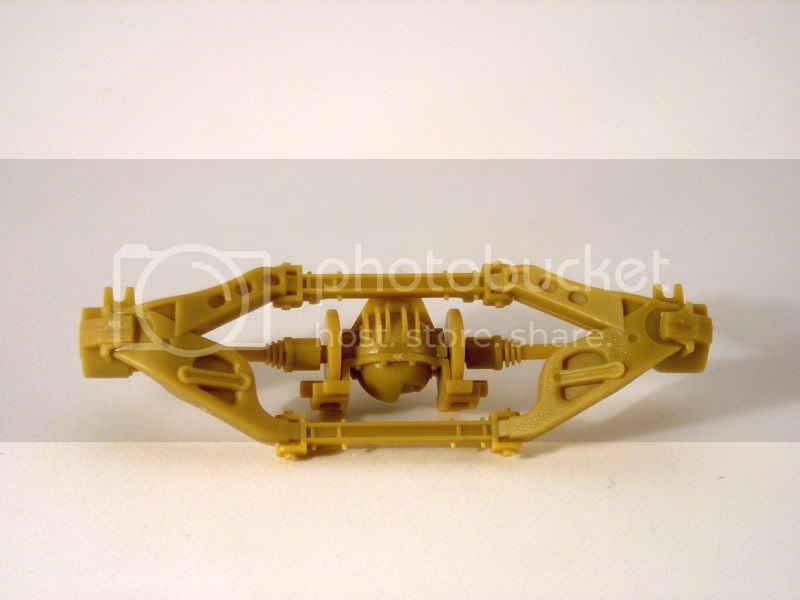
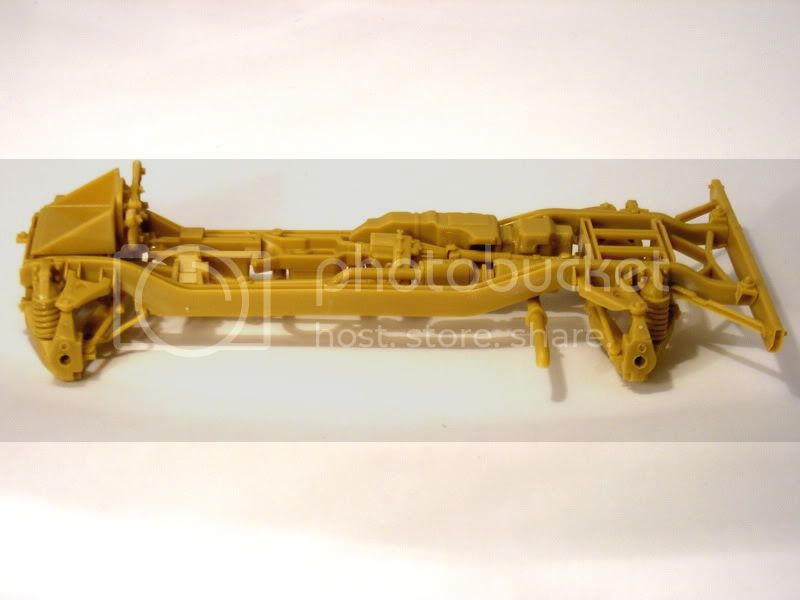
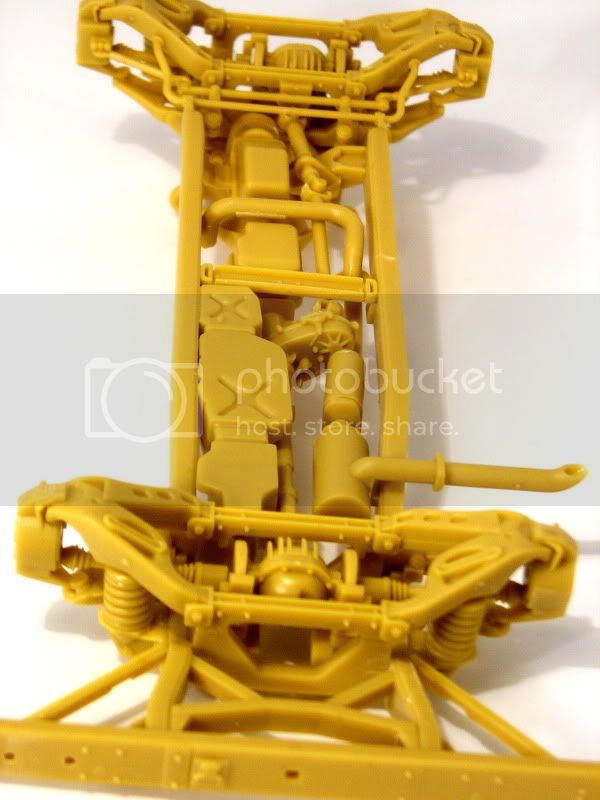
I'd like to do this one right, so everyone's input is welcome. This build will be a feature review here on Armorama, so I'm going to build this out.of-the-box. What I'm trying to do is show anyone building this kit the ups and downs during the actual build so let's get started.
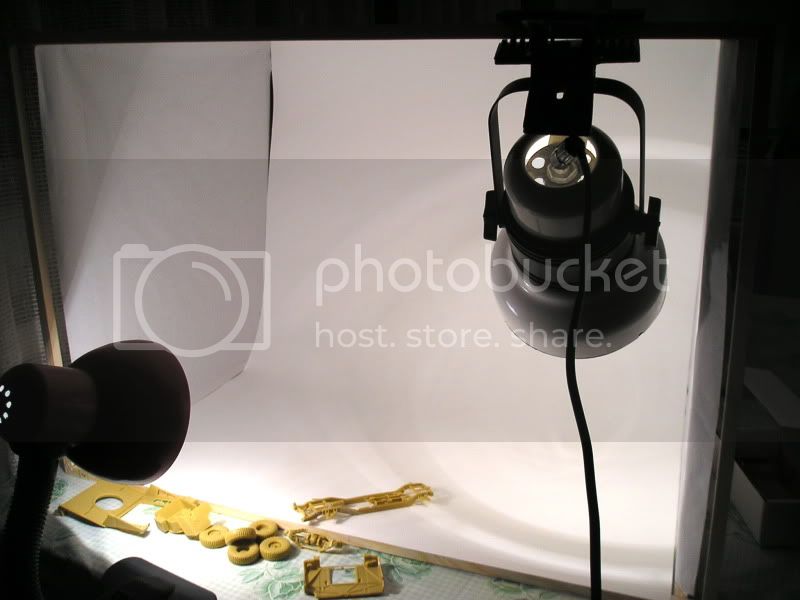
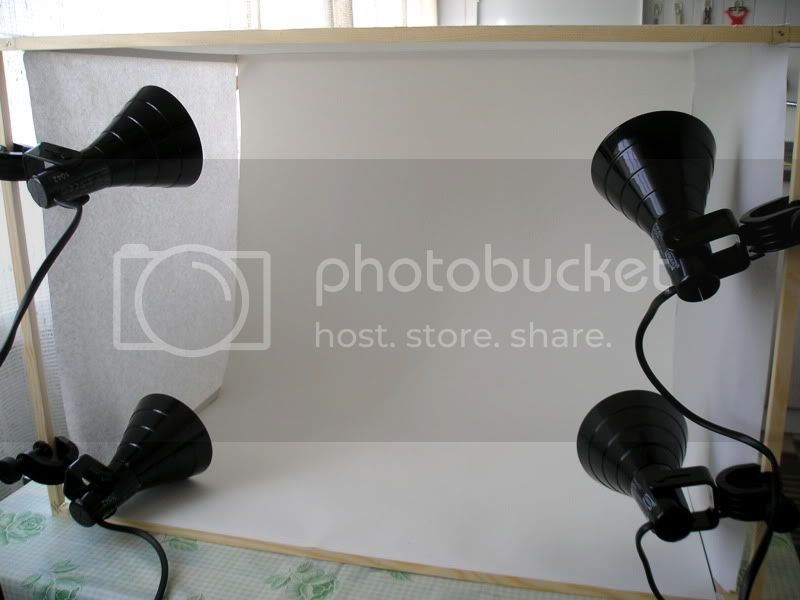
The first thing I'd like to say I'm trying to get better shots. So far I'm using a pretty old camera, so I'm doing the best I can. If anyone has some ideas for improvement, please speak up. I just made a simple light-box and this is what I'll be using through this blog.
I won't be following the steps indicated in the instructions but build in modules, so I can figure out what works best. I will be following the part sequence however by the instructions.
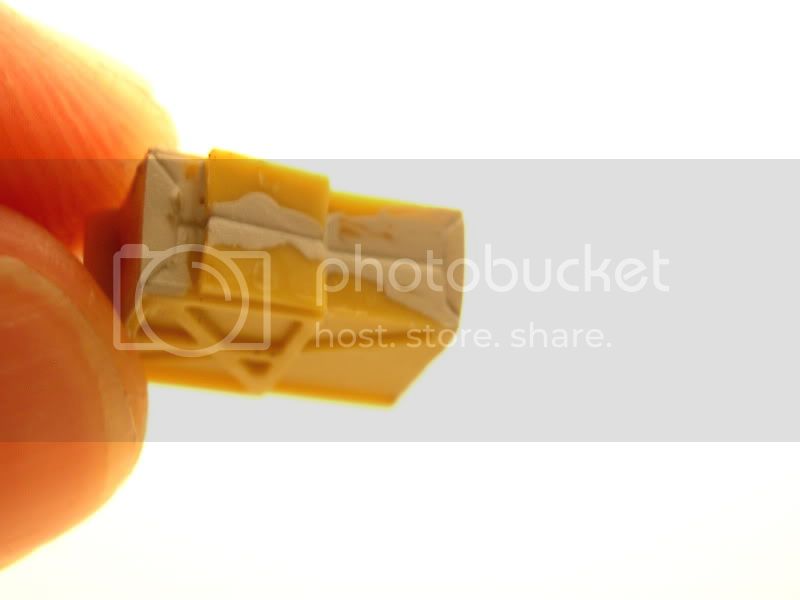
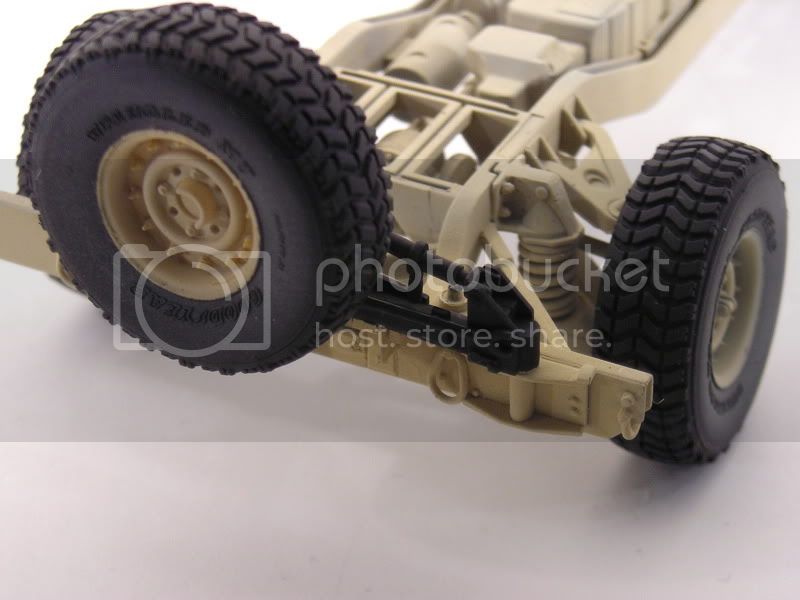
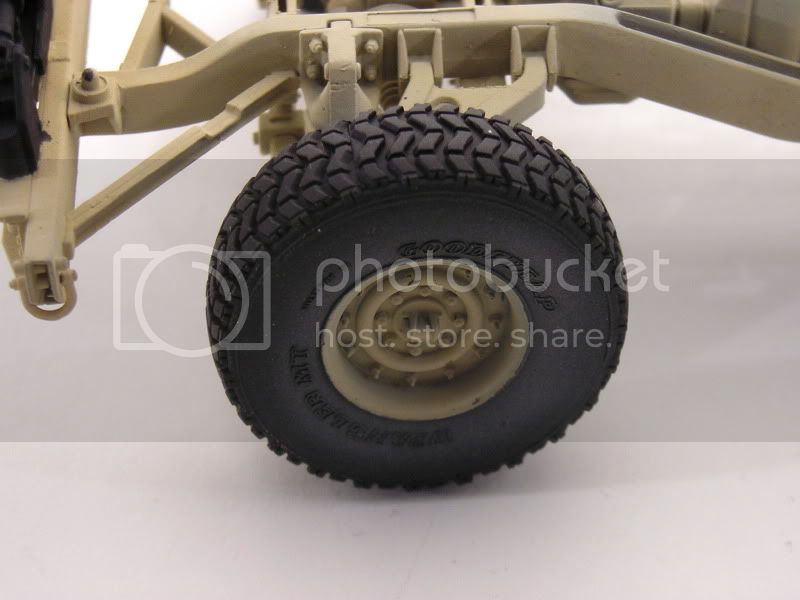
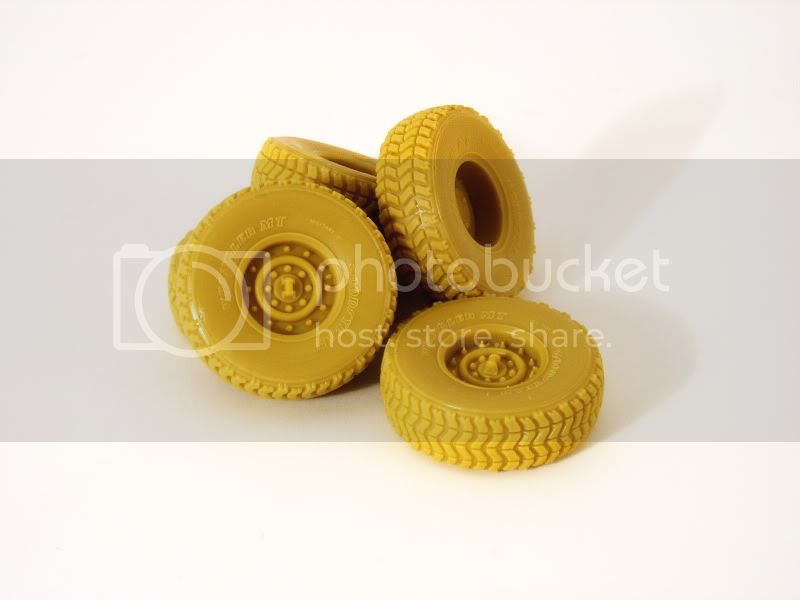
This is what I made first. I'm very happy to say the fit is great. The errors in the kit will be mentioned in the inbox review coming soon, but for now let's repeat. The thread pattern is wrong and the lettering is off due to copyrights? but the concept of 3 part per tire is great, no puttying is necessary and everything lines up neatly.
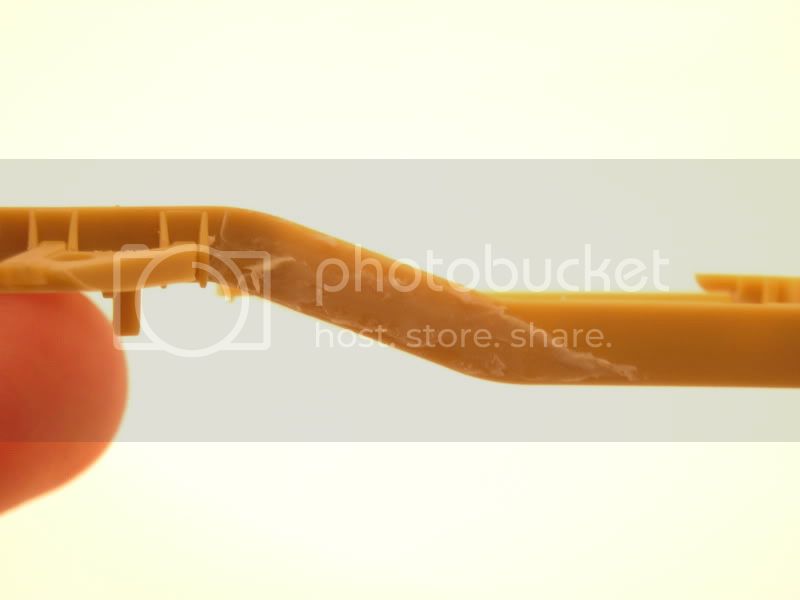
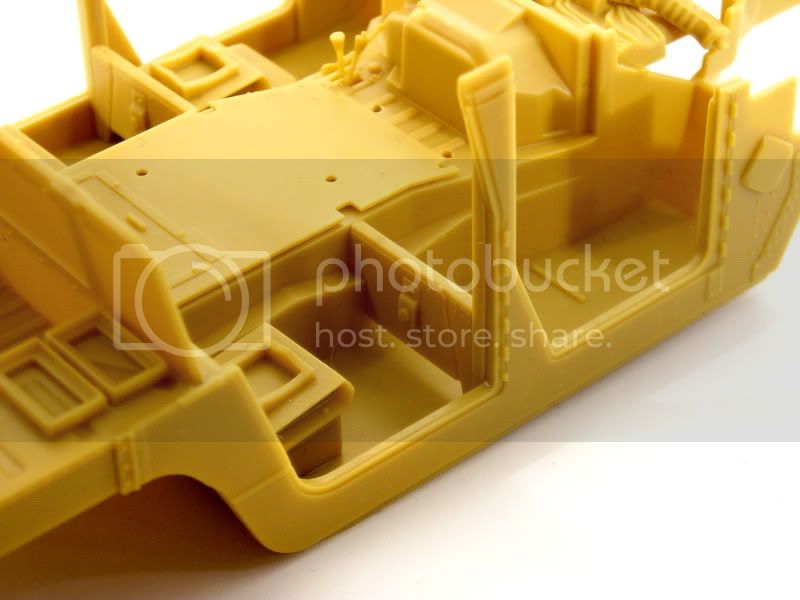
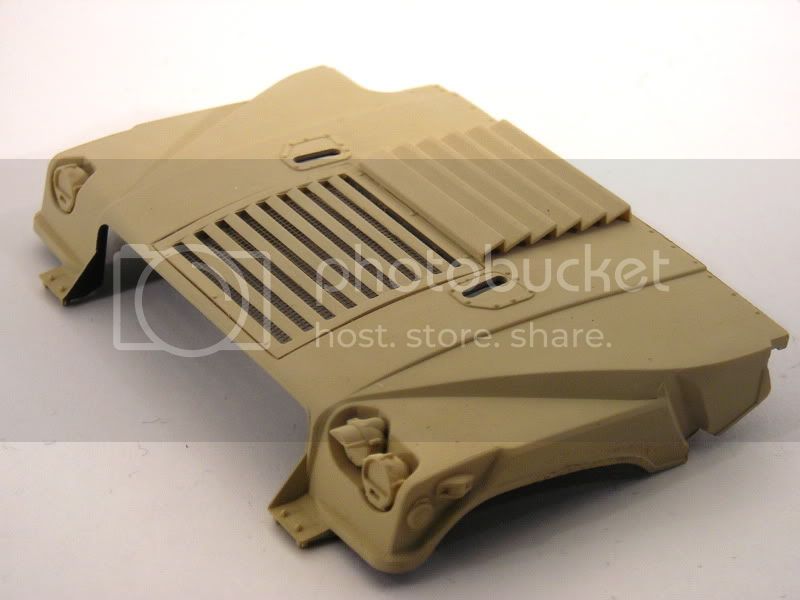
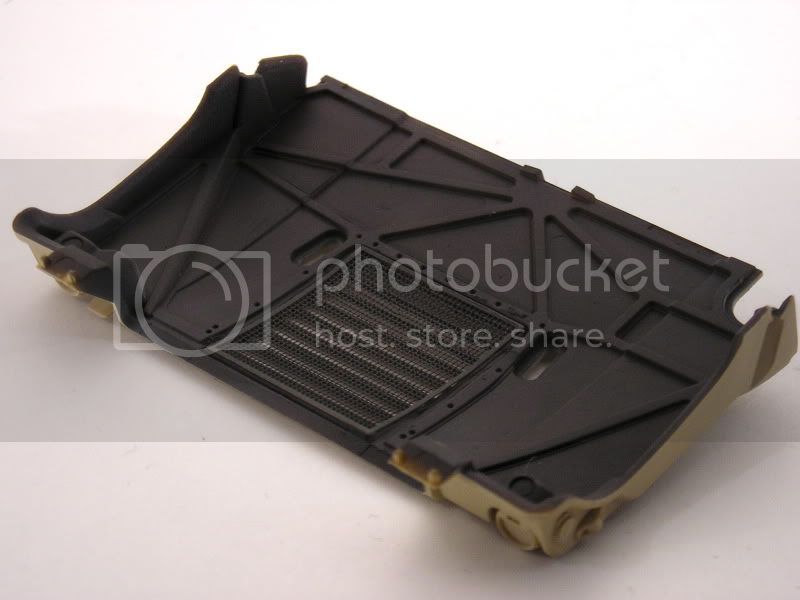
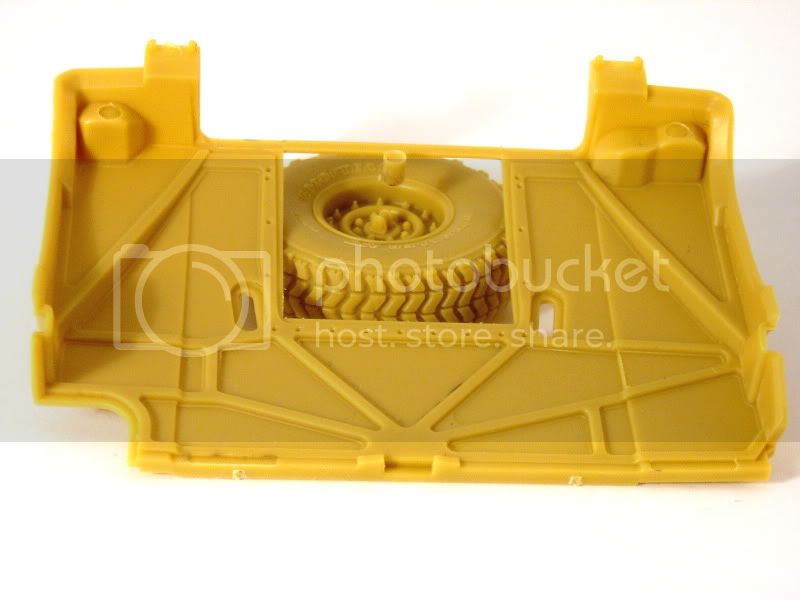
I just snapped the hood of the sprue to show the nice framing on the inner side. It's a welcome sight if you want to model this open.
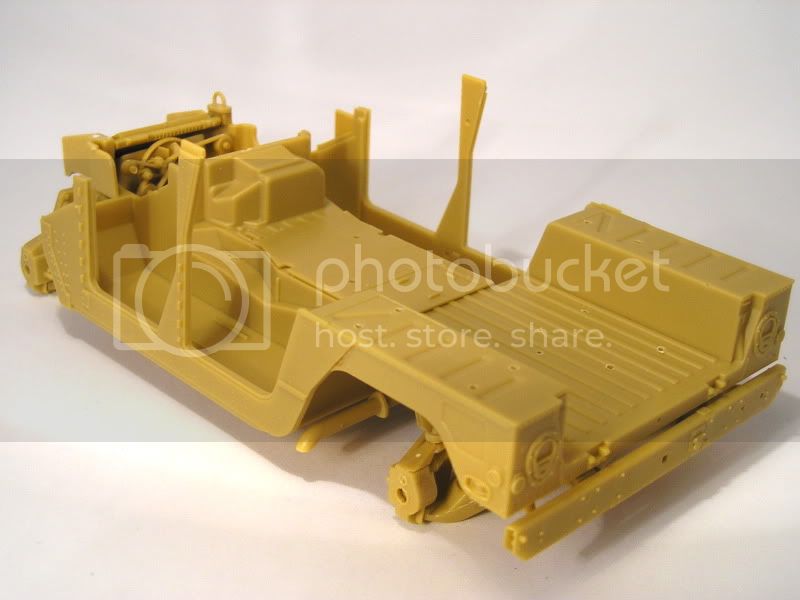
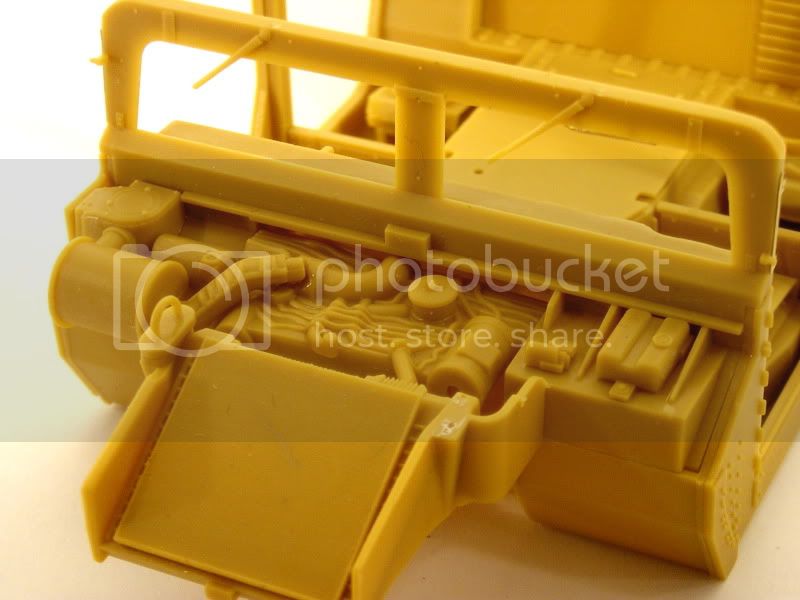
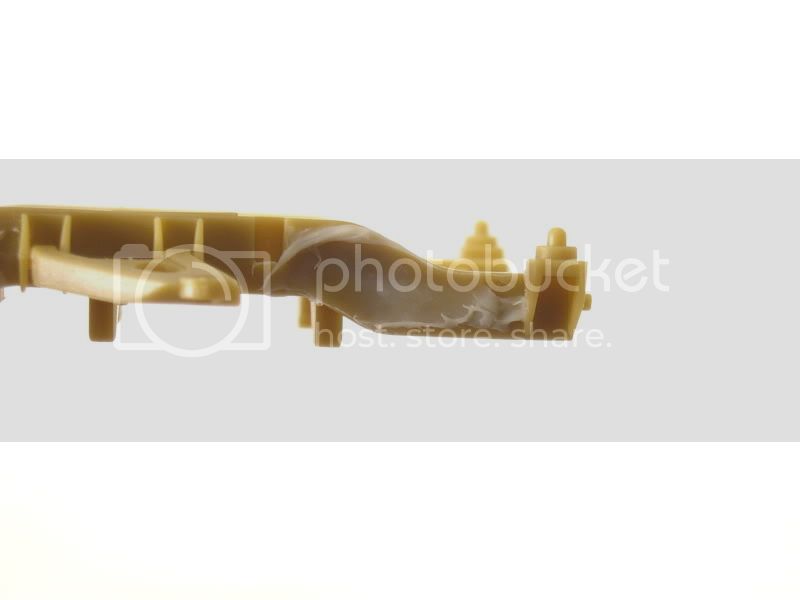
Next in line is something with more work. The chassis frame has a seam line all the way long and a couple of sink marks that needs taking care of prior of adding more parts. I used a handful of Mr.Dissolving Putty to fill the sink marks, and will sand everything when it cures. To remove the seam line, just run the scalpel along the plastic and with a few quick swipes, it's done
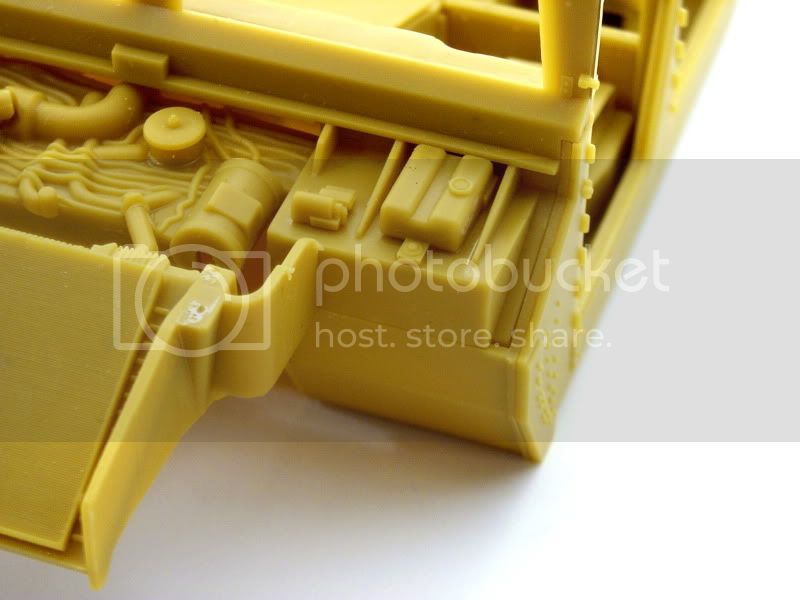
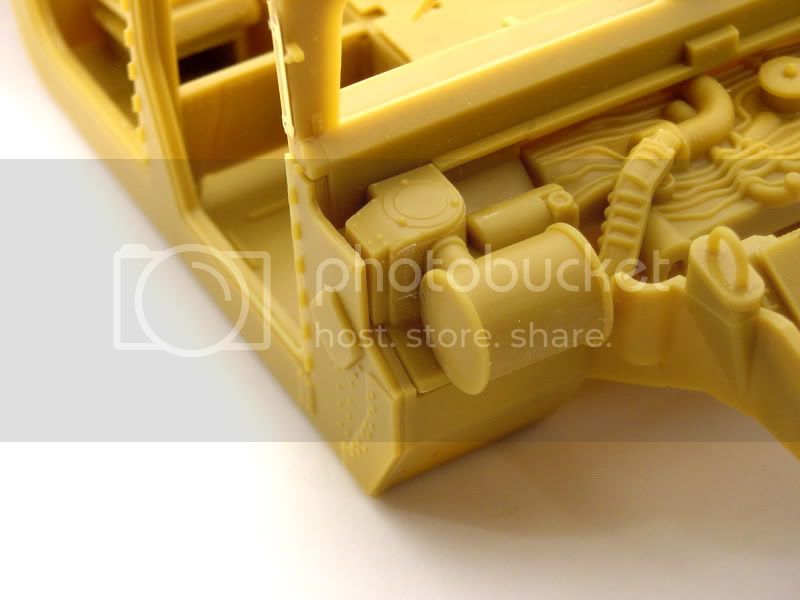
The lower body has nice detail all over. There are some holes that need to be drilled out and you can start adding some parts soon. I added the side armor plating, floor covers and the radiator as these won't hinder any painting or building that will occur later.
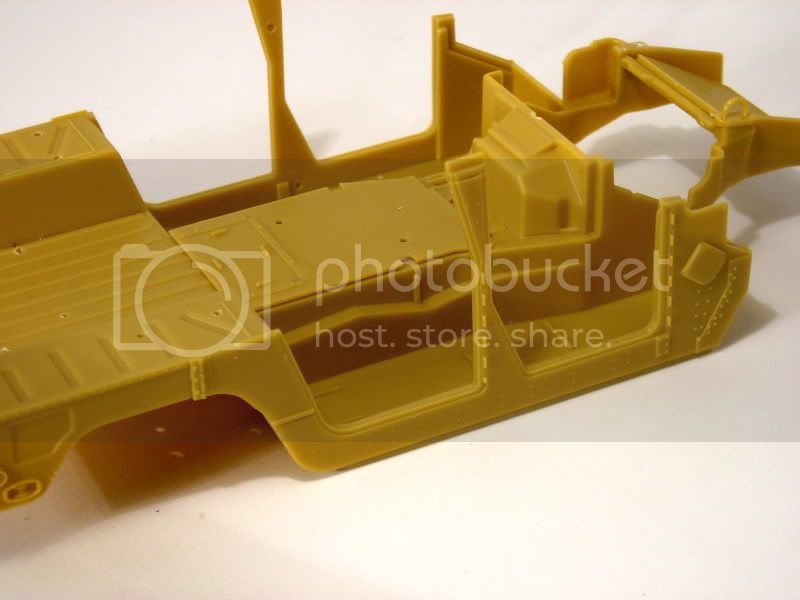
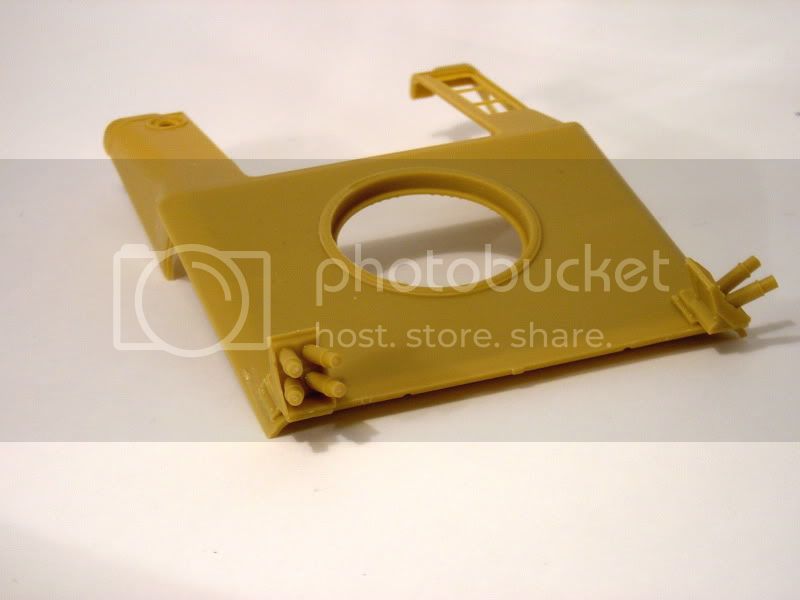
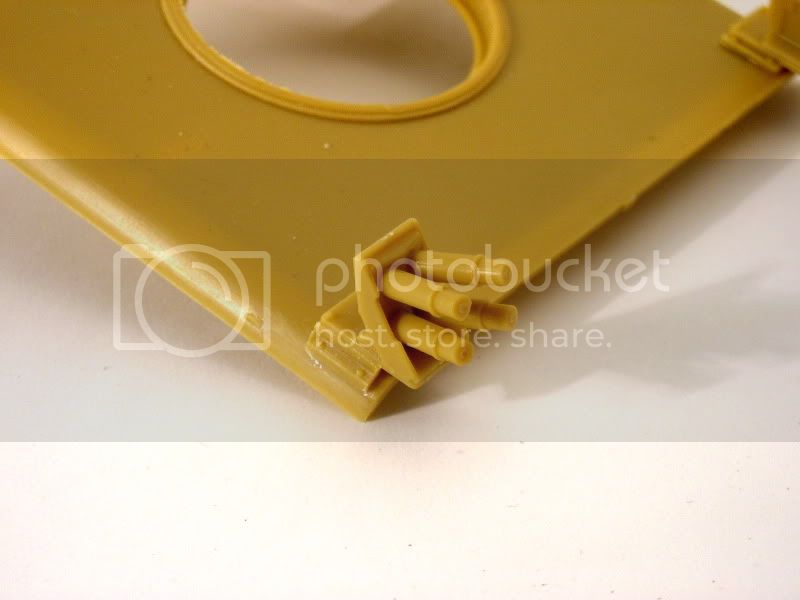
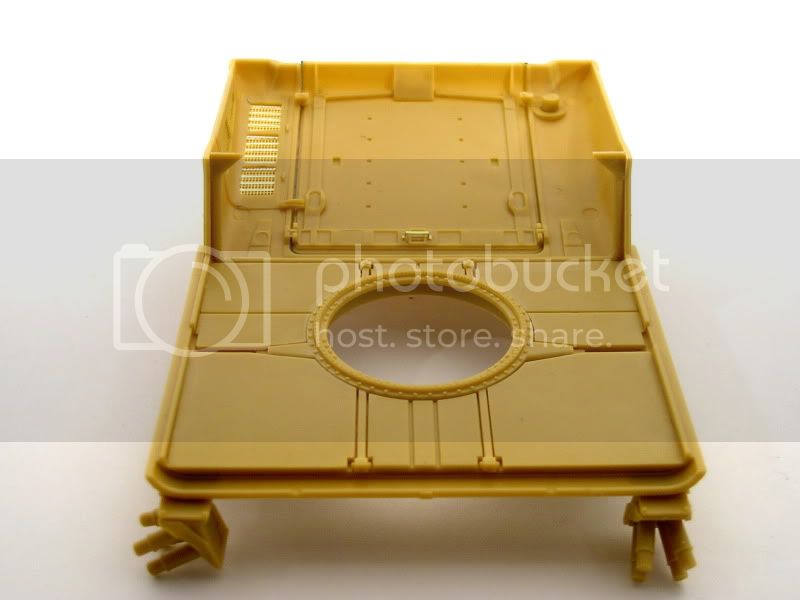
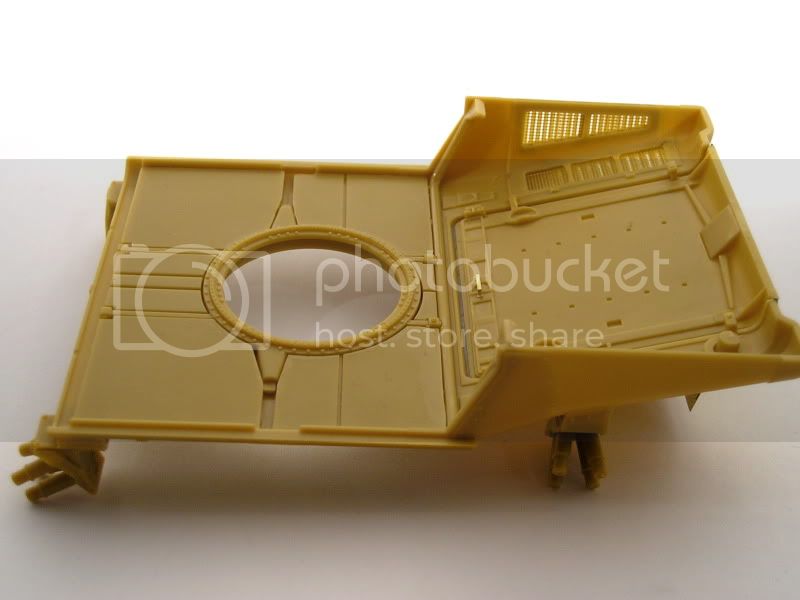
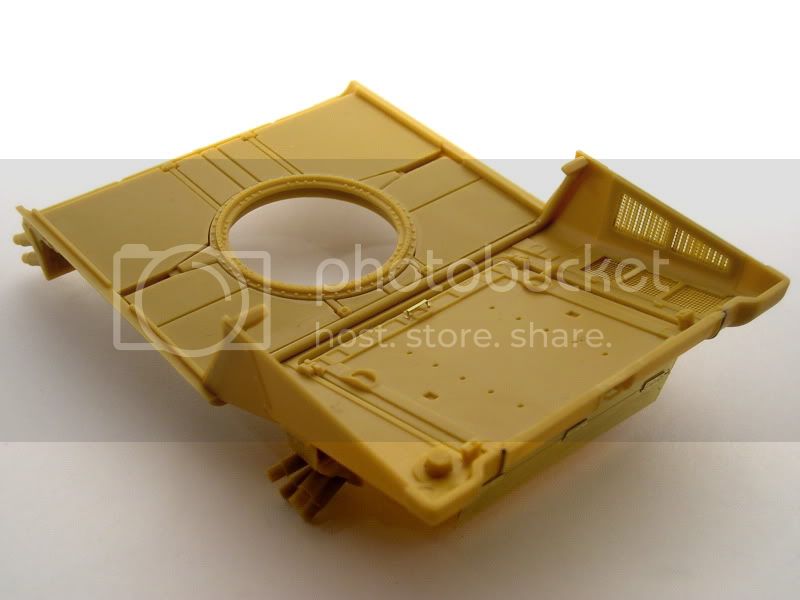
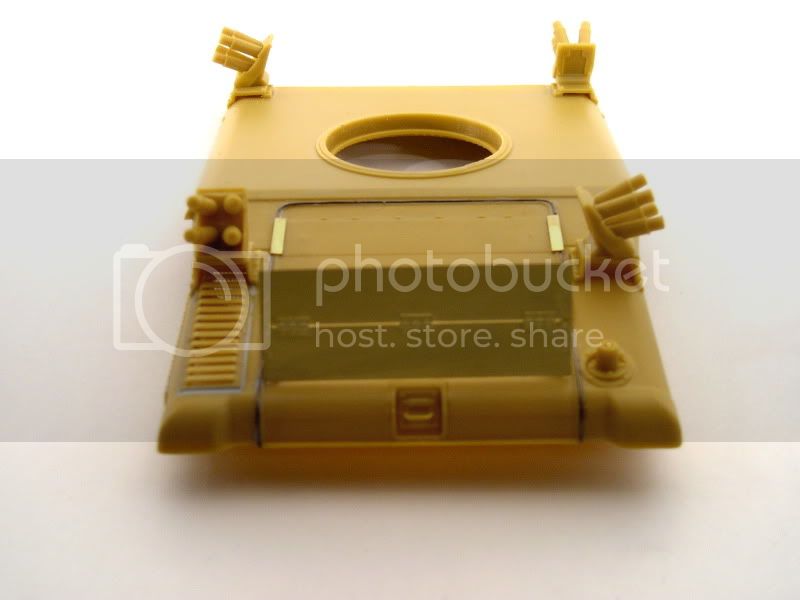
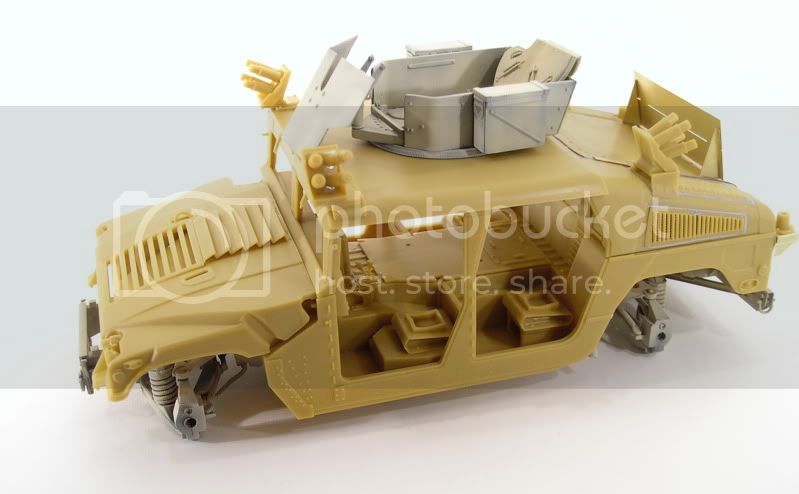
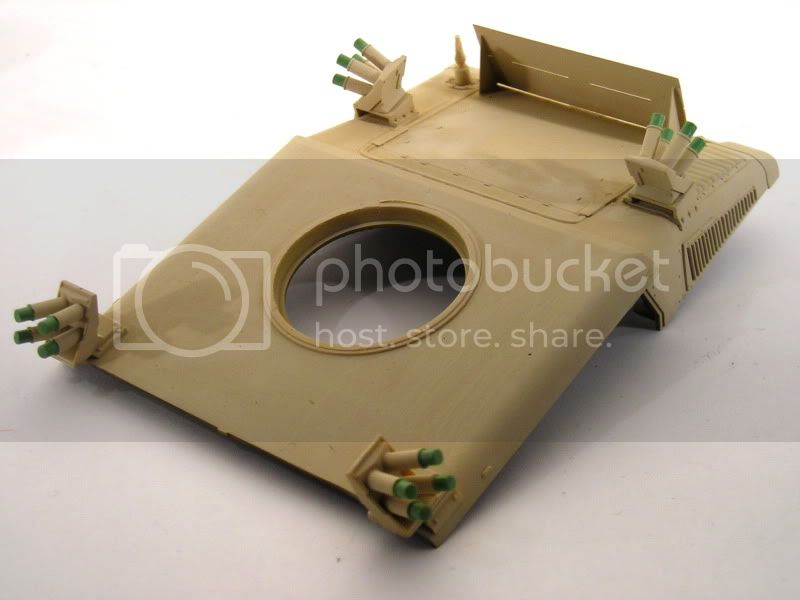
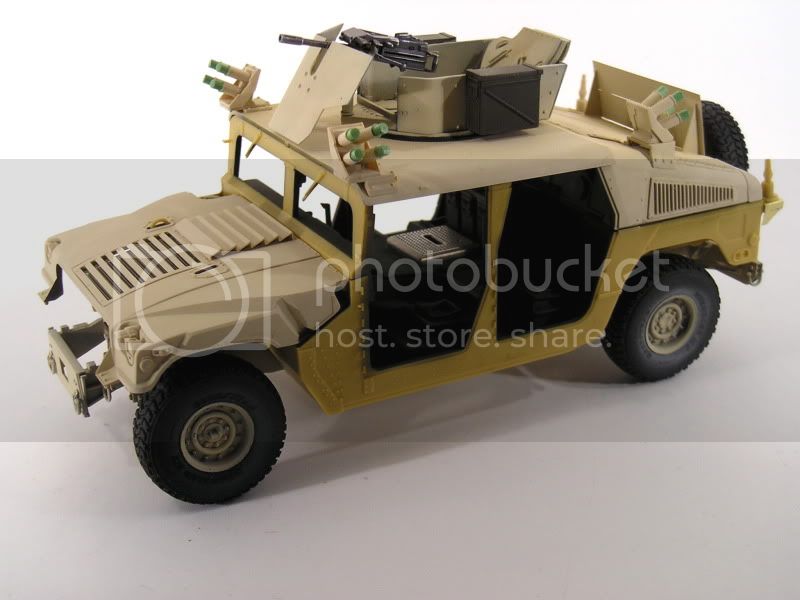
The big parts go pretty easy here. I added the roof padding? and some parts like the turret ring. Also I've started the smoke discharger assembly. The fit here is good as well, but I do have some issues about the smoke dischargers - the exact position is kind of a mystery as the instructions give a vague picture and no locating points what so ever to place them. I placed these two according to some pics on the web. I saw some overhang the roof a bit so I went for that style.
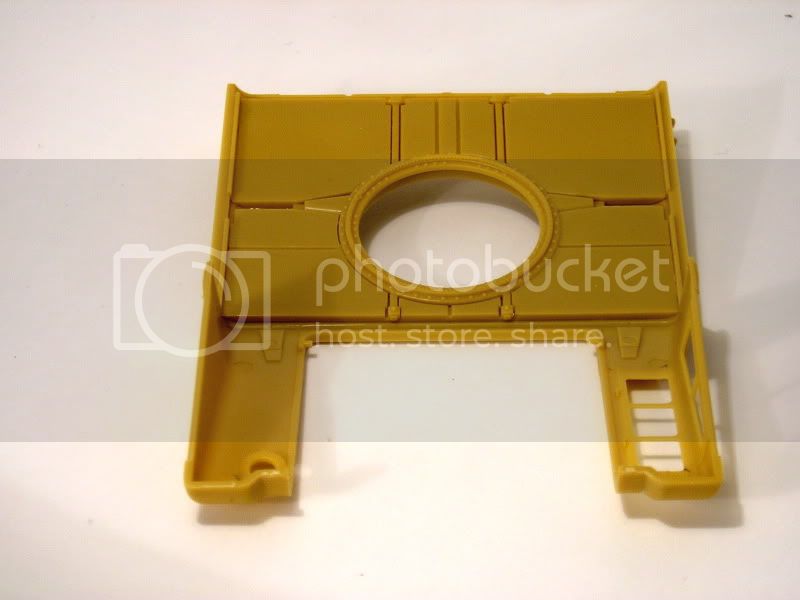
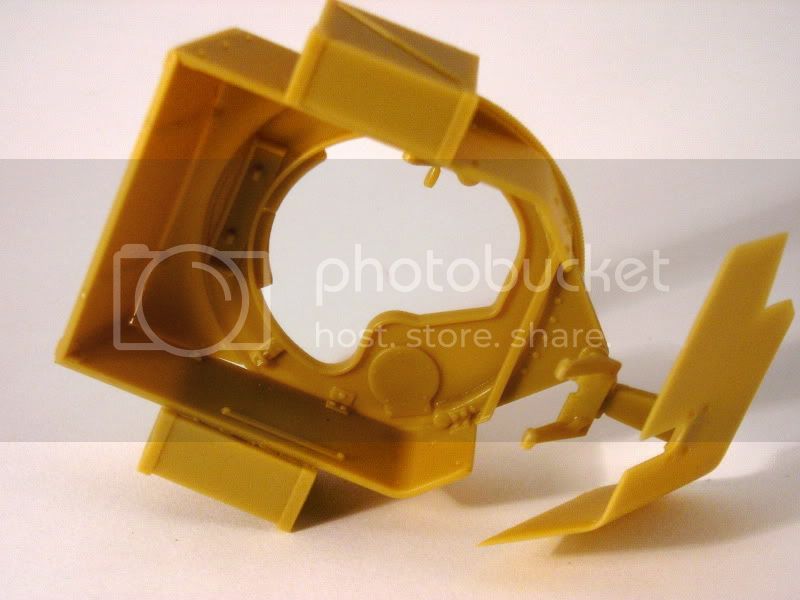
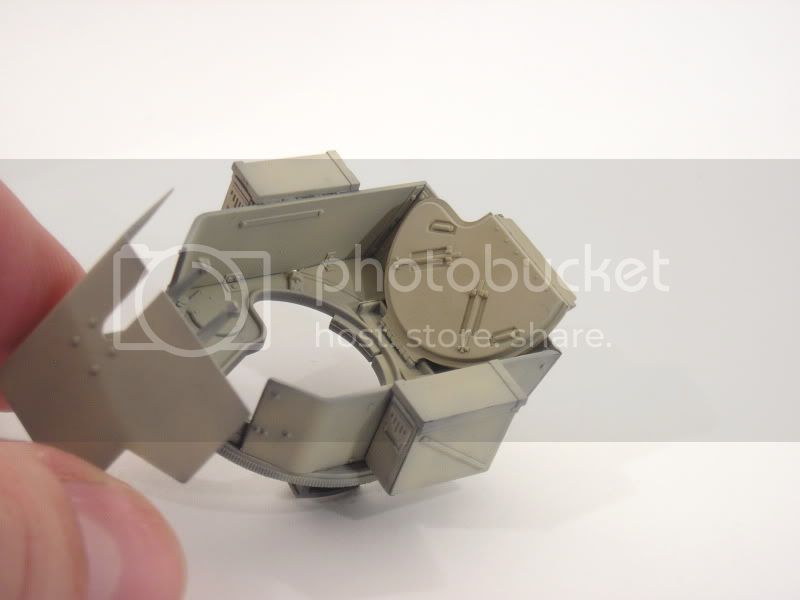
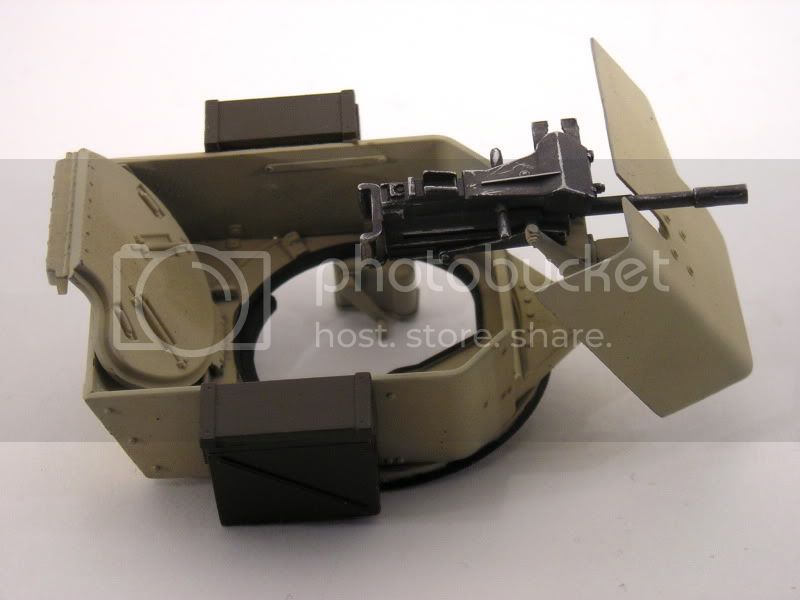
Speaking of the roof, I also took a shot of the turret. Its pretty straightforward affair, but is on the small side. I have Legends GPK turret and it's wider than the kit offering but this one looks ok to me. I don't have the exact measures of the real thing so this is coming off from looking at random pics on the web. The fit of the armor plates on the turret is actually good, but I hacked off some plastic while sanding, so I'll need to use filler on some places
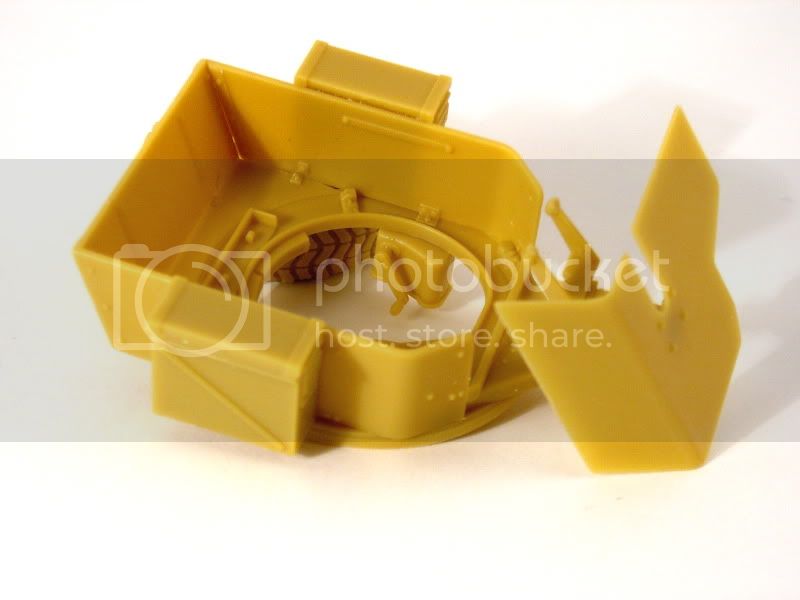
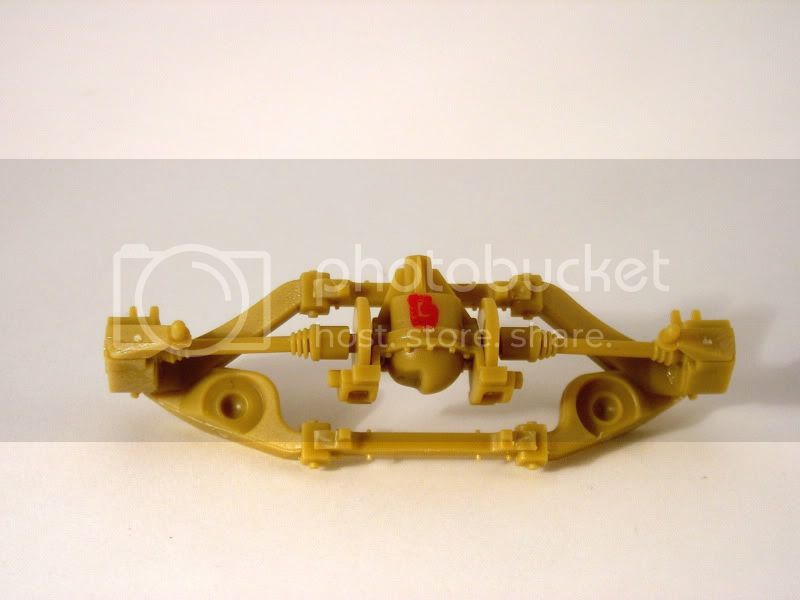
One thing I picked up here. I've read the instructions are wrong on the first step and want you to place the back axle on the front. I assembled the (rear) axle and labeled it with a marker to know what goes where.
So, later I'll see how everything fits on the frame. So much for now.
>cheers
Constructive Feedback
For in-progress or completed build photos. Give and get contructive feedback!
Hosted by Darren Baker, Dave O'Meara
Bronco M1114 build review
Mario_HR
Croatia Hrvatska
Joined: June 28, 2006
KitMaker: 376 posts
Armorama: 303 posts
Joined: June 28, 2006
KitMaker: 376 posts
Armorama: 303 posts
Posted: Wednesday, February 16, 2011 - 08:16 AM UTC
afv_rob
England - East Anglia, United Kingdom
Joined: October 09, 2005
KitMaker: 2,556 posts
Armorama: 2,199 posts
Joined: October 09, 2005
KitMaker: 2,556 posts
Armorama: 2,199 posts
Posted: Wednesday, February 16, 2011 - 12:10 PM UTC
Looking good so far! Your pictures are very good, wish I could take such photos.
couple of comments though:
-The interior roof padding: this insulation cladding is an optional extra, not all humvees have it fitted and its best left off anyway to allow you to fit crew figures in.
-The plate which fits inside the crew compartment and has the gunners platform mounted on it is too long. The end needs to be snipped off nearest to the radio just wear the drill hole is.
Jedge3
Michigan, United States
Joined: July 17, 2010
KitMaker: 258 posts
Armorama: 208 posts
Joined: July 17, 2010
KitMaker: 258 posts
Armorama: 208 posts
Posted: Wednesday, February 16, 2011 - 04:33 PM UTC
I look forward to your build. I have one of these in the stash waiting to be built. Great pictures as well, the light box is working nicely.
Mario_HR
Croatia Hrvatska
Joined: June 28, 2006
KitMaker: 376 posts
Armorama: 303 posts
Joined: June 28, 2006
KitMaker: 376 posts
Armorama: 303 posts
Posted: Wednesday, February 16, 2011 - 07:31 PM UTC
Thanks guys, so far this kit is not giving too much of a fight
I really should have taken a pic before I added the insulation. I figured this is an elegant solution of hiding 10+ pin marks that was on the interior side. I figure this will lower the overall height in the cabin.
This I didn't know. I do know that the back end is off, and the kit instructions have you placing some boxy thingy usually found only on M1151. I will put some ammo boxes here instead.
Quoted Text
-The interior roof padding: this insulation cladding is an optional extra, not all humvees have it fitted and its best left off anyway to allow you to fit crew figures in.
I really should have taken a pic before I added the insulation. I figured this is an elegant solution of hiding 10+ pin marks that was on the interior side. I figure this will lower the overall height in the cabin.
Quoted Text
-The plate which fits inside the crew compartment and has the gunners platform mounted on it is too long. The end needs to be snipped off nearest to the radio just wear the drill hole is.
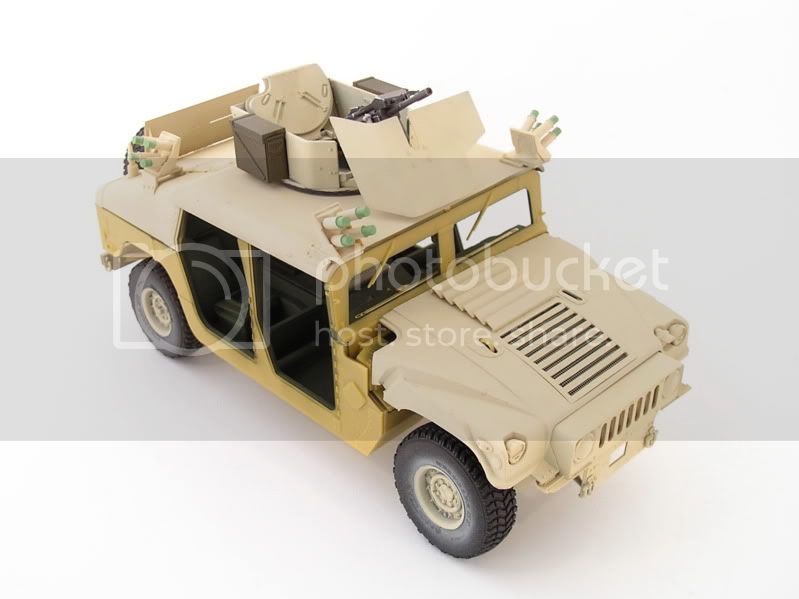
This I didn't know. I do know that the back end is off, and the kit instructions have you placing some boxy thingy usually found only on M1151. I will put some ammo boxes here instead.
Mario_HR
Croatia Hrvatska
Joined: June 28, 2006
KitMaker: 376 posts
Armorama: 303 posts
Joined: June 28, 2006
KitMaker: 376 posts
Armorama: 303 posts
Posted: Friday, February 18, 2011 - 02:30 AM UTC
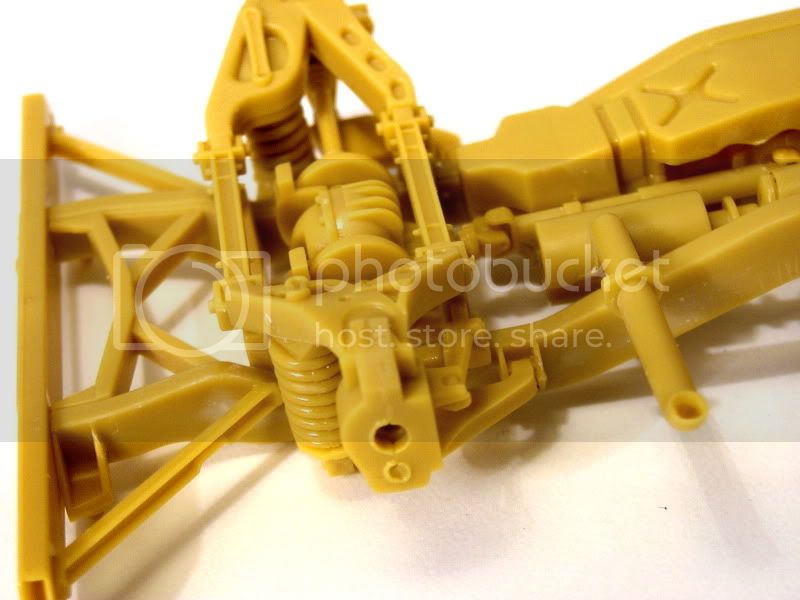
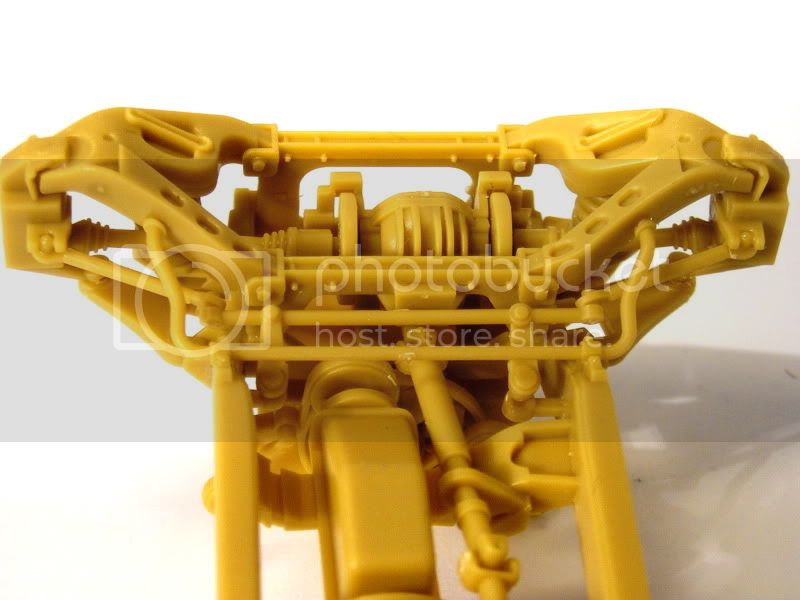
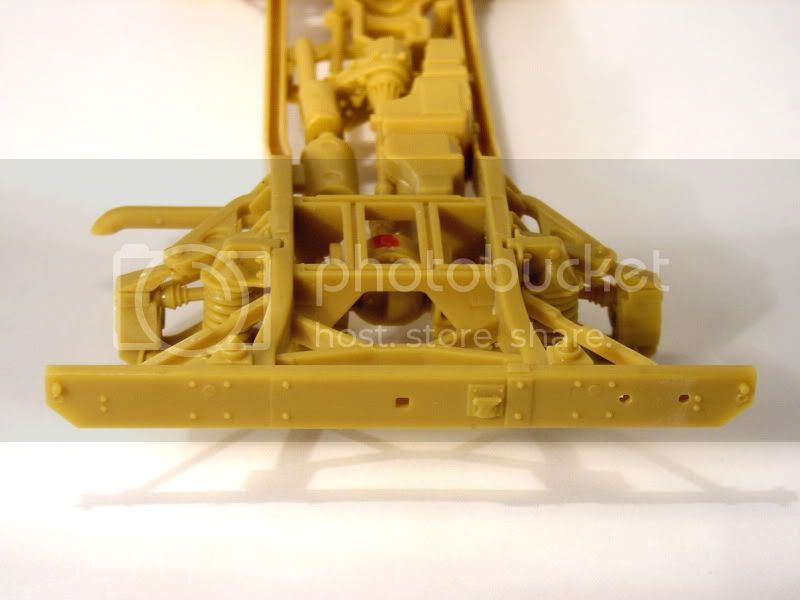
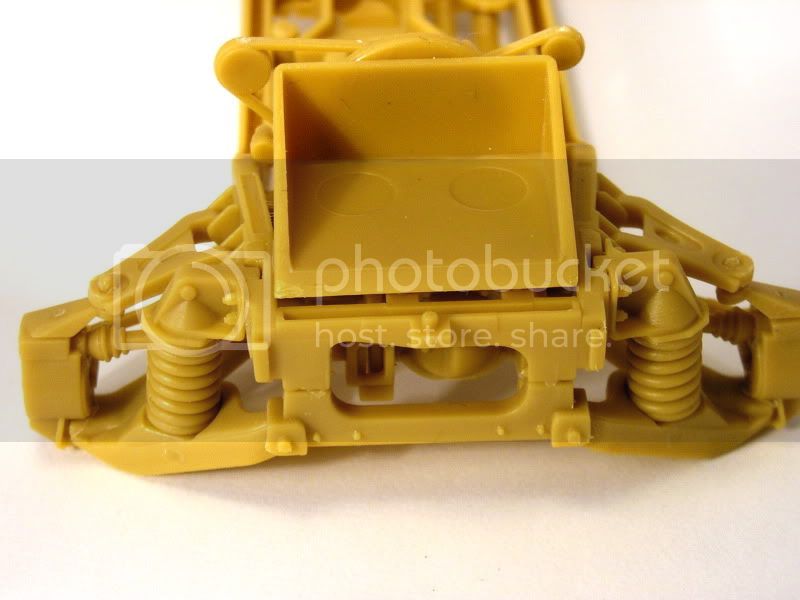
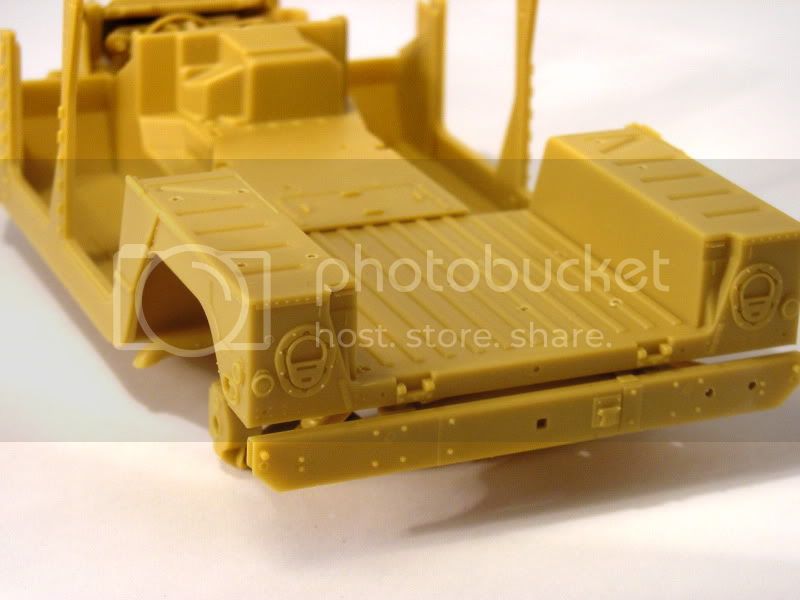
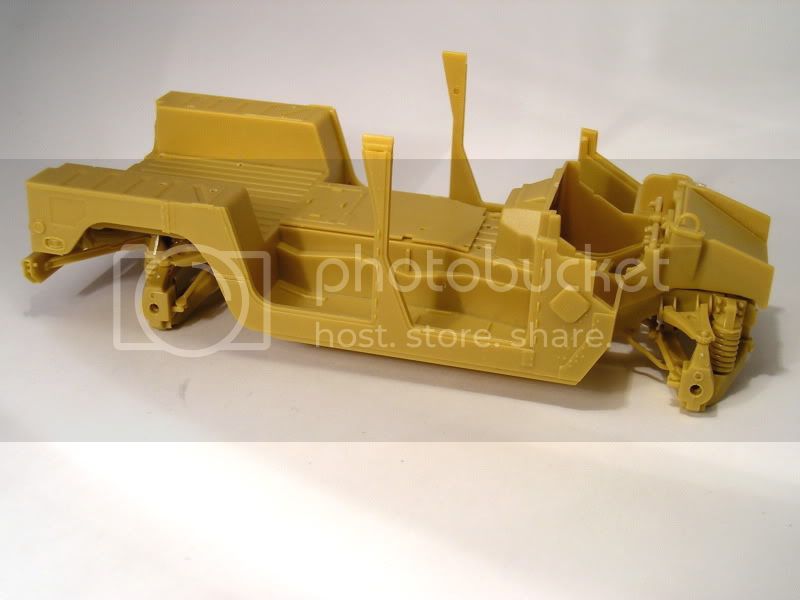
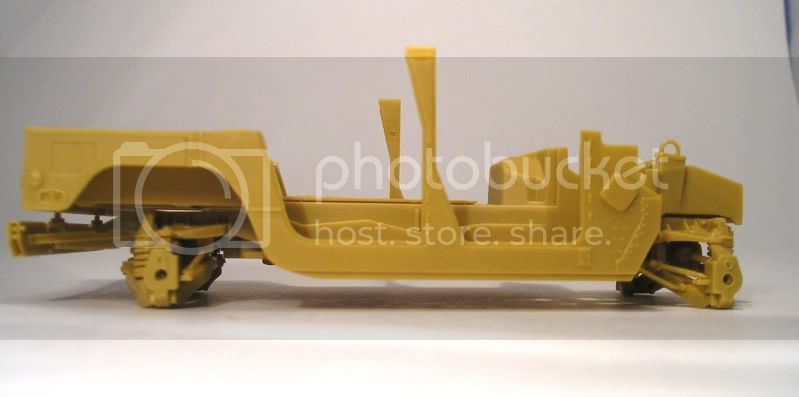
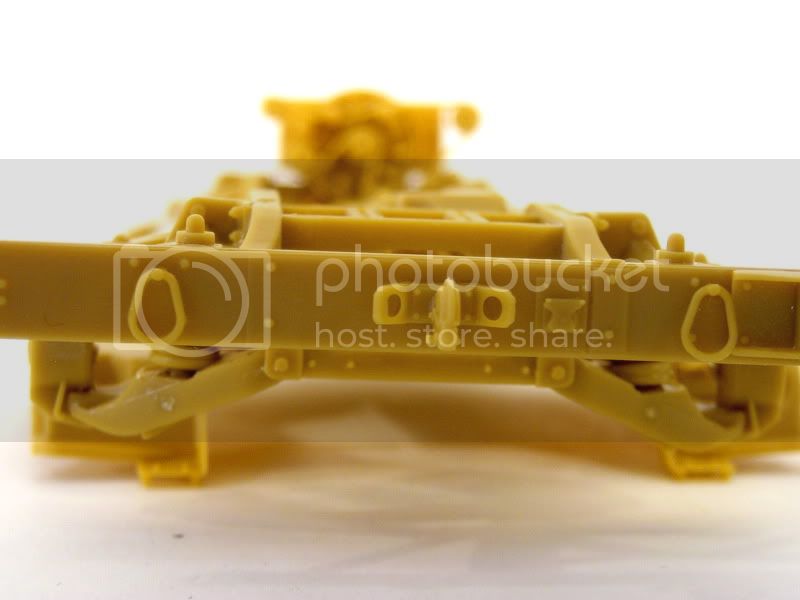
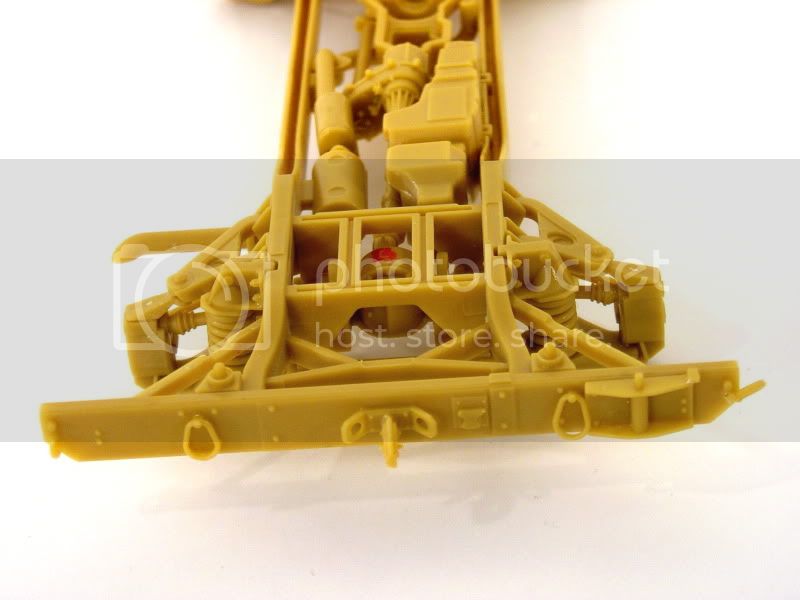
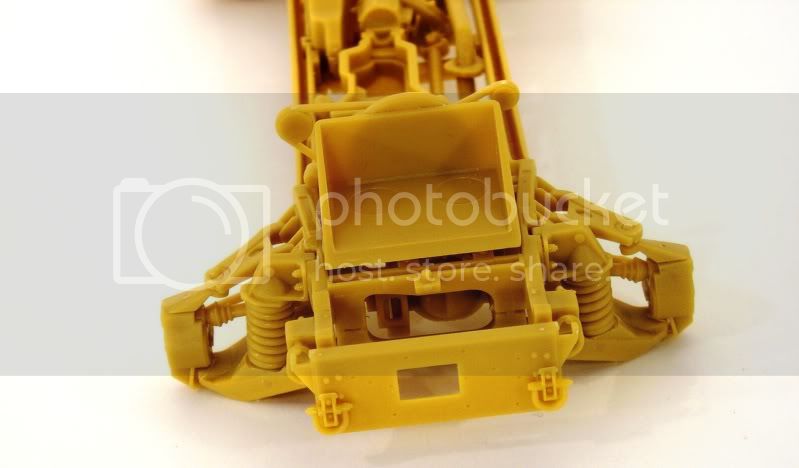
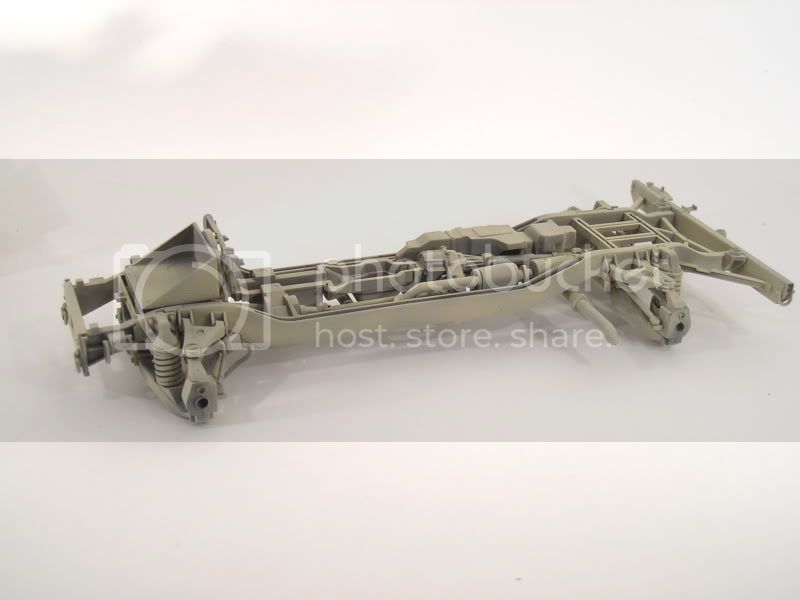
Here's the lower part of the frame. I glued everything together and assembled it so the major components can be removed for painting. It's handy to do this so you can figure out if everything fits together, and I like seeing the bigger picture
One thing you can do for an OOB build is drill out the exhaust. It's easy to do and looks better then the stumpy kit part
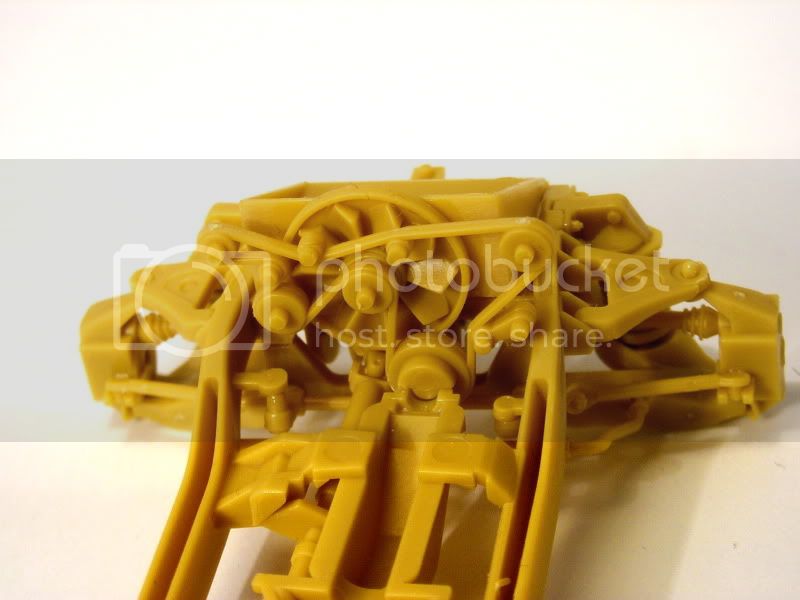
Here are some pics of the suspension assembly. It's very detailed, but care is necessary not to glue something backwards or on the wrong side of the frame. It's easy to get lost in the instruction sheet
Another first in HMMWV models is the addition of a radiator and belt assembly. It looks nice for plastic parts, but I wonder how much of it will be seen
Two large pin marks dominate this part, but when covered up, nothing will be seen, so I didn't bother cleaning this up
Here are some pics of the frame and body assembly. It's just placed on top and there are no fit issues. A lot of things get covered up...
That's it for now
Cheers,
Mario
ti
Dalarnas, Sweden
Joined: May 08, 2002
KitMaker: 2,264 posts
Armorama: 1,763 posts
Joined: May 08, 2002
KitMaker: 2,264 posts
Armorama: 1,763 posts
Posted: Friday, February 18, 2011 - 05:44 AM UTC
This is a great review and build. I have this kit and this is a good way to get familiar with it before finding out all the minus myself. At least this way, I am prepared. Thanks.
JustinWhitmer
United States
Joined: February 18, 2011
KitMaker: 4 posts
Armorama: 3 posts
Joined: February 18, 2011
KitMaker: 4 posts
Armorama: 3 posts
Posted: Friday, February 18, 2011 - 06:08 AM UTC
I am waiting on this kit as well. Are you assembling everything and them painting after? I am trying to figure out if I want to paint sub-assemblies and then construct it as a whole or attempt a lot of very fine masking. Looks great and I cant wait for mine to come in. I am an OIF Vet circa 05-06 so if anyone needs any period specific advice for Iraq lemme know.
Mario_HR
Croatia Hrvatska
Joined: June 28, 2006
KitMaker: 376 posts
Armorama: 303 posts
Joined: June 28, 2006
KitMaker: 376 posts
Armorama: 303 posts
Posted: Friday, February 18, 2011 - 07:55 AM UTC
Thanks guys, I appreciate this.
Charles - this is just what I wanted to do this for. If someone finds this useful for their build that's great. Sometimes I'd wish for someone to tell me what to look out for when building
Justin - I'd appreciate any input you can give. I'm trying to get most of the sub-assemblies done to speed up the build but It's not the easiest for detail painting. Fortunately, most of the chassis is painted in the same manner I'm trying to get this done and I'll try to do more detail painting by hand. Once I get to building more interior details I will build more parts separately
retiredyank
Arkansas, United States
Joined: June 29, 2009
KitMaker: 11,610 posts
Armorama: 7,843 posts
Joined: June 29, 2009
KitMaker: 11,610 posts
Armorama: 7,843 posts
Posted: Friday, February 18, 2011 - 09:07 AM UTC
Kit seems to have a very nice undercarriage. I'm trying to move away from tanks just because of this. Rather spend 4 hours building and undercarriage than that long trimming indy tracks.
M1A1hunter2
Wellington, New Zealand
Joined: April 13, 2008
KitMaker: 43 posts
Armorama: 37 posts
Joined: April 13, 2008
KitMaker: 43 posts
Armorama: 37 posts
Posted: Friday, February 18, 2011 - 08:02 PM UTC
looks really good, cant wait to see the finished m1114, cant wait to get mine from lucky model soon
Mario_HR
Croatia Hrvatska
Joined: June 28, 2006
KitMaker: 376 posts
Armorama: 303 posts
Joined: June 28, 2006
KitMaker: 376 posts
Armorama: 303 posts
Posted: Saturday, February 19, 2011 - 08:54 PM UTC
Thanks guys, I appreciate the comments. Matt - I know what you're talking about. I just had some fun with Fruil tracks a while ago and now I wouldn't trade wheels for indy tracks.
On a side note, The inbox review is also up and running and in case you didn't see it here's the link:
Inbox Review
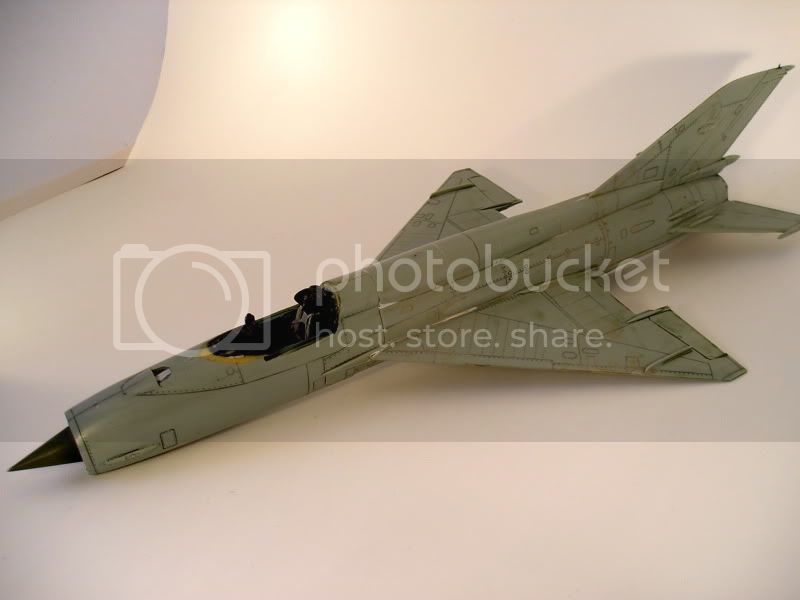
I bought some more lamps to update my lightbox a bit so wit a little luck the pics will be better. For a test I took these:
Hopefully I'll get some more updates today so stay tuned
On a side note, The inbox review is also up and running and in case you didn't see it here's the link:
Inbox Review
I bought some more lamps to update my lightbox a bit so wit a little luck the pics will be better. For a test I took these:
Hopefully I'll get some more updates today so stay tuned
Mario_HR
Croatia Hrvatska
Joined: June 28, 2006
KitMaker: 376 posts
Armorama: 303 posts
Joined: June 28, 2006
KitMaker: 376 posts
Armorama: 303 posts
Posted: Sunday, February 20, 2011 - 02:58 AM UTC
Well, back to building... I added more to the rear bumper and the winch housing. Unfortunately a couple of issues here :
If you add the spare tire carrier mount on the fender, there's no place for the tow hook but as you can see it's no biggie, the tow hooks are loose anyway right?
As for the front - It works all out, but there are no parts for the winch. None at all. This is not too hard to scratch build but for this build I will not be making one. Shame this part is not considered important by Bronco.
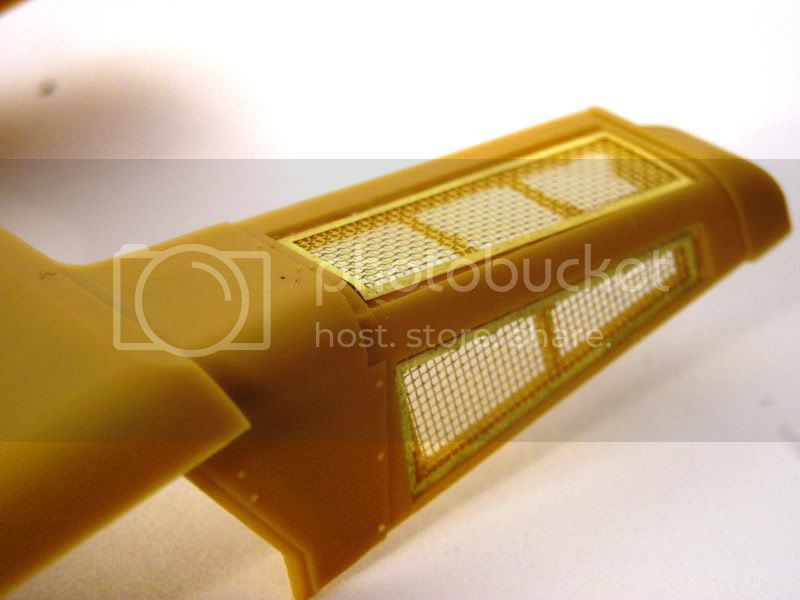
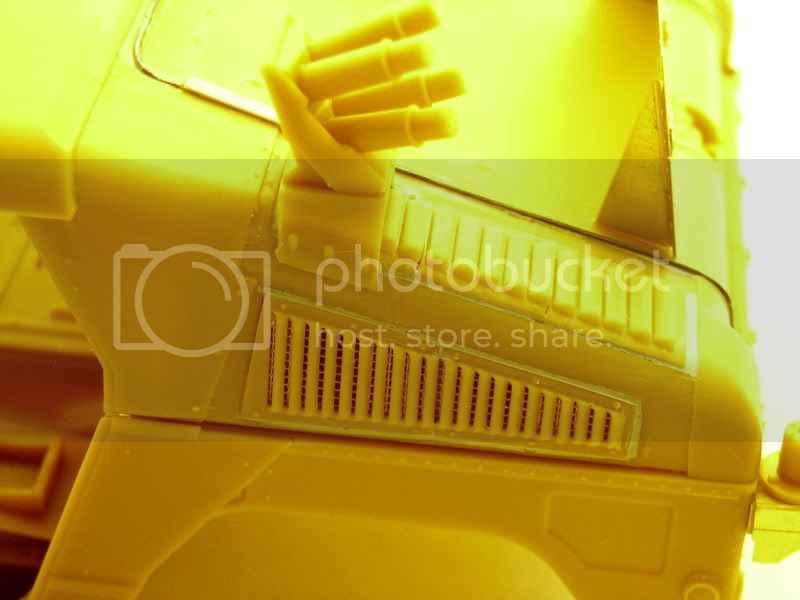
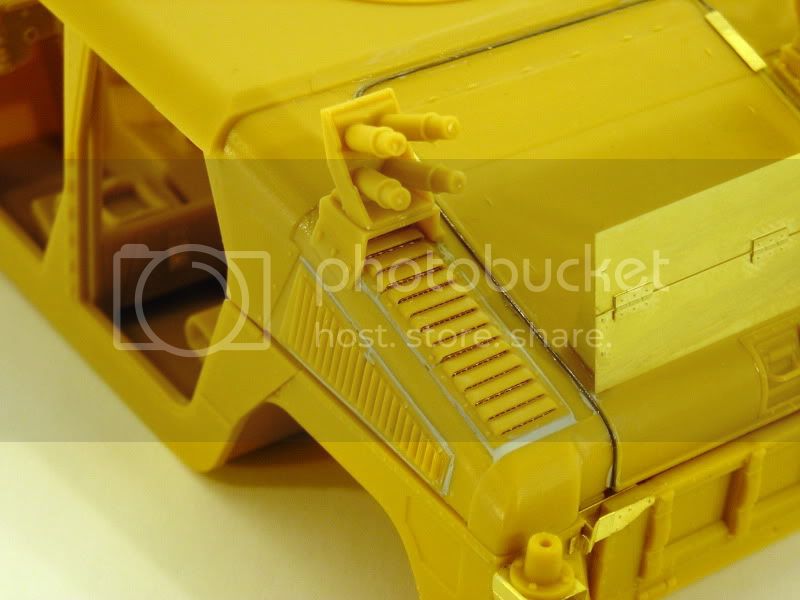
I also added the first PE parts. The grilles for the AC vents go nicely, atough you have to add a slight kink to the upper grille so it follows the curvature of the opening. Hope it can be seen in the photo:
Mario_HR
Croatia Hrvatska
Joined: June 28, 2006
KitMaker: 376 posts
Armorama: 303 posts
Joined: June 28, 2006
KitMaker: 376 posts
Armorama: 303 posts
Posted: Friday, February 25, 2011 - 07:47 AM UTC
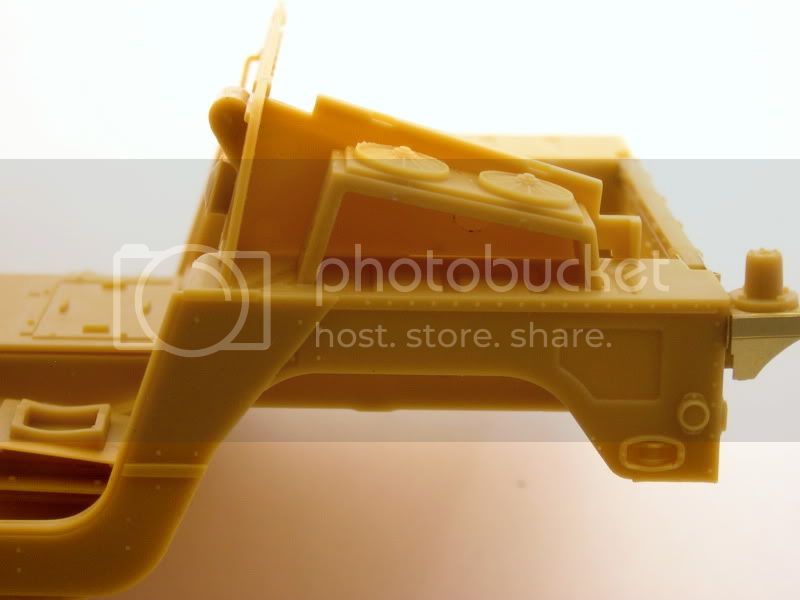
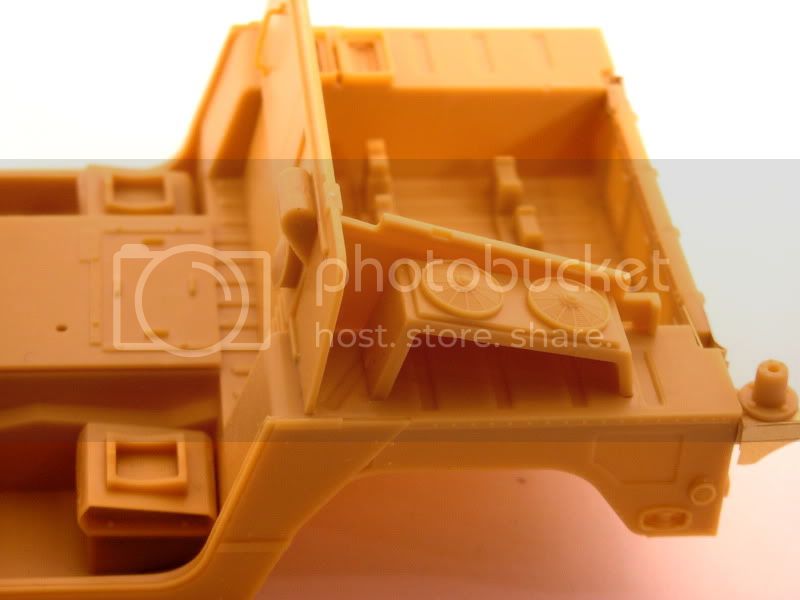
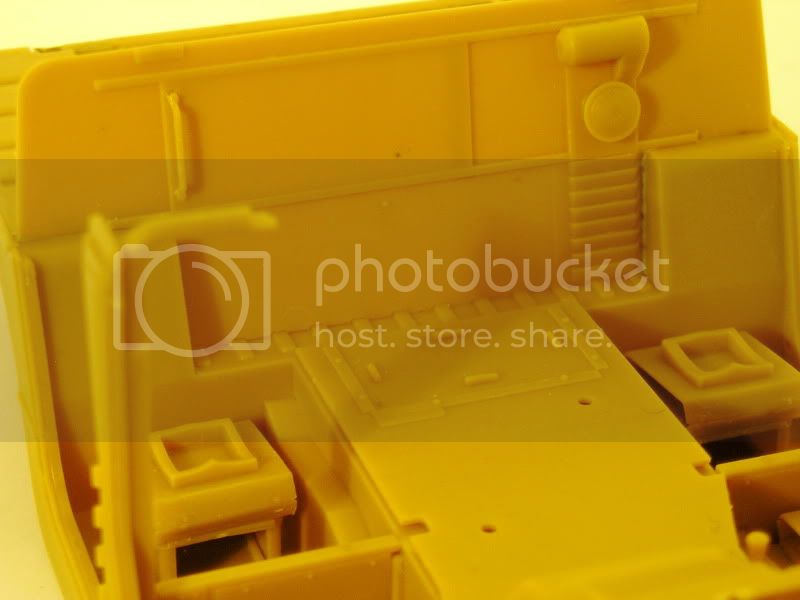
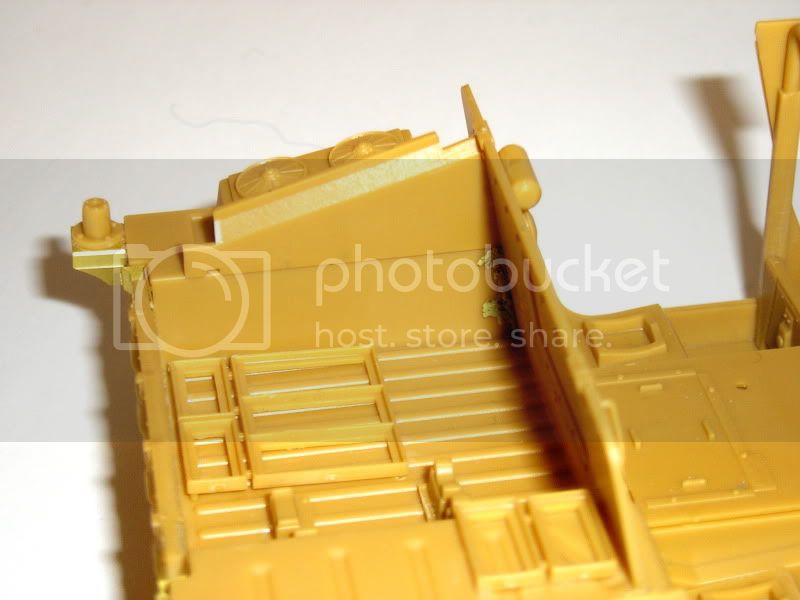
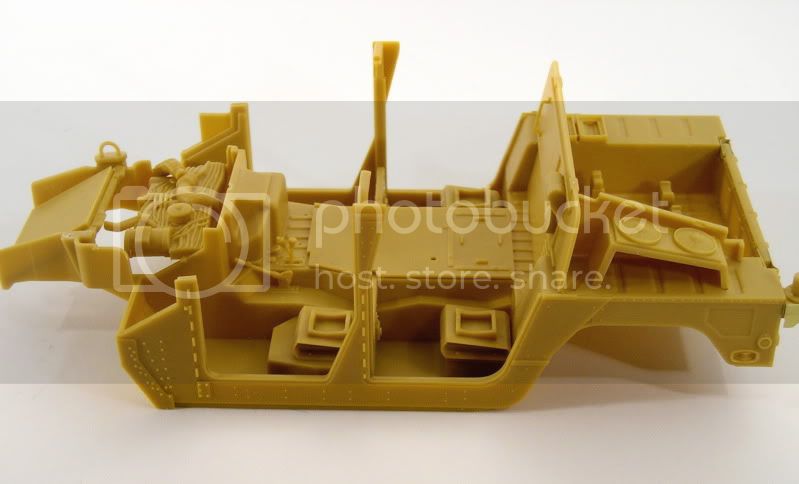
I've started building more components and ran into some trouble. This is mostly due to shady instructions and weird angles that don't tell the proper part positioning. I started with the cargo-passenger compartment wall. It's hard to tell the exact position and the fit is less then stellar. Judging from reference shots and some pre-fitting I got the placement.
Also the wall sides don't reach the body. So some miliput smoothened with water filled the cavities.
Here's a couple more pics for anyone having issues how to fit this
Also you can see that I added the AC fans and the appropriate sidewall. I did this before painting, as once it's covered nothing will be seen. Great idea, but I'm not too sure how this was supposed to be visible.
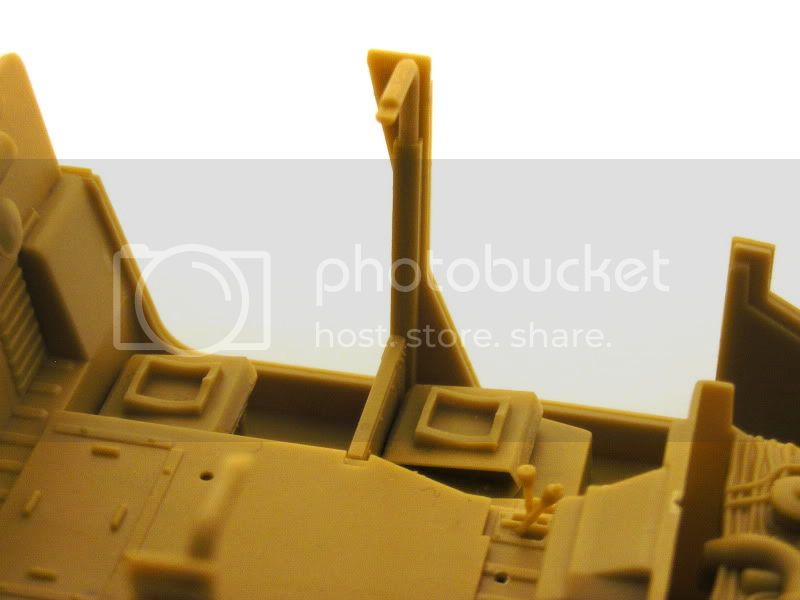
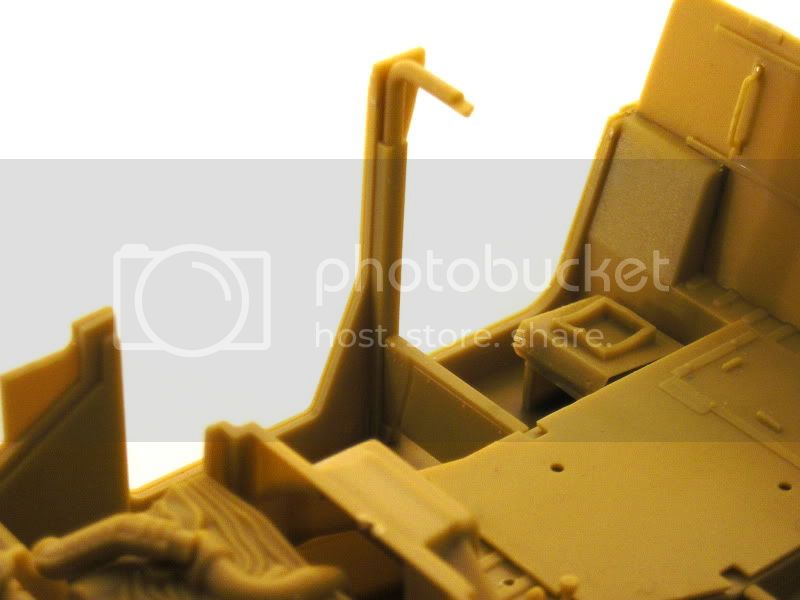
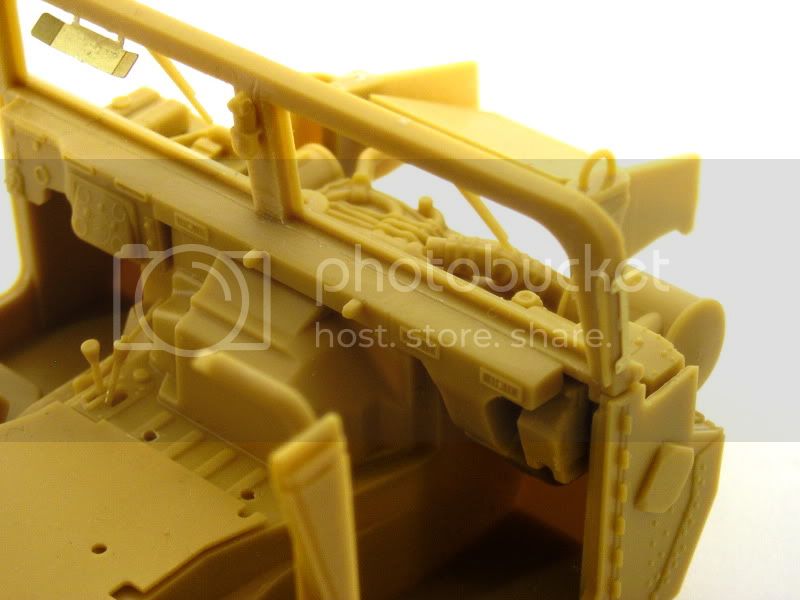
One more thing I didn't know exactly how to fit right was the rollbar parts on both sides. This is how it's supposed to look once assembled correctly. For anyone needing pics of both sides here's a few:
I started building the windshield assembly. This is just dry-fitted to show how well these part fit on the chassis.
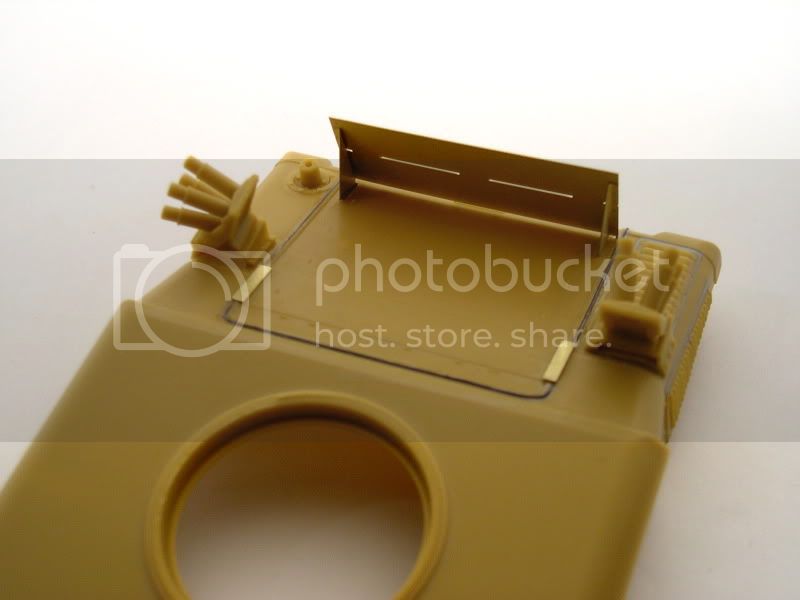
I also decided to close the cargo hatch. So far I've seen throughout this build, everything was planned to be shown open. If you try to close the hatch, the fit is not that great. Here are some shots of both the inside as well as outside. Interior issue was only the rollbar part - again the angle was a bit of a puzzle. On the outside I've added some lead wire (0.3mm) to fill the seam along the hatch-roof combination and to look like the rubber gasket (sealant) present on the hatch. Also I've added the warning board from PE parts. This is quite nice, but no rivet detail is present on the back side. I don't know why Bronco decided to break the AC louvres into several parts as they don't fit very nice. Some Mr.Surfacer 500 helped to seal these.
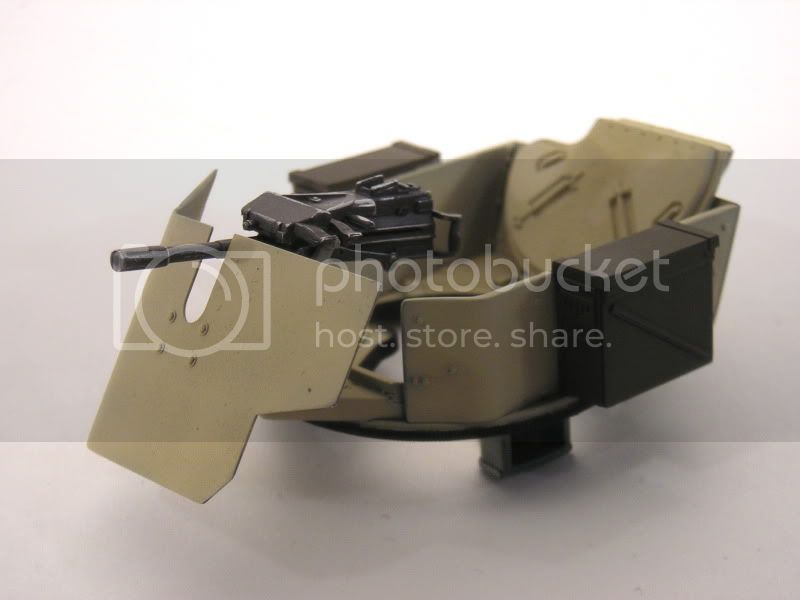
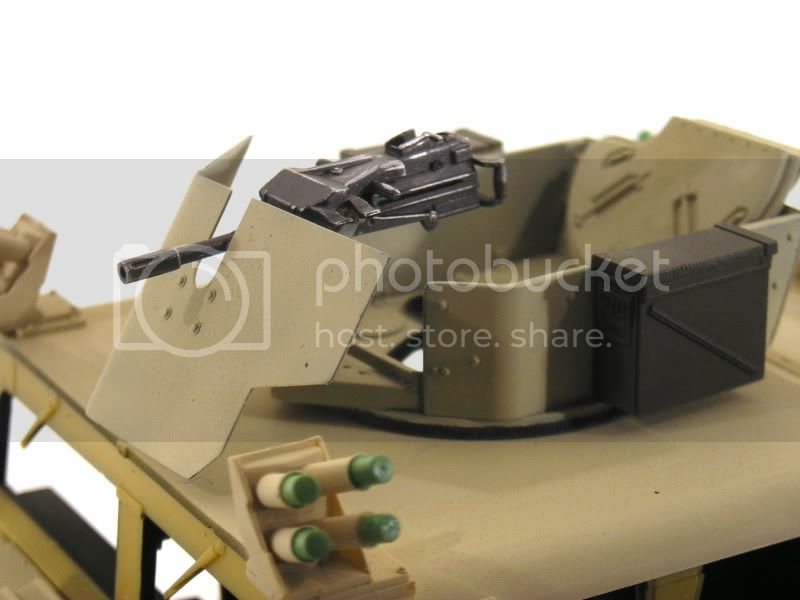
The worst parts fitting are the ammo boxes. The ammo box for the Mk.19 is a multi-part affair and is supposed to be butt-joined together. It's hard to achieve perfect straight angles and a lot of putty will be needed to clean this up.
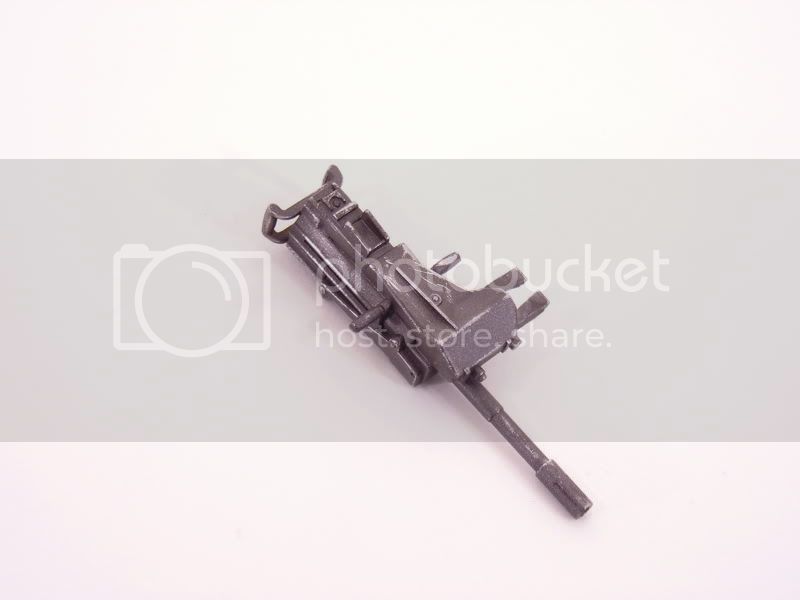
Paint job is next. I started by painting the Mk.19. Alclad steel base, followed by MM gun metal, buffed and chipped with a q-tip.
Turret assembly got a first coat of MM sand, as well as the lower chassis frame
And finally here's everything so far dry-fitted
M1A1hunter2
Wellington, New Zealand
Joined: April 13, 2008
KitMaker: 43 posts
Armorama: 37 posts
Joined: April 13, 2008
KitMaker: 43 posts
Armorama: 37 posts
Posted: Friday, February 25, 2011 - 11:04 AM UTC
WOW mine just arrived from Luckymodel today.... with the Model Master paints i brought the Sand cause lots of people have said its the right color.... how do you personaly go about thinning it for airbrushing as i had a play around with it and it didnt give a great result like the Tamiya has in the past for me.
Cant wait to get stuck into my M1114
GSPatton
California, United States
Joined: September 04, 2002
KitMaker: 1,411 posts
Armorama: 609 posts
Joined: September 04, 2002
KitMaker: 1,411 posts
Armorama: 609 posts
Posted: Friday, February 25, 2011 - 01:09 PM UTC
Really nice assembly but check out the hatch supprots for the roof hatch they are not like that on the real thing they actually post out at an angle look it up on google images. I am looking out for you so you have the most accurate M1114 possible I finished mine not to long ago and it is an awesome kit.
collin26
Connecticut, United States
Joined: March 24, 2007
KitMaker: 317 posts
Armorama: 259 posts
Joined: March 24, 2007
KitMaker: 317 posts
Armorama: 259 posts
Posted: Friday, February 25, 2011 - 04:18 PM UTC
Mario,
Thank you for all of the hard work you are putting into this review. Very informative. Looks like a nice build as well.
Mario_HR
Croatia Hrvatska
Joined: June 28, 2006
KitMaker: 376 posts
Armorama: 303 posts
Joined: June 28, 2006
KitMaker: 376 posts
Armorama: 303 posts
Posted: Friday, February 25, 2011 - 06:52 PM UTC
Crap, I knew i messed up somewhere... Frank I'm having trouble finding a good picure of how is this set up. Am I looking for the C pillar? Thanks for looking out
Mario
Mario
Quoted Text
Really nice assembly but check out the hatch supprots for the roof hatch they are not like that on the real thing they actually post out at an angle look it up on google images. I am looking out for you so you have the most accurate M1114 possible I finished mine not to long ago and it is an awesome kit.
Mario_HR
Croatia Hrvatska
Joined: June 28, 2006
KitMaker: 376 posts
Armorama: 303 posts
Joined: June 28, 2006
KitMaker: 376 posts
Armorama: 303 posts
Posted: Friday, February 25, 2011 - 07:23 PM UTC
Luke, I noticed it dries up dead flat and smells kinda different than other MM enamels. I dilute it with regular nitro (cellulose?) thinner to a milky consistency like any other. I sprayed it slightly thinner than I'd do normally just to get coverage, and I will be needing more coats that's for sure.
Bumblebee
Croatia Hrvatska
Joined: April 15, 2010
KitMaker: 18 posts
Armorama: 16 posts
Joined: April 15, 2010
KitMaker: 18 posts
Armorama: 16 posts
Posted: Friday, February 25, 2011 - 10:50 PM UTC
Nice pictures and great blog Mario Keep on posting
Mario_HR
Croatia Hrvatska
Joined: June 28, 2006
KitMaker: 376 posts
Armorama: 303 posts
Joined: June 28, 2006
KitMaker: 376 posts
Armorama: 303 posts
Posted: Friday, March 04, 2011 - 07:02 AM UTC
I've started painting, nothing much but a general cover layer. I started with the bonnet. Nothing complicated here, black on the interior, sand on the outside. More details will be brush painted, like the black rubber parts on the lift hook openings and bonnet clamps that will be added later once I see how it fits to the body.
Next came up the wheels. I painted them Mr.Color nato black and the rims sand. I dusted them too with the sand color and will be doing some weathering with pigments later. I also painted the spare tire carrier black
I painted the roof as well. The part I don't know if it's correct is the smoke grenades. I know they come with both black as well green ends. Is the light green correct or possible or do I need to make it black?
The turret got some paint-love too...
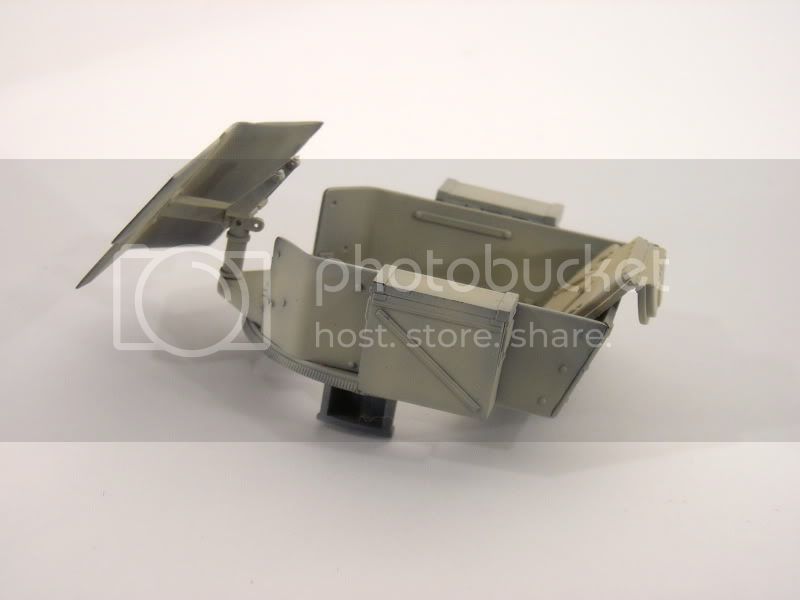
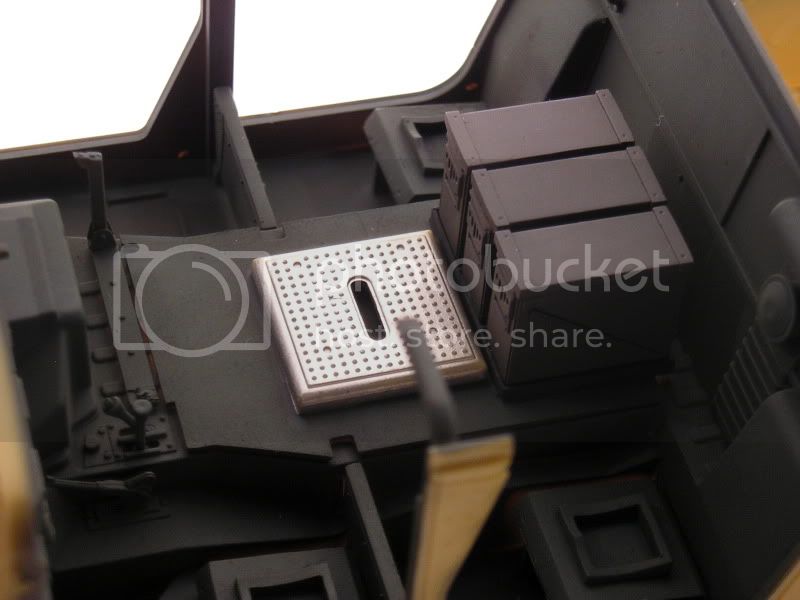
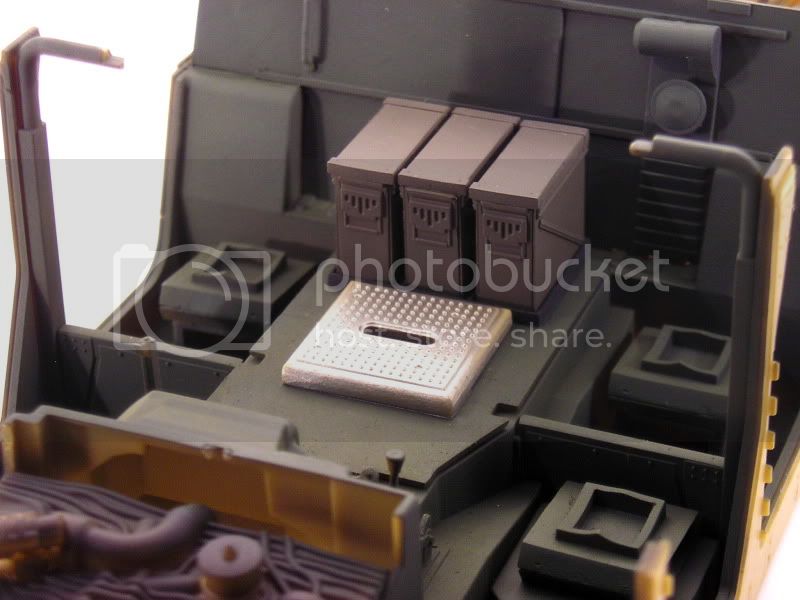
I started the interior. Couple of things to notice here. I sanded off the floor details for the AC not used on the M1114 and added the ammo box frame and 3 40mm ammo boxes from the kit part. I still need to do some straps. The gunners pedestal mount needs to be turned like in the picture. If you're following the instructions you will have the opening peripendicular to this position. The gunner's platform is painted alclad titanium gold and will need a dark wash to make it look like the real (worn) deal.
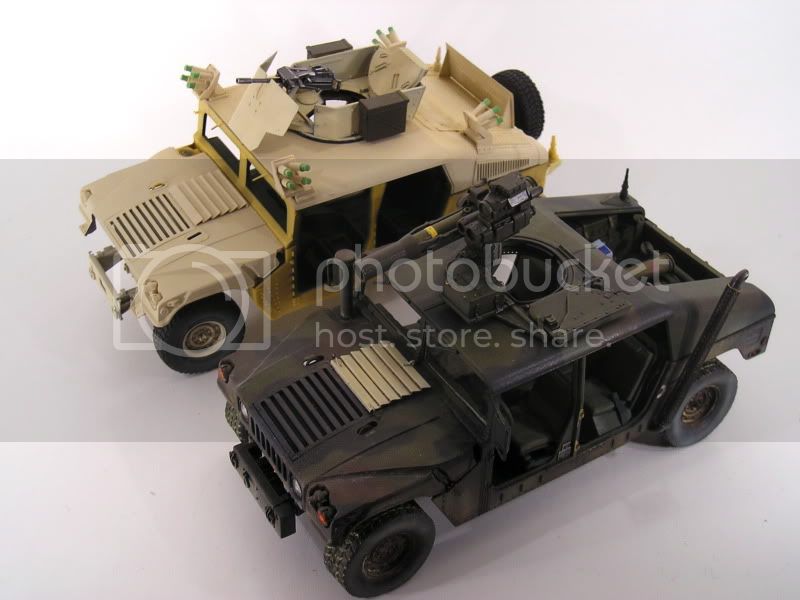
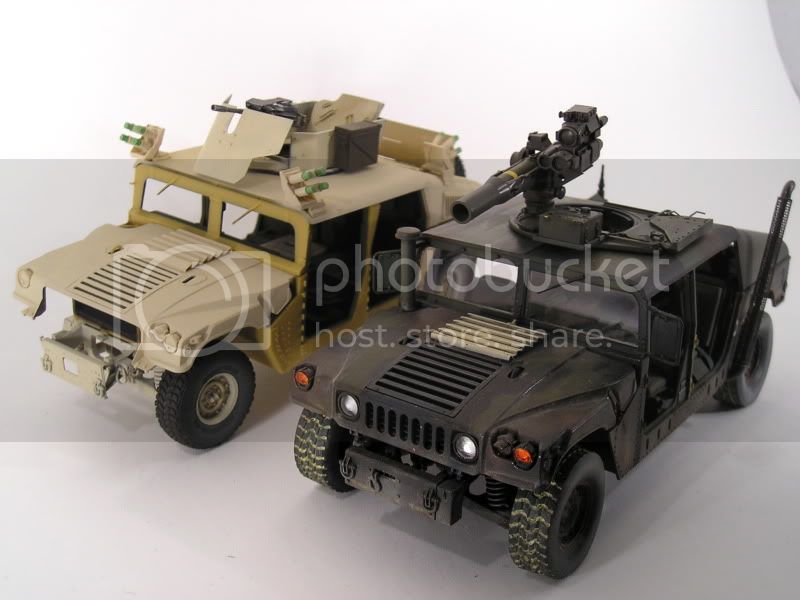
And here's how everything looks dryfitted together and with a little Tamiya cousin
JustinWhitmer
United States
Joined: February 18, 2011
KitMaker: 4 posts
Armorama: 3 posts
Joined: February 18, 2011
KitMaker: 4 posts
Armorama: 3 posts
Posted: Monday, March 07, 2011 - 11:58 PM UTC
I regards to your question about the smoke launchers. If you honestly want to make it period accurate to U.S. forces in Iraq you best bet is to scratch build covers for the launchers. 99% of the time you will either see them covered or the tubes empty. I have never seen them used but in demonstration and I have spent a considerable part of my life "downrange". Otherwise she looks great so far and keep up the good work!
PS- I have this kit waiting on my shelf calling my name.
35th-scale
Kildare, Ireland
Joined: November 21, 2007
KitMaker: 3,212 posts
Armorama: 2,807 posts
Joined: November 21, 2007
KitMaker: 3,212 posts
Armorama: 2,807 posts
Posted: Tuesday, March 08, 2011 - 02:20 AM UTC
Great review, thanks!
From my own build experienc on this one be carefull when putting the chassis, body, hood and front sticky-out bit with the headlights together to get all parts perfectly squared to each other.
Mario_HR
Croatia Hrvatska
Joined: June 28, 2006
KitMaker: 376 posts
Armorama: 303 posts
Joined: June 28, 2006
KitMaker: 376 posts
Armorama: 303 posts
Posted: Friday, March 11, 2011 - 03:57 AM UTC
A bit of an update. I've got some kind of flue and don't feel so hot and it reflects in these pics
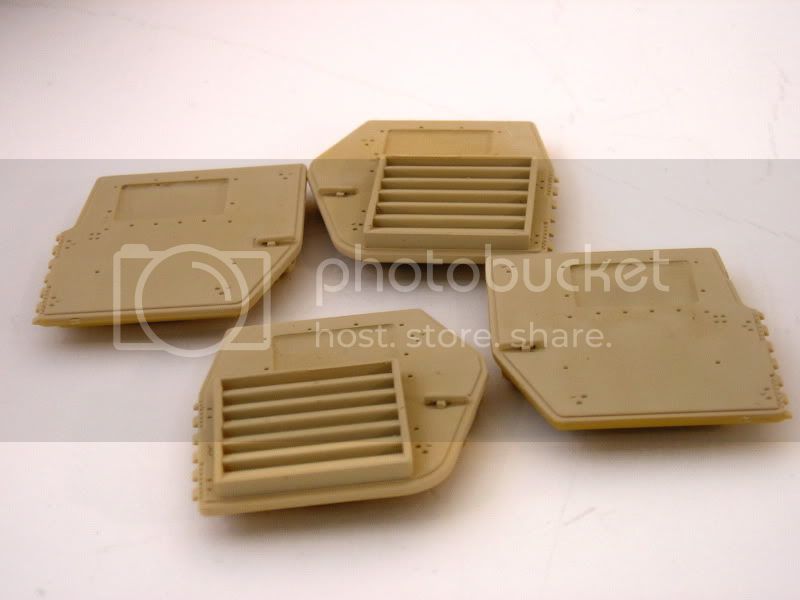
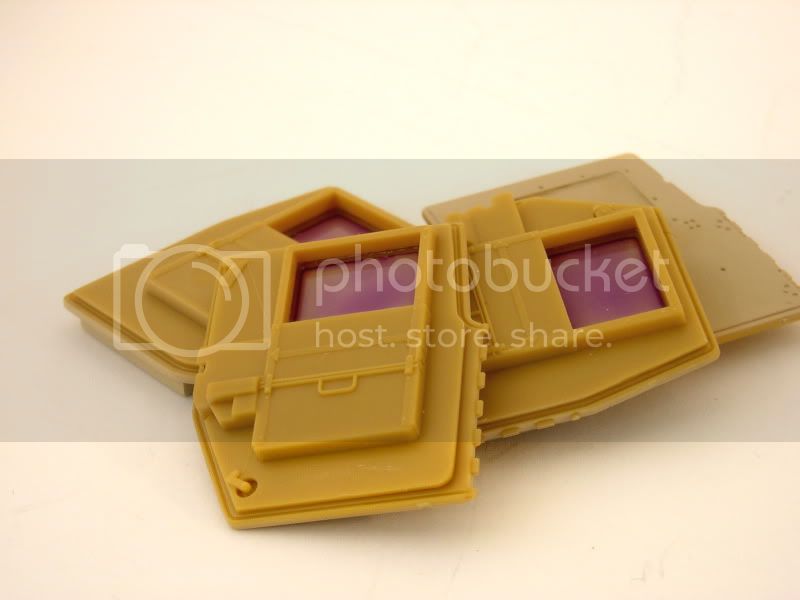
I painted up the doors -
and no, I haven't forgot to mask the windows i used Humbrol's Maskol. It stinks a lot, but it can be dilluted with water and easily applied to corners and hard to reach places.
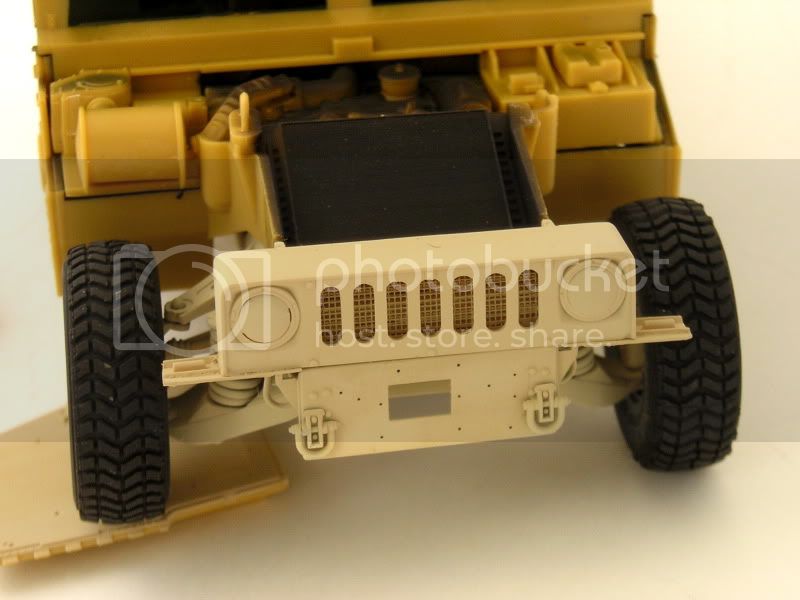
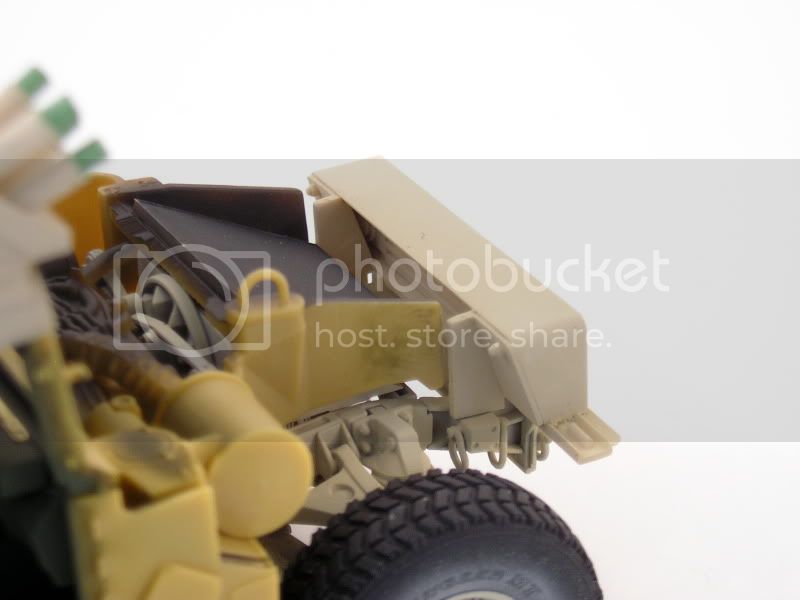
I also did the front bumper . Some mis-alignment is present here because I didn't realize in time that the PE parts are not the exact length and one side protrudes more than it should and lifts the piece slightly upward. It shouldn't be a difficult fix.
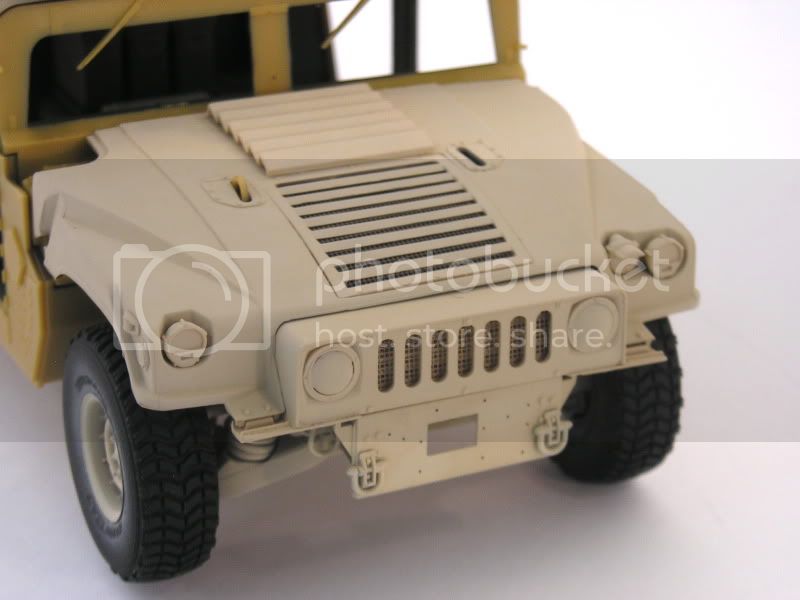
Here's the pic with the bonnet dryfitted. I think the main concern with this part is the tow hooks. Their base is a bit too thick and doesn't allow proper alignment. Also the angle of the tow hook should be adjusted to the bonnet opening and not to the chassis base.
And one for the ending... I misplaced a wheel - crap
Maki
Senior Editor
Croatia Hrvatska
Joined: February 13, 2002
KitMaker: 5,579 posts
Armorama: 2,988 posts
Joined: February 13, 2002
KitMaker: 5,579 posts
Armorama: 2,988 posts
Posted: Friday, March 11, 2011 - 08:25 AM UTC
Looking good so far. Any news regarding the smoke dischargers? Is there a way to put a cover on those without having to remove the top of the smoke grenades?
Perhaps this would be of help: link
Mario
Perhaps this would be of help: link
Mario
Posted: Saturday, March 12, 2011 - 07:26 AM UTC
Here is another link for smoke grenade information.
http://www.defaiya.com/defaiyaonline/index.php?option=com_content&view=article&id=101&Itemid=50&lang=en
Despite what the article says, the same grenade is used by all branches of the US military. My Infantry Battalion used some of these in Japan in November of 2010.
Hope it helps.
http://www.defaiya.com/defaiyaonline/index.php?option=com_content&view=article&id=101&Itemid=50&lang=en
Despite what the article says, the same grenade is used by all branches of the US military. My Infantry Battalion used some of these in Japan in November of 2010.
Hope it helps.