Ontario, Canada
Joined: February 04, 2009
KitMaker: 743 posts
Armorama: 549 posts
Posted: Monday, April 11, 2011 - 09:44 AM UTC
Hello All,
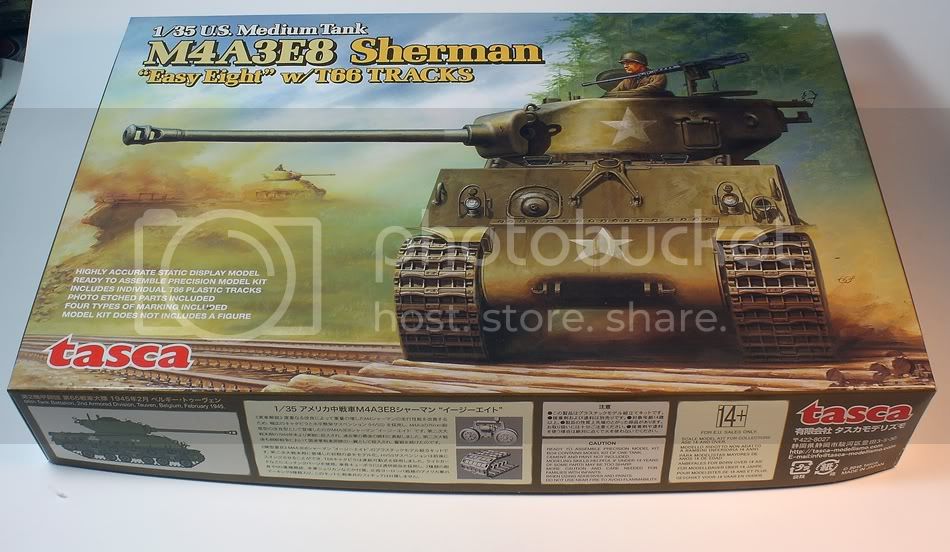
Here's the new project I have been wanting to start for some time, Tasca's M4A3E8 "Easy Eight" Sherman.
This is my first M4A3E8 build so I will be looking for inputs and ideas on this build from the many Sherman experts here.
Cheers,
David.
http://ghmicro.wix.com/twis-first-cut
Ontario, Canada
Joined: February 04, 2009
KitMaker: 743 posts
Armorama: 549 posts
Posted: Monday, April 11, 2011 - 01:23 PM UTC
My refererences for this build will be Hunnicutt's Sherman book, Squadron's M4 Sherman Walk around, Squadron's US Armor Camouflage and Markings World War II and Steve Zaloga's Modelling the M4 76mm Sherman. For picture references I am going to use Mr. Zaloga's M4 Sherman at War and US Tank Battles in Germany and some other sites such as prime portal and Toadman's tank site. I know some of the tanks on these sites are Kluges (i.e. the post war M4A3E8 on the prime portal site I believe has an earlier T23 turret that was originally on a M4A3 (76) W as evidenced by the casting numbers on the side of the turret that were not done on M4A3E8's?) but they are good for checking the fit land location of parts.
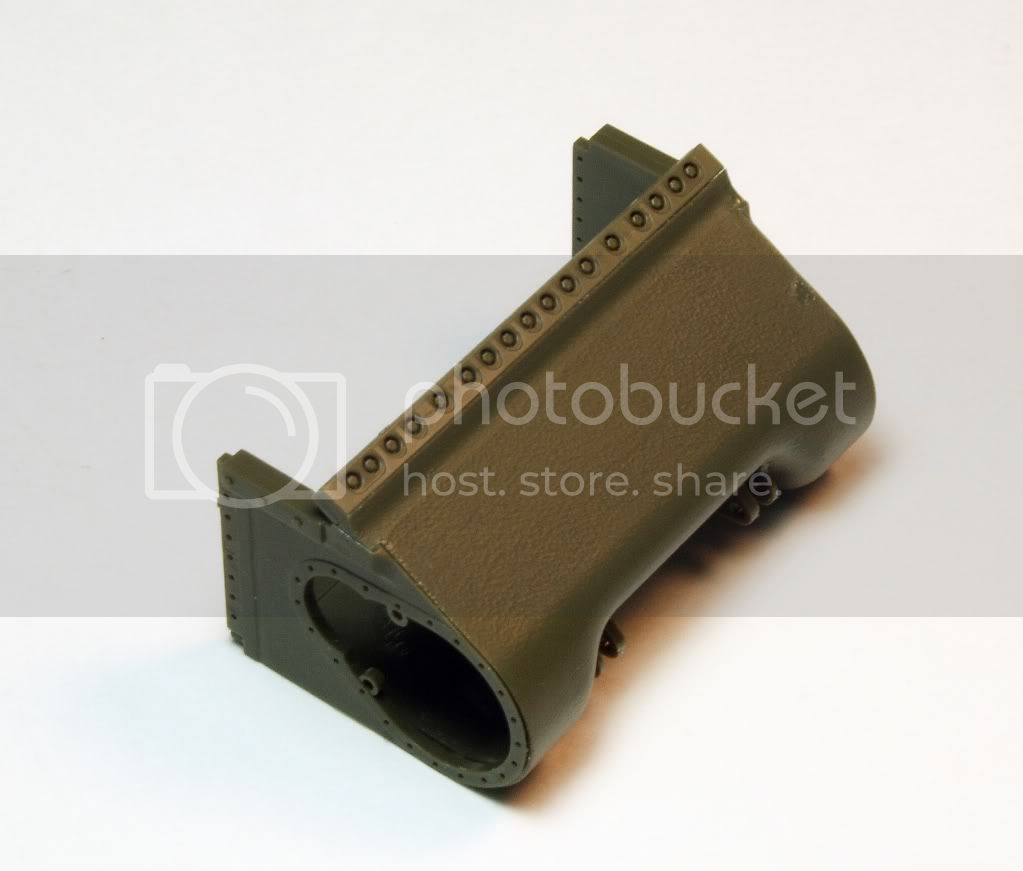
Anyway let's get on with it. Here's a shot of the differential built up. All pieces went together very nicely. The differential has some subtle texturing which is nice but I plan to rough it up with some Mr. Surfacer 500.
http://ghmicro.wix.com/twis-first-cut

#045
South Carolina, United States
Joined: September 23, 2005
KitMaker: 362 posts
Armorama: 350 posts
Posted: Monday, April 11, 2011 - 01:55 PM UTC
Hey Dave,
This should build up into a nice Sherman and Iím looking forward to following along as you progress. My only advice is build this the you want. If thatís with all the bells and whistles or straight out of the box then so be it. Just have a fun! I just pick up their Jumbo and canít wait to get my teeth into that but I have to finish my Dragon E8 Sherman first!
If youíre interested in seeing what I got done so far follow this
LinkHave
FUN 
Eric Rains
Greenwood, SC, USA
Ohio, United States
Joined: August 12, 2010
KitMaker: 731 posts
Armorama: 711 posts
Posted: Monday, April 11, 2011 - 02:02 PM UTC
Very Nice choice, I will be watching this closely as I have this kit in the stash.
Another option for the cast texture is the liquid glue technique. The Tasca plastic responds very well to this technique. You can see the results on my Tasca M4A1 build.
[url=http://armorama.kitmaker.net/forums/163768&page=1[/url]
Ontario, Canada
Joined: February 04, 2009
KitMaker: 743 posts
Armorama: 549 posts
Posted: Tuesday, April 12, 2011 - 12:45 AM UTC
Hi Eric,
Thanks for stopping by and having a look. I checked out your build per the link you sent me. Very very nice indeed. I really like how you are modelling your tank after a picture. I want to do the same as well but haven't decided which one. I will post some ideas shortly for feedback.
The sandbags on your tank are excellent by the way. Did you make them with some kind of putty like apoxy sculpt?
I plan to build this guy mostly out of the box. I will add a few AM goodies like a metal barrel. and corrrect some of the things on the kit as well.
BTW Tasca gives you a 2 piece barrel in the kit which despite the level of detail and fit is really old school Tamiya in my opinion. This is one area where DML has them beat.
I will be folllowing your build as well.
Cheers,
Dave.
http://ghmicro.wix.com/twis-first-cut
Ontario, Canada
Joined: February 04, 2009
KitMaker: 743 posts
Armorama: 549 posts
Posted: Tuesday, April 12, 2011 - 12:47 AM UTC
Hey John,
Thanks for stopping by. The glue technique looks very cool. I might try it. I especially like the look of texture it gave the turret on your M4A1. Very nice.
Regards,
Dave.
http://ghmicro.wix.com/twis-first-cut
Louisiana, United States
Joined: March 06, 2010
KitMaker: 3,128 posts
Armorama: 2,959 posts
Posted: Tuesday, April 12, 2011 - 03:30 AM UTC
Dave;
A punt from a non-Shermie guy...
The cast surface of that front piece looks really really good and very much "to scale" just as it is! I would respectfully suggest you NOT rough it up any more - to do so would be over-doing things, IMHO.
Consider that the real item was cast in sand, and may typically have a cast-surface relief or grain of perhaps two or 3 mm or maybe 1/8 US inch... which scales down, in 1/35, to around 1/10 of a mm, or maybe 0.004 - 0.005 inch (maybe 1/200 inch - about as thick as a piece of copier paper). Even a very coarse casting surface probably has surface relief mostly under 1/4 inch, or perhaps 0.007 - 0.008 inch (less than 1/100 inch) when scaled down to 1/35. Further, the real thing was also painted over in heavy primer followed by heavy enamel - which would surely reduce the texture coarseness some.
I have to say that the kit piece really does convey an appropriate amount of roughness - Its appearance matches quite well with the many pics of Sherman cast front-end covers I can find on the web.
Just my opine, here, gents

Bob

#045
South Carolina, United States
Joined: September 23, 2005
KitMaker: 362 posts
Armorama: 350 posts
Posted: Tuesday, April 12, 2011 - 01:12 PM UTC
Hi Dave,
Thanks for your nice comments and Iíll be looking forward to seeing the and your photo ideas.
As for the sandbags I used
Magic Sculpt epoxy. It has a nice working time based on the temperature that you are building in. I worked in 2 hours sessions to avoid mistakes and it did not harden before I was finished. I also worked with the amount of Magic Sculpt to do about 3-5 sand bags at a time. I came back the next day and it was nice a hard all ready for the next session. Here is a link to the product on
Amazon, I actually got mine from ebay. I also did some experimenting for making tarps and Magic Sculpt will work great for that as well.
For casting texture donít do what I did, what a big mistake. I'll cover my turret build in an upcoming post when i get further along, it's quite sad in a funny sort of way. I did run across Johnís method a few months back and really like his results and Iíll be attempting this on my next build. That being said I agree with Bob as to the realities of how the casting texture would appear. But man I really like the look of a nicely done casting effect. So it basically comes down to what you want your finial casting effect to look like.
Keep up the good work!!

Eric Rains
Greenwood, SC, USA
Removed by original poster on 04/14/11 - 20:34:28 (GMT).
Ontario, Canada
Joined: February 04, 2009
KitMaker: 743 posts
Armorama: 549 posts
Posted: Thursday, April 14, 2011 - 09:32 AM UTC
Hi Bob,
thanks for stopping by. Your opinion makes a lot of sense indeed.
I am still going to try the Mr. Surfacer but keeping in mind the texture already present on the final drive housing I will put just a very light texturing on it.
Regards,
Dave.
http://ghmicro.wix.com/twis-first-cut
Ontario, Canada
Joined: February 04, 2009
KitMaker: 743 posts
Armorama: 549 posts
Posted: Thursday, April 14, 2011 - 09:33 AM UTC
Hey Eric, thanks for the information on the sandbags. I need to give this a try sometime.
Cheers,
Dave.
http://ghmicro.wix.com/twis-first-cut
Ontario, Canada
Joined: February 04, 2009
KitMaker: 743 posts
Armorama: 549 posts
Posted: Thursday, April 14, 2011 - 09:35 AM UTC
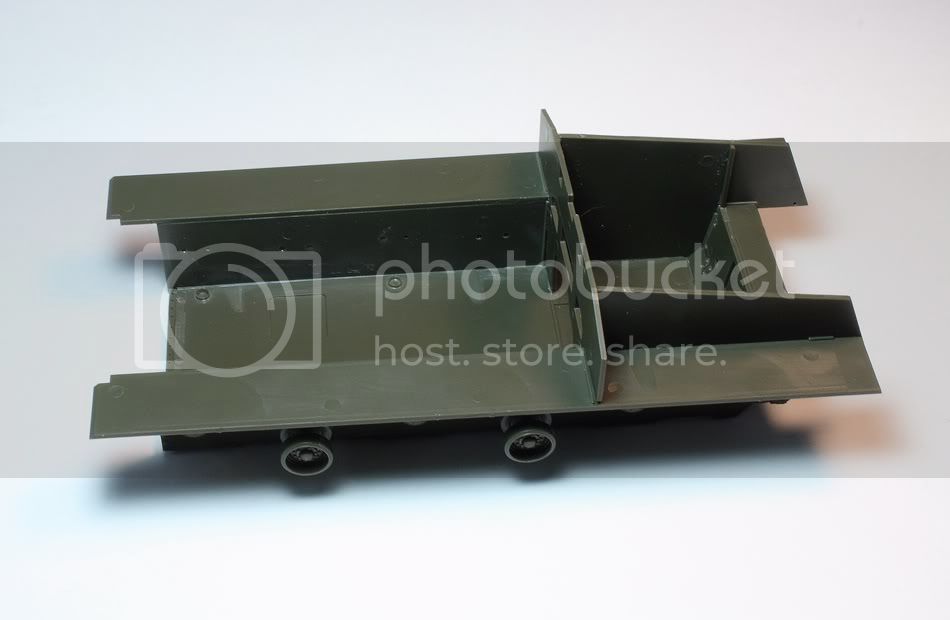
Here's the lower hull tub completed. With the Tasca kit you are required to build the bottom hull and hull sides as well as add the sponsons, rear lower plate and firewall. Although more work than a preformed hull it does allow you to avoid the scenario of dealing with warped hull sides that can be sometimes seen on the preformed ones. Less warpage = better fit
There are locating tabs on some of the parts (see tab at the rear of the hull above the sponson) and the instructions are not clear as to whether the sponson has to be above or below the tab. As you can see I have the sponson below it. I dry fitted the upper hull to the lower hull to check the fit and it fit very cleanly so I am assuming I did it correctly but if not I am not worried as the fit is still excellent.
http://ghmicro.wix.com/twis-first-cut
Ohio, United States
Joined: August 12, 2010
KitMaker: 731 posts
Armorama: 711 posts
Posted: Thursday, April 14, 2011 - 02:54 PM UTC
Looking good dave,
You will find that the Tasca kits "fall" right together.
Now, I just need to learn how to use the url tools here on armorama and make links like Eric's.
Ontario, Canada
Joined: February 04, 2009
KitMaker: 743 posts
Armorama: 549 posts
Posted: Friday, April 15, 2011 - 01:42 AM UTC
Thanks for stopping in John.
I am pretty happy with the kit thus far.
Sorry for the mediocre pictures. My 9 year old son took one of my lights I use for photos to use in his fort that he made from the box of our recently purchased Plasma TV. I got it back now though so the quality of the pictures should improve.

Dave.
http://ghmicro.wix.com/twis-first-cut
Minnesota, United States
Joined: July 20, 2004
KitMaker: 1,513 posts
Armorama: 1,449 posts
Posted: Friday, April 15, 2011 - 01:51 AM UTC
Dave,
Great start-that's one kit I have to start sometime!
Dan

Looking to meet other MN Armor modellers. I live in Buffalo.
Ontario, Canada
Joined: February 04, 2009
KitMaker: 743 posts
Armorama: 549 posts
Posted: Friday, April 15, 2011 - 07:20 AM UTC
Hi Dan,
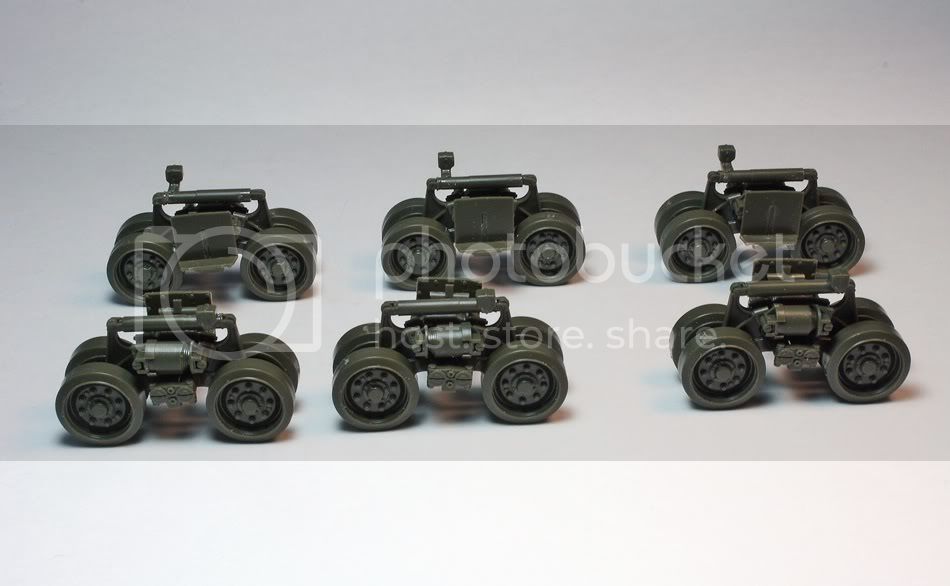
Glad to see you checked in. It really is a nice kit. The fit is excellent and the instructions are mostly very good. Tasca has done a fine job here. Even the bogies and road wheels go together fairly quickly and effortlessly. I just picked up the DML M4A3E8 and I must say the bogies in that kit look like they require more effort.
Anyway speaking of bogies and road wheels here is a shot of the HVSS suspension completed.
http://ghmicro.wix.com/twis-first-cut
Minnesota, United States
Joined: July 20, 2004
KitMaker: 1,513 posts
Armorama: 1,449 posts
Posted: Friday, April 15, 2011 - 07:41 AM UTC
I've built a few Tasca's Shermans, but not a 'E8 yet. Dragon's Sherman's just don't compare!
Dan

Looking to meet other MN Armor modellers. I live in Buffalo.
Ontario, Canada
Joined: February 04, 2009
KitMaker: 743 posts
Armorama: 549 posts
Posted: Sunday, April 17, 2011 - 05:13 AM UTC
Hi Dan,
Yes the Tasca kit is very nice. My First one.
Funny thing though Tasca did not include a tow cable in the kit. They included then Towing eyes but not the cable. I just purchased a Karaya one for it.
Regards,
David.
http://ghmicro.wix.com/twis-first-cut
Ontario, Canada
Joined: February 04, 2009
KitMaker: 743 posts
Armorama: 549 posts
Posted: Sunday, April 17, 2011 - 05:34 AM UTC
Here I am again with another update.
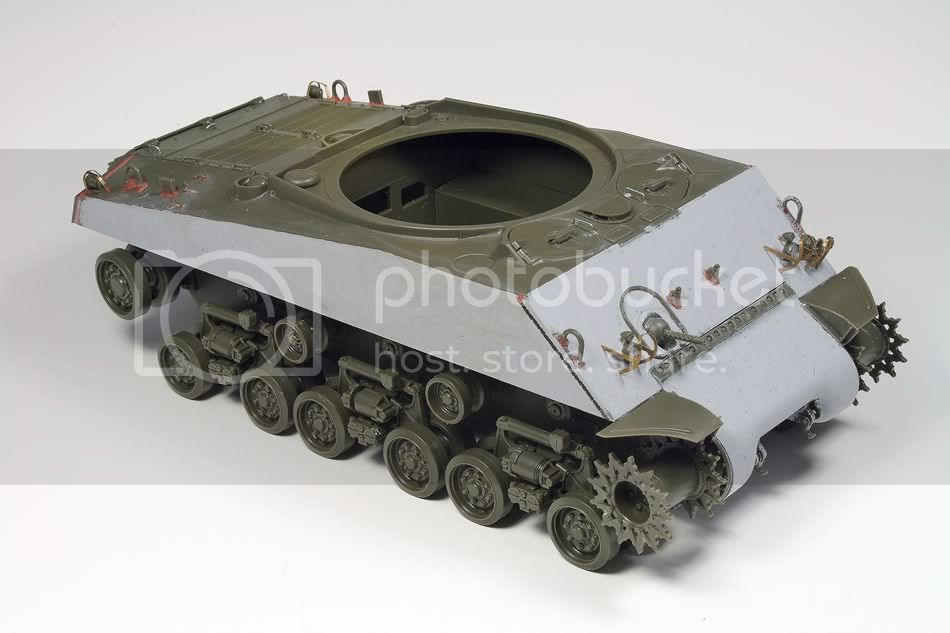
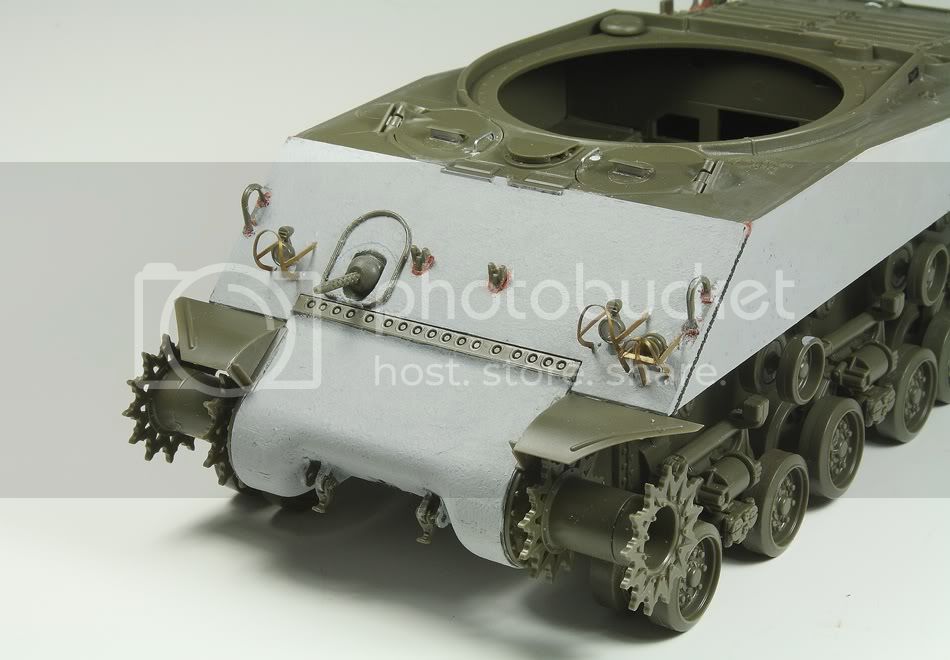
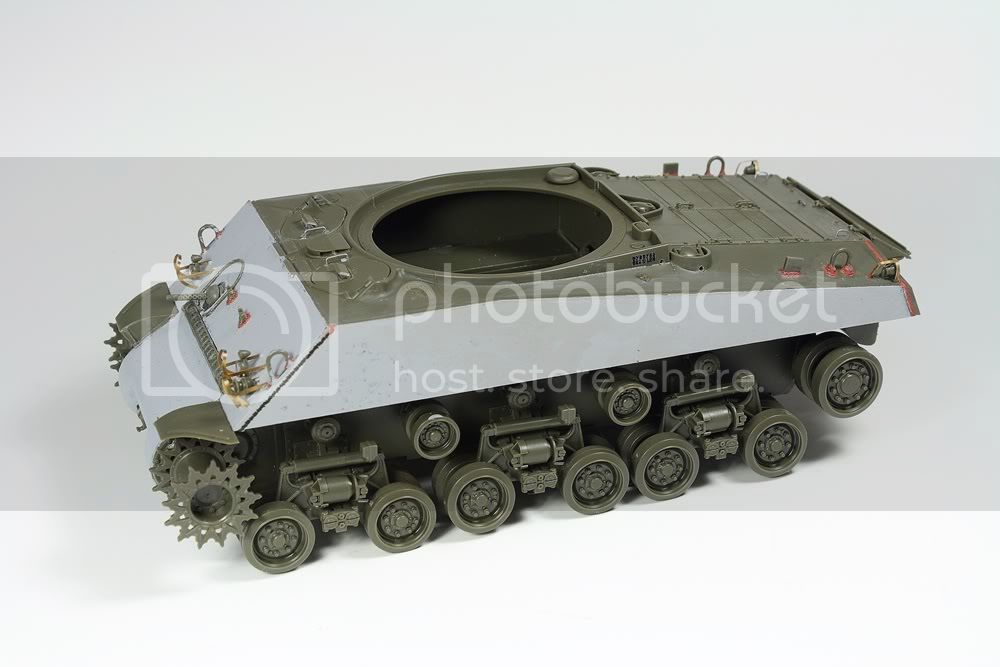
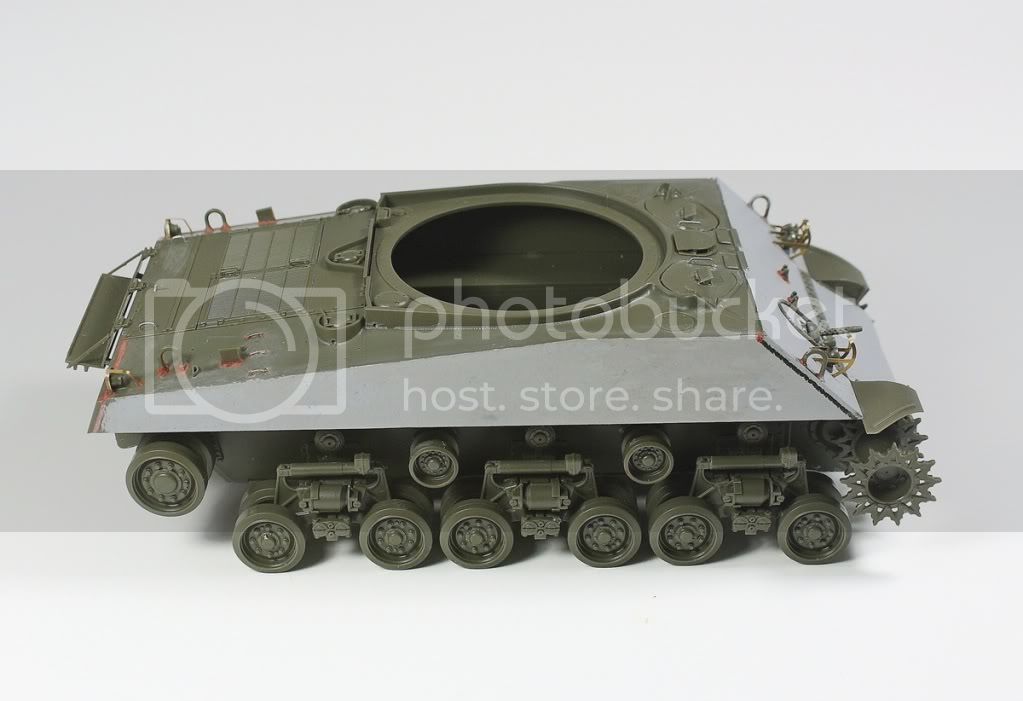
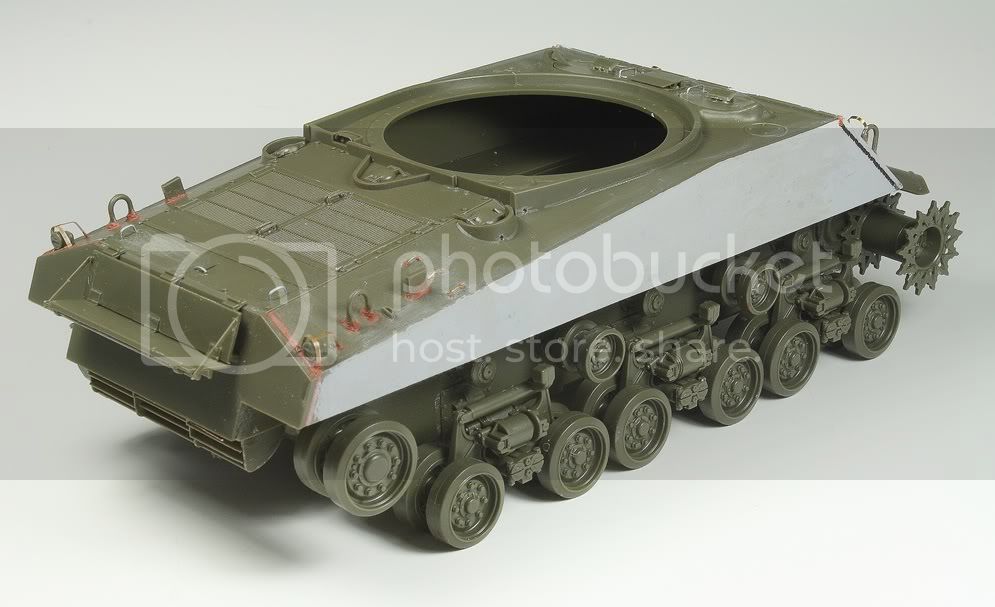
Got a fair amount of work done recently and consider the hull essentially done.
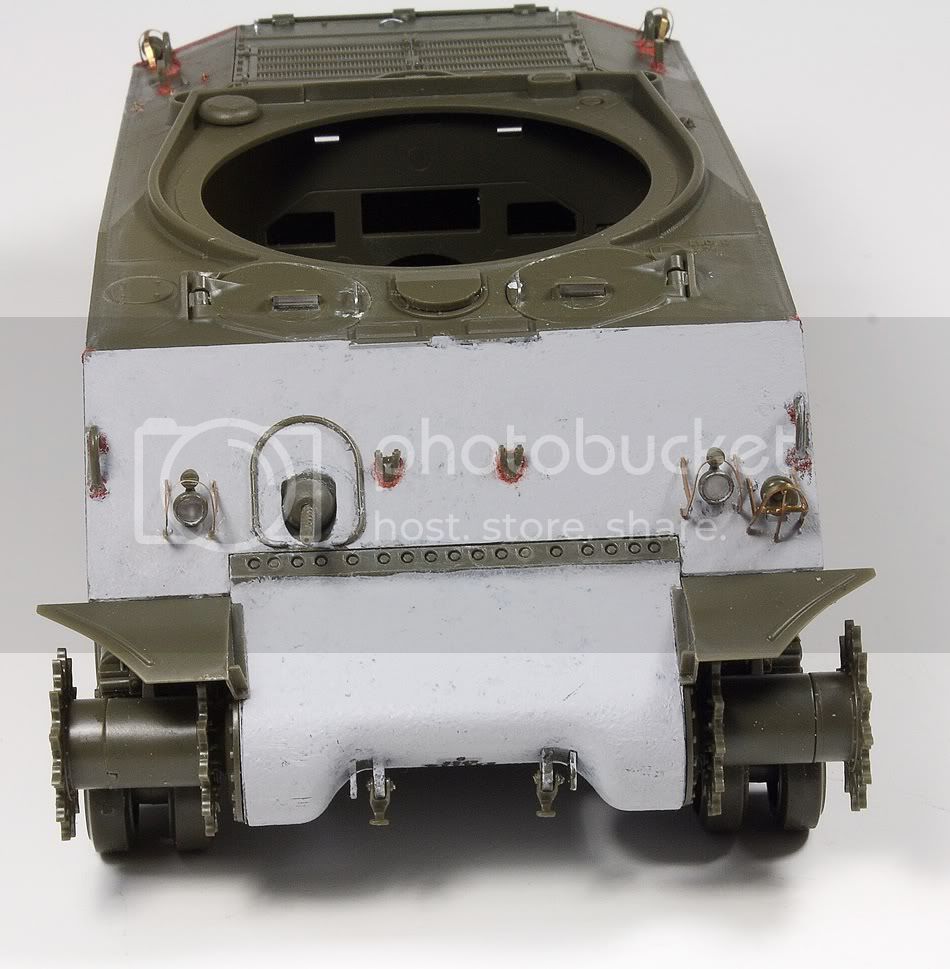
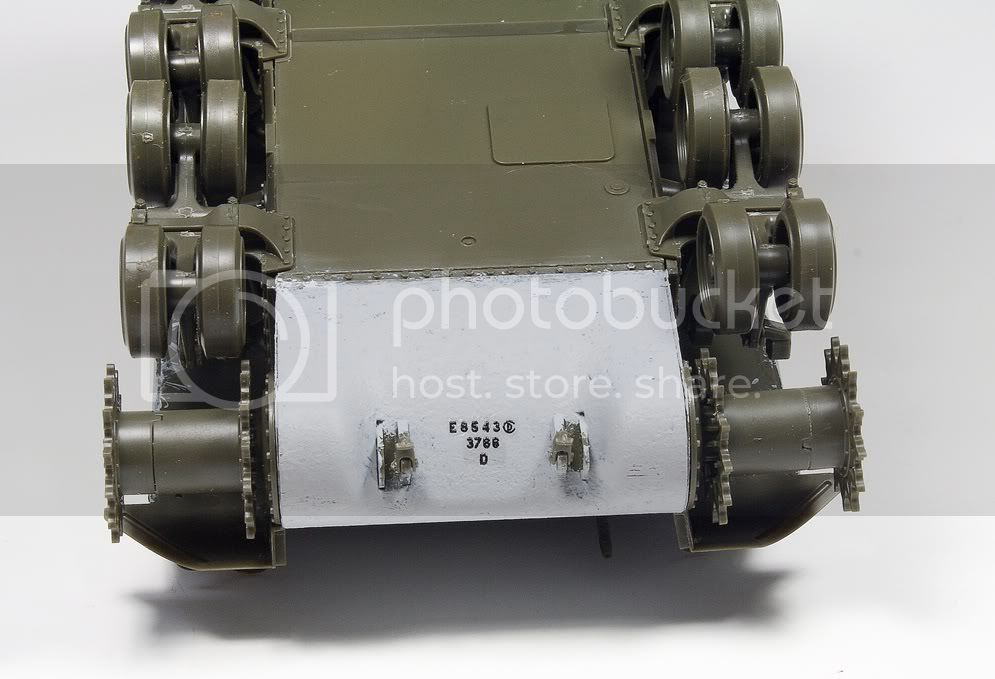
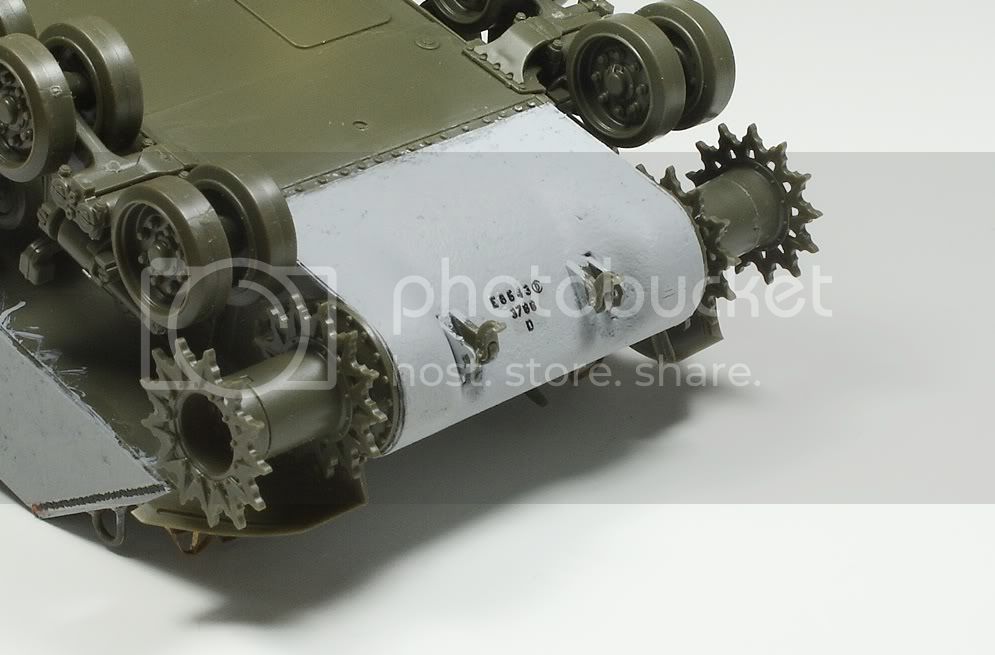
Despite the kit being an excellent one for fit and finnish I detailed it a bit more by adding Welds with putty for the rear plate, towing hooks, and travel lock. For the front plate I used the Decal Weld lines from Archer.
I also added the drain holes around the fuel and water caps, grab handles with wire as well as tool hooks on the rear starboard side. I have always like the PE light and horn guards and decided to use these instead of plastic ones.
To add some additional detail I purchased the Archer M4A3 (76) HVSS resin foundry casting symbols (AR88054) for this kit as well. Finally I added some light textruing on the hull sides, front plate and final drive housing with Mr. Surfacer 500.
I posted these pictures on my blog as well so feel free to check them out there as well.
http://ghmicro.wix.com/twis-first-cut
Ontario, Canada
Joined: February 04, 2009
KitMaker: 743 posts
Armorama: 549 posts
Posted: Sunday, April 17, 2011 - 05:39 AM UTC
http://ghmicro.wix.com/twis-first-cut
England - South West, United Kingdom
Joined: January 06, 2007
KitMaker: 3,661 posts
Armorama: 2,764 posts
Posted: Sunday, April 17, 2011 - 08:47 AM UTC
Dave, looking good so far, the mr surfacer looks good on there, as well as the cast numbers!! be careful of the gap on the drivewheels though!

Support Our Troops! Hit the Yes button If you find reviews or features helpful.
Virginia, United States
Joined: February 05, 2002
KitMaker: 6,149 posts
Armorama: 4,573 posts
Posted: Wednesday, April 20, 2011 - 08:21 AM UTC
Dave-- what mix did you use to spray the Mr Surfacer?
thanks
DJ
DJ Judge
COL (R), USA
"Tanker Boots do not a Tanker Make."
Ontario, Canada
Joined: February 04, 2009
KitMaker: 743 posts
Armorama: 549 posts
Posted: Thursday, April 21, 2011 - 10:07 AM UTC
Hey Les,
Welcome to the build log.
good point about the drive sprockets. I will throw some filler in there to to seal them up.
Cheers,
Dave.
http://ghmicro.wix.com/twis-first-cut
Ontario, Canada
Joined: February 04, 2009
KitMaker: 743 posts
Armorama: 549 posts
Posted: Thursday, April 21, 2011 - 10:52 AM UTC
Hi DJ,
thanks for stopping in and having a look.
I didn't spray the Mr. Surfacer. I used an old flat brush and dabbed it on non thinned then as it started to thicken up and dry i dipped the brush in Tamiya Acrylic thinner and worked it over the covered area to thin it out and smooth the textuing a bit.
Regards,
Dave.
http://ghmicro.wix.com/twis-first-cut
Virginia, United States
Joined: February 05, 2002
KitMaker: 6,149 posts
Armorama: 4,573 posts
Posted: Thursday, April 21, 2011 - 12:30 PM UTC
DJ Judge
COL (R), USA
"Tanker Boots do not a Tanker Make."


