Constructive Feedback
For in-progress or completed build photos. Give and get contructive feedback!
Tasca Sherman M4A3E8
Totalize
Visit this Community
Ontario, Canada
Joined: February 04, 2009
KitMaker: 743 posts
Armorama: 549 posts
Posted: Thursday, April 21, 2011 - 02:19 PM UTC
Hey Guys,

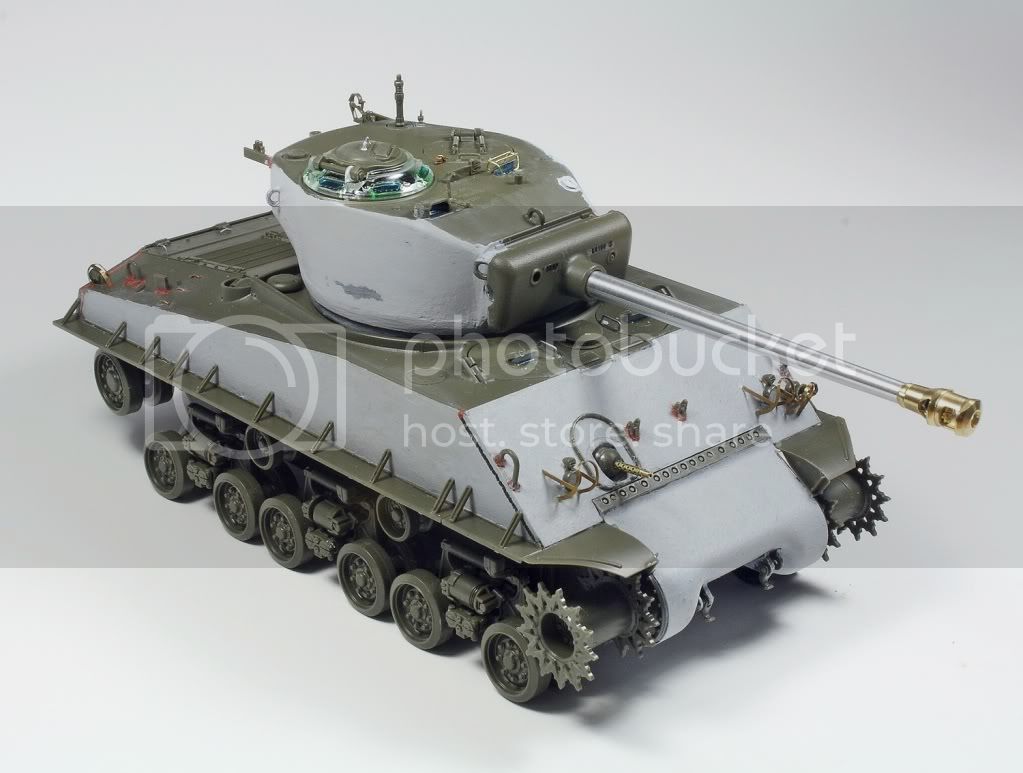
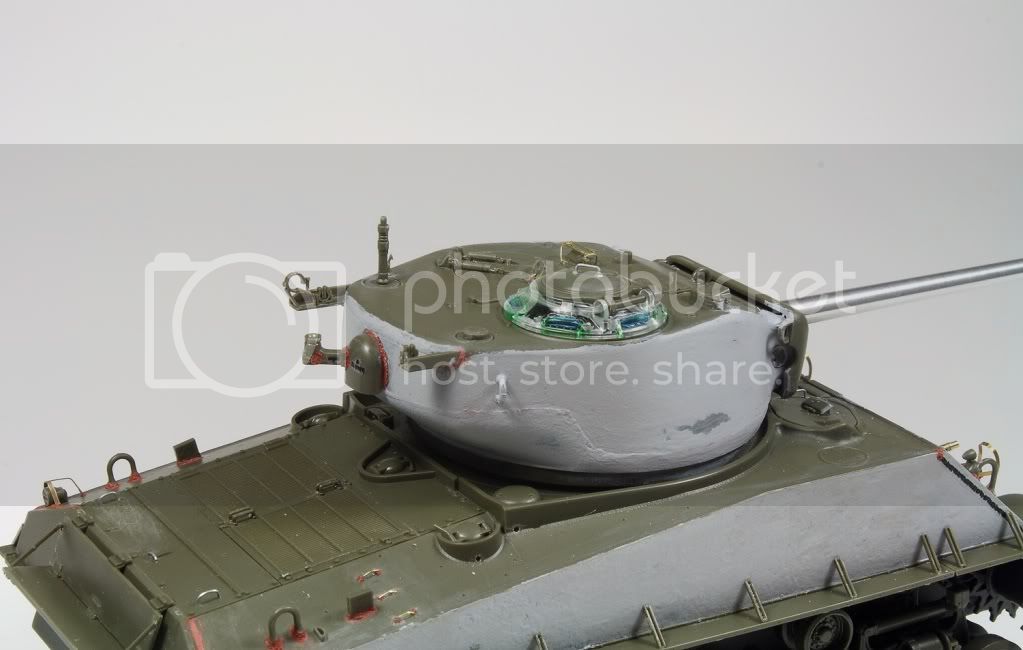
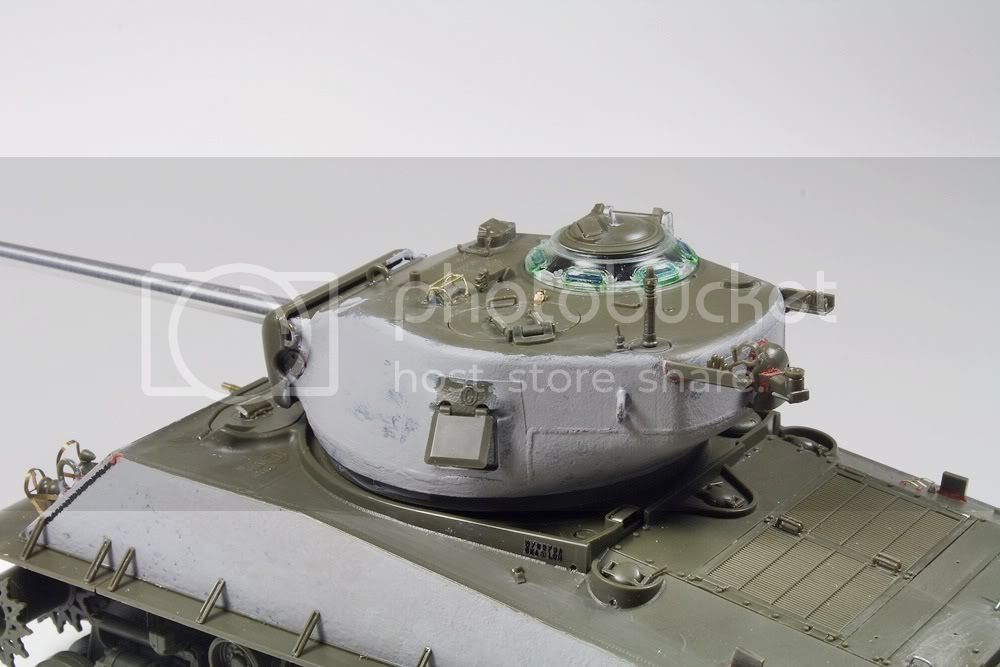
Here's another update. I started working on the turret and the mantlet area.

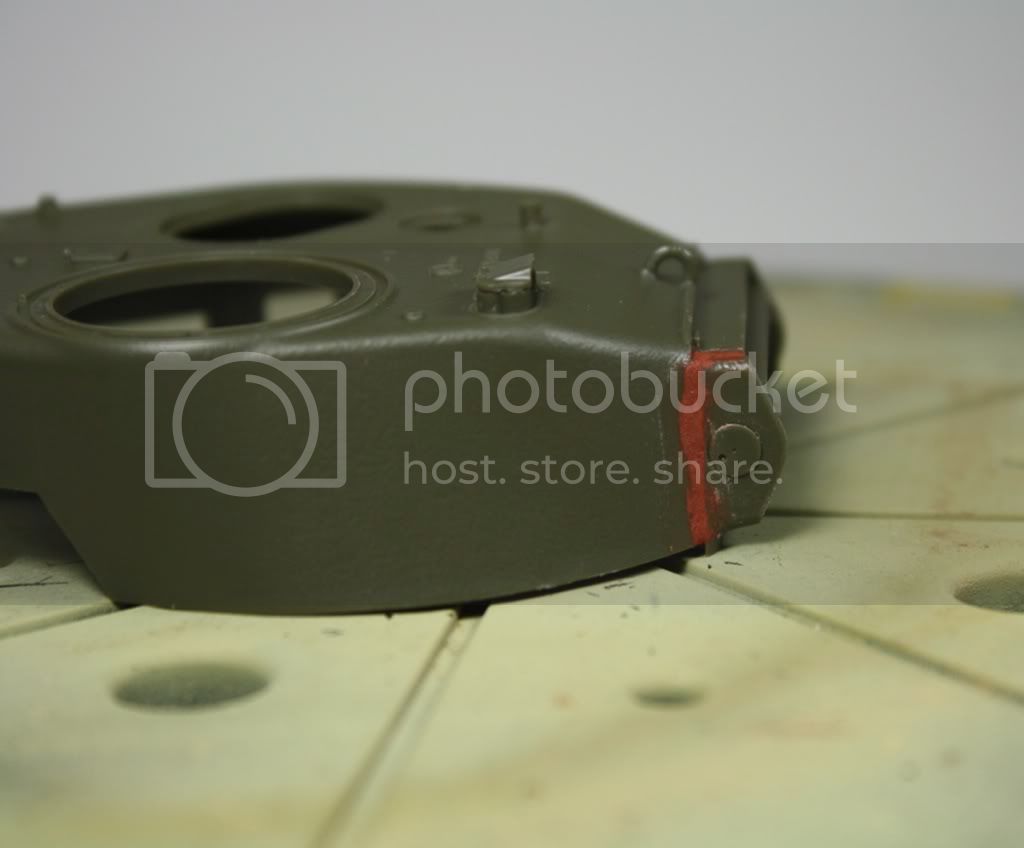
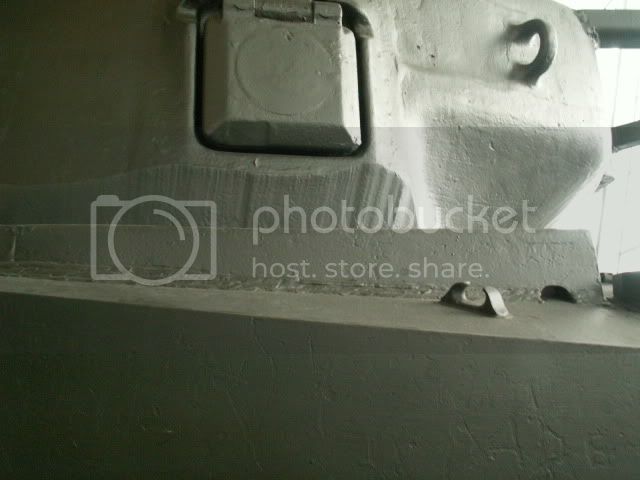
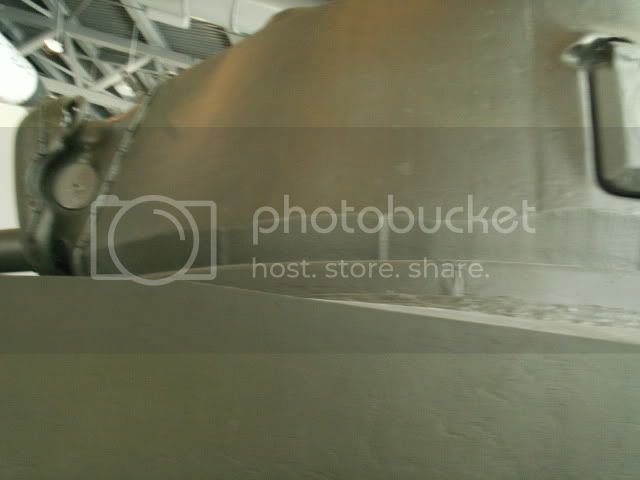
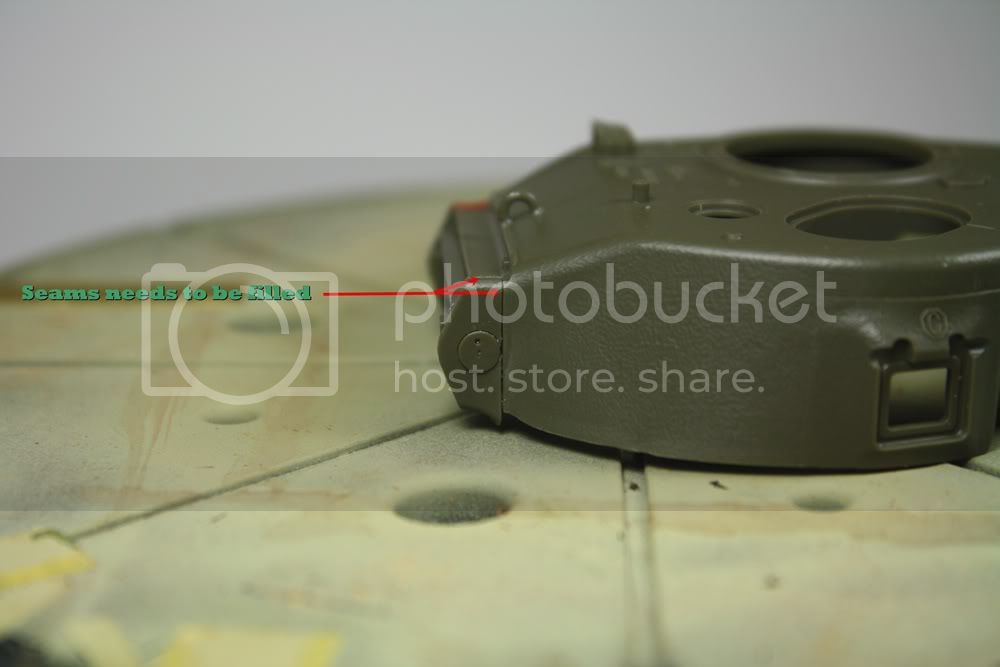
The Tasca Mantlet needs a bit of work with some filling. Again I used my trusted automotive putty to fill in the seams mentioned below. After a light sanding I ran a coat of extra thin cement over the area to smooth it out.


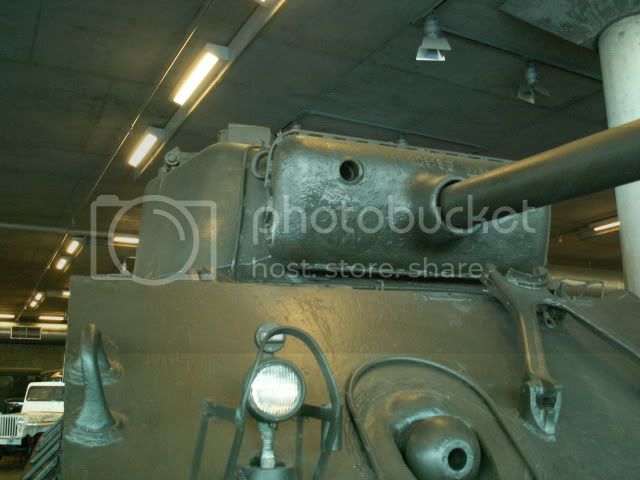
Picture of the actual mantlet.

thebear
Visit this Community
Quebec, Canada
Joined: November 15, 2002
KitMaker: 3,960 posts
Armorama: 3,579 posts
Posted: Thursday, April 21, 2011 - 04:45 PM UTC
Hi David ...I've been following this build and things are really coming together very nicely..I'd be careful about how rough you make the armor on the hull as they are really quite smooth...

I've got this kit in my stash but one thing really bugs me is the hole for the mortar in the turret is not there ...Weren't they always there?
Keep up the good work and you got me thinking about building this kit soon..

Rick
Totalize
Visit this Community
Ontario, Canada
Joined: February 04, 2009
KitMaker: 743 posts
Armorama: 549 posts
Posted: Friday, April 22, 2011 - 01:53 PM UTC
Hi Rick,

thanks for the kind comments. Much appreciated.

The mortor launchers were done away with on the T23 turret I believe.

Regards,
David.
thebear
Visit this Community
Quebec, Canada
Joined: November 15, 2002
KitMaker: 3,960 posts
Armorama: 3,579 posts
Posted: Friday, April 22, 2011 - 04:54 PM UTC
Hi Dave ..if you look at your picture of the real turret you can see it with a cap over it ...
I think it was welded over after the war on some turrets,but I'm not really sure...
Where's Roy when you need him ? ...lol
thebear
Visit this Community
Quebec, Canada
Joined: November 15, 2002
KitMaker: 3,960 posts
Armorama: 3,579 posts
Posted: Friday, April 22, 2011 - 07:40 PM UTC
I went looking for pictures and it seems like some did and some didn't have the mortars..Now was this factory specific or was it time specific I still don't know...

Rick
Totalize
Visit this Community
Ontario, Canada
Joined: February 04, 2009
KitMaker: 743 posts
Armorama: 549 posts
Posted: Saturday, April 23, 2011 - 01:41 AM UTC
Hi Rick,

I believe you are correct. The tank in the picture I provided has the mortar capped. I did a bit more research and it looks like the T23 turrets manufactured by United Steel Castings, American Steel Foundry and Continental Hubbard (the latter 2 being used by Detroit Tank Arsenel who manufactured the M4A3) had the smoke mortar installed. However, Gary Binder mentioned back in 2006 on Missing Lynx that there was a Technical Bulletin from the U.S. War Department that called for the removel of the mortar

TB ORD FE43, dated 15 May 1945, entiltled;

"Tank Medium M4 Series and Tank Light M24: Removal of 2-Inch Smoke Mortar M3".

This order gives specific instructions on how to remove it. See here:

http://www.network54.com/Forum/47208/thread/1148101073/Sherman+75mm+Turret+bomb+thrower-+when-


Perhaps the reason it is not on the Tasca Kit is due to them referencing post War tanks that had the mortar removed and covered over. Some people say that on some tanks it was done so well that you can't tell it was even there.
Nevertheless, for the period covered by my build (Dec 44-May 45) I believe the mortar should be there.

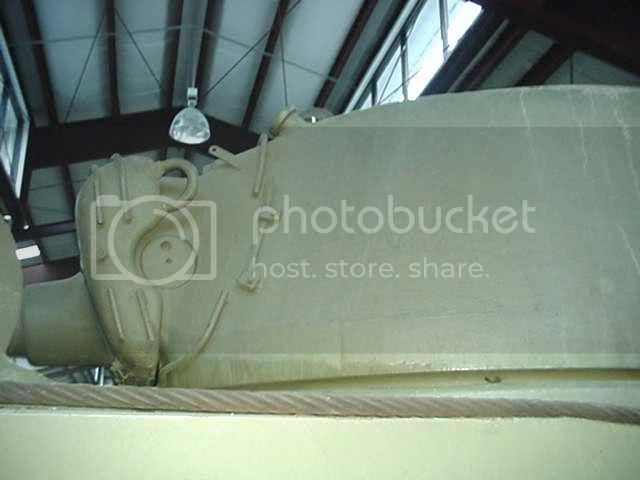
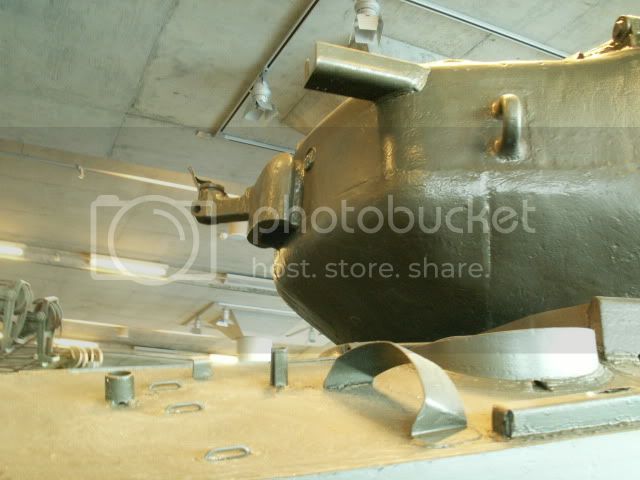
Here's a picture of preserved M4A3E8 in Korea. You can only slightly tell that the smoke mortar has been removed. Could easily be overlooked by a researcher as having never existed
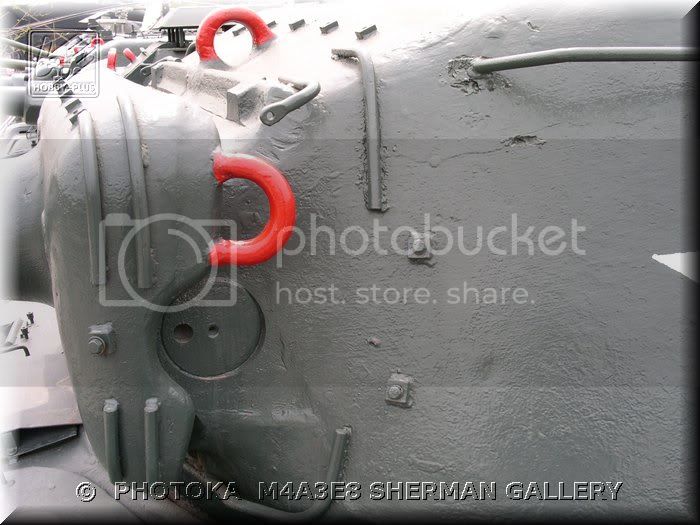


At any rate thanks for mentioning this. It's great to get the feedback to allow me to build a more accurate kit. Now I just need to figure out how to add it.

BTW. I have the DML M4A3E8 Thunderbolt kit and the turret has the smoke mortar. Kind of dissapointing Tasca missed this given their kits are in some cases 30% more than the DML kits.

Cheers,
Dave.
HONEYCUT
Visit this Community
Victoria, Australia
Joined: May 07, 2003
KitMaker: 4,002 posts
Armorama: 2,947 posts
Posted: Saturday, April 23, 2011 - 02:30 PM UTC
Hey Dave
Looking good thus far mate.
As for the 2" mortar dilemma, at a pinch I'd say to include it if it wasn't there already on the D82081 turret (The 76mm turret which featured the armoured cupola and the round split hatch as loaders hatch)
Yours has the later oval loaders hatch and would therefore be D7054366, which didn't appear to have the mortar penetration? This is speculative without the info in front of me
Brad
Totalize
Visit this Community
Ontario, Canada
Joined: February 04, 2009
KitMaker: 743 posts
Armorama: 549 posts
Posted: Monday, April 25, 2011 - 02:25 PM UTC
Hi Brad,

Thanks for the comments. Much appreciated.

I agree that I should have the 2" mortar launcher in place. In the Hunnicutt book there is a picture of the M3A3E8 assembly line at Detroit Tank Arsenal taken late in the war that also includes some M4A3 105's with the HVSS suspension, The M4A3E8's in the picture have the oval loader's hatch and the 2" mortar launcher from what I can see.

Regards,
Dave.
Totalize
Visit this Community
Ontario, Canada
Joined: February 04, 2009
KitMaker: 743 posts
Armorama: 549 posts
Posted: Friday, April 29, 2011 - 03:18 PM UTC
Hi guys,

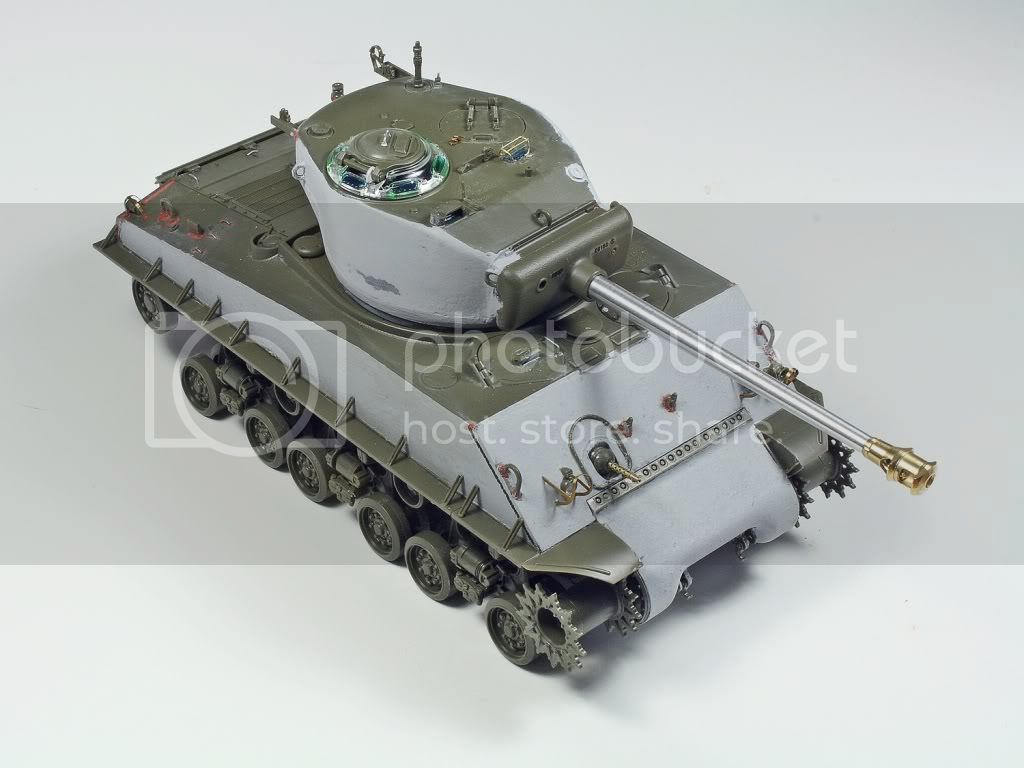
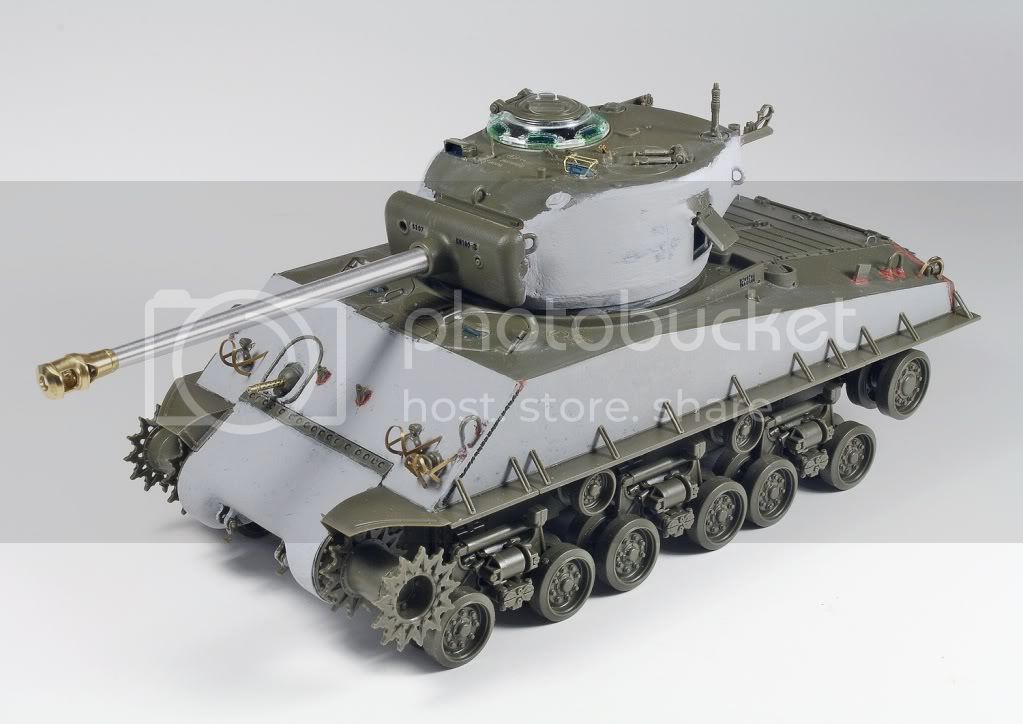
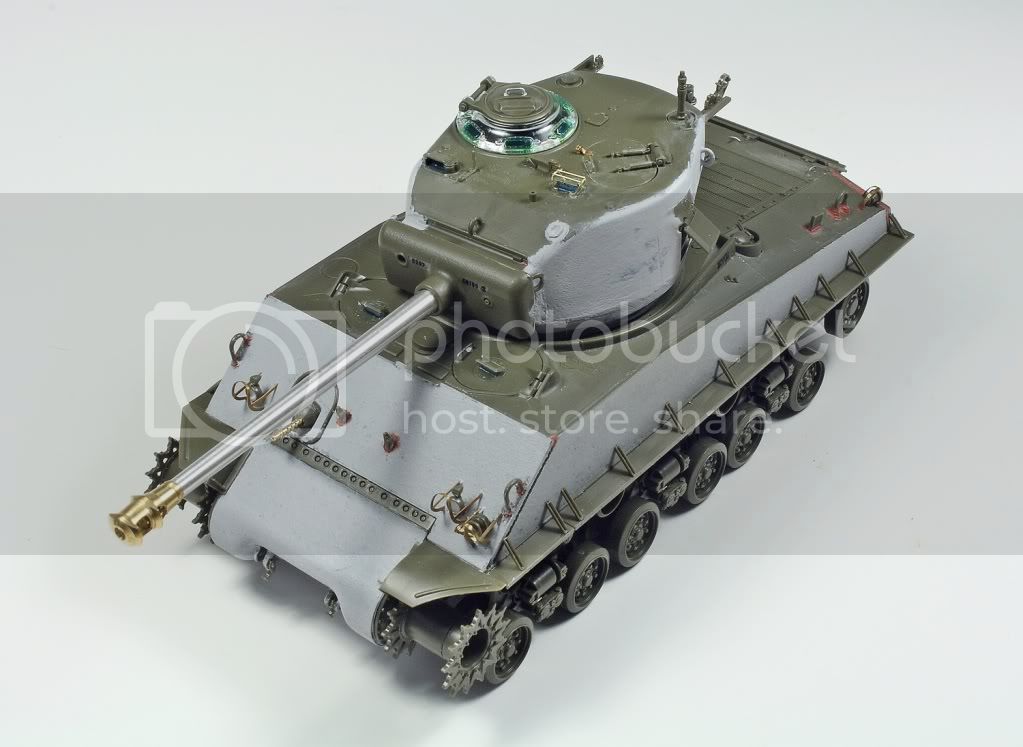
Here's another update. Got the weld lines done on the turret and added the smoke mortar opening on the turret as well. I used a piece of evergreen rod softened with extra thing cement then bent to the shape needed. I used the smoke mortar on the DML M4A3E8 Thunderbolt T23 turret as a guide. I also painted the pericopes lenses and covered them up with MicroMask in preparation for painting. I added the periscope guard on the turret but in hindsight I should have left it off as it could be a pain to work around it when I have to remove the Micromask. We shall see. I also added the casting marks on the mantlet. There are some very small ones to add on the turret side hatch but I am going to leave them off until after I prime.

I lopped off the kit bow .30 cal MG and replaced it with RB Model's M1919 .30 Cal MG which I think looks much better. As for the 76mm main gun, the RB model barrel used here was fairly easy to fit to the Tasca Mantlet. I just had to drill out the hole in the mantlet a bit further for the Barrel's connecting shaft to fit. Once this was done it just snapped in place firmly. see below.

Comments and suggestions are most welcome.

Thanks,
David.


errains
#045
Visit this Community
South Carolina, United States
Joined: September 23, 2005
KitMaker: 362 posts
Armorama: 350 posts
Posted: Saturday, April 30, 2011 - 11:53 PM UTC
Outstanding David!!

Nice clean build! I just love the texturing of the turret. I also used the RB barrels on my current build. While I had problems with the muzzle break the end results are well worth the effort.

Just outstanding work overall! Looking forward to your further updates.

thebear
Visit this Community
Quebec, Canada
Joined: November 15, 2002
KitMaker: 3,960 posts
Armorama: 3,579 posts
Posted: Sunday, May 01, 2011 - 02:47 PM UTC
Hi David ...I was looking at your pictures and noticed you haven't remove the mold marks from around the pistol port ...That shouldn't be there on the real turret .. also the weld seams are not weld seams but mold separation marks on the real turret ...These scars can look a lot like weld seams or could be grinded down .. It can be really quite rough...


Rick
Totalize
Visit this Community
Ontario, Canada
Joined: February 04, 2009
KitMaker: 743 posts
Armorama: 549 posts
Posted: Tuesday, May 03, 2011 - 12:35 AM UTC
Hi Eric,

Thanks very much for the comments. I am rather liking this Tasca kit. It is going together quite well. The only real issue I found was that the loader's hatch does not come with the retaining spring brackets thus leaving the springs open on their ends near the hatch's hinge. I fixed that by fashioning my own from some spare parts.

Cheers,
Dave.
Totalize
Visit this Community
Ontario, Canada
Joined: February 04, 2009
KitMaker: 743 posts
Armorama: 549 posts
Posted: Tuesday, May 03, 2011 - 12:49 AM UTC
Hi Rick,

Thanks a bunch for your help in identifying the corrections that are needed. It's great to do these builds and get the help from the community.

Great catch. I will make the corrections accordingly.

Cheers,
Dave.
Totalize
Visit this Community
Ontario, Canada
Joined: February 04, 2009
KitMaker: 743 posts
Armorama: 549 posts
Posted: Sunday, May 08, 2011 - 09:47 AM UTC
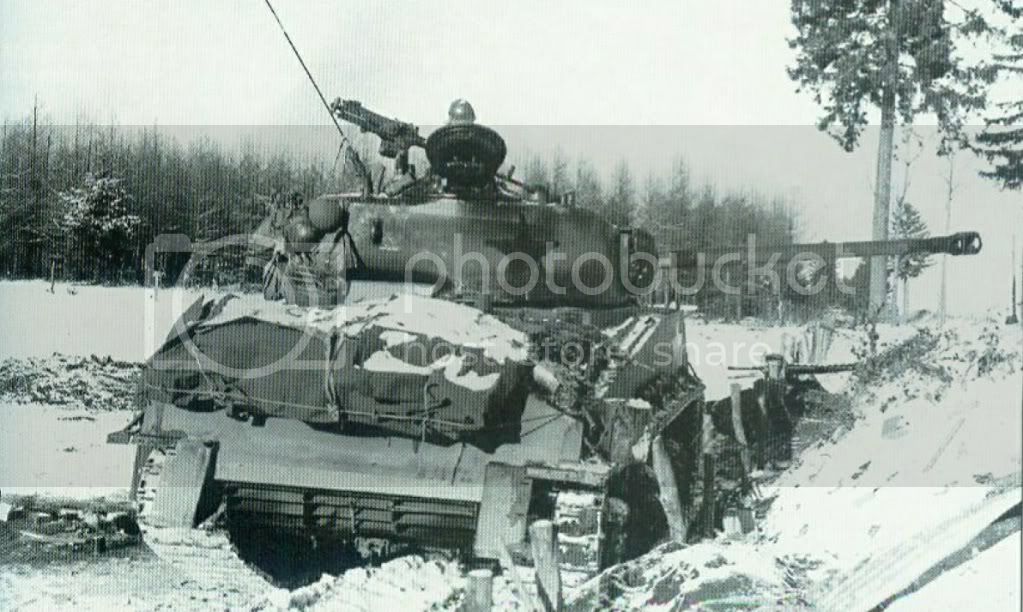
I have been checking various pictures of M4A3E8's in the ETO near the end of the war and think I have finally settled on doing the one below. This particular tank served with the U.S. 4th Armoured division during the battle of the bulge.
The M4A3E8 entered service during the battle of the bulge and this one is a fairly new one. Of particular interest is the painted out star on the turret although the original one remains ont the hull. Also of interest are the remains of the sandshields on the rear of the tank which look like narrow flaps. As I understand these tanks were delivered with the sand shields on but due to snow build up and the difficulty of getting access to the running gear for repairs they were quickly discarded. I am going to build the shields from evergreen plastic sheet


Totalize
Visit this Community
Ontario, Canada
Joined: February 04, 2009
KitMaker: 743 posts
Armorama: 549 posts
Posted: Monday, May 30, 2011 - 10:55 AM UTC

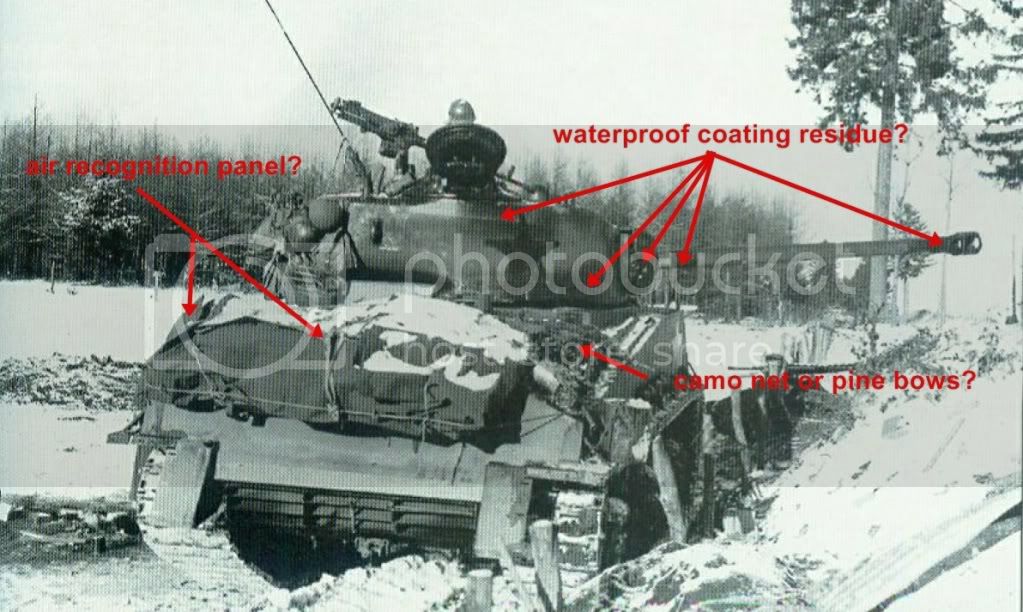
Hi Guys, I am doing Tasca's M4A3E8 and want to do a tank from the 4th Armoured Division during the Battle of the Bulge. I have the below picture of a 4th Armoured Division M4A3E8 during the battle of the bulge but was hoping that there are some additional pictures of this tank somewhere I could reference. Also, in looking at the tank it appears to have dark areas on the turret which I read somewhere could be the waterproofing material they coated these new tanks in during shipping. I also can't make out what is on the right rear deck. It looks like there is an oil can or water can and either some camo netting or spruce bows. There appears to be an air recognition panel laying across the top of the stowage tarp which is partially covered in snow?

Any help in providing some input would be much appreciated.


Joel_W
Staff MemberAssociate Editor
AUTOMODELER
Visit this Community
New York, United States
Joined: December 04, 2010
KitMaker: 11,666 posts
Armorama: 1,143 posts
Posted: Sunday, June 05, 2011 - 03:36 AM UTC
Enjoying following your build, since I'm new to Armor modeling, and have never owned nor seen a Tasca kit before. My standard for excellence is currently the Dragon Sherman's (of which I'm currently building their M4A1 DV).

From following your build, Tasca seems to be just a few steps above the Dragon line of kits. One thing I dislike about them is the directions, which can be very confusing to a new modeler of their kits. How are the Tasca directions?
pseudorealityx
Visit this Community
Georgia, United States
Joined: January 31, 2010
KitMaker: 2,191 posts
Armorama: 1,814 posts
Posted: Sunday, June 05, 2011 - 03:58 AM UTC

Quoted Text

From following your build, Tasca seems to be just a few steps above the Dragon line of kits. One thing I dislike about them is the directions, which can be very confusing to a new modeler of their kits. How are the Tasca directions?


I've built both Tasca and Dragon Shermans...

Directions on the Tasca kits are more clear, however, at times they can jump around. What they've done on at least a few of the Shermans that are just variations of others.... (early, mid, late), is they have 1 "standard" set of directions, and then a smaller sheet/book that incorporates the changes for the particular kit you have. So you have to go back and forth between the two to make sure you pickup all of the pertinent changes. Just take your time and check both sets of directions often and you'll be fine.

The Dragon kits build up into nice Shermans. The Tasca kits just have more finesse. You can really see that they took the time to really think out how they wanted to make each part.
Totalize
Visit this Community
Ontario, Canada
Joined: February 04, 2009
KitMaker: 743 posts
Armorama: 549 posts
Posted: Wednesday, June 29, 2011 - 04:12 PM UTC
HI Joel,

My apologies for not getting back to you sooner. Been very busy lately and haven't had much chance to check peoples comments.

To answer your question the Tasca instructions are very well laid out and definitely less confusing vs. Dragon. However, they are not perfect either. As an example one has to build the lower hull unlike the Dragon kits that provide the lower tub already assembled. In this case with the Tasca kit they provide raised guide strips to allow you to line up the sides of the hull with the bottom plate as well as the sponsons. Unfortunately the instructions nor the drawings indicate which side of the strip you should place a paritcular section on such as the sponsons. Perhaps its my lack of experience assembling a section such as this but I had to check the fit a few times to get it right. Other than that the kit has come together very nice.
Joel_W
Staff MemberAssociate Editor
AUTOMODELER
Visit this Community
New York, United States
Joined: December 04, 2010
KitMaker: 11,666 posts
Armorama: 1,143 posts
Posted: Friday, July 01, 2011 - 03:54 AM UTC
following your build closely, as I've never attempted a Tasca Sherman as yet. Your texturing method seems like the perfect way for a newbie like myself to attempt it when needed.
panamadan
Visit this Community
Minnesota, United States
Joined: July 20, 2004
KitMaker: 1,513 posts
Armorama: 1,449 posts
Posted: Friday, July 01, 2011 - 11:35 AM UTC
Great job Dave-about to start one myself.
Dan
stoney
Visit this Community
British Columbia, Canada
Joined: October 16, 2006
KitMaker: 480 posts
Armorama: 399 posts
Posted: Friday, July 01, 2011 - 12:24 PM UTC
Hi Dave, looking good! love those Tasca kits, built one of the firefly VC's myself and enjoyed it immensely. I know it was mentioned and its hard to see in your pics how coarse it is, but be careful with the texturing on the hull as the steel there is quite smooth, much different from the final drive housing and turret. Best of luck, it looks great!
Totalize
Visit this Community
Ontario, Canada
Joined: February 04, 2009
KitMaker: 743 posts
Armorama: 549 posts
Posted: Saturday, July 02, 2011 - 01:25 AM UTC
Joel, Dan, Eric,

Thanks for the comments. I tried to keep the texturing as subtle as I good. Very light on the sides, glacis and final drive cover, a bit heavier on the turret sides. I will be posting some pics soon with the base coat on so you will be able to see what it looks like painted. I will also try to do some closeups as well.

Cheers for now.
Dave.
Totalize
Visit this Community
Ontario, Canada
Joined: February 04, 2009
KitMaker: 743 posts
Armorama: 549 posts
Posted: Tuesday, August 02, 2011 - 06:36 AM UTC
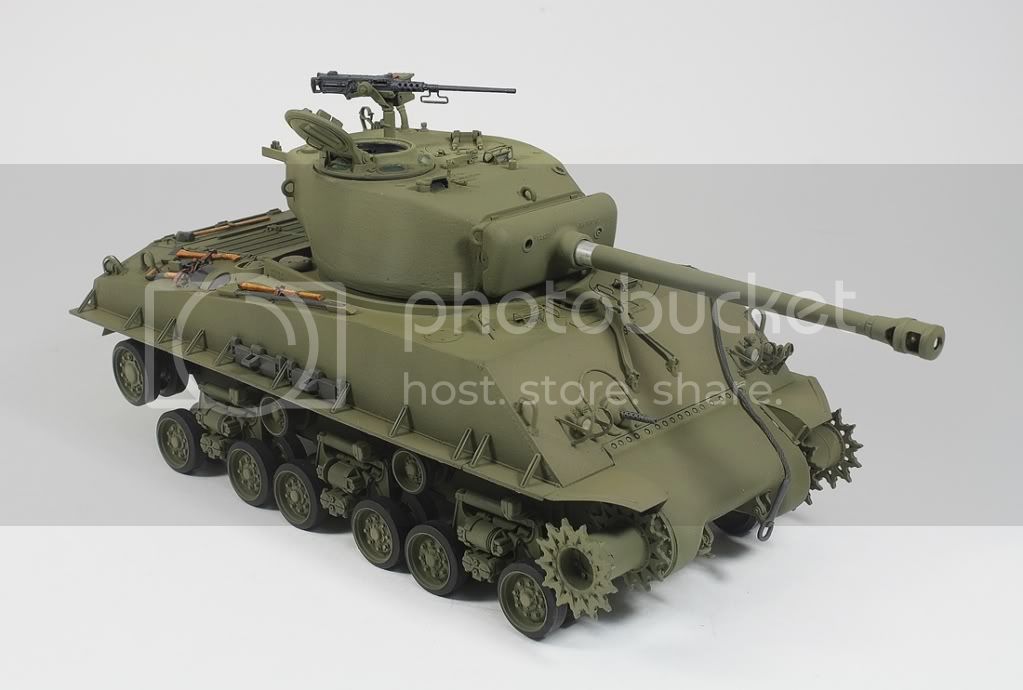
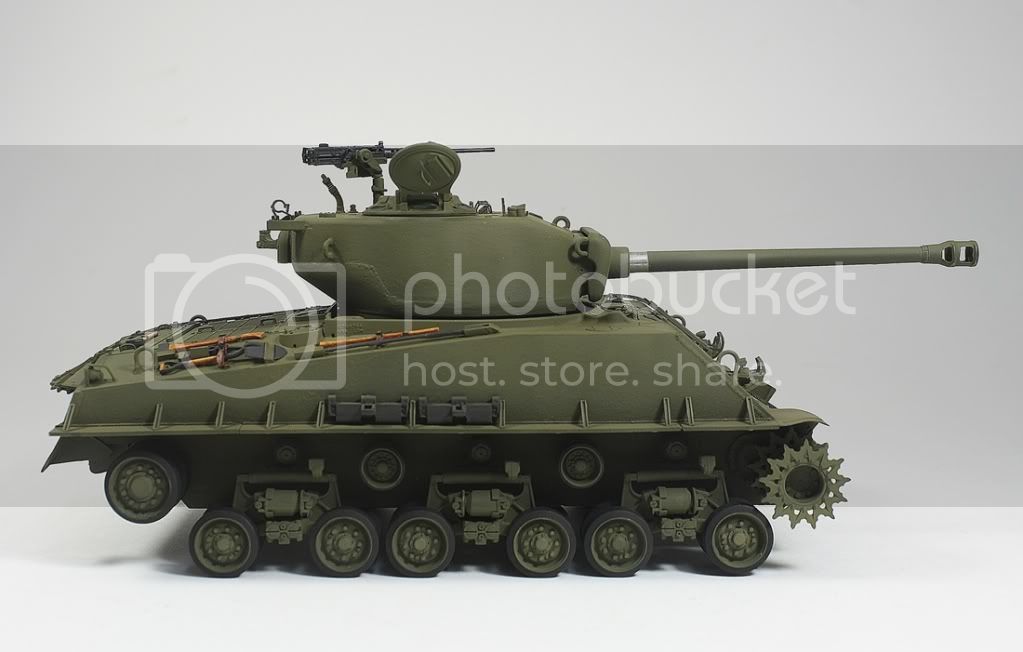
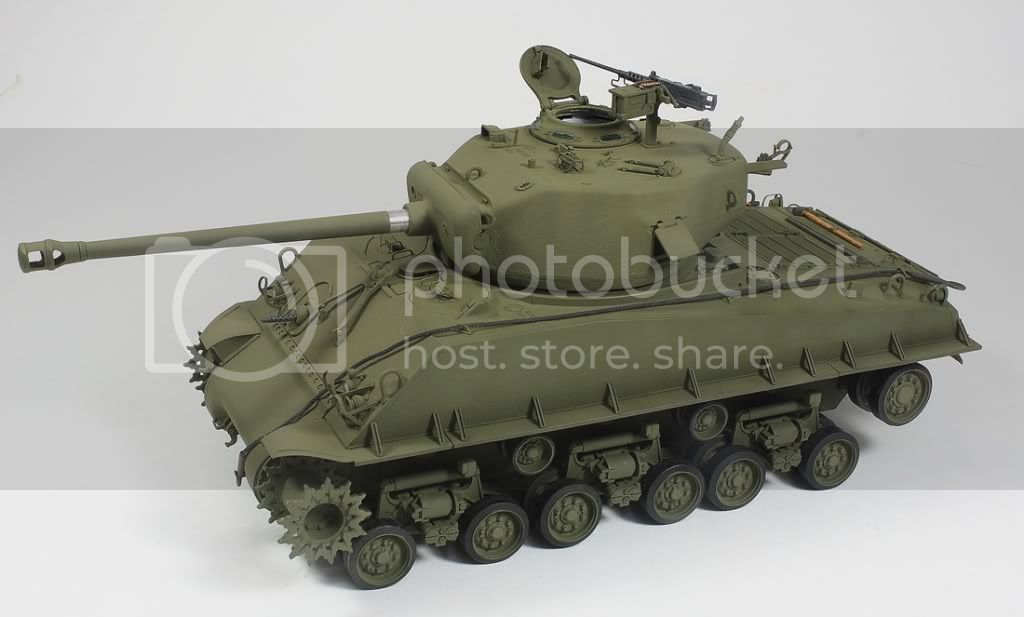
Well its been a while since I provided progress shots of my U.S. 4th Armored Division Battle of the Bulge M4A3E8. It's been a bit slow going as it is summer here in Canada and my time has been mostly spent with family and kids doing extracurricular activities. Looks like August is shaping up to be even busier. At any rate I have been getting some time in here and there and thought I would get some progress shots for all to see. Comments and suggestions are of course welcome. So,having said that let's get on with it.
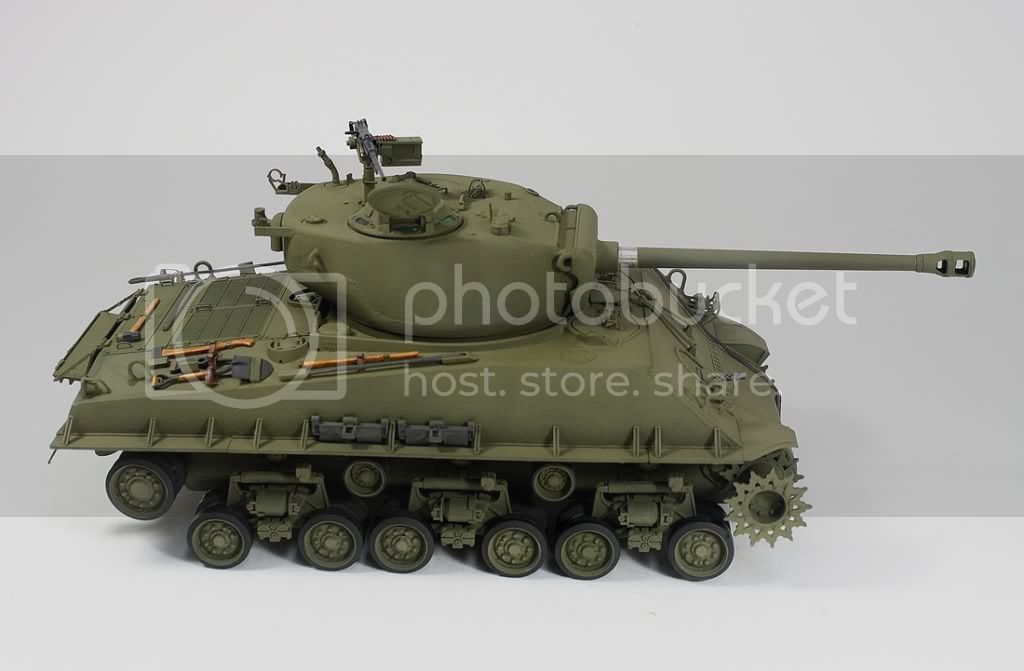
Here are some shots with the basecoat on.


I did not use any primer on this tank other than the subtle surface texturing I did on the turret sides, hull sides, glacis and final drive with some diluted Mr. Surfacer 500. I took a page out of Steve Zaloga's Osprey Modelling books on modelling the Sherman Tank in which he states that today's acrylic paints are so good that you really don't need to prime in most cases. Additionally, primer can sometimes cover up some of the surface details.

In terms of painting the tank itself I wanted to exhibit some Olive Drab colour variations on various surfaces and so did some colour modulation by spraying the horizontanal and upper vertical surfaces using Tamiya's XF62 Olive Drab mixed with XF60 Dark yellow in a 60/40 ratio. For the darker lower areas I used a 70/30 and 80/20 mix of XF62/XF60. Where I got more of a stark or clearly defined transition between the darker and light shaded areas I lightly misted the area with the lighter colour to tie both colours in.

The rear fenders for the sand shields were fashioned out plastic card stock. The tow cable and ends are from Eureka XXL ER-3503. I also added a resin tow cable retainer, which is near the front left driver's hatch, and a towing clamp near the rear left side to hold down the tow cable, both from formations.
Totalize
Visit this Community
Ontario, Canada
Joined: February 04, 2009
KitMaker: 743 posts
Armorama: 549 posts
Posted: Tuesday, August 02, 2011 - 06:46 AM UTC
I was also finished off the .50 MG. It is not glued on as yet but I threw it on the tank to see what it looked like. M4A3's had a bit of a different set up for loading the .50 ammo into the MG. As I learned from John Guld and Tim Streeter's excellent site Modelling the US Army in World War 2, the ammo box lid had to be removed before it could inserted into the D80030 (6580030) ammo box holder. Here's the link to Tim's site showing the D80030 set up.

http://www.usarmymodels.com/ARTICLES/MG%20Mounts/MGmounts%20page%208%20D80030.html

As for what I Did, I hollowed out the appropriate ammo box where the ammo would be fed from. I then cut off a small piece of the ammo belt that comes with the kit and put it in the hollowed out area. My goal here was to make the ammo box look like it was full of ammo. I then cut a longer strip and bent it using hot steam from a kettle per the Tasca instructions to serve as the portion of the belt being fed into the MG and glued it in place. I think it looks pretty good but let me know what you think. I painted the MG in a greyish colour to represent the grey parkerized finish that was common on WWII .50 Cal MG's.

For the commander's hatch I added the locking latch with some plastic stock and photo etch from the Aber Buckle set. The periscope housing is also a photoetch piece from Aber's Sherman set.


stansmith
Visit this Community
England - North West, United Kingdom
Joined: July 18, 2010
KitMaker: 611 posts
Armorama: 584 posts
Posted: Tuesday, August 02, 2011 - 06:59 AM UTC
really great build, loving the 50.cal especially the rounds in the ammo box!