Michigan, United States
Joined: October 21, 2007
KitMaker: 96 posts
Armorama: 89 posts
Posted: Thursday, August 25, 2011 - 10:36 AM UTC
Zuid-Holland, Netherlands
Joined: August 07, 2004
KitMaker: 4,808 posts
Armorama: 1,069 posts
Posted: Thursday, August 25, 2011 - 10:40 AM UTC
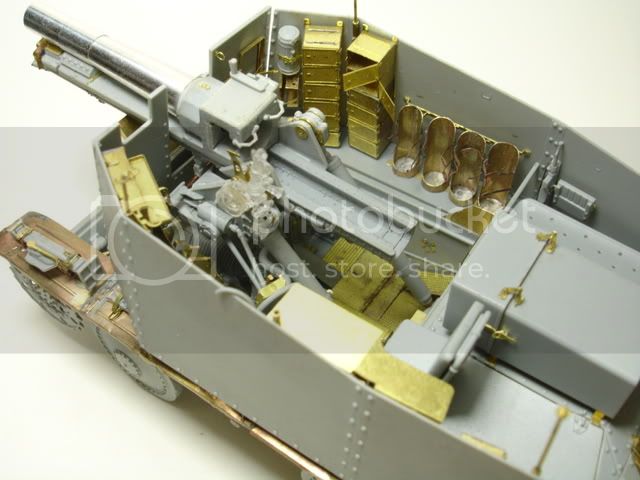
That is one great looking vehicle! Very nice PE work indeed. I have practically the same set for the Marder III M. But some parts are to over engineered. Not that is a bad thing though, it will be quit difficult sometimes. But you have done a great job!
What kind of camouflage will you use for this?
Michigan, United States
Joined: October 21, 2007
KitMaker: 96 posts
Armorama: 89 posts
Posted: Thursday, August 25, 2011 - 10:54 AM UTC
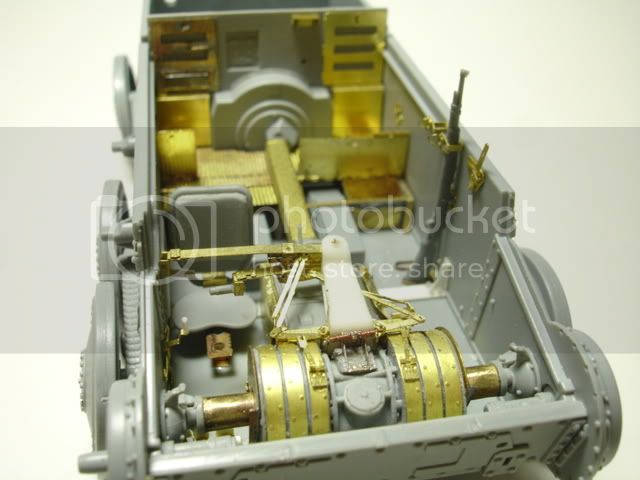
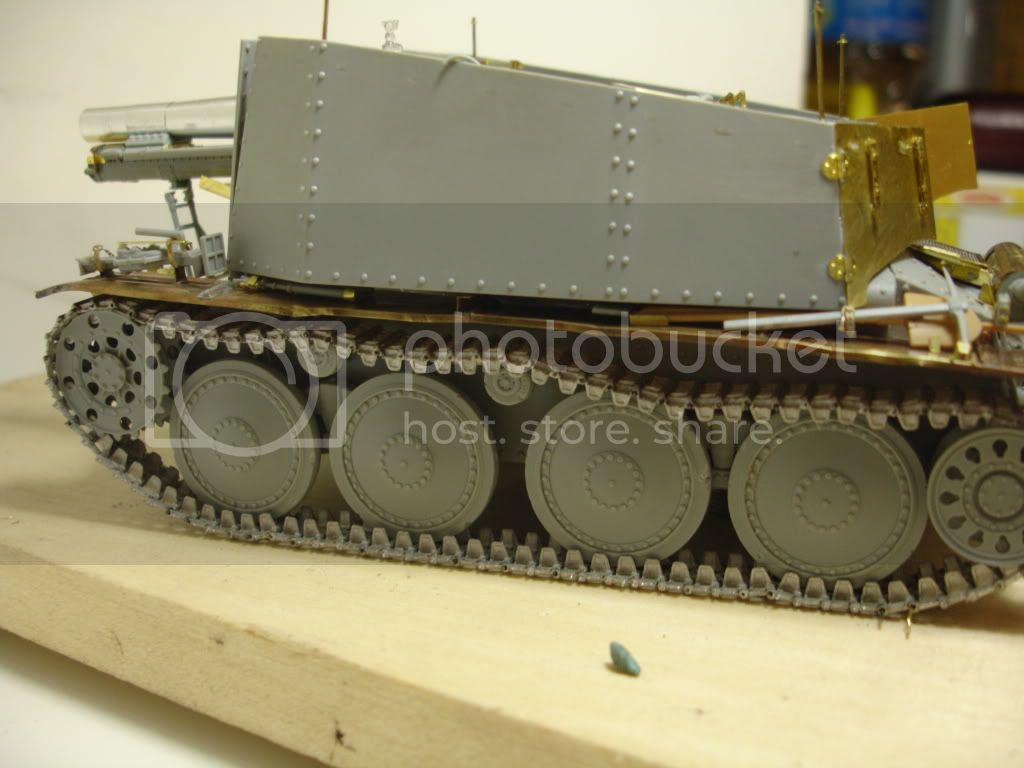
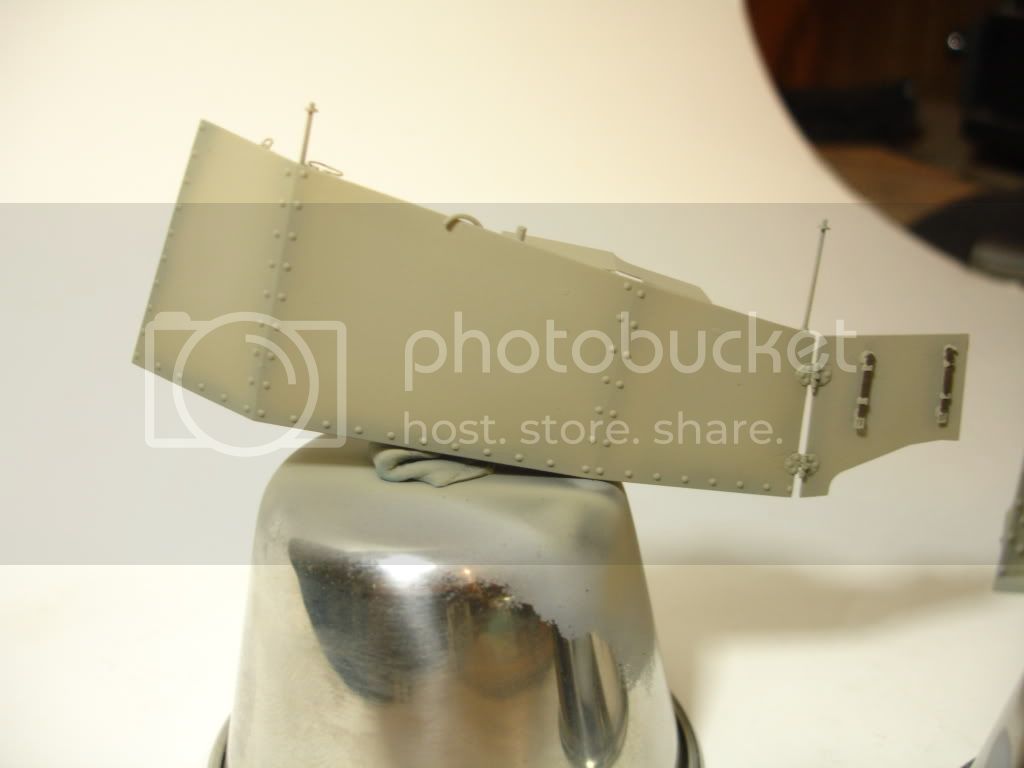
Thanks!, The fenders are extremely difficult to master because they want you to anneal the metal, then impress the grooves that run the length of the fenders, but doing this warps the metal and makes them "crown up". I am not too sure about the finish...I either will do a dark yellow, with the very thin brown and green stripes, or this pattern:
http://i3.photobucket.com/albums/y77/AcoolVW/panzers/38t/ActionPublications-DeutschePanze-6.jpgAkershus, Norway
Joined: July 20, 2010
KitMaker: 1,709 posts
Armorama: 1,581 posts
Posted: Thursday, August 25, 2011 - 10:59 AM UTC
Arkansas, United States
Joined: June 29, 2009
KitMaker: 11,610 posts
Armorama: 7,843 posts
Posted: Thursday, August 25, 2011 - 11:06 AM UTC
Talk about pimpn a model! Not even my BMP project has anything on this. Very nice job with the pe. I can only imagine painting something like that.
Ideals are peaceful. History is violent.
Grumpyoldman
 Consigliere
Florida, United States
Joined: October 17, 2003
KitMaker: 15,338 posts
Armorama: 7,297 posts
Posted: Thursday, August 25, 2011 - 11:09 AM UTC
Character is what you do when no one is looking.
Few things are harder to put up with than a good example.- Mark Twain
Make yourself an honest man, and then you may be sure that there is one less scoundrel in the world.--Thomas Carlyle
Scotland, United Kingdom
Joined: October 04, 2010
KitMaker: 275 posts
Armorama: 260 posts
Posted: Thursday, August 25, 2011 - 11:27 AM UTC
Almost looks to neat to cover over with paint ?
You must have nerves of steel to do all that etch. ten out of ten and a gold star.
Michigan, United States
Joined: October 21, 2007
KitMaker: 96 posts
Armorama: 89 posts
Posted: Friday, August 26, 2011 - 03:16 AM UTC
I always get nervous when I get ready to paint a big project that has taken a long time. It would be a shame to ruin it during painting, but I have been lucky so far (knock on wood!).
I also agree that something is taken away when you paint and cover up all that hard work! I dont know if you guys read AFV Modeller, but there is a builder Lee Llyod who built a Tiger 1 using photo etch and scratch built parts. His work is truly amazing and inspiring!!

I scanned this from issue #15, if you like it go to afvmodeller.com, and on the website you can purchase the article to download in pdf format on your computer, and it is really cheap. I think it cost less than $2 or 3 dollars.
It is work like this that pushes me to do better!
Joel_W
Associate Editor New York, United States
Joined: December 04, 2010
KitMaker: 11,666 posts
Armorama: 1,143 posts
Posted: Friday, August 26, 2011 - 03:54 AM UTC
Outstanding, simply outstanding. You have nerves of steel with that amount of PE work. I know what you mean about not wanting to paint all that work. With the just little bit of PE I've worked with, I've had that same feeling. Looking forward to seeing your updates.
On my Workbench:
Monogram 1/24 scale 427 Shelby Cobra
Just Completed:
Beemax 1/24 scale BMW M3 E30 1992 Evolution II
California, United States
Joined: April 27, 2011
KitMaker: 255 posts
Armorama: 250 posts
Posted: Friday, August 26, 2011 - 01:06 PM UTC
great work

Lisboa, Portugal
Joined: March 04, 2008
KitMaker: 5,386 posts
Armorama: 4,727 posts
Posted: Friday, August 26, 2011 - 02:34 PM UTC
Great work Nathan !!
I got the same set from Griffon but didn't start it yet...
You did an outstanding work there !!!
Active Builds: 0
Active Campaigns: 0
Michigan, United States
Joined: October 21, 2007
KitMaker: 96 posts
Armorama: 89 posts
Posted: Saturday, August 27, 2011 - 01:43 AM UTC
Quoted Text
Great work Nathan !!
I got the same set from Griffon but didn't start it yet...
You did an outstanding work there !!!
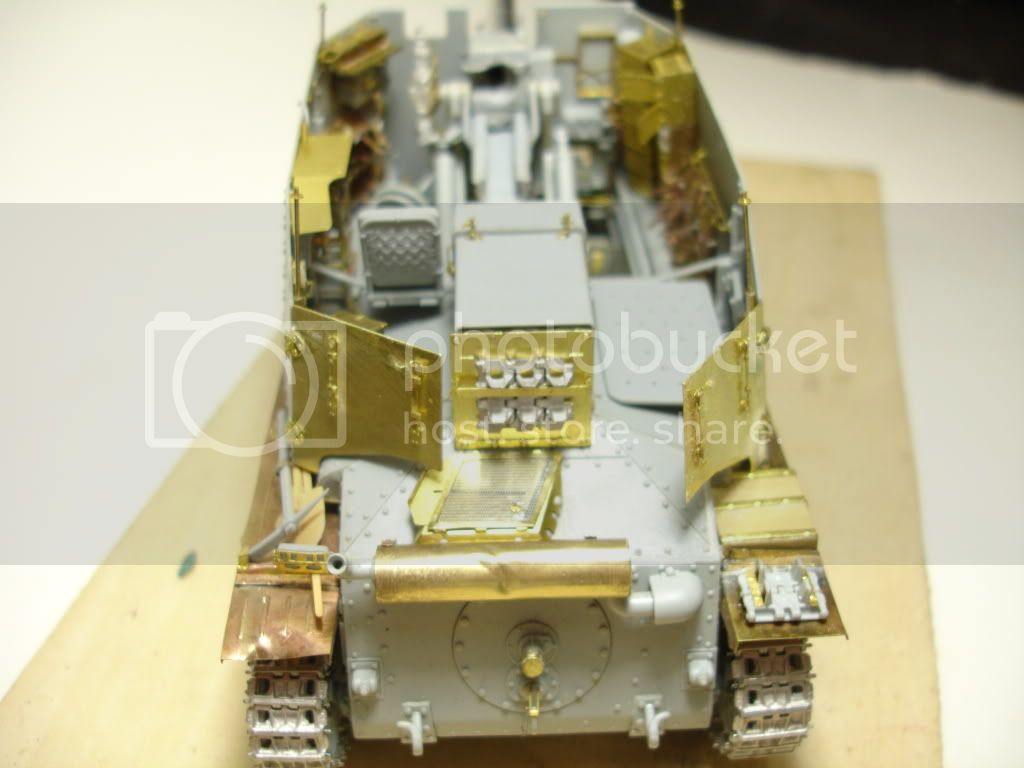
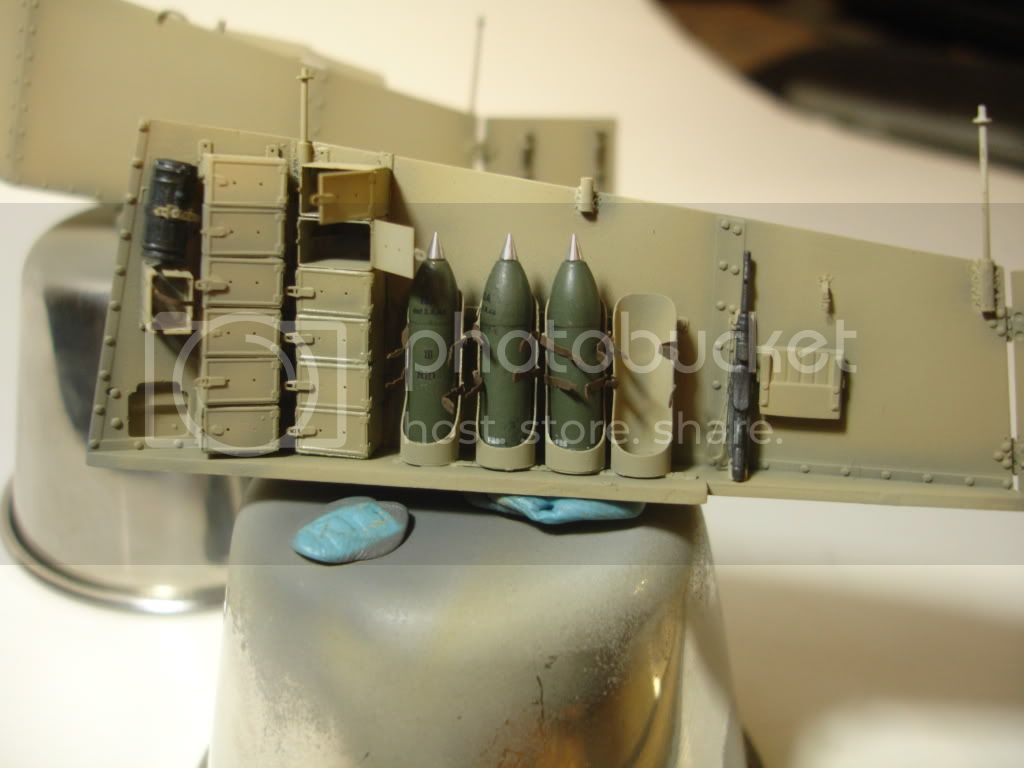
Like I said above the fenders were a major pain. Unless you plan to pose them roughed up a little bit I would try a different technique to add the raised ridges that run the fenders. Next time I might use streched sprue glued in place. Just a thought.
You will also pull out a few hairs building the radio rack!
What is nice about the Griffon set is they give you extras for the little parts, that always get lost in the carpet abyss.
Zuid-Holland, Netherlands
Joined: August 07, 2004
KitMaker: 4,808 posts
Armorama: 1,069 posts
Posted: Saturday, August 27, 2011 - 04:31 AM UTC
Hi Nathan,
I had to deal with the same problem with the fenders. But I think I have found the solution for this without adding stretched sprues or any other kind of plastics. You can still add the grooves with a pencil. But, if you have done that the metal will bend, as you have discoverd.
Now I think the best way to bend it back is to put you thumbs in the middle of the fender and push the bend to its opposite position. Hold it(!) and without letting lose you will follow the grooves to the end of the fender. You will bend the whole fender like an U form and simultaneously placing the fingers (with the thumb on the upper side!) from the middle to the left and right. This will result in an straighten fender without any additions to it.
Hope I have explained it right and hopefully understandable, because it is extremely difficult to explain. It is very simple if you see it in real life, but that is a bit of a problem I guess

Greetz,
Hilbert
Michigan, United States
Joined: October 21, 2007
KitMaker: 96 posts
Armorama: 89 posts
Posted: Tuesday, August 30, 2011 - 12:54 PM UTC
New Jersey, United States
Joined: November 02, 2009
KitMaker: 609 posts
Armorama: 433 posts
Posted: Tuesday, August 30, 2011 - 11:42 PM UTC
Nathan - This is a staggering amount of work. How long has it taken you to reach this point? I'm just starting out with PE, so this boggles my mind. One question - what do you use to attach the PE to the model? I use Gorilla Glue but wonder whether there's a better (cleaner) option. Also, do you mix CA with anything (e.g. talc) to give it more strength?
I totally agree with you regarding the Friul tracks. I just assembled this set for my own Grille Ausf. H and encountered the same problems ... lots of drilling and the tiny links don't help.
Michigan, United States
Joined: October 21, 2007
KitMaker: 96 posts
Armorama: 89 posts
Posted: Wednesday, August 31, 2011 - 01:22 AM UTC
Quoted Text
Nathan - This is a staggering amount of work. How long has it taken you to reach this point? I'm just starting out with PE, so this boggles my mind. One question - what do you use to attach the PE to the model? I use Gorilla Glue but wonder whether there's a better (cleaner) option. Also, do you mix CA with anything (e.g. talc) to give it more strength?
It is hard to say exactly how long it has taken me, I work on my models on and off, especially in summer. But I have been working on this one since May, and would guess around 100 hours.
I like to solder P.E when I need it to be strong bond, other wise I will just use CA. And to attach the P.E. parts to model I use the same CA. I actually use Loctite CA that you can buy from hardware stores, it works just as good and has the right amount of drying time to set a part, not tp mention you will save some money.
Regarding Gorilla glue I have used it but not on my models, and I noticed that when it dries it expands a little, this seems like it might be more work than necessary. I think you should give CA a try!
Joel_W
Associate Editor New York, United States
Joined: December 04, 2010
KitMaker: 11,666 posts
Armorama: 1,143 posts
Posted: Wednesday, August 31, 2011 - 01:58 AM UTC
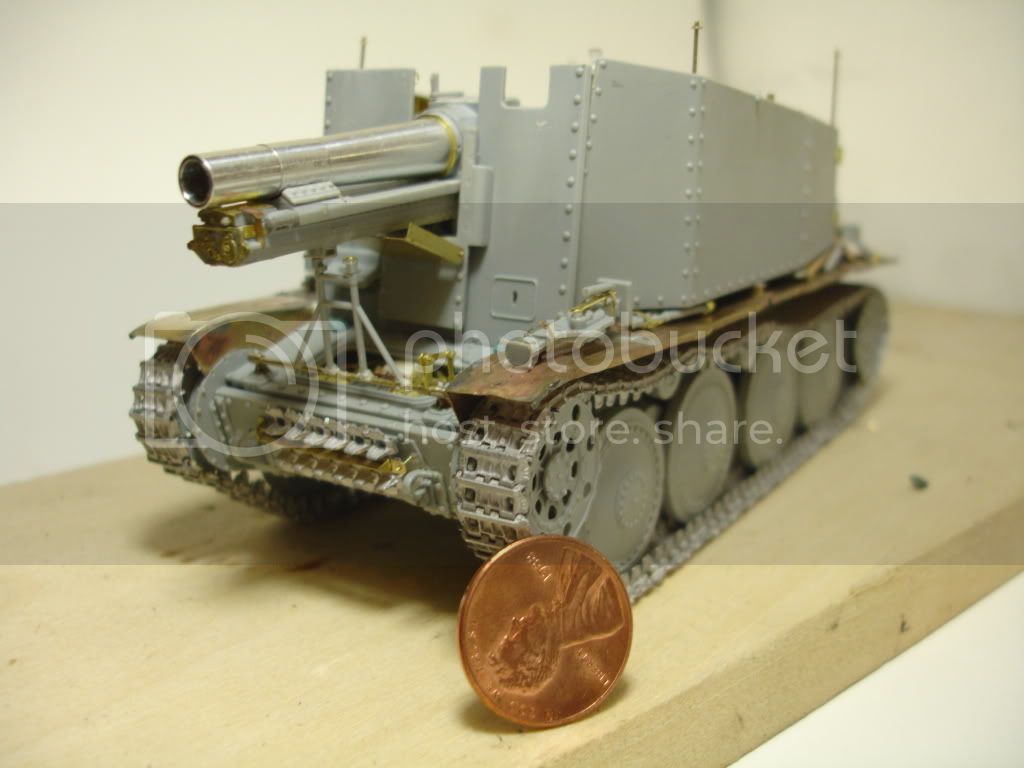
Nathan, your latest update is just mind bobbling. I can't imagine doing all that PE work, and getting it all to fit perfectly. I was amazed at just how small the model is after looking a the picture with the penny.
I've settled on Gorilla CA glue for general work, and Loctite gel for gap filling applications. Both work great, have non-clogging tips, and are extremely economical in both their size and price. I get mine at Home Depot, so the price is right.
On my Workbench:
Monogram 1/24 scale 427 Shelby Cobra
Just Completed:
Beemax 1/24 scale BMW M3 E30 1992 Evolution II
Michigan, United States
Joined: October 21, 2007
KitMaker: 96 posts
Armorama: 89 posts
Posted: Saturday, September 24, 2011 - 03:57 PM UTC
Auckland, New Zealand
Joined: June 01, 2011
KitMaker: 1,716 posts
Armorama: 1,638 posts
Posted: Saturday, September 24, 2011 - 06:20 PM UTC
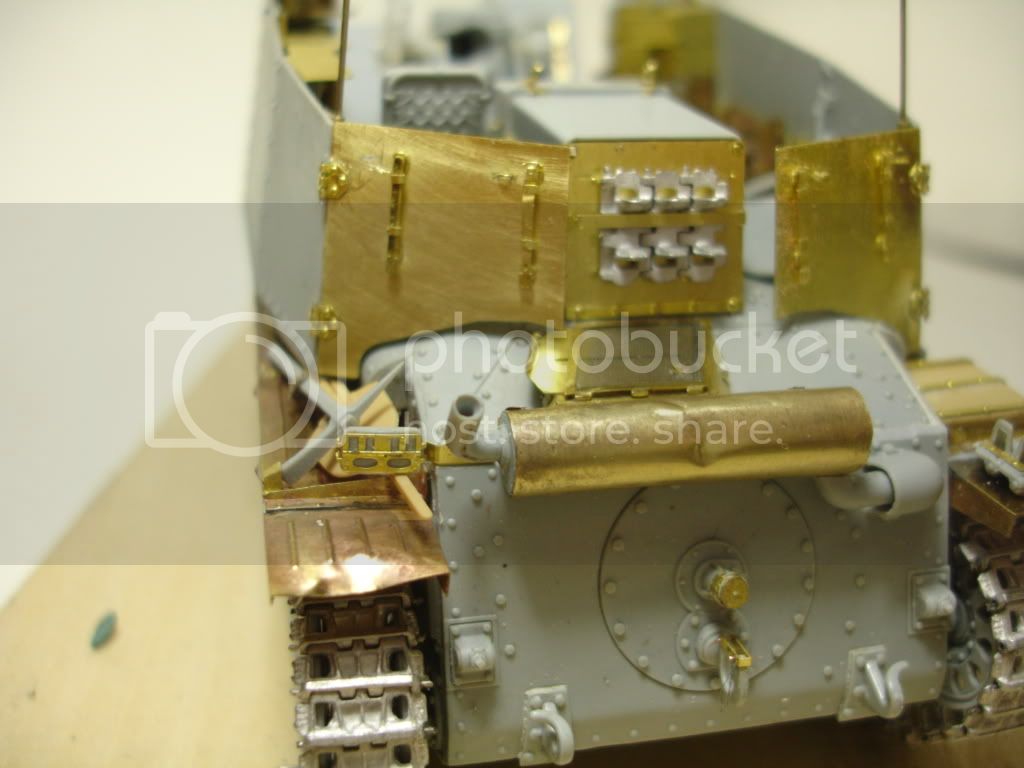
Nathan ,, mate if there was such a thing as a PE jungle i do believe i am looking at it with your seriously impressive Grille ..this is pretty close to a work of art with the PE alone ,,its damn hard to find the words for this wee little beast ..dude top marks ..can't wait to see this thing finished

I know the voices ain't real but they do come up with some great ideas
Never trust a man who left alone with a tea cozy and doesn't try it on ( Billy Connolly )
Overkill is often very understated
Joel_W
Associate Editor New York, United States
Joined: December 04, 2010
KitMaker: 11,666 posts
Armorama: 1,143 posts
Posted: Sunday, September 25, 2011 - 12:52 AM UTC
On my Workbench:
Monogram 1/24 scale 427 Shelby Cobra
Just Completed:
Beemax 1/24 scale BMW M3 E30 1992 Evolution II
Michigan, United States
Joined: October 21, 2007
KitMaker: 96 posts
Armorama: 89 posts
Posted: Sunday, September 25, 2011 - 02:35 AM UTC
Thank you!
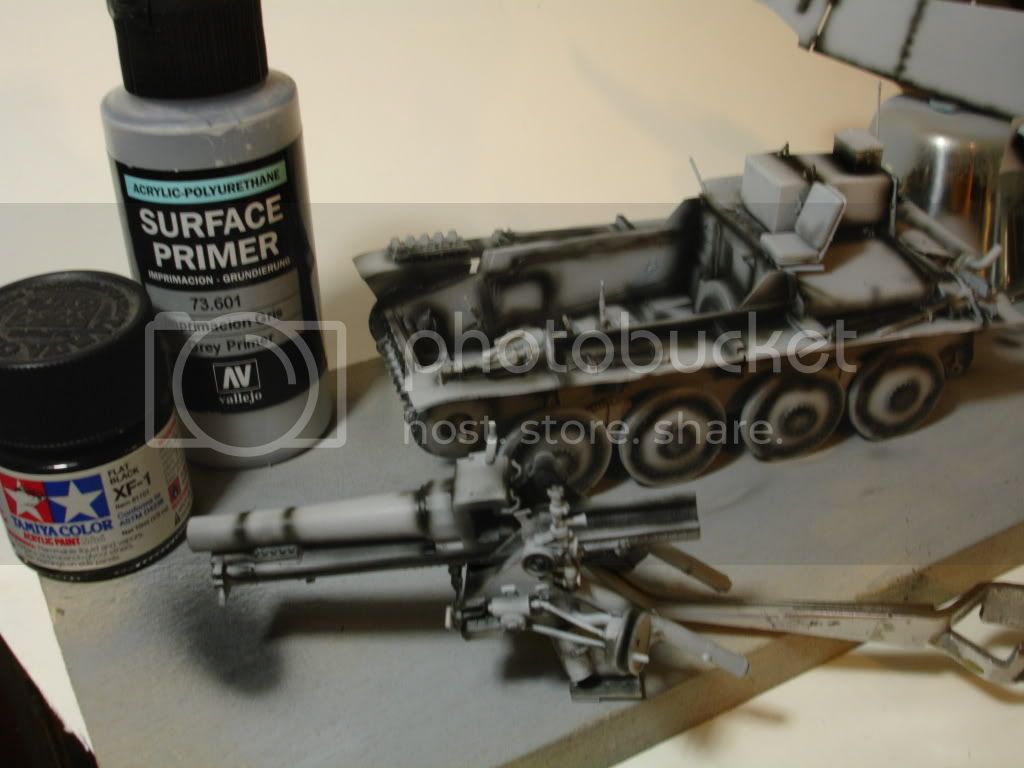
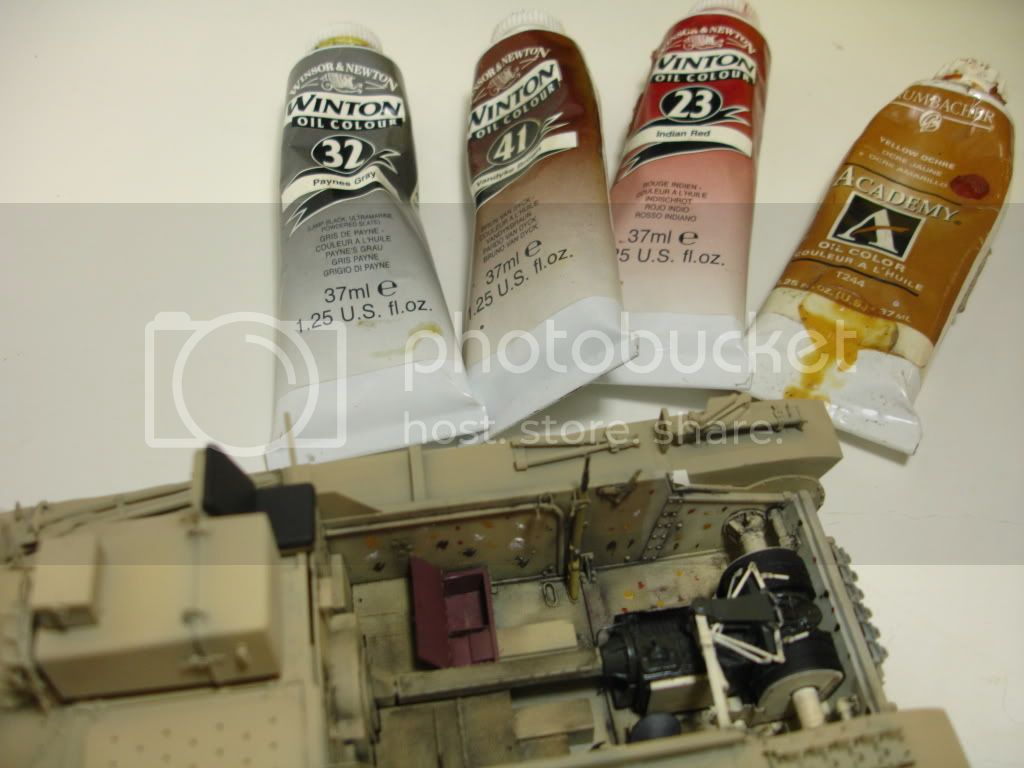
When I first realized how bad the finish was I immediately started to remove it with paint thinner and scrubbing with brushes. This wasn't exactly perfect and another modeler, SSGTOMS gave me a tip to dunk everything in a bath of brake fluid overnight, this worked really good to get primer off everything! I then washed it in soapy water. Either the thinner, or brake fluid, or combination of both affected the glue on the photo etch, and most parts came apart!! This wasn't too bad though because it allowed me to clean up better. I spent a good week making sure everything was cleaned up and put back together.
I guess that's what I get for rushing!! because I did not have a modeling primer in stock when I started I used a product that was not designed for modeling!

Wisconsin, United States
Joined: February 03, 2009
KitMaker: 367 posts
Armorama: 326 posts
Posted: Tuesday, September 27, 2011 - 06:14 AM UTC
This is simple amazing! Your work is very clean.
I have built 2 grilles ootb. I haven't really been happy with them. The 138/1 H is my favorite AFV of all time, so like a crazy person, I have 2 more in my stash with 2 upgrade kits from Griffon. I also have the Nuts and Bolts book, which while expensive is necessary.
I am thinking about getting 2 sets of Fruilmodel tracks. Are these a lot nicer to use than the magic track? I found this was the hardest part of the model. My tracks always bowed inwards when viewed from the front.
Thanks.
Michigan, United States
Joined: October 21, 2007
KitMaker: 96 posts
Armorama: 89 posts
Posted: Wednesday, September 28, 2011 - 01:23 PM UTC
Quoted Text
This is simple amazing! Your work is very clean.
I have built 2 grilles ootb. I haven't really been happy with them. The 138/1 H is my favorite AFV of all time, so like a crazy person, I have 2 more in my stash with 2 upgrade kits from Griffon. I also have the Nuts and Bolts book, which while expensive is necessary.
I am thinking about getting 2 sets of Fruilmodel tracks. Are these a lot nicer to use than the magic track? I found this was the hardest part of the model. My tracks always bowed inwards when viewed from the front. Thanks.
Yeah I starting to really love this thing! I usually like the big tanks but the Grille is growing on me, maybe not quite as much as you! LOL!
I also bought the nuts and bolts book, and by far this is one of the best reference books I have, it is worth every penny!!
I have been using Fruilmodel tracks on all my tanks the last couple years, for several reasons, they are easy to build, ease of installation onto tank, scale weight, and weathering. You just can't go wrong with them, my set required drilling out all the pin holes and just a tad of flash removal.
What camo scheme have you applied to your Grilles? I'm still in debate as to what I'm going to go with.
Michigan, United States
Joined: October 21, 2007
KitMaker: 96 posts
Armorama: 89 posts
Posted: Sunday, October 09, 2011 - 07:29 AM UTC
Wisconsin, United States
Joined: February 03, 2009
KitMaker: 367 posts
Armorama: 326 posts
Posted: Sunday, October 09, 2011 - 08:10 AM UTC
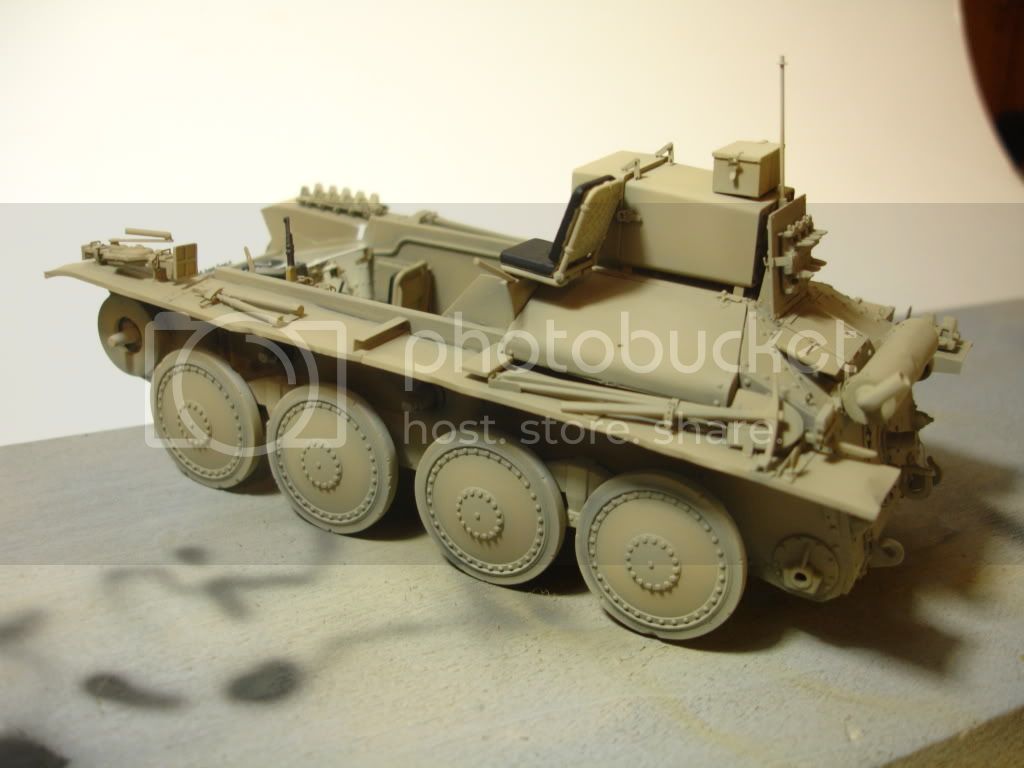
Holy S***!!!
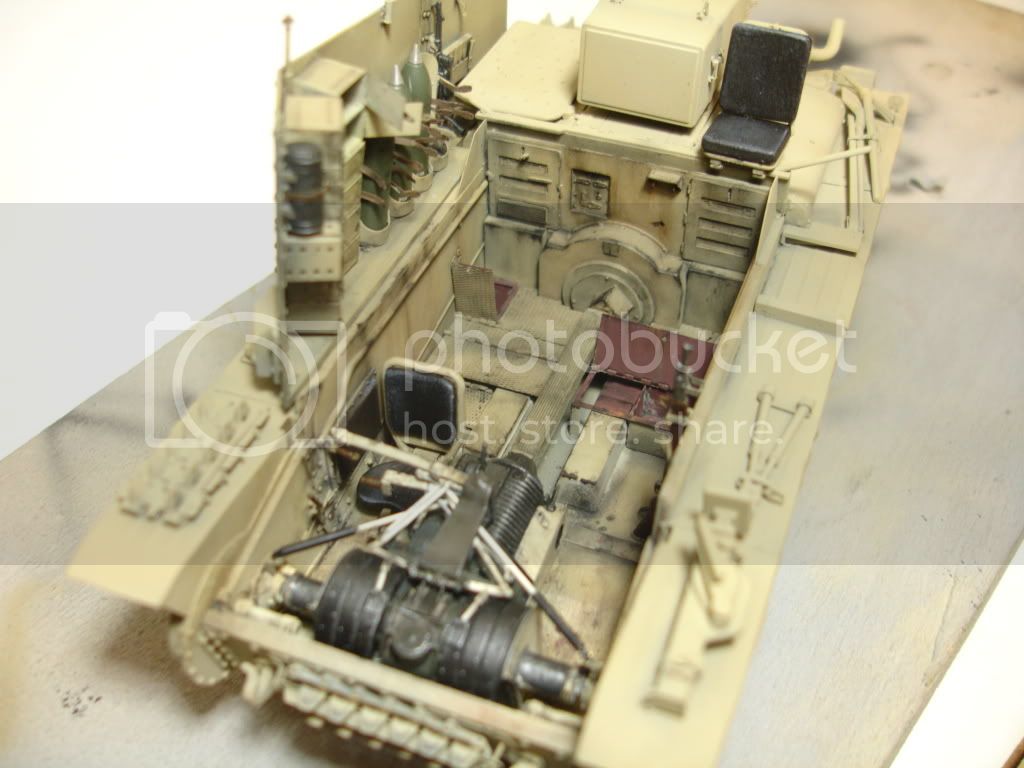
That is some amazing work! You are going to school full time and working! I am happy to see other younger guys modelling. The weathering is very tasteful. I like that the inside doesn't look like a speckeled egg. I feel that is how most do their chipping on a open top AFV.
Very very very very very nice work!
.....tears of joy.