Hosted by Darren Baker
Carentan, June 12th, 1944
Curtisl21

Joined: July 09, 2011
KitMaker: 51 posts
Armorama: 49 posts

Posted: Wednesday, September 21, 2011 - 04:45 AM UTC
nice cant wait to see you get painting
bizzychicken

Joined: September 06, 2008
KitMaker: 967 posts
Armorama: 842 posts

Posted: Thursday, September 22, 2011 - 01:27 AM UTC
Brandi, WOW wahat a great start to what looks like a Epic Dio keep it up, will be staying tuned. 

ophelia53

Joined: March 10, 2010
KitMaker: 254 posts
Armorama: 226 posts

Posted: Thursday, September 22, 2011 - 02:49 AM UTC
Geraint: thanks a lot!!! This is my first real dio with all the trimmings, and I'm excited. I think it might take me quite some time to build, haha. Thanks for watching!!
Curtis: I know! I'm nervous and excited. The good news is, I think I finally figured out the problem of my airbrush fitting to my compressor: I needed an adapter, and I've ordered it...maybe it will get here today and I can start practicing with it!
Nico: Did you mean the plank thickness or the thickness of the floor/ceiling itself? The planks are balsa, 3/16" by 1/8th, I believe...
Thanks all for looking at my build. I hope I can teach some of the newer modelers myself some tricks as I make some mistakes myself.

Curtisl21

Joined: July 09, 2011
KitMaker: 51 posts
Armorama: 49 posts

Posted: Thursday, September 22, 2011 - 08:37 AM UTC
cool what airbrush do you have
ophelia53

Joined: March 10, 2010
KitMaker: 254 posts
Armorama: 226 posts

Posted: Friday, September 23, 2011 - 03:22 PM UTC
Curtis, since you asked, I took some photos of the airbrush for you.
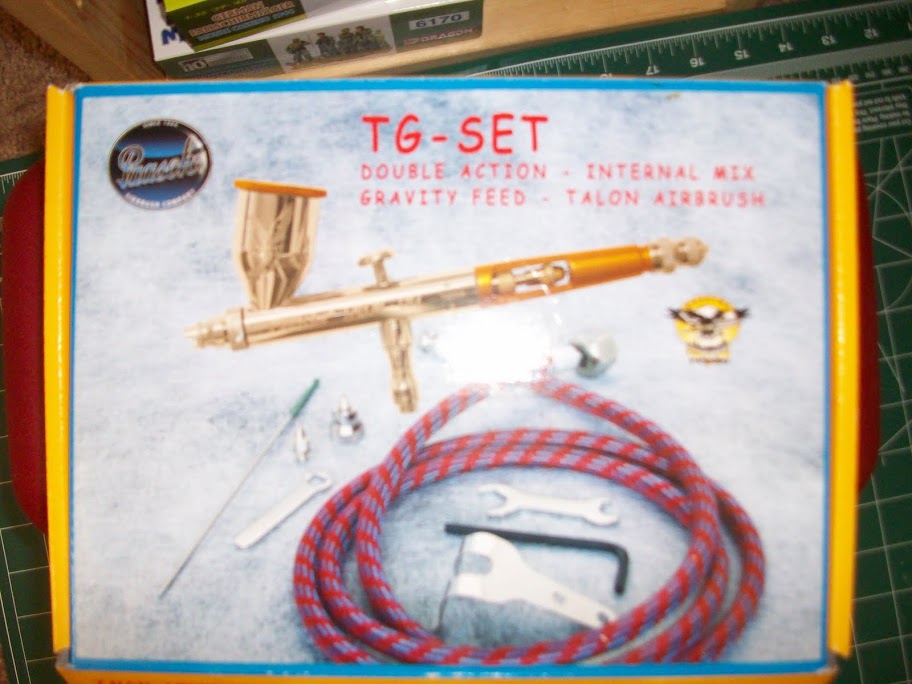
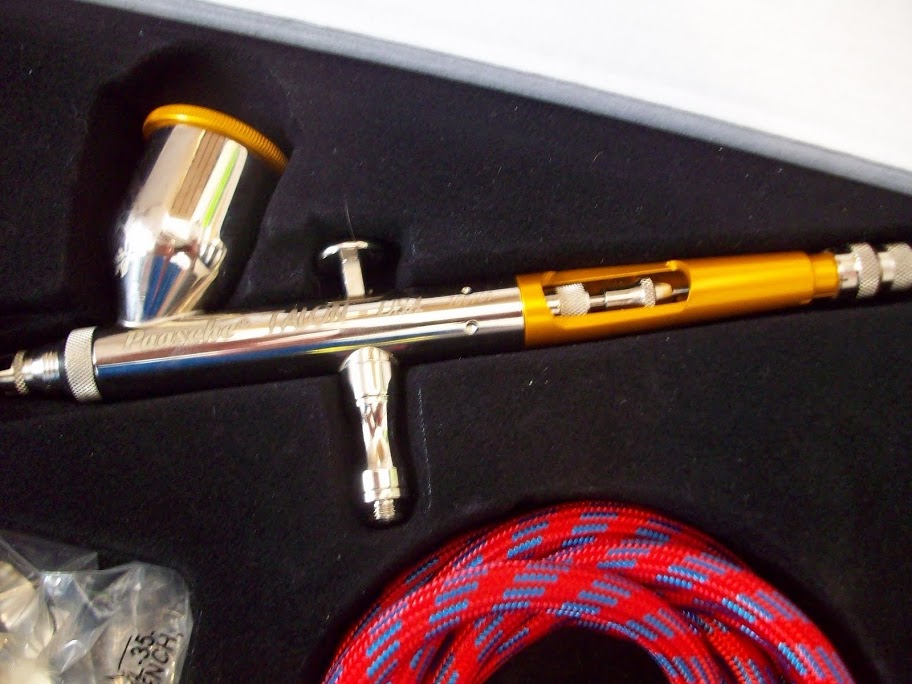
It's a dual action, gravity feed, internal mix airbrush I got off Ebay about a year ago for a good deal. There are similar ones now that are a bit better for around the same price I paid. I'll let you know how awesome it is when I use it once I get my adapter.
On with the update!
The last few days have been focused on getting the foam mockups done with some figures kind of together in their basic poses to get a feel for the scene. I'm still going to need to get my hands on some more US paratroopers as now I have an influx of Germans but there will be more US guys than German guys in this scene.
Here's the figure I have throwing the grenade into the first story of the Cafe, where there will be an MG set up. He's a Tamiya basic US Infantry guy that I'm going to paint up into a paratrooper. The detailing on this figure is not nearly as good as the other figs in the scene so far, but his pose is awesome!
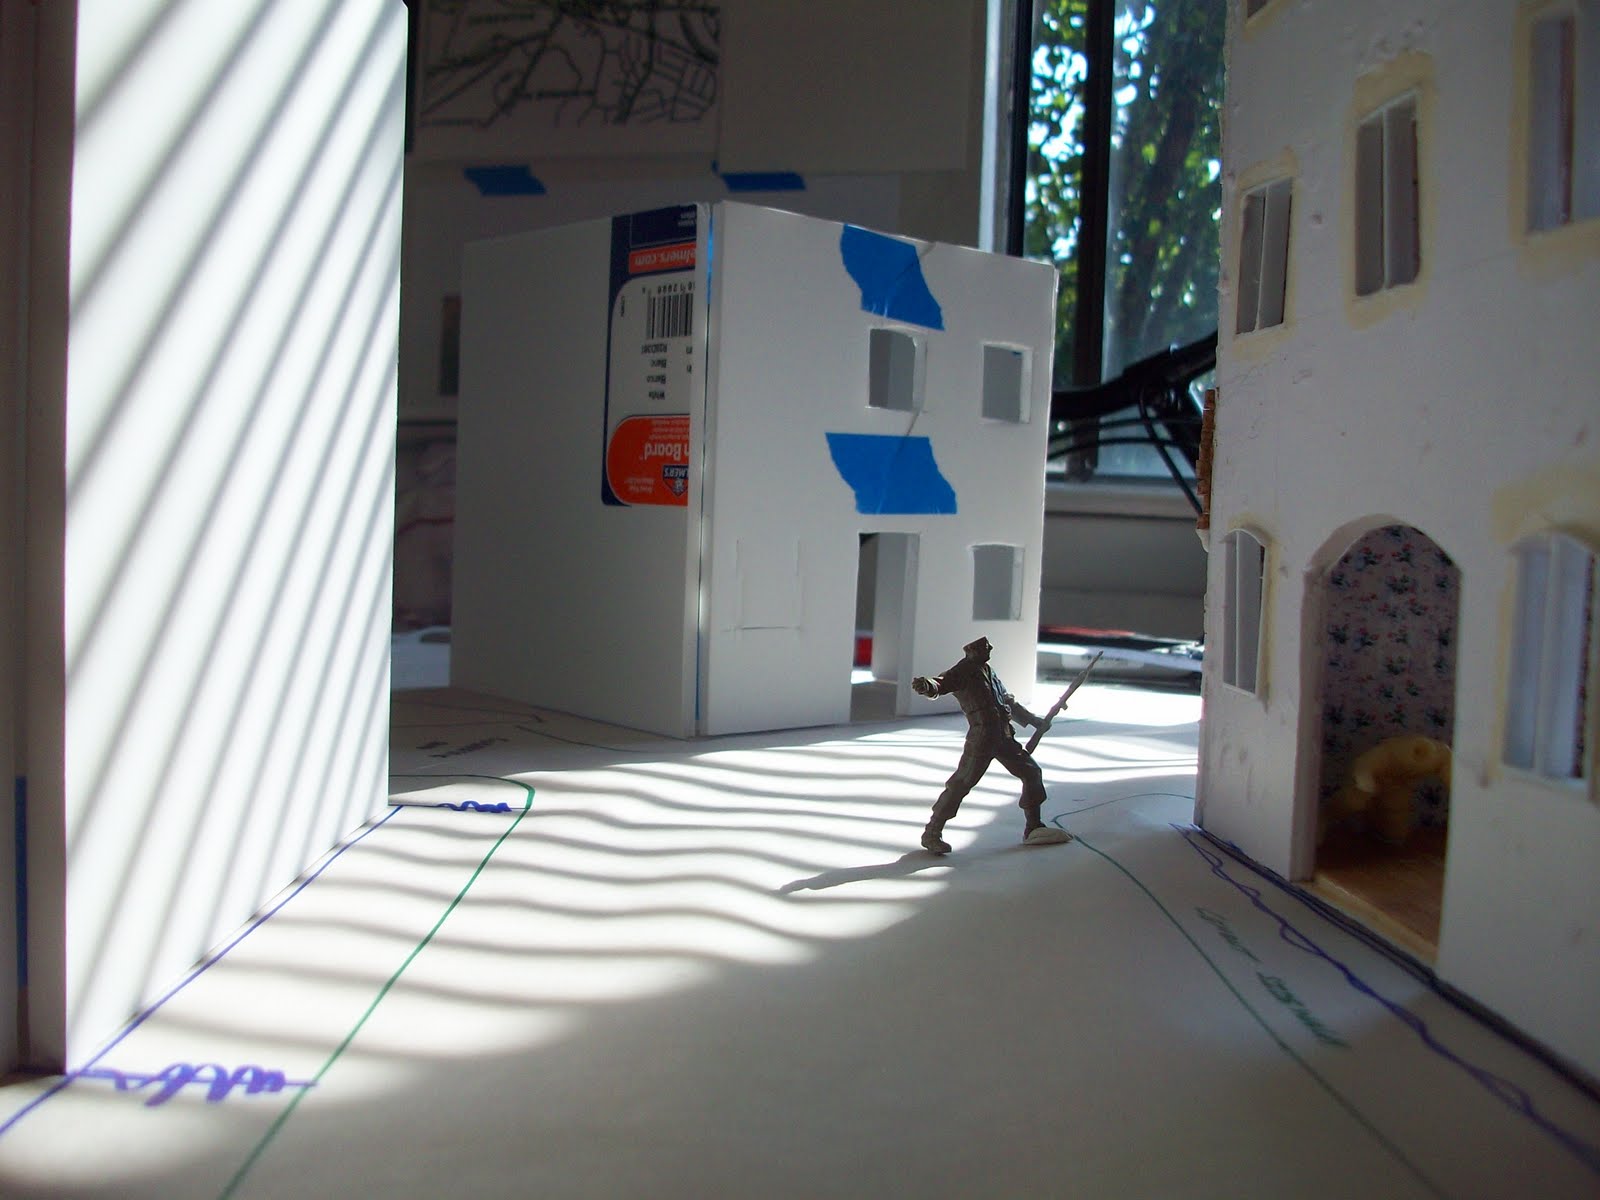
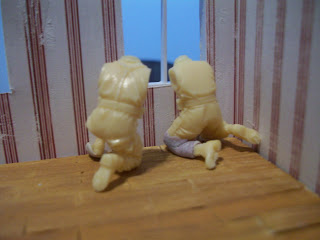
Here's the German para with the US para throwing the grenade. The white fig is German and he's going to be trying to miss the grenade by doing a diving maneuver.
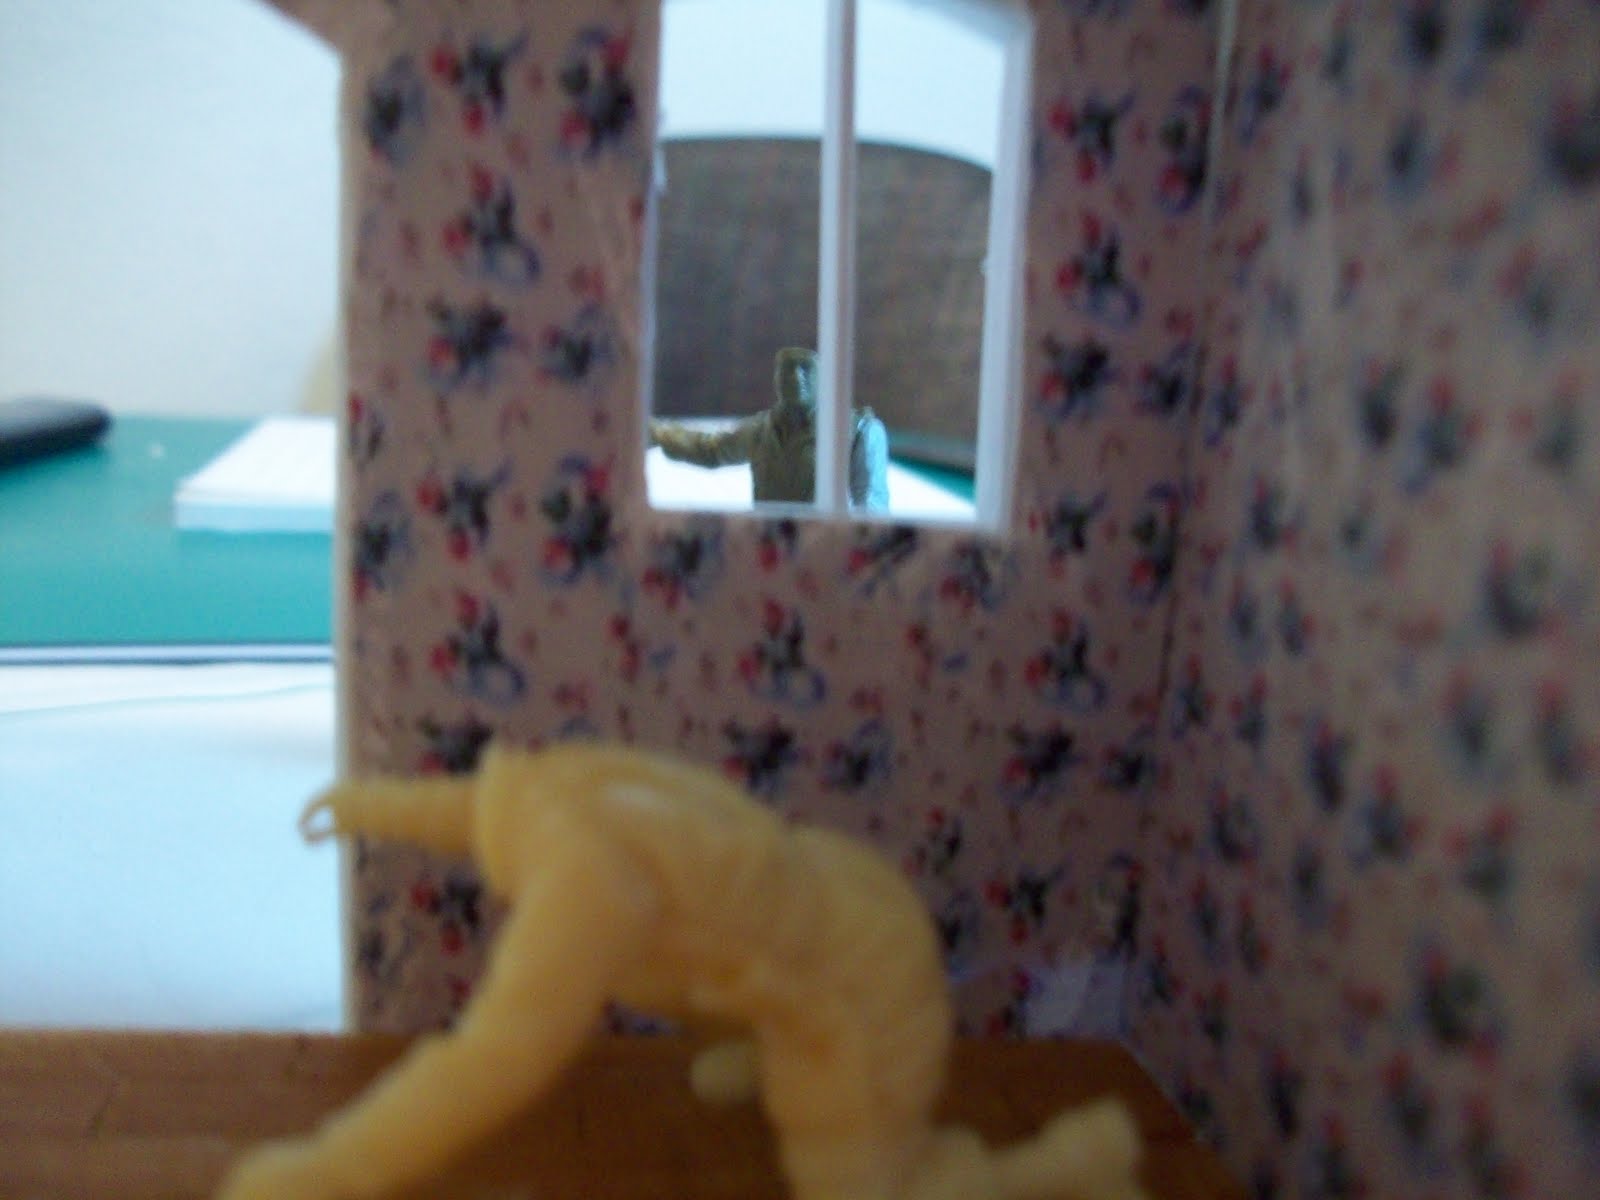
MG gunners on the top story of the Cafe will be set up here.
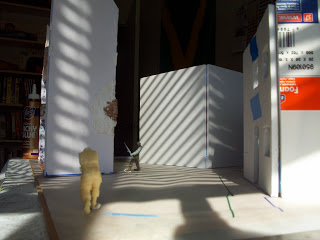
Here's a different view...This is a side view and between the two buildings on the right will be the access road E company comes running in on. The building on the left is the Cafe with the grenade thrower and the white fig is a German para running. I'm thinking I may not include him, but I like his pose and he could add a sense of urgency to the scene, if done correctly. There would be a low wall to the right of him, if I include him.
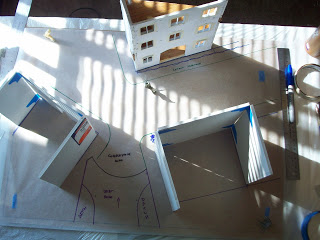
Here's a birds-eye on the plan set up with the 3 buildings standing so I could get a sense of movement throughout the scene.
The start of the second building, which will quickly turn into a mostly destroyed house.
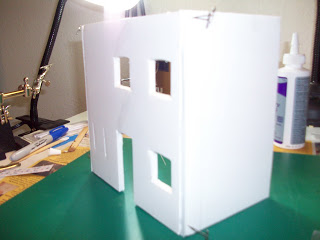
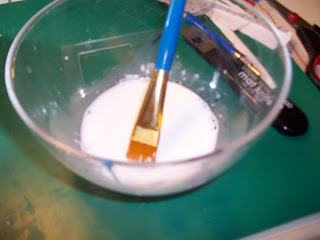
Here we have the greatest trick for foamcore: white glue mixed with water and painted on the foamcore so it will be resistant to moisture and take better to gluing of different types of materials. I didn't know this trick while building the Cafe, and I added it a little too late, so I have some fixing of the cafe to do now.
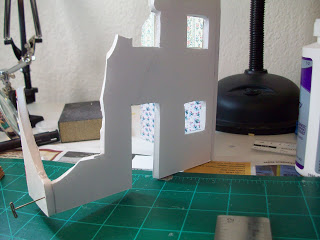
Here's the same building, now destroyed!
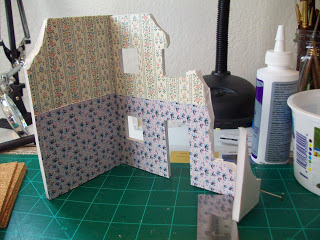
I added the wallpaper before I destroyed it, and that was a great move on my part. It sure was easier doing it this way.
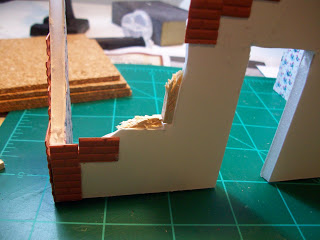
Here's some Plastruct G scale brick sheet I bought. The only reason I went this route instead of scratchbuilding the bricks is, I could foresee the problems of having the brick look like it was under a layer of plaster. This seemed like a better and easier option, so I wouldn't have to do the entire building in cork bricks cut out by hand (that would take forever!) and it is thing enough to allow the gesso not have to be added in goops of layers.

Here's the brick sheet cut and glued on, I'm now waiting for the glue to dry so I can the bricks down and start adding air clay to give a sense of plaster and brick mixed in. I will use cork bricks for the busted sides of the building, due to depth and stability and realism. This photo also shows the pieces of the busted window frame, made from balsa wood. That was fun to make!
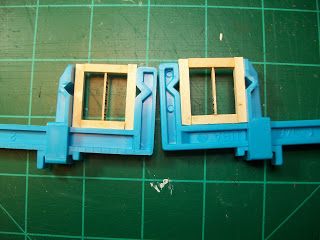
Here's the two right side windows, and I got to use my new 2 dollar clamps I got today! They actually worked *perfectly* and I'm glad I got them. I went with wood for these windows just to change it up and I also want to get a feel for all the different materials so I'll know which ones I like best for future projects.
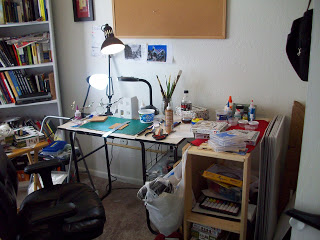
And now for some fun photos: Here's some photos of my "craft room", the second bedroom in our apartment, small, and I got stuck with all the extra crap there's nowhere else to put. And yes, there's a mountain bike in there as well. My cat uses it to climb up to the window sill. Silly cat.
This is the building/painting station. It's an old not-very-stable-but-sort-of-nice drafting desk I got for free last semester. I keep all my paints on the right with different glues, and have as much light as possible set up.
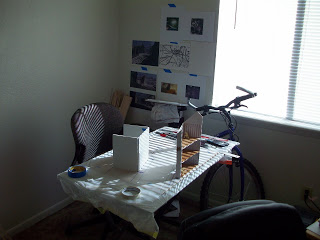
The dio is built here, when the pieces get done. It's literally right behind me from the painting desk.
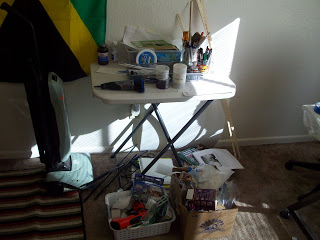
This is a crappy table I also got for free that's to the left of the dio desk. I keep extra crap on it, and also, on the floor, as you can see. And the vacuum cleaner lives near it as well.
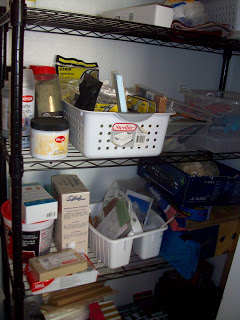
Inside the narrow tiny closet is the shelving with more modelling stuff than I'll ever know what to do with, but need just in case. You know how it is!
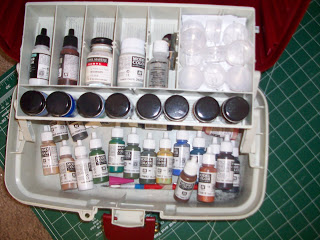
My hobby paints for figs and armor. I use Vallejo acrylics and Model Master enamels.
Thanks everyone for your comments and continued interest in my first real dio! I'm excited and learning a ton from you all.
It's a dual action, gravity feed, internal mix airbrush I got off Ebay about a year ago for a good deal. There are similar ones now that are a bit better for around the same price I paid. I'll let you know how awesome it is when I use it once I get my adapter.
On with the update!
The last few days have been focused on getting the foam mockups done with some figures kind of together in their basic poses to get a feel for the scene. I'm still going to need to get my hands on some more US paratroopers as now I have an influx of Germans but there will be more US guys than German guys in this scene.
Here's the figure I have throwing the grenade into the first story of the Cafe, where there will be an MG set up. He's a Tamiya basic US Infantry guy that I'm going to paint up into a paratrooper. The detailing on this figure is not nearly as good as the other figs in the scene so far, but his pose is awesome!
Here's the German para with the US para throwing the grenade. The white fig is German and he's going to be trying to miss the grenade by doing a diving maneuver.
MG gunners on the top story of the Cafe will be set up here.
Here's a different view...This is a side view and between the two buildings on the right will be the access road E company comes running in on. The building on the left is the Cafe with the grenade thrower and the white fig is a German para running. I'm thinking I may not include him, but I like his pose and he could add a sense of urgency to the scene, if done correctly. There would be a low wall to the right of him, if I include him.
Here's a birds-eye on the plan set up with the 3 buildings standing so I could get a sense of movement throughout the scene.
The start of the second building, which will quickly turn into a mostly destroyed house.
Here we have the greatest trick for foamcore: white glue mixed with water and painted on the foamcore so it will be resistant to moisture and take better to gluing of different types of materials. I didn't know this trick while building the Cafe, and I added it a little too late, so I have some fixing of the cafe to do now.

Here's the same building, now destroyed!
I added the wallpaper before I destroyed it, and that was a great move on my part. It sure was easier doing it this way.
Here's some Plastruct G scale brick sheet I bought. The only reason I went this route instead of scratchbuilding the bricks is, I could foresee the problems of having the brick look like it was under a layer of plaster. This seemed like a better and easier option, so I wouldn't have to do the entire building in cork bricks cut out by hand (that would take forever!) and it is thing enough to allow the gesso not have to be added in goops of layers.
Here's the brick sheet cut and glued on, I'm now waiting for the glue to dry so I can the bricks down and start adding air clay to give a sense of plaster and brick mixed in. I will use cork bricks for the busted sides of the building, due to depth and stability and realism. This photo also shows the pieces of the busted window frame, made from balsa wood. That was fun to make!
Here's the two right side windows, and I got to use my new 2 dollar clamps I got today! They actually worked *perfectly* and I'm glad I got them. I went with wood for these windows just to change it up and I also want to get a feel for all the different materials so I'll know which ones I like best for future projects.
And now for some fun photos: Here's some photos of my "craft room", the second bedroom in our apartment, small, and I got stuck with all the extra crap there's nowhere else to put. And yes, there's a mountain bike in there as well. My cat uses it to climb up to the window sill. Silly cat.
This is the building/painting station. It's an old not-very-stable-but-sort-of-nice drafting desk I got for free last semester. I keep all my paints on the right with different glues, and have as much light as possible set up.
The dio is built here, when the pieces get done. It's literally right behind me from the painting desk.
This is a crappy table I also got for free that's to the left of the dio desk. I keep extra crap on it, and also, on the floor, as you can see. And the vacuum cleaner lives near it as well.
Inside the narrow tiny closet is the shelving with more modelling stuff than I'll ever know what to do with, but need just in case. You know how it is!
My hobby paints for figs and armor. I use Vallejo acrylics and Model Master enamels.
Thanks everyone for your comments and continued interest in my first real dio! I'm excited and learning a ton from you all.


WARDUKWNZ

Joined: June 01, 2011
KitMaker: 1,716 posts
Armorama: 1,638 posts

Posted: Friday, September 23, 2011 - 05:28 PM UTC
Well surprise surprise ,,here i am thinking that your new to this modeling thingy and you slip this in and its only now i've seen it  .. oh i am lovin it ..awsome deal on the Hobby fan Pak40 ,,great model tho a little annoying in places ..thats resin for you ..one thing with your figures ,,the Tamiya figures you have not good ..saying they are old is a understatement ..those guys have been around not long after i was born ..when you put them with your others they will look really out of place ..the weapon sets are ok but trust me once you get your hands on the good stuff it will blow your mind
  the buildings are starting to look really cool ..wallpaper is sweet .since your watching my dio to be fare i'll be watching yours too
  this is gonna be very cool .
Phill
 .. oh i am lovin it ..awsome deal on the Hobby fan Pak40 ,,great model tho a little annoying in places ..thats resin for you ..one thing with your figures ,,the Tamiya figures you have not good ..saying they are old is a understatement ..those guys have been around not long after i was born ..when you put them with your others they will look really out of place ..the weapon sets are ok but trust me once you get your hands on the good stuff it will blow your mind
  the buildings are starting to look really cool ..wallpaper is sweet .since your watching my dio to be fare i'll be watching yours too
  this is gonna be very cool .
Phill

Curtisl21

Joined: July 09, 2011
KitMaker: 51 posts
Armorama: 49 posts

Posted: Friday, September 23, 2011 - 11:41 PM UTC
Very cool this dio will look awesome when finished I am stuck on my project at the moment as I don't know what paints to use on the buildings what paints are you using for your buildings ?. I also had problems with attaching the airbrush to he compressor especially when they are new to you. It also took abit for me to get the thinner ratios right I am really interested in how this project will turn out good luck
ophelia53

Joined: March 10, 2010
KitMaker: 254 posts
Armorama: 226 posts

Posted: Saturday, September 24, 2011 - 03:13 AM UTC
Phil: unfortunately, I think you're right. Is Tamiya known for their armor, or are their newer kits better? I've found that you definitely get what you pay for with figures and armor. That makes me sad, because this guy's pose is amazing. Any ideas for some dead paratroopers, or good kits that have a guy chucking a grenade that could be sort of similar to the one I modded?
And don't be fooled. I AM new to this. I've messed around building simple things like cars and some guys, but I've never modded figures, built full buildings to look like the real thing, or really gotten my hands dirty with the frustrations of the immense amount of problem solving modelling requires. But the end results are awesome! It feels so good to have some people watching my little build log, hehe. Thanks so much for your support!!
Curtis: You know, I am going to stick with the colors I see in the renderings and the BoB episode...a slate green and blue, some tans, white window frames, brown shutters probably on the Cafe and a reddish brown color for the building next to it...I still am trying to figure out how to get the gesso on and when to do it...I think I'm gonna give the resin windows a shot again. Cutting the plastic pieces out is terribly annoying. If there's one part of a building I hate scratch building, it's these freakin' windows!
Does anyone know if the resin will melt Plastruct? Just curious.
I'll be back later with a small update. I started weathering the wallpaper of the destroyed house with my new MIG pigments and it looks quite awesome!!!!
Thanks again guys!!!
Easy_Co

Joined: September 11, 2002
KitMaker: 1,933 posts
Armorama: 985 posts

Posted: Saturday, September 24, 2011 - 05:11 AM UTC
Hi brandi like the build so far,reyour question about Tamyia Armor,they are proberbly the best engineered and easy to build kits you can get pour the glue in the box give it a shake and out pops a kit,seriously for a first armour build you wont go far wrong with Tamyia I would steer clear of Dragon till you get a few builds behind you many many parts poor instructions but well moulded.re the trooper lobbing a grenade I believe Dragon do a set with a para lying down throwing a grenade,good figures too. 

VLADPANZER

Joined: December 20, 2010
KitMaker: 568 posts
Armorama: 549 posts

Posted: Saturday, September 24, 2011 - 06:42 AM UTC
Liking this one, a great undertaking!!!


ophelia53

Joined: March 10, 2010
KitMaker: 254 posts
Armorama: 226 posts

Posted: Saturday, September 24, 2011 - 08:46 AM UTC
John, thanks for the suggestion. I will get some Tamiya armor kits and give them a go before getting into the Dragon kits I have. They are so pretty! 
Vlad, thank you!!! Glad to have you along!

Vlad, thank you!!! Glad to have you along!

WARDUKWNZ

Joined: June 01, 2011
KitMaker: 1,716 posts
Armorama: 1,638 posts

Posted: Saturday, September 24, 2011 - 12:23 PM UTC
Allo  ... Ya its a shame about those old figures ,,but John i bang on the money with what he says ... Dragon do a set and it is a good one to ,, heres some sets for you to take a look at ,,think you'll like these ..
1/35 Fallschirmjager Batalion 500, Drvar 1944 , 6145
1/35 Winter Grenadiers Wiking Division Eastern Front 1943-45,, 6372
this set is from Tamyia ..this has the exact guy your looking for i think ..
1/35 German Front-Line Infantry Men ,, 35196
Now this set is not cheap but man does it come with a heap of stuff ,,and i mean alot
Heres a list of whats in this one set ..
Tamiya 1/35 WWII German Army Soldiers Special Collection No.1 # 89780
Set includes
35030 German Assault Troops,
35047 German 75mm Anti-Tank Gun
35184 German Machine Gun Crew,
35188 German Tank Ammo-Loading Crew,
35196 German Front Line Infantrymen,
35212 German Soldiers at Field Briefing
35220 Kubelwagen Engine Maintenance Set
35240 German Soldiers with Bicycles
35241 German Motorcycle Orderly Set
35256 German Assault Infantry with Winter Gear
ICM German Tank Crew (1943-45)
ICM Operation Barbarossa June 22nd 1941
That would keep ya going for a week or two lol
At Luckymodel this set is .. $58,99 US ..thats a damn good deal ..oh dont forget postage to .
Theres a lot of pretty late issue figures in this set and they are many times better than that old set you got and they are a pleasure to work with too .
As for the armour ..Tamiya is a prefect place to start ..when you been at it awhile you can start building things like this
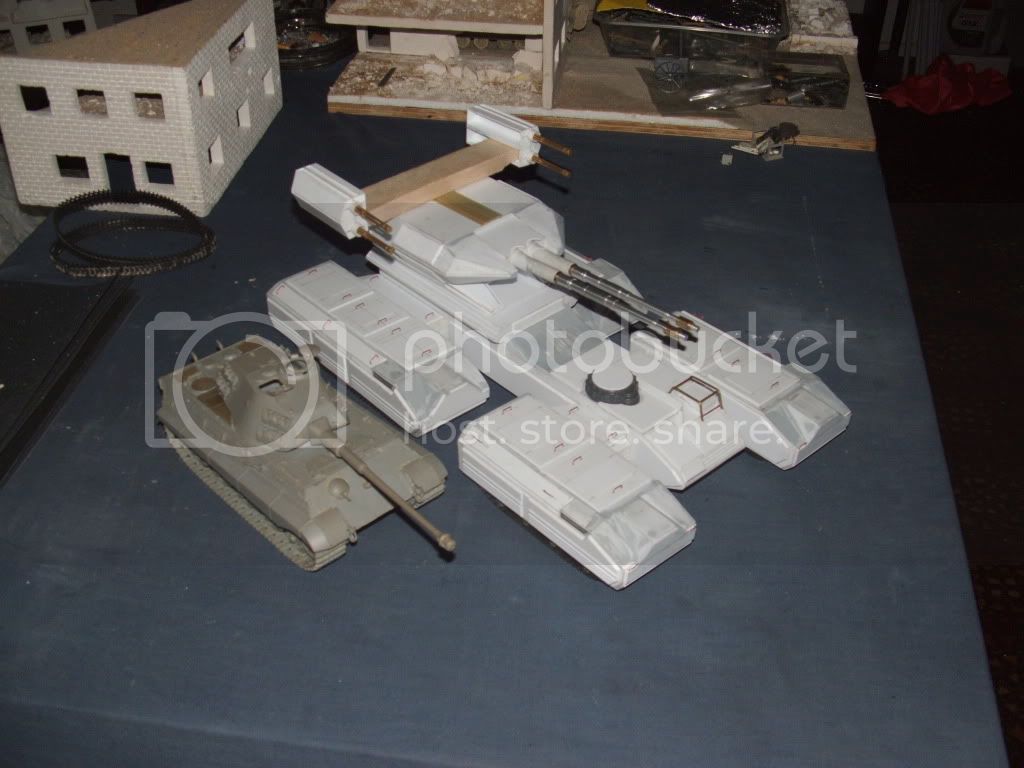
Oh by the way ..it is 1/35 scale

PS .. Your very welcome ,,you'll get all the support you need
 ... Ya its a shame about those old figures ,,but John i bang on the money with what he says ... Dragon do a set and it is a good one to ,, heres some sets for you to take a look at ,,think you'll like these ..
 1/35 Fallschirmjager Batalion 500, Drvar 1944 , 6145
1/35 Winter Grenadiers Wiking Division Eastern Front 1943-45,, 6372
this set is from Tamyia ..this has the exact guy your looking for i think ..
1/35 German Front-Line Infantry Men ,, 35196
Now this set is not cheap but man does it come with a heap of stuff ,,and i mean alot

Heres a list of whats in this one set ..
Tamiya 1/35 WWII German Army Soldiers Special Collection No.1 # 89780
Set includes
35030 German Assault Troops,
35047 German 75mm Anti-Tank Gun
35184 German Machine Gun Crew,
35188 German Tank Ammo-Loading Crew,
35196 German Front Line Infantrymen,
35212 German Soldiers at Field Briefing
35220 Kubelwagen Engine Maintenance Set
35240 German Soldiers with Bicycles
35241 German Motorcycle Orderly Set
35256 German Assault Infantry with Winter Gear
ICM German Tank Crew (1943-45)
ICM Operation Barbarossa June 22nd 1941
That would keep ya going for a week or two lol
At Luckymodel this set is .. $58,99 US ..thats a damn good deal ..oh dont forget postage to .
Theres a lot of pretty late issue figures in this set and they are many times better than that old set you got and they are a pleasure to work with too .
As for the armour ..Tamiya is a prefect place to start ..when you been at it awhile you can start building things like this


Oh by the way ..it is 1/35 scale


PS .. Your very welcome ,,you'll get all the support you need

dioman13

Joined: August 19, 2007
KitMaker: 2,184 posts
Armorama: 1,468 posts

Posted: Saturday, September 24, 2011 - 01:48 PM UTC
Hey Brandi, Dragon does one set of U.S. paras, kit # 6010, four figure set. Old set but not too bad as far as figures go. Maybe swap heads with some Hornet ones and they will stand up O.K. The old Italeri set is terrible, I would stay away from them. Verlindin has a few sets that are available through Scalehobbyist mail order. There are a set of extras, that build up into three troopers. I think they sell for about $16 plus shipping. So if you can afford a few sets you'll save on the cost of shipping. Kit bashing the figures will give you more posses to work with. Of course the resin set s are more expensive but there seems to be a lack of U.S. paras around, at least I haven't found much. Am still looking for my R/R campaign diorama and would like to add more figures to it. So far your build is coming out pretty nice. Plastuct is a good place to find build materials. I am using their tile roof section for a dio I have been building, normally I scratch build most building stuff, but it looked real good and a short cut is good now and then. Looking forward to whatching this come together.
ophelia53

Joined: March 10, 2010
KitMaker: 254 posts
Armorama: 226 posts

Posted: Saturday, September 24, 2011 - 02:05 PM UTC
Phil, holy crap, man!!!! Thanks a ton!!! And also...I, someday, will be able to put a tank together and have it look as awesome as yours. Too bad you live so far away, I'd love to have a mentor that could show me what the hell I'm supposed to be doing, ha! As far as all the German kits go, I'm actually all set with them. There are definitely way more German paras available than US ones. It's the US guys I'm having to track down. I did some searching today and did come up with a few.
Bob, thanks for the notice on the Italeri set. I was considering picking it up, but I'm glad now that I can save my money and put it elsewhere. I'll be picking up a few of the dragon airborne as well as the 2nd armored division, there's some nice poses in that kit. I do have some nice heads to swap with, that's the beauty of ordering too many kits!! (no such thing as too many, though, huh? hehe)
I'm going to make some good progress on the figures I have tomorrow. I got my other US paras in the mail, so I'm going to mod and hopefully start putting on some paint tomorrow. Thanks again for all the advice and the help!!!

WARDUKWNZ

Joined: June 01, 2011
KitMaker: 1,716 posts
Armorama: 1,638 posts

Posted: Saturday, September 24, 2011 - 03:01 PM UTC
OH you wanted US paras lol ,,(message to self ,,read the post next time numnuts ) ..ok lets see what i can find ,,you might have already found these but lets see ..
Oh one trick of the trade is buying mutable packs of the same kits and modify them for what you want to do ..you will be very surprised as to what to you do ,,works for me lol
ok check these guys out ...the links any way lol
http://www.hobbyeasy.com/en/data/32475.html
http://www.hobbyeasy.com/en/data/27615.html
http://www.hobbyeasy.com/en/data/24299.html
this is a good one .
http://www.hobbyeasy.com/en/data/18941.html
http://www.hobbyeasy.com/en/data/18941.html
http://www.hobbyeasy.com/en/data/22991.html
Now remember even tho many are not paras then can be turned into paras ..its all part of modelling ..getting what you want when you can't get what you want lol ya that make sense
Oh by the way ,, you have the skill to bang a tank together now ..your better than you think you are ..hell all of us can see that
Oh one trick of the trade is buying mutable packs of the same kits and modify them for what you want to do ..you will be very surprised as to what to you do ,,works for me lol
ok check these guys out ...the links any way lol
http://www.hobbyeasy.com/en/data/32475.html
http://www.hobbyeasy.com/en/data/27615.html
http://www.hobbyeasy.com/en/data/24299.html
this is a good one .
http://www.hobbyeasy.com/en/data/18941.html
http://www.hobbyeasy.com/en/data/18941.html
http://www.hobbyeasy.com/en/data/22991.html
Now remember even tho many are not paras then can be turned into paras ..its all part of modelling ..getting what you want when you can't get what you want lol ya that make sense

Oh by the way ,, you have the skill to bang a tank together now ..your better than you think you are ..hell all of us can see that

ophelia53

Joined: March 10, 2010
KitMaker: 254 posts
Armorama: 226 posts

Posted: Sunday, September 25, 2011 - 02:21 AM UTC
Hey Phil,
Thanks for all the kits! A few I do have already (Dragon is so freaking amazing)
And I'm getting my hands on the Nemrod Para kit this weekend. I also have a MasterBox kit waiting for me at my mom's place, which I'll start on today as well.
Some of the kits I didn't think to check on, and they'll work beautifully! Thanks again
I've never painted a military figure before, not REALLY painted it, but I have Shep Paine's "How to Build Dios" book and it's got a lot of info on it. I've scouted these forums for tips and I'm scared and excited to start the painting!
Here's that small update I promised, since I'll be back later with some photos on the figures:
I broke out the MIG pigments the other night and started weathering the wallpaper of the destroyed building. The idea is, it's obviously been hit pretty hard with some major artillery (I realized the next day that I'd need to rip and tear the wallpaper, it wouldn't survive a bashing like the one I supposedly took, so I am working on that now and will post the updated weathering when it's more complete):
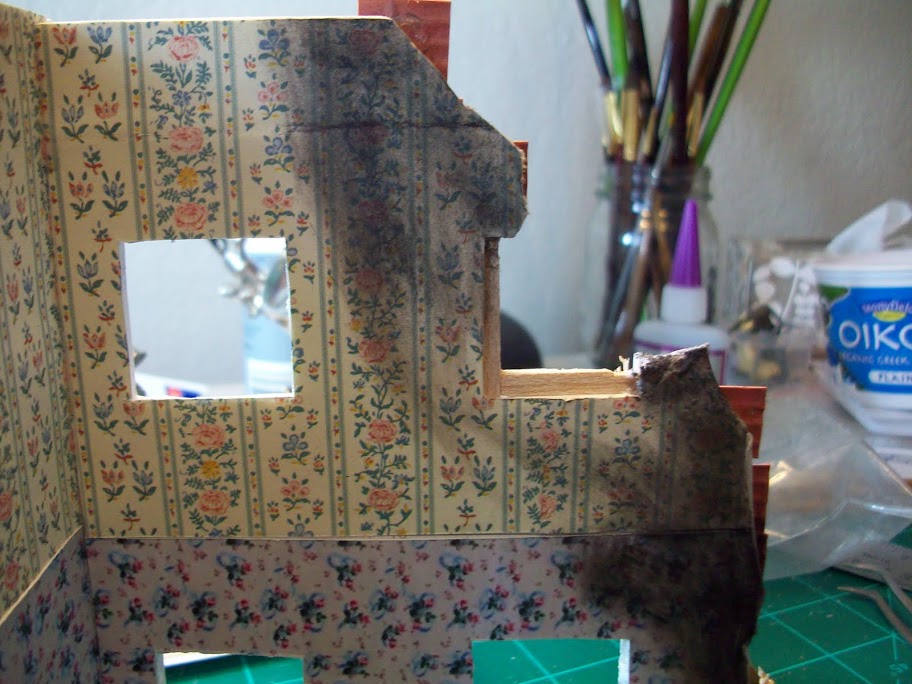
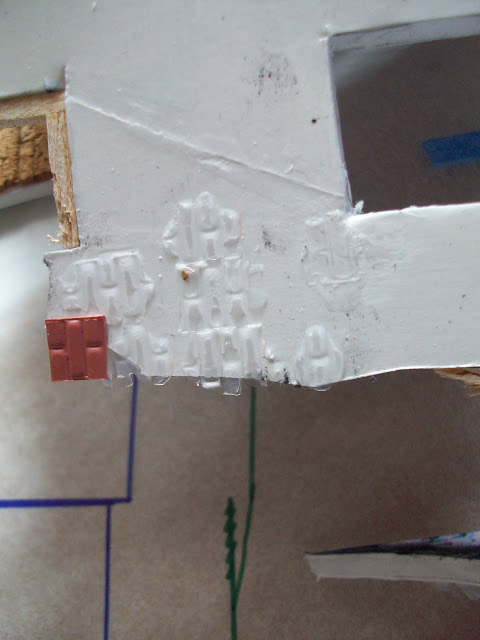
Here's a photo of something that I found interesting, through accident. I was gluing down those pieces of the red plastruct brick and when I went to go cut the edges down, they popped off, leaving the glue behind. But the glue is actually the exact brick imprint I need. Pretty sweet! So I have learned a nice trick by accident. I'm sure this will happen a lot.
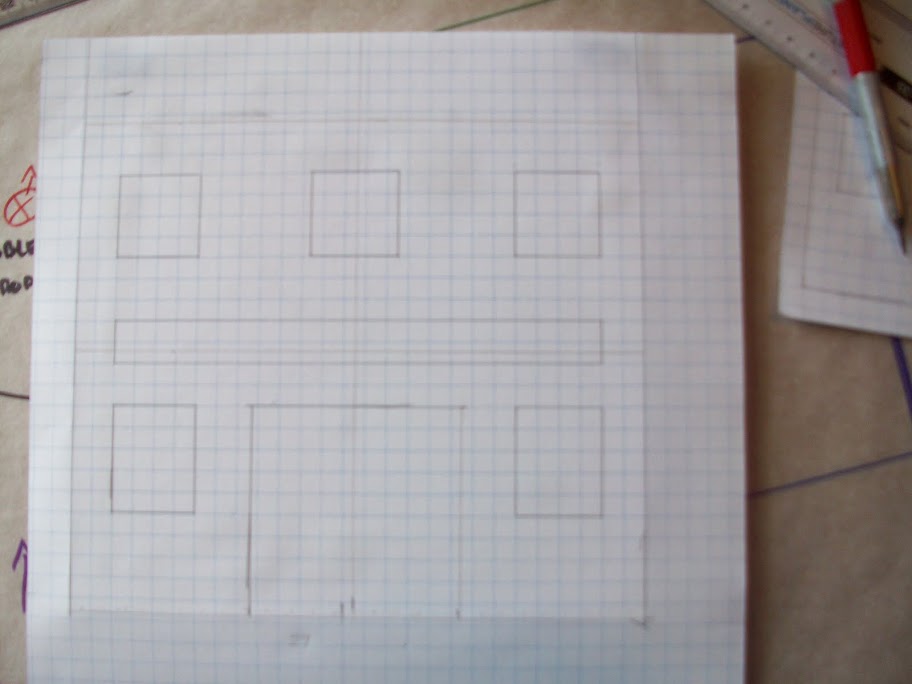
And here's the last full building drawn out on grid paper. This will be a furniture shop, I think. That seems more fun than a clothing store or pharmacy or general goods and will allow me practice on building some furniture:
I shall return with painted figures. Thanks for watching!
Thanks for all the kits! A few I do have already (Dragon is so freaking amazing)
And I'm getting my hands on the Nemrod Para kit this weekend. I also have a MasterBox kit waiting for me at my mom's place, which I'll start on today as well.
Some of the kits I didn't think to check on, and they'll work beautifully! Thanks again

I've never painted a military figure before, not REALLY painted it, but I have Shep Paine's "How to Build Dios" book and it's got a lot of info on it. I've scouted these forums for tips and I'm scared and excited to start the painting!
Here's that small update I promised, since I'll be back later with some photos on the figures:
I broke out the MIG pigments the other night and started weathering the wallpaper of the destroyed building. The idea is, it's obviously been hit pretty hard with some major artillery (I realized the next day that I'd need to rip and tear the wallpaper, it wouldn't survive a bashing like the one I supposedly took, so I am working on that now and will post the updated weathering when it's more complete):
Here's a photo of something that I found interesting, through accident. I was gluing down those pieces of the red plastruct brick and when I went to go cut the edges down, they popped off, leaving the glue behind. But the glue is actually the exact brick imprint I need. Pretty sweet! So I have learned a nice trick by accident. I'm sure this will happen a lot.

And here's the last full building drawn out on grid paper. This will be a furniture shop, I think. That seems more fun than a clothing store or pharmacy or general goods and will allow me practice on building some furniture:
I shall return with painted figures. Thanks for watching!
dioman13

Joined: August 19, 2007
KitMaker: 2,184 posts
Armorama: 1,468 posts

Posted: Sunday, September 25, 2011 - 03:24 AM UTC
Hey Brandi, throughout the war units kept old equip. and uniforms ect. Just make sure that the equip is correct for your time period. That's the major problem when getting figures for a dio. The pose may be good but if it has a jacket that wasn't issued till 1945, you have a problem. The assualt and capture of Carentan was pretty close to the invassion. The mixing of uniforms was there but make sure for the right units. Such a case is for the leggings worn, they changed often. U.S. rangers wore leggings that were cut down in height to facilitate faster walking. Para's normally wore jump boots when jumping but as the war progressed, they wore what ever was available since they became ground pounders after. Same thing with the uniforms, make sure they are time appropiate. It's a real P.I.T.A. to get these small details right, but can make or break a dio with a spacific time or location. A good refferance book will help with this or just ask here at armorama for the info. Someone with better knowlage than I will come up with the correct info. Finding the right para's for the early part of the invasion is hard. That's why I am using para's and glider infantry for my dio. By the way, glider infantry were airborne but used a mixture of para and infantry uniforms and equip. Not to make it harder on you, just trying to help keep you accurate as you proceed on you adventure.
ophelia53

Joined: March 10, 2010
KitMaker: 254 posts
Armorama: 226 posts

Posted: Sunday, September 25, 2011 - 09:39 AM UTC
Hey, Bob! Thanks a lot for the tip. I have done extensive research on the Carentan battle that I am replicating, and you're right...finding the right guys for the dio is really difficult for a project so specific. The paras I have now will do the job well, with some minor modifications. I appreciate the info!

WARDUKWNZ

Joined: June 01, 2011
KitMaker: 1,716 posts
Armorama: 1,638 posts

Posted: Sunday, September 25, 2011 - 11:25 AM UTC
Bob's right in a big way there ..thats where i love building the dio's for this customer ..he's not worried about if the clothes are bang on the money .if he likes this group of guys then he gets these good of guys ..hell it makes my life so much easier ..you can call it cheating in a bigway but the customer is always right ..ok thats bollocks but he does have some pretty good ideas ..already got the next dio to build for him after this one .. 18 ton Famo towing a 128mm Kanone 43 , nice and simple again lol
Lovin where your dio is going Brandi ,,keeping a close eye on this
Lovin where your dio is going Brandi ,,keeping a close eye on this

ophelia53

Joined: March 10, 2010
KitMaker: 254 posts
Armorama: 226 posts

Posted: Sunday, September 25, 2011 - 03:55 PM UTC
Hi Phil 
Yes, you are one lucky duck with your customer. That's pretty cool that you make money off doing what you love. I hope someday I can get as good as quite a few of you guys on here...the level of experience and realism is just astonishing when I flip through the build logs...really inspiring. And keeping this build log has kept me motivated thus far! It's nice knowing that someone cares about my little diorama haha. So thanks again for keeping up, I am excited to keep learning from you guys.
I am not feeling so well, so needless to say, the figs didn't get any paint on them today. I did glue some more together and got about 5 almost together now, but I need to buy some more kits this weekend and wait for them to come in to really know the story of the dio. I think I found my dead US para, though!
The MasterBox para kit is REALLY nice!!! The little guys even have the bayonets on their boots...can't beat that. It's a softer plastic, but the parts are well done and really easy to clean up. I found a really good book on my mom's shelf today I had left with the German split camo pattern I'll need for the german guys, pretty cool!
I hope to get my adapter for my airbrush soon so I can start learning how to use it. The houses are coming along nicely, I got more wood for the floors today so I'll be working on those tomorrow if I feel better.
See you guys soon!
Happy modeling!

Yes, you are one lucky duck with your customer. That's pretty cool that you make money off doing what you love. I hope someday I can get as good as quite a few of you guys on here...the level of experience and realism is just astonishing when I flip through the build logs...really inspiring. And keeping this build log has kept me motivated thus far! It's nice knowing that someone cares about my little diorama haha. So thanks again for keeping up, I am excited to keep learning from you guys.
I am not feeling so well, so needless to say, the figs didn't get any paint on them today. I did glue some more together and got about 5 almost together now, but I need to buy some more kits this weekend and wait for them to come in to really know the story of the dio. I think I found my dead US para, though!

The MasterBox para kit is REALLY nice!!! The little guys even have the bayonets on their boots...can't beat that. It's a softer plastic, but the parts are well done and really easy to clean up. I found a really good book on my mom's shelf today I had left with the German split camo pattern I'll need for the german guys, pretty cool!
I hope to get my adapter for my airbrush soon so I can start learning how to use it. The houses are coming along nicely, I got more wood for the floors today so I'll be working on those tomorrow if I feel better.
See you guys soon!
Happy modeling!

WARDUKWNZ

Joined: June 01, 2011
KitMaker: 1,716 posts
Armorama: 1,638 posts

Posted: Monday, September 26, 2011 - 12:16 AM UTC
Sorry to hear your not feeling that great  hate feeling like crap which is kinda normal for me ,,bugga .. oh well least we have models lol .
You couldnt be mor right about the skills of some of the blokes in here ..my mind has been blown away so many times is amazing i have any of it left ..the talent these guys have makes me believe that being a natural at something is very ture ..Mig's work alone shocked me to the core and like you i'll be using Mig's pigments soon ..can't buy them here so have to get them from over seas .
We have something in common ,, this dio i'm building 90% of the figures are Master Box to lol ..ok i think about 75% ,,theres Tamiya and Dragon in there to ,,it is a British / US dio after all
Trust me on this ..took me a little while to get used to the air brush ..take your time and you'll be sweet
Hope your feeling better today
Phill
 hate feeling like crap which is kinda normal for me ,,bugga .. oh well least we have models lol .
 You couldnt be mor right about the skills of some of the blokes in here ..my mind has been blown away so many times is amazing i have any of it left ..the talent these guys have makes me believe that being a natural at something is very ture ..Mig's work alone shocked me to the core and like you i'll be using Mig's pigments soon ..can't buy them here so have to get them from over seas .
We have something in common ,, this dio i'm building 90% of the figures are Master Box to lol ..ok i think about 75% ,,theres Tamiya and Dragon in there to ,,it is a British / US dio after all

Trust me on this ..took me a little while to get used to the air brush ..take your time and you'll be sweet

Hope your feeling better today

Phill

jashby

Joined: July 01, 2009
KitMaker: 278 posts
Armorama: 248 posts

Posted: Monday, September 26, 2011 - 12:46 AM UTC
Hi Brandi,
I picked up this set of US Army figures and they turned out pretty good. Only thing I didn't like was their packs but the detail is okay. Just a pain with the seam lines.
You might be able to use them in your diorama. The one throwing the smoke grenade can easily be throwing a frag. The wounded and the bud dragging him are really good and give a real sense of action.
Cheers, John
http://www.hobbyeasy.com/en/data/43807.html
ophelia53

Joined: March 10, 2010
KitMaker: 254 posts
Armorama: 226 posts

Posted: Monday, September 26, 2011 - 02:18 AM UTC
John, that's so funny you linked that...I was looking around last night and I came upon this set...I think it will be MUCH better than the tamiya guy i currently have. I'll pick it up this weekend as well.
Phil, thanks alot. I feel worse but Im skipping class today so I can rest and get better. I have a huge test tomorrow I need to cram for lol
Also...my dio will be 20 inches by 24 inches...so this will be a hefty dio. Today, I finally have all 3 buildings set up enough where I can *finally* start the groundwork, yay!!!
Also...I'm re-doing the cafe...again...looking at it, my other buildings are already better than that one and the mistakes are glaring. It shouldn't take too long to re-o..the windows will probably take the longest.
does anyone have any tips on how to create a dormer? I had a lot of trouble with it before and couldn't quite grasp it.
Thanks guys!!! I hope to be feeling better soon, too.
Phil, thanks alot. I feel worse but Im skipping class today so I can rest and get better. I have a huge test tomorrow I need to cram for lol

Also...my dio will be 20 inches by 24 inches...so this will be a hefty dio. Today, I finally have all 3 buildings set up enough where I can *finally* start the groundwork, yay!!!
Also...I'm re-doing the cafe...again...looking at it, my other buildings are already better than that one and the mistakes are glaring. It shouldn't take too long to re-o..the windows will probably take the longest.
does anyone have any tips on how to create a dormer? I had a lot of trouble with it before and couldn't quite grasp it.
Thanks guys!!! I hope to be feeling better soon, too.


Adamskii

Joined: November 06, 2010
KitMaker: 537 posts
Armorama: 474 posts

Posted: Monday, September 26, 2011 - 02:20 AM UTC
this diorama gives me wood.
Love where this is going! lots enthusiasm..
Adam
Love where this is going! lots enthusiasm..
Adam

WARDUKWNZ

Joined: June 01, 2011
KitMaker: 1,716 posts
Armorama: 1,638 posts

Posted: Monday, September 26, 2011 - 07:43 PM UTC
Hey Brandi  .. what type of dormer do you need ? there's a few different types to choose from ,,like a link dormer or shed dormer ..the shed dormer has a window in it where the link dormer is to surround a chimney ,, guess you looking for a shed dormer by what your building ..but dont quote me on that lol .
So we going dio size are we lol .. ok this is how big mine is ..23.5 ins by 39.5 ins long ..not the biggest i have built but up there with the most enjoyable .
.
Can't wait to see some bigger pics of your dio ..see what it looks like from above .
Hope your feeling better soon and in time for your exam too
Phill
 .. what type of dormer do you need ? there's a few different types to choose from ,,like a link dormer or shed dormer ..the shed dormer has a window in it where the link dormer is to surround a chimney ,, guess you looking for a shed dormer by what your building ..but dont quote me on that lol .
 So we going dio size are we lol .. ok this is how big mine is ..23.5 ins by 39.5 ins long ..not the biggest i have built but up there with the most enjoyable
 .
.Can't wait to see some bigger pics of your dio ..see what it looks like from above .
Hope your feeling better soon and in time for your exam too

Phill
 |


