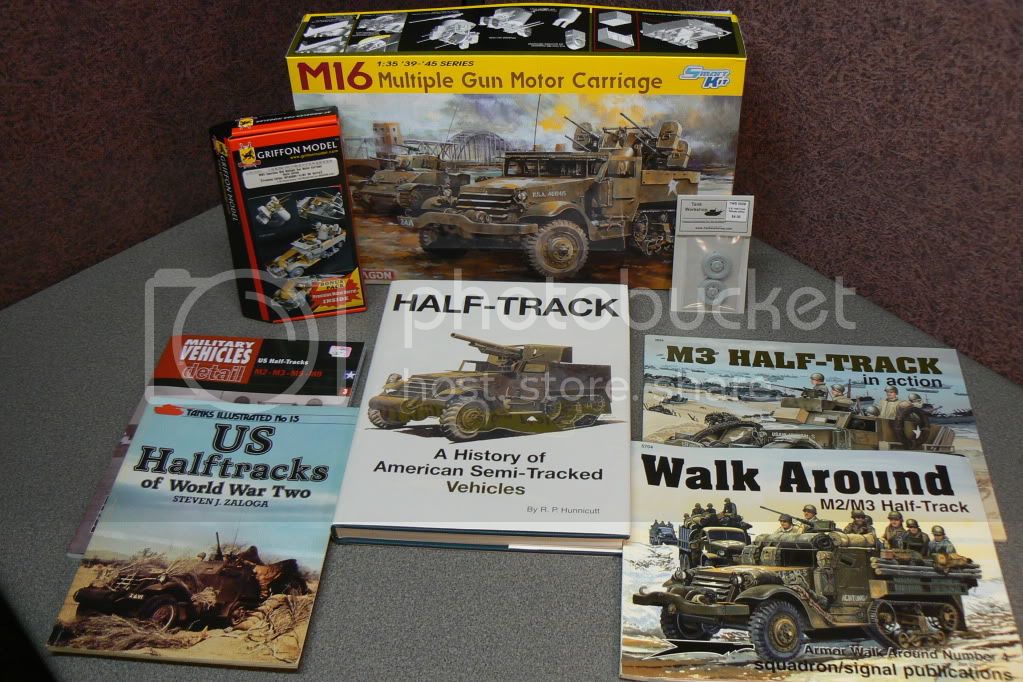
Some more updates. Working a few different items now.
First, I cut the hood pieces from the door sections as the hood will be entirely brass. Also had to cut off the "block" jerrycan holders as they will be replaced aith P/E.
To me, the worst thing about P/E is when you have to remove molded-on surface details. I use a small chisel blade on my x-acto. In this case, the rectangular hole left by removal of the jerrycan holders was filled with a sheet of 30 thou sheet plastic. I then filled the gap on the inside with Mr Surfacer 500 and sanded smooth. The exterior was trickier because I couldn't sand smooth without eradicating a lot of rivets. I decided to add a sheet of 10 thou plastic to cover the surgery, as the original molded detail indicated a thin plate there:

I measured the width of the plate using a compass, then marked the 10 thou sheet top and bottom and cut a strip of the proper width using a metal straightedge

Then I cut the sections a little long. I aligned them with the door jamb and held them in place with some cross-action tweezers and sparingly applied a drop of Ambroid ProWeld (which I prefer for fast joining, good ol Testors liquid if I need to adjust the piece at all)

Then I cut off the excess and wet sanded flush

You'll notice in the above pic the molded on handles are still present. I shaved them off and then cleaned up the excess with a little sander I use, made from a stiff coffee stirrer with punched out discs of sandpaper super glued on the ends. I find it works great for cleaning up the remnants of the molded on detail without disturbing surrounding rivets etc


Then, to make the TINY handles, I used the "Bug" etch tool to make sure the dimensions are even. I centered the handle upside down under the thinnest "finger" and clamped it down

Then bent up the sides with a razor blade

Then put a strip of 20 thou sheet up against the handle and bent the attachment points down with the blade

I use a piece of doubled over masking tape to hold the tiny pieces til I'm ready for them

I then put a drop of super glue on an old razor blade. Picked up the handles with the thinnest pair of tweezers imaginable, dipped each attachment point in the glue and carefully attached them. Very nerve wracking... you get one shot and if its not straight you have to break it loose and try again. The finished handles:

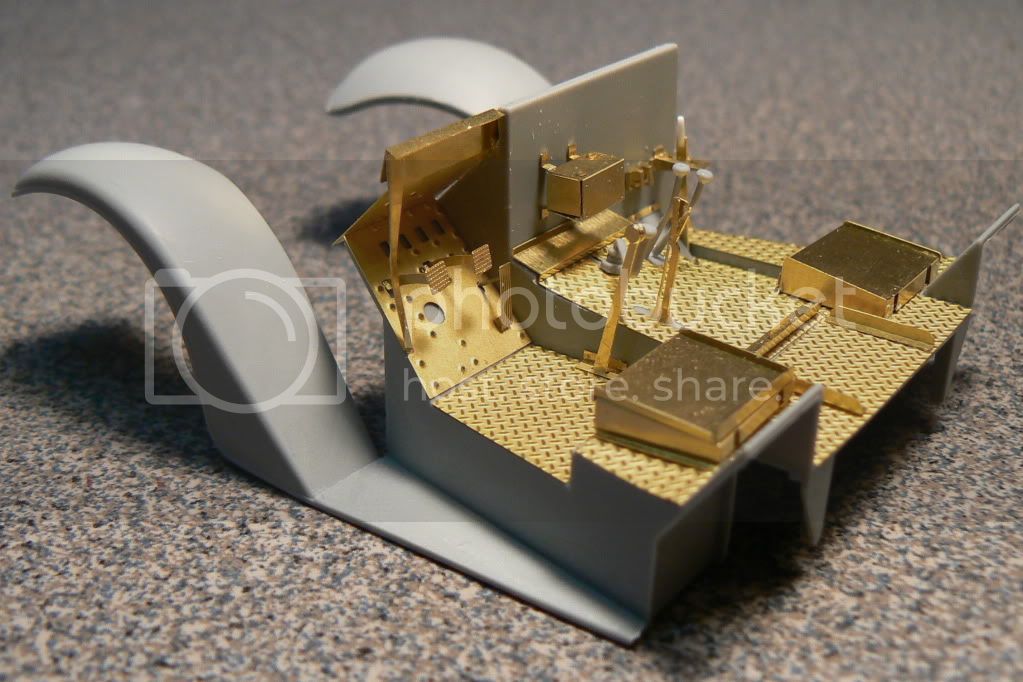
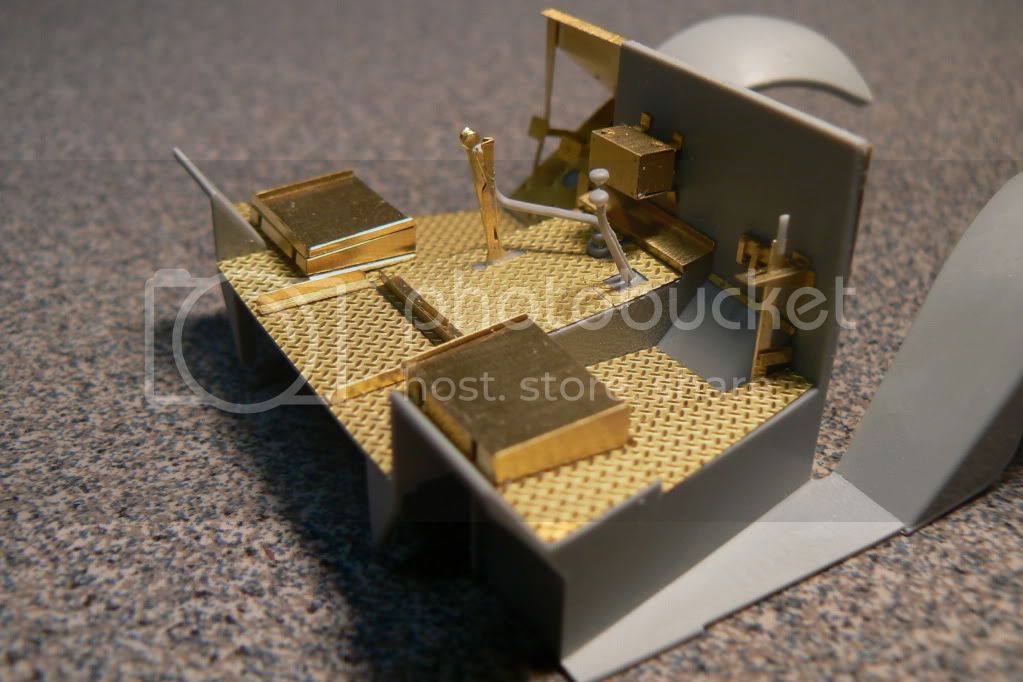
Next up is the partially assembled gun platform. The seat was actually just a suspended piece of canvas, so I thinned down the over-thick kit part. Once it was in place I laid a piece of tissue soaked in water and elmers over the seat.


Once it is dry I will trim the edges.
That's it for now, hopefully more tomorrow, I think I have a couple free hours tonight!
Thanks for looking!
Terry