

John,
Ohh that has to suck sorry to hear that indeed!!! As well as all the afore mentioned ways tamiya laquer thinner is also a great paint stripper trust me I know
Mike
Campaigns
Where Armorama group builds can be discussed, organized, and updates posted.
Where Armorama group builds can be discussed, organized, and updates posted.
Hosted by Darren Baker, Richard S.
Tank Destroyer/SPG Campaign

Tanksami

Joined: August 06, 2011
KitMaker: 1,314 posts
Armorama: 1,217 posts

Posted: Monday, August 06, 2012 - 11:48 AM UTC


Braille

#135

Joined: August 05, 2007
KitMaker: 1,501 posts
Armorama: 1,485 posts

Posted: Monday, August 06, 2012 - 12:31 PM UTC
Tank Destroyer and SPG geeks,
Ive been in a bit of a modeling slump lately, I cant seem to stay focused or find the motivation to do any modeling. I think that I just need to try something different or just try a different approach and get away from all of my reference material and build something that appeals to me. Most importantly I need to finish a build!
One of my small scale modeling contacts, Jan tread_geek Etal, recently got himself into somewhat of a modeling slump too. To kick-start himself back to normal he built something outside of his normal interest and went so far as to join a campaign for added effect. And it worked for him! Finding myself in just such a similar situation I thought Id go ahead and do the same. Phill WARDUKWNZ, I hope that I am not intruding and that my contribution kit is in line with the campaign rules?

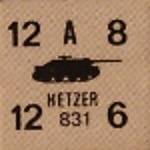
This artwork caught my attention and sparked my interest into kick-starting me back into building something.

Here is the kit Ive chosen as my campaign contribution, note the date stamp embedded on the photograph. With the exception of a set of Fruilmodel metal tracks, which are on the way, this effort will be put together straight OOTB.

I dont follow the instructions and tend to skip around because I like building my kits from the inside out. One of the first things I do is to test fit, file, fill, sand and put the major components together before adding any of the smaller detailed parts on to them just in case I run into a warped or poor fitting piece. Here Ive added weld seams with plastic rod (red arrows) and filled the gap between parts that represent a single piece on the real vehicle (red circle), me thinks?

The hull was slightly warped on my kits example so I used styrene tubing to square and separate the hulls upper side walls.

I discovered the warped hull when I went to test fit the upper rear engine deck. The rear engine deck is only placed on the lower hull for the photograph.

Other than the rear engine deck all of the major lower hulls parts are now cemented together. Although there are a lot of parts included in the kit, with many that wont be used, this is turning out to be a fun build. Oh, I almost forget to mention that I added small holes, with a pin vise and micro drill, to represent the dowel pin opening that secures the hatch hinges together, to the outer sides of the escape / transmission hatch hinges (these can be faintly seen in the photograph). What you see took me most of the day and part of my evening to put together (just a slow builder).
@jkb_sprint John,
Did you happen to use an automotive lacquer based primer on your kit? If this should be the case that paint is now embedded on the plastic and it also would have had the effect to melt the plastic too? Looks like you tried to cover the model in primer in one go! Been there and done that before, but I do know how frustrating that can be. I dont think you could save the model if what I mentioned is the case. And as Marc Petro mentions a motivation killer!!! Sometimes things happen that are not fair.
John, I personal would like a happy outcome for you and for you to finish the campaign so I happen to have one of Shanghai Dragons #6081 late production Brummbar kits in the stash that Id be happy to donate to you, if youre interested? Just PM me. Heres a link to a bigfoot Brummbar to see just what can be done with this kit. Being a late production variant you dont need the Zimmerit paste unless you want to go that route?
Lots of excellent builds going on here already and the campaign is only just beginning.
~ Eddy
Ive been in a bit of a modeling slump lately,
I cant seem to stay focused or find the motivation to do any modeling. I think that I just need to try something different or just try a different approach and get away from all of my reference material and build something that appeals to me. Most importantly I need to finish a build! One of my small scale modeling contacts, Jan tread_geek Etal, recently got himself into somewhat of a modeling slump too. To kick-start himself back to normal he built something outside of his normal interest and went so far as to join a campaign for added effect. And it worked for him! Finding myself in just such a similar situation I thought Id go ahead and do the same. Phill WARDUKWNZ, I hope that I am not intruding and that my contribution kit is in line with the campaign rules?
This artwork caught my attention and sparked my interest into kick-starting me back into building something.
Here is the kit Ive chosen as my campaign contribution, note the date stamp embedded on the photograph. With the exception of a set of Fruilmodel metal tracks, which are on the way, this effort will be put together straight OOTB.
I dont follow the instructions and tend to skip around because I like building my kits from the inside out. One of the first things I do is to test fit, file, fill, sand and put the major components together before adding any of the smaller detailed parts on to them just in case I run into a warped or poor fitting piece. Here Ive added weld seams with plastic rod (red arrows) and filled the gap between parts that represent a single piece on the real vehicle (red circle), me thinks?
The hull was slightly warped on my kits example so I used styrene tubing to square and separate the hulls upper side walls.
I discovered the warped hull when I went to test fit the upper rear engine deck. The rear engine deck is only placed on the lower hull for the photograph.
Other than the rear engine deck all of the major lower hulls parts are now cemented together. Although there are a lot of parts included in the kit, with many that wont be used, this is turning out to be a fun build. Oh, I almost forget to mention that I added small holes, with a pin vise and micro drill, to represent the dowel pin opening that secures the hatch hinges together, to the outer sides of the escape / transmission hatch hinges (these can be faintly seen in the photograph). What you see took me most of the day and part of my evening to put together (just a slow builder).
@jkb_sprint John,
Did you happen to use an automotive lacquer based primer on your kit? If this should be the case that paint is now embedded on the plastic and it also would have had the effect to melt the plastic too? Looks like you tried to cover the model in primer in one go! Been there and done that before, but I do know how frustrating that can be. I dont think you could save the model if what I mentioned is the case. And as Marc Petro mentions a motivation killer!!! Sometimes things happen that are not fair.
John, I personal would like a happy outcome for you and for you to finish the campaign so I happen to have one of Shanghai Dragons #6081 late production Brummbar kits in the stash that Id be happy to donate to you, if youre interested? Just PM me. Heres a link to a bigfoot Brummbar to see just what can be done with this kit. Being a late production variant you dont need the Zimmerit paste unless you want to go that route?
Lots of excellent builds going on here already and the campaign is only just beginning.
~ Eddy
Hangelafette
Joined: April 22, 2012
KitMaker: 344 posts
Armorama: 315 posts

Posted: Monday, August 06, 2012 - 02:20 PM UTC
John - The Italeri Jagdpanzer IV molds must be cursed! It was the only build so far that I did not enjoy. I hope some of the suggestions are helpful enough that you can mount a rescue.
Nate
I hope some of the suggestions are helpful enough that you can mount a rescue.Nate
Hangelafette
Joined: April 22, 2012
KitMaker: 344 posts
Armorama: 315 posts
Posted: Monday, August 06, 2012 - 02:43 PM UTC
I'm in with Academy's new Hetzer.

I picked up a detail set from DEF Model and I have a set of Spade Ace Tracks en route from Hong Kong to spruce her up.
 Nate
Nate
I picked up a detail set from DEF Model and I have a set of Spade Ace Tracks en route from Hong Kong to spruce her up.
Nate
Nito74

Joined: March 04, 2008
KitMaker: 5,386 posts
Armorama: 4,727 posts
Posted: Monday, August 06, 2012 - 02:49 PM UTC
Sweet kit there Nathan !
It looks good, can you post some sprue pics, just wanted to check it between the Tamyia's & Trumpeter's offer.
Does it have any interior details or engine ?
Ambush scheme for the painting options I bet.

It looks good, can you post some sprue pics, just wanted to check it between the Tamyia's & Trumpeter's offer.
Does it have any interior details or engine ?
Ambush scheme for the painting options I bet.

BigSmitty
Joined: October 01, 2008
KitMaker: 597 posts
Armorama: 439 posts

Posted: Monday, August 06, 2012 - 02:51 PM UTC
Monday night update on Herr Spranz's StuG III:
Steps 2 and 3 are complete, along with some of step 4. I can't attach the lower rear hull until I attach the rear idlers as the hull slips between the rear of the idlers and underneath the back of the hull. Sounds weird I know, but I can't put the rear on and shoehorn the idlers; they simply don't fit.
No big deal, I'll just paint the idlers tomorrow and attach them, then on to the rest. Pictures to follow:
Don't sand the ridges off the suspension. I almost thought it was a massive mold seam until I noticed the kit instructions had the same line in the same spot...
Tailor

Joined: May 26, 2008
KitMaker: 1,168 posts
Armorama: 256 posts

Posted: Monday, August 06, 2012 - 06:03 PM UTC
Quoted Text
I thought acetone are plastic.
mixing up acetone (= liquid organic solvent; C3-H6-0) and acetate (= plastic)?
Maybe in US English there's a different word for acetone...
Cheers,
Guido
Nito74
Joined: March 04, 2008
KitMaker: 5,386 posts
Armorama: 4,727 posts
Posted: Tuesday, August 07, 2012 - 03:50 AM UTC
Here's a slow progress on the Emil

I added some wiring.
~

Still missing some equipment, but I will paint it separatly
I added some wiring.
~
Still missing some equipment, but I will paint it separatly

PantherF
Joined: June 10, 2005
KitMaker: 6,188 posts
Armorama: 5,960 posts

Posted: Tuesday, August 07, 2012 - 04:26 AM UTC
Looking good John!

I'm starting to paint my Emil, then assemble the rest.
Are you sure you want to paint the equipment 'separate'? I think you'll find it easier to install all of what you want, then paint them. A micro-brush and wax paper will be the easiest... at least that's MY professional, unasked for opinion.
Now while the paint is dryin', the StuG, the VAB, and two TD's await me. As well as an M1117 that has the stupidest directions.
~ Jeff


1721Lancers

Joined: March 21, 2012
KitMaker: 1,673 posts
Armorama: 1,640 posts
Posted: Tuesday, August 07, 2012 - 04:35 AM UTC
Hi John, that is a major  . I shall not ask what happened. Maybe you, Sal and I can do a campaign called "how to dodge or if it´s too late deal with big disastors" campaign. No seriously, don´t drop out, do something else.
I have an Academy M18, a Trumpeter Hetzer Starr( but you´ll
need friuls for that) or a Tamiya StuG III G that I could leand you on permenant basis. If one of these you wish, just
drop a PM with your address and (pay per celestrial virgin
 ) it shall be on its way to you.
Paul
PS- send that ugly lump to the plastic gods, there´s a flame thrower plan on the "modelling a foto 2" site 
. I shall not ask what happened. Maybe you, Sal and I can do a campaign called "how to dodge or if it´s too late deal with big disastors" campaign. No seriously, don´t drop out, do something else.I have an Academy M18, a Trumpeter Hetzer Starr( but you´ll
need friuls for that) or a Tamiya StuG III G that I could leand you on permenant basis. If one of these you wish, just
drop a PM with your address and (pay per celestrial virgin
) it shall be on its way to you. PaulPS- send that ugly lump to the plastic gods, there´s a flame thrower plan on the "modelling a foto 2" site

PantherF
Joined: June 10, 2005
KitMaker: 6,188 posts
Armorama: 5,960 posts
Posted: Tuesday, August 07, 2012 - 04:51 AM UTC
Quoted Text
PS- send that ugly lump to the plastic gods, there´s a flame thrower plan on the "modelling a foto 2" site
Speaking of which... I have yet to find a subject?
~ Jeff
jkb_sprint

Joined: April 23, 2012
KitMaker: 402 posts
Armorama: 394 posts
Posted: Tuesday, August 07, 2012 - 06:23 AM UTC
Guys sorry for the late response, but was working till late. Thank you all very much for your interest!
Right now the model is soaking in Leopard 1 brake fluids. ( Why from a Leopard 1? For luck! They are related after all.... ).
I doubt it if it's going to have any results since that oily surface you see in the pics is actually melted plastic, so even if the primer goes away there is still the melt down issue. Yet i will give it a try.
The primer is an acrylic one for plastics. I used the same canister to primer the T 62 i recently built and had no problem at all. I use such sprays for a few years now and never had any strange effects. I don't know maybe the heat? It was about 45 C at the time. Maybe the plastic? I washed the parts before assembly. Maybe sheer bad luck.
Eddy and Paul thank you very much for your kind offer, i'm obliged, but that wont be necessary. I have one more kit i can use for this campaign.
The ''state of the art'' 1/35th scale Zvezda Panzerjager 1. Operations on hostile kit are to commence at 21:00 Bravo time.

Right now the model is soaking in Leopard 1 brake fluids. ( Why from a Leopard 1? For luck! They are related after all....
). I doubt it if it's going to have any results since that oily surface you see in the pics is actually melted plastic, so even if the primer goes away there is still the melt down issue. Yet i will give it a try.
The primer is an acrylic one for plastics. I used the same canister to primer the T 62 i recently built and had no problem at all. I use such sprays for a few years now and never had any strange effects. I don't know maybe the heat? It was about 45 C at the time. Maybe the plastic? I washed the parts before assembly. Maybe sheer bad luck.
Eddy and Paul thank you very much for your kind offer, i'm obliged, but that wont be necessary. I have one more kit i can use for this campaign.
The ''state of the art'' 1/35th scale Zvezda Panzerjager 1. Operations on hostile kit are to commence at 21:00 Bravo time.
Petro
Joined: November 02, 2003
KitMaker: 984 posts
Armorama: 846 posts
Posted: Tuesday, August 07, 2012 - 06:34 AM UTC
Quoted Text
Quoted Text
I thought acetone are plastic.
mixing up acetone (= liquid organic solvent; C3-H6-0) and acetate (= plastic)?
Maybe in US English there's a different word for acetone...
Cheers,
Guido
See what happens when you don' t proof read before posting.
It was supposed to say ate plastic.
I didn't notice until too late for me to edit.

Tojo72
Joined: June 06, 2006
KitMaker: 4,691 posts
Armorama: 3,509 posts
Posted: Tuesday, August 07, 2012 - 09:31 AM UTC
John and Smitty,looking good.Finally some builds with no disasters 
Welcome in Eddie,looking forward to one of your blogs.
Welcome in Eddie,looking forward to one of your blogs.
Nito74
Joined: March 04, 2008
KitMaker: 5,386 posts
Armorama: 4,727 posts
Posted: Tuesday, August 07, 2012 - 11:39 AM UTC
@ Anthony
So far no major problems..
@John
Good to get another one on the bench. I have that same kit lined up for soon...(maybe after the Emil..)
@Jeff
Thanks !
I prefer to paint it separatly, but I might try your technique perfected by years of plasticohlic wisdom at the workbench
2 questions Jeff,
What will be your sequence for this build ? I mean do you build the whole thing at paint it or do you will get the gun and lower hull built and painted separatly ?
I'm not familiar with wax paper..
PantherF
Joined: June 10, 2005
KitMaker: 6,188 posts
Armorama: 5,960 posts
Posted: Tuesday, August 07, 2012 - 11:45 AM UTC
So what color are you painting your Emil?
I'm using Model Masters Panzer Gray, then maybe Tamiyas Gray for my DML Dicker Max that's on it's way.
~ Jeff
I'm using Model Masters Panzer Gray, then maybe Tamiyas Gray for my DML Dicker Max that's on it's way.
~ Jeff
Nito74
Joined: March 04, 2008
KitMaker: 5,386 posts
Armorama: 4,727 posts
Posted: Tuesday, August 07, 2012 - 12:16 PM UTC
Tamyia German Grey with AK & MIG filters for Panzer Grey.
Tailor
Joined: May 26, 2008
KitMaker: 1,168 posts
Armorama: 256 posts
Posted: Tuesday, August 07, 2012 - 05:38 PM UTC
Quoted Text
Quoted TextQuoted Text
I thought acetone are plastic.
mixing up acetone (= liquid organic solvent; C3-H6-0) and acetate (= plastic)?
Maybe in US English there's a different word for acetone...
Cheers,
Guido
See what happens when you don' t proof read before posting.
It was supposed to say ate plastic.
I didn't notice until too late for me to edit.
Ahhh! OK, understood!
Yes Acetone eats plastic, if left on too long. One needs to scrup 5-10 seconds and them wipe quickly using kitchen tissue. It worked out for me a number of times.
Guido

WARDUKWNZ

Joined: June 01, 2011
KitMaker: 1,716 posts
Armorama: 1,638 posts

Posted: Tuesday, August 07, 2012 - 10:36 PM UTC
Hey guys ..bout time i did something for my own campaign talk about being slow ,,man .
First off tho ,,the guys ,,,
John ... Damn dude ..talk about a allergic reaction ,but all is not lost ,,first hand experience with the exact same thing .. screw tell ya how it happened ,,talk about how to make it look good ,, first off its all good ..clean off the primer ,then where the damage is gently cover it with putty ,,thats the roof but for the lower parts,sides this is the easy way to fix it ..Zimmerit it ,covers it very nicely and look great,but even if your not that great at doing Zimm you can cover the Zimm with foliage as German armour was covered in the stuff late in the war ..two birds ..one stone
Paul .. Big ass problem from a brand new model mate ..glad it turned out so damn good after your new turret ,nicely done dude
Matt .. Its rockin along very nicely bud .. very nice clean paint too .. this is gonna look very cool when its finished
Seriously happy with the progress which you guys are hauling ass on the work bench ,,Jon's hunting tiger is looking as big and mean as ever .. Rob's work on his SU's is looking clean,tidy and moving along nicely .
Thomas,, Your Onto's is moving along nicely too ,,been a fav of mine that little machine for years ..happy its in this campaign .
John,,Nito74,,Emil is another which is looking cool ,,got one of those and man she's a big bugger when its built course i'm gonna like that
Anthony,, Very nice progress on the SU100 ,, thats gonna look real good when its done ..another tank killer getting close to done too .
Sal ,, Its rocking man and thats the vehicle which is the figure head of this campaign so glad your building that one .
Eddy ,, Built one of those many years ago but yours has a huge amount of detail compared to the early Dragon one ,,looking forward to seeing that one done
Now to what i have been up too ,,check it out guys ,,told ya i like my armour big

Dragon tracks on a Trumpeter tank ,,no problems at all

Had to give it a new barrel ,,the kit one is crap , now its got this beauty ,had to machine the outer tube so it would fit the kit part.


Quite happy with the results ,,I had to give it a tank commander .


And now its ready for painting ..


And this thing is big ,,very big


Phill
talk about being slow ,,man . First off tho ,,the guys ,,,
John ... Damn dude ..talk about a allergic reaction ,but all is not lost ,,first hand experience with the exact same thing .. screw tell ya how it happened ,,talk about how to make it look good ,, first off its all good ..clean off the primer ,then where the damage is gently cover it with putty ,,thats the roof but for the lower parts,sides this is the easy way to fix it ..Zimmerit it ,covers it very nicely and look great,but even if your not that great at doing Zimm you can cover the Zimm with foliage as German armour was covered in the stuff late in the war ..two birds ..one stone
Paul .. Big ass problem from a brand new model mate ..glad it turned out so damn good after your new turret ,nicely done dude
Matt .. Its rockin along very nicely bud .. very nice clean paint too .. this is gonna look very cool when its finished
Seriously happy with the progress which you guys are hauling ass on the work bench ,,Jon's hunting tiger is looking as big and mean as ever .. Rob's work on his SU's is looking clean,tidy and moving along nicely .
Thomas,, Your Onto's is moving along nicely too ,,been a fav of mine that little machine for years ..happy its in this campaign .
John,,Nito74,,Emil is another which is looking cool ,,got one of those and man she's a big bugger when its built
course i'm gonna like that Anthony,, Very nice progress on the SU100 ,, thats gonna look real good when its done ..another tank killer getting close to done too .
Sal ,, Its rocking man and thats the vehicle which is the figure head of this campaign
so glad your building that one . Eddy ,, Built one of those many years ago but yours has a huge amount of detail compared to the early Dragon one ,,looking forward to seeing that one done
Now to what i have been up too ,,check it out guys ,,told ya i like my armour big
Dragon tracks on a Trumpeter tank ,,no problems at all
Had to give it a new barrel ,,the kit one is crap , now its got this beauty ,had to machine the outer tube so it would fit the kit part.
Quite happy with the results
,,I had to give it a tank commander .And now its ready for painting ..
And this thing is big ,,very big
Phill

Tojo72
Joined: June 06, 2006
KitMaker: 4,691 posts
Armorama: 3,509 posts
Posted: Tuesday, August 07, 2012 - 10:51 PM UTC
Very impressive Phil
Also impressive is all that metal on that halftrack
I have been doing my Magic Tracks the last couple of nights,good progress
Also impressive is all that metal on that halftrack
I have been doing my Magic Tracks the last couple of nights,good progress
WARDUKWNZ
Joined: June 01, 2011
KitMaker: 1,716 posts
Armorama: 1,638 posts
Posted: Tuesday, August 07, 2012 - 10:56 PM UTC
Anthony,,Oh i wish those were Magic tracks but no luck there ..those are the old as hell tracks from Dragon's E100 and man did they need alot of cleaning ..but still did them all in one sitting ..much better than the one piece ones the kit came with
Oh that M2 half track is one i am building for the US half tracks campaign ..the entire upper hull is PE .if ya really want to look at it close up there's plenty of pics on the campaign page .
Phill
Oh that M2 half track is one i am building for the US half tracks campaign ..the entire upper hull is PE .if ya really want to look at it close up there's plenty of pics on the campaign page .
Phill
PantherF
Joined: June 10, 2005
KitMaker: 6,188 posts
Armorama: 5,960 posts
Posted: Tuesday, August 07, 2012 - 10:59 PM UTC
WOW Phill! Yours is already put together! I promise a start on mine either today or tomorrow. I had a little hich-up with my health and I was "unavailable" for a while but feel better than ever, even more so I bought 2 more TD kits for a future Campaign so modeling days are far from over for me.
Man... I'm looking hard at one of those kits Phill! What's it called? An E-100 Jagdpanzer? I lost count when the paper panzers hit the net.
~ Jeff
I promise a start on mine either today or tomorrow. I had a little hich-up with my health and I was "unavailable" for a while but feel better than ever, even more so I bought 2 more TD kits for a future Campaign so modeling days are far from over for me.Man... I'm looking hard at one of those kits Phill! What's it called? An E-100 Jagdpanzer? I lost count when the paper panzers hit the net.
~ Jeff
WARDUKWNZ
Joined: June 01, 2011
KitMaker: 1,716 posts
Armorama: 1,638 posts
Posted: Tuesday, August 07, 2012 - 11:08 PM UTC
Jeff .. Well to give you a bit of info mate, two days is all it took to bang this thing together ..its easy as hell ..very few parts and dude you gotta replace those tracks ,,mine was badly twisted and useless ..thanks to a friend that problem was sorted and dude get one !!
AND!!!! health !!! dude you better be better cause i know first hand about the health crap ..i take 14 pills a day,every day ..not bad for a 44 your old huh ?
AND!!! i'm holding you too that promise to buddy boy
Phill
AND!!!! health !!! dude you better be better cause i know first hand about the health crap ..i take 14 pills a day,every day ..not bad for a 44 your old huh ?
AND!!! i'm holding you too that promise to buddy boy
Phill

ltb073
Joined: March 08, 2010
KitMaker: 3,662 posts
Armorama: 3,078 posts
Posted: Tuesday, August 07, 2012 - 11:18 PM UTC
Phill That Beast is kick ass for sure are you sure its 1/35 scale Looking forward to seeing that monster with paint on it
@Jeff hope all is better now get back to the bench
I have been making some progress on my Jadgpanzer using Anthonys method of Testors black bottle cement on the Magic Tracks

Directions say 97 links even with no sag that aint gonna cut it more like 108
Then I started throwing some paint at it as well


I still have a ways to go and those road wheels are in need of a fixing I should get some more time at it today
Looking forward to seeing that monster with paint on it @Jeff hope all is better now get back to the bench
I have been making some progress on my Jadgpanzer using Anthonys method of Testors black bottle cement on the Magic Tracks

Directions say 97 links even with no sag that aint gonna cut it more like 108
Then I started throwing some paint at it as well


I still have a ways to go and those road wheels are in need of a fixing I should get some more time at it today

WARDUKWNZ
Joined: June 01, 2011
KitMaker: 1,716 posts
Armorama: 1,638 posts
Posted: Tuesday, August 07, 2012 - 11:27 PM UTC
Hey Sal mate and yup its 1/35th all right big bugger aint it
Your Panzer IV/l70 is looking pretty good man ..one little bit of info for you tho ..the front road wheels were solid steel .. so instead of black the rim would be bloody near polished ,so sliver or polished steel would make them look great .
Phill
and yup its 1/35th all right big bugger aint it Your Panzer IV/l70 is looking pretty good man ..one little bit of info for you tho ..the front road wheels were solid steel .. so instead of black the rim would be bloody near polished ,so sliver or polished steel would make them look great .
Phill
 |

WEB HOSTING BY


Copyright ©2021 Armorama and Kitmaker Network, a subsidiary of Silver Star Enterprises
All Rights Reserved. Please read our Conditions of Use and Privacy Policy.
All Rights Reserved. Please read our Conditions of Use and Privacy Policy.