DML Jagdpanzer IV + base JW doing axis again
Groningen, Netherlands
Joined: October 01, 2003
KitMaker: 1,236 posts
Armorama: 700 posts
Posted: Monday, May 14, 2012 - 07:54 AM UTC
Hi guys,
It has been a long time since I last posted anything and I have been experimenting with various techniques for vehicles and ground work. And something different the modern vehicles I usually do.
Here I used the Dragon Jagdpanzer IV l7 basically out of the box except for the tracks which are from Fiul.
I used the AK74 interactive mud products and tried enamel washes for the first time.
The base is made up from DAS clay, cellu-clay, herbs and beech tree seeds. I used various brands for the stowage.
Enough typing and some photos.


The wood of the base still needs to be cleaned up.
Any tips on how to improve on the vehicle or ground work are most welcome, especially the ground work as this a new thing for me.
Cheers, thanks for looking and thanks for any tips you can give me,
JW
Ontario, Canada
Joined: February 04, 2009
KitMaker: 743 posts
Armorama: 549 posts
Posted: Monday, May 14, 2012 - 08:05 AM UTC
Jan,
Very nice. Love the weathering and ground work.
What unit is this Jagdpanzer from?
Looks great.
http://ghmicro.wix.com/twis-first-cut
Groningen, Netherlands
Joined: October 01, 2003
KitMaker: 1,236 posts
Armorama: 700 posts
Posted: Monday, May 14, 2012 - 08:31 AM UTC
Thanks,
I have,no idea what unit it is from. All I know is that it is one of the marking and painting options vorm the Dragon instructions. Can't find the instructions now but will look hand get back to you on that.
Cheers,
Jw
Ontario, Canada
Joined: August 15, 2006
KitMaker: 282 posts
Armorama: 229 posts
Posted: Monday, May 14, 2012 - 10:59 AM UTC
Hello Jan,
Very well executed, great base and groundwork.
A great model, well done.
Regards,
garth
' Should Hitler decide to invade Hell, I would at least make favourable reference to the Devil in the House of Commons' - Winston Churchill
Groningen, Netherlands
Joined: October 01, 2003
KitMaker: 1,236 posts
Armorama: 700 posts
Posted: Monday, May 14, 2012 - 05:40 PM UTC
@ Dave
Looked it up in the instructions and the paint scheme is from the 7th Pz. Div. at the. eastern front 1945.
Cheers,
Jw
Kentucky, United States
Joined: May 27, 2007
KitMaker: 327 posts
Armorama: 259 posts
Posted: Monday, May 14, 2012 - 11:00 PM UTC
OUTSTANDING

England - South East, United Kingdom
Joined: December 13, 2004
KitMaker: 2,192 posts
Armorama: 1,615 posts
Posted: Wednesday, May 16, 2012 - 09:05 AM UTC
Very nice indeed Janwillem. I particularly like the groundwork, looks very natural and effective. The way it angles across the base works well too, and the wires for attaching foliage are a nice touch. Not over-weathered either. Superb!
"Lord Raglan wishes the cavalry to advance rapidly to the front, follow the enemy, and try to prevent the enemy carrying away the guns. Troops of Horse Artillery may accompany. French cavalry is on your left. Immediate. Airey."
Groningen, Netherlands
Joined: October 01, 2003
KitMaker: 1,236 posts
Armorama: 700 posts
Posted: Wednesday, May 16, 2012 - 10:00 AM UTC
Thanks Steve.
I used the excellent video by Richard Windrow "Expert Model Craft, Terrain Modelling" for getting my head around making the base.
His techniques for making ground cover are simple to use and give good results to even noobs like me when it comes to terrain modelling.
Cheers,
JW
Groningen, Netherlands
Joined: October 01, 2003
KitMaker: 1,236 posts
Armorama: 700 posts
Posted: Saturday, May 26, 2012 - 04:26 AM UTC
Modena, Italy
Joined: March 08, 2012
KitMaker: 140 posts
Armorama: 140 posts
Posted: Saturday, May 26, 2012 - 04:53 AM UTC
Beautiful! The figures are spectacular! Bravo!
Gianfranco
P. S.: ... If I send you some of my figures, we agree?

"The German soldier has amazed the world. The Italian soldier has amazed the German soldier." (Gen. Erwin Rommel - Lybia, 1942).
Groningen, Netherlands
Joined: October 01, 2003
KitMaker: 1,236 posts
Armorama: 700 posts
Posted: Saturday, May 26, 2012 - 08:58 AM UTC
Grazie Mille Gianfranco,
I use the Verlinden technique and painted them with oil paints combined with some extra high lighting.
Still learning but I am quite satisfied with how they turned out.
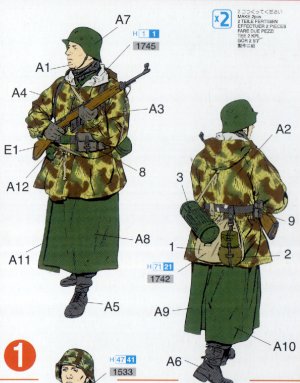
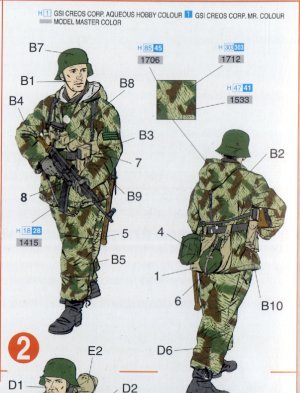
The German uniforms took 3 tries before the result was okay. Still getting my head around all the different types of uniform that are out there and how to paint them.
Cheers,
JW
Massachusetts, United States
Joined: November 07, 2008
KitMaker: 796 posts
Armorama: 763 posts
Posted: Wednesday, May 30, 2012 - 02:12 AM UTC
WOW
This is all around fantastic work. The tank and figs are awesome as is the base. very nice work bud.
Scratchmod-The Art of Destruction
Groningen, Netherlands
Joined: October 01, 2003
KitMaker: 1,236 posts
Armorama: 700 posts
Posted: Thursday, May 31, 2012 - 04:30 AM UTC
Thanks Rob,
I used this one to try some new things and have to say I like the way it turned out.
Cheers,
JW
Indiana, United States
Joined: June 10, 2005
KitMaker: 6,188 posts
Armorama: 5,960 posts
Posted: Thursday, May 31, 2012 - 09:05 AM UTC
Nicely done detail work on the engine deck!
Love the dirt/mudd effects too!

Thanks for sharing your awesome Lang!
~ Jeff
Ohio, United States
Joined: August 12, 2010
KitMaker: 731 posts
Armorama: 711 posts
Posted: Thursday, May 31, 2012 - 10:20 AM UTC
That is some very nice work, I love every thing about that model.
California, United States
Joined: April 27, 2011
KitMaker: 255 posts
Armorama: 250 posts
Posted: Thursday, May 31, 2012 - 01:02 PM UTC
great job on everything. how did you like the ak stuff?

Massachusetts, United States
Joined: February 08, 2012
KitMaker: 1,271 posts
Armorama: 1,253 posts
Posted: Thursday, May 31, 2012 - 02:39 PM UTC
This diorama is perfect in every way, there's really nothing that needs any improvement. But maybe add some grenadiers along the side? I always loved figures, I thought that they gave more life to a scene, but it really doesn't need it, it's amazing as is.
-Conor

I'm doin' stuff. Lotta stuff.
Groningen, Netherlands
Joined: October 01, 2003
KitMaker: 1,236 posts
Armorama: 700 posts
Posted: Thursday, May 31, 2012 - 07:57 PM UTC
Thank you for the great comments guys.
@Conor
I had planed on a soldier walking next the vehicle near the log on the right front side. I have been looking for one that is suitable and have goten the old but still good German 352nd Volksgrenadier Division figure set. I do still need to assemble and paint them and see which one looks best. But I agree that it would balence the base out better, so I'll take your advice onboard.
@craig
The AK stuff works good. I never like adding mud to my models as I always find it hard to get a convincing result. But the AK mud set works like a charm. Using the colours from light to dark and adding more plaster to the mix with every step you get a great result with a minimum of fuss And unwanted splatter is removed quick and easy with a brush and a bit of turpentine.
Also I would recomend the Mig DVD on wither camouflage. It has a good section on applying the mud.
Again thanks for the feed back and if you have anything more to add or questions let me know.
Cheers,
JW
Groningen, Netherlands
Joined: October 01, 2003
KitMaker: 1,236 posts
Armorama: 700 posts
Posted: Wednesday, June 06, 2012 - 03:50 AM UTC
Well I narrowed it down to these two
either this one:
or this one
Which one would you guys use?
North Carolina, United States
Joined: May 17, 2012
KitMaker: 1,980 posts
Armorama: 1,571 posts
Posted: Friday, June 15, 2012 - 04:09 AM UTC
The base, mud, and figures all look great, especially the base and figures. I know how things can change in photos so it's hard to tell, but the tank looks a little too "clean". To have a vehicle with the mud build up on the lower sides and wheels, I would expect to see a little staining and streaking on the superstructure and front plates.
Groningen, Netherlands
Joined: October 01, 2003
KitMaker: 1,236 posts
Armorama: 700 posts
Posted: Friday, June 15, 2012 - 08:05 AM UTC
Hi Bob,
Only the rear and lower part of the front hull have mud. Nothing really on the rest. That was more an aesthetic choice as I did not want to cover the paint finish. But I do get what you mean. Thanks for you input.
Cheers,
JW
Texas, United States
Joined: March 08, 2010
KitMaker: 2,465 posts
Armorama: 2,383 posts
Posted: Friday, June 15, 2012 - 09:23 AM UTC
Hi JW,
WOW!!! That is a fisrt rate build right there. Great paint, Weathering, and Ground work. Bravo man!
Gary
Ohio, United States
Joined: March 21, 2008
KitMaker: 35 posts
Armorama: 30 posts
Posted: Friday, June 15, 2012 - 10:36 AM UTC
outstanding work!

Massachusetts, United States
Joined: February 08, 2012
KitMaker: 1,271 posts
Armorama: 1,253 posts
Posted: Friday, June 15, 2012 - 10:59 AM UTC
I really like both.
COMBINE THEM.

I'm doin' stuff. Lotta stuff.
Groningen, Netherlands
Joined: October 01, 2003
KitMaker: 1,236 posts
Armorama: 700 posts
Posted: Sunday, June 17, 2012 - 11:59 PM UTC
Thanks for the kind words guys.
@ Conor.
I am only planning to place one as two would make it a bit to buisy (in my eyes)
Cheers,
JW


