#226
British Columbia, Canada
Joined: February 20, 2012
KitMaker: 1,909 posts
Armorama: 1,066 posts
Posted: Friday, February 08, 2013 - 05:29 AM UTC
That's some fine work there Marc!

Cheers Rob.
Anything without guns is a target!
27 completed campaigns and counting :)
#047
England - East Anglia, United Kingdom
Joined: September 13, 2005
KitMaker: 2,016 posts
Armorama: 1,187 posts
Posted: Saturday, February 09, 2013 - 01:19 AM UTC
Looks great Marc,love the tools

Major Caryle,
"Shall we have a go at the far end now,sir?"
Lt Colonel "Johnny" Frost,
"Having a go,is hardly text book terminology Harry"
Major Caryle,
"But you'll let us try sir?"
A Bridge Too Far
Lottery Campaign "Oh de Vichy"
#226
British Columbia, Canada
Joined: February 20, 2012
KitMaker: 1,909 posts
Armorama: 1,066 posts
Posted: Sunday, February 10, 2013 - 03:59 PM UTC
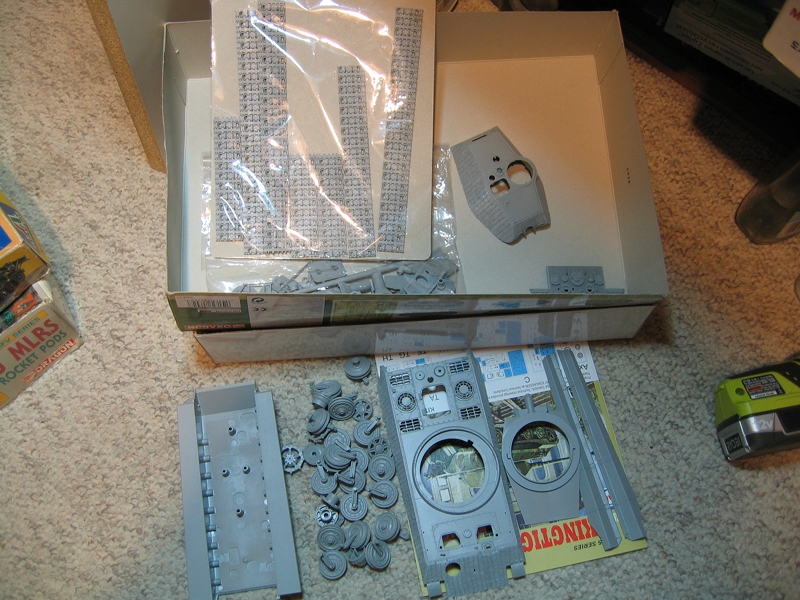
I have quite a few of the parts all cleaned up
including all of the Magic Tracks, those had three raised ejector marks one type of track piece and two on the other

I have them in runs but not glued yet.
Cheers Rob.
Anything without guns is a target!
27 completed campaigns and counting :)
CMOT
 Editor-in-Chief
England - South West, United Kingdom
Joined: May 14, 2006
KitMaker: 10,954 posts
Armorama: 8,571 posts
Posted: Sunday, February 10, 2013 - 05:06 PM UTC
Damn you Rob you just made me realise I had not removed the lugs on the tracks hanging on the side of my turret, which I have now rectified. That out of the way I am glad to see you are getting into gear now as you do make models that are a joy to watch come together especially the painting stages.
#226
British Columbia, Canada
Joined: February 20, 2012
KitMaker: 1,909 posts
Armorama: 1,066 posts
Posted: Sunday, February 10, 2013 - 06:32 PM UTC
LOL

Thanks Darren!
And Thanks for the compliment
I am surprised though as I am still learning to airbrush and I am not at all happy with my weathering efforts of late

seems my best effort was my first after starting back at this.
Cheers Rob.
Anything without guns is a target!
27 completed campaigns and counting :)
New Jersey, United States
Joined: June 02, 2006
KitMaker: 1,212 posts
Armorama: 674 posts
Posted: Monday, February 11, 2013 - 09:06 AM UTC
Darren, Andy, Rob... thanks guys.
Rob, what Ryobi tool is that off to the right and what are you going to do with a big honkin' tool like that on delicate little model parts?

The wife had foot surgery on Friday, that went very well, and I had to stay close to home since she really couldn't get around. So while she watched the tube... just realized how outdated that expression is... I sat at the bench and got all the little fiddly bit for the tools and cables attached. Last night I finally got to get this thing primed.


Here's a couple of closeups of the steel texturing with some oblique lighting. I am pleased with the look.


#226
British Columbia, Canada
Joined: February 20, 2012
KitMaker: 1,909 posts
Armorama: 1,066 posts
Posted: Monday, February 11, 2013 - 12:08 PM UTC
Quoted Text
Rob, what Ryobi tool is that off to the right and what are you going to do with a big honkin' tool like that on delicate little model parts?
LOL
Marc, that is a flashlight for battling the carpet monster.
Cheers Rob.
Anything without guns is a target!
27 completed campaigns and counting :)
New Jersey, United States
Joined: June 02, 2006
KitMaker: 1,212 posts
Armorama: 674 posts
Posted: Monday, February 11, 2013 - 01:56 PM UTC
A flashlight? Oh good, ya scared me for a sec.
Rob you need to catch the little bugger. Just make sure you use fresh plastic as bait.

Lisboa, Portugal
Joined: March 04, 2008
KitMaker: 5,386 posts
Armorama: 4,727 posts
Posted: Monday, February 11, 2013 - 03:00 PM UTC
Active Builds: 0
Active Campaigns: 0
Maine, United States
Joined: February 11, 2011
KitMaker: 1,654 posts
Armorama: 1,565 posts
Posted: Tuesday, February 12, 2013 - 12:33 PM UTC
1/72nd PE works well also and stays fresh longer
Jeff T.
The building lamp is lit.Build'em if you got'em.
CMOT
Editor-in-Chief England - South West, United Kingdom
Joined: May 14, 2006
KitMaker: 10,954 posts
Armorama: 8,571 posts
Posted: Tuesday, February 12, 2013 - 11:33 PM UTC
I will have to give the carpet monster trap a test as I suffer that problem.
That model looks stunning so far Marc with the very realistic finish you have there to the body work.
New Jersey, United States
Joined: June 02, 2006
KitMaker: 1,212 posts
Armorama: 674 posts
Posted: Wednesday, February 13, 2013 - 01:38 AM UTC
I can't find the picture of the "lethal trap". If I do I'll post it and you can have options
A quick pic of the base coat.

Oklahoma, United States
Joined: February 11, 2013
KitMaker: 294 posts
Armorama: 196 posts
Posted: Wednesday, February 13, 2013 - 01:40 AM UTC
I fixed the pest but good. My bench is over concreet.
Of course there's the Tool Rack Beast.
On the bench:
The Night Shift Campaign: GWH P-61 "The Last Shoot Down". 1/48
Spanish Civil War Campaign: Dragon Pz I Ausf B 1/35
Revell B-17 1/48 with lots of add ons.
Complete rehab and repaint of Dragon Pz III J. 1/35
New Jersey, United States
Joined: June 02, 2006
KitMaker: 1,212 posts
Armorama: 674 posts
Posted: Wednesday, February 13, 2013 - 08:24 AM UTC
FOUND IT!
Catch it or kill it... you choice

New Jersey, United States
Joined: June 02, 2006
KitMaker: 1,212 posts
Armorama: 674 posts
Posted: Thursday, February 14, 2013 - 10:16 AM UTC
Started in on the camo today. Need to do a little touch up on some yellow areas but the turret is done.

New Jersey, United States
Joined: June 02, 2006
KitMaker: 1,212 posts
Armorama: 674 posts
Posted: Tuesday, February 19, 2013 - 04:12 AM UTC
Been working on the weathering the couple of days. Started with the filters, then some fading and streaking... which BTW appear more stark in the photo than in the flesh... and did the pin washes on the turret.
Opinions and critiques always welcome.


CMOT
Editor-in-Chief England - South West, United Kingdom
Joined: May 14, 2006
KitMaker: 10,954 posts
Armorama: 8,571 posts
Posted: Tuesday, February 19, 2013 - 04:21 AM UTC
Very nice work Marc it has a lot of promise.
Texas, United States
Joined: July 21, 2005
KitMaker: 248 posts
Armorama: 231 posts
Posted: Friday, February 22, 2013 - 01:31 PM UTC
Gentlemen,
This is what ive gotten done so far. Dragons Jagdtiger Porsche production #6351. Its o.o.b except for the Cavilier zimm. (Good stuff!) I applied black primer with a base coat of tamiya dark yellow. Next is wash, pigments, ect. Comments welcome!
Cheers,
-Ziggy


CMOT
Editor-in-Chief England - South West, United Kingdom
Joined: May 14, 2006
KitMaker: 10,954 posts
Armorama: 8,571 posts
Posted: Friday, February 22, 2013 - 01:39 PM UTC
Looks good to me Chris what have you attached the Zimmerit with as I like to know alternate glue types. I found epoxy glues to be the best so far.
Texas, United States
Joined: July 21, 2005
KitMaker: 248 posts
Armorama: 231 posts
Posted: Friday, February 22, 2013 - 01:44 PM UTC
Thanks Darren,
I just used regular white elmers glue. Ive had no problems with it so far, but will see if it continues to adhere after the washes.

CMOT
Editor-in-Chief England - South West, United Kingdom
Joined: May 14, 2006
KitMaker: 10,954 posts
Armorama: 8,571 posts
Posted: Friday, February 22, 2013 - 02:55 PM UTC
I have used PVA before as well without any major issues, it is just that I find the Epoxy a quicker method and once it is on it is not coming off again.
New Jersey, United States
Joined: June 02, 2006
KitMaker: 1,212 posts
Armorama: 674 posts
Posted: Saturday, February 23, 2013 - 04:42 AM UTC
Outstanding Chris. I am a big fan of the Cavalier zim. I have use 5 min epoxy and slow setting CA and was happy with both. Never tried white glue.
The last couple of sessions were devoted to pin washes and starting in on the scratching. The washing was pretty straight forward. All of the scratches and chips, only the turret so far, are done with a fine pointed brush.


Texas, United States
Joined: July 21, 2005
KitMaker: 248 posts
Armorama: 231 posts
Posted: Saturday, February 23, 2013 - 05:36 AM UTC
Wow...amazing paint job...
How do you get that awsome fading effect between the camo stripes? And rust streaks?
Well done!
-Ziggy

Tasmania, Australia
Joined: December 19, 2011
KitMaker: 92 posts
Armorama: 88 posts
Posted: Saturday, February 23, 2013 - 02:53 PM UTC
Well I finally made a start, weather has been too nice to stay inside. Haven't built many kits so I'm still trying to work out my preferred way of doing the tracks.


Great work Marc...
Cheers.
CMOT
Editor-in-Chief England - South West, United Kingdom
Joined: May 14, 2006
KitMaker: 10,954 posts
Armorama: 8,571 posts
Posted: Saturday, February 23, 2013 - 05:23 PM UTC
Max; I find it much easier to build a full track run and then before the glue fully sets I apply them to the model making show the join is on the drive wheel. This way the tracks can still be removed for painting which I find easier to do off of the vehicle.
Marc; very nice work as always.