Tasmania, Australia
Joined: December 19, 2011
KitMaker: 92 posts
Armorama: 88 posts
Posted: Saturday, February 23, 2013 - 08:09 PM UTC
Quoted Text
Max; I find it much easier to build a full track run and then before the glue fully sets I apply them to the model making show the join is on the drive wheel. This way the tracks can still be removed for painting which I find easier to do off of the vehicle.
I think I'll have to agree as I tried that method the last time I had to do tracks, but at least this time I haven't assembled the whole tank, so this time there's less chance of me breaking off any small parts.
Cheers.
Quebec, Canada
Joined: November 19, 2011
KitMaker: 1,389 posts
Armorama: 1,388 posts
Posted: Sunday, February 24, 2013 - 02:12 AM UTC
Quoted Text
Max; I find it much easier to build a full track run and then before the glue fully sets I apply them to the model making show the join is on the drive wheel. This way the tracks can still be removed for painting which I find easier to do off of the vehicle.
Marc; very nice work as always.
I second that! I also do a single run, I find it easyer to work with it afterward.
Saddly I think I won`t be able to join... I was hoping for a tigerII for my Bday but got a superb Panther II instead ( KT was B.O.

) Still I`m gonna follow this thread.
Wing_nut
Awesome work my friend.
Phil.

Modeling...
I rest my case.
Ontario, Canada
Joined: March 25, 2010
KitMaker: 514 posts
Armorama: 261 posts
Posted: Sunday, February 24, 2013 - 04:21 AM UTC
AS for myself when building the tracks, single link plastic ones. I use the testors liquid, a slow setting type. The lower hull is built, painted, weathered slightly with road wheels installed. The tracks are painted, weathered to an extent. By installing them now I can usually manipulate them easier without working around the fenders and such and without the hull attached. With this all done I attack the hull. When all is done the whole project is weathered. Hope this helps.
Ontario, Canada
Joined: March 25, 2010
KitMaker: 514 posts
Armorama: 261 posts
Posted: Sunday, February 24, 2013 - 02:02 PM UTC
New Jersey, United States
Joined: June 02, 2006
KitMaker: 1,212 posts
Armorama: 674 posts
Posted: Tuesday, February 26, 2013 - 01:12 PM UTC
Thanks for the comment guys
Trevor that looks great.
Chris, After the base camo the 1st step was to spray a thin filter of buff/thinner at a 5:95 mix. 3 or 4 coats. Then a dot filter of white, tan, and brown oils. Not to heavy on the brown. The chips/scratches are Vallejo 70.822 German camo Black Brown and the streaks are AK streaking grime.
I finished up the chips/scratches/streaks last night. Some real subtle shading of the 3 color to brighten some spot that got dark in the process. Shows up better than in the pics. Unless someone has a suggestion I am going leave the uppers as is and start in on the lower hull area.


Utah, United States
Joined: May 27, 2003
KitMaker: 1,026 posts
Armorama: 654 posts
Posted: Thursday, February 28, 2013 - 02:59 PM UTC
Nice work gents. And speedy.
It's been a while, but I managed to get some work done. I followed Marc's lead and tried the straight-pin-for-lifting-lugs trick.
And I got lazy and decided, since this is a late model KT, to leave off the jack and wood block. So I just filled in the jack mount points and threw on some random looking hardware where the block was meant to go.

It's not much to look at, especially when you consider the posts above. Trevor and Marc are tough acts to follow!
Keith
Build 'em better than the box art!
CMOT
 Editor-in-Chief
England - South West, United Kingdom
Joined: May 14, 2006
KitMaker: 10,954 posts
Armorama: 8,571 posts
Posted: Thursday, February 28, 2013 - 03:37 PM UTC
Marc: Fantastic work on the muzzlebrake paint job and it makes for a great build.
Keith: It is good to see you back and building keep it up.
New Jersey, United States
Joined: June 02, 2006
KitMaker: 1,212 posts
Armorama: 674 posts
Posted: Friday, March 01, 2013 - 01:37 AM UTC
Thanks Darren.
Keith it looks great. And that was not lazy. In fact the opposite. Doing the extra work to correct that for a late KT.

Hawaii, United States
Joined: August 27, 2006
KitMaker: 1,646 posts
Armorama: 1,557 posts
Posted: Friday, March 01, 2013 - 01:56 PM UTC
Aloha All: some very nice work going on in this campaign.
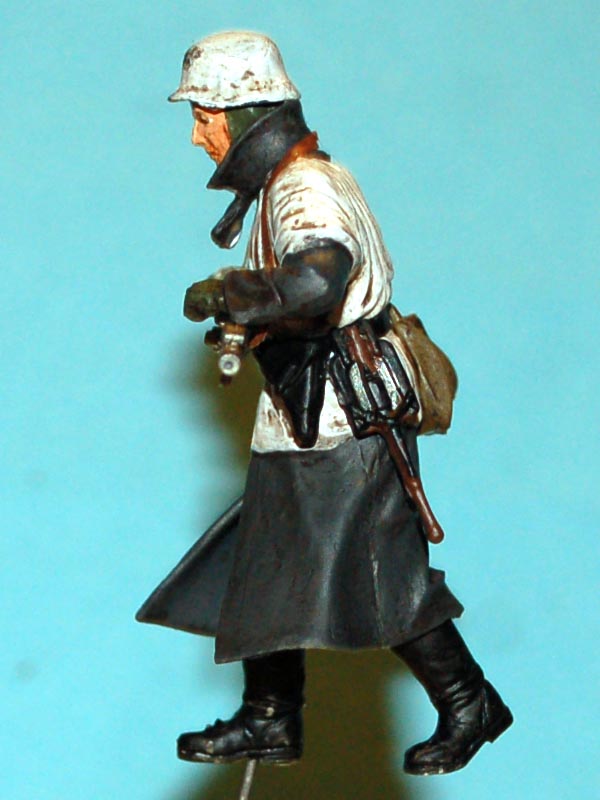
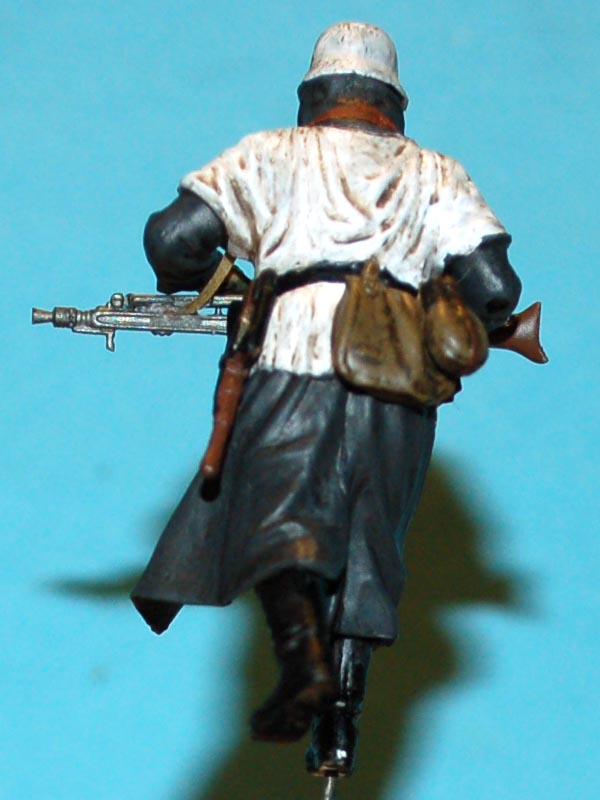
For anyone that is building, or has, Tamiya's 1/35th King Tiger in the Ardennes #35252: I am interested in the motorcyle riding figure and am willing to buy it. I don't need the tank or the motorcycle (someday, budget permiting...)
Please PM me if you are able / willing to part with the figure.
Many Thanks and Happy Modeling, -zon
"Certainty of death.
Small chance of sucess.
What are we waiting for?"
-Gimli, Return of the King.
New Jersey, United States
Joined: June 02, 2006
KitMaker: 1,212 posts
Armorama: 674 posts
Posted: Wednesday, March 06, 2013 - 01:35 AM UTC
CMOT
Editor-in-Chief England - South West, United Kingdom
Joined: May 14, 2006
KitMaker: 10,954 posts
Armorama: 8,571 posts
Posted: Wednesday, March 06, 2013 - 02:35 AM UTC
Really nice work Marc and the biggest compliment I can make is that I would like it on my shelf.
Lisboa, Portugal
Joined: March 04, 2008
KitMaker: 5,386 posts
Armorama: 4,727 posts
Posted: Wednesday, March 06, 2013 - 04:10 AM UTC
Quoted Text
Really nice work Marc and the biggest compliment I can make is that I would like it on my shelf.
Me too.. Great job Marc !!
Active Builds: 0
Active Campaigns: 0
Wisconsin, United States
Joined: April 05, 2007
KitMaker: 2,023 posts
Armorama: 1,234 posts
Posted: Wednesday, March 06, 2013 - 04:16 AM UTC
WOW Marc ! Great looking KT ! Realistic chipping in just the right amounts, nice paint. Thank you for sharing with us !
On the bench :
A whole bunch of figures, Too many half built kits and a (gasp) wing thing

#226
British Columbia, Canada
Joined: February 20, 2012
KitMaker: 1,909 posts
Armorama: 1,066 posts
Posted: Wednesday, March 06, 2013 - 07:32 AM UTC
Yes very nice! Marc

Cheers Rob.
Anything without guns is a target!
27 completed campaigns and counting :)
New York, United States
Joined: December 29, 2011
KitMaker: 343 posts
Armorama: 313 posts
Posted: Wednesday, March 06, 2013 - 09:44 AM UTC
Looks awesome, great job, I never get tired of Tigers
- John
The Scenic Factory
www.thescenicfactory.com
New Jersey, United States
Joined: June 02, 2006
KitMaker: 1,212 posts
Armorama: 674 posts
Posted: Friday, March 08, 2013 - 12:22 AM UTC
Darren, Thanks so much, that is indeed a very nice compliment.
And thanks to all for comments and following. It was fun. All I have to do now is figured how the get the patch and put it the banner.
4 straight "big cats" builds and I need a diversion. So I am going back in time to WWI for a little canvas, plywood and baling wire
Ontario, Canada
Joined: March 25, 2010
KitMaker: 514 posts
Armorama: 261 posts
Posted: Friday, March 08, 2013 - 02:08 AM UTC
By observing the finished Tiger II, it has given me a few ides in how to detail my own tanks. Hopefully I can apply them successfully and complete this Jagd Tiger which has been sitting far too long on my bench. Lovely work.
Texas, United States
Joined: July 21, 2005
KitMaker: 248 posts
Armorama: 231 posts
Posted: Tuesday, March 12, 2013 - 12:24 PM UTC
Hello guys,
Small update on my progress so far. Finished pigments and chipping, now its time to weather the tracks, and a few minor add-ons.(i.e cables,barrel,) Im gonna add some netting and some tree branches as this will end up in a dio when im finished.
All comments welcome.
Cheers all,
Ziggy


CMOT
Editor-in-Chief England - South West, United Kingdom
Joined: May 14, 2006
KitMaker: 10,954 posts
Armorama: 8,571 posts
Posted: Tuesday, March 12, 2013 - 01:02 PM UTC
Keep it coming Chris.
I am trying to get a diorama base sorted that I am happy with but it is a struggle at6 the moment.
CMOT
Editor-in-Chief England - South West, United Kingdom
Joined: May 14, 2006
KitMaker: 10,954 posts
Armorama: 8,571 posts
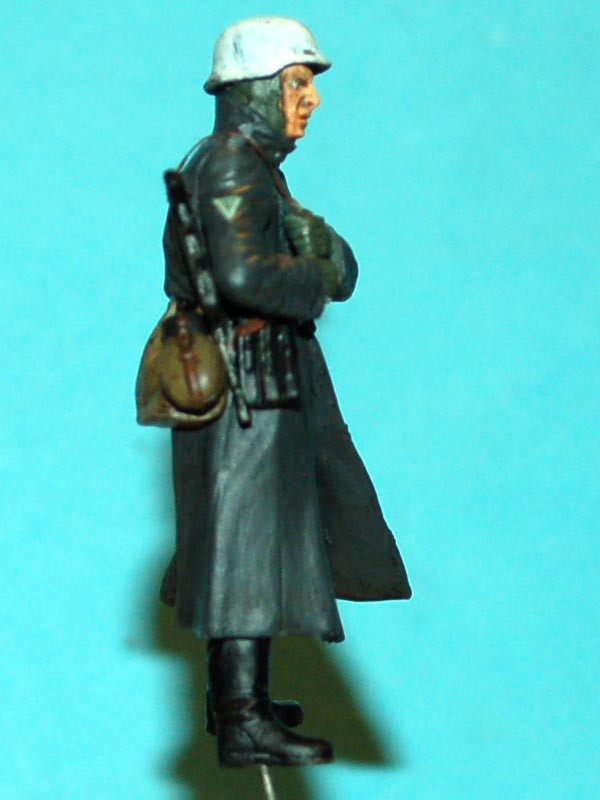
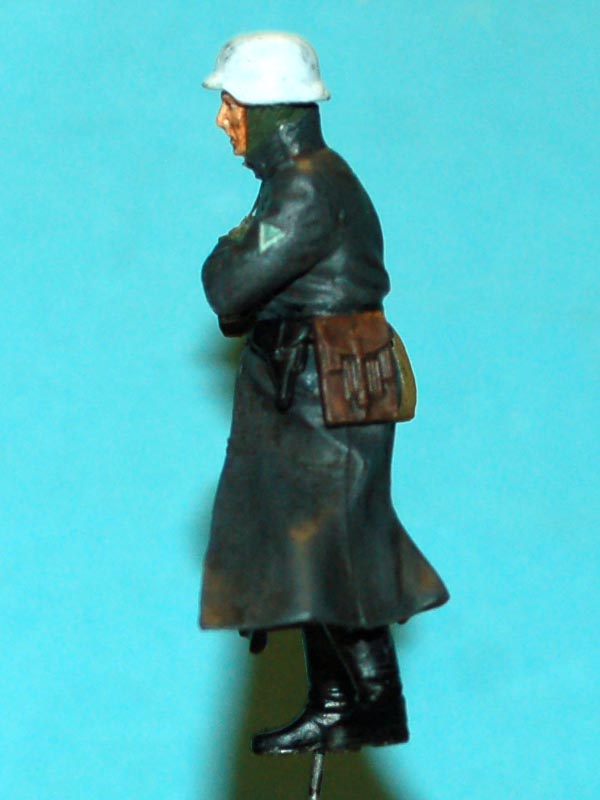
Posted: Wednesday, March 13, 2013 - 04:19 PM UTC
CMOT
Editor-in-Chief England - South West, United Kingdom
Joined: May 14, 2006
KitMaker: 10,954 posts
Armorama: 8,571 posts
Posted: Friday, March 15, 2013 - 09:41 AM UTC
#226
British Columbia, Canada
Joined: February 20, 2012
KitMaker: 1,909 posts
Armorama: 1,066 posts
Posted: Saturday, March 16, 2013 - 09:54 PM UTC
I have about everything cleaned up and will soon start assembly I wanted to better show the mod I did to the rear plate because the zimmerit went under the bracket, it should not. I placed the rear plate in position and marked it with a knife, then carefully trimmed the zimmerit away with a knife and chisel. After getting a nice fit I added some styrene srips to the back of the bracket so that the rear plate was back in the right position to join the upper hull.

Cheers Rob.
Anything without guns is a target!
27 completed campaigns and counting :)
CMOT
Editor-in-Chief England - South West, United Kingdom
Joined: May 14, 2006
KitMaker: 10,954 posts
Armorama: 8,571 posts
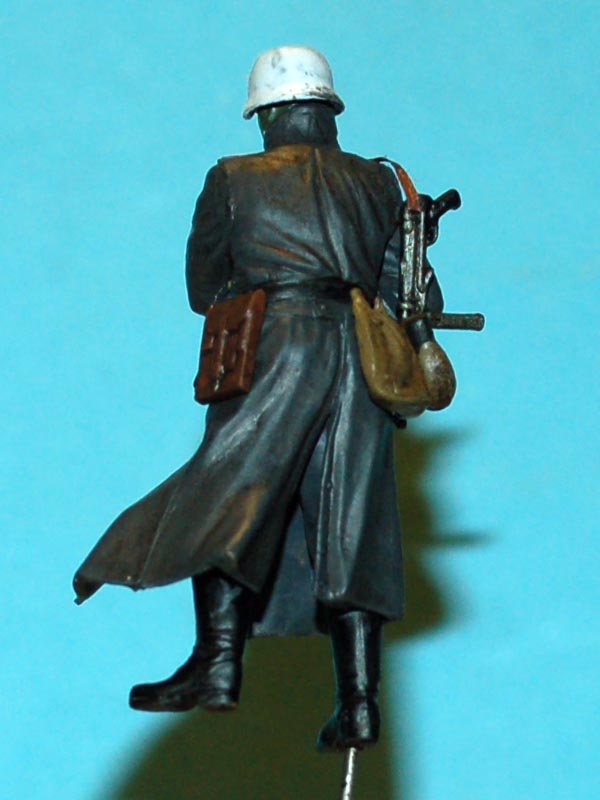
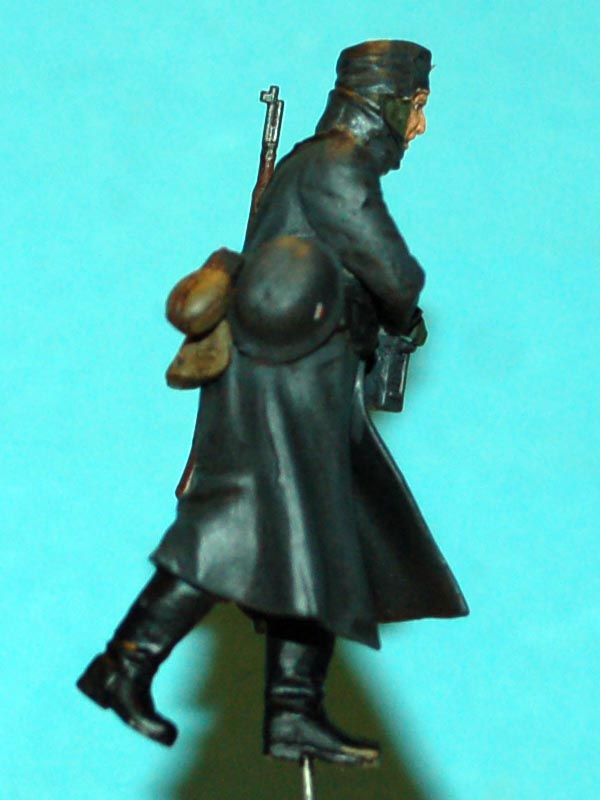
Posted: Sunday, March 17, 2013 - 01:54 AM UTC
That is the biggest problem with the zimmerit covered kit, DML has a habit of putting it where it is not wanted and while not a big issue does mean the modeller needs to think a long way ahead and it catches out the unweary.
CMOT
Editor-in-Chief England - South West, United Kingdom
Joined: May 14, 2006
KitMaker: 10,954 posts
Armorama: 8,571 posts
Posted: Sunday, March 17, 2013 - 08:05 AM UTC
#226
British Columbia, Canada
Joined: February 20, 2012
KitMaker: 1,909 posts
Armorama: 1,066 posts
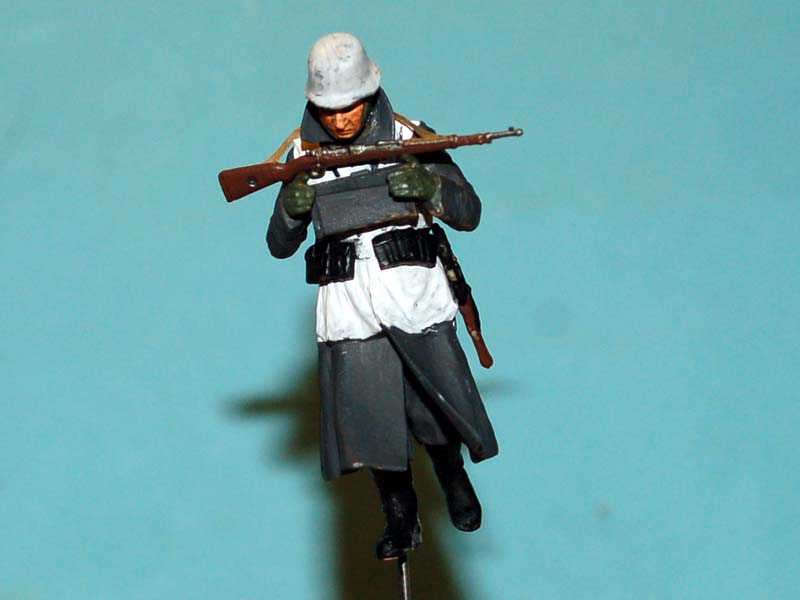
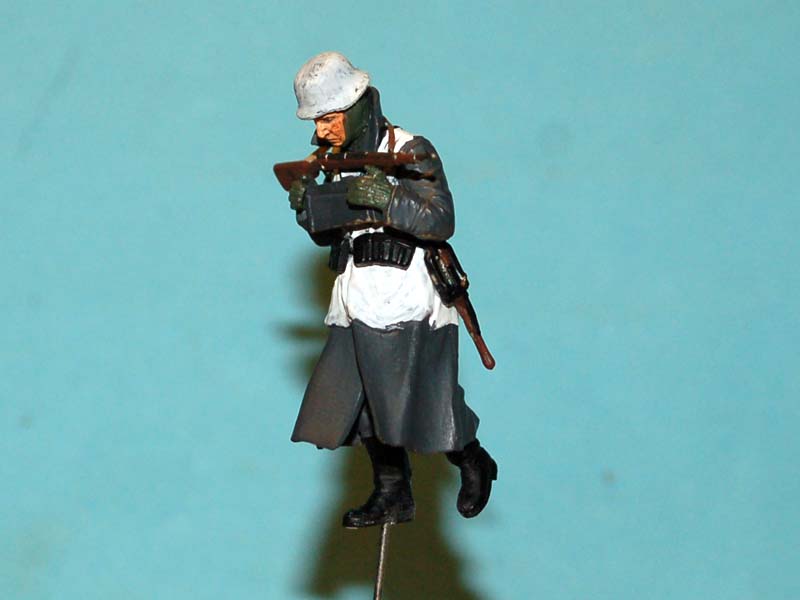
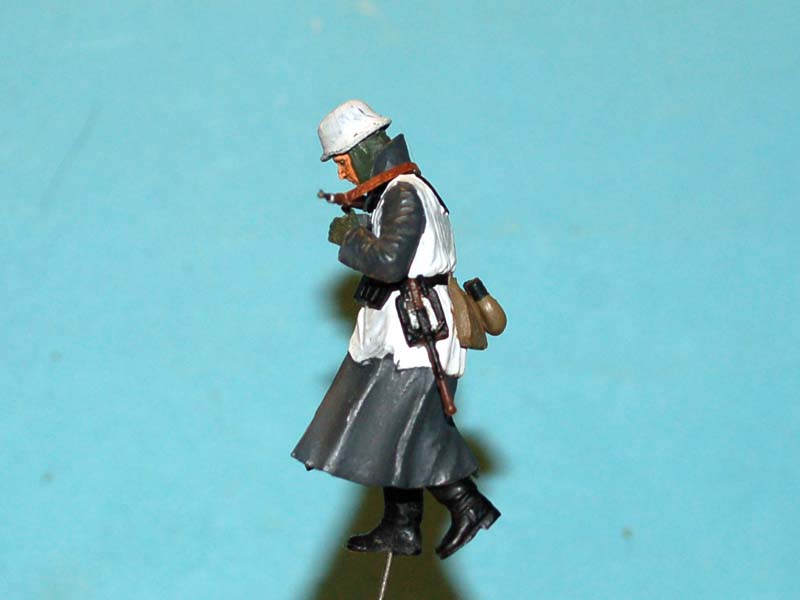
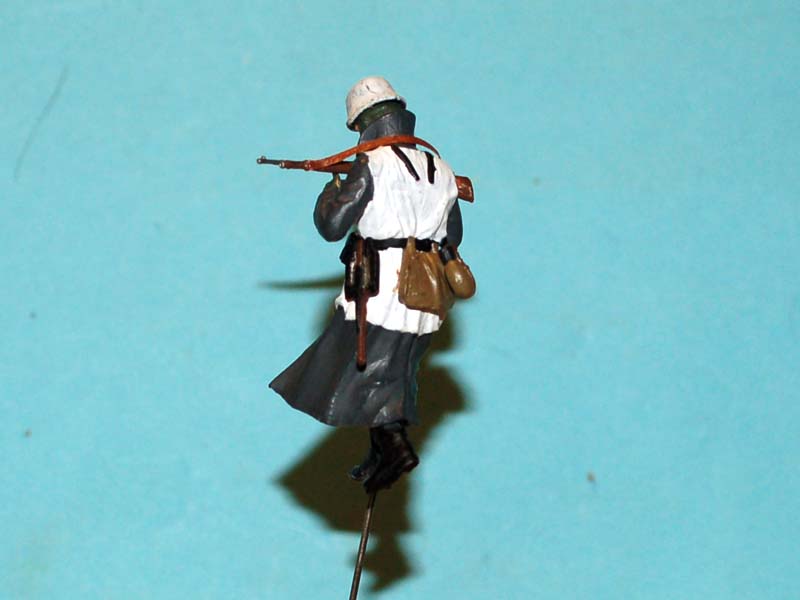
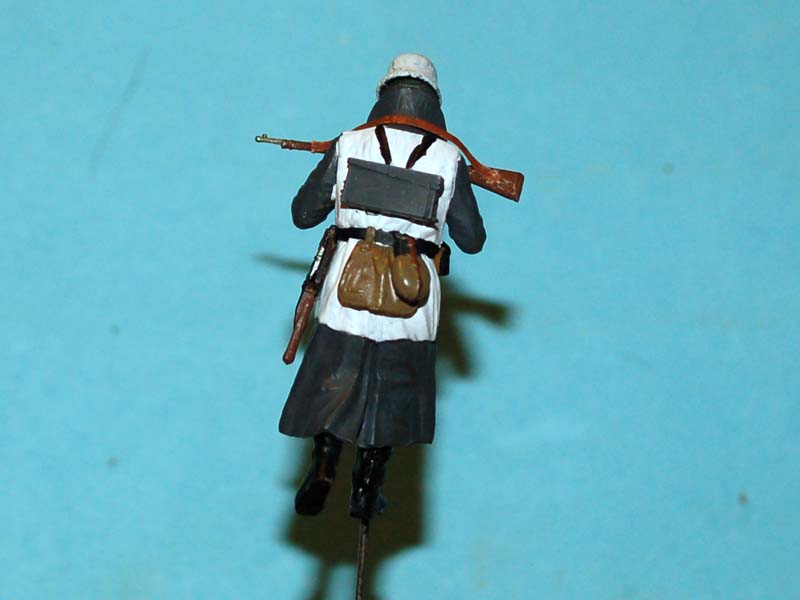
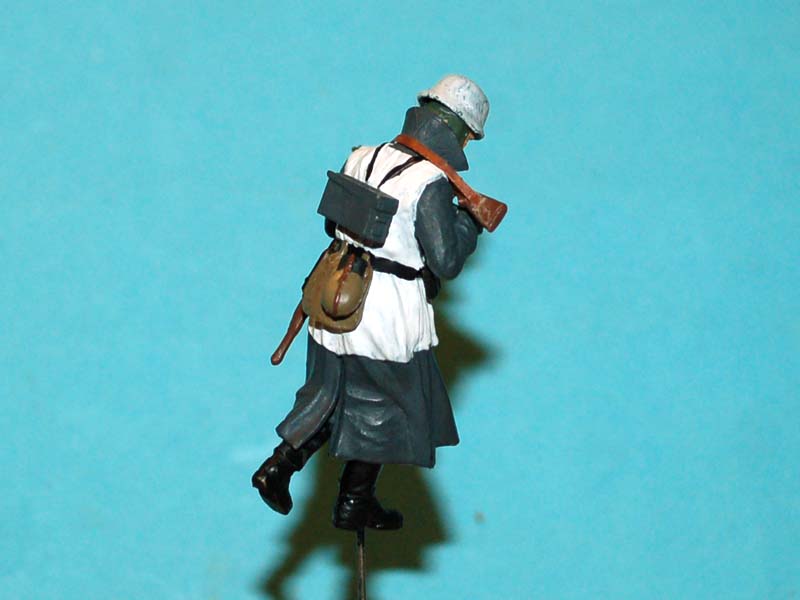
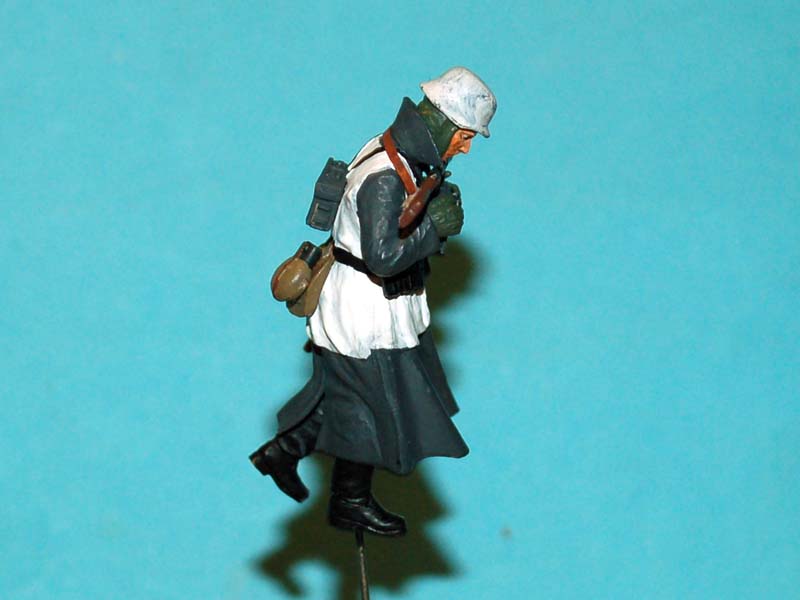
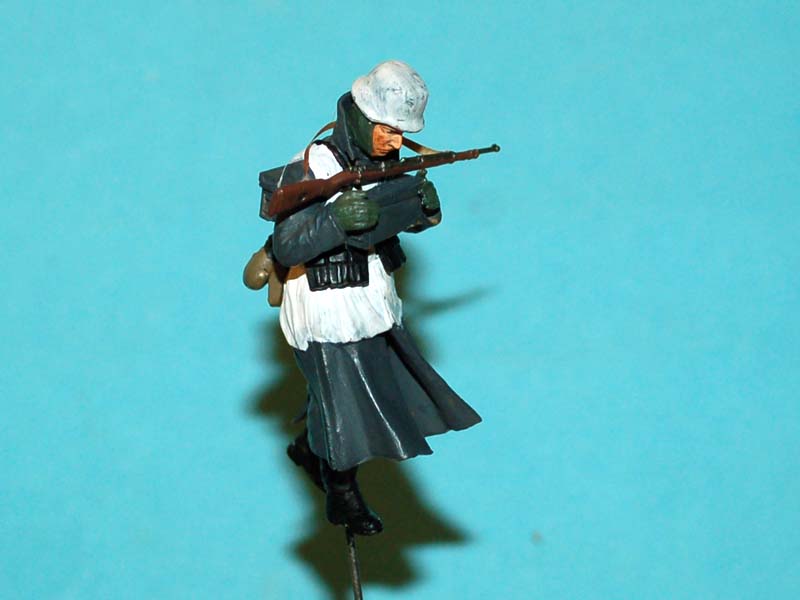
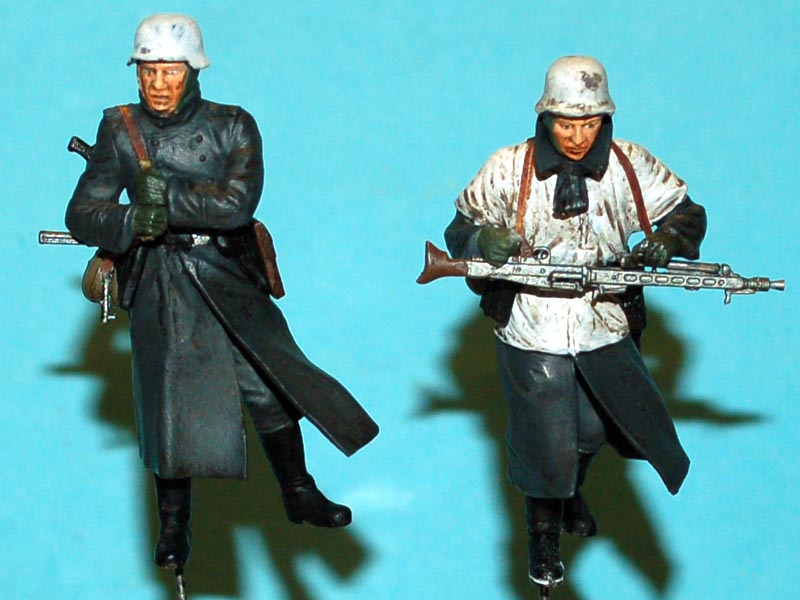
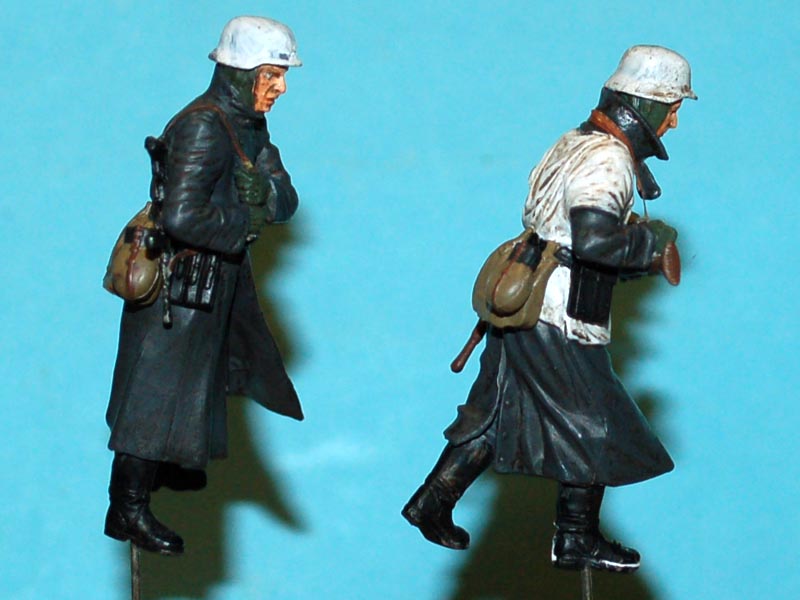
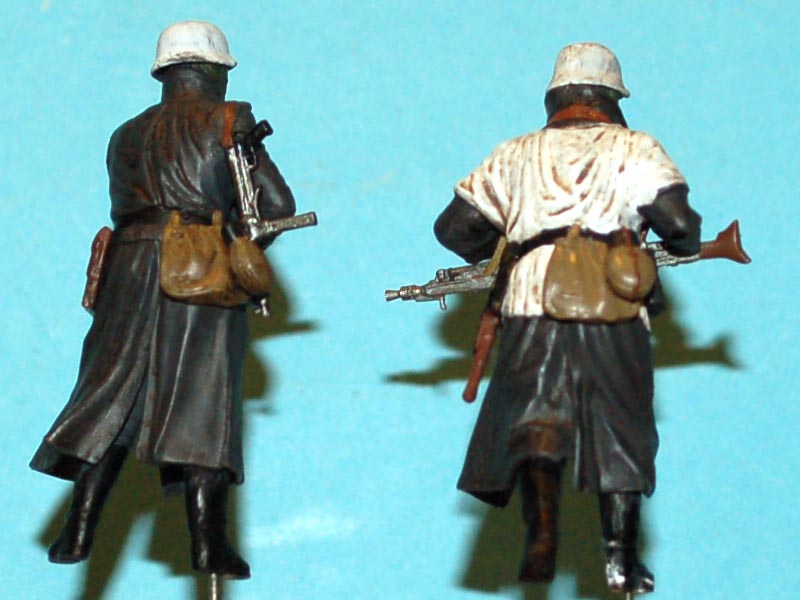
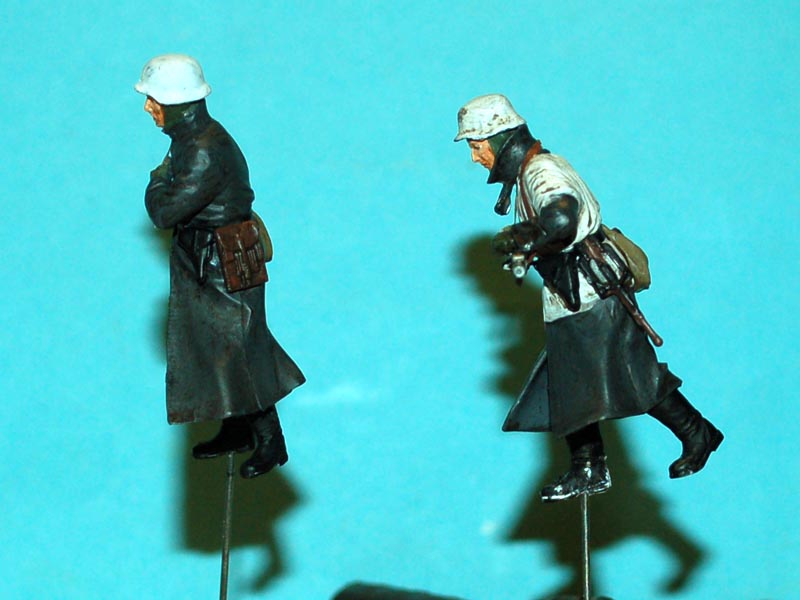
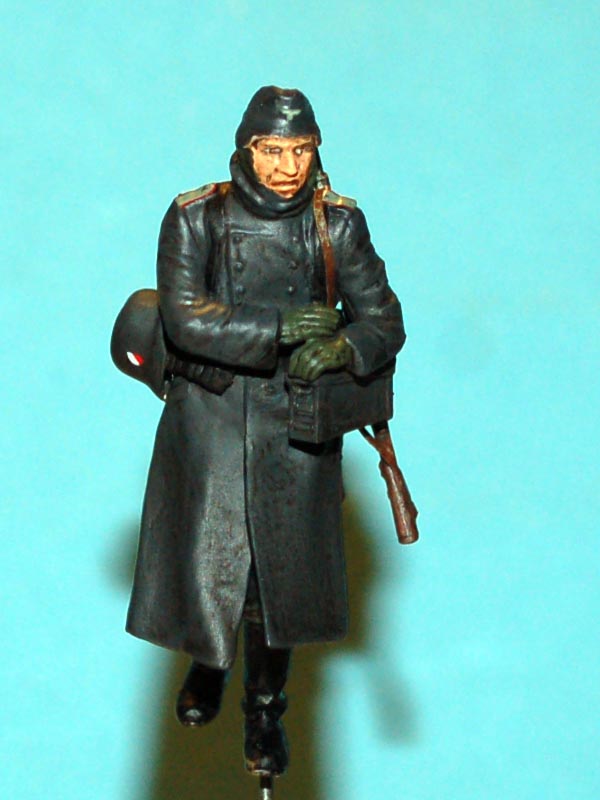
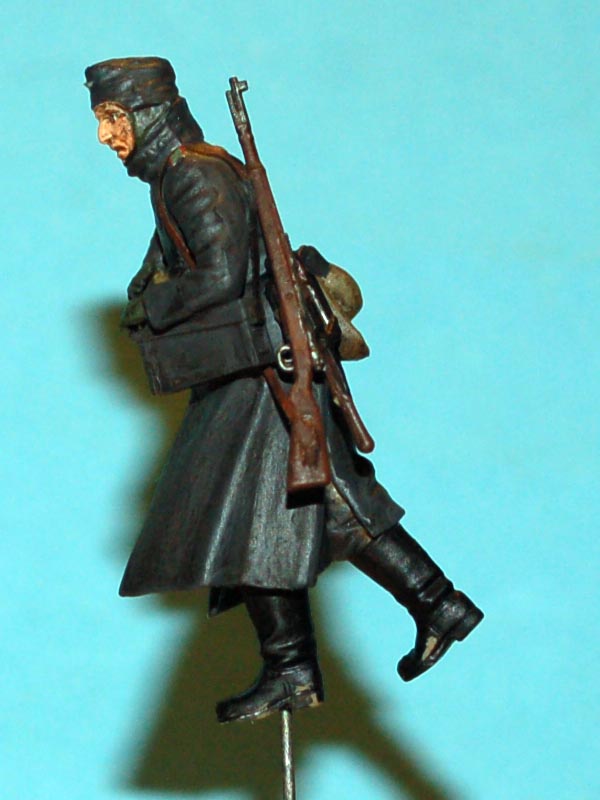
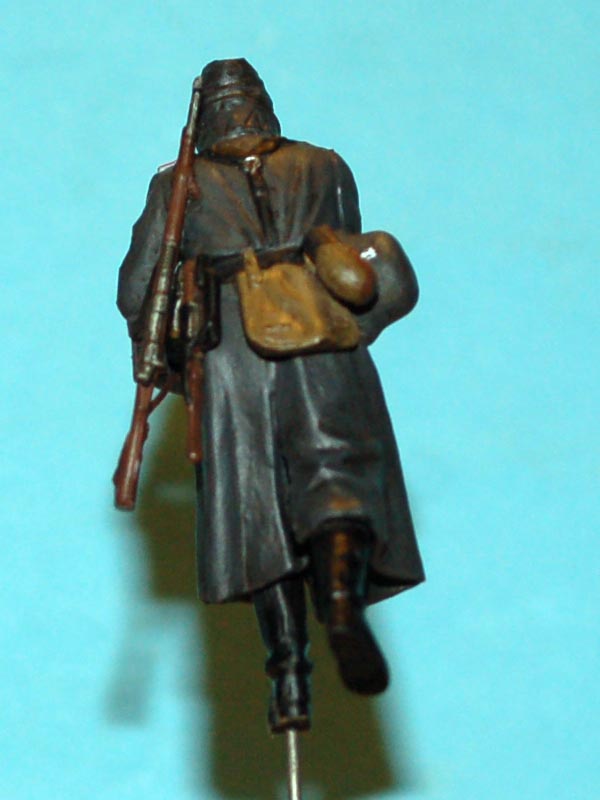
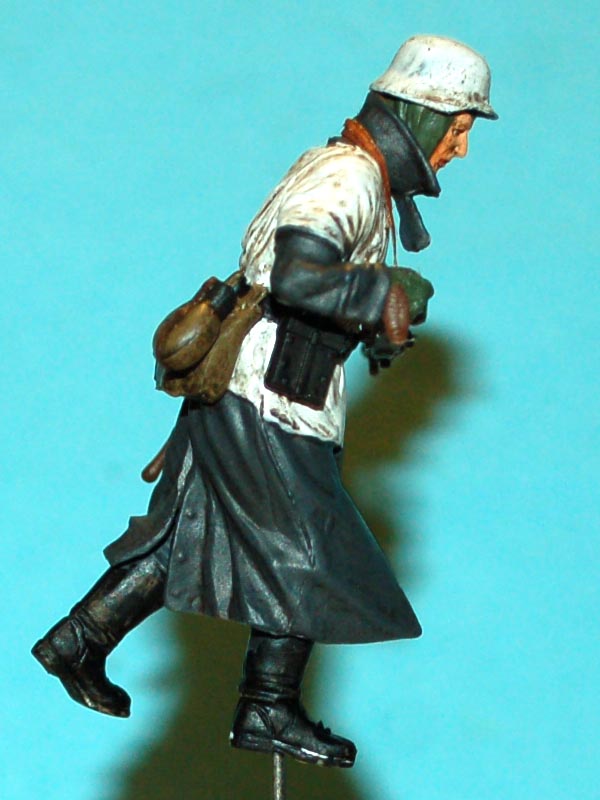
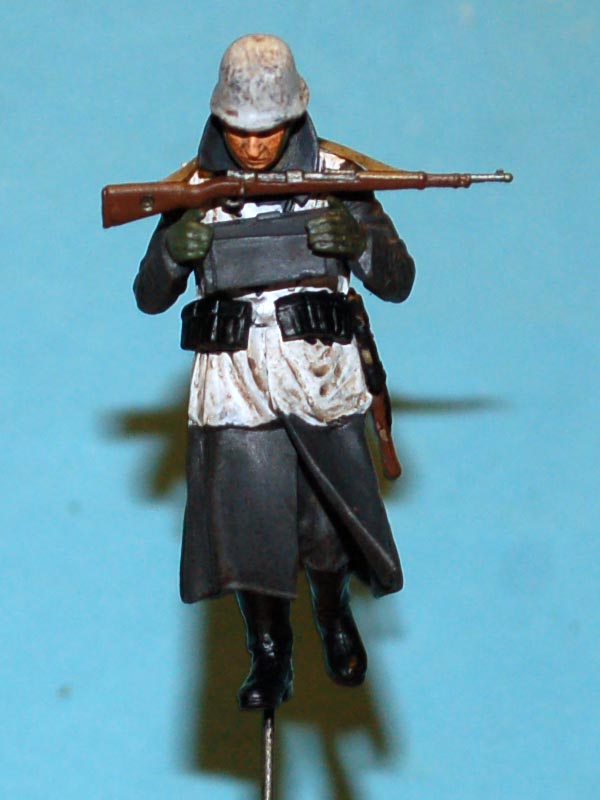
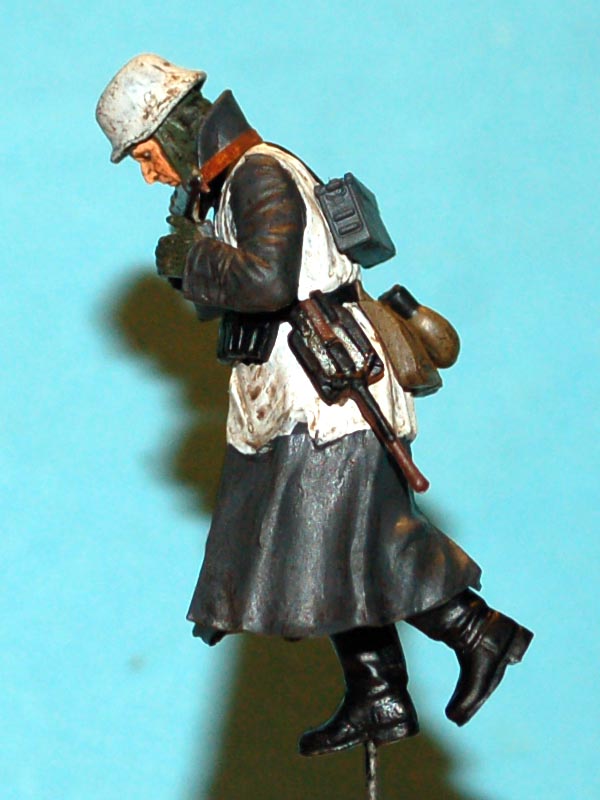
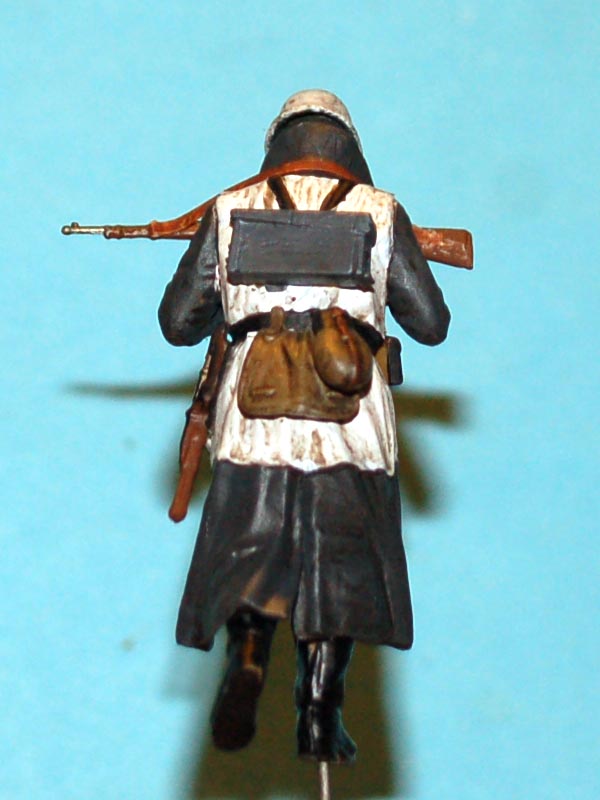
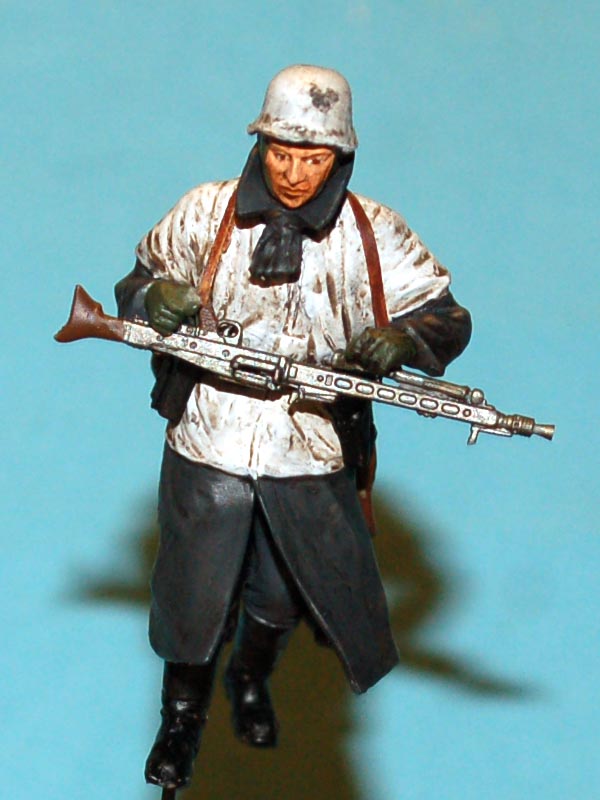
Posted: Sunday, March 17, 2013 - 10:03 AM UTC
Darren,
The figures look Great! the second one could use some pupils though, looks a bit like a zombie.

Cheers Rob.
Anything without guns is a target!
27 completed campaigns and counting :)