Time to put up some progress shots.
I approached building the Aerosan like I would an airplane. So I went ahead and pre-painted the cockpit interior and seats.

I decided to go ahead and prepaint white the rear areas around the engine. I ended up painting a little more than I had planned.

Time to get started on the engine. Assembled and ready for paint.

While the engine is being painted and then set aside to dry, I started on the seats. I added cushions made from cardboard. I added a layer of white glued tissue paper to give it a wrinkled fabric look.

Once the white glue had dried, I painted them Panzer Gray. Once that had dried, I dry-brushed Field Gray. The two grays were actually part of the engine paint procedure.

Speaking of painting the engine...here they are. Base coat of semi-gloss black. Dry-brushings of the two grays. Finished them off with a brushing of steel.

Seats mounted. By the way, I reverse dry-brushed a dark tan to give the interior added detail.

Both sides on and engine mounted. I actually broke the end off one of the engine mounts while trying to push it all the way in. I trimmed the remaining ends to allow the supports to sit flush in their mount locations. I left the prop and radiator off for now.

That's it for now. I'm kind of working on this one during breaks on a couple other projects. It's a pretty straightforward kit and a joy to build so far. Depending on how other projects work out, I don't see it being much longer before assembly is done and it'll be ready for paint. I'll definitely be making a base for it....if only to save me from knocking the skis off.
And yes, I've thought about swapping the skis for tires and even for rail wheels. Definitely lots of places you could go with this one. I wish I bought a couple of these kits now.


 My younger daughter saw to that.
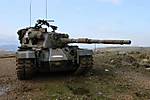
  Anyway time to start working on the T 28.