Polish city building with kv-1
Quebec, Canada
Joined: November 19, 2011
KitMaker: 1,389 posts
Armorama: 1,388 posts
Posted: Tuesday, November 27, 2012 - 02:24 AM UTC
@ Nico
Thanks, crazy what an old sign post can turn into! I'm always on the look out of what people are throwing away, you never know it could be huge amount of styrene

@ David
Thanks a lot, the kv-1 was a blast to build, I'm glad you like it. Here is a link to the build.
https://armorama.kitmaker.net/forums/199402&page=1And don't you worry I'll stick some timber in the rubbles allright! Must admit I should have probably donee this prior glueing....Still learning

Phil.

Modeling...
I rest my case.
Quebec, Canada
Joined: November 19, 2011
KitMaker: 1,389 posts
Armorama: 1,388 posts
Posted: Tuesday, November 27, 2012 - 02:52 AM UTC
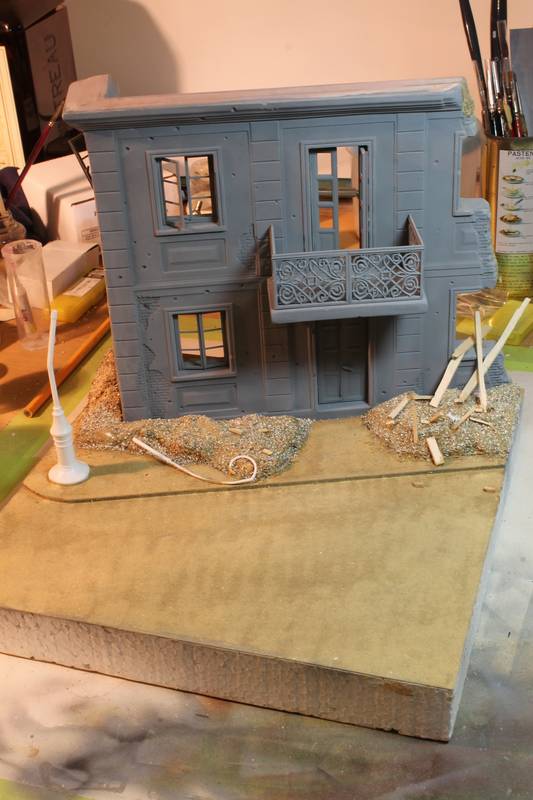
here is a peak.. I've glued the wood debris on and the corner lamp. After that I got to make some brick debris...how am I gonna do that? Maybe clay?... And afterward It will be finer dirt and a seal.
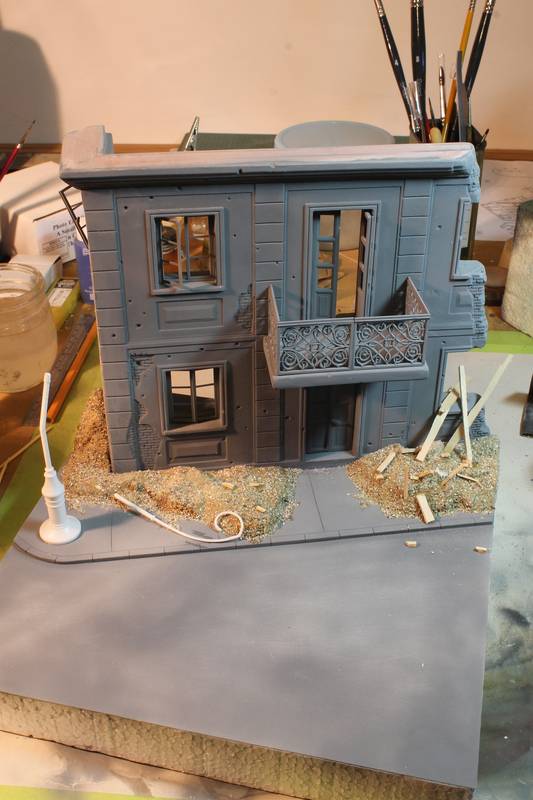
Thanks for watching and comments.
Phil.
Modeling...
I rest my case.
Quebec, Canada
Joined: November 19, 2011
KitMaker: 1,389 posts
Armorama: 1,388 posts
Posted: Tuesday, November 27, 2012 - 02:17 PM UTC
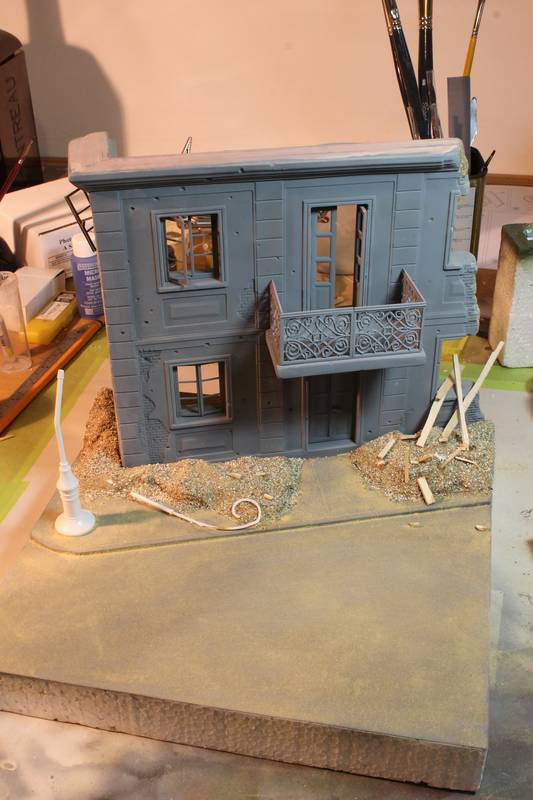
Covered thé whole ground with dustlike dirt. I'll post pics when it'll be dried And cleaned up.
Phil.
Modeling...
I rest my case.
CMOT
 Editor-in-Chief
England - South West, United Kingdom
Joined: May 14, 2006
KitMaker: 10,954 posts
Armorama: 8,571 posts
Posted: Tuesday, November 27, 2012 - 05:15 PM UTC
Silly question Phil but I assume you will be adding brick rubble to you base rubble?
Texas, United States
Joined: March 08, 2010
KitMaker: 2,465 posts
Armorama: 2,383 posts
Posted: Tuesday, November 27, 2012 - 05:21 PM UTC
Yeah Phil, where Da bricks bro!?!?!?!?


Gary

#135
California, United States
Joined: August 05, 2007
KitMaker: 1,501 posts
Armorama: 1,485 posts
Posted: Tuesday, November 27, 2012 - 07:27 PM UTC
@asmodeuss Philippe,
You could sprinkle bits of broken brick mixed in with kitty litter (the plaster type). Apply some railroad modeling scenic glue from a spray container to set all of the debris in place.
As far as the lamp post goes my vote is the same as Master WinBoggs. Now if that lamp post was here in Reseda you wouldnt need to worry about it as it would have gotten lifted, broken or not, just saying!!!!
BTW, cool new avatar.
~ Eddy

If you absolutely must have a city completely destroyed overnight . . . call the MARINES
Currently on the bench:
1:12 Bandia Star Wars K-2SO
1:35 Takom T-54B Late
Auckland, New Zealand
Joined: June 01, 2011
KitMaker: 1,716 posts
Armorama: 1,638 posts
Posted: Tuesday, November 27, 2012 - 07:53 PM UTC
Hey ya Phil mate ,, here's an idea for you to make your rubble look very cool and its easy .. plaster of paris ..just make some up and pour it onto a plastic sheet and let it go completely dry ,, then smash the crap out of it lightly
ya that makes prefect sense

Hitting it lightly with give you many different sizes and when its placed right it looks also exactly like the real thing .
I'm using this technique with this dio i am building for a customer .Here's a couple of pics .


Phill
I know the voices ain't real but they do come up with some great ideas
Never trust a man who left alone with a tea cozy and doesn't try it on ( Billy Connolly )
Overkill is often very understated
Quebec, Canada
Joined: November 19, 2011
KitMaker: 1,389 posts
Armorama: 1,388 posts
Posted: Wednesday, November 28, 2012 - 02:25 AM UTC
Thanks for the tip Phill.
Darren and Gary, brick is already planned I've got lots of molding plaster and I'm building the mold this week. I just did not figure how many i make and if I go all the way with the molds...Depends on my motivation I presume

I'll post an update today.
Modeling...
I rest my case.
Quebec, Canada
Joined: November 19, 2011
KitMaker: 1,389 posts
Armorama: 1,388 posts
Posted: Wednesday, November 28, 2012 - 03:10 AM UTC
Here is what I've done, with very dilluted exterior wood glue( it has a mat finish and it's harder when dry) I've covered the areas that I wanted to be covered with a dirt texture. Then using sanding dust from pine wood(very fine) I've covered those areas with a ``sifter``

and it looks like this:
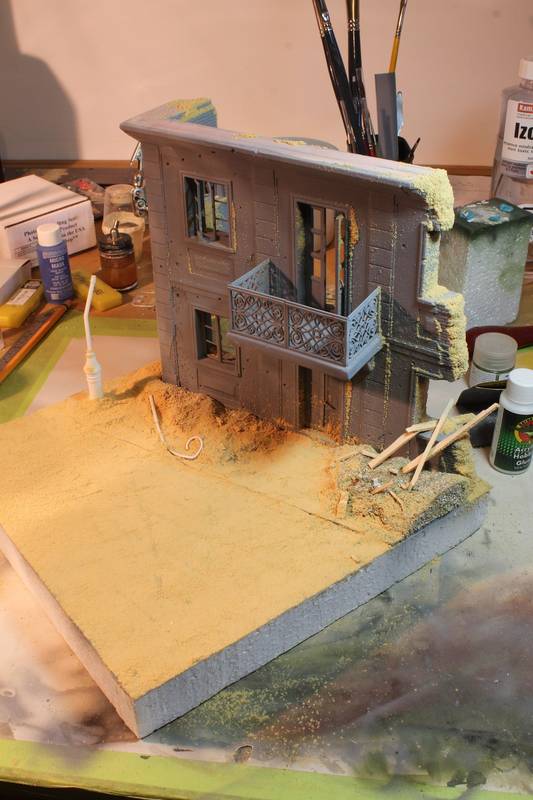
After 12hrs I took of the sanding dust and i was left with a textured ground and sidewalk that are blending together slowly as a war torn city ground would be. Of course another pass is planned, I,ve done some test and 2 pass is to my likeing.
Remember this is not the color it will be it is only the base materials. With this texture I presume that the pigments will grip easely in this 3d kind of ground.
Anyway enough jiberish

Thanks for watching and comments.
Phil.
Modeling...
I rest my case.
Texas, United States
Joined: March 08, 2010
KitMaker: 2,465 posts
Armorama: 2,383 posts
Posted: Wednesday, November 28, 2012 - 05:59 AM UTC
Hey Phil,
Man that looks great!!! Nice use of the sawdust. Where did you get the sawdust..........Jest kiddin' bro!
I cant wait to the next update!
Gary
Auckland, New Zealand
Joined: June 01, 2011
KitMaker: 1,716 posts
Armorama: 1,638 posts
Posted: Wednesday, November 28, 2012 - 08:39 AM UTC
Phil thats a bloody brilliant result ,tied it all in so nicely and it leveled it all out too ..seriously liking how this is going so i'll be keeping my eye on this build
Phill
I know the voices ain't real but they do come up with some great ideas
Never trust a man who left alone with a tea cozy and doesn't try it on ( Billy Connolly )
Overkill is often very understated
CMOT
Editor-in-Chief England - South West, United Kingdom
Joined: May 14, 2006
KitMaker: 10,954 posts
Armorama: 8,571 posts
Posted: Wednesday, November 28, 2012 - 08:50 AM UTC
Phil I like the weathering/detailing thus far as it really is starting to come together. Don't forget to add rubble on the inside of the building if it is destroyed as it will add to the overall effect.
Quebec, Canada
Joined: November 19, 2011
KitMaker: 1,389 posts
Armorama: 1,388 posts
Posted: Wednesday, November 28, 2012 - 01:41 PM UTC
Thanks guys! I'll make sure to adress those situation: bricks and rubbles inside.
Nice to have peeps To watch my back!
Modeling...
I rest my case.
Quebec, Canada
Joined: November 19, 2011
KitMaker: 1,389 posts
Armorama: 1,388 posts
Posted: Thursday, November 29, 2012 - 02:14 AM UTC
The base ground is laid down. The second coat of sanding dust really blended everything together. Now it is time to finish my brick mold Lets hope it'll work
And also work on the interior. I think this may take longer than I tought.
I need to clean some parts that received some dirt but i'm glad with this ground texture...lets say 80%
Thanks for watching and comments.
Phil.
Modeling...
I rest my case.
Texas, United States
Joined: March 08, 2010
KitMaker: 2,465 posts
Armorama: 2,383 posts
Posted: Thursday, November 29, 2012 - 01:18 PM UTC
Very nice brother Phil! Are you going to place the lamp-post shade on the rubble or leave it off? What are you using to glue/fix the sawdust in place?
Gary
Canada
Joined: October 18, 2012
KitMaker: 57 posts
Armorama: 42 posts
Posted: Thursday, November 29, 2012 - 02:21 PM UTC
Nice job Phil from another Quebecer. I look forward to see this dia develop.
John
Quebec, Canada
Joined: November 19, 2011
KitMaker: 1,389 posts
Armorama: 1,388 posts
Posted: Thursday, November 29, 2012 - 02:24 PM UTC
Thanks and Merci John! Nice to have a fellow Quebecquer on board.
I'll try to make us proud!
@Gary Yes sir! I'll place that lamp post shade in the rubbles...I've just forgot to put it in the pics
hehehe
For the sanding dust I used dilluted exterior wood glue about 70% water.
Phil.
Modeling...
I rest my case.
Quebec, Canada
Joined: November 19, 2011
KitMaker: 1,389 posts
Armorama: 1,388 posts
Posted: Friday, November 30, 2012 - 02:10 AM UTC
I've started to assemble my brick mold.
The length will be cut with a blade, or breaked as it is rubbles. I hope it will work like a ice cube mold...
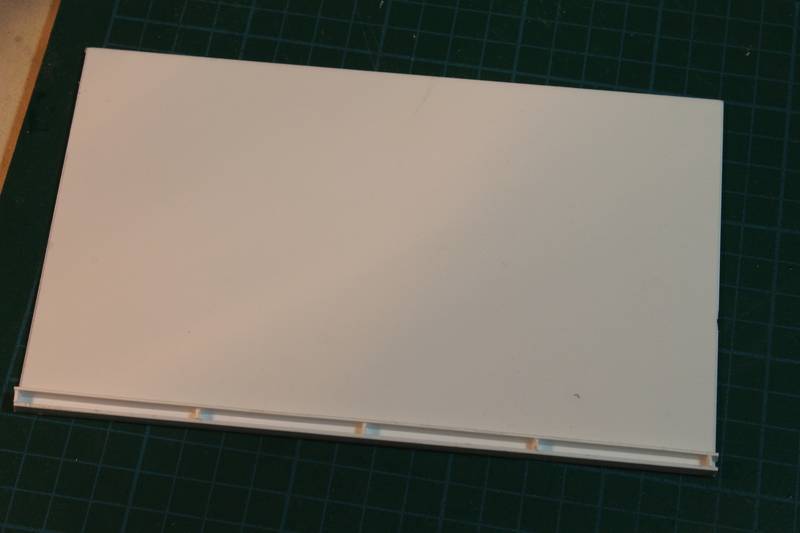
My hopes are not too high but if I don't try it I won't know!
Thanks for watching.
Phil.
Modeling...
I rest my case.
Texas, United States
Joined: March 08, 2010
KitMaker: 2,465 posts
Armorama: 2,383 posts
Posted: Friday, November 30, 2012 - 03:34 AM UTC
Quoted Text
My hopes are not too high but if I don't try it I won't know!
Thanks for watching.
Phil.
There is no try....there is only DO - young padawan

Gary
Warszawa, Poland
Joined: November 04, 2011
KitMaker: 50 posts
Armorama: 49 posts
Posted: Saturday, December 01, 2012 - 12:16 PM UTC
Looking good. Keep going
Quebec, Canada
Joined: November 19, 2011
KitMaker: 1,389 posts
Armorama: 1,388 posts
Posted: Saturday, December 01, 2012 - 05:36 PM UTC
Master Windu, I will do!
Thanks Babyloon, I'll be on and off this project for a while... Do not want to rush it.
Phil.
Modeling...
I rest my case.
Quebec, Canada
Joined: November 19, 2011
KitMaker: 1,389 posts
Armorama: 1,388 posts
Posted: Monday, December 03, 2012 - 01:59 PM UTC
The mold went pretty good! I've used artform mold compound for casting the bricks and slate(for breaking pieces, thx Phill.) It retracted a tad lenghtwise but since I was casting long bars to cut bricks it was fine.
here what I got:
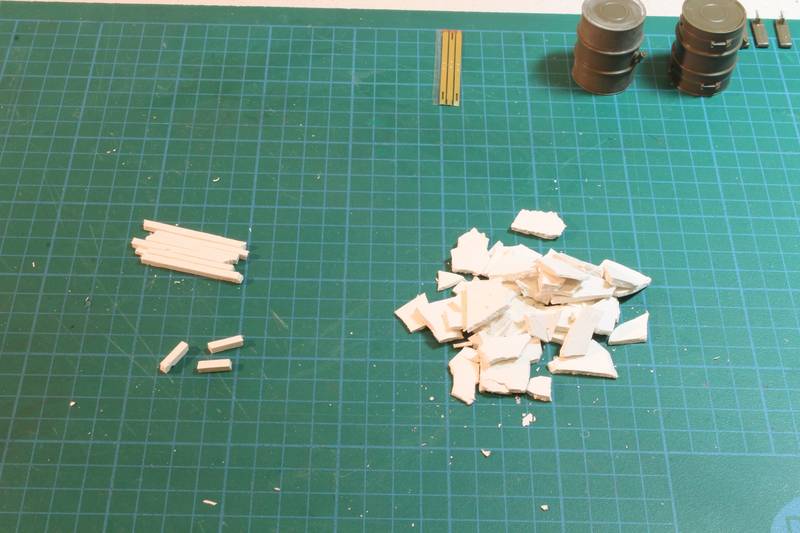
Thanks for watching.
Phil.
Modeling...
I rest my case.
West-Vlaaderen, Belgium
Joined: August 14, 2005
KitMaker: 3,938 posts
Armorama: 520 posts
Posted: Sunday, December 09, 2012 - 09:31 PM UTC
Yo Phil,,
Nicely done the technique with sanding dust...your right it's come really nice together with two coats. Nice trick!
Keep this up!
Greetz Nico

Visit my Blog: http://thedioramaworld.blogspot.com/ -->
Bench: Model display dioramas.
Quebec, Canada
Joined: November 19, 2011
KitMaker: 1,389 posts
Armorama: 1,388 posts
Posted: Monday, December 10, 2012 - 02:12 AM UTC
Thanks nico!
I'm working on the rubbles. Molding some bricks and slate. I'll update this week.
Phil.
Modeling...
I rest my case.
Quebec, Canada
Joined: November 19, 2011
KitMaker: 1,389 posts
Armorama: 1,388 posts
Posted: Wednesday, January 02, 2013 - 04:01 AM UTC
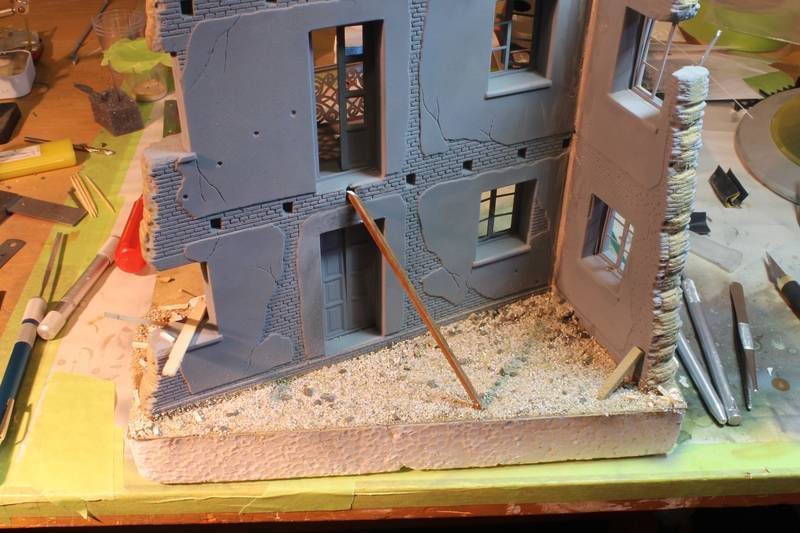
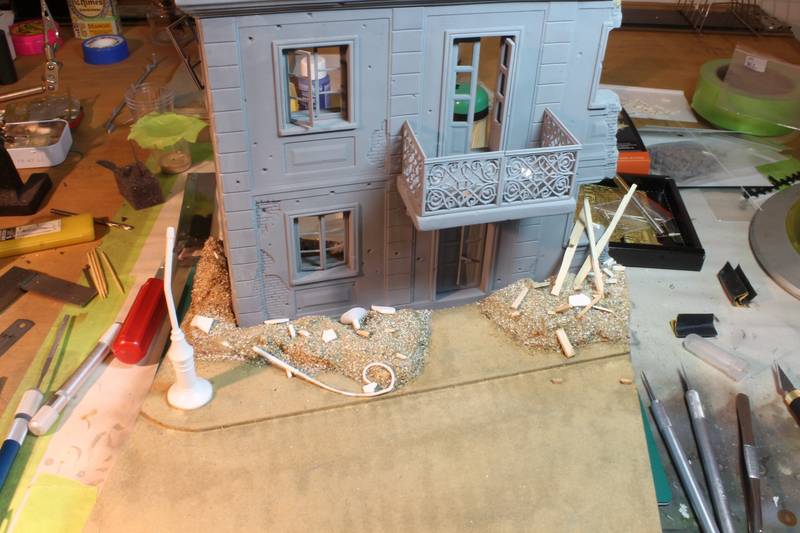
Hey guys I worked a little on the dio... putted some debris inside and added bricks and rubbles on the front.
Thanks for watching gents!
Phil.
Modeling...
I rest my case.


