 I cancelled my order. They don't answer nothing nada. So I suggest no one waste time money and effort with these people.
Hosted by Darren Baker
I am new and starting my 1/35 Dragon Leopold

Scarlet_Guidon_6

Joined: December 29, 2012
KitMaker: 197 posts
Armorama: 186 posts

Posted: Tuesday, February 05, 2013 - 01:39 PM UTC
 I cancelled my order. They don't answer nothing nada. So I suggest no one waste time money and effort with these people.
Scarlet_Guidon_6

Joined: December 29, 2012
KitMaker: 197 posts
Armorama: 186 posts

Posted: Tuesday, February 05, 2013 - 01:54 PM UTC
 Today, I glued the tracks and the rr ties to the base. Guess I didn't do a good enough job masking as I had to use my Dremel tool to make space for the RR ties. Pushing the rails through the tiny slots was a bear!!! Super glue and kicker to the rescue. It looks pretty good,even my wife said it looked big and good!
If you are building this model I recommend you glue the base then add strengtheners at each joint as they become unwieldy and tend to break at the glue lines. I used left over sprue as longitudinal stiffeners. Now to touch up some gaps and touch up painted areas.Steel on top of track, rust on side of track and brown on the sleepers(ties).
I am still trying to understand how the aluminum barrel fits. It is awfully long but Herr R Schatton says it works so I will try and see.
I really like using Vallejo acrylic pints. They brush on smooth and cover well.
I need more Dunklegelb (Dark yellow) the sheer size eats spray cans of paint. just priming used all my gray primer. If I can figure out how to up load photos I will show them to you!!!! I tried using directions but no up load even though it said success!!!! I have photo on my computer (under 3 mg and jpeg), I even tried to create an album but so far no joy!!! If you know how feel free to instructing this newby!!

firstcircle


Joined: November 19, 2008
KitMaker: 2,249 posts
Armorama: 2,007 posts

Posted: Wednesday, February 06, 2013 - 09:13 AM UTC
I maybe wrong, but I'm not sure you were successful uploading all your photos; it seems like you have three photos up there:
Your photos
Simplified instructions are here and there is a link there to more detailed instructions.
Does this help?
Your photos
Simplified instructions are here and there is a link there to more detailed instructions.
Does this help?


Scarlet_Guidon_6

Joined: December 29, 2012
KitMaker: 197 posts
Armorama: 186 posts

Posted: Sunday, March 03, 2013 - 12:39 PM UTC
I am well into my build. I NEED HELP!!! I have taken pics of my build.I have followed the instructions to the letter.I hit upload/submit. The site indicated processing. Then I get the photos have sucessfully uploaded. BUT THERE IS NOTHING THERE!!!!!! MY PHOTOS

Scarlet_Guidon_6

Joined: December 29, 2012
KitMaker: 197 posts
Armorama: 186 posts

Posted: Sunday, March 03, 2013 - 12:55 PM UTC
I looked at the detailed method of uploading photos. It shows a header that has the photos on it. Looking here there is no photos section. I will gladly e mail pis to anyone then you upload and I will describe!!!!! I am trying to share my build,
Thank you!!
Thank you!!


Scarlet_Guidon_6

Joined: December 29, 2012
KitMaker: 197 posts
Armorama: 186 posts

Posted: Monday, March 04, 2013 - 06:40 PM UTC
This is a test start to my build and pictures


Scarlet_Guidon_6

Joined: December 29, 2012
KitMaker: 197 posts
Armorama: 186 posts

Posted: Monday, March 04, 2013 - 06:50 PM UTC
The above photo is of my old work bench and it shows the 2 crew kits I am building. The one that comes with the Dragon kit and the Trumpeter kit.I have glued and assembled the crews.I have discovered Vallejo Acrylic paints. They are great.I used Vallejo German uniform grey,I made the helmets a slight shade darker or contrast. Note I use a brush and Spray cans. I haven't tried air brushing.. I primed the crews with Grey primer. I Also primed the Leopolds kit with grey primer then hit it with Tamiya TS-3 Dark yellow from the spray can.
I have the Archer decals for the uniform collar tabs ,the shoulder boards and helmet markings,haven't done them yet. Got tired of figures and wanted to start the gun.
I will send and print more as I get time.


I have the Archer decals for the uniform collar tabs ,the shoulder boards and helmet markings,haven't done them yet. Got tired of figures and wanted to start the gun.
I will send and print more as I get time.


Scarlet_Guidon_6

Joined: December 29, 2012
KitMaker: 197 posts
Armorama: 186 posts

Posted: Tuesday, March 05, 2013 - 10:46 AM UTC
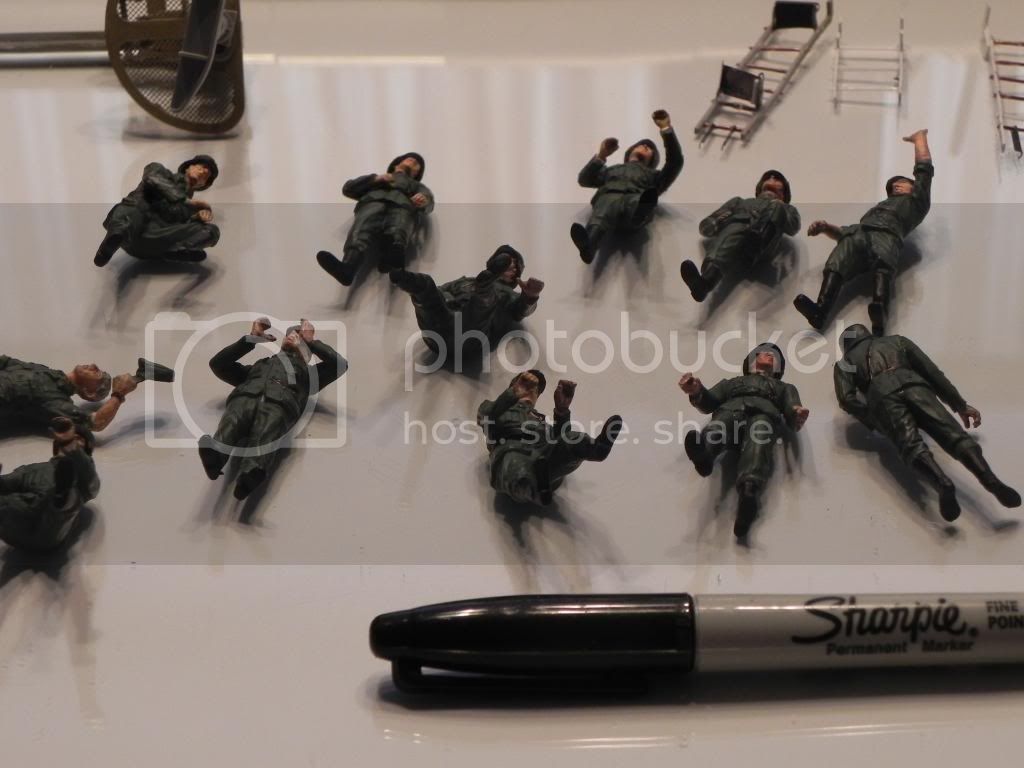
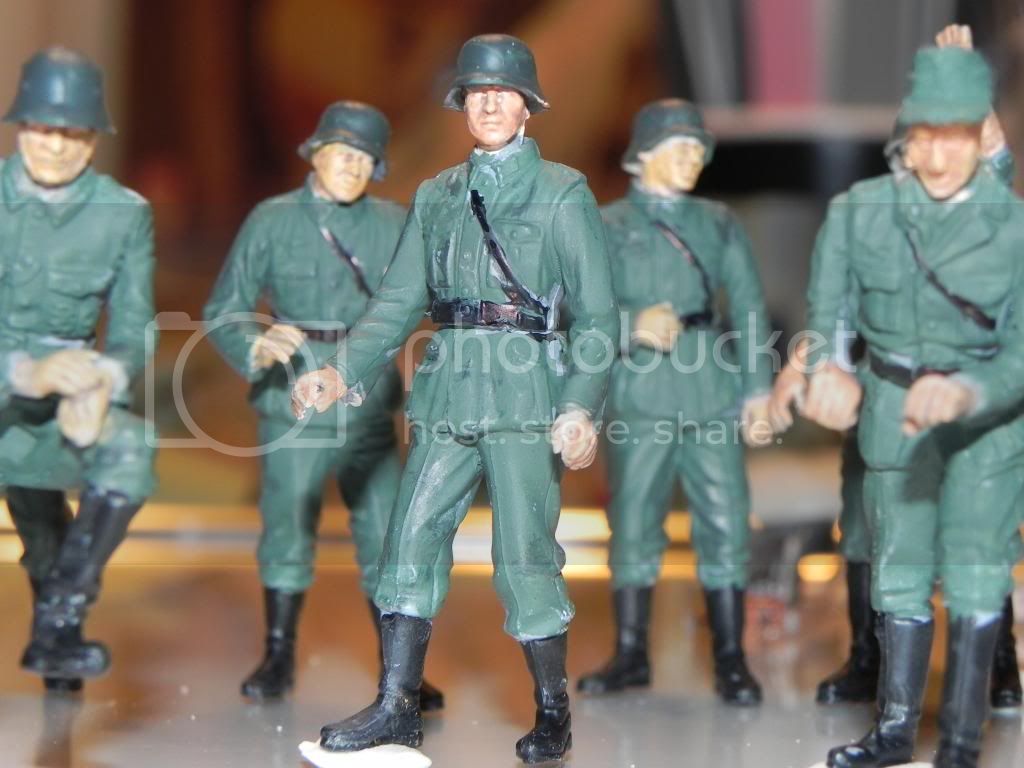
Ref the above photo. The Figures got painted,flesh etc. How to do the belts and straps. They were black,I used a Black Permanent marker,Carefully I use it to "paint the belts straps etc. Easier than trying to paint them. I haven't put decals on yet later.
Now the attached photos are of the Rail trucks,I used both kit and Eduard photoetch. Unfortunately some of the photo etc was so small that ,I couldn't cut and glue so I didn't bother. this is a display for my cannon room not a contest.No one will pick it up or look at it with a microscope.The trucks were difficult and complicated,right now it is painted Dark yellow(Dunklegelb sp). Please note that one truck was a bit warped. When I put it on the tracks it didn't sit flat. I will fix that later by method to be determined.
I am using crazy glue, I like the thick and kicker. Also debonder to take apart and correct mistakes. The steps are an example.I put them together wrong,took them apart and re did them. Hope you can see the photoetch. If you are as clumsy as me you will need the following,plastic rods tiny,to small. Also sheets of evergreen sheet several widths. My Demel tool was a help, grinding and drilling.
Sanding sticks from the local beauty suppy shop,(cheaper than hobby shops. I have discovered that I need lots of paint as this thing has a lot of area.


Lonewolf7usa

Joined: March 24, 2009
KitMaker: 312 posts
Armorama: 296 posts

Posted: Tuesday, March 05, 2013 - 11:50 AM UTC
Wecome to the tread building gang. I was 2nd Cav during the cold war and did border duty. I'm in the Cold war MBT campaign Right now with a T-62. Your build is coming along great. I'd like to do that piece but I don't have the money or the space for it. Not to mention 3 kids with nosey and sticky fingers. Oh well, again great job so far on your build.

Scarlet_Guidon_6

Joined: December 29, 2012
KitMaker: 197 posts
Armorama: 186 posts

Posted: Tuesday, March 05, 2013 - 12:48 PM UTC
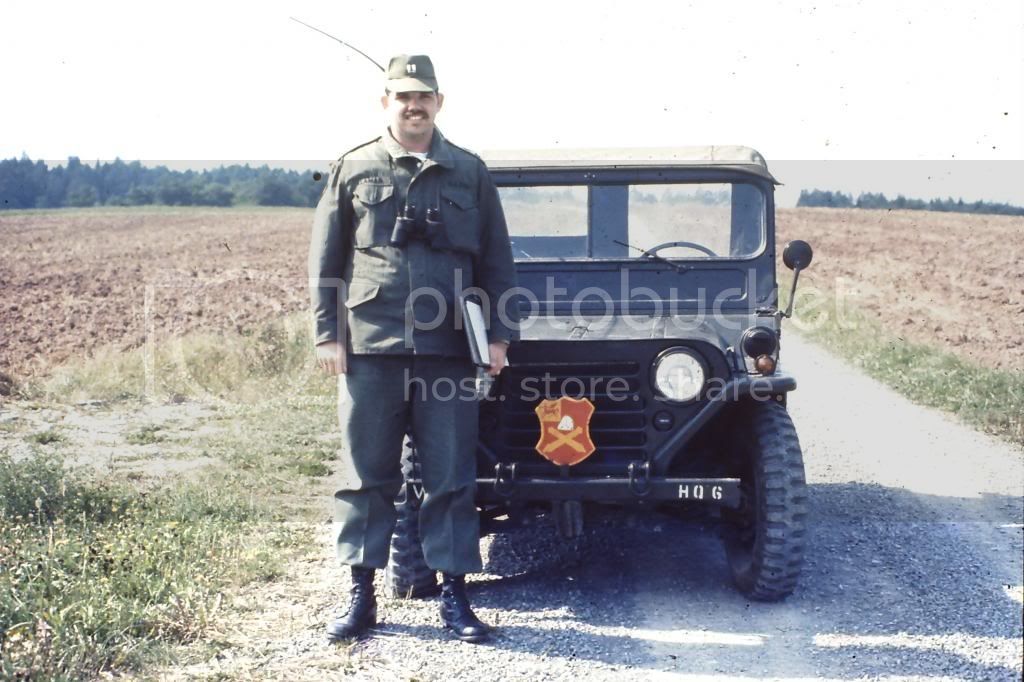
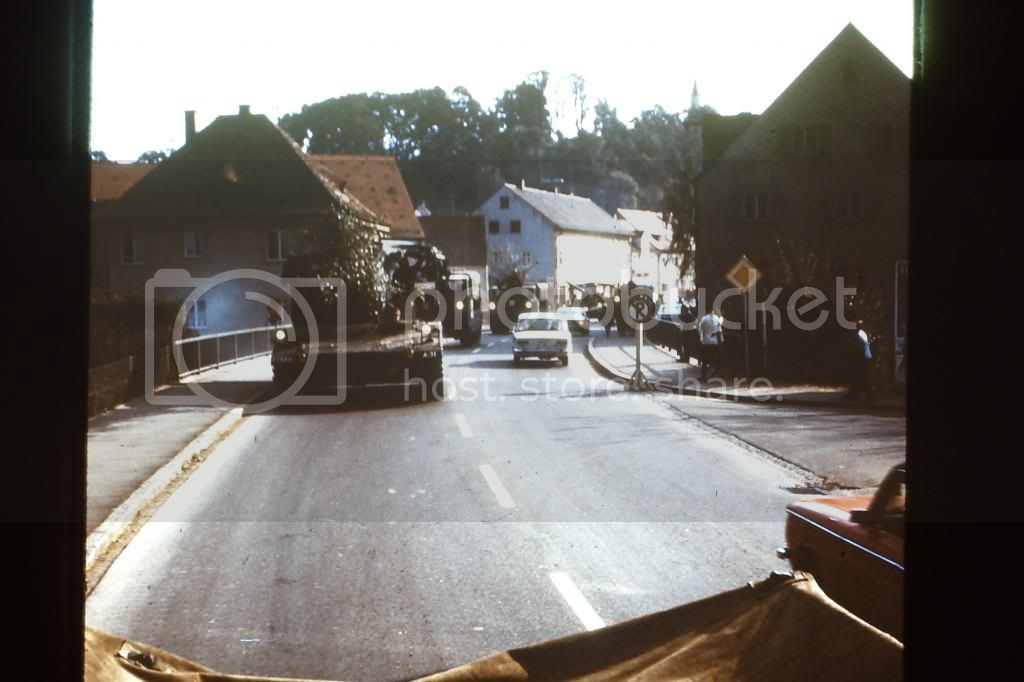
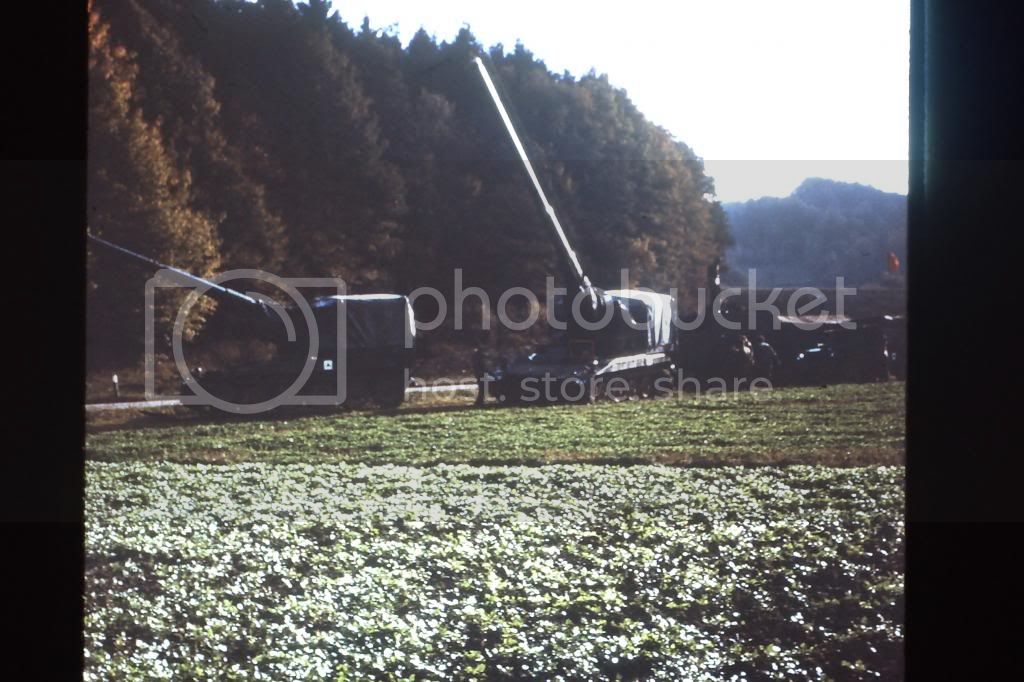
Thank you for the kind words. 2nd Cav,where in Germany? I had a battery of 175mm Guns in Bamberg, Very close to the Czech border. Our alert positions were in the woods and we were to fire at rail yards 30 miles away.
Thank GOD we never had to put training to use. Our son is grown but the Grand kids know not to touch!!Not by punishment but because Granddad builds tanks for them to play with,and break.
I will soon post how to make ladders for a German 28cm rail gun when you have totally messed up the kit and the photo etch parts.I needed no help to do it either!!


Lonewolf7usa

Joined: March 24, 2009
KitMaker: 312 posts
Armorama: 296 posts

Posted: Wednesday, March 06, 2013 - 05:47 AM UTC
I was at Amberg. 3/2 Cav. out of Pond Barracks. We considered ourselves expendable because if the shooting strted we were the first in line. Like you thank god it didn't happen.

Scarlet_Guidon_6

Joined: December 29, 2012
KitMaker: 197 posts
Armorama: 186 posts

Posted: Wednesday, March 06, 2013 - 07:30 AM UTC
Here are more photos of the painted but not yet finished artillery crews. Both the Dragon and trumpeter crews are shown.I haven't finished the faces and the decals. I aso pln to touch up the paint job. I used AV German uniform acrylic paint.




bpunchy

Joined: February 22, 2009
KitMaker: 366 posts
Armorama: 199 posts

Posted: Wednesday, March 06, 2013 - 08:05 AM UTC
Great build .. massive project
One of the guys at the model club I'm in builds a lot of guns , and his Leopold is huge .
Looking forward to watching the progress.
Keep posting please Sir


One of the guys at the model club I'm in builds a lot of guns , and his Leopold is huge .
Looking forward to watching the progress.
Keep posting please Sir


Scarlet_Guidon_6

Joined: December 29, 2012
KitMaker: 197 posts
Armorama: 186 posts

Posted: Thursday, March 07, 2013 - 10:41 AM UTC
First,you probably noticed my change in Callsign, Scarlet Guidon 6 was my call sign in Germany when I commanded A Btry 6th Bn 10th Fa,175mm Sp Guns. Probably one of my favorite times in my Army career. I built model of the M 107.
Back to Leopold,K5-e. These photos are of the hoist that was used to lift the 255kg shell,canisters and powder bags up to the gun. The kit is interesting in that just below the metal floor just above my finger in in unpainted grey is a sort of nut that when you twist it onto the pedestal it allows the hoist platform to turn left or right 90 degrees,so you can pose it in any position. The arm also pivots up and down. I haven't rigged the hoist yet or finished painting it.
In one photo you can see a bunch of shells,powder canisters, brass shell casings and powder bags,in my opinion the ones fro R Shotten in Germany made of brass are superior in detail and finish.. He shipped the barrel and shells then asked for payment. I paid the $62 total via Paypal.


If you aren't using e bay and Paypal you are missing bargains galore. I got some Verlinden shells, archer decals on e bay. Also for you fellow married guys. I buy her makeup for example Vera Wang perfume at dept store $145,e bay new in box $45. Model stuff ,metal detectors appliances are great buys. Pay using Paypal and if the shipper doesn't mail of its not what you ordered Paypal refunds your money and debits the sellers account!!
My next post will be on ladders. They are a real bear to make.The crummy ones will go on the backside (where you won't see them!!) I am making a jig for the Eduard etched ones,with one surviving kit ladder group as back up. They are so tiny complicated that I glued them to my fingers the glass and they are so thing and break if you even think about touching them!!UGHH!!! It is still a fun build,and it is going to be huge on my cannon wall.
Oh,before I forget I am in HEAVY ARTILLERY CAMPAIGN, but how do I ost photos for that??


Back to Leopold,K5-e. These photos are of the hoist that was used to lift the 255kg shell,canisters and powder bags up to the gun. The kit is interesting in that just below the metal floor just above my finger in in unpainted grey is a sort of nut that when you twist it onto the pedestal it allows the hoist platform to turn left or right 90 degrees,so you can pose it in any position. The arm also pivots up and down. I haven't rigged the hoist yet or finished painting it.
In one photo you can see a bunch of shells,powder canisters, brass shell casings and powder bags,in my opinion the ones fro R Shotten in Germany made of brass are superior in detail and finish.. He shipped the barrel and shells then asked for payment. I paid the $62 total via Paypal.


If you aren't using e bay and Paypal you are missing bargains galore. I got some Verlinden shells, archer decals on e bay. Also for you fellow married guys. I buy her makeup for example Vera Wang perfume at dept store $145,e bay new in box $45. Model stuff ,metal detectors appliances are great buys. Pay using Paypal and if the shipper doesn't mail of its not what you ordered Paypal refunds your money and debits the sellers account!!
My next post will be on ladders. They are a real bear to make.The crummy ones will go on the backside (where you won't see them!!) I am making a jig for the Eduard etched ones,with one surviving kit ladder group as back up. They are so tiny complicated that I glued them to my fingers the glass and they are so thing and break if you even think about touching them!!UGHH!!! It is still a fun build,and it is going to be huge on my cannon wall.
Oh,before I forget I am in HEAVY ARTILLERY CAMPAIGN, but how do I ost photos for that??


Lonewolf7usa

Joined: March 24, 2009
KitMaker: 312 posts
Armorama: 296 posts

Posted: Thursday, March 07, 2013 - 10:54 AM UTC
Same way you are posting yourt photos for your build now. No problem!! BTW, Your build is going great.

Scarlet_Guidon_6

Joined: December 29, 2012
KitMaker: 197 posts
Armorama: 186 posts

Posted: Friday, March 08, 2013 - 01:40 PM UTC
Before I continue,if anyone wants a better or different view of what I am posting just ask ,ok.!!!
Here are some shots of the track bed. I first painted the ties with rail tie brown. Then I masked the track bed and sprayed a product from Home Depot. It produced a rock looking effect that sits on the plastic and looks very realistic. Then I had to clean out where I didn't mask enough. Dremel tool time!!!Then I glued the ties. Then I spit on the rails and used saliva on the little guides and slid the rails(already painted with AV rust.) through the tiny slots. I broke a couple and just glued to make it ok. Once done I used a flat brush and AV oily steel to paint the top of the rail,even unused track goes shiny when a train goes over it, Note the extra plastic underneath to stop the sections from opening when picked up/ Then I took the completed trucks and well they looked pretty good. Like a rail car.

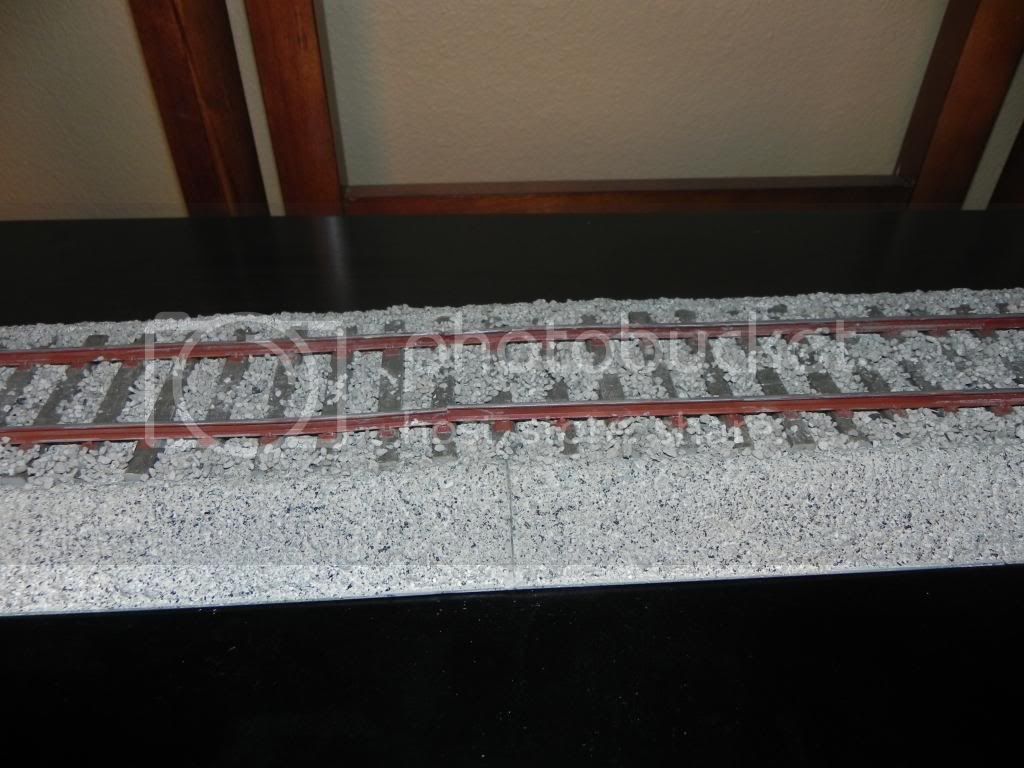


Here are some shots of the track bed. I first painted the ties with rail tie brown. Then I masked the track bed and sprayed a product from Home Depot. It produced a rock looking effect that sits on the plastic and looks very realistic. Then I had to clean out where I didn't mask enough. Dremel tool time!!!Then I glued the ties. Then I spit on the rails and used saliva on the little guides and slid the rails(already painted with AV rust.) through the tiny slots. I broke a couple and just glued to make it ok. Once done I used a flat brush and AV oily steel to paint the top of the rail,even unused track goes shiny when a train goes over it, Note the extra plastic underneath to stop the sections from opening when picked up/ Then I took the completed trucks and well they looked pretty good. Like a rail car.


Scarlet_Guidon_6

Joined: December 29, 2012
KitMaker: 197 posts
Armorama: 186 posts

Posted: Friday, March 08, 2013 - 01:44 PM UTC
Here are some other models I have done. 

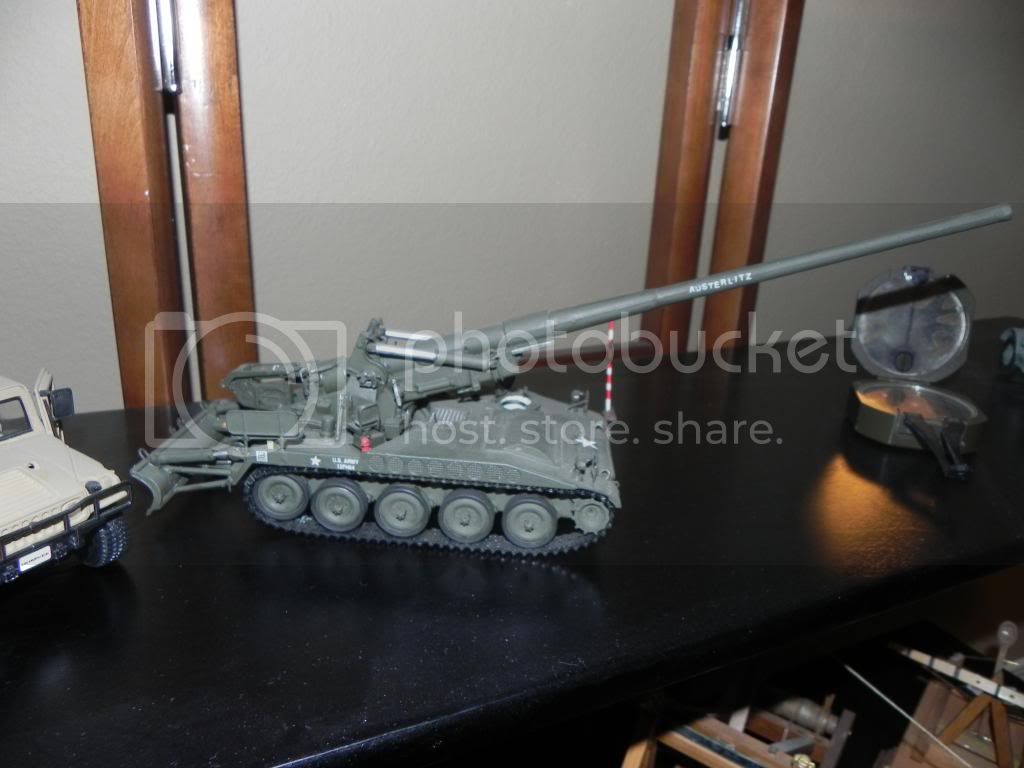


I will answer any questions you may have!!! These are all models of equipment I have either serverd in or commanded,


I will answer any questions you may have!!! These are all models of equipment I have either serverd in or commanded,

Scarlet_Guidon_6

Joined: December 29, 2012
KitMaker: 197 posts
Armorama: 186 posts

Posted: Sunday, March 17, 2013 - 02:33 PM UTC
Ok Today is a bad day!!!
Question 1 is where did my photos go???? It says removed because I have moved etc, I haven;t changed anything??? Whats going on????
HELP!!!!
Then I had all my build out side ,sunny warm day. I was going to spray Dark yellow on several sub assemblies. I came in to get another can of Tamiya TS-3 Dark yellow. I went back outside to my paint table,cardboard on the big trash can and a gust had blown everything off. Couple of things broke off and I lost one little piece. I fixed the rail truck,no problem but I had to fabricate a new breech block. The kit one disappeared into the grass.I fabricated one that I think looks better than the kit. After all I spent 32 years playing with the real thing.
 I think it is interesting the different philosophies of artillery obduration. We used and copied ,to a certain extent the french.Interrupted step thread breech assemblies. The Germans perfected the horizontal sliding breech block.Which we copied after WWI ,for light arty 75mm,105mm. We used the french step thread and powder bags for 155 through 16 inch. The Germans used sliding breech for everything up to the 80cm Dora/Gustav.Using sliding breech required a brass canister for rearward obduration. Simpler to manufacture but a bit more complicated supply problem. The US needed just a round(projo) and powder bags to fire off a round. The Germans need a round (projo,powder and a big brass canister that could only be reused after refurbishing at a rear area.
I have taken a few more photos and as soon as I find out why photobucket or what ever has removed my photos.HAPPY ST PATRICKS DAY!!!
Question 1 is where did my photos go???? It says removed because I have moved etc, I haven;t changed anything??? Whats going on????
HELP!!!!
Then I had all my build out side ,sunny warm day. I was going to spray Dark yellow on several sub assemblies. I came in to get another can of Tamiya TS-3 Dark yellow. I went back outside to my paint table,cardboard on the big trash can and a gust had blown everything off. Couple of things broke off and I lost one little piece. I fixed the rail truck,no problem but I had to fabricate a new breech block. The kit one disappeared into the grass.I fabricated one that I think looks better than the kit. After all I spent 32 years playing with the real thing.
 I think it is interesting the different philosophies of artillery obduration. We used and copied ,to a certain extent the french.Interrupted step thread breech assemblies. The Germans perfected the horizontal sliding breech block.Which we copied after WWI ,for light arty 75mm,105mm. We used the french step thread and powder bags for 155 through 16 inch. The Germans used sliding breech for everything up to the 80cm Dora/Gustav.Using sliding breech required a brass canister for rearward obduration. Simpler to manufacture but a bit more complicated supply problem. The US needed just a round(projo) and powder bags to fire off a round. The Germans need a round (projo,powder and a big brass canister that could only be reused after refurbishing at a rear area.
I have taken a few more photos and as soon as I find out why photobucket or what ever has removed my photos.HAPPY ST PATRICKS DAY!!!

Scarlet_Guidon_6

Joined: December 29, 2012
KitMaker: 197 posts
Armorama: 186 posts

Posted: Sunday, March 17, 2013 - 02:36 PM UTC
Atry to upload photos.
https://gallery.kitmaker.net/data/500/thumbs/m107_1.jpg
https://gallery.kitmaker.net/data/500/thumbs/m107_1.jpg

Scarlet_Guidon_6

Joined: December 29, 2012
KitMaker: 197 posts
Armorama: 186 posts

Posted: Sunday, March 17, 2013 - 02:38 PM UTC
OK another try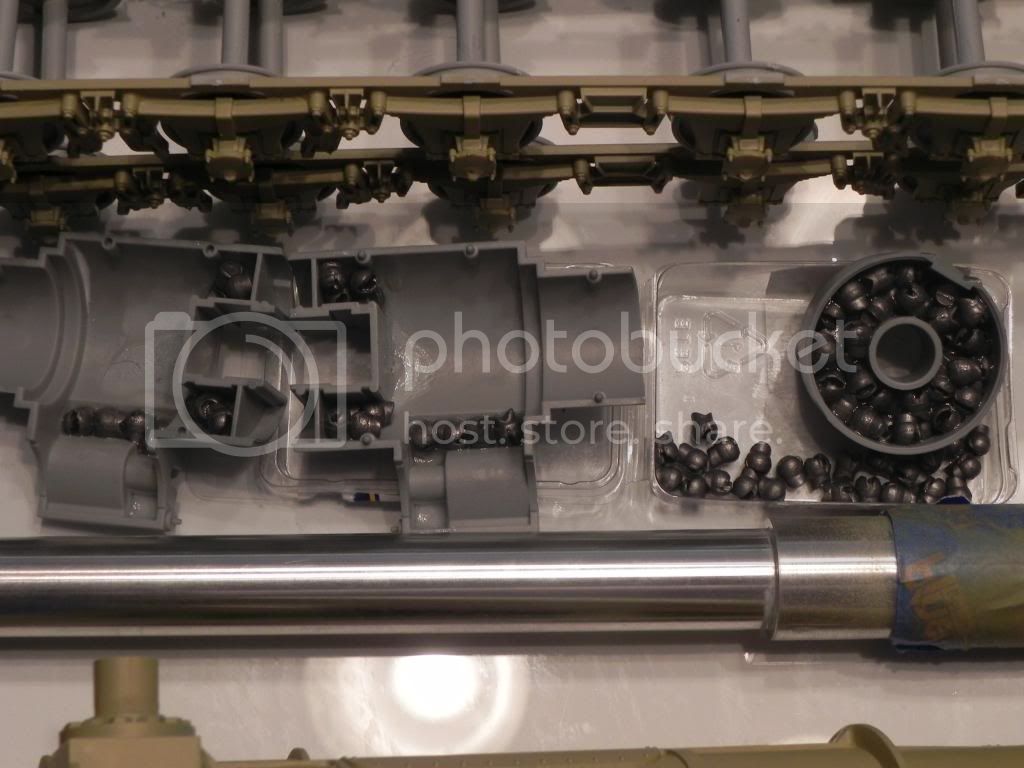


Scarlet_Guidon_6

Joined: December 29, 2012
KitMaker: 197 posts
Armorama: 186 posts

Posted: Sunday, March 17, 2013 - 02:44 PM UTC
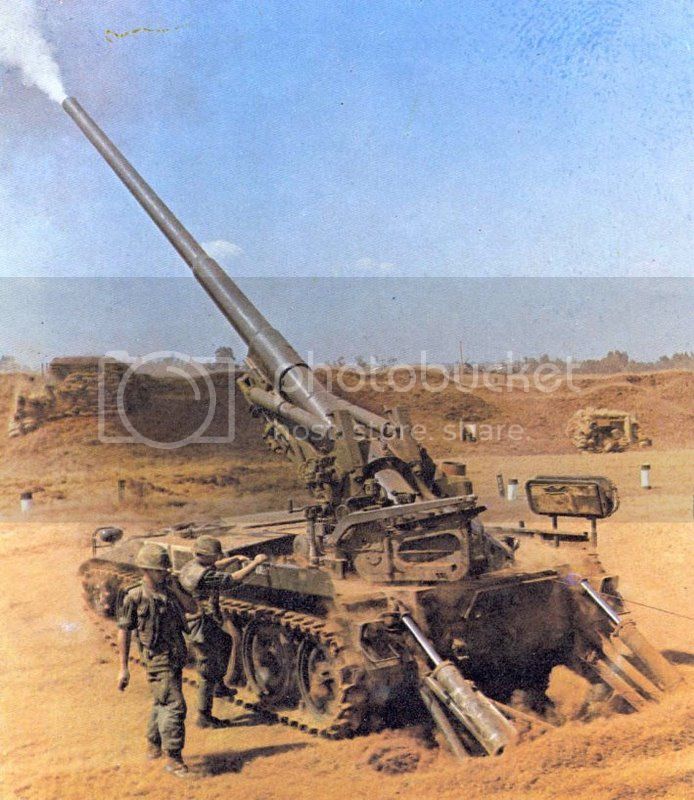


Scarlet_Guidon_6

Joined: December 29, 2012
KitMaker: 197 posts
Armorama: 186 posts

Posted: Monday, March 18, 2013 - 04:41 AM UTC
Hi all, I have looked at other blogs here and I am sorry I have not detailed or explained my Leopold enoug From now on I will try to to do a better job.Right now I have glued and dry fitted the gun assembly. The interior unit does not fit the carriage. It needs to be down so tat the deck will lie flat. I am adjusting it and if that fails I will simply grind the top down until it is level with the gun rail carriage.
I built a new breech assembly. I used some evergreen flat stock and fabricated a box. I will drill a hole in it to make a hand crank unit.
The new breech block looks pretty good.I used flat stock and a box(tool box/plastic from and old kit. Then softener flat stock and made the curve. Grinding and filling until here it is(pic to follow after I Dyson the house for my lovely wife!!! By the way
 I bought a NEATO XV 21 Robo Vac. I will be setting it up and if you are interested I will tell how it works. Got it on E bay(new) for about $ 185 off store price.
I will use macro to take photos. I looked trough some of the other blogs ,I am so not as talented as most of you guys!!!!
Oh I use the plastic sleeves that they use to covwer the newspaper o paint. I can hold the part in my left hand and spray with my right. No paint on watch hand etc. works great.
Oh I also use mostly CA glue.
I built a new breech assembly. I used some evergreen flat stock and fabricated a box. I will drill a hole in it to make a hand crank unit.
The new breech block looks pretty good.I used flat stock and a box(tool box/plastic from and old kit. Then softener flat stock and made the curve. Grinding and filling until here it is(pic to follow after I Dyson the house for my lovely wife!!! By the way
 I bought a NEATO XV 21 Robo Vac. I will be setting it up and if you are interested I will tell how it works. Got it on E bay(new) for about $ 185 off store price.
I will use macro to take photos. I looked trough some of the other blogs ,I am so not as talented as most of you guys!!!!

Oh I use the plastic sleeves that they use to covwer the newspaper o paint. I can hold the part in my left hand and spray with my right. No paint on watch hand etc. works great.
Oh I also use mostly CA glue.

Scarlet_Guidon_6

Joined: December 29, 2012
KitMaker: 197 posts
Armorama: 186 posts

Posted: Monday, March 18, 2013 - 05:59 AM UTC
Here you can see the gun assy inside the carriage. There are grooves at bottom where it fits in the carriage. The white square is stock to help strengthen the assy that holds the barrel up in position. Even with a LOT of weight added the barrel is heavy and wants to fall.Look at the recoil cylinder. that piece has a part that allows the elevation of the barrel. You don't glue it it slides back and forth. 


Next is the new breech block and the breech mechanism
.

Here is the gun mech ,the interior assy. is the gun sitting in the interior assy.
The breech

The carriage,the gun assy and the deck
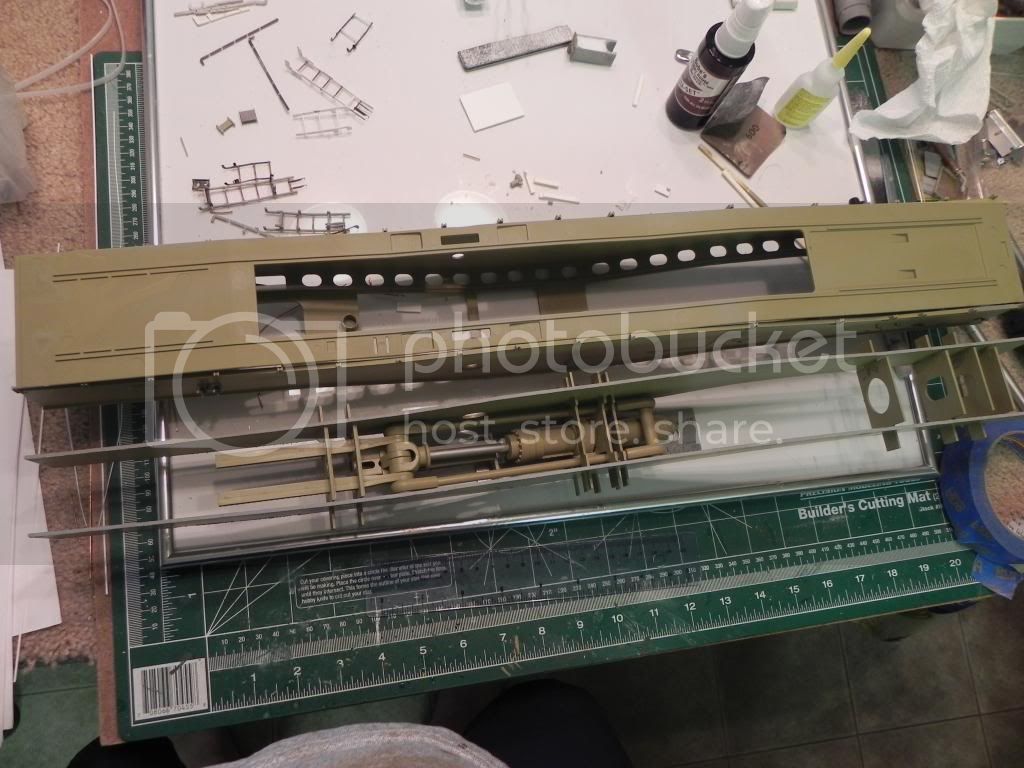
Gun assy front to back


I painted the ammo crane used parts from kit. The photo etch grating looks great.My opinion lol.


Next is the new breech block and the breech mechanism
.


Here is the gun mech ,the interior assy.
 is the gun sitting in the interior assy.
The breech

The carriage,the gun assy and the deck

Gun assy front to back


I painted the ammo crane used parts from kit. The photo etch grating looks great.My opinion lol.


Scarlet_Guidon_6

Joined: December 29, 2012
KitMaker: 197 posts
Armorama: 186 posts

Posted: Monday, March 18, 2013 - 06:06 AM UTC
Please keep in mind that this model will sit in my home and will not be entered in contests so where i screwed up and where It is not 100% accurate is not an issue most people who see it won't know if I modified it.
I apologize to you purists out there. I am a philistne lol.
Oh anyone know where I can buy 1/35 scale ladders??????
I apologize to you purists out there. I am a philistne lol.
Oh anyone know where I can buy 1/35 scale ladders??????


Scarlet_Guidon_6

Joined: December 29, 2012
KitMaker: 197 posts
Armorama: 186 posts

Posted: Monday, March 18, 2013 - 09:23 AM UTC
Re Ladders went on E bay,they have lots of different scale ladders. O scale is like 1/48 close enough to 1/35.
 |


