Яusso-Soviэt Forum: Cold War Soviet Armor
For discussions related to cold war era Russo-Soviet armor.
Trumpeter BMP-1 in depth build BLOG
Jacques
Visit this Community
Minnesota, United States
Joined: March 04, 2003
KitMaker: 4,630 posts
Armorama: 4,498 posts
Posted: Monday, January 07, 2013 - 04:42 PM UTC
Well, I happen to have a TP-4 periscope as used in the BMP. Here are the measurements...and yes, the Trumpeter clear plastic periscopes seem to match the top half that would stick out of the hull quiet well.


Jacques
Visit this Community
Minnesota, United States
Joined: March 04, 2003
KitMaker: 4,630 posts
Armorama: 4,498 posts
Posted: Tuesday, January 08, 2013 - 10:17 AM UTC
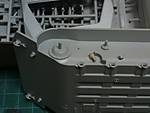
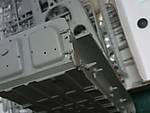
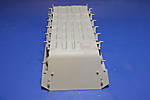
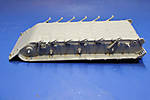
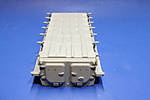
Started with the idler, roadwheels, and sprocket.

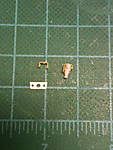
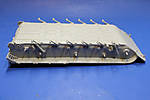
I like to keep all of my wheel parts in halves until I can at least prime them black. This leaves no hard-to-reach missed spots. The idler was a bit tricky as it has 5 PE parts to represent the "spokes" of the real thing. Unfortunately, it seems to me that they are too thin/anemic to make it look like the prototype.


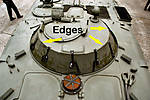
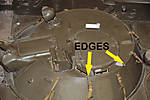
There may possibly be two production types:

Style #1: Inner "spokes" are flush with the outside edge.


AND


Style #2: The inner "spokes" are recessed. This may be a repair, a experiment, or museum fix. It is less common in the photos I have seen but more closely matches what Trumpeter made.


Overall I am happy with Trumpeter's Idler, but the purist has some work to do. Same goes for the road wheels and sprocket.

-

I glued the PE "spokes' in using a newer method...liquid model cement. I put the glue on the idler half that i was going to glue the PE to, added all 5 pieces, and carefully added the other half of the idler WITHOUT GLUE. Once this dried, a couple of hours, I was able to carefully take the unglued half off and the PE sticks in place. The PE sticks well, but be careful as they are still fragile. now I can paint the innards and glue together without too much fuss.


Jacques
Visit this Community
Minnesota, United States
Joined: March 04, 2003
KitMaker: 4,630 posts
Armorama: 4,498 posts
Posted: Tuesday, January 08, 2013 - 10:20 AM UTC
And I found another BLOG someone else did with comparisons to the DML kit. http://modelerssocialclub.proboards.com/index.cgi?board=armor&action=display&thread=2801
panamadan
Visit this Community
Minnesota, United States
Joined: July 20, 2004
KitMaker: 1,513 posts
Armorama: 1,449 posts
Posted: Tuesday, January 08, 2013 - 11:38 AM UTC
Good start. I couldn't read the other websites review as it's comparing "apples and oranges". I hope we see many of these being built!
Dan
seanmcandrews
Visit this Community
Pennsylvania, United States
Joined: May 09, 2009
KitMaker: 561 posts
Armorama: 553 posts
Posted: Wednesday, January 09, 2013 - 12:45 PM UTC
Here's the Russian take on this kit. http://panzer35.ru/forum/45-10538-2 On the second page there's link to another page discussing variations in tracks and sprockets, interesting stuff. Jacques, in regards to your BMP periscope, I'm assuming the smaller end is the end that sticks out of the hull ?

Sean
Jacques
Visit this Community
Minnesota, United States
Joined: March 04, 2003
KitMaker: 4,630 posts
Armorama: 4,498 posts
Posted: Wednesday, January 09, 2013 - 04:20 PM UTC
In regards to the periscope, the larger portion with the black rubber edge is what is INSIDE the vehicle. Yes, the smaller portion is exposed outside the vehicle.

And thanks for the link.
Jacques
Visit this Community
Minnesota, United States
Joined: March 04, 2003
KitMaker: 4,630 posts
Armorama: 4,498 posts
Posted: Wednesday, January 23, 2013 - 07:05 AM UTC
Slow going, but steam is building!

I have painted the interior faces of the sprockets and idlers. This is primer (black), paint (Testors Dark Green), gloss coat wash of Future with Windsor Newton water colors (Burnt Umber and Burnt Sienna), and then dull coat and assembly. This preps a nasty, hard to get area.


Jacques
Visit this Community
Minnesota, United States
Joined: March 04, 2003
KitMaker: 4,630 posts
Armorama: 4,498 posts
Posted: Tuesday, February 05, 2013 - 04:32 AM UTC
Am I working on this? Yes. Do I have pictures to post? No. Why? I have a new camera I have to figure out how to use to get awesome pics.

Patience please.
Jacques
Visit this Community
Minnesota, United States
Joined: March 04, 2003
KitMaker: 4,630 posts
Armorama: 4,498 posts
Posted: Thursday, February 14, 2013 - 09:19 AM UTC
iPhone photos! Anyhow...

The rear fender/vanes where somewhat nicely done, with a thin face to the rear, but thicker on the inside facing the idler, and noticable to me anyhow. Took a file and thinned them down. I would still replace them with PE if I had the option, but they look a lot better.


For the "shocks", Trumpeter "muffer the punt" a bit. The unequal sided PE bracing (parts PE-A5 and PE-A6) are fine with etched fold lines (right piece in picture, mounted on part B26). The equal sided PE bracing (parts PE-A4) did NOT have any etched fold lines. This means, with that big hole in the middle, they do not fold very nicely, even with a PE folding tool. Annoyed, but I pulled it off well enough. (Both folded and unfolded on left side of picture).


Moving on...
Jacques
Visit this Community
Minnesota, United States
Joined: March 04, 2003
KitMaker: 4,630 posts
Armorama: 4,498 posts
Posted: Thursday, March 07, 2013 - 03:33 AM UTC
Small update...working on the shocks and rear doors.


Shocks in place. Lower front pieces are also on. The "clips" for the front tow hook shackles are ok, but still do not feel quite right.

Next, the rear doors. Since there is nothing to see inside the model, I glued them on in the closed position. The only interior piece I added was the inside door lining fuel tank.


You can see some of the rear hull detail pieces and hinge detail. Everything lines up very nicely, but a little bit of cleanup may be required. The tolerances are pretty tight, so any flash can skew things a bit. Just a note to keep an eye on things.

Jacques
Visit this Community
Minnesota, United States
Joined: March 04, 2003
KitMaker: 4,630 posts
Armorama: 4,498 posts
Posted: Monday, March 11, 2013 - 09:53 AM UTC
Ok...first, the TP-4 seems to be a TANK periscope, and a older one at that. I have been advised it may be from a OT-62. Any ideas on the TP-4 lineage?

Lower hull finished before priming:


And a close up of the rear. The rear fenders have been thinned down, as mentioned above, and the spare tracks have been left off for now:


rlockie
Visit this Community
England - South West, United Kingdom
Joined: June 01, 2004
KitMaker: 8 posts
Armorama: 7 posts
Posted: Monday, March 11, 2013 - 11:03 AM UTC
Good work so far Jacques.

In addition to the dropped ball with the roof fan, did Trumpeter miss the fuel filler for the central tank, which seems in photos to be between the left side roof hatches? It shows up in photos but I don't know if it was introduced (or dropped) during production. Having said that, I can't see how else fuel would be fed to the tank and the drawings in the manual clearly show a pipe that leads down from it.
Jacques
Visit this Community
Minnesota, United States
Joined: March 04, 2003
KitMaker: 4,630 posts
Armorama: 4,498 posts
Posted: Monday, March 11, 2013 - 01:45 PM UTC
Yes, there is much to discuss about the upper hull. I am working on it right now. I will post as I fix the issues...but many things will be addressed...including the fuel filler cap which should be there.
Grapple
Visit this Community
Czech Republic
Joined: March 03, 2013
KitMaker: 4 posts
Armorama: 4 posts
Posted: Thursday, March 14, 2013 - 11:54 PM UTC
Maybe I have more than a good insight to be able to add something to the topic, having advantage of 25 years long service under my belt and being trained on and having served a couple of years with BMP-1 (better to say BVP-1) equipped unit... Yes, I was a "Dark Side" Cold War warrior.
I hope I am not a rivet counter (thanks God no rivets are there on BMP-1), you can see some missing or misinterpreted parts are not so small...
I am sure Leopard, Abrams or Chally tankies would love their "armoured horses" as I love my (although long time off service) former...

I wrote a review of an old and many times cloned/reincarnated DRAGON/SHANGHAI DRAGON/ZVEZDA/REVELL/??? BMP-1 and -2 and made measurements of real vehicles (at least 150-200 dimensions measured, quite a nice bunch of numbers) and made a nice number of pictures.
I compared Trumpy "one" to the real vehicle, checked all the calculated dimensions and now I can say and subscribe it by my blood that when speaking about dimensions (not only general) of Trumpy "one", this is really a top notch.

I have found only two dimensions misinterpreted:
1. The base of turret is by 2 mm smaller than should be and because of rotation centres of base and turret roof are not the same, it is visible in two front quadrants of turret on the sides of gun mantlet. Trumpy designers missed the fact that turret walls are made of armour plates of various thickness, they made vertical weld seams/joints but those steps are missing... The way of correction is not so difficult - you can add 1/10 mm plastic sheet in two layers and this would be the only "big plastic surgery"...
2. ATGM loading hatch is approximately 1,5 mm narrower than should be. But you can see that only at the moment you can know that and you concentrate your effort on that.

Then there are some details misinterpreted or missing:
3. There is no entrenching tool or clamp to hold it on the right part of hull roof next to the turret, although there already is front sheet metal stripe to hold that there.

4. There is no crowbar, its front holder or clamp at the left rear corner of hull next to the antenna.

5. Towing cables are missing to be held on both sides of the hull roof next to the squad hatches as are missing their fitting elements except of small hooks behind the turret.

6. Central fuel tank filler with thin sheet metal collar is missing between two left squad hatches.

7. There are weld seams between the exhaust and right cooler mesh misinterpreted and they (the angle) should be moved "one screwhead to the right" and one seam should be added.

8. Three screwheads on the roof armoured plates joint on the right of the turret are missing and should be added.

9. Thin sheet metal lip or collar around the exhaust is missing and should be added.

10. Air compressor outlet between the front drainage pump armour cover and exhaust is missing and should be added, it is small detail but important for weathering and "oilshitting" fans - there is usually black stuff of oil and condesated water leaking there and it makes nice "rainmark"...

11. Side position lamps (slightly behind the turret) on the hull roof should be rotated strictly perpendicularly to the long axis of hull...

12. Those PE reinforcements to the idler wheel are pretty late features and I haven't seen them even on BMP-2s, only those idler wheels with mesh surface reinforcement have them.

13. Boxy shaped wiring covers behind front lights are late feature (typical for BMP-2, Svatava, etc) too. BMP-1s have only small valve shaped joint box and a screwhead shaped bushing...

14. Mesh cover of engine air inlet behind the turret is less than simplified and spider shaped reinforcement is missing on it.

15. There are two grabhandles on so called "big armour hatch" above the gearbox, those handles should be parallel. Right one is ok, left one is misoriented along the hatch edge... This one should not obscure the view through periscope...

16. There should be 9 stripes with buckles around turret walls to hold rolled tarpaulin. None is there, either molded on the turret wall or provided as separate or even PE part.

17. Vertical bar next (right) to the gunner's hatch on the turret roof should be hollow, it is a tube in fact. It was intended to accomodate red/white/red boxy alarm float tied with a thin rope to the towing cable when vehicle was fitted to cross deep water obstacle...

I hope I haven't missed something.

Although the mistakes/shortages list is not so short I still insist on saying that new Trumpy BMP-1 is quite good model and can be modelled even better, if corrections are made and some parts are added...

I am quite happy they made it and I hope they will made BMP-2 and specialised variants even better.

There was somebody surprised that no clear periscope parts are provided for rear doors but those are in fact under metal covers hence no clear plastic is needed and would be useful only if somebody decides to make them open/erected...
Grapple
Visit this Community
Czech Republic
Joined: March 03, 2013
KitMaker: 4 posts
Armorama: 4 posts
Posted: Friday, March 15, 2013 - 01:48 AM UTC
To Robert Lockie: All the tanks (central fuel cell and rear door ones were/are connected together, you can see connecting hoses when rear door is open - lower thick ones and upper thin ones. You can fill all the system fully through one filler only, but it takes some time (and that's why crews used to fill door fuel cells first and then they added a "mug or two" through central tank fuel filler).
There was no tankmeter on the dashboard, only vertical transparent fuel level gauge tube with a scale was connected to the system, it was located in the left squad compartment behind the turret inside metal tube with narrow vertical slot.
Jacques
Visit this Community
Minnesota, United States
Joined: March 04, 2003
KitMaker: 4,630 posts
Armorama: 4,498 posts
Posted: Friday, March 15, 2013 - 03:10 AM UTC
Thanks for the list Zdenek, and welcome. Do you have a picture that you can show how to fix the turret?

And I was the one who brought up the rear door periscopes. It was based more on the fact that the rear doors can be open so why not have clear door periscopes. Not a big deal though...

I am currently working on the upper hull, so there will be notes...
rlockie
Visit this Community
England - South West, United Kingdom
Joined: June 01, 2004
KitMaker: 8 posts
Armorama: 7 posts
Posted: Friday, March 15, 2013 - 09:06 AM UTC
Thanks Zdenek

That's a most helpful list - not that many years ago it would have been unthinkable to have a user actually tell us this kind of thing!

I was aware that the tanks were linked (you can hardly miss those hoses and there is no other way to move the fuel out of the door tanks) but presumably there must have been some sort of pump to move fuel between them as the hose from the door tank leaves from the bottom, so I'd expect that filling from the roof filler would result in an overflow there before the door tanks had filled. Not that I NEED to know this as I don't plan on making a working fuel system in my model but this sort of trivia is interesting to me.
rlockie
Visit this Community
England - South West, United Kingdom
Joined: June 01, 2004
KitMaker: 8 posts
Armorama: 7 posts
Posted: Sunday, March 17, 2013 - 09:19 PM UTC
From photographs, my interpretation of the turret sides is that there are two 'steps' that indicate the three thicknesses of plate, the thickest armour being (unsurprisingly) in the frontal quadrants, then stepping down to a thinner section on the sides and then again to the thinnest armour on the rear of the turret.

The steps are chamfered, which can make them tricky to spot. What I was uncertain about was how high the steps are (0.25mm in 1/35 according to Zdenek) and whether this was a feature present throughout the production run or a later development.

I suspect that the easist way to model the feature would be to use a Post-it note or similar tacked to the kit turret to determine the shapes of each part and then cut them out out roughly from 0.25mm sheet, curve the four pieces slightly to help them conform and then attach and clamp in place before trimming after the cement has set. Anyone tried it yet?
Jacques
Visit this Community
Minnesota, United States
Joined: March 04, 2003
KitMaker: 4,630 posts
Armorama: 4,498 posts
Posted: Wednesday, March 20, 2013 - 08:46 AM UTC
I have looked into the turret detail, and sure enough, there it is. First off,Thanks to Prime Portal for the images. They are for use in discussion purposes only.


Notice especially in the second photo of how the thickness between the turret edge weldbead and the actual edge increases with each lamination, moving right to left.

Now, what to do about it...

Grapple
Visit this Community
Czech Republic
Joined: March 03, 2013
KitMaker: 4 posts
Armorama: 4 posts
Posted: Sunday, March 31, 2013 - 07:12 AM UTC
Sorry for delay, gentelemen, I did not have access to I-net connected computer.
For making stepped turret sides I use (I have made three turrets so far for clubmates) 0,2 mm plastic tab (very flexible) made by (no advert)... This makes steps equal to approx 7 mm in reality.
At first - sand off welds on turret sides and make marks where they were.
Then cut roughly piece of plastic and fit it to the side of gun aperture "casting". Use extra thin liquid cement and wait till it dries well.
Then draw vertical line and cut rear vertical edge of plastic tab to cover both front and second quadrant of turret side and fit precisely to the sanded off rear verical weld seam. Use extra thin liquid cement to glue it to the turret side in the rear. Be sure there is no gap along turret base and roof - no gap, no filling. Think twice, measure precisely, cut once.
Then use extra thin... and glue upper and lower connection lines. Wait till it dries well and then use new sharp knife to cut upper and lower edges of new armour plate, sand it to make it integral part of turret.
Repeat this for the second layer of armour on the first quadrant of turret only.
Do the same for the first and second quadrant on the opposite side of turret.
Lower edge of turret will probably need some fine sanding but nothing serious - it will fit turret ring collar without special problems...
This all makes the trick, steps will be noticeable and the turret will look a bit better.

Making template first, cutting plastic sheet into the shape makes next steps more than trickier (you would have to control all four edges of plastic sheet at the moment of gluing) than acceptable and does not give you real advantage in fact.
In certain moments you will believe third hand and extra fingers would be good... Do not worry, two hands are enough.
vonHengest
Visit this Community
Texas, United States
Joined: June 29, 2010
KitMaker: 5,854 posts
Armorama: 4,817 posts
Posted: Thursday, August 01, 2013 - 10:16 AM UTC
I was gifted this kit for Christmas as it's been known that I've been waiting for a new kit for quite a long time. I keep having to resist the urge to build it while I'm following your blog here Jacques as I have a tendency to get overly exited and pushing ahead too fast. There's been a lot of really good information here from you and other fellow modelers, and I've really been enjoying watching the progress. I'm still waiting on your SU-100 blog to come to a close as well. How did the bathroom remodel turn out by the way?
Jacques
Visit this Community
Minnesota, United States
Joined: March 04, 2003
KitMaker: 4,630 posts
Armorama: 4,498 posts
Posted: Friday, August 02, 2013 - 11:25 AM UTC

Quoted Text

I was gifted this kit for Christmas as it's been known that I've been waiting for a new kit for quite a long time. I keep having to resist the urge to build it while I'm following your blog here Jacques as I have a tendency to get overly exited and pushing ahead too fast. There's been a lot of really good information here from you and other fellow modelers, and I've really been enjoying watching the progress. I'm still waiting on your SU-100 blog to come to a close as well. How did the bathroom remodel turn out by the way?


OUCH. But, how well you have called it. Actually, now that you bring it up:

1. Su-100. I have recently fixed (it fell during painting a couple of years ago) and re-base-painted it. Once I get back to the point the BLOG was at, I will be finishing it up.

2. Bathroom remodel. Finished it a year ago. Took a little over a year to do AND I had to re-tile a shower inteh basement. Thanks for asking.

3. BMP-1. I have it next to me while I write this. I am working on the turret issues right now.

VonArnim
Visit this Community
North Carolina, United States
Joined: April 10, 2004
KitMaker: 48 posts
Armorama: 35 posts
Posted: Tuesday, September 24, 2013 - 08:18 AM UTC
Any updates on the BMP-1 Jacques ?


regards Joey
Jacques
Visit this Community
Minnesota, United States
Joined: March 04, 2003
KitMaker: 4,630 posts
Armorama: 4,498 posts
Posted: Thursday, September 26, 2013 - 06:36 AM UTC
Still working on the turret issue. (The layered armor stuff). I think I may end up just using .010 styrene to fix the issue...honestly, I have been avoiding this. I am a coward!

BUT...there is hope. I may actually get a couple days off without things to do at work OR home so I can rest and then experiment.
VonArnim
Visit this Community
North Carolina, United States
Joined: April 10, 2004
KitMaker: 48 posts
Armorama: 35 posts
Posted: Sunday, September 29, 2013 - 04:41 AM UTC
Hi Jacques ,

Thanks for the update ! Hopefully you will have more soon !

best regards
JOEY