


Campaigns
Where Armorama group builds can be discussed, organized, and updates posted.
Where Armorama group builds can be discussed, organized, and updates posted.
Hosted by Darren Baker, Richard S.
Armored Car Campaign
Blackstoat

Joined: October 15, 2012
KitMaker: 568 posts
Armorama: 561 posts

Posted: Tuesday, April 22, 2014 - 09:31 AM UTC
If you'll have me I'd like to enter this


35th-scale

Joined: November 21, 2007
KitMaker: 3,212 posts
Armorama: 2,807 posts

Posted: Tuesday, April 22, 2014 - 07:50 PM UTC
That would be perfect Andy and we'd be delighted to have you on board. Welcome!


tatbaqui

#040

Joined: May 06, 2007
KitMaker: 2,713 posts
Armorama: 2,451 posts

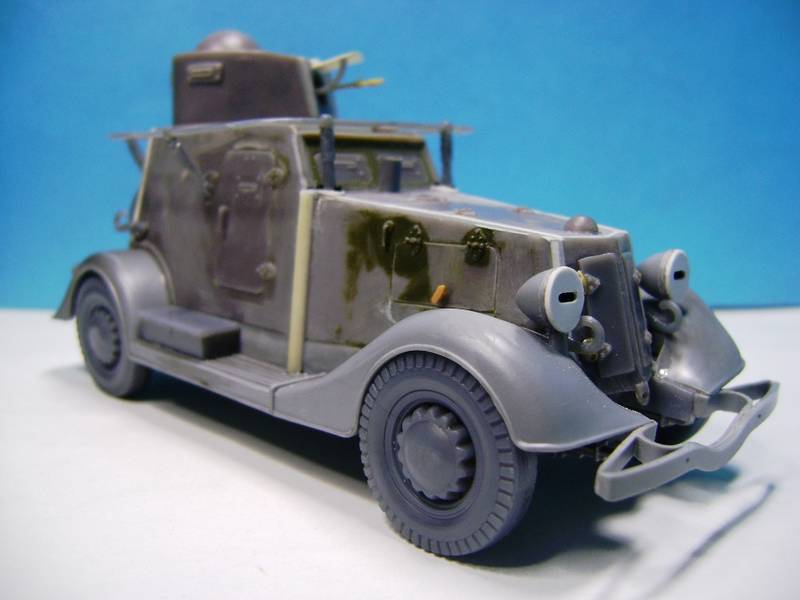
Posted: Saturday, April 26, 2014 - 01:08 PM UTC
Hello,
The better part of the previous week's build time was spent on filling and sanding.
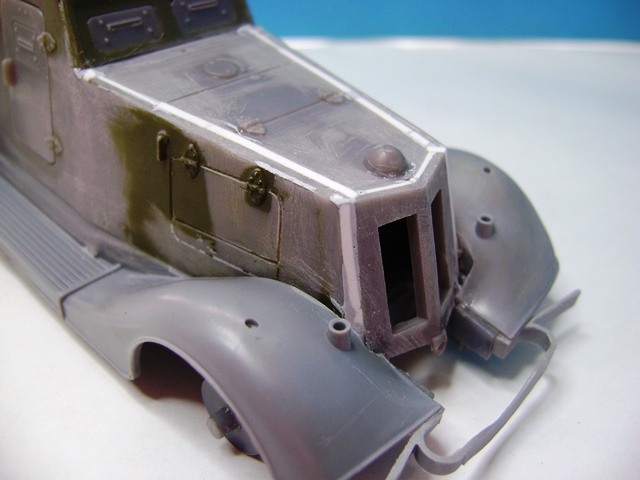
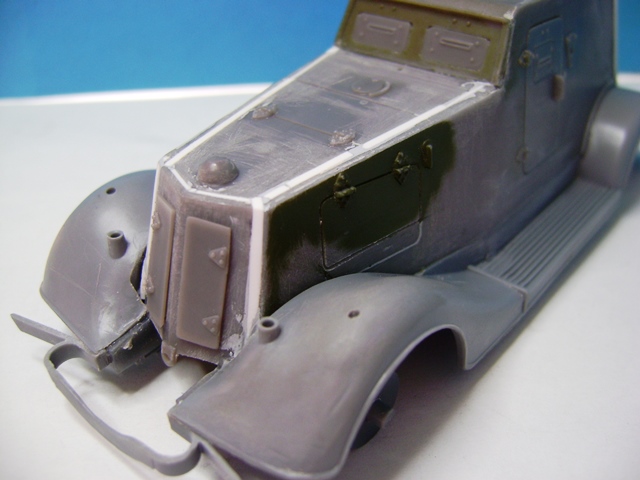
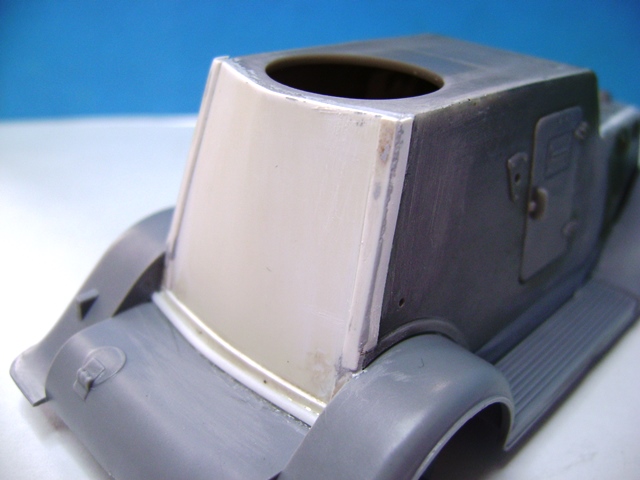
Quite happy with the results, most especially that this did not go way of the bin. I'd say this part ordeal is mostly done with. The last major build item I see is installing the frame antenna -- all the slots, except for the one on the sides where the supports should go in, have been sanded out when I did the alignment corrections. Hopefully I can get it installed and aligned correctly.
In between the body works I also did the turret part. As I planned to finish this as a beute, I have replaced the main armament with an MG 34. Will post pics on this later.
Cheers,
Tat
The better part of the previous week's build time was spent on filling and sanding.
Quite happy with the results, most especially that this did not go way of the bin. I'd say this part ordeal is mostly done with. The last major build item I see is installing the frame antenna -- all the slots, except for the one on the sides where the supports should go in, have been sanded out when I did the alignment corrections. Hopefully I can get it installed and aligned correctly.
In between the body works I also did the turret part. As I planned to finish this as a beute, I have replaced the main armament with an MG 34. Will post pics on this later.
Cheers,
Tat

PrickleHead

Joined: December 31, 2013
KitMaker: 338 posts
Armorama: 121 posts

Posted: Saturday, April 26, 2014 - 11:44 PM UTC
Had issues with my M8 so have had to restart with the Sk.Kfz.222


eMan

#298

Joined: August 08, 2002
KitMaker: 1,182 posts
Armorama: 665 posts

Posted: Monday, April 28, 2014 - 01:10 PM UTC
Here is my entry to the campaign, Panda 1/35 M-ATV MRAP. 

35th-scale
Joined: November 21, 2007
KitMaker: 3,212 posts
Armorama: 2,807 posts
Posted: Wednesday, April 30, 2014 - 08:26 PM UTC
Nice choice Lap Man, but a challanging build. I'm waiting for the "corrected" re-release of the Kinetic one.
Anyway, I'm nearly done:


Anyway, I'm nearly done:

ColinEdm


Joined: October 15, 2013
KitMaker: 1,355 posts
Armorama: 1,229 posts
Posted: Thursday, May 01, 2014 - 01:43 AM UTC
Ooohhh, very nice Sean! Cool looking vehicle.

ltb073

Joined: March 08, 2010
KitMaker: 3,662 posts
Armorama: 3,078 posts
Posted: Thursday, May 01, 2014 - 08:44 AM UTC
Sean Very nice indeed I thought at first that i was looking at a real truck 
My Progress has been slow Interior was painted and unber wash applied

I then moved on to the outer fenders

thats it for now
My Progress has been slow Interior was painted and unber wash applied

I then moved on to the outer fenders

thats it for now

eMan
#298
Joined: August 08, 2002
KitMaker: 1,182 posts
Armorama: 665 posts
Posted: Thursday, May 01, 2014 - 01:46 PM UTC
More update progress.


Martinvidas

Joined: February 13, 2011
KitMaker: 322 posts
Armorama: 300 posts

Posted: Thursday, May 01, 2014 - 06:36 PM UTC
My updates for the last week


35th-scale
Joined: November 21, 2007
KitMaker: 3,212 posts
Armorama: 2,807 posts
Posted: Thursday, May 01, 2014 - 07:49 PM UTC
Thanks Sal & Colin....If you thought it was real then there is some benefit in bad photography 
Hi Martin, when the hatch is open it's folded in half and lying flat against the roof, not sticking straight up. Interesting use of Lego! Hope your kids don't object
Hi Martin, when the hatch is open it's folded in half and lying flat against the roof, not sticking straight up. Interesting use of Lego! Hope your kids don't object
Martinvidas
Joined: February 13, 2011
KitMaker: 322 posts
Armorama: 300 posts
Posted: Friday, May 02, 2014 - 11:03 PM UTC

The top is painted
shorty53
#330
Joined: July 15, 2011
KitMaker: 175 posts
Armorama: 72 posts

Posted: Saturday, May 03, 2014 - 04:10 PM UTC
Have all the bits on the Bushmaster and ready to paint.

Undercoat applied.

Undercoat applied.
tatbaqui
#040
Joined: May 06, 2007
KitMaker: 2,713 posts
Armorama: 2,451 posts
Posted: Sunday, May 04, 2014 - 02:19 AM UTC
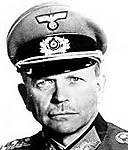
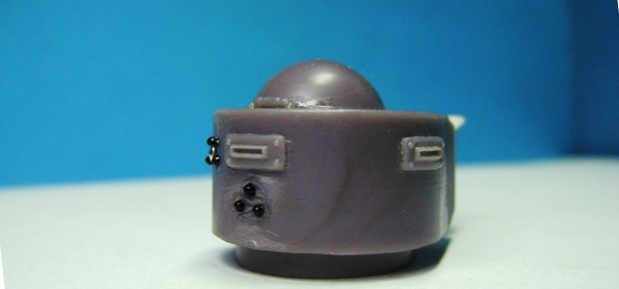
As I wanted to depict a beute BA-20, I took inspiration from this:
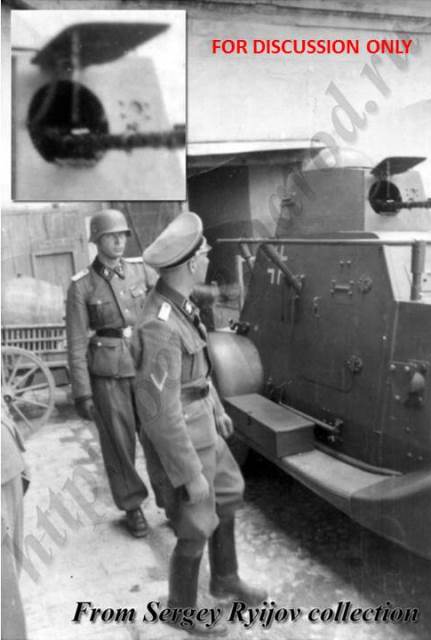
I read it was a BA-20 with the Prinz Eugen division when they were in Yugoslavia ca 1942.
Bits and pieces came from the spares box -- i.e. MG 34, plastic card. The arm for the field mod hatch came from the kit's steering wheel. The interior won't be seen anyway so I sanded it down and made good use of it.
Pics of the turret from last week's work:
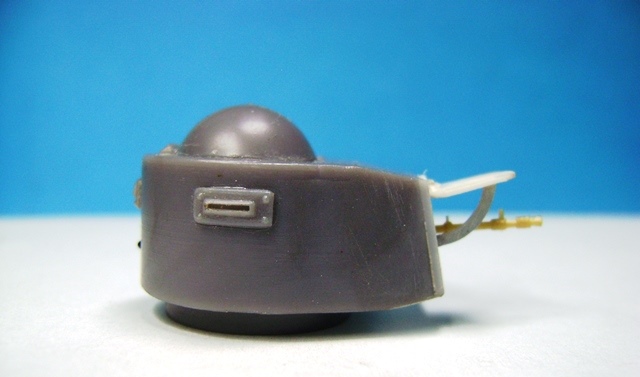
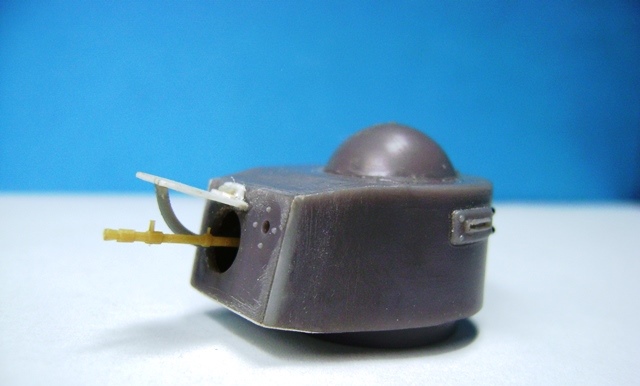
Reference pics and builds I've seen had these behind. But surely theirs are more to scale than mine The black bits came from the ends of a discarded hairbrush.
Tonight I finished installing the frame antenna. It completes the build, though it still needs some cleaning up to do. If all things go well this week, I should be able to have it primed by the weekend.
Cheers,
Tat
I read it was a BA-20 with the Prinz Eugen division when they were in Yugoslavia ca 1942.
Bits and pieces came from the spares box -- i.e. MG 34, plastic card. The arm for the field mod hatch came from the kit's steering wheel. The interior won't be seen anyway so I sanded it down and made good use of it.
Pics of the turret from last week's work:
Reference pics and builds I've seen had these behind. But surely theirs are more to scale than mine
The black bits came from the ends of a discarded hairbrush.Tonight I finished installing the frame antenna. It completes the build, though it still needs some cleaning up to do. If all things go well this week, I should be able to have it primed by the weekend.
Cheers,
Tat
tatbaqui
#040
Joined: May 06, 2007
KitMaker: 2,713 posts
Armorama: 2,451 posts
Posted: Monday, May 05, 2014 - 10:25 PM UTC
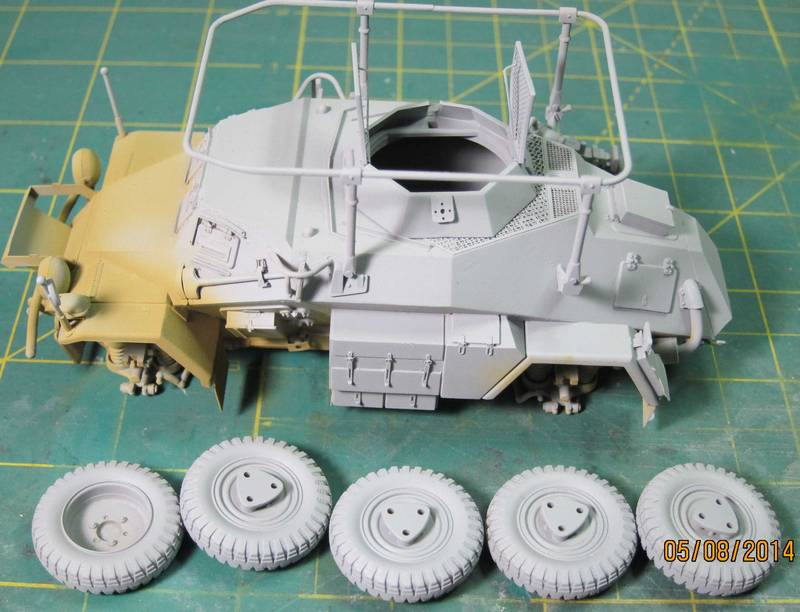
Hello,
Cleaned-up the installation of the frame antenna, wheels dry-fitted.
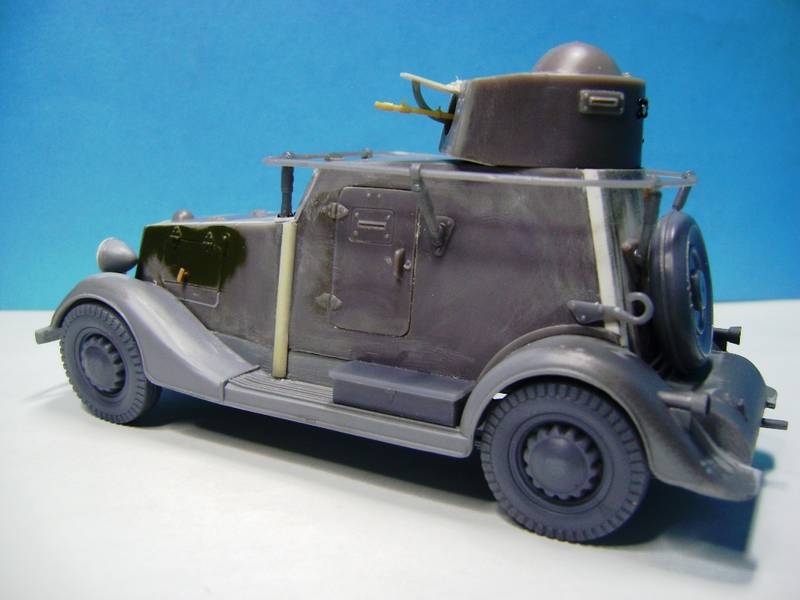
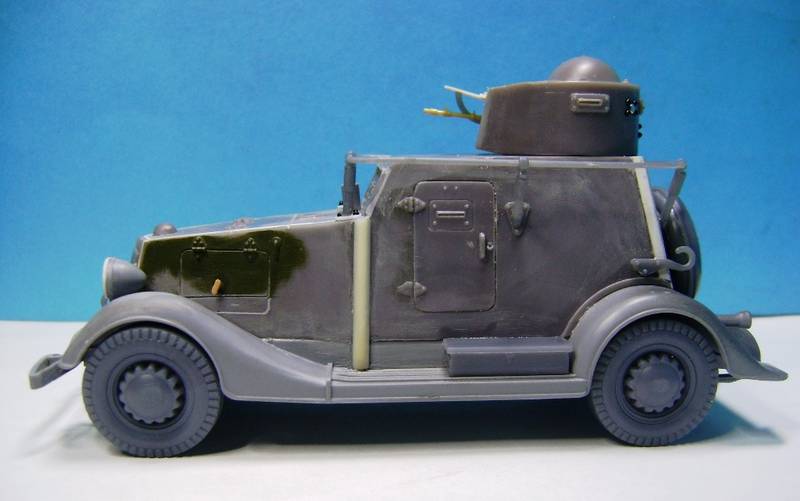
Happy to complete this phase. Off to the paint shop!
Cheers,
Tat
Cleaned-up the installation of the frame antenna, wheels dry-fitted.
Happy to complete this phase. Off to the paint shop!
Cheers,
Tat
ltb073
Joined: March 08, 2010
KitMaker: 3,662 posts
Armorama: 3,078 posts
Posted: Tuesday, May 06, 2014 - 01:22 AM UTC
Tat nice work there is that a resin kit 
I completed my build and got the base coat of dunkelgelb on


Im off for the next 3 days so hopefully I can get the 2nd camo color on this guy
I completed my build and got the base coat of dunkelgelb on


Im off for the next 3 days so hopefully I can get the 2nd camo color on this guy

Nito74

Joined: March 04, 2008
KitMaker: 5,386 posts
Armorama: 4,727 posts
Posted: Tuesday, May 06, 2014 - 08:19 AM UTC
Nice job Sal !
Those 234 from Dragon are stunning kits, great level of detail,
I would advise you to add the 2 Mg42 and the 4 metal indicators later on, handling the kit for paint & weather you might break some small part.. but it's too late now, be careful..
Those 234 from Dragon are stunning kits, great level of detail,
I would advise you to add the 2 Mg42 and the 4 metal indicators later on, handling the kit for paint & weather you might break some small part.. but it's too late now, be careful..
tatbaqui
#040
Joined: May 06, 2007
KitMaker: 2,713 posts
Armorama: 2,451 posts
Posted: Tuesday, May 06, 2014 - 09:30 AM UTC
Thanks Sal! It's plastic -- older generation I'd say. The kit is Alan re-boxed by DML in the 90's. Not sure if Alan is the original manufacturer as I've seen other mutations of it going by unfamiliar brand names.
I originally planned to do a 234 as well, but changed it in view of the campaign time left.
Thumbs up on the shade of your dunkelgelb -- what paint did you use? Was it a mix?
Cheers,
Tat
I originally planned to do a 234 as well, but changed it in view of the campaign time left.
Thumbs up on the shade of your dunkelgelb -- what paint did you use? Was it a mix?
Cheers,
Tat
Blackstoat
Joined: October 15, 2012
KitMaker: 568 posts
Armorama: 561 posts
Posted: Tuesday, May 06, 2014 - 09:40 AM UTC
Quoted Text
Hello,
The better part of the previous week's build time was spent on filling and sanding.
Quite happy with the results, most especially that this did not go way of the bin. I'd say this part ordeal is mostly done with. The last major build item I see is installing the frame antenna -- all the slots, except for the one on the sides where the supports should go in, have been sanded out when I did the alignment corrections. Hopefully I can get it installed and aligned correctly.
In between the body works I also did the turret part. As I planned to finish this as a beute, I have replaced the main armament with an MG 34. Will post pics on this later.
Cheers,
Tat
You ought to try the Zvezda version. It was too much work, I'm afraid it'll end in the bin for sure.
Looks like your efforts were worthwhile.
tatbaqui
#040
Joined: May 06, 2007
KitMaker: 2,713 posts
Armorama: 2,451 posts
Posted: Tuesday, May 06, 2014 - 12:27 PM UTC
Thanks Andy.
It was a challenge for me, but yes well worth it in the end -- having the personal satisfaction of completing it, my build inaccuracies aside. Now I am reminded of the RPM Minenraummer in the stash -- read horror stories on its build. While there seems to be a better product available, I may get crazy enough to give it a try in this lifetime.
Cheers,
Tat
dweeb203

Joined: May 06, 2014
KitMaker: 59 posts
Armorama: 58 posts
Posted: Wednesday, May 07, 2014 - 02:37 AM UTC
Hello! May i join this groupbuild with a humvee? It's not the armored type (M966), but i planned to make it customized armored type. Here are the progress (started it yesterday, pic taken this evening)

Critics and opinions are welcome
Critics and opinions are welcome
ltb073
Joined: March 08, 2010
KitMaker: 3,662 posts
Armorama: 3,078 posts
Posted: Wednesday, May 07, 2014 - 05:05 AM UTC
Quoted Text
Nice job Sal !
Those 234 from Dragon are stunning kits, great level of detail,
I would advise you to add the 2 Mg42 and the 4 metal indicators later on, handling the kit for paint & weather you might break some small part.. but it's too late now, be careful..
Thanks John and yeah a little late for that now so it be very careful time
Quoted Text
Thumbs up on the shade of your dunkelgelb -- what paint did you use? Was it a mix?
@ Tat Thanks as well the mix is just some Tamiya XF-60 about 45% and rubbing alcohol


TMoon
#152
Joined: December 07, 2002
KitMaker: 487 posts
Armorama: 441 posts
Posted: Thursday, May 08, 2014 - 03:55 AM UTC
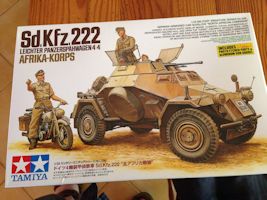
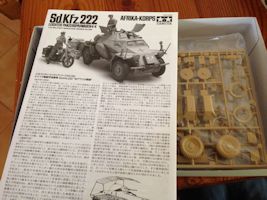
Here is an in process photo of the German Armored Car by Tamiya
Tom
Tom
Martinvidas
Joined: February 13, 2011
KitMaker: 322 posts
Armorama: 300 posts
Posted: Friday, May 09, 2014 - 09:53 PM UTC
the last week progress:


SHAKY962

Joined: May 21, 2012
KitMaker: 765 posts
Armorama: 438 posts

Posted: Saturday, May 10, 2014 - 09:10 AM UTC
I start again with the work on the M8....


 |

WEB HOSTING BY


Copyright ©2021 Armorama and Kitmaker Network, a subsidiary of Silver Star Enterprises
All Rights Reserved. Please read our Conditions of Use and Privacy Policy.
All Rights Reserved. Please read our Conditions of Use and Privacy Policy.