Campaigns
Where Armorama group builds can be discussed, organized, and updates posted.
Armored Car Campaign
mvaiano
Visit this Community
Sao Paulo, Brazil
Joined: January 24, 2012
KitMaker: 1,054 posts
Armorama: 1,050 posts
Posted: Saturday, September 14, 2013 - 05:51 AM UTC
Hi gentlemen!

Great projects so far. I hope mine will be as good as yours.

So, let's start:


I pretend to finnish the build in 3 or 4 days.

Cheers!

Marco
gcdavidson
Visit this Community
Ontario, Canada
Joined: August 05, 2003
KitMaker: 1,698 posts
Armorama: 1,563 posts
Posted: Saturday, September 14, 2013 - 06:38 AM UTC

Quoted Text

Hi gentlemen!
to finnish the build in 3 or 4 days.

Cheers!

Marco


3-4 days to build....3-4 months to cut all that masking tape! I look forward to this one Marco, good luck.
steph2102
Visit this Community
Isere, France
Joined: April 23, 2011
KitMaker: 735 posts
Armorama: 606 posts
Posted: Saturday, September 14, 2013 - 06:54 AM UTC
hello,
I had to give up my mounting BA20,too twisted pieces.

I will make a LAV 150.
steph
mvaiano
Visit this Community
Sao Paulo, Brazil
Joined: January 24, 2012
KitMaker: 1,054 posts
Armorama: 1,050 posts
Posted: Saturday, September 14, 2013 - 09:19 AM UTC

Quoted Text


Quoted Text

Hi gentlemen!
to finnish the build in 3 or 4 days.

Cheers!

Marco


3-4 days to build....3-4 months to cut all that masking tape! I look forward to this one Marco, good luck.


Thanks Graeme!

Hope not. I made some in scale color copies of the color charts. Those copies have the same size of the actual model. So, I will use this as a template to cut my masking tapes. I hope it will work.

Cheers!

Marco
imatanker
Visit this Community
Maine, United States
Joined: February 11, 2011
KitMaker: 1,654 posts
Armorama: 1,565 posts
Posted: Saturday, September 14, 2013 - 10:02 AM UTC
So let's get this thing started.Got the bench from this.....

To a workable state.
Start up pics. Revell's 1/72nd Dingo I


Not many pieces,but still pretty detailed.
So we're off Jeff T.
rtvmodeler
#136
Visit this Community
Distrito Federal, Mexico
Joined: April 06, 2002
KitMaker: 437 posts
Armorama: 391 posts
Posted: Saturday, September 14, 2013 - 01:35 PM UTC
Hello friends!

More updates:

Working the periscopes with styrene. I continue using the details with soldering and another periscopes.


Regards!
Rodolfo
JonDicks
Visit this Community
Queensland, Australia
Joined: October 13, 2009
KitMaker: 223 posts
Armorama: 224 posts
Posted: Saturday, September 14, 2013 - 06:45 PM UTC
@Rodolfo - Good work! That looks like a very challenging build you have taken on! I will be watching with interest.

I have put some paint on the 222


I will be doing fading with oils next.
andromeda673
Visit this Community
Wisconsin, United States
Joined: July 30, 2013
KitMaker: 584 posts
Armorama: 525 posts
Posted: Sunday, September 15, 2013 - 03:11 AM UTC
Here are some pics of my finished project, I went with the old standby, a Humvee with some side door armor and hood armor, thank you for letting me part of this campaign. I took some finished pictures next to my recently finished abrams, and the finished base.

also the I did not glue the roof on, as I wanted to be able to take it off in case anyone wants to look inside.

Thanks for looking!


mecanix
Visit this Community
Kerry, Ireland
Joined: March 03, 2003
KitMaker: 201 posts
Armorama: 189 posts
Posted: Tuesday, September 17, 2013 - 09:31 AM UTC
For those who aren't aware, a little background.
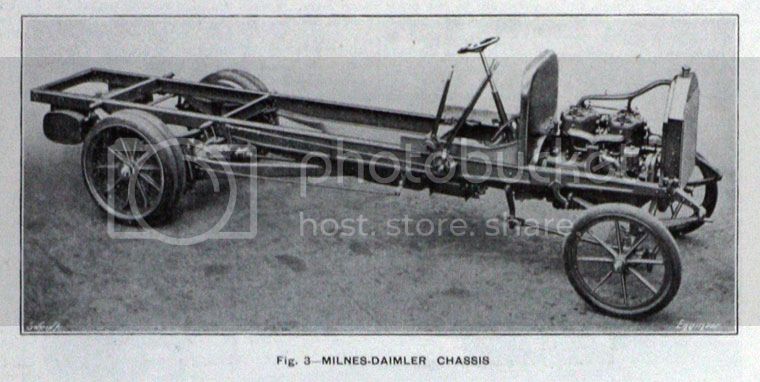
On the Easter weekend in April 1916 Irish Nationalist insurgents occupied key public buildings in and around central Dublin and declared the birth of the Irish Republic.The British Army occupied on the Western Front initially were slow to react. A key problem being the relief, reinforcement and resupply of barricades and strong points, through out the city, trying to contain the insurgency. On the Wednesday,26th April, Guinness were approached for the loan of 5 of their Milnes-Daimler 4ton trucks. These being German Daimler chassis with a Milnes dray body for delivering barrels of stout. Permission given, they were driven to Inchicore railway workshops outside the city and various bodies and plating were attached overnight.
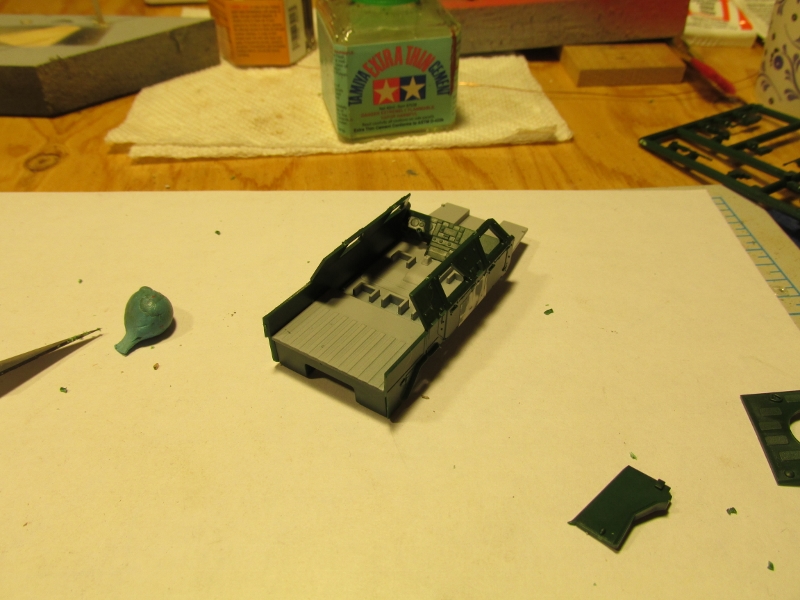
2 had large, open box bodies fitted and three had engine smoke boxes bolted to the bed with loopholes and a rear door.
The only reference I can find

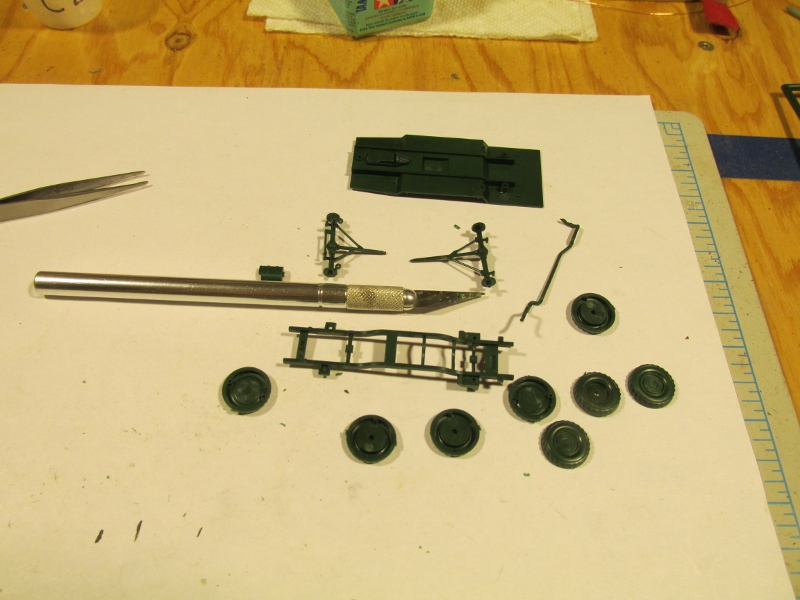
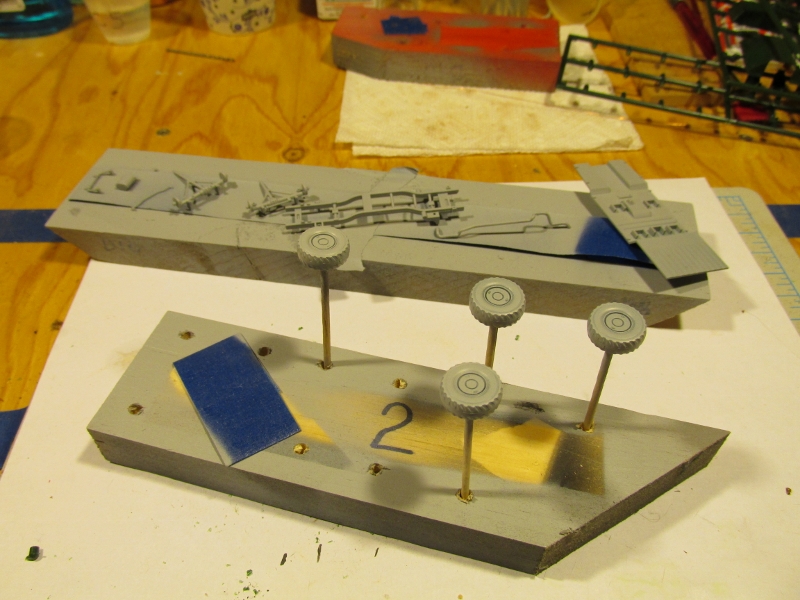
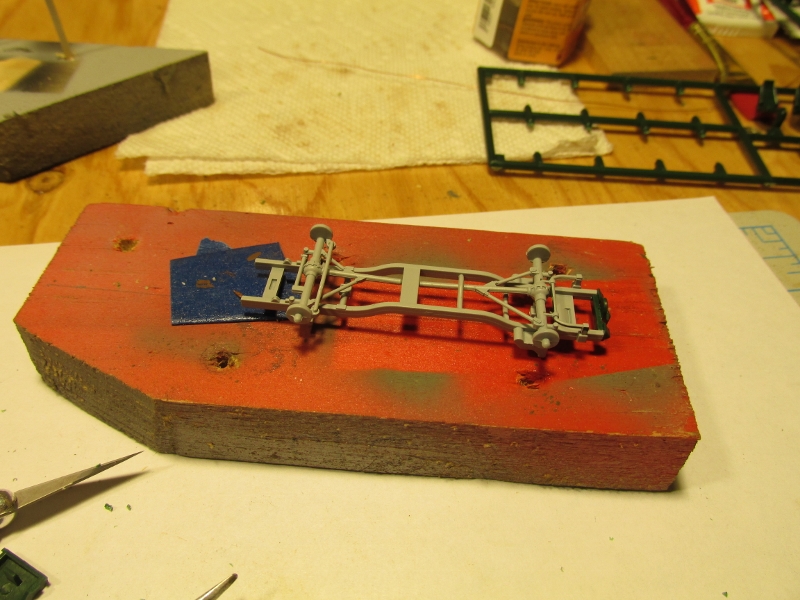
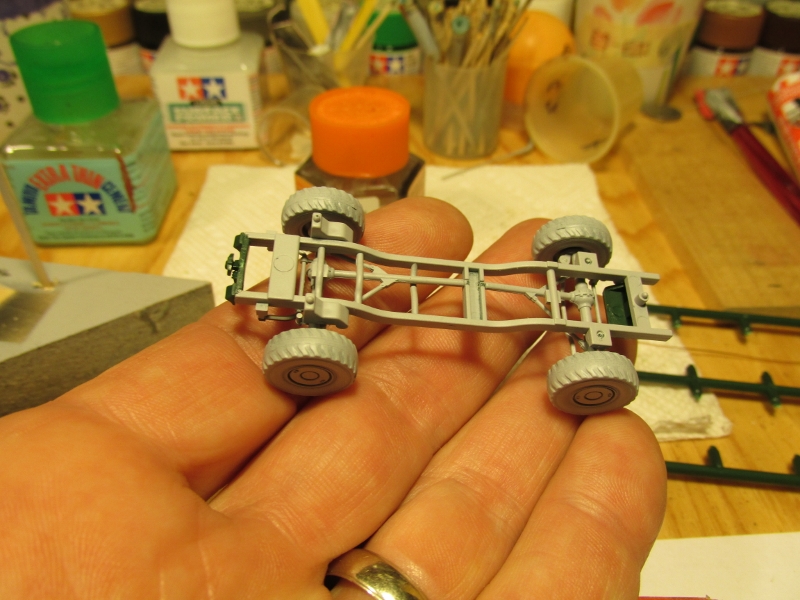
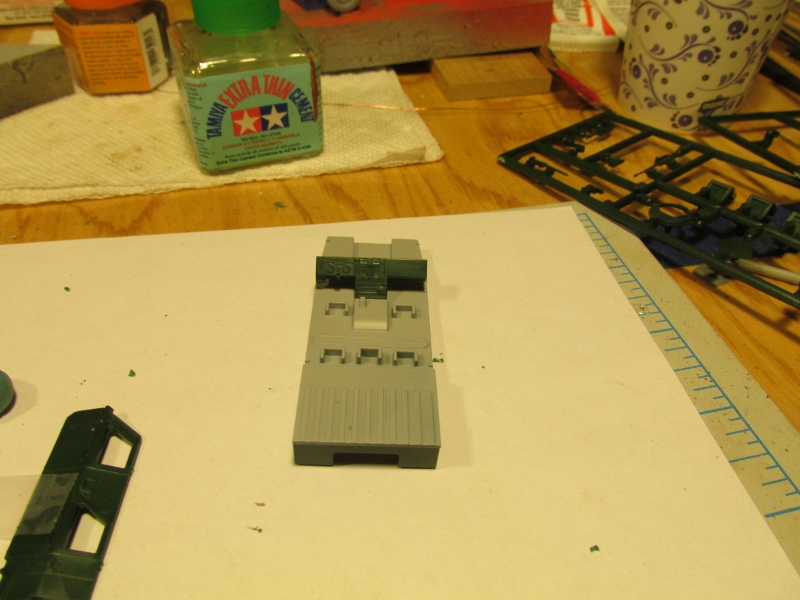
Searching or more like pillaging my stash, I found the chassis from a Zverda GAZ AAA and made some alterations. The only drawings available are 30 years old and rather basic.Using whatever modern data I could find I adjusted them. It is important to remember that these were build overnight and that no one is like another. However, it was by professional railway engineers so it must look hurriedly put together but not sloppy.


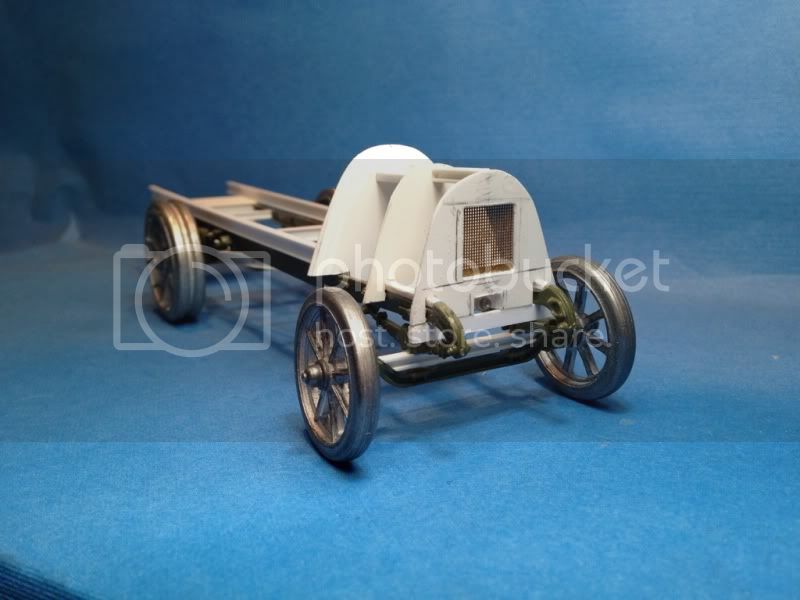
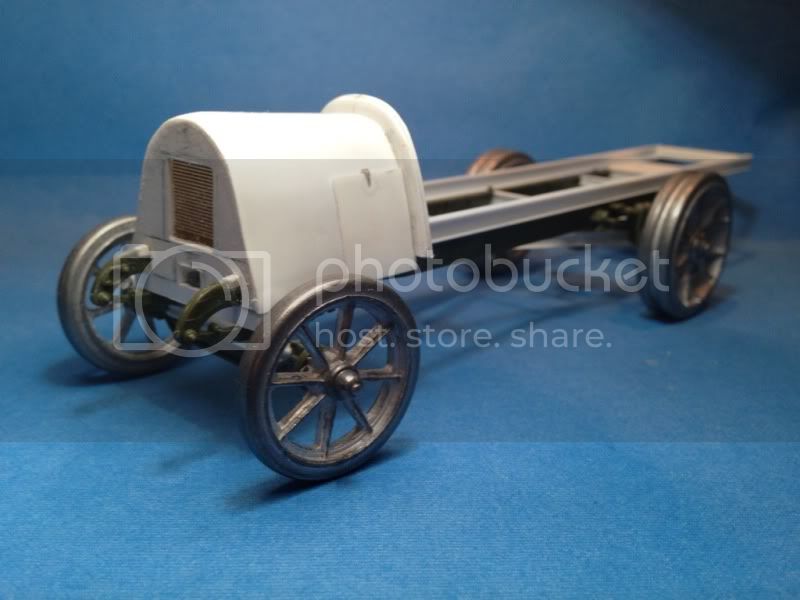
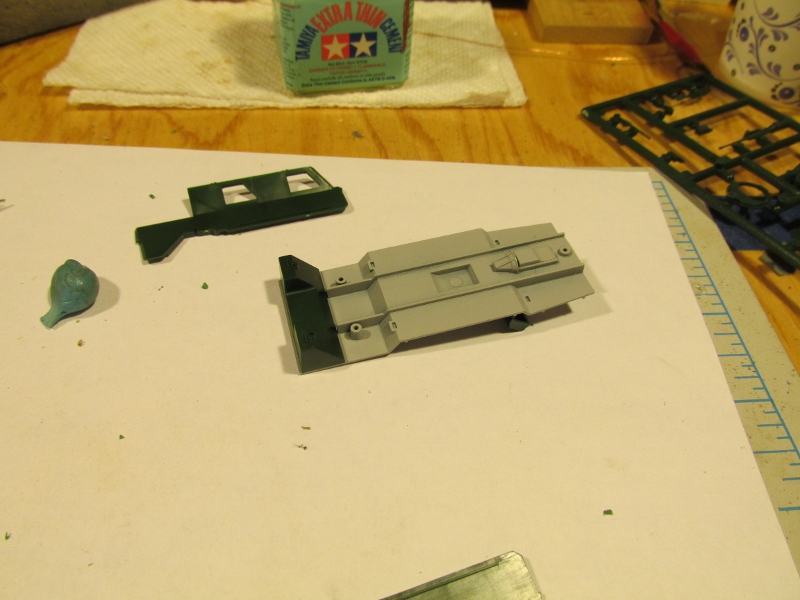
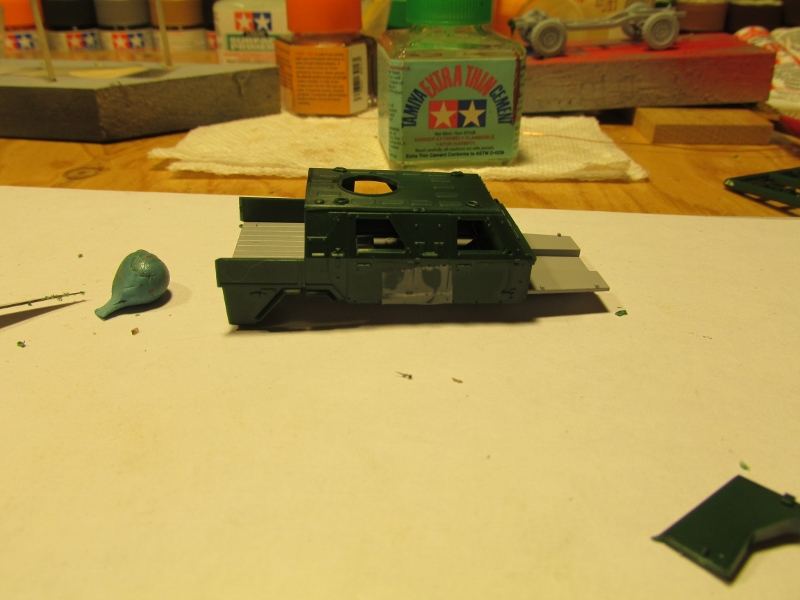
The engine cover, exhaust and box covering the fuel tank are added and the wheels which come from a Scale-Link Bedford War Office 3 ton subsidy truck kit.
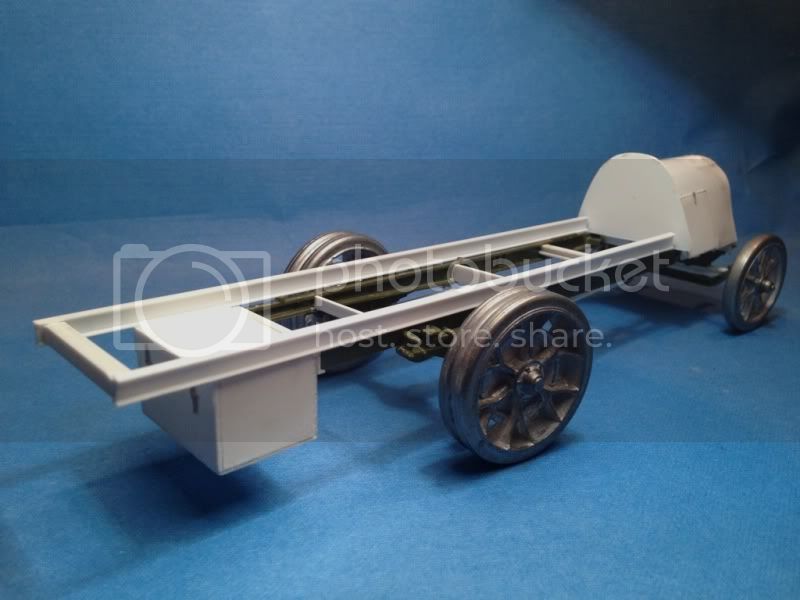
Next will be the truck bed. Thank you for sitting through the history lesson !!
regards
windysean
Visit this Community
Wisconsin, United States
Joined: September 11, 2009
KitMaker: 1,917 posts
Armorama: 735 posts
Posted: Tuesday, September 17, 2013 - 11:36 AM UTC
I love the history lessons! ...and being of Irish decent, Irish history in particular.
-Sean H
35th-scale
Visit this Community
Kildare, Ireland
Joined: November 21, 2007
KitMaker: 3,212 posts
Armorama: 2,807 posts
Posted: Wednesday, September 18, 2013 - 11:25 PM UTC
Sean - lovely Humvee (and Abrams)....that was a fast build. I'd love to be able to get that much time at the bench

Mecanix - Looking good. I love watching your scratch-build vehicles. Thanks for bringing this one to the campaign

Jon - That 222 is coming along nicely

Rodalf - The detail your adding will really enhance that kit. Great work so far.

Jeff - nice little Dingo. Will you be getting the 1/35 version when it comes out?

Steph - Pity about the BA20 but that 150 is a nice kit. Look forward to seeing your progress

Marco - Are you going to do the digital camo? That will be fun!


Would anyone like to try their hand at doing a banner for the campaign?

Cheers
Sean
mvaiano
Visit this Community
Sao Paulo, Brazil
Joined: January 24, 2012
KitMaker: 1,054 posts
Armorama: 1,050 posts
Posted: Thursday, September 19, 2013 - 12:02 AM UTC
Hi Sean!

I do, I bougth this kit just because this paint.

The build is almost done. I will post pics next weekend.

Next weekend I will start the paint job too (if the rain let me).

About the banner: I have no talent to propose one, and, as a "newbee" in campaigns, I have a question: Can I use the banner just after finnish the kit or after the campaig?

Cheers!

Marco
35th-scale
Visit this Community
Kildare, Ireland
Joined: November 21, 2007
KitMaker: 3,212 posts
Armorama: 2,807 posts
Posted: Thursday, September 19, 2013 - 01:48 AM UTC
Hi Marco,
hope the rain holds off for you!

The banners are awarded by the campaign administrator at the end of the campaign, not as each entry is finished. Sorry, you'll have to wait a bit longer

Sean
mvaiano
Visit this Community
Sao Paulo, Brazil
Joined: January 24, 2012
KitMaker: 1,054 posts
Armorama: 1,050 posts
Posted: Thursday, September 19, 2013 - 02:09 AM UTC
Thanks Sean!

Patience is a virtue!

Cheers!

Marco
Nito74
Visit this Community
Lisboa, Portugal
Joined: March 04, 2008
KitMaker: 5,386 posts
Armorama: 4,727 posts
Posted: Thursday, September 19, 2013 - 02:33 AM UTC
@Marco & @Sean

The ribbons are awarded at the end of the Campaign by the Campaign Manager or the Campaign Administrator, in this case Sean or myself.
(Ribbons are visible on the users profile)

The banners can be made by anyone and used whenever they want.
They are visible next to the signature.
They can be single images like mine (Panzer 38t Banner Campaign) or like Rodolfo Torres Banner that is animated image with several banners.

Hope this helps the Banner // Ribbon Campaign questions.

After seeing all your builds... I'm in for this one.
I'll use these :


with


and

mvaiano
Visit this Community
Sao Paulo, Brazil
Joined: January 24, 2012
KitMaker: 1,054 posts
Armorama: 1,050 posts
Posted: Thursday, September 19, 2013 - 02:39 AM UTC
Thank you for the information John!

Abou you kit of choice... WOW, heavy wepons...

Obrigado!

Marco
Murdo
Visit this Community
Scotland, United Kingdom
Joined: May 25, 2005
KitMaker: 2,218 posts
Armorama: 1,050 posts
Posted: Thursday, September 19, 2013 - 07:30 AM UTC
Ermm, Luca, Umm...

I have a 1/35th Tamiya Saladin armoured car I'd like to build but the problem is.. It's already built. I built it hundreds of years ago when I was a sprog (Yes, I still have it). It is horrible, both the kit and the build.

Obviously as the kit is built it is ineligible however, the kit is now unbuilt and unpainted, which will make it eligible... I hope?

This was the kit on Monday (Excuse the front trial wheel):


And this is the kit in its current state:


Will this qualify as "unbuilt" enough as I don't think I can unbuild it any further without ruining it.

The chassis is totaly incorrect so I won't be using it anyway, nor the wheels.

Can I play? Please???
35th-scale
Visit this Community
Kildare, Ireland
Joined: November 21, 2007
KitMaker: 3,212 posts
Armorama: 2,807 posts
Posted: Thursday, September 19, 2013 - 10:03 AM UTC
Thanks for clearing that up John....my fault for mixing up the banners & ribbons.

Love your choice: will be one mean looking beast when complete.

Murdo, Luca seems to have disappeared (hope he's OK) so I've taken over the campaign. As the key component of any campaign is participation and enjoying the builds of others, and given how broken down that Saladin is in it's current state, plus all the extra clean up your going to need before putting it back together, then I'm going to allow it.....welcome on board. Don't forget to go and enlist on the actual campaign page.

Cheers
Sean
Murdo
Visit this Community
Scotland, United Kingdom
Joined: May 25, 2005
KitMaker: 2,218 posts
Armorama: 1,050 posts
Posted: Thursday, September 19, 2013 - 10:37 AM UTC
Thanks Sean. I enlisted a while back.

Nito74
Visit this Community
Lisboa, Portugal
Joined: March 04, 2008
KitMaker: 5,386 posts
Armorama: 4,727 posts
Posted: Thursday, September 19, 2013 - 11:04 AM UTC
No problem, Sean.

I think a minigun gives some character to any kit

I've just opened the Bronco's box, so many detailing and options.. I'm guessing that will more kits like that coming my way...
GregCloseCombat
Visit this Community
California, United States
Joined: June 30, 2008
KitMaker: 2,408 posts
Armorama: 2,394 posts
Posted: Thursday, September 19, 2013 - 12:41 PM UTC


I think i'll try this 1/48 BA-20. (Wink wink Steph...hope it works out)
imatanker
Visit this Community
Maine, United States
Joined: February 11, 2011
KitMaker: 1,654 posts
Armorama: 1,565 posts
Posted: Thursday, September 19, 2013 - 09:21 PM UTC
Great work everybody. There is going to be some weird lookin' stuff being built in this campaign

Here's my first update on the Dingo


Wheels are blue tacked in place


That's it for now. Model on, Jeff T.
rtvmodeler
#136
Visit this Community
Distrito Federal, Mexico
Joined: April 06, 2002
KitMaker: 437 posts
Armorama: 391 posts
Posted: Saturday, September 21, 2013 - 07:59 AM UTC
Hello friends!

@ Thanks Jon!. I hope to see more updates of your 222
@ Thanks Sean!
@ G.Houle.- excellent WIP!
@ Mecanix.- excellent work with the "scratch"
@ John.- nice project, the Live Resin really is high quality!
@ Jeff.- good work with the little Dingo

-----------------------------------------

More updates:

Next steps:: To remove the lights front because they are oversized and to finish the work in "scratch" of the periscopes, rounds and handles.


Regards!
Rodolfo
Murdo
Visit this Community
Scotland, United Kingdom
Joined: May 25, 2005
KitMaker: 2,218 posts
Armorama: 1,050 posts
Posted: Saturday, September 21, 2013 - 10:21 AM UTC
There are some nice looking builds going on here. I'm also glad to see I'm not the only one that will be doing some scratchbuilding.

I knew the wheels were wrong but until I had a look for references I didn't realise just how bad the rest of the kit was. The chassis and hull is totally wrong and bears no resemblance at all to the real thing so I scratchbuilt a new hull. Here it is (in white styrene) next to the original:


Fitted in place:


And comparing the old with the new:


Actually... Looking at that front on view I have a horrible feeling the rest of the original top hull might be wrong too.

I have no idea how to scratchbuild the axles (which aren't actually "axles", the suspension looks horribly complicated) and have a dreadful feeling I've bitten off far more than I can chew and should have kept quiet and left the thing gathering dust in its box.


This will be fun


steph2102
Visit this Community
Isere, France
Joined: April 23, 2011
KitMaker: 735 posts
Armorama: 606 posts
Posted: Saturday, September 21, 2013 - 10:58 AM UTC
hello,
Greg, I hope that everything will be for the better.
Murdo, good courrage , I wanted to buy this kit but I'll give it up.
G.Houle, very beautiful montage
Mecamix I'm Still also impressed by your editing, very nice.
no camera at the moment, but I'll post my progress in a week.
steph