Ille-et-Vilaine, France
Joined: March 17, 2008
KitMaker: 29 posts
Armorama: 27 posts
Posted: Friday, October 18, 2013 - 02:44 AM UTC
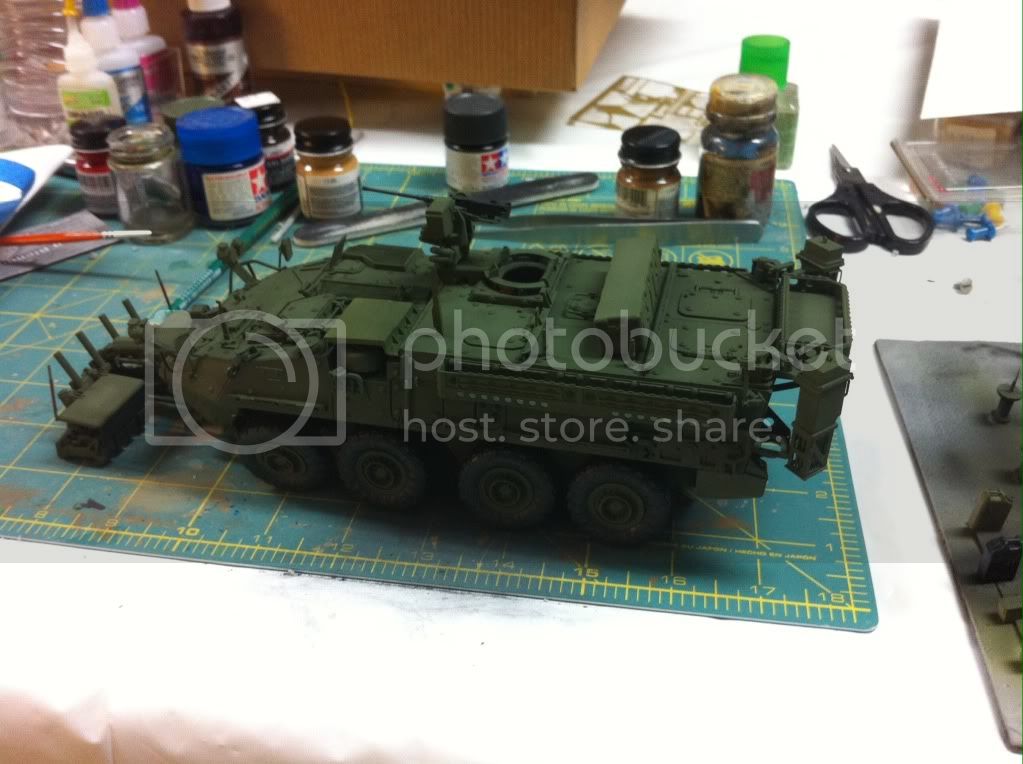
Hello everyone, build started for me, finished step 4 last night :


I cleaned most of the part that I think will be possibly visible later. Some putty needed on the side, nothing really hard to do.
My last build was a Trumpeter M1117, and this is much, much better, fit is perfect, instructions are very good, no comparison.
I also enjoyed a lot soldering photo-etched part, so i bought on ebay this Legend Production upgrade

Will tell you when i receive it.
Modelling Blog : http://models.elijaa.org/
On the Bench : Trumpeter M1117
Florida, United States
Joined: March 30, 2010
KitMaker: 139 posts
Armorama: 136 posts
Posted: Friday, October 18, 2013 - 02:46 AM UTC
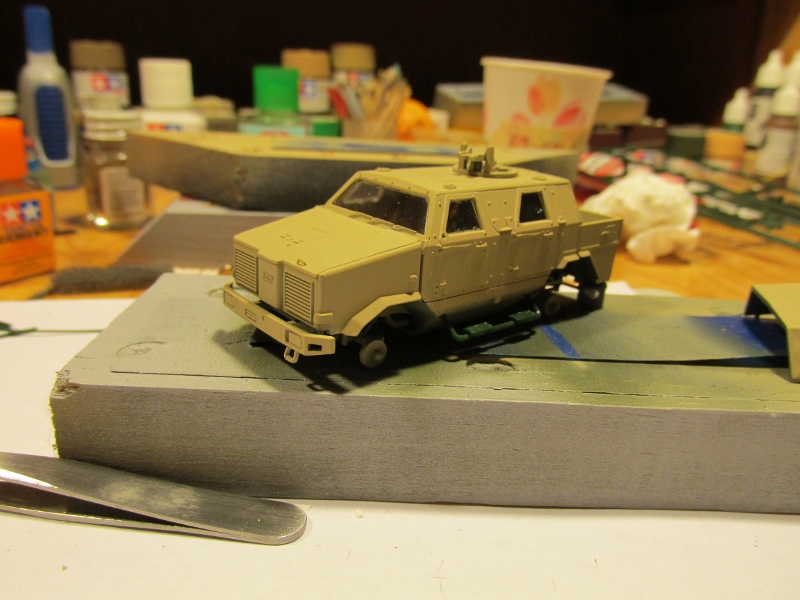
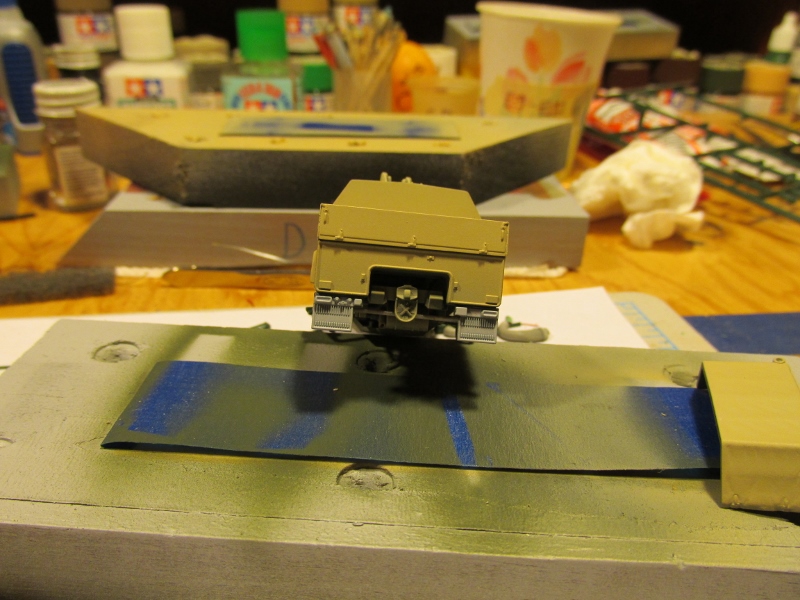
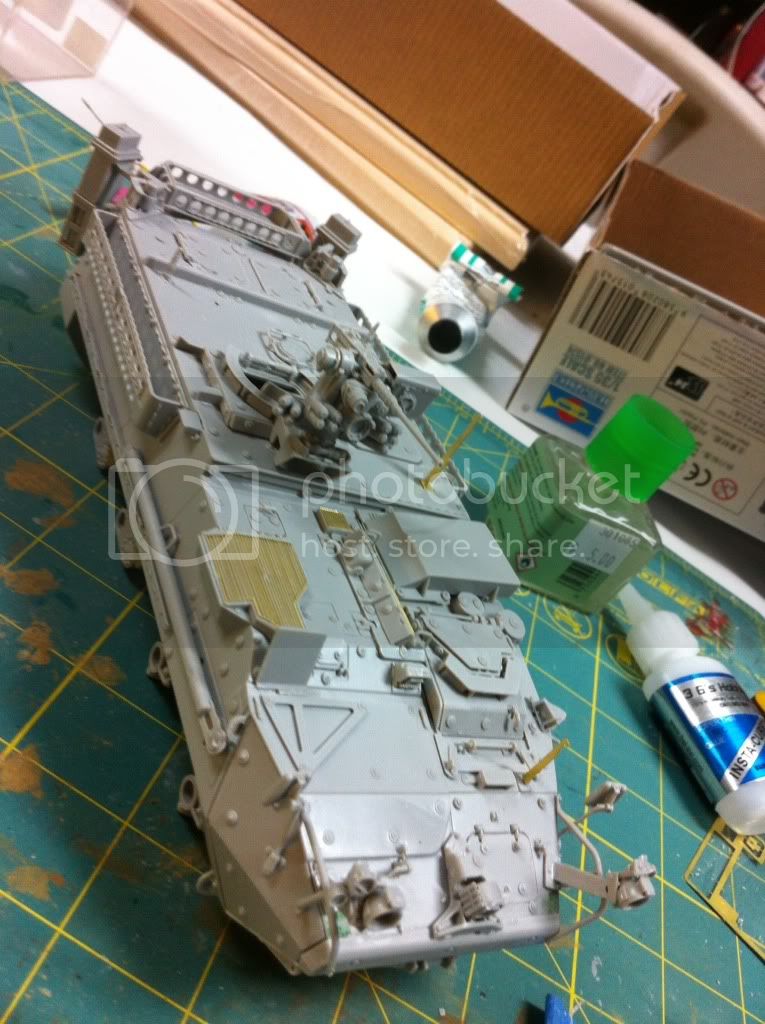
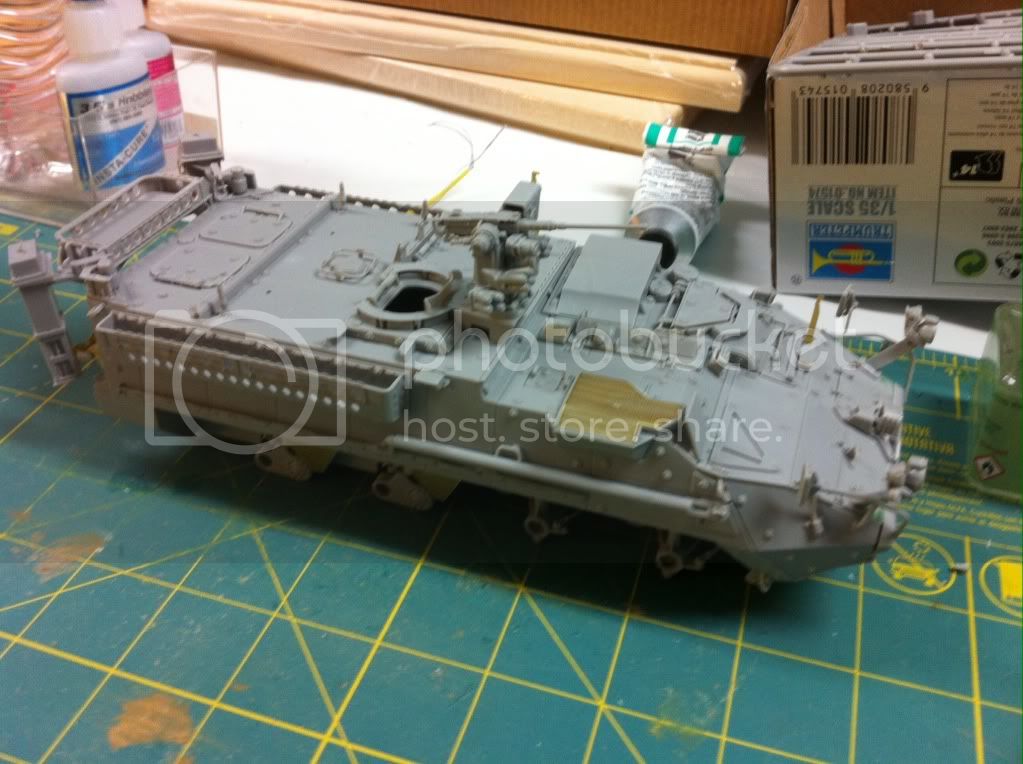
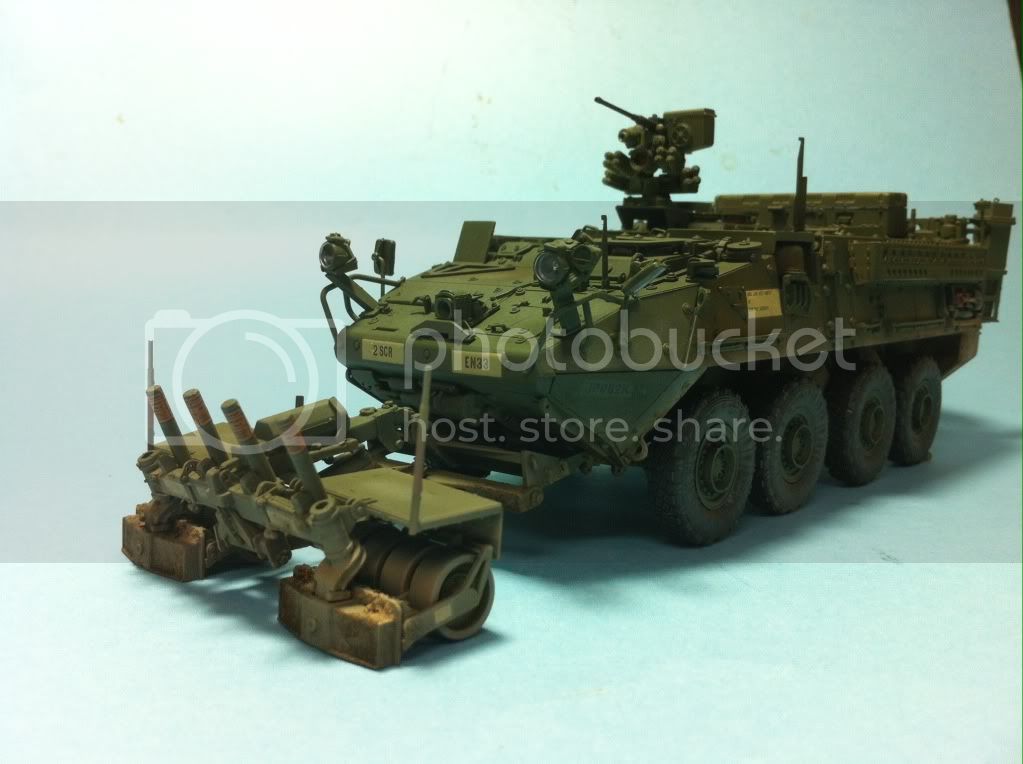
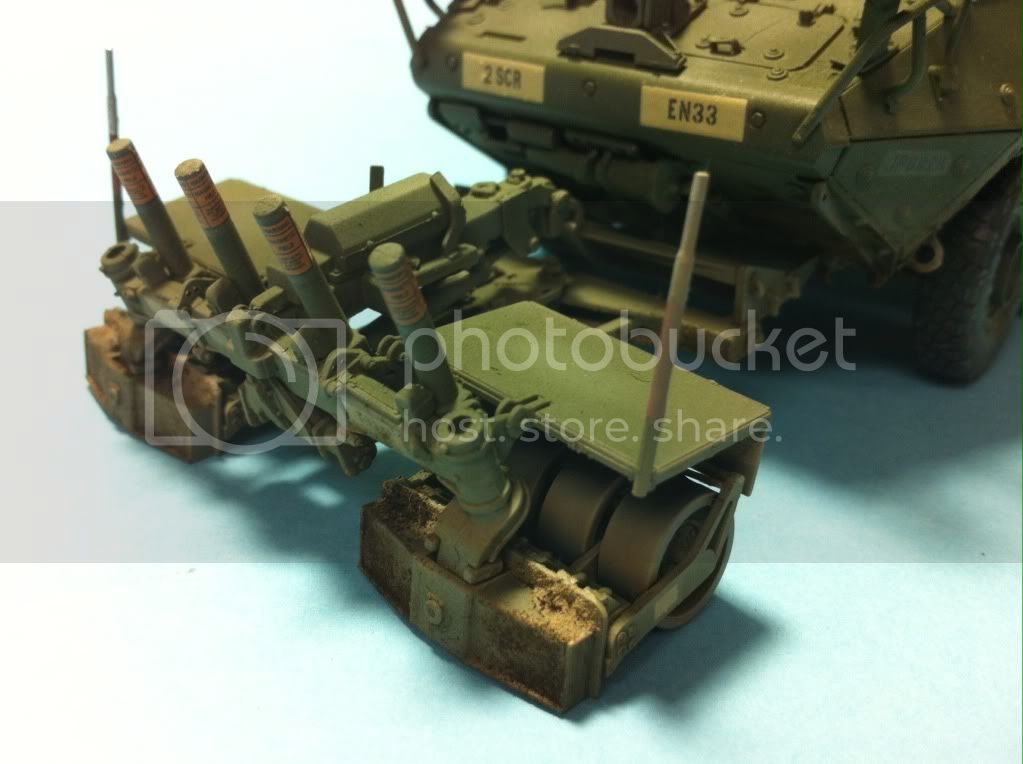
Here's yesterday's progress- the upper hull is pretty much done. Not thrilled with the large intake PE part. Fortunately, my prototype doesn't use it, which will work out good. Today I'll get the mine roller finished, prime, and possibly paint!

Rear view of lane markers.

Front view with JFK mounting plate. This is unique to the ESV variant.
More to come later!
Take care,
Larry
Florida, United States
Joined: March 30, 2010
KitMaker: 139 posts
Armorama: 136 posts
Posted: Friday, October 18, 2013 - 02:48 AM UTC
Oops- wrong number one pic! This is what actually wanted to post....
Maine, United States
Joined: February 11, 2011
KitMaker: 1,654 posts
Armorama: 1,565 posts
Posted: Friday, October 18, 2013 - 09:23 AM UTC
Holy mackeral Larry, slow down Man you're making us look bad

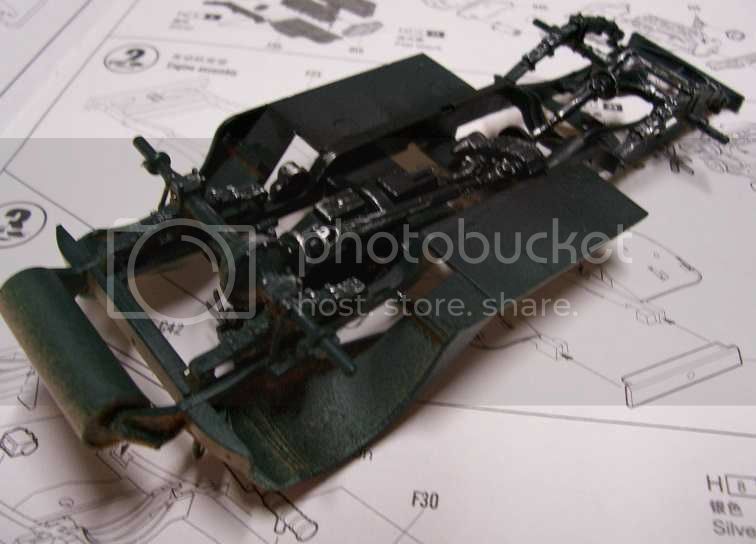
More progress on the Dingo
Up on all fours,tires and roof still dry fitted
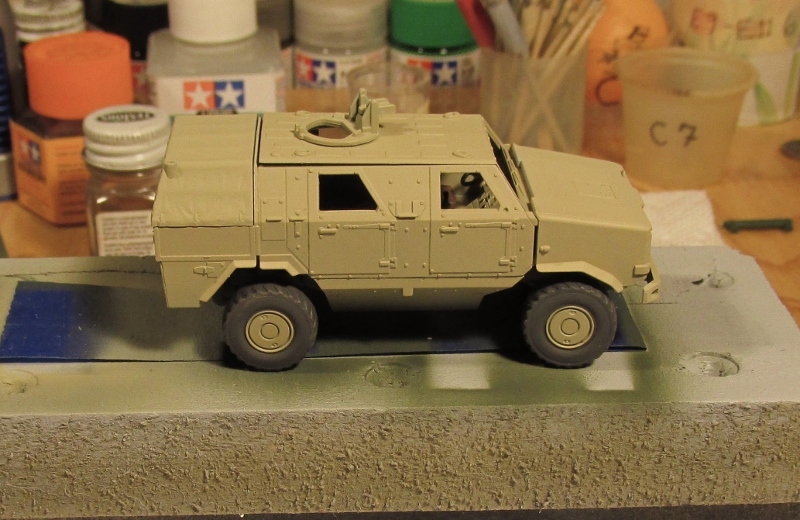
Stepbars and scratched tow cable (that the carpet monster swallowed) in place.

Windows in.
And mudflaps attatched.
A little touch up work with the AB and we'll be ready for camo

Jeff T.
The building lamp is lit.Build'em if you got'em.
Arkansas, United States
Joined: June 29, 2009
KitMaker: 11,610 posts
Armorama: 7,843 posts
Posted: Friday, October 18, 2013 - 09:26 AM UTC
Just picked up Tamiya's old sd.kfz. 232 8 RAD. I'll be building the early version and as such will be getting Eduard's pe set for it.
Ideals are peaceful. History is violent.
Maine, United States
Joined: February 11, 2011
KitMaker: 1,654 posts
Armorama: 1,565 posts
Posted: Friday, October 18, 2013 - 12:29 PM UTC
Matt, cool buddy. The eight wheelers in any config are my favorite armored car
The building lamp is lit.Build'em if you got'em.

#123
New Mexico, United States
Joined: November 17, 2008
KitMaker: 1,202 posts
Armorama: 635 posts
Posted: Friday, October 18, 2013 - 12:43 PM UTC
Howdy Y'all

@Larry & @Jeff-I'm not usually a modern armor fan but I need to get those models. Too cool.
Hopefully I can work on my tiny M-8 Greyhound if I don't have too "honey do's" this weekend. I've got a gloss coat over the decals and will proceed with an oil wash, flat coat and final weathering.
Take Care,
Don "Lakota"
Working on Campaigns:
1/72 Hasegawa Ki-84 Frank
1/144 Dragon Armor
Florida, United States
Joined: March 30, 2010
KitMaker: 139 posts
Armorama: 136 posts
Posted: Friday, October 18, 2013 - 03:32 PM UTC
Th s evenings update:
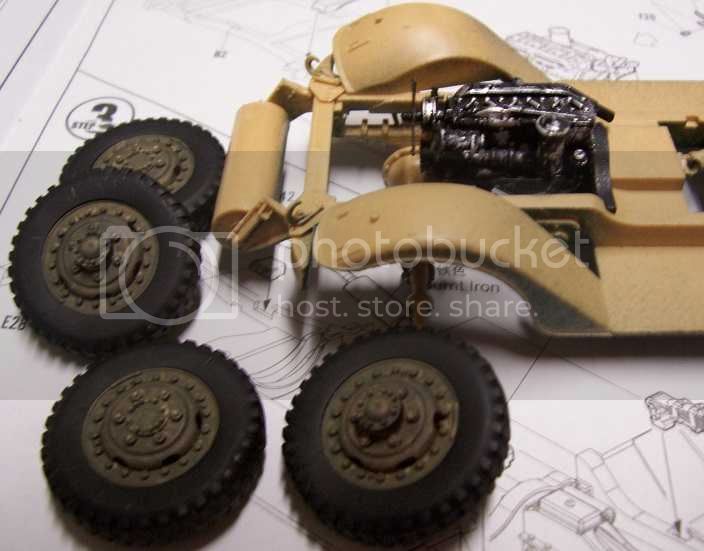
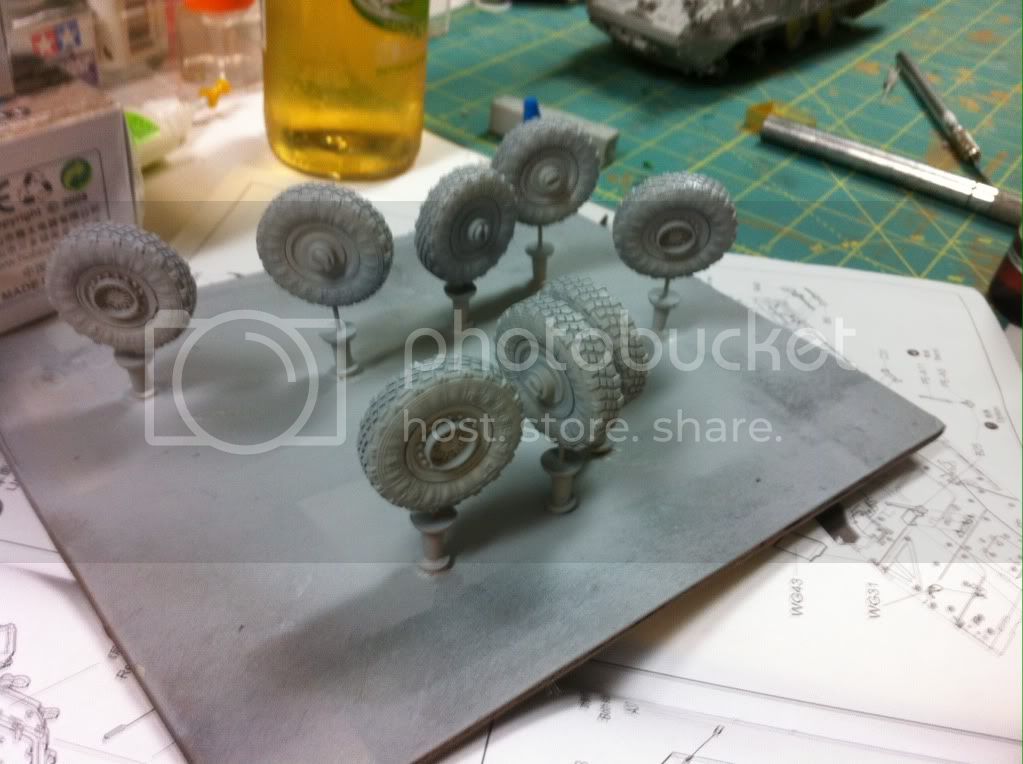
trump's tires. Any comments? After assembling them and priming in Tamiya rattle can, I'm not terribly put off by them. If it means using them for an OOB build, or waiting on and paying for DEF or somebody else's "sagged" whelks, I'm goin with these.
Ok, upper hull is pretty much done. Not bad. It helps to have a good photo reference ( duh). To make things go together good. Just sayin...
And that's about it!
Florida, United States
Joined: March 30, 2010
KitMaker: 139 posts
Armorama: 136 posts
Posted: Friday, October 18, 2013 - 03:33 PM UTC
Tires..... I hate photobucjket.....
Maine, United States
Joined: February 11, 2011
KitMaker: 1,654 posts
Armorama: 1,565 posts
Posted: Friday, October 18, 2013 - 09:24 PM UTC
Larry, I think the tires look good. Unless you REALLY want the "weight bulge", I'd use 'em
Jeff T.
The building lamp is lit.Build'em if you got'em.
Lisboa, Portugal
Joined: March 04, 2008
KitMaker: 5,386 posts
Armorama: 4,727 posts
Posted: Saturday, October 19, 2013 - 05:47 AM UTC
Some more details added.
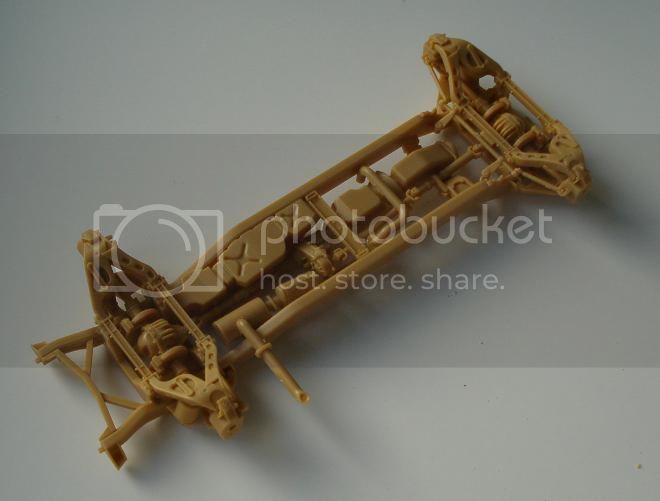
This will be next:


Active Builds: 0
Active Campaigns: 0
California, United States
Joined: June 30, 2008
KitMaker: 2,408 posts
Armorama: 2,394 posts
Posted: Saturday, October 19, 2013 - 07:02 PM UTC

Snail's pace on my 1/48 234/4.

Florida, United States
Joined: March 30, 2010
KitMaker: 139 posts
Armorama: 136 posts
Posted: Monday, October 21, 2013 - 05:07 AM UTC
Quoted Text
Larry, I think the tires look good. Unless you REALLY want the "weight bulge", I'd use 'em Jeff T.
Jeff, I think I'm going to go with them for this job. I have the AFV Club command and control/ tac air party Stryker, and when I do that one, I'll use DEF or Real Model tires, and I'll build it with Eduards bird cage armor to represent an OIF Stryker in country. But that job is down the road a little bit, as I have a couple other irons in the fire currently....
Florida, United States
Joined: March 30, 2010
KitMaker: 139 posts
Armorama: 136 posts
Posted: Monday, October 21, 2013 - 07:30 AM UTC
Lisboa, Portugal
Joined: March 04, 2008
KitMaker: 5,386 posts
Armorama: 4,727 posts
Posted: Monday, October 21, 2013 - 09:04 AM UTC
Hi Larry !
Nice Stryker |
But you are building it for which Campaign ? I've seen the same photos for the Trumpeter & Armored Car Campaign.
You can't use the same kit for both Campaigns.
Pick one Campaign and build something else for the other one.
Cheers,
John
Active Builds: 0
Active Campaigns: 0
Florida, United States
Joined: March 30, 2010
KitMaker: 139 posts
Armorama: 136 posts
Posted: Monday, October 21, 2013 - 05:31 PM UTC
John, no problem, I'll scratch the Trump campaign, I didn't know, sorry!
Florida, United States
Joined: March 30, 2010
KitMaker: 139 posts
Armorama: 136 posts
Posted: Monday, October 21, 2013 - 05:35 PM UTC
Problem fixed! I'll come up with something else for the Trump campaign, shouldn't be too terribly difficult to pull something down from the pile!
England - North East, United Kingdom
Joined: June 22, 2010
KitMaker: 1,224 posts
Armorama: 1,207 posts
Posted: Monday, October 21, 2013 - 10:34 PM UTC
Quoted Text
Rob;
Hi! Short answer is "yes" - all surfaces readily visible from outside, including the outer sides of those chassis rails, etc., would be the hull color. As to whether the inner faces of frame rails and suspension parts... all the "melons" and hardware would of course have been painted their "OEM" industrial finishes (NOT rot-oxide primer red, but some form of black enamel). Inner faces of frame members and suspension bits - including tie-rod, etc., would also likely have been the black enamel.
My best guess would be that no primer would have been left visible on these cars, as all were produced before mid-1944, and painting likely still followed most production practices. As the chassis were built by one company AU/Horch) and the hulls built by another (Eisenwerke Weserhutte, I think), and hulls mated to chassis by yet another, I would expect that the completed chassis would have shipped as a complete finished (painted in enamel black) industrial product to the final assembler, who then painted the entire contraption as needed by regs.
IF there was any rot-oxide primer left exposed, I would bet that it was so only in the engine compartment and maybe (but I think less likely) on the floor of the crew space.
Just my thoughts 
PS: I am finally wrapping up my HobbyBoss 223 build - after much tooing and frowing and dithering and scratch mods and frustration and FUN! IMHO, the HB kit is pretty nice and full of details and a fun build, but there are lots of inaccuracies that should be addressed if one is picky. I would expect that the HB 222 kit follows along in many ways - fun, lots of details, various inaccuracies needing address.
Bob 
cheers Bob - thinking then to build entire chassis (minus wheels) paint in black then add body work - then when painting not worry too much about the underside - not sure much would be visible but it also means that any wear on the chassis would be to black not primer/grey
Lisboa, Portugal
Joined: March 04, 2008
KitMaker: 5,386 posts
Armorama: 4,727 posts
Posted: Tuesday, October 22, 2013 - 12:35 AM UTC
Quoted Text
Problem fixed! I'll come up with something else for the Trump campaign, shouldn't be too terribly difficult to pull something down from the pile!
That's ok Larry.
Great Stryker by the way.
The weapon station is AM or it's from the Trumpeter kit ?
All Strykers come with .50 cal on the weapon station ?
Active Builds: 0
Active Campaigns: 0
Florida, United States
Joined: March 30, 2010
KitMaker: 139 posts
Armorama: 136 posts
Posted: Tuesday, October 22, 2013 - 02:38 AM UTC
Quoted Text
Quoted Text
Problem fixed! I'll come up with something else for the Trump campaign, shouldn't be too terribly difficult to pull something down from the pile!
That's ok Larry.
Great Stryker by the way.
The weapon station is AM or it's from the Trumpeter kit ?
All Strykers come with .50 cal on the weapon station ?
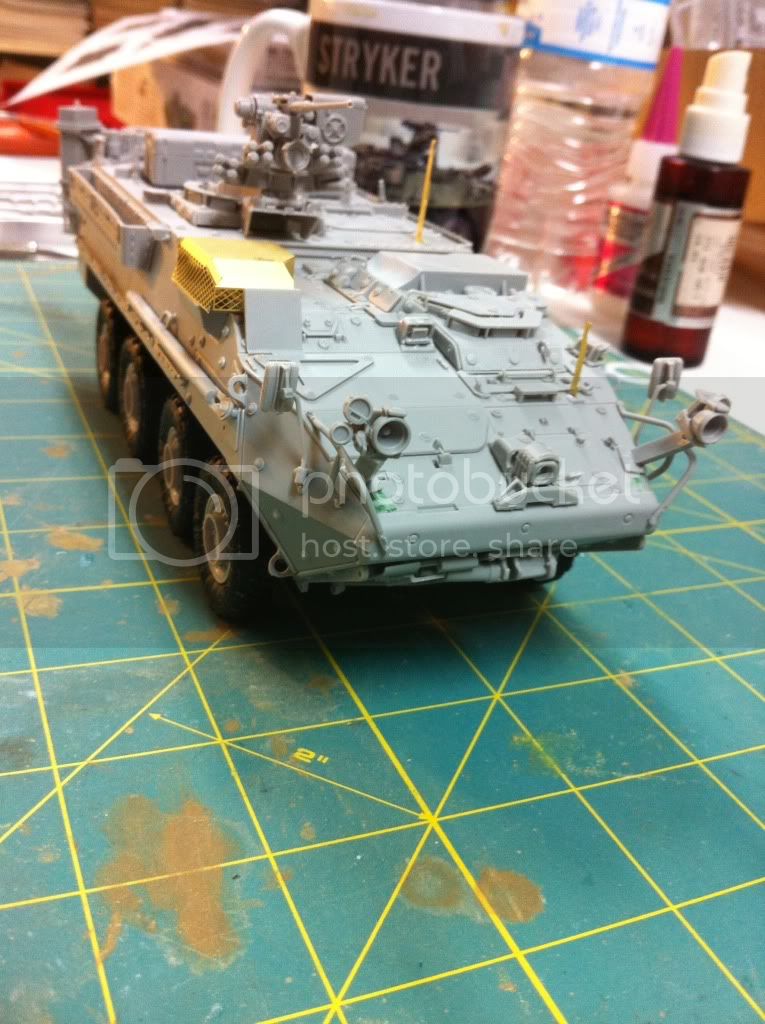
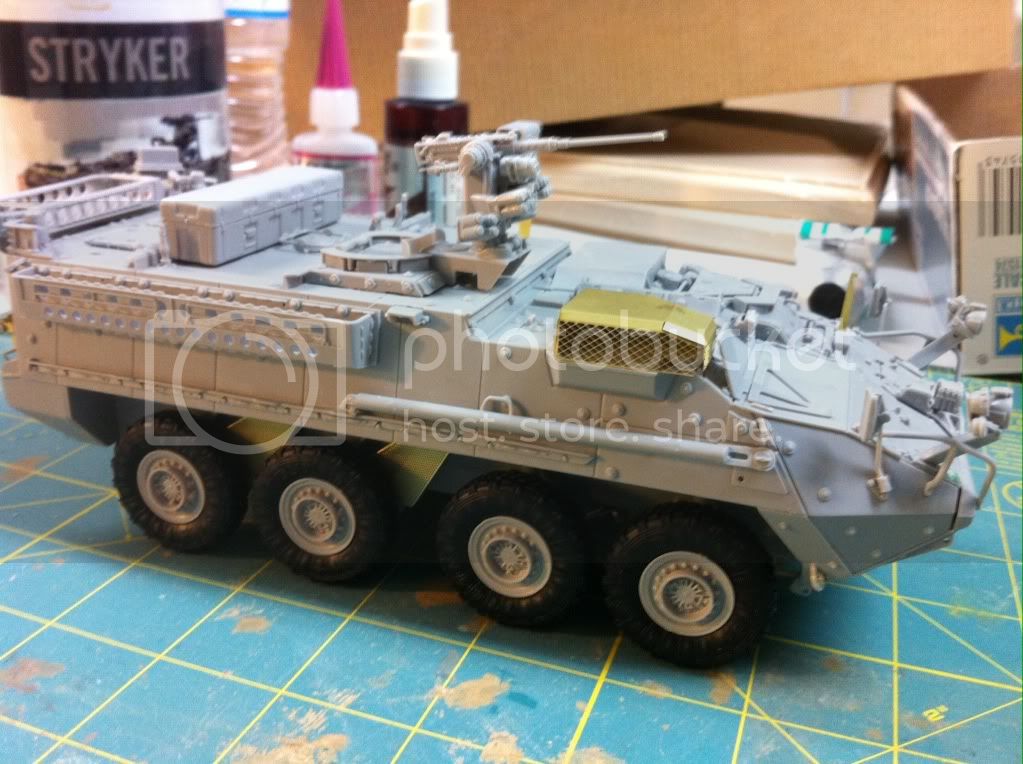
John, it's the kit part, which is actually pretty good, I think. The whole model is OOB. I didn't want to get into the whole AM thing on this build, just build it, paint it, weather it, and base mount it and that's that! I may add a figure at some point, but that'd be about the extent of it in terms of add-ons! Here's the latest progress as of last night. Decals and I'm planning on starting the weathering effects today, if I can get some time, that is! Take care guys, and as always, I welcome comments in any form!
Larry

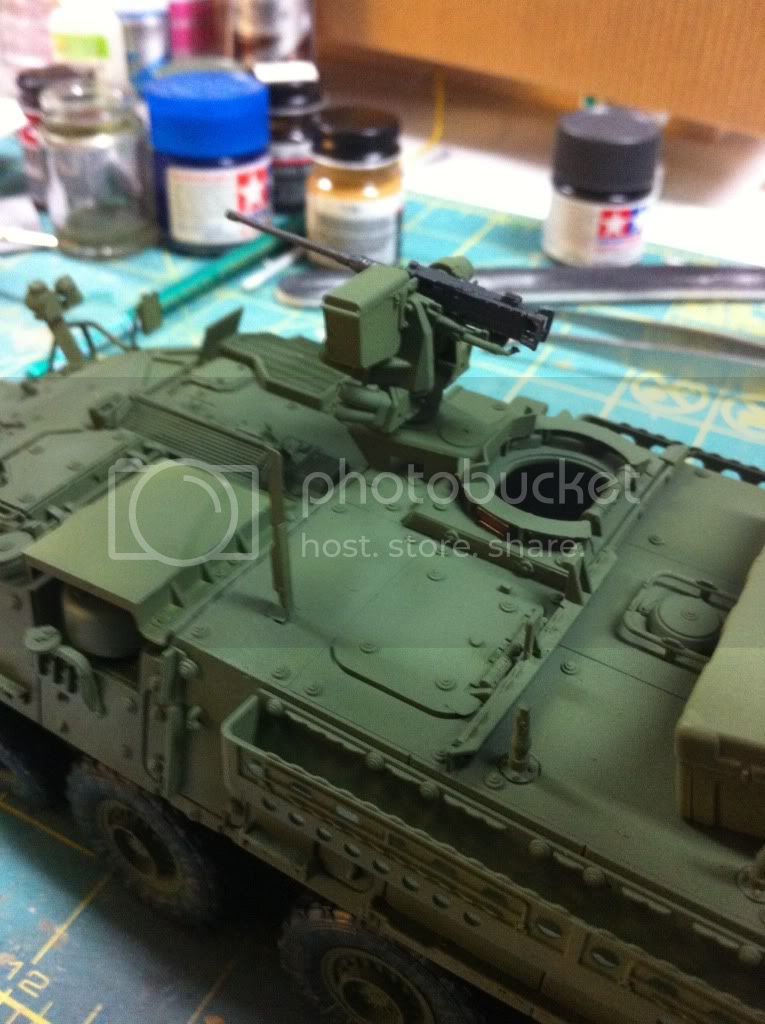
Paint is all Tamiya, pre-shaded, light coats, panel highlights, etc....
Sao Paulo, Brazil
Joined: January 24, 2012
KitMaker: 1,054 posts
Armorama: 1,050 posts
Posted: Tuesday, October 22, 2013 - 06:19 AM UTC
Quoted Text
All Strykers come with .50 cal on the weapon station ?
Hi John!
You can see Mk19 in weapons station to. My command version has this heavy machine gun.
Cheers!
Marco
Removed by original poster on 10/22/13 - 19:33:10 (GMT).
Florida, United States
Joined: March 30, 2010
KitMaker: 139 posts
Armorama: 136 posts
Posted: Tuesday, October 22, 2013 - 07:34 AM UTC
Quoted Text
Quoted Text
All Strykers come with .50 cal on the weapon station ?
Hi John!
You can see Mk19 in weapons station to. My command version has this heavy machine gun.
Cheers!
Marco
I guess that depends. There are pics in the Zwilling/ Shulz Stryker book that show the M2 .50 cal machine gun in the standard manual mount. But the CROWS can be fitted with the MK 19 40mm grenade launcher as well. The kit parts give the builder that option also....
Larry
South Carolina, United States
Joined: December 03, 2009
KitMaker: 2,160 posts
Armorama: 1,906 posts
Posted: Tuesday, October 22, 2013 - 03:41 PM UTC
Florida, United States
Joined: March 30, 2010
KitMaker: 139 posts
Armorama: 136 posts
Posted: Tuesday, October 22, 2013 - 03:53 PM UTC
Here's tonight's progress- got the weathering started, now to let everything set up overnight, and go back and fix a couple of stupid mistakes!

Go figure. Anyway, here's a couple of shots....


Well guys, that's about it for tonight! It's getting close, like I said, fix a few screw ups, add some clear parts and other odds and ends, perhaps a figure and some stowage, and mount the whole thing to a simple wooden base, and that's it! Have a good night, fellas!
Larry