Florida, United States
Joined: March 30, 2010
KitMaker: 139 posts
Armorama: 136 posts
Posted: Saturday, November 09, 2013 - 02:26 AM UTC
Ok, guys, here's my Stryker ESV base mounted. Stowage is on the bench, getting painted, and I need a figure. Anyway, here it is....


Any comments are welcome, of course!
Istanbul, Turkey / Türkçe
Joined: December 05, 2007
KitMaker: 953 posts
Armorama: 705 posts
Posted: Saturday, November 09, 2013 - 10:51 AM UTC
Great work Larry...

California, United States
Joined: June 30, 2008
KitMaker: 2,408 posts
Armorama: 2,394 posts
Posted: Monday, November 11, 2013 - 04:14 AM UTC
England - North East, United Kingdom
Joined: June 22, 2010
KitMaker: 1,224 posts
Armorama: 1,207 posts
Posted: Monday, November 11, 2013 - 07:49 AM UTC
nice work LARRY & GREG...
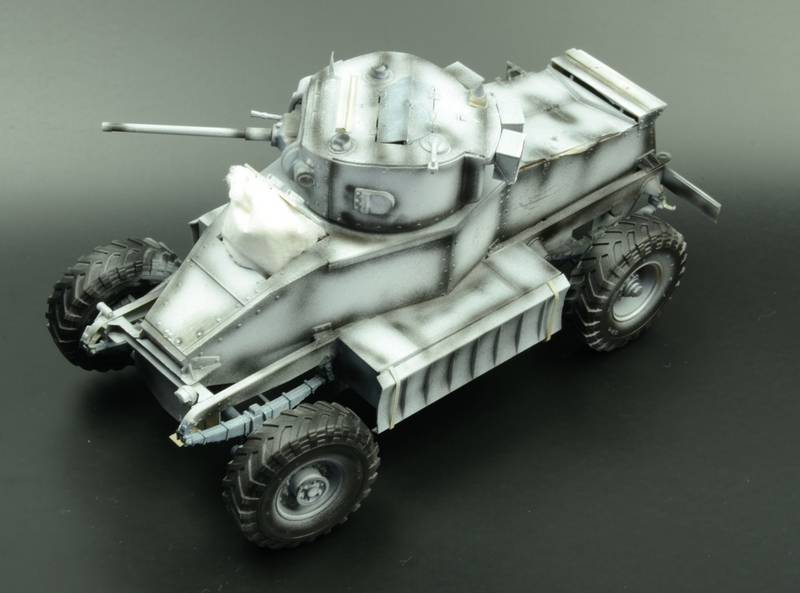
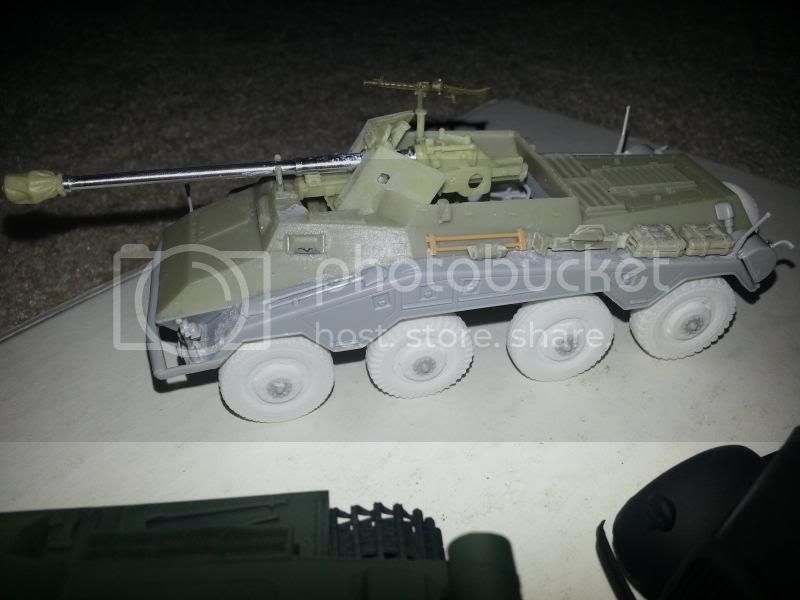
my 222 is coming on (no photos as yet). started to paint the interior, finished the gun mounting and also started on researched field mods. as I hae found photos of the real vehicle i am building i know it had 4 oil cans mounted on the rear wheel arches (2 on each side) so have done the first out of thin copper sheet... will keep that in mind for the 2nd, may rebuild it as it isnt perfect (it looks ok for a first go)....
the photo also shows other stowage - including a box mounted on the rear engine deck - not sure how it is fixed tho - cant work out if it is tied or welded to the door itself. will have a look at doing something...
and of course i am still going for netting over the front with stowage behind it - oh and dust covers on the gun muzzles and possible over the grenade screens too (not sure if they would;ve been fitted in the desert tho but hey it adds a difference)..
slowly but surely i am beginning to see how to make this kit my own and add some interest.....
Lisboa, Portugal
Joined: March 04, 2008
KitMaker: 5,386 posts
Armorama: 4,727 posts
Posted: Monday, November 11, 2013 - 12:00 PM UTC
Here's my progress :


I was very happy until I looked at the photos Kuba provided, damn ... have to redo it again..
Active Builds: 0
Active Campaigns: 0
Florida, United States
Joined: March 30, 2010
KitMaker: 139 posts
Armorama: 136 posts
Posted: Monday, November 11, 2013 - 03:13 PM UTC
Greg , cool piece! 1/48 has sure come a long way since the ol' Bandai stuff! I'm looking forward to seeing the completed piece!
Sao Paulo, Brazil
Joined: January 24, 2012
KitMaker: 1,054 posts
Armorama: 1,050 posts
Posted: Tuesday, November 12, 2013 - 03:25 AM UTC
Hi guys!
First of all: Great works. No more comments.
Them, I'm here just to say I'm quit of my Snow Leopard. I did not like the final result of the paint job and put it back in the box and stash. May be I will finnish it in the future.
Now, I'm thinking about start the little Trumpy's Italian Puma. We will see.
Thanks for your suport so far.
Marco
England - North East, United Kingdom
Joined: June 22, 2010
KitMaker: 1,224 posts
Armorama: 1,207 posts
Posted: Tuesday, November 12, 2013 - 10:11 PM UTC
need to redo my interior pain (the buff part anyway) as the xtracrylix was a faff and the finsih was not good... anyway, will get time to do that this evening I hope...
in the meantime, as I have explicit photos of the vehicle I am building (going off registration number) I have started on some field mods... the photos I have have 4 fuel cans mounted on the wheel arches. so this is what I will attempt. First go looks like:


which actually isnt too bad I dont think.. will do the same for the other side. will also look at what else I can add from the photos....
also, the gun mount is complete.. must say that while it looked fiddly in the instructions it went together fairly easily:


Ontario, Canada
Joined: November 10, 2010
KitMaker: 587 posts
Armorama: 550 posts
Posted: Wednesday, November 13, 2013 - 10:28 AM UTC
England - North East, United Kingdom
Joined: June 22, 2010
KitMaker: 1,224 posts
Armorama: 1,207 posts
Posted: Wednesday, November 13, 2013 - 09:16 PM UTC
nice work Alex... on the engine - i masked mine with aluminium foil - it just needs to loosely cover it (or on teh 222 it did anyway). you could maybe blu-tac it to the engine... or try cling film....
i dont think my engine will be visible after all but i did protect it a little just in case....

#123
New Mexico, United States
Joined: November 17, 2008
KitMaker: 1,202 posts
Armorama: 635 posts
Posted: Saturday, November 16, 2013 - 12:40 PM UTC
Howdy Y'all

I completed my M-8 Greyhound and discovered all 6 wheels didn't sit flat. Back to the drawing board with Plan B, a base with some groundwork to hide the flaw.

I used some lightweight wall patch, white glue, parking lot gravel and sand.

I'll add paint and grass tomorrow.
Take care,
Don "Lakota"
Working on Campaigns:
1/72 Hasegawa Ki-84 Frank
1/144 Dragon Armor
California, United States
Joined: June 30, 2008
KitMaker: 2,408 posts
Armorama: 2,394 posts
Posted: Saturday, November 16, 2013 - 03:03 PM UTC
Hi Don. Wheels sure have a habit of doing that. But now you'll have a dynamic dio
California, United States
Joined: June 30, 2008
KitMaker: 2,408 posts
Armorama: 2,394 posts
Posted: Saturday, November 16, 2013 - 08:39 PM UTC
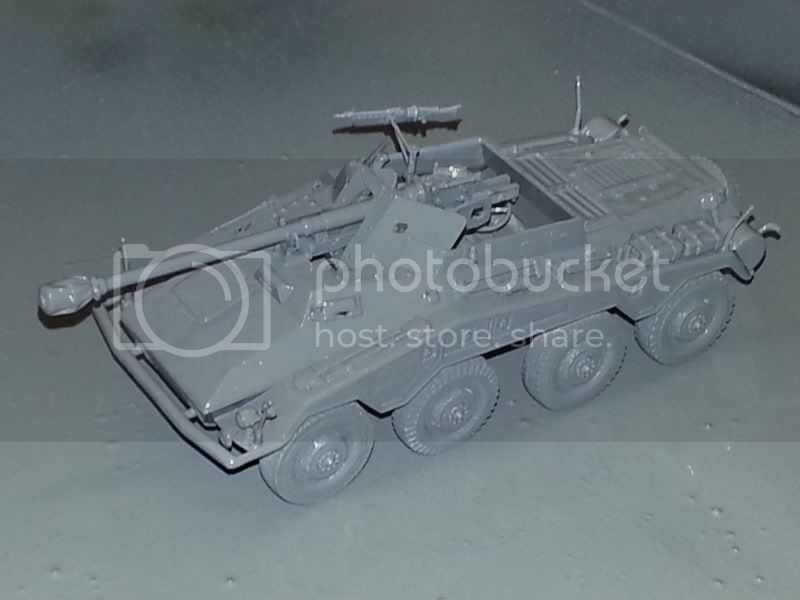
Primed. I'm going tri-color using blue tac method. Maybe I'll have a chance tomorrow. 1/48 234/4 gasoline conversion kit for Italeri Puma
England - North East, United Kingdom
Joined: June 22, 2010
KitMaker: 1,224 posts
Armorama: 1,207 posts
Posted: Sunday, November 17, 2013 - 04:05 AM UTC
#123
New Mexico, United States
Joined: November 17, 2008
KitMaker: 1,202 posts
Armorama: 635 posts
Posted: Sunday, November 17, 2013 - 09:05 AM UTC
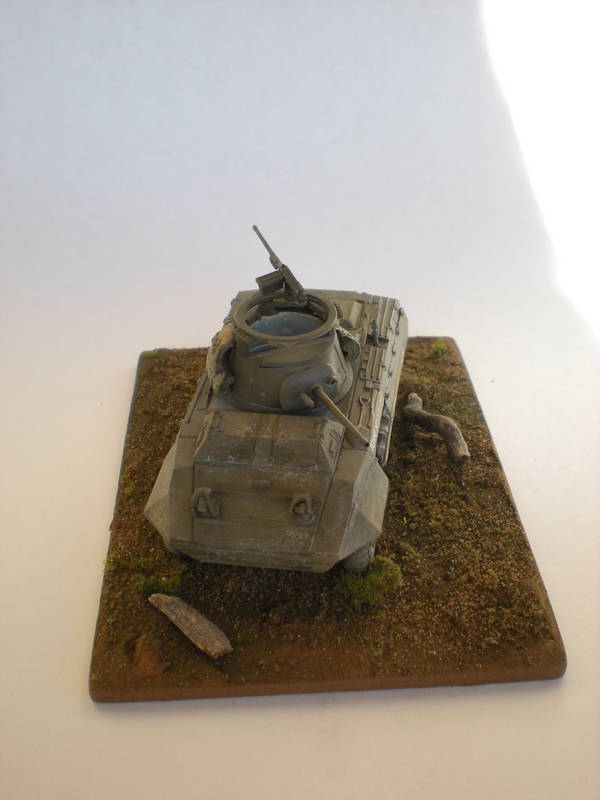
Howdy Y'all
I finally finished my M-8 Greyhound. This was the Italeri 1/72 kit built out of the box except for the Aber metal barrel, which is a must-have part for this kit.
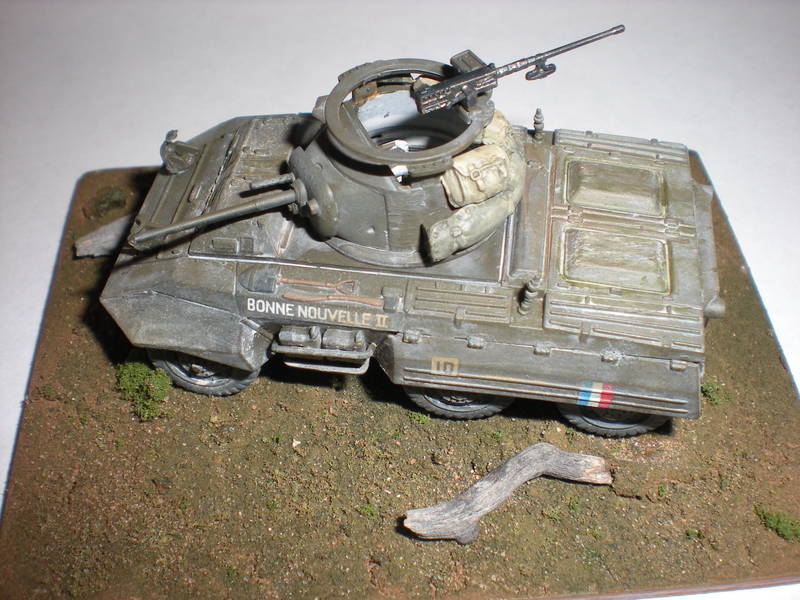
I'm not really satisfied with the groundwork. I still need to work on my diorama techniques. This was fun and can't wait to see everyone else's project.

Y'all take care,
Don "Lakota"
Working on Campaigns:
1/72 Hasegawa Ki-84 Frank
1/144 Dragon Armor
England - North East, United Kingdom
Joined: June 22, 2010
KitMaker: 1,224 posts
Armorama: 1,207 posts
Posted: Monday, November 18, 2013 - 09:24 PM UTC
nice Dio Don... looks very good.....
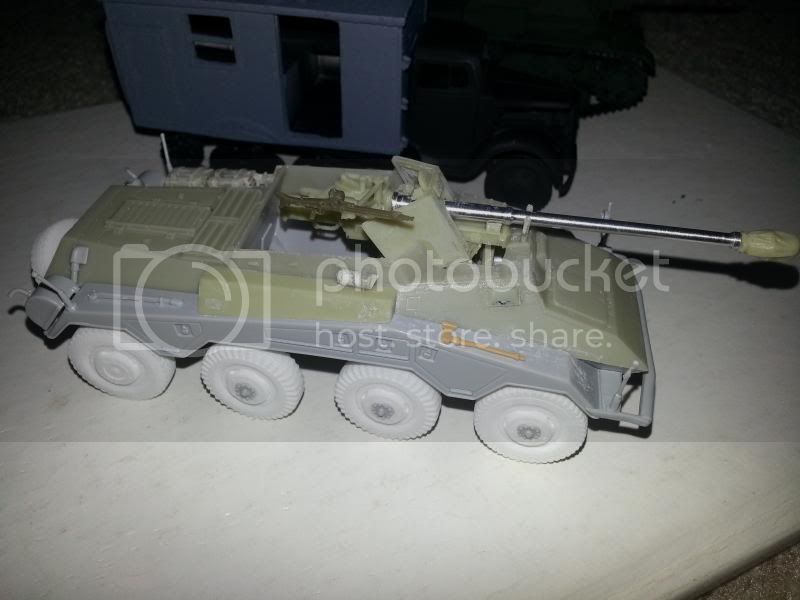
and today's update - body together, exterior taking shape... still need to build the 2nd fuel can frame and then add all the fiddly bits....


PS out of interest - does anyone have a better photo of a 222 sporting something akin to the box mounted on the rear engine hatch? any ideas on how it was fixed (I cant see any cable/rope tying it down so am thinking it could be welded directly on to the door?)
http://i3.photobucket.com/albums/y58/Jambock__39-Weiss/sd222.jpg(also thoughts on what is on the front wheel arch in this photo)
Ille-et-Vilaine, France
Joined: March 17, 2008
KitMaker: 29 posts
Armorama: 27 posts
Posted: Tuesday, November 19, 2013 - 04:14 AM UTC
Great builds on this topic !
More progress here, Step 5 to 8-9
Front and rear bumpers


Interior :

Learning to solder photo etched part


More to come later
Modelling Blog : http://models.elijaa.org/
On the Bench : Trumpeter M1117
England - North East, United Kingdom
Joined: June 22, 2010
KitMaker: 1,224 posts
Armorama: 1,207 posts
Posted: Tuesday, November 19, 2013 - 09:25 AM UTC
nice work Cyrille... soldering is next on my things to try. Going to scratch up some stowage on my 222 to go on the rear engine deck - if i can get to grips with it i might try some more complex work on future builds....
any tips from you first time?
Ontario, Canada
Joined: November 10, 2010
KitMaker: 587 posts
Armorama: 550 posts
Posted: Tuesday, November 19, 2013 - 10:20 AM UTC
Ille-et-Vilaine, France
Joined: March 17, 2008
KitMaker: 29 posts
Armorama: 27 posts
Posted: Wednesday, November 20, 2013 - 01:40 AM UTC
Thank you Robert,
For soldering i used this very useful post by Nick as a guideline :
https://armorama.kitmaker.net/forums/132015&ord=&page=3I prefer the blow torch over the classic soldering, as i didn't have to touch the photo-etched to solder it. Although actually I lack of tweezers and magnets to hold piece in place.
After soldering, clean it with this :

or if you put too much, sanding paper and that's it, very very strong bond.
I recommend you to see some youtube guide about electronic soldering, it help understand what is solder, flux, how heat work on metal pieces, ...
Modelling Blog : http://models.elijaa.org/
On the Bench : Trumpeter M1117
England - North East, United Kingdom
Joined: June 22, 2010
KitMaker: 1,224 posts
Armorama: 1,207 posts
Posted: Wednesday, November 20, 2013 - 02:39 AM UTC
thanks for that - will continue to read up on it
England - North East, United Kingdom
Joined: June 22, 2010
KitMaker: 1,224 posts
Armorama: 1,207 posts
Posted: Wednesday, November 20, 2013 - 06:44 AM UTC
Quoted Text
thanks for that - will continue to read up on it
well, first attempt at soldering was a disaster... just couldnt get it to melt, or if it did it flashed into a ball... may be the soldering iron i have (old gas powered one) or the solder or the flux... or in fact just me... anyway when i get more time i will try again - ran out of gas....
Removed by original poster on 11/21/13 - 02:38:07 (GMT).
New South Wales, Australia
Joined: February 01, 2005
KitMaker: 69 posts
Armorama: 59 posts
Posted: Thursday, November 21, 2013 - 10:45 AM UTC
Ontario, Canada
Joined: November 10, 2010
KitMaker: 587 posts
Armorama: 550 posts
Posted: Thursday, November 21, 2013 - 02:50 PM UTC


 are the parts in this step tiny and just don't cooperate. I can't even count the number of expletives I went through building this, but hell does it look good.