_GOTOBOTTOM
Armor/AFV: Softskins
Softskins group discussions.
Hosted by Darren Baker
SAS Pink Panther Build Log.
joegrafton
Visit this Community
United Kingdom
Joined: October 04, 2009
KitMaker: 1,209 posts
Armorama: 1,143 posts
Posted: Monday, July 29, 2013 - 02:37 AM UTC
I'm going to build the classic Tamiya SAS Pink Panther in 1/35th scale.
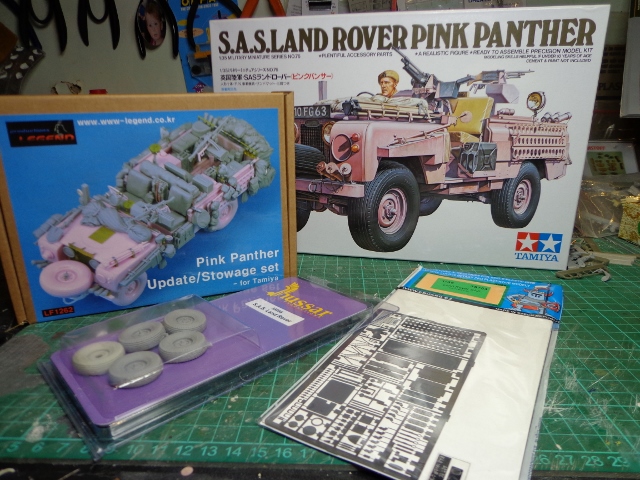
I have used the following kits & accessories to complete the build:


Tamiya #76 SAS Land Rover Pink Panther together with
Eduard #35754 Photo-Etch set for the Tamiya kit &
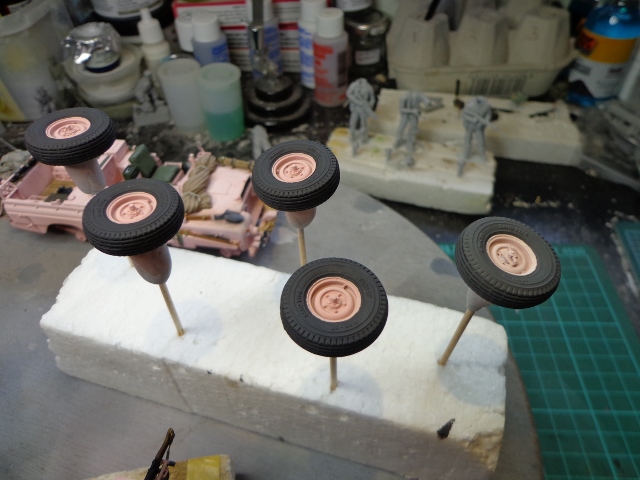
Hussar Productions #35086 SAS Land Rover sand tyres &
Legend Productions (#1262) SAS Pink Panther Stowage & Update set.

I will also be using the following book as a reference guide:


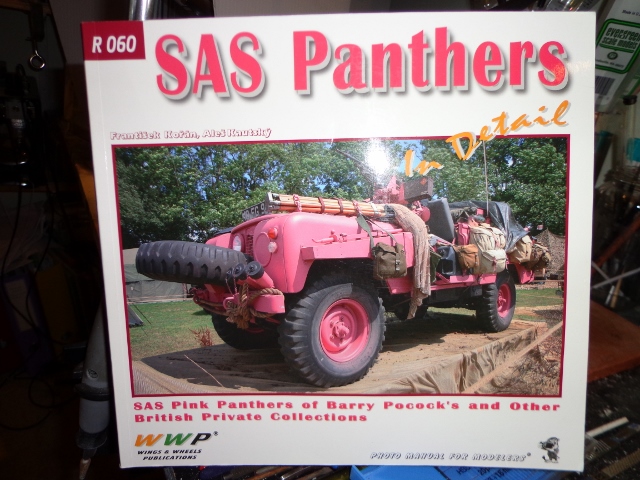
SAS Panthers in Detail (#R060), part of the Wings & Wheels Publications series.

I would like to thank John Tapsell for a lot of guidance through this build. Thanks mate!

Joe.


joegrafton
Visit this Community
United Kingdom
Joined: October 04, 2009
KitMaker: 1,209 posts
Armorama: 1,143 posts
Posted: Monday, July 29, 2013 - 02:53 AM UTC
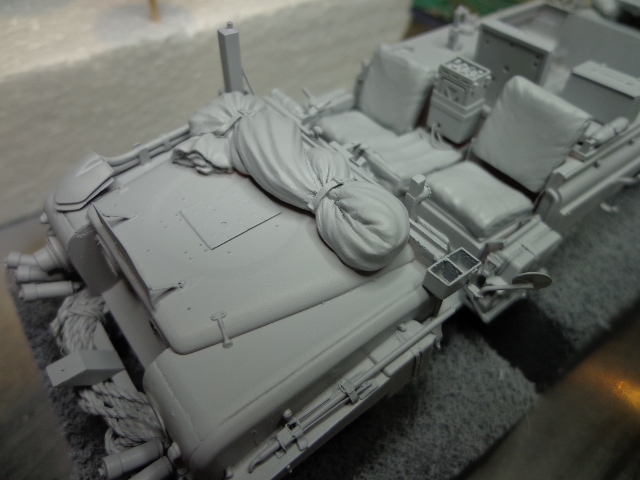
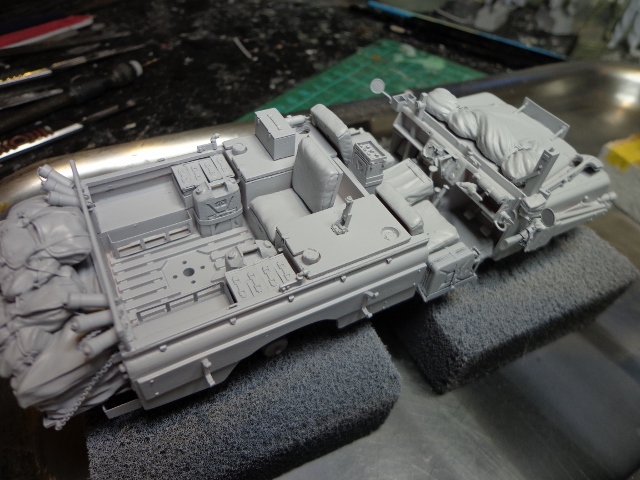
On studying the reference materials, both book & various images on the internet (google search), I realised I would have to use both the Eduard PE & the Legend Productions SAS Pink Panther Detail & Update set as not all parts from both kits were completely accurate. However, by mixing the various parts of each set you can build a very realistic scale model.
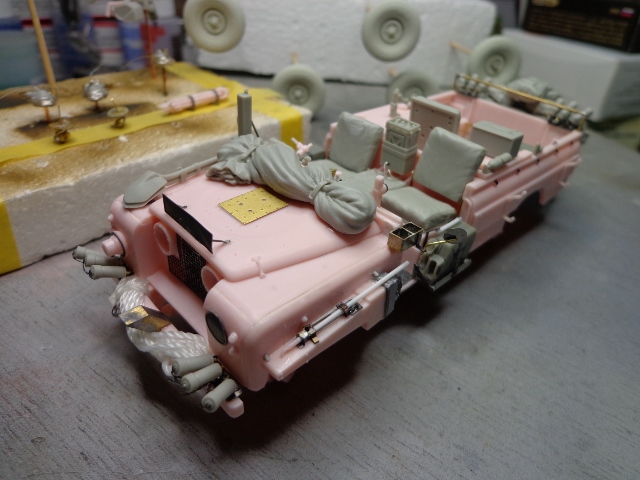
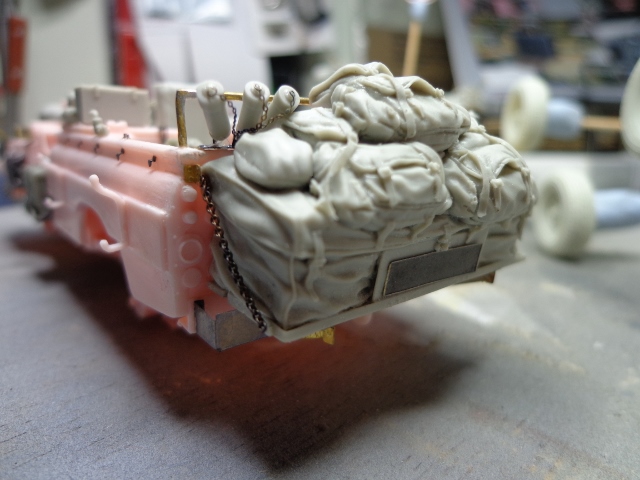


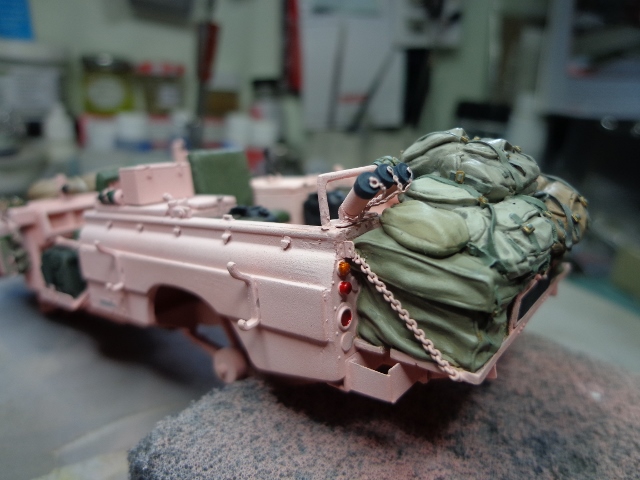
I used my own ultra fine chain here as I felt the one supplied with the Legend set is slightly oversized.
I swapped the Legend number plate for the Eduard as I will be adding my own plate number. Also, I am told that the plates on the original was not embossed (ie: the numbers/letters did not stand out but were completely flat-I hope that makes sense!)
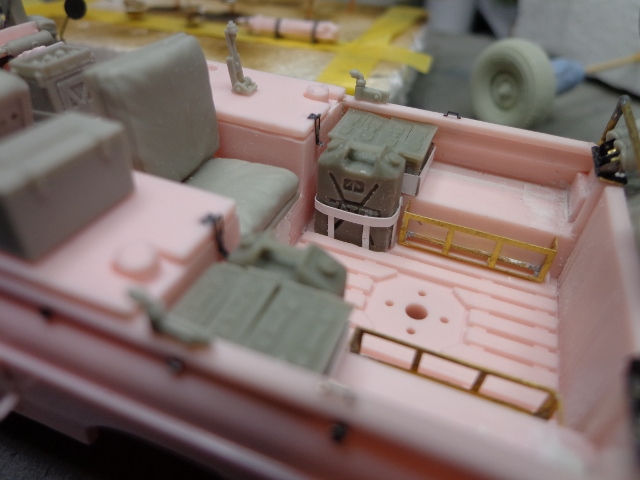

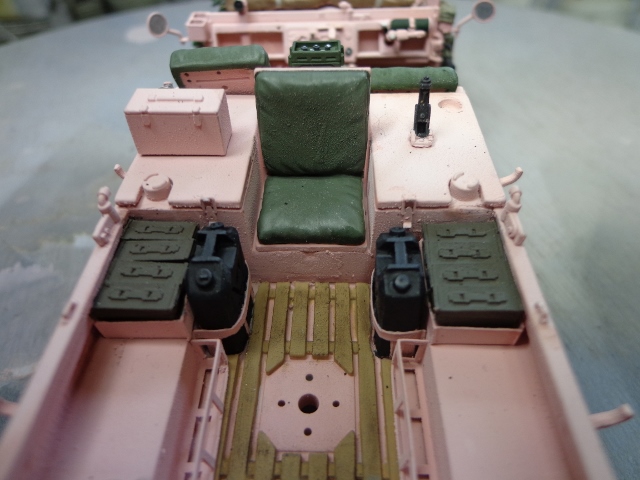
I've used various gauges of plastic sheet throughout the build to add a little detail that isn't supplied in any of the kits. Here, I'm using some to fit the Accurate Armour British water cans in as these haven't been supplied at all & this vehicle was used in the desert!
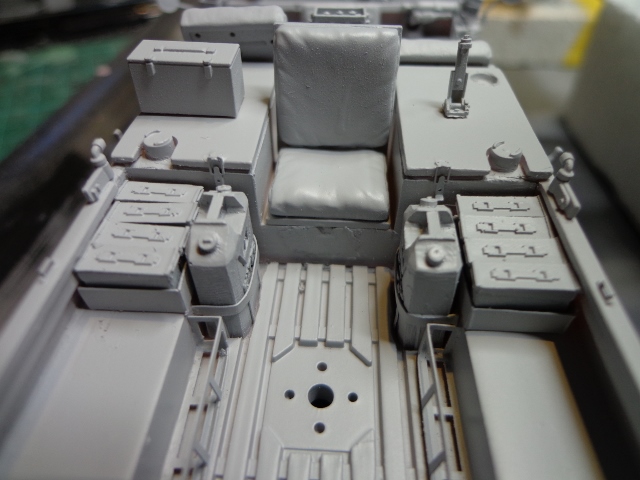
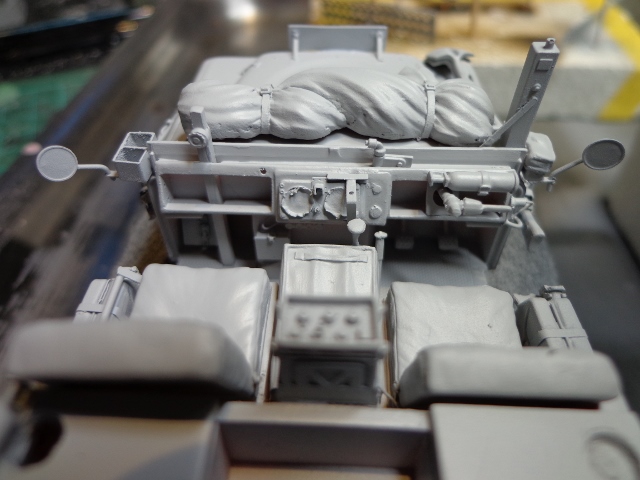
Notice how I scratched out a line towards the top edge of the large fuel tanks & right round its circumference. This was a sheet of wood on the real thing which laid over the top of the tanks & is not represented on the Tamiya kit. However, easy enough to replicate. You will need to add a couple of hinges also behind the front seats. I used plastic rod.
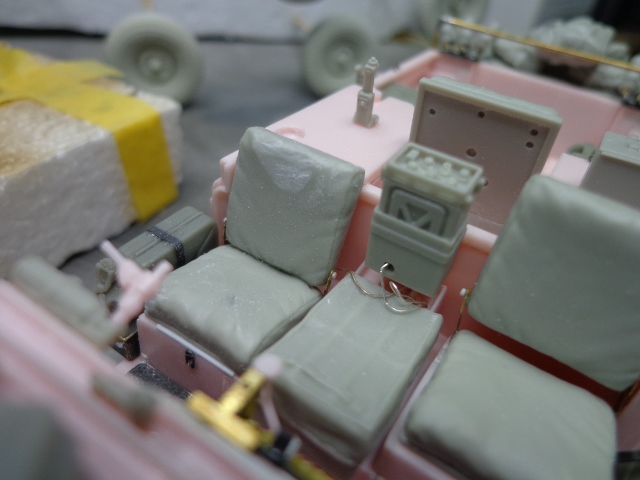

0.2mm copper wire is used for the wires on the radio.
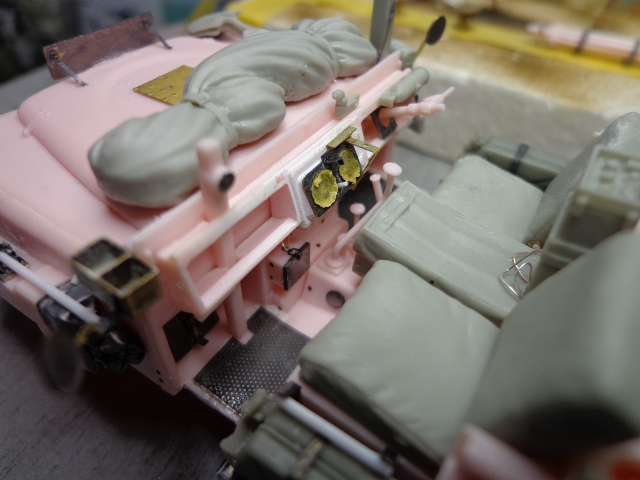

I've used some of the excellent Archer Fine Transfers resin rivets to add some more detail to the cab interior.
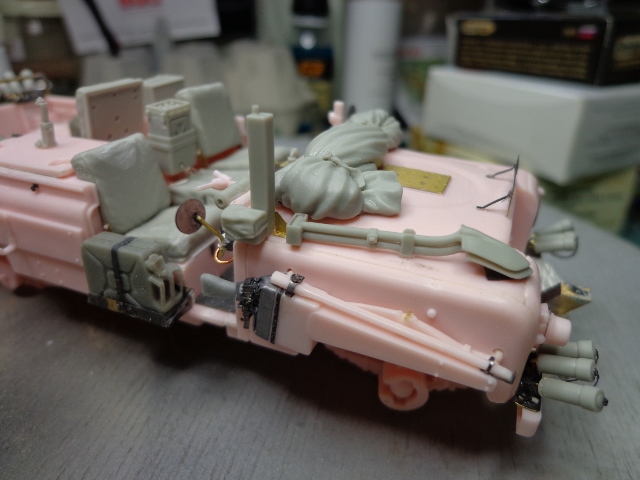

Using the spades from the Legend set is a much better option, IMHO.
I used the kit rifle bins as I wanted to add the canvas protector myself. I used very thin lead sheet for this task.
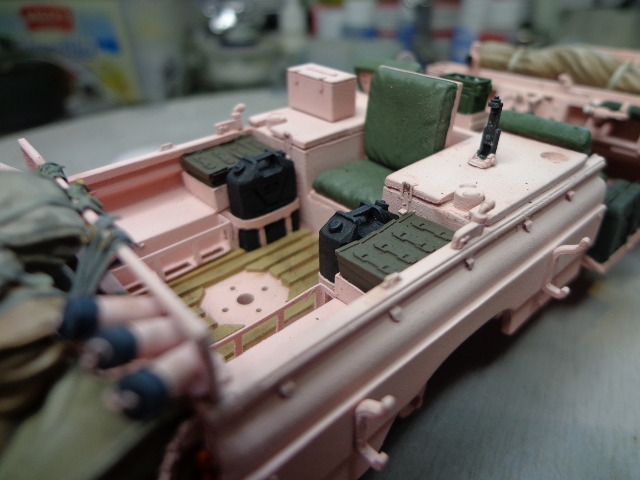
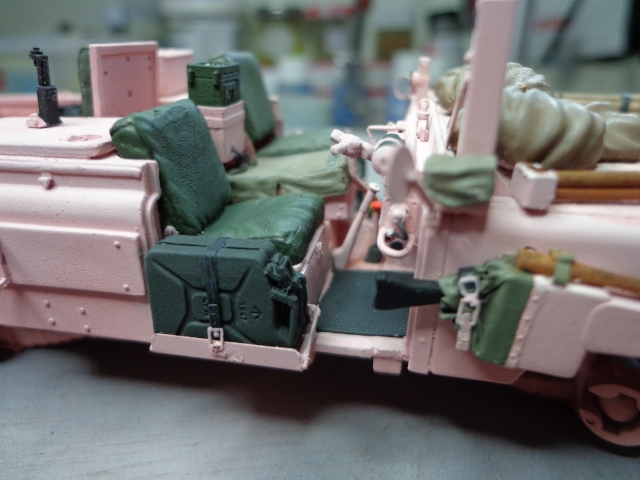
The spare jerry can containers are made using the Eduard PE set & the jerry cans are the Accurate Armour British fuel cans.
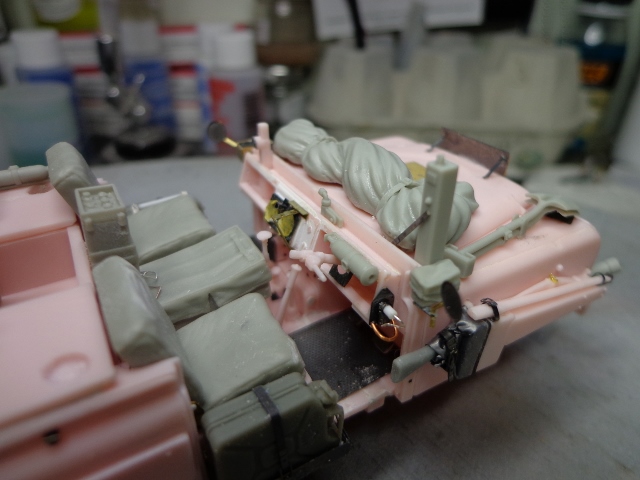

Various gauges of copper wire have been used to replicate electrical wiring in the cab.
An Aber wing nut has been used to "hold" the pick axe head in place on top of the rifle stowage bin. You might have to look carefully to see it!
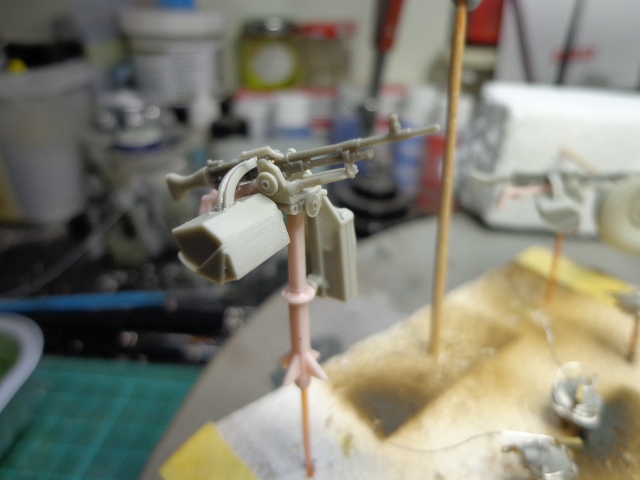

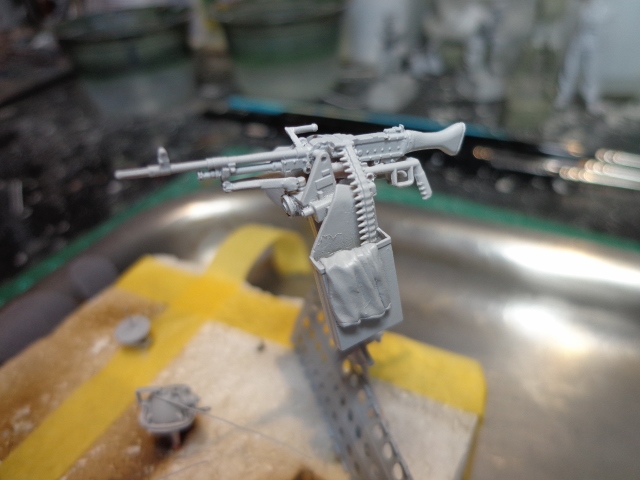
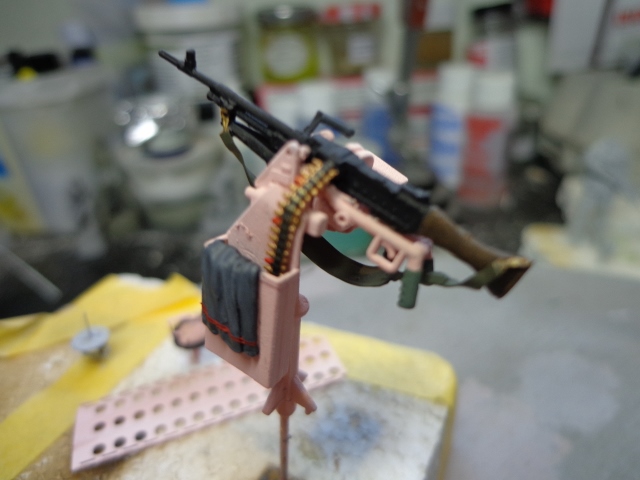
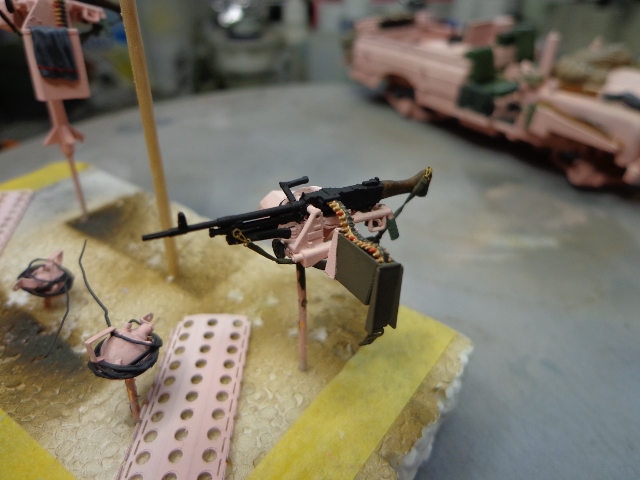
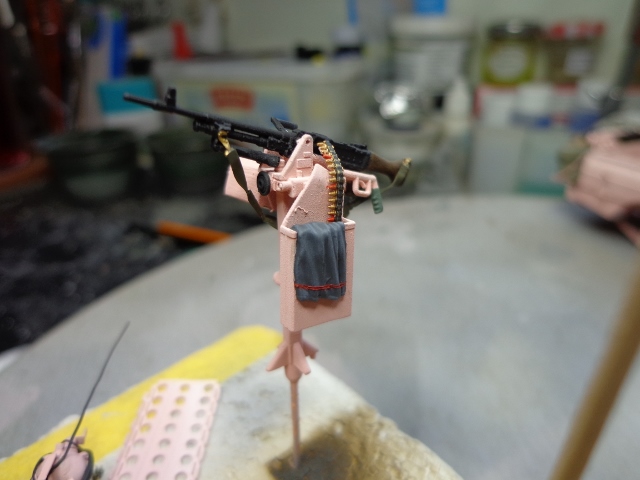
Using the parts from the Legend set for the GPMG's will build a much more accurate rendition of the original than using the Eduard set. However, I did swap the machine guns for the Live Resin GPMG's but replaced the "plastic stock" for the "wooden stock" from the Legend set.
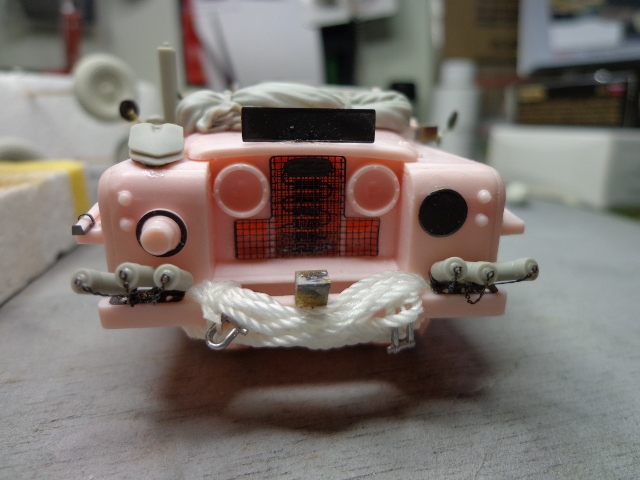

"D" ring shackles are white metal from MR Modellbau.
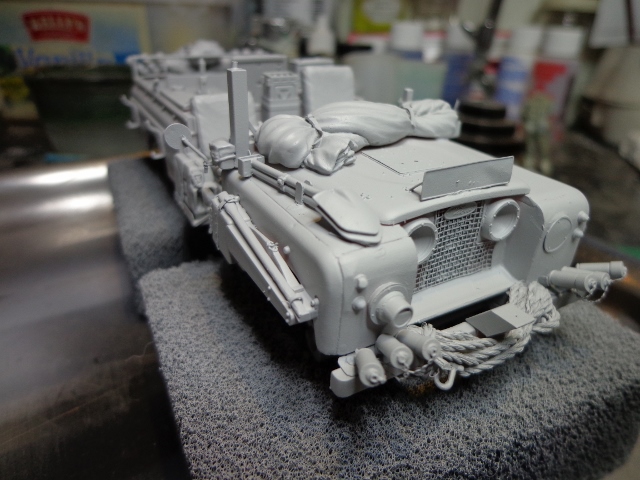
I have used the Eduard PE radiator & cover as I felt these were better detailed than the Legend parts.

Hope you like.

Joe.
joegrafton
Visit this Community
United Kingdom
Joined: October 04, 2009
KitMaker: 1,209 posts
Armorama: 1,143 posts
Posted: Monday, July 29, 2013 - 03:11 AM UTC
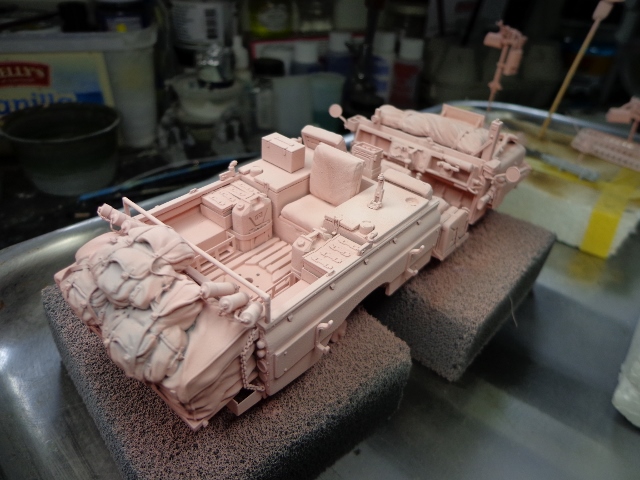
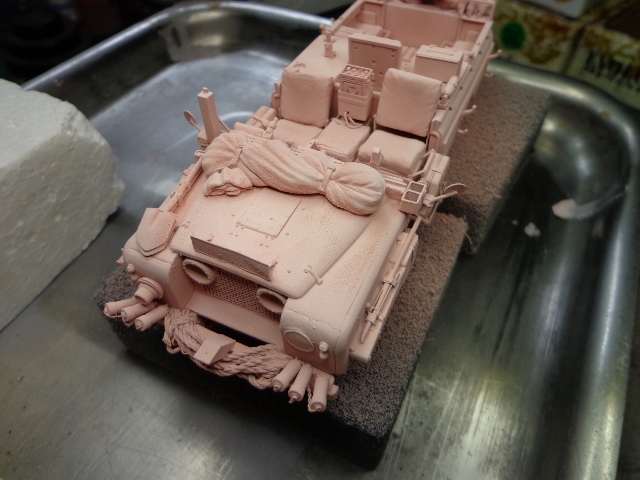
I applied a coat of grey Vallejo primer & allowed to dry for 24 hours:


Trays were added to the real thing to hold 4x ammo boxes each side for the rear mounted GPMG. I used 0.13mm plastic sheet for this task. The ammo boxes are from Accurate Armour.
This is a good shot showing the tops of the fuel tanks where I scratched out the plastic on the Tamiya kit part to render the wooden boards placed on top of them.


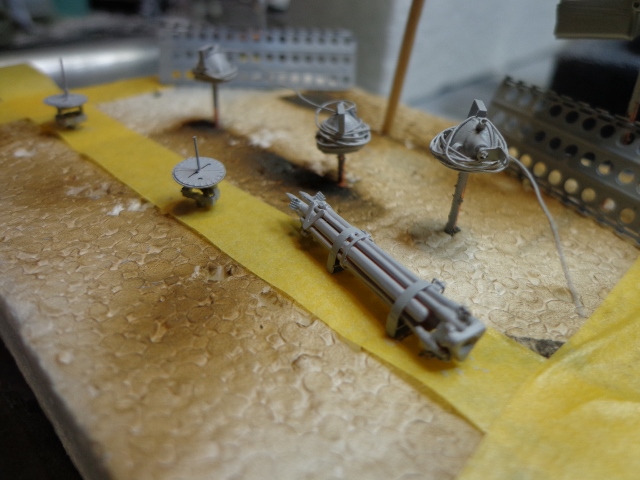
Building the sun compasses was a real nightmare! Very fiddly!
The searchlights from the Legend set are excellent. I have wrapped some 0.2mm copper wire around them to replicate electric cable. In the reference book you will see that the searchlights on the real thing have this detail.
I used some 0.13mm plastic sheet to make a "canvas" handle on the theodolite, as well as some Aber wing nuts, too. Just a little extra detail to make the finished piece look good.
Joe.
18Bravo
Visit this Community
Colorado, United States
Joined: January 20, 2005
KitMaker: 7,219 posts
Armorama: 6,097 posts
Posted: Monday, July 29, 2013 - 01:45 PM UTC
I like the looks of this very much. What are you using for the tow rope in the front?
joegrafton
Visit this Community
United Kingdom
Joined: October 04, 2009
KitMaker: 1,209 posts
Armorama: 1,143 posts
Posted: Monday, July 29, 2013 - 07:01 PM UTC
Hi Rob,
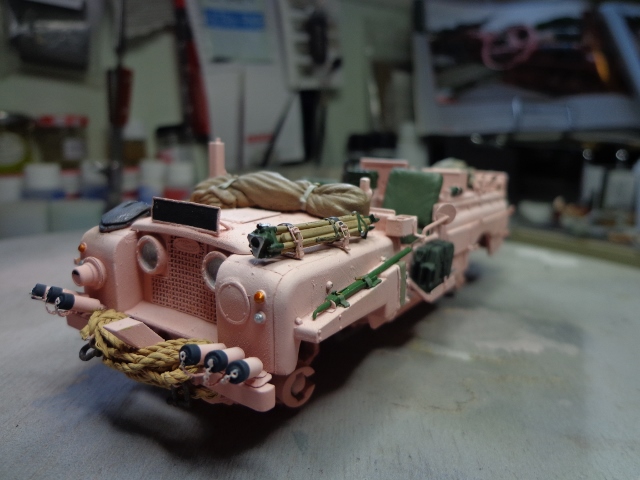
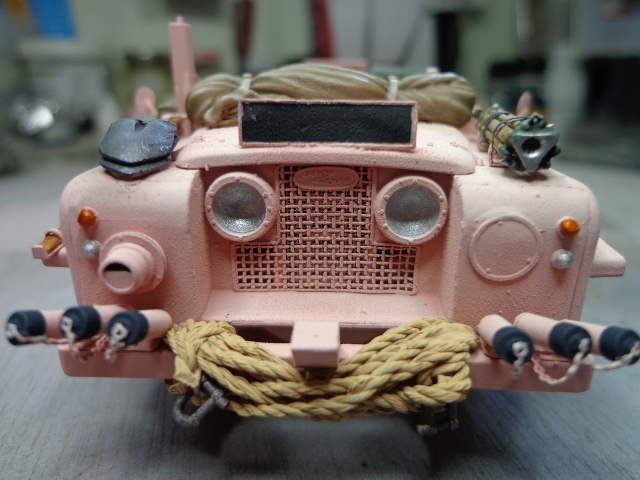
The rope at the front is one supplied with the Legend update set.I guess its just a length of poly cotton.
By the way, most of my pictures seem to have disappeared from this thread. Can anybody else see all of the photos I've posted so far or have they disappeared completely?

Joe.
noddy927
Visit this Community
Scotland, United Kingdom
Joined: February 15, 2013
KitMaker: 1,273 posts
Armorama: 568 posts
Posted: Monday, July 29, 2013 - 07:26 PM UTC

Quoted Text

Hi Rob,
The rope at the front is one supplied with the Legend update set.I guess its just a length of poly cotton.
By the way, most of my pictures seem to have disappeared from this thread. Can anybody else see all of the photos I've posted so far or have they disappeared completely?

Joe.


Hi Joe
If you use photobucket you can't move the pictures once uploaded to kit maker as they disappear. I had this problem until someone kindly informed me about this.
Nice model by the way, look forward to the end result.

Pete
Stefan1580
Visit this Community
Berlin, Germany
Joined: November 20, 2006
KitMaker: 360 posts
Armorama: 354 posts
Posted: Monday, July 29, 2013 - 07:31 PM UTC
Hi Joe,

good work so far. I have ordered only the "small" set for the land Rover because i need the british water bottles and ammo pouches for my Vietnam Figures. The rest will be used for some of my Land Rovers i have in stash. The complete conversion set looks great but i am too can´t see all Photos. Perhabs something with the link/picture name?

Greetings

Stefan
Dannyd
Visit this Community
England - North West, United Kingdom
Joined: March 27, 2007
KitMaker: 803 posts
Armorama: 793 posts
Posted: Monday, July 29, 2013 - 07:50 PM UTC
Hi Joe, I'm also getting a ton of red x's here mate, shame as I would love to see them all. I've got the kit in the stash with the legend set.


BR

Dan
joegrafton
Visit this Community
United Kingdom
Joined: October 04, 2009
KitMaker: 1,209 posts
Armorama: 1,143 posts
Posted: Monday, July 29, 2013 - 10:39 PM UTC
Okay, thanks for the heads up on the dreaded red x's. I think I've managed to sort it out now!

Joe.
skyhawk
Visit this Community
Florida, United States
Joined: June 03, 2003
KitMaker: 1,095 posts
Armorama: 743 posts
Posted: Tuesday, July 30, 2013 - 12:37 AM UTC
very nice! I have the identical batch of goodies to do my own Pink Panther!

ill be following your build further!
Andy
joegrafton
Visit this Community
United Kingdom
Joined: October 04, 2009
KitMaker: 1,209 posts
Armorama: 1,143 posts
Posted: Tuesday, July 30, 2013 - 03:15 AM UTC
Stefan,
Be careful with the water bottles supplied with the Legend kit. I wanted to use them for this build but they are way oversized, in my humble opinion. I would suggest using the water bottles supplied with the Aussie SAS figures from Bravo 6.

Joe.
joegrafton
Visit this Community
United Kingdom
Joined: October 04, 2009
KitMaker: 1,209 posts
Armorama: 1,143 posts
Posted: Tuesday, July 30, 2013 - 03:34 AM UTC
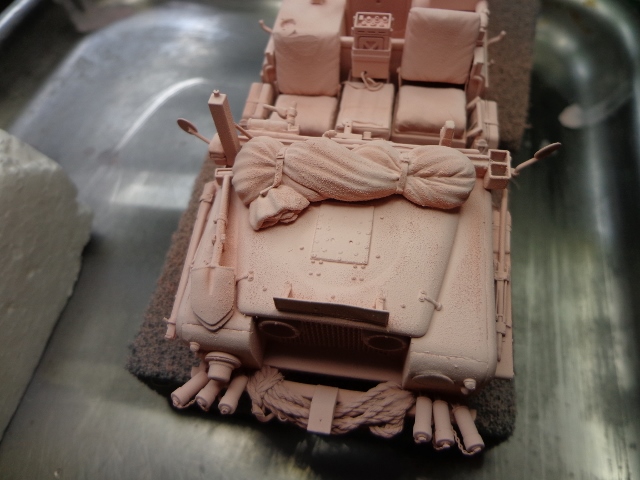
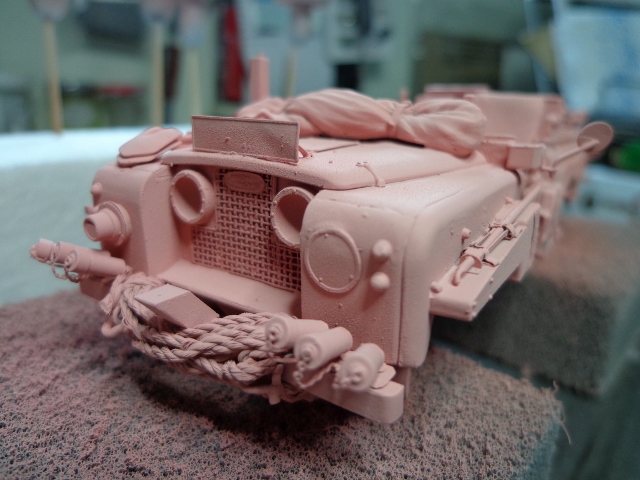
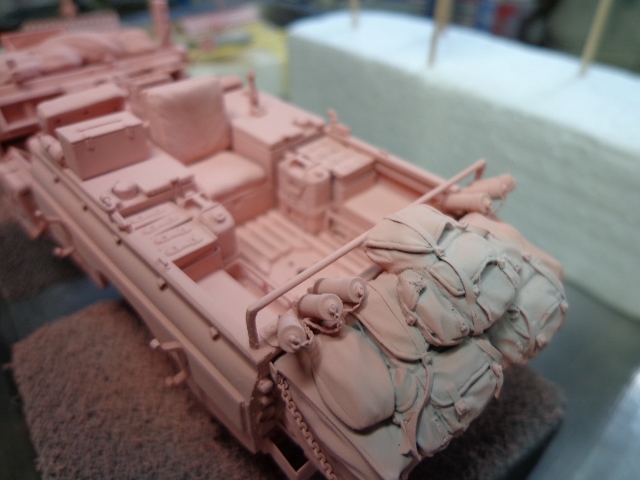
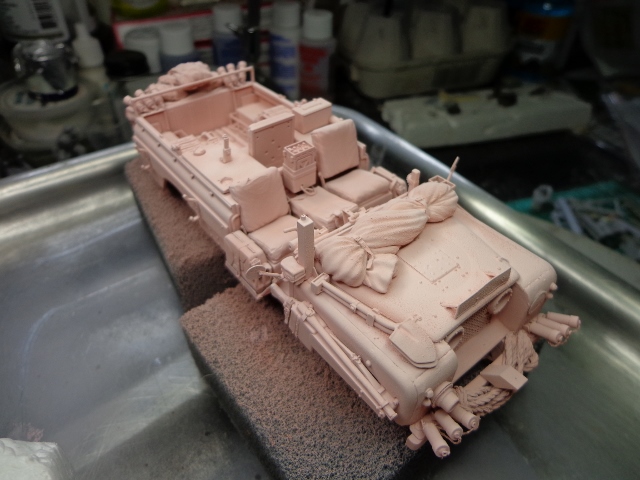
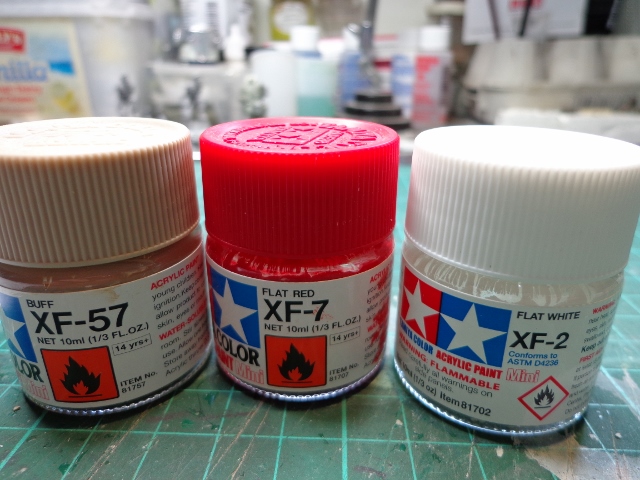
I have used the following colours from Tamiya to mix up a desert pink for the overall base colour:


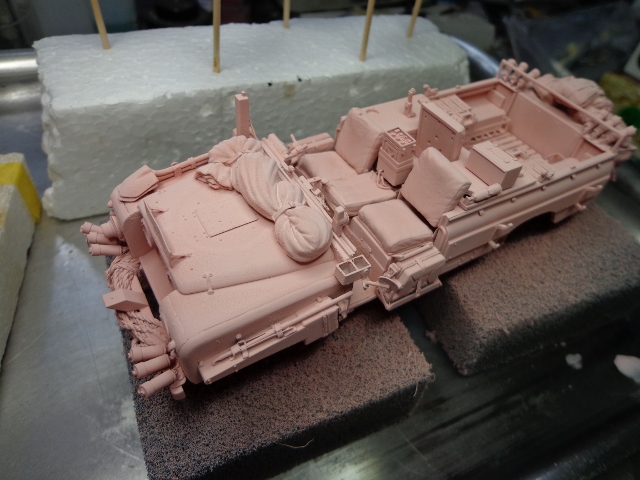
I laid down a base colour of desert pink over the whole vehicle. I then followed this by adding some more flat white to the mix & spraying this on all upward facing surfaces. I did this several times , adding more & more white so the bonnet & other larger areas were almost bleached looking. This represents paint out in the hot sun for too long. It's unfortunate but I don't think you can see this effect due to the limitations of the camera I'm using. However, it is there & will look good on the finished piece.
Plasticbattle
#003
Visit this Community
Donegal, Ireland
Joined: May 14, 2002
KitMaker: 9,763 posts
Armorama: 7,444 posts
Posted: Wednesday, July 31, 2013 - 01:36 AM UTC
Very nice build Joe. The AM stowage set makes such a difference to this old kit. Really gives it a huge lift. Like the desert pink colour as well. Should be a stunner.
Maki
Staff MemberSenior Editor
ARMORAMA
Visit this Community
Croatia Hrvatska
Joined: February 13, 2002
KitMaker: 5,579 posts
Armorama: 2,988 posts
Posted: Wednesday, July 31, 2013 - 02:17 AM UTC
Looking good so far, mate! I'm glad to see the Legend stowage put to use, I liked the set very much from the moment I saw it released.

One question, I've been looking for shackles of the specific dimension for quite some time now for my Scorpion build. I did not know MR has some... Can you please tell me the dimensions of the ones you used?

Cheers,
Mario
Keef1648
Visit this Community
South Carolina, United States
Joined: January 23, 2008
KitMaker: 1,240 posts
Armorama: 1,192 posts
Posted: Wednesday, July 31, 2013 - 06:02 AM UTC
Nice build.

Two questions though.

Based on the location of whatever Legend has you put between the front seats, how is the driver going to change gears?

Secondly, what radio is depicted by Legend?


Keith.
joegrafton
Visit this Community
United Kingdom
Joined: October 04, 2009
KitMaker: 1,209 posts
Armorama: 1,143 posts
Posted: Wednesday, July 31, 2013 - 06:15 AM UTC
Hi Keith,
Thanks for your message.
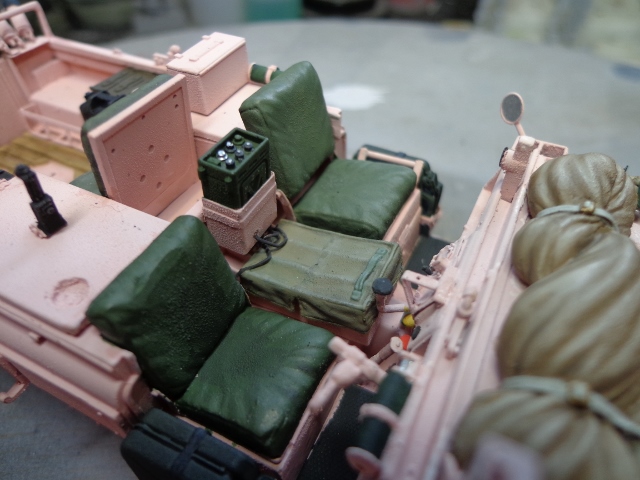
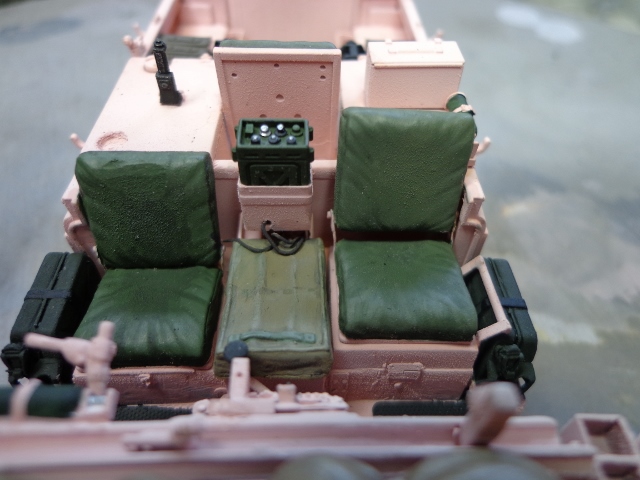
The large resin piece between the seats depicts a tray for stowing 8x 200rd 7.62mm belt link rounds for the front GPMG.
It has a protective canvas cover over it.
From reference pictures in the book shown at the beginning of the thread the real thing has this tray protruding forward of the front seats, therefore on the model too.
As I understand it the gear stick was positioned side on to the driver. Hopefully, somebody more technically minded might be able to explain!
I do agree, however, that it does look a little strange.

The radio is the Larkspur A43 ground to air radio used by British Special Forces back in the 1970's eventually giving way to the Clansman systems, or so I've been told.

Hope all this helps.

Joe.
joegrafton
Visit this Community
United Kingdom
Joined: October 04, 2009
KitMaker: 1,209 posts
Armorama: 1,143 posts
Posted: Wednesday, July 31, 2013 - 06:26 AM UTC
Keith,
One more thing I forgot to mention is the Mk123 'Spy' radio which is the anonymous looking 'wooden' box behind the front passenger seat mounted onto the top of the fuel tank.

Again, hope this helps.

Joe.
JohnTapsell
Visit this Community
United Kingdom
Joined: August 24, 2011
KitMaker: 227 posts
Armorama: 226 posts
Posted: Wednesday, July 31, 2013 - 07:35 AM UTC
Joe,

That looks good so far.

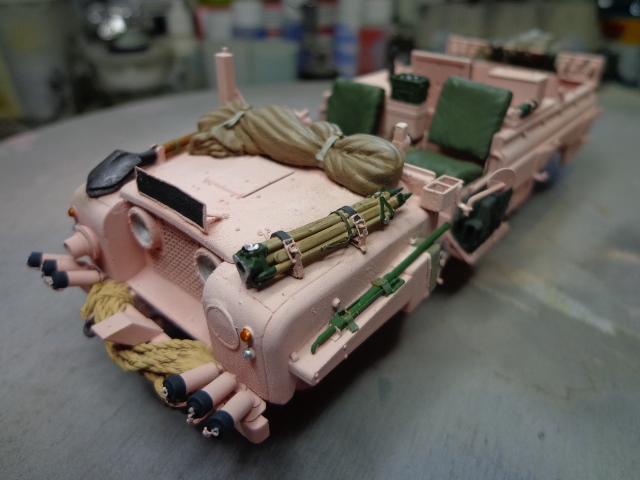
One comment I would make is to choose between the locations for the sun compass. the vehicles wouldn't have had two sun compasses - the two locations are alternatives dependent on whether you want a 'front seat navigator' or a 'back seat navigator'.

Regards,
John
Keef1648
Visit this Community
South Carolina, United States
Joined: January 23, 2008
KitMaker: 1,240 posts
Armorama: 1,192 posts
Posted: Wednesday, July 31, 2013 - 08:03 AM UTC

Quoted Text

Hi Keith,
Thanks for your message.
The large resin piece between the seats depicts a tray for stowing 8x 200rd 7.62mm belt link rounds for the front GPMG.
It has a protective canvas cover over it.
From reference pictures in the book shown at the beginning of the thread the real thing has this tray protruding forward of the front seats, therefore on the model too.
As I understand it the gear stick was positioned side on to the driver. Hopefully, somebody more technically minded might be able to explain!
I do agree, however, that it does look a little strange.

The radio is the Larkspur A43 ground to air radio used by British Special Forces back in the 1970's eventually giving way to the Clansman systems, or so I've been told.

Hope all this helps.

Joe.


Yes the gears stick actually was a wierd shape on series 1 though 3 Rovers, almost a Z shape and did indeed almost hit against the Ammo stowage when in 4th gear.

As for the Radios. >

1. The A43R Ground to Air radio for working with aircraft and helicopters. It operated in the UHF frequency band, (240 - 300MHz) range. It could also be used as a Beacon for aircraft to home in on its signal... Operating ranges varied from, up to 40 miles on the 'whip' antenna (arial) and up to 130 miles using an elivated discore, working to aircraft up to 30,000ft.

2. They also carried the A41 manpack, a VHF set with a working range of 10 - 15 miles depending on terrain. This could be used for vehicle to vehicle or with supporting infantry, it was easily dismounted.

3. The wireless set 123. was a lightweight, miniaturized, high frequency radio. The operating range was up to 500 miles but this was a 'Morse only' set and was primarily used as a rear link back to the HQ areas.
..

Keep up the good work.

Keith.

joegrafton
Visit this Community
United Kingdom
Joined: October 04, 2009
KitMaker: 1,209 posts
Armorama: 1,143 posts
Posted: Saturday, August 31, 2013 - 03:49 AM UTC
Hi fellas,
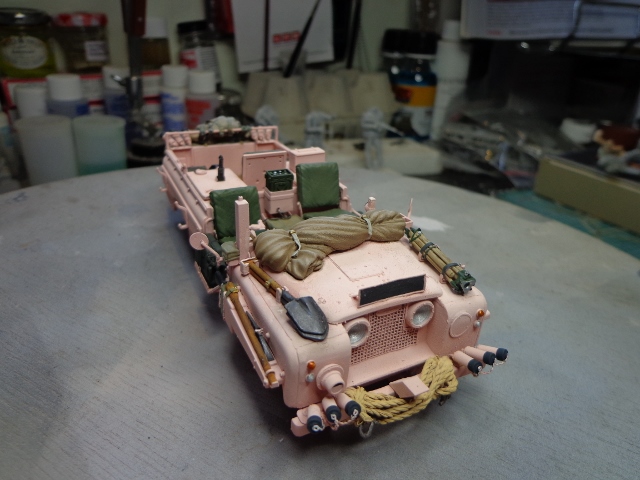
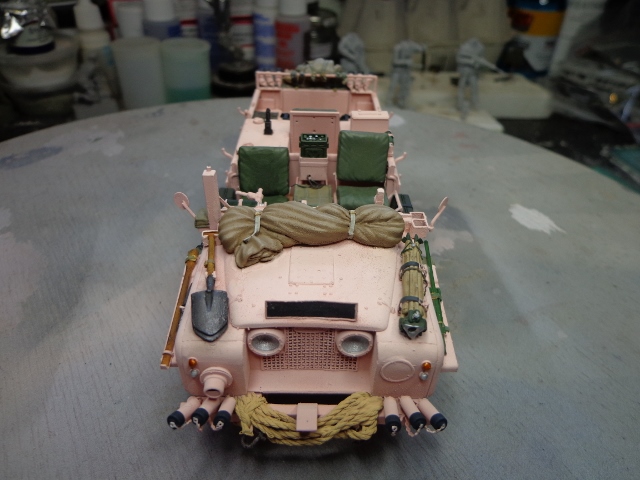
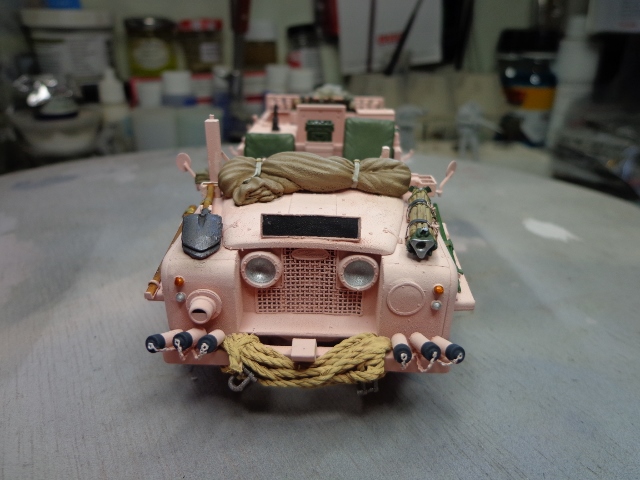
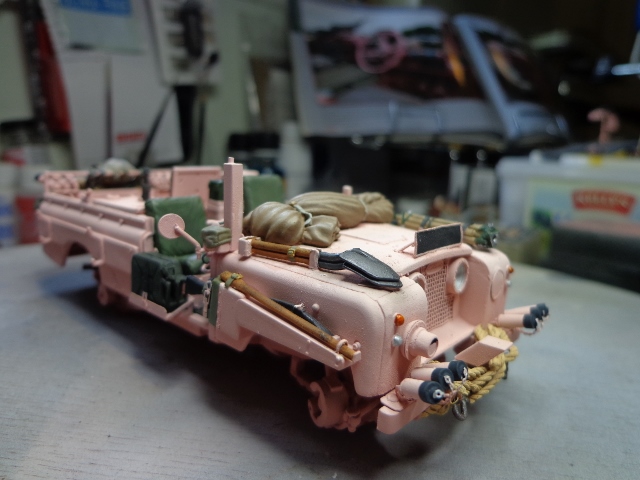
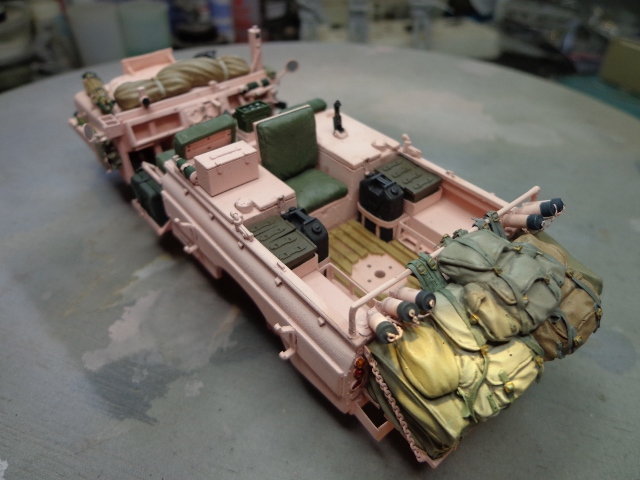
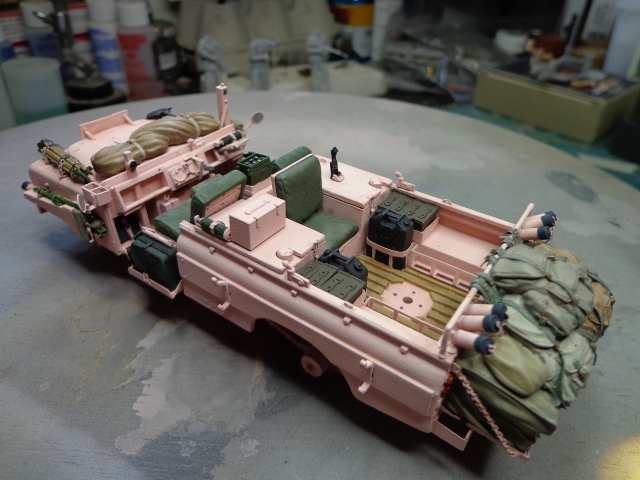
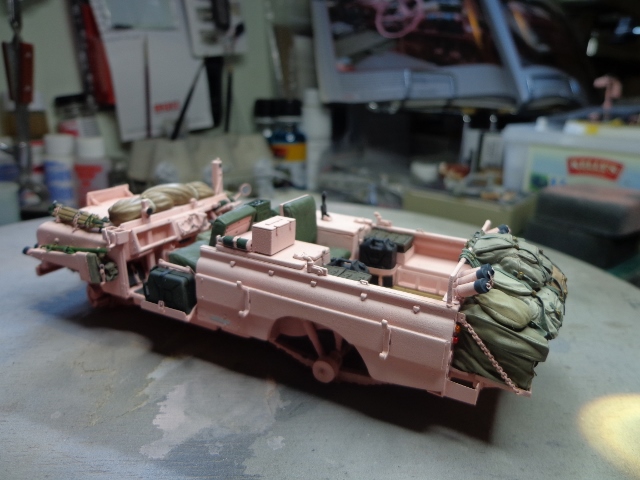
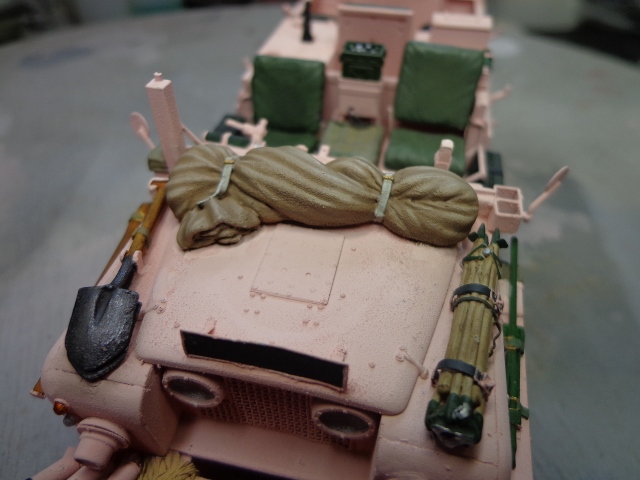
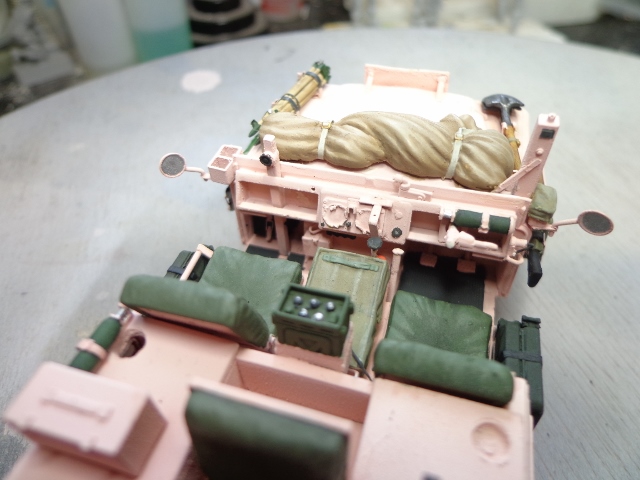
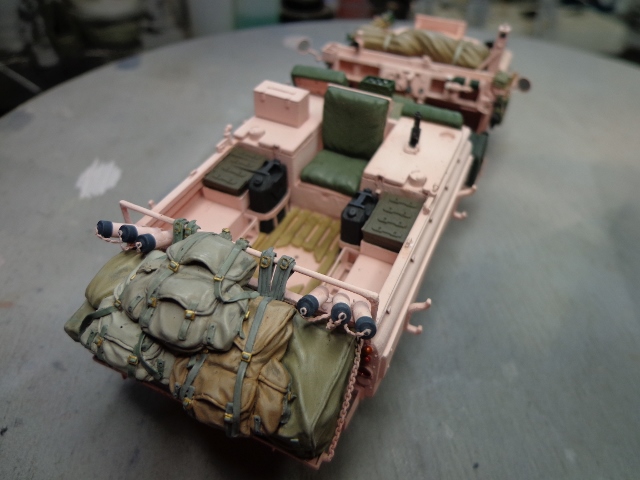
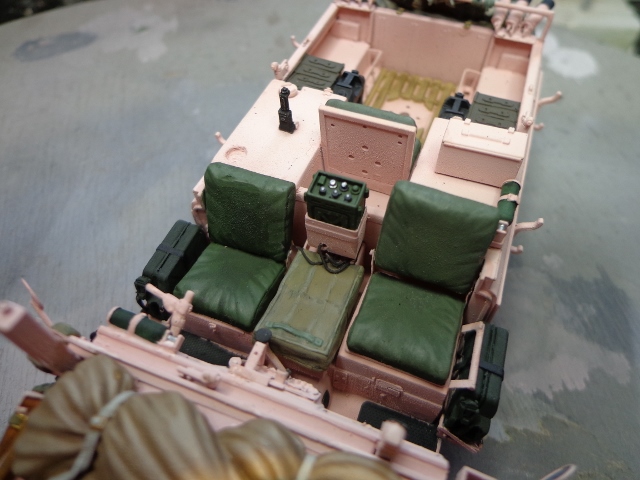
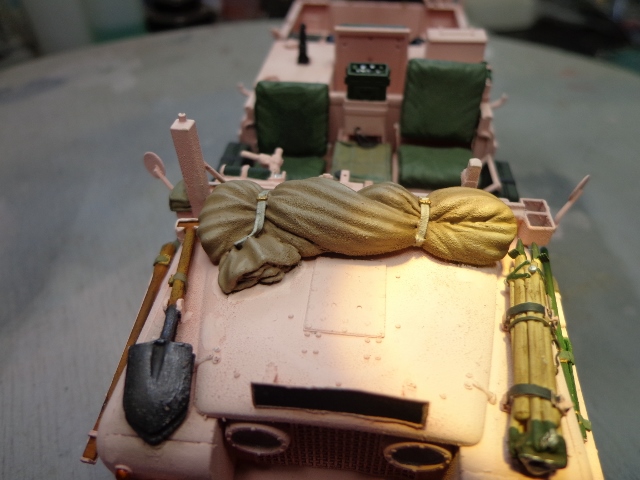
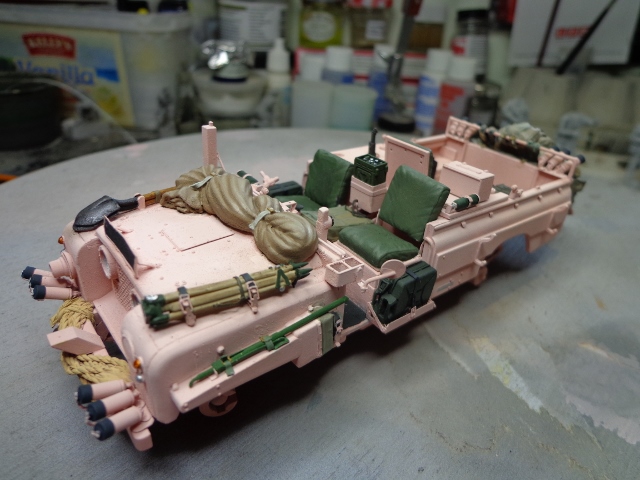
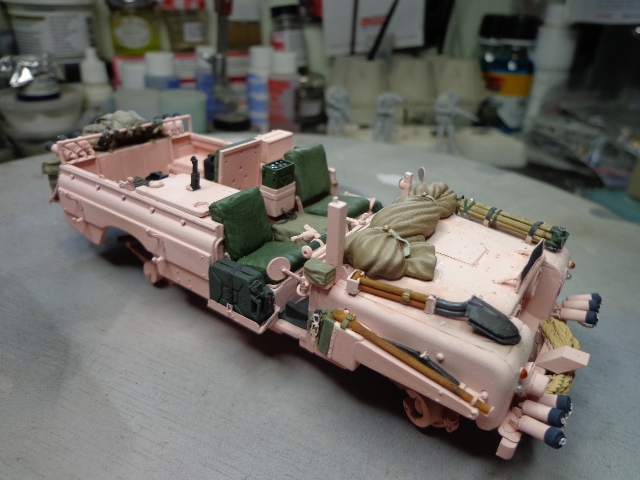
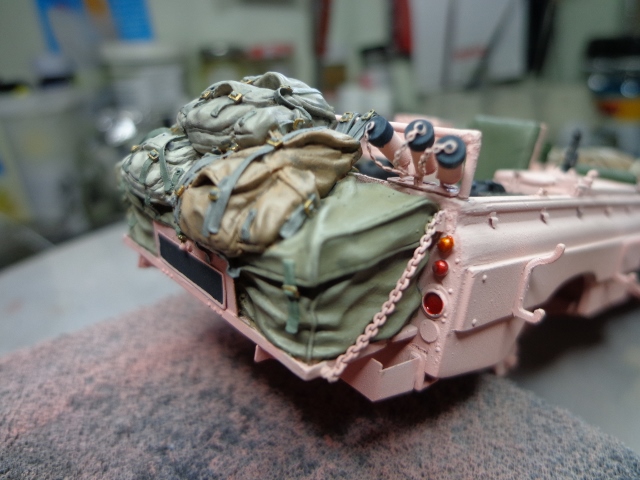
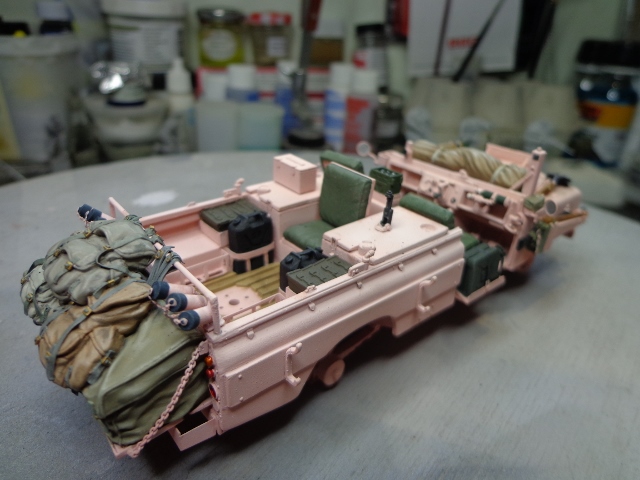
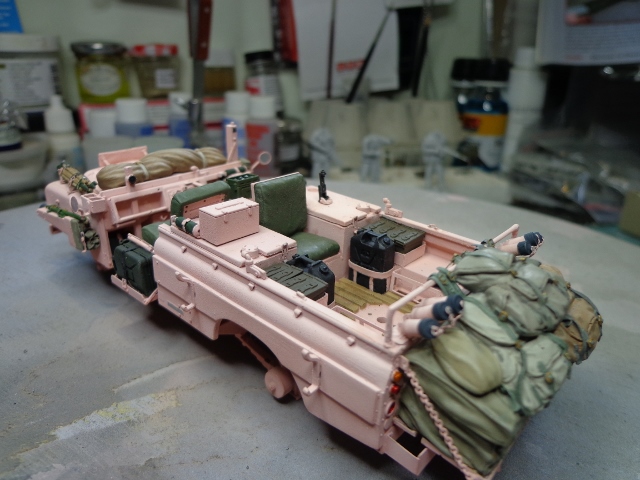
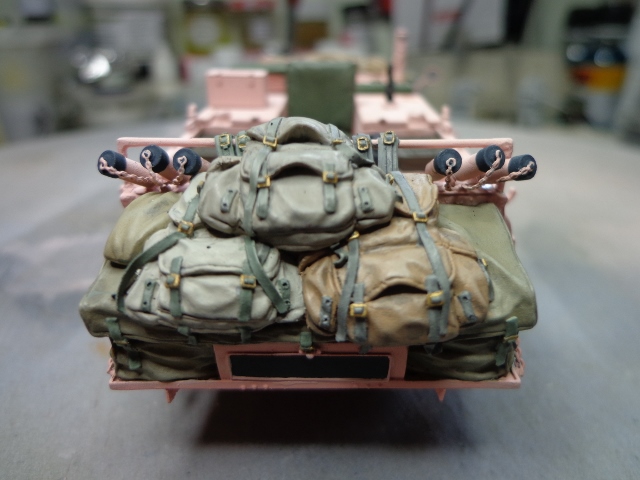
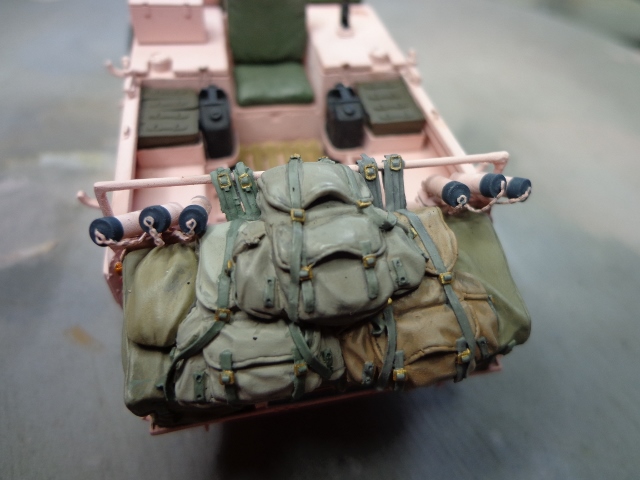
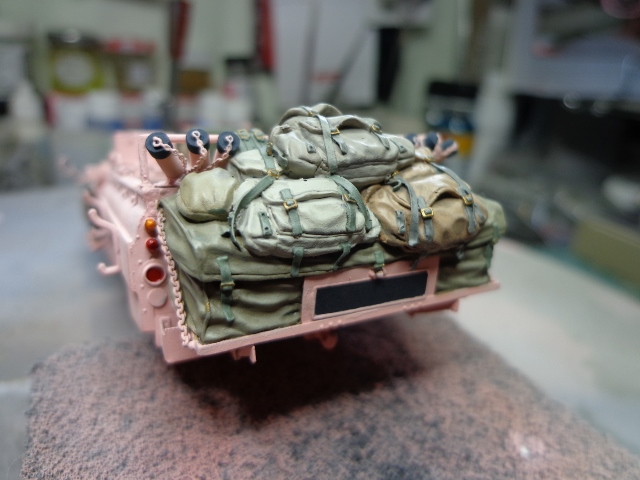
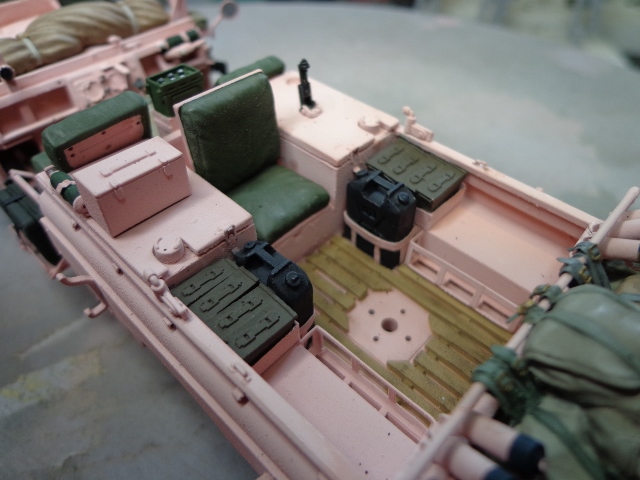
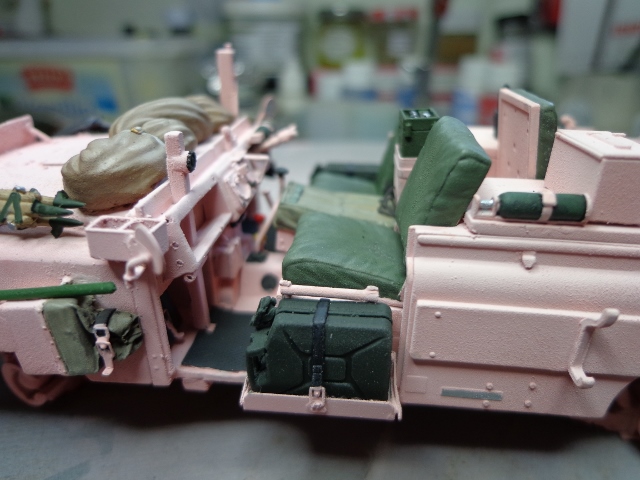
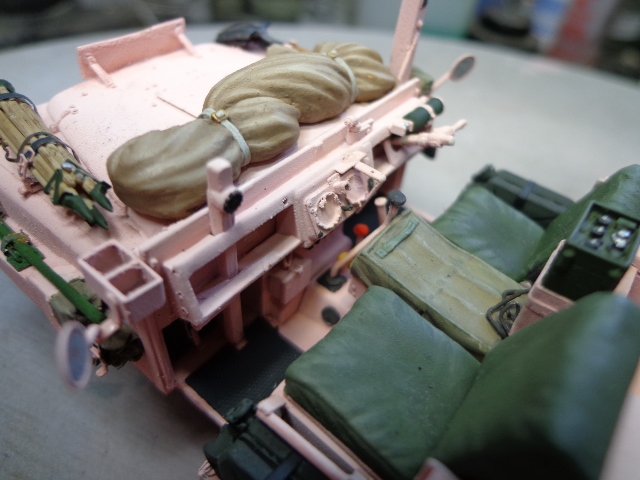
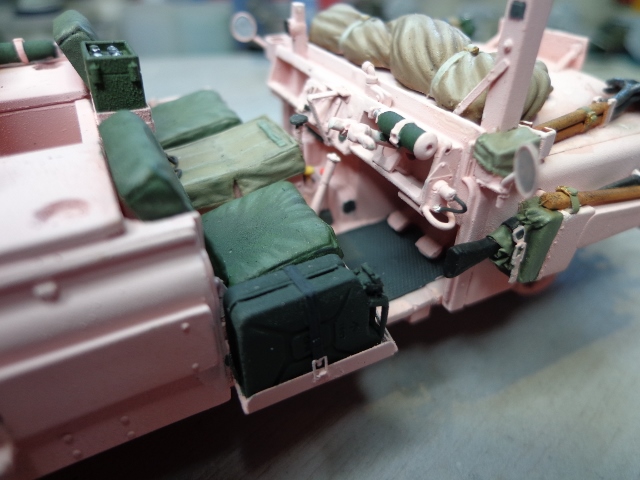
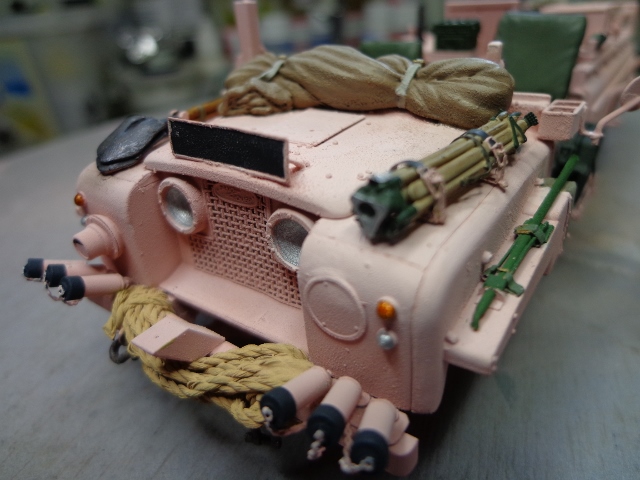
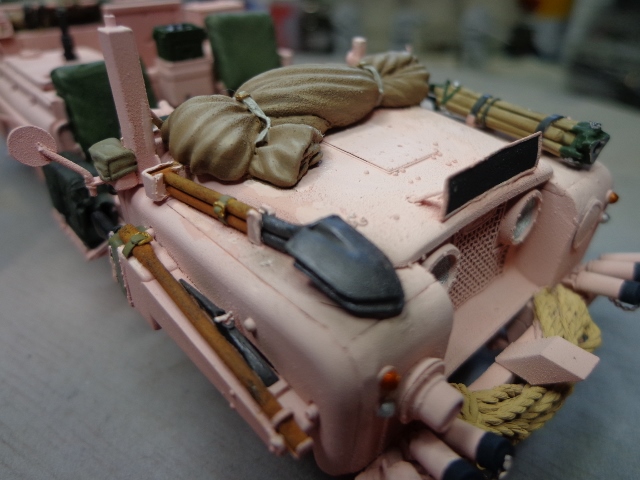
Okay, sorry for the delay but it has taken an age to get all the detail painted in (and a family holiday in between!).
So, just to update you all on how the build is coming along. Here's a few pics for you...


joegrafton
Visit this Community
United Kingdom
Joined: October 04, 2009
KitMaker: 1,209 posts
Armorama: 1,143 posts
Posted: Saturday, August 31, 2013 - 04:02 AM UTC
More...


joegrafton
Visit this Community
United Kingdom
Joined: October 04, 2009
KitMaker: 1,209 posts
Armorama: 1,143 posts
Posted: Saturday, August 31, 2013 - 04:08 AM UTC
Even more...


Hope you like.
Again, let me know what you think.

Joe.
joegrafton
Visit this Community
United Kingdom
Joined: October 04, 2009
KitMaker: 1,209 posts
Armorama: 1,143 posts
Posted: Saturday, August 31, 2013 - 04:14 AM UTC
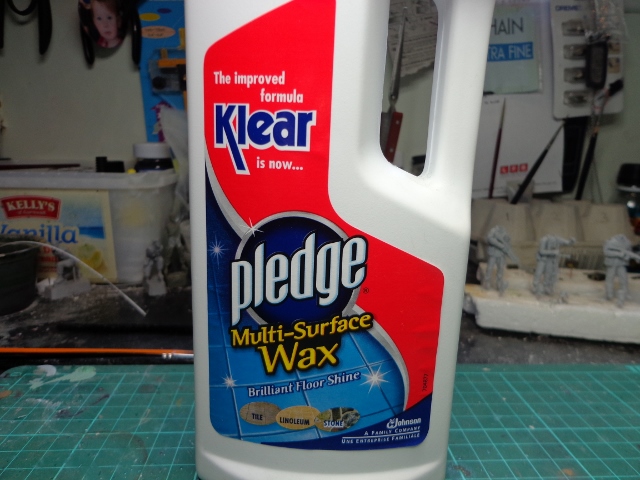
Now for a coat of this...


This will help with applying the decals.
bat-213
Visit this Community
Canada
Joined: December 30, 2011
KitMaker: 902 posts
Armorama: 788 posts
Posted: Monday, September 02, 2013 - 10:53 AM UTC
that is a very cool build.did you hand paint the
details or use an airbrush?
joegrafton
Visit this Community
United Kingdom
Joined: October 04, 2009
KitMaker: 1,209 posts
Armorama: 1,143 posts
Posted: Monday, September 02, 2013 - 09:05 PM UTC
Hi Roy,
Thanks for your message!
All the details are hand painted using Vallejo & Lifecolor acrylics, Floquil 'old silver' & W&N Van Dyke brown oil paint.

Joe.
 _GOTOTOP