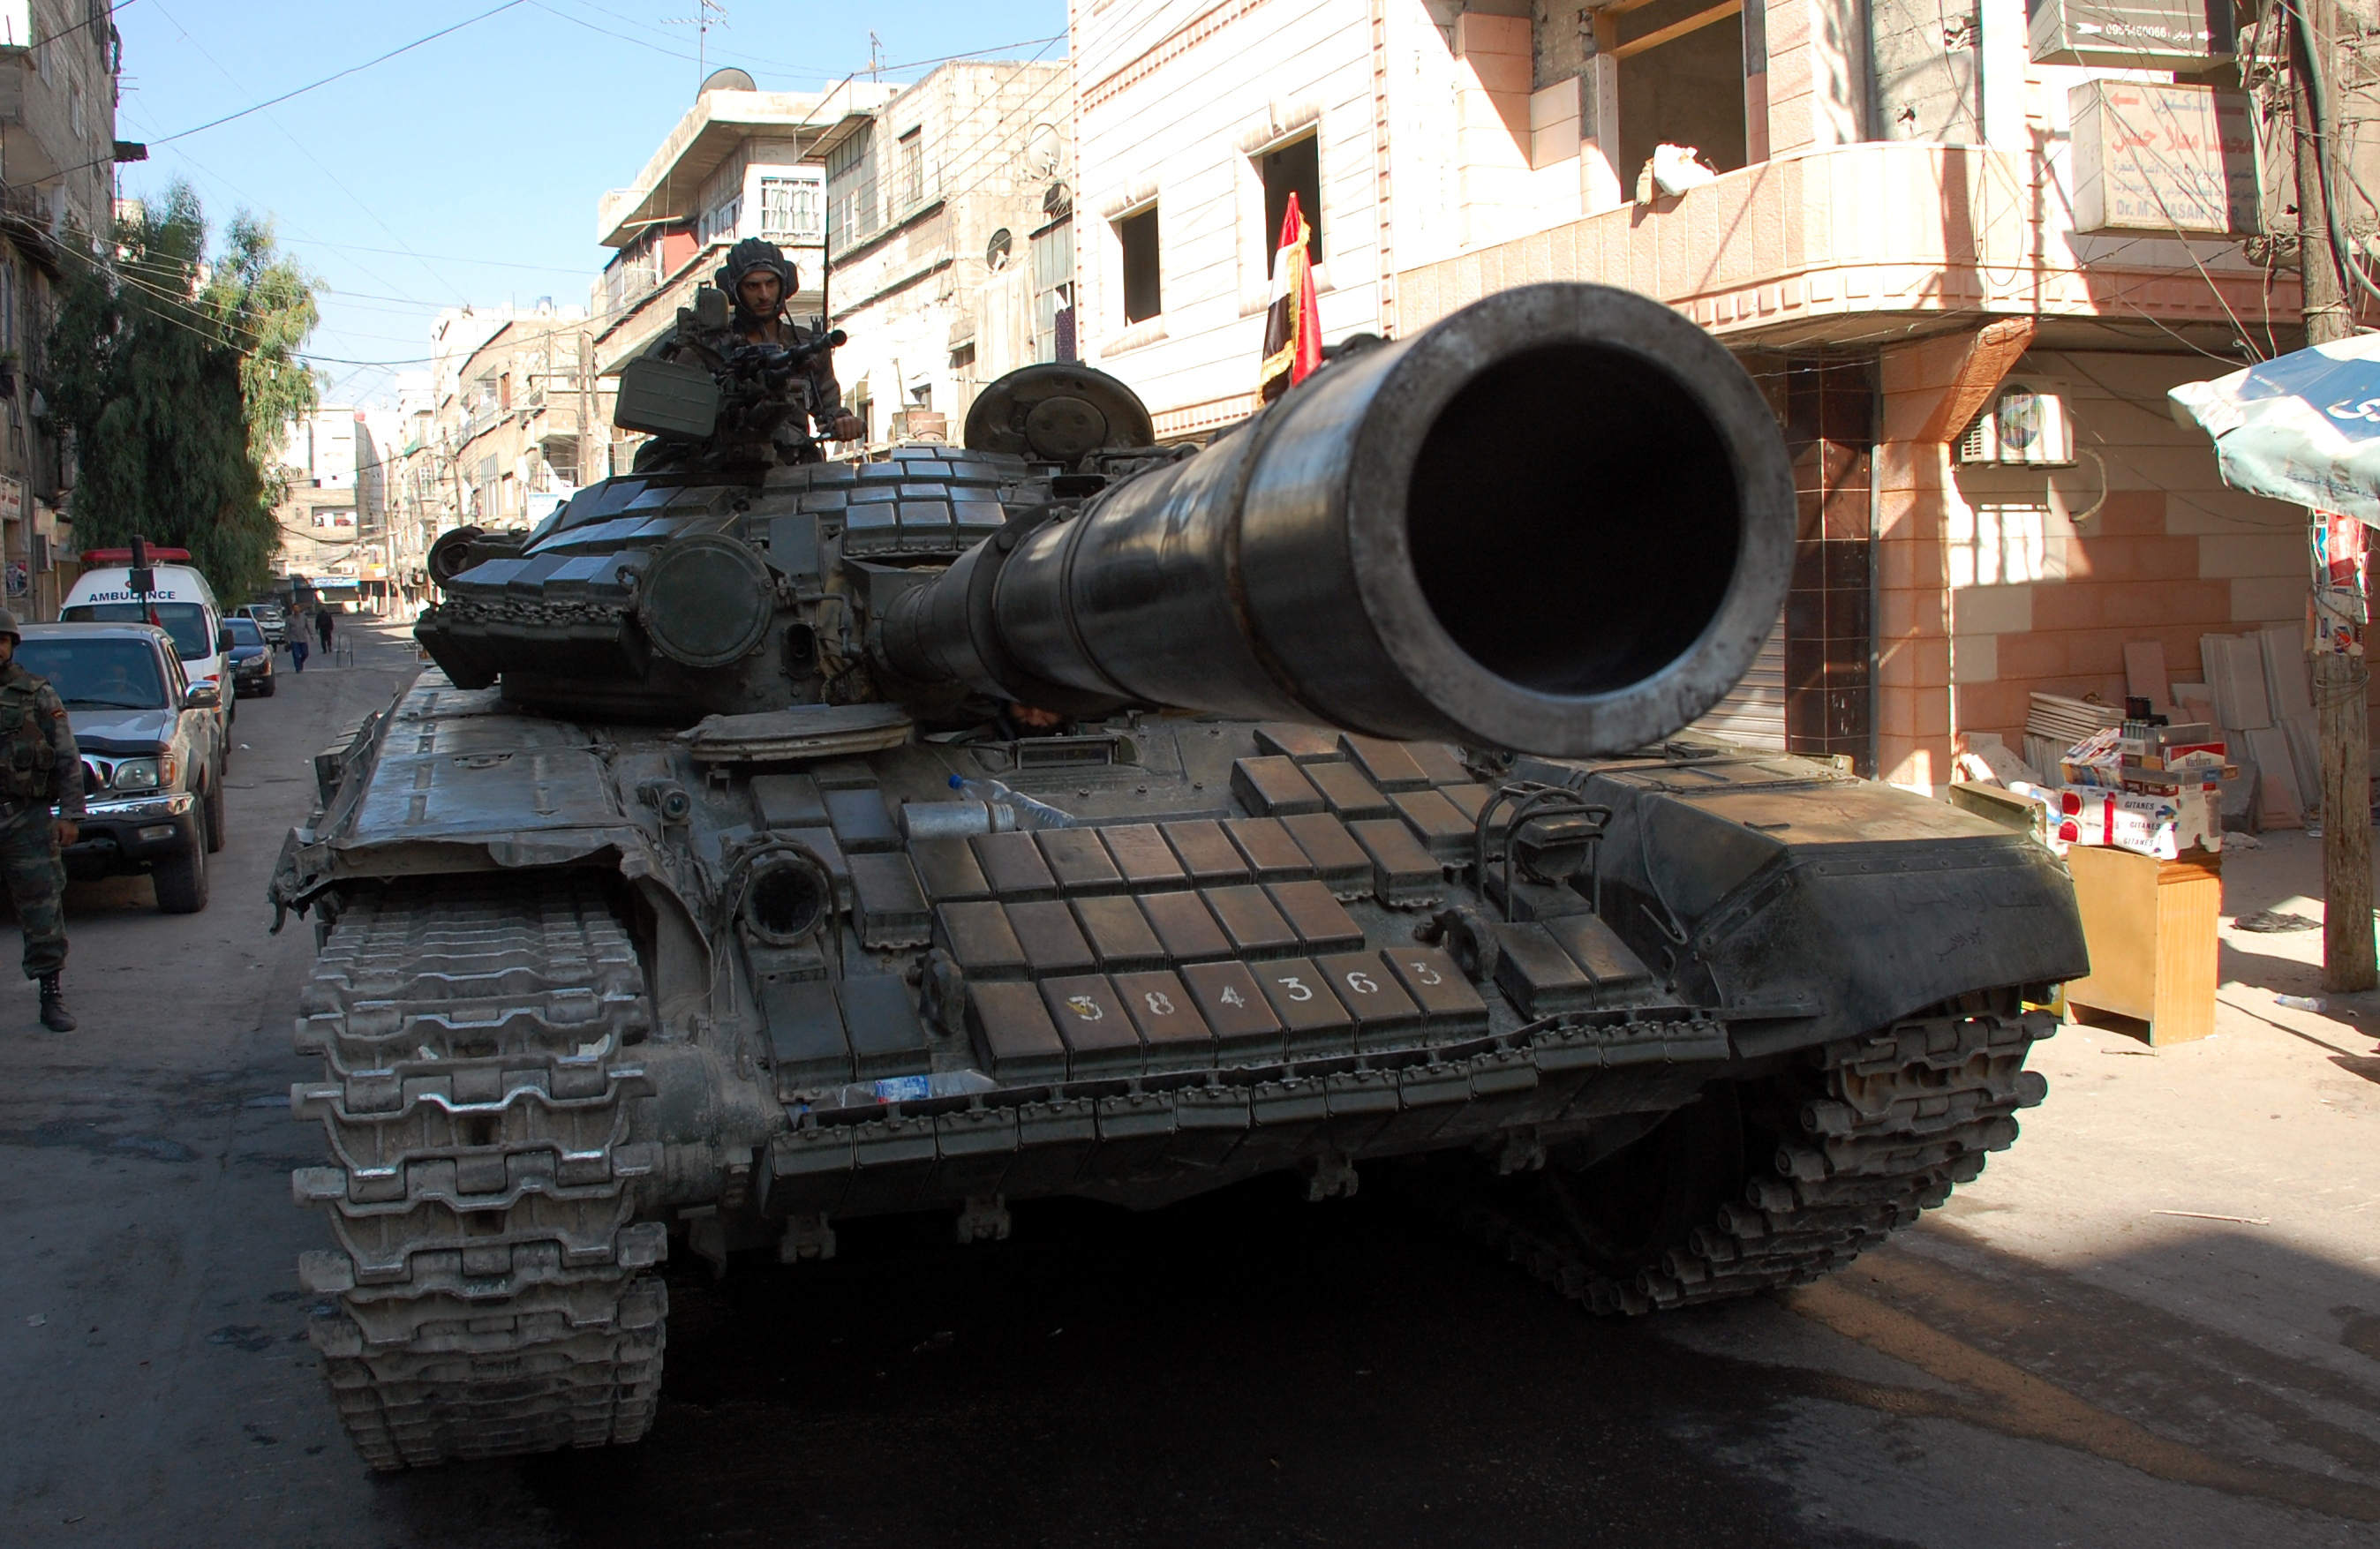
Phil,
Thanks very much for the great introduction. I hope you didn't set expectations too high.
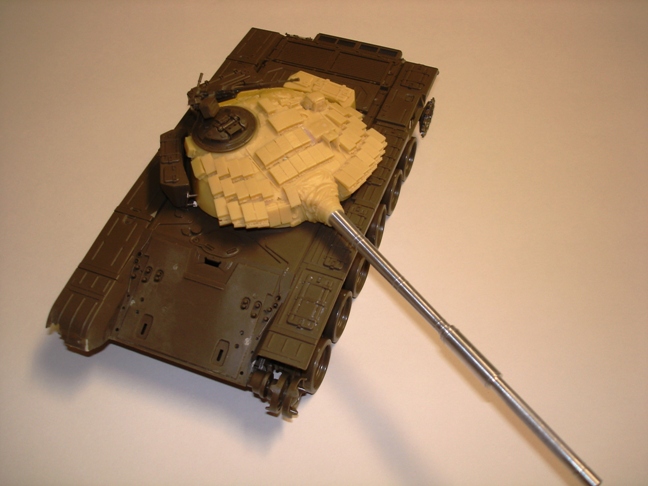
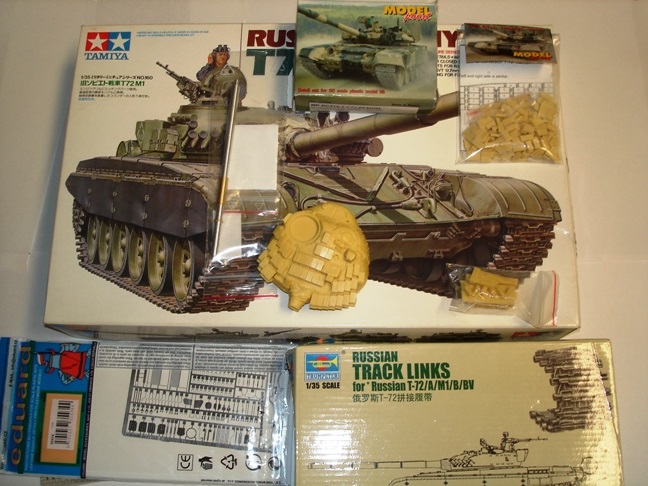
I will be using the Modelpoint conversion that has been collecting dust in the closet.
Яusso-Soviэt Forum
Russian or Soviet vehicles/armor modeling forum.
Hosted by Darren Baker, Jacques Duquette
siryan t72 av with era upgrade
RuloMxy
District of Columbia, United States
Joined: March 05, 2009
KitMaker: 154 posts
Armorama: 137 posts
Joined: March 05, 2009
KitMaker: 154 posts
Armorama: 137 posts
Posted: Wednesday, September 25, 2013 - 12:38 PM UTC
asmodeuss
Quebec, Canada
Joined: November 19, 2011
KitMaker: 1,389 posts
Armorama: 1,388 posts
Joined: November 19, 2011
KitMaker: 1,389 posts
Armorama: 1,388 posts
Posted: Thursday, September 26, 2013 - 12:23 AM UTC
Very nice selection Raul! This is going to be very interesting! A quick question to all: I have seen pics of syrian T72 with the turms sights but without the era blocks on the turret, were there any with them and with the anti-radiation armor? anyone got pics?
Here what I am talking about:
2012-fb-album-military-campaigns-14-06-12 par asmodeuss, sur Flickr
Phil.
Here what I am talking about:
2012-fb-album-military-campaigns-14-06-12 par asmodeuss, sur Flickr
Phil.
RuloMxy
District of Columbia, United States
Joined: March 05, 2009
KitMaker: 154 posts
Armorama: 137 posts
Joined: March 05, 2009
KitMaker: 154 posts
Armorama: 137 posts
Posted: Thursday, September 26, 2013 - 01:08 AM UTC
Phil,
It is difficult to tell if it has the anti-radiation layer. This source says there are some Syria and her TURMS-T equipped T-72's
For discussion purposes source http://spioenkop.blogspot.com
T-72AV with Turm-t
It is difficult to tell if it has the anti-radiation layer. This source says there are some Syria and her TURMS-T equipped T-72's
For discussion purposes source http://spioenkop.blogspot.com
T-72AV with Turm-t
SEDimmick
New Jersey, United States
Joined: March 15, 2002
KitMaker: 1,745 posts
Armorama: 1,483 posts
Joined: March 15, 2002
KitMaker: 1,745 posts
Armorama: 1,483 posts
Posted: Thursday, September 26, 2013 - 01:29 AM UTC
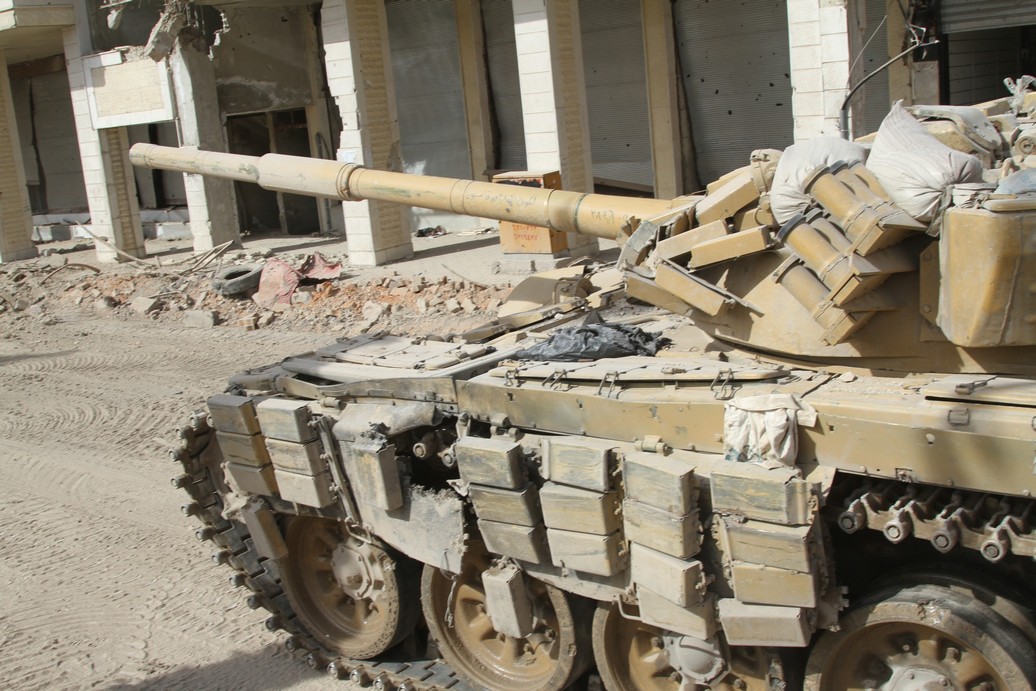
They did...see here, you can see the mounting bosses and the liner behind the gunners sight
asmodeuss
Quebec, Canada
Joined: November 19, 2011
KitMaker: 1,389 posts
Armorama: 1,388 posts
Joined: November 19, 2011
KitMaker: 1,389 posts
Armorama: 1,388 posts
Posted: Friday, September 27, 2013 - 02:03 AM UTC
Well, well, well. Seems like there is nothing like Armorama for intel!
Raul and Scott I cannot thank you enough.
Now I need to get as much info and pics on turms, since My client wants one on there But, we will cross that bridge at the river.
Update today afternoon.
Phil.
Raul and Scott I cannot thank you enough.
Now I need to get as much info and pics on turms, since My client wants one on there But, we will cross that bridge at the river.
Update today afternoon.
Phil.
asmodeuss
Quebec, Canada
Joined: November 19, 2011
KitMaker: 1,389 posts
Armorama: 1,388 posts
Joined: November 19, 2011
KitMaker: 1,389 posts
Armorama: 1,388 posts
Posted: Friday, September 27, 2013 - 02:37 AM UTC
Here is where I am at!
spare link01 par asmodeuss, sur Flickr
spare link02 par asmodeuss, sur Flickr
spare link04 par asmodeuss, sur Flickr
Right rack will be empty.
i should have more pics soon.
Raul, any progres so far? can`t wait to see this modelpoint turret up close!
Comments are more than welcomed.
Phil.
spare link01 par asmodeuss, sur Flickr
spare link02 par asmodeuss, sur Flickr
spare link04 par asmodeuss, sur Flickr
Right rack will be empty.
i should have more pics soon.
Raul, any progres so far? can`t wait to see this modelpoint turret up close!
Comments are more than welcomed.
Phil.
RuloMxy
District of Columbia, United States
Joined: March 05, 2009
KitMaker: 154 posts
Armorama: 137 posts
Joined: March 05, 2009
KitMaker: 154 posts
Armorama: 137 posts
Posted: Friday, September 27, 2013 - 03:02 AM UTC
Phil,
For the Turms here is a link that may give you some ideas on how to build it:
T-72M4CZ
Regarding the build, I may start building the hull first. I will start "chopping" it on the weekend to simulate battle damage; nothing extensive.
I am leaving the turret for last as it needs some work and I am waiting for parts. The TPD sight needs to be corrected and the anti-radiation layer screws need to be added (I have ordered them but will take some time to get them). Additionally, the commander's hatch has to be modified to add the anti-radiation layer and the ERA mount that protects the mantlet build. The turret will be a good workout for when I get my hand on the trumpeter T-90 regarding installing anti radiation layer screws.
Good luck with the Turms! I guess you are facing lots of fun with the dremel to get space for the Turms. Can't wait to see the results; It will be an awesome kit.
Raul
asmodeuss
Quebec, Canada
Joined: November 19, 2011
KitMaker: 1,389 posts
Armorama: 1,388 posts
Joined: November 19, 2011
KitMaker: 1,389 posts
Armorama: 1,388 posts
Posted: Friday, September 27, 2013 - 04:44 AM UTC
Mucho Thanks Raul!
Not yet sure if we are going forward with the turms cause of the nice miniarm turret....
YumYum, I do love some battle damage
Phil.
Not yet sure if we are going forward with the turms cause of the nice miniarm turret....
YumYum, I do love some battle damage
Phil.
asmodeuss
Quebec, Canada
Joined: November 19, 2011
KitMaker: 1,389 posts
Armorama: 1,388 posts
Joined: November 19, 2011
KitMaker: 1,389 posts
Armorama: 1,388 posts
Posted: Sunday, September 29, 2013 - 03:58 AM UTC
Couple of pics of my progres:
rear glacis is pretty much finished
rearglacis06 par asmodeuss, sur Flickr
And the sweet fruils sprockets are on with a little PE mud scruber.
sprocket01 par asmodeuss, sur Flickr.
Comments are welcomed.
Phil.
rear glacis is pretty much finished
rearglacis06 par asmodeuss, sur Flickr
And the sweet fruils sprockets are on with a little PE mud scruber.
sprocket01 par asmodeuss, sur Flickr.
Comments are welcomed.
Phil.
todorovicandreas
Austria
Joined: May 01, 2007
KitMaker: 608 posts
Armorama: 593 posts
Joined: May 01, 2007
KitMaker: 608 posts
Armorama: 593 posts
Posted: Sunday, September 29, 2013 - 04:08 AM UTC
Nice progress! Keep it up, looking forward to this one.
Andreas
Andreas
asmodeuss
Quebec, Canada
Joined: November 19, 2011
KitMaker: 1,389 posts
Armorama: 1,388 posts
Joined: November 19, 2011
KitMaker: 1,389 posts
Armorama: 1,388 posts
Posted: Sunday, September 29, 2013 - 04:41 AM UTC
Thanks for the good words Andreas, and welcome aboard.
asmodeuss
Quebec, Canada
Joined: November 19, 2011
KitMaker: 1,389 posts
Armorama: 1,388 posts
Joined: November 19, 2011
KitMaker: 1,389 posts
Armorama: 1,388 posts
Posted: Wednesday, October 02, 2013 - 02:30 AM UTC
Progres!
Miniarms wheel set may be not the best around...But they really did the job with a minimum of fuss.
roadwheels03 par asmodeuss, sur Flickr
roadwheels04 par asmodeuss, sur Flickr
Lower hull is near completion, couple of details to be added and I think I`ll go with the fuils!
thanks for watching and comments
Phil.
BBD468
Texas, United States
Joined: March 08, 2010
KitMaker: 2,465 posts
Armorama: 2,383 posts
Joined: March 08, 2010
KitMaker: 2,465 posts
Armorama: 2,383 posts
Posted: Wednesday, October 02, 2013 - 03:55 AM UTC
Hey Brother Phil, wheels look fantastic! She lookin a treat my friend.
asmodeuss
Quebec, Canada
Joined: November 19, 2011
KitMaker: 1,389 posts
Armorama: 1,388 posts
Joined: November 19, 2011
KitMaker: 1,389 posts
Armorama: 1,388 posts
Posted: Thursday, October 03, 2013 - 12:25 AM UTC
Thanks brotherman!
you got something cooking on armorama these days?
Phil.
you got something cooking on armorama these days?
Phil.
BBD468
Texas, United States
Joined: March 08, 2010
KitMaker: 2,465 posts
Armorama: 2,383 posts
Joined: March 08, 2010
KitMaker: 2,465 posts
Armorama: 2,383 posts
Posted: Thursday, October 03, 2013 - 02:31 AM UTC
Hey Phil, i posted my T-90 build yesterday. Been a while since i had a build thread here so i wanted to get "back in business".....as it were.
Gary
Gary
asmodeuss
Quebec, Canada
Joined: November 19, 2011
KitMaker: 1,389 posts
Armorama: 1,388 posts
Joined: November 19, 2011
KitMaker: 1,389 posts
Armorama: 1,388 posts
Posted: Friday, October 04, 2013 - 01:21 AM UTC
Where is the thread?
asmodeuss
Quebec, Canada
Joined: November 19, 2011
KitMaker: 1,389 posts
Armorama: 1,388 posts
Joined: November 19, 2011
KitMaker: 1,389 posts
Armorama: 1,388 posts
Posted: Sunday, October 06, 2013 - 02:52 AM UTC
I got to the point that I had to chop it down! Always a little nervous but it went well.
frontglacis01 par asmodeuss, sur Flickr
Cleaning was fast and straightforward.
frontglacis02 par asmodeuss, sur Flickr
I glued the parts with epoxy and let it cure overnight.
frontglacis03 par asmodeuss, sur Flickr
Little putty was needed...I am kinda glad since the putty is in small, hard to sand area.
putty01 par asmodeuss, sur Flickr
While putty cures: Fruils!
fruils01 par asmodeuss, sur Flickr
Comments are more than welcomed!
Phil.
BBD468
Texas, United States
Joined: March 08, 2010
KitMaker: 2,465 posts
Armorama: 2,383 posts
Joined: March 08, 2010
KitMaker: 2,465 posts
Armorama: 2,383 posts
Posted: Sunday, October 06, 2013 - 04:48 AM UTC
OUTSTANDING!!! Fit like a glove didnt it. Bring on the fruilage mon frère!
RuloMxy
District of Columbia, United States
Joined: March 05, 2009
KitMaker: 154 posts
Armorama: 137 posts
Joined: March 05, 2009
KitMaker: 154 posts
Armorama: 137 posts
Posted: Sunday, October 06, 2013 - 03:50 PM UTC
Philippe,
Nice progress! I will be copying some of the detailing you have done. Thank you very much for inspiring me to start building a Syrian T-72 AV.
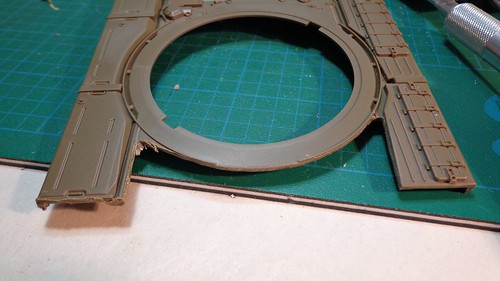
I will be changing some of the detailing sets. I will be using the SBS Model photo etch and most likely buy a working track set. I will be using, if I can fix it, a Modelpoint T-72 without thermal sleeve. If somebody has any ideas on how to recreate the ribs, that are left when the thermal sleeve is removed, please let me know.
I am currently working on detailing the area between the upper and lower hull. Removing plastic to recreate battle damage leave big holes that have to be plugged.
(The turret accesories haven't been glued)
asmodeuss
Quebec, Canada
Joined: November 19, 2011
KitMaker: 1,389 posts
Armorama: 1,388 posts
Joined: November 19, 2011
KitMaker: 1,389 posts
Armorama: 1,388 posts
Posted: Monday, October 07, 2013 - 01:59 AM UTC
Hi Raul!! nice update...Very nice!
Have you double checked the roadwheels with ref pics, Tam kit have 8 bolt wheels wich is for a early and elusive model, most comon wheels are 6 bolts. But Hey! I`m not counting rivets here and my model will surely have a lot of discrepancys from an actual vehicule. I just wanted to point that out if for some reason you did not know.
Keep this beast posted Raul, nice clean and crisp start.
Phil.
Ranchhand
Texas, United States
Joined: September 04, 2010
KitMaker: 289 posts
Armorama: 257 posts
Joined: September 04, 2010
KitMaker: 289 posts
Armorama: 257 posts
Posted: Monday, October 07, 2013 - 02:39 AM UTC
i have seen pics of syrian t-72's with mixed roadwheels, seems they are in full "road warrior" mode there!
Thanks for the blog, i am following with big interest as i am also working on this exact type of tank, except i am making one that is "rode hard and put up wet"
I have the lower hull and running gear done, ill try to post pics. thanks again!
Thanks for the blog, i am following with big interest as i am also working on this exact type of tank, except i am making one that is "rode hard and put up wet"
I have the lower hull and running gear done, ill try to post pics. thanks again!
RuloMxy
District of Columbia, United States
Joined: March 05, 2009
KitMaker: 154 posts
Armorama: 137 posts
Joined: March 05, 2009
KitMaker: 154 posts
Armorama: 137 posts
Posted: Monday, October 07, 2013 - 05:07 AM UTC
Hi Phil,
Thanks. I have been looking at different photos and Tthe Syrian T-72 AVs seem to have a mixture of both wheels. It seems to be dependent on the how early the T-72 was produced and battle use.
T-72 with early fenders (early wheels, in some photos mixture of both early and late wheels)
photo for discussion purpose, taken from site http://bmpd.livejournal.com/489801.html#cutid1
T-72 with late fenders (late wheels)
photo for discussion purpose, taken from site
http://milinme.wordpress.com/2013/01/10/
I will be buying later on a late T-72 wheel set and will be using some wheels; I will be using the rest in another project.
In other things, I have been trying to find photos of the KMT mounts on Syrian T-72AVs. Export versions have fewer number of mounts than the Russian ones which the Miniarm represent. Although it will be covered by ERA, you may want to double check, as it may affect slightly the angle created when they are mounted (first row, top to bottom, on top the KMT mounts), which may be noticeable when compared to the row next to it.
This seems to be version you are modeling, correct me if I am wrong
photo for discussion purpose, taken from site
http://milinme.wordpress.com/2013/01/27/syrian-t-72av-2/
Have you had any thoughts of what color are you going to paint the beast? Green or desert sand?
Best Regards,
Raul
asmodeuss
Quebec, Canada
Joined: November 19, 2011
KitMaker: 1,389 posts
Armorama: 1,388 posts
Joined: November 19, 2011
KitMaker: 1,389 posts
Armorama: 1,388 posts
Posted: Monday, October 07, 2013 - 11:55 AM UTC
Aaron, thanks for the comments! If you want you can join the fun on this blog. If you post pictures be sure to add a little ``how you got there`` comment. we do love learning different technique.
Raul, my dear friend, I knew you had all angles covered
Thanks a lot for the late fenders pics As for the mine clearing attachement points I have yet to find suitable pictures as well. I got pretty good one without era blocks but I`m waitting to find some clear and close pics. so I did not assess this matter as of now.
This is getting very interesting.
Phil.
Raul, my dear friend, I knew you had all angles covered
Thanks a lot for the late fenders pics As for the mine clearing attachement points I have yet to find suitable pictures as well. I got pretty good one without era blocks but I`m waitting to find some clear and close pics. so I did not assess this matter as of now.
This is getting very interesting.
Phil.
Ronin91
Belgrade, Serbia & Montenegro
Joined: October 10, 2013
KitMaker: 4 posts
Armorama: 4 posts
Joined: October 10, 2013
KitMaker: 4 posts
Armorama: 4 posts
Posted: Thursday, October 10, 2013 - 05:13 AM UTC
Hi to all!
I'm also building Syrian T-72A, and this topic is great!
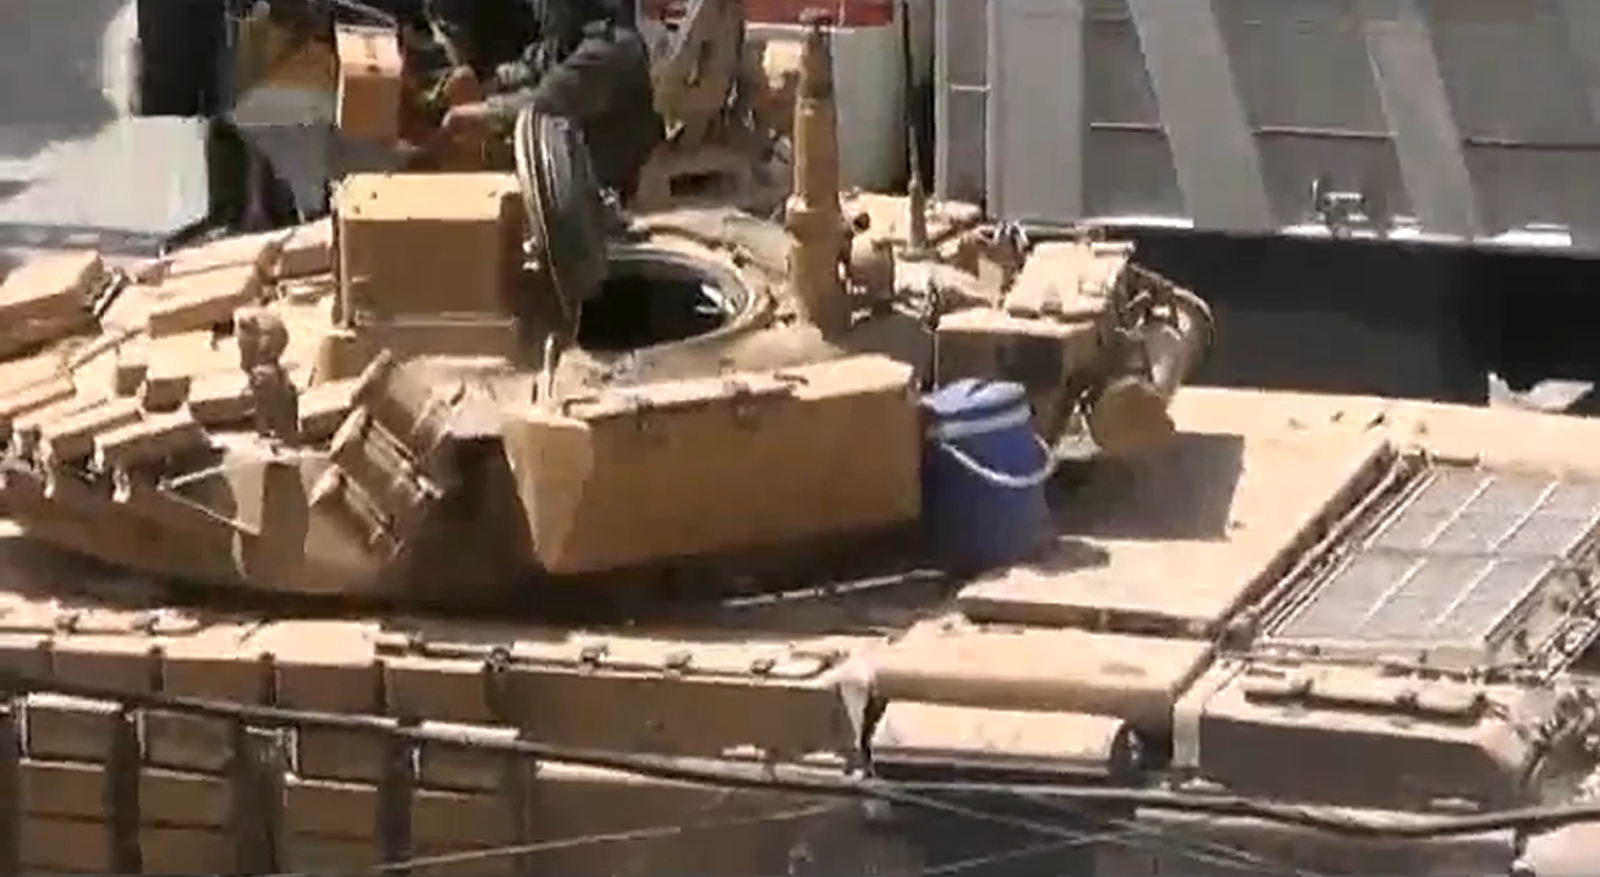
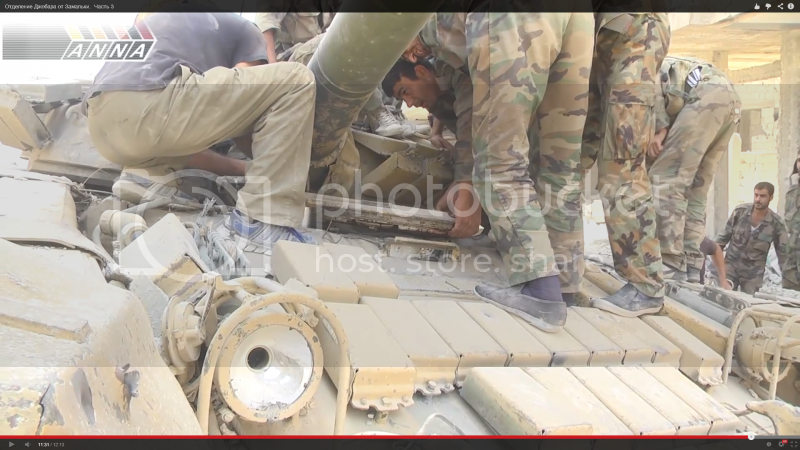
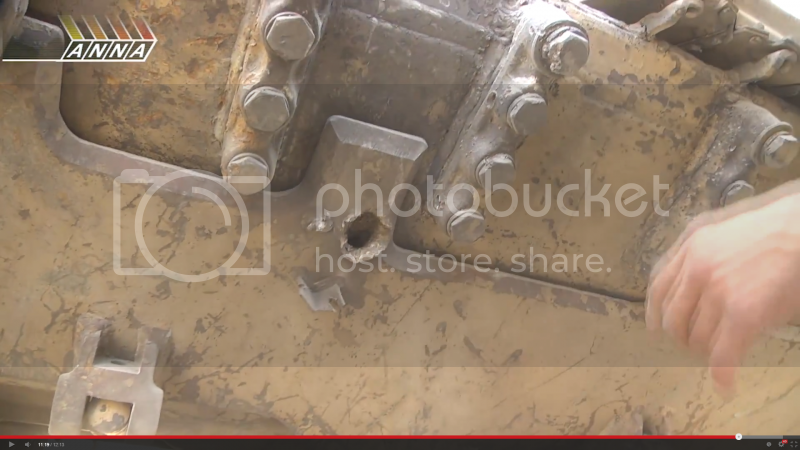
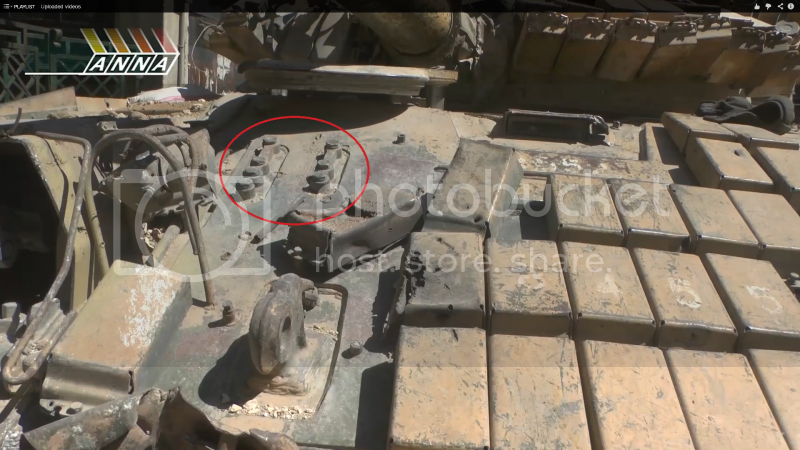
This photos are from latest ANNA video.
http://www.youtube.com/watch?v=xPB3vBpfcms
We can clearly see 8 mine cleaning attachment points and added on front plate. I think that all syrian T-72AV with 16mm front plate are upgraded early T-72A. Some early T-72A are upgraded by adding 16mm plate on glacis. There is no M1 uprgaded to AV standard in SAA.
Also this is one of the different things between M1 and A
Cheers,
Aleksa Elez
RuloMxy
District of Columbia, United States
Joined: March 05, 2009
KitMaker: 154 posts
Armorama: 137 posts
Joined: March 05, 2009
KitMaker: 154 posts
Armorama: 137 posts
Posted: Thursday, October 10, 2013 - 06:41 AM UTC
Aleksa,
Thanks a lot for the photos! It seems that I will have to buy the SP designs front hull.
Best Regards,
Raul
Thanks a lot for the photos! It seems that I will have to buy the SP designs front hull.
Best Regards,
Raul