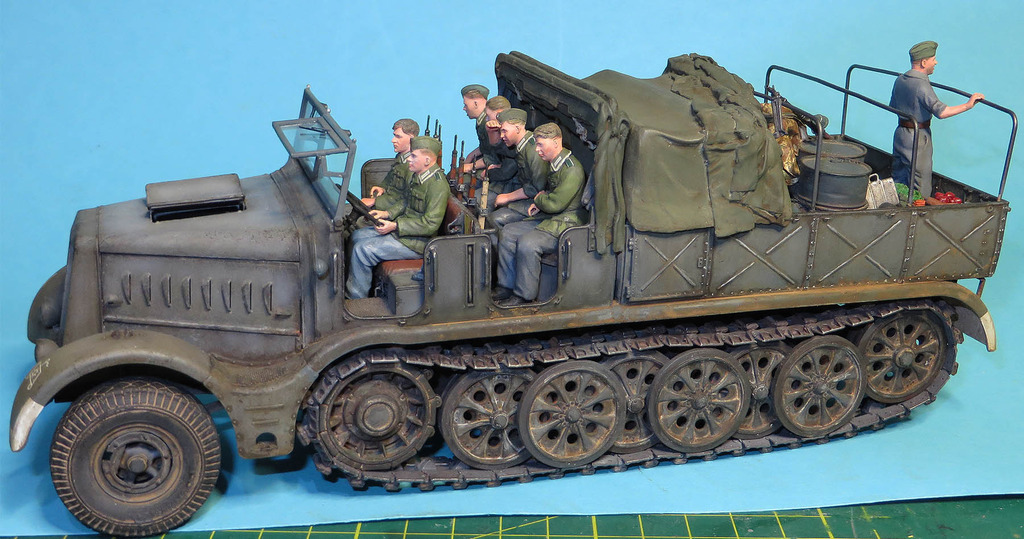
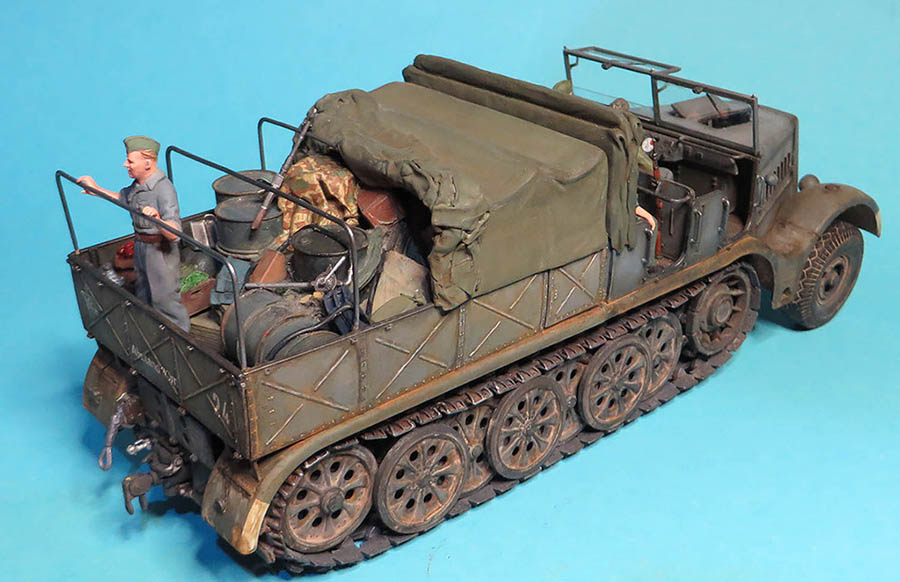
Thanks Guys,
Andrew,
I have been experimenting with the uniform colours and the plan is to give the crew a lot more attention to detail before glueing into position.
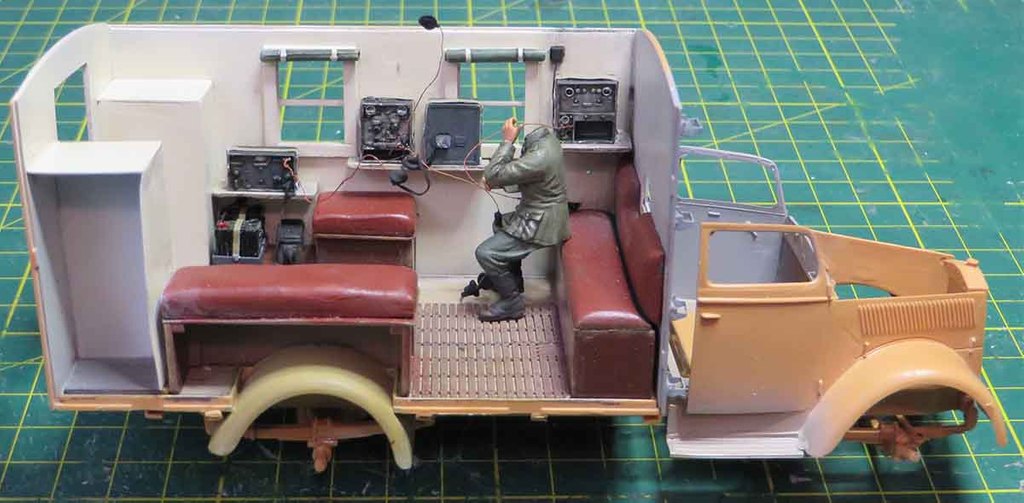
Spent more time away from the Famo over the last week and a half with some form of an attempt to clear partly finished projects.The Opel blitz radio van was tonight's session with painting the window frames. Last weekend's work was the second Miniart Harley Davidson.Ready for paint.
I'm trying to get back to the Famo....
LOL
Michael
Armor/AFV
For discussions on tanks, artillery, jeeps, etc.
Hosted by Darren Baker, Mario Matijasic
Tamiya Famo Sd Ah 116 trailer and DML Panzer
airborne1
Queensland, Australia
Joined: April 15, 2006
KitMaker: 915 posts
Armorama: 797 posts
Joined: April 15, 2006
KitMaker: 915 posts
Armorama: 797 posts
Posted: Wednesday, August 03, 2016 - 05:19 PM UTC
airborne1
Queensland, Australia
Joined: April 15, 2006
KitMaker: 915 posts
Armorama: 797 posts
Joined: April 15, 2006
KitMaker: 915 posts
Armorama: 797 posts
Posted: Saturday, August 06, 2016 - 05:48 PM UTC
So Famo is on the side at the moment so the the radio van below will be built in the same build thread.
It's a change of scenery for the time being as the famo and radio van will be built together and completed around the same time.
Window frame colour was changed after this photo, painted the same colour as interior.
Michael
It's a change of scenery for the time being as the famo and radio van will be built together and completed around the same time.
Window frame colour was changed after this photo, painted the same colour as interior.
Michael
airborne1
Queensland, Australia
Joined: April 15, 2006
KitMaker: 915 posts
Armorama: 797 posts
Joined: April 15, 2006
KitMaker: 915 posts
Armorama: 797 posts
Posted: Friday, August 19, 2016 - 03:32 AM UTC
Hello again,
Work on famo, limited
interim project, Radio Van has my attention.Sorry FAMO
Intention was to have a Mantis Miniature bulldog sitting in front seat of the Famo.
It was going to be a tight squeeze with the dog and the 3 guys in the front.
Option 2 bulldog will now sit on floor in Radio Van.
Will have to look for a smaller mutt to fit in the famo.
Really smashing the work on the radio van.Will be back to famo shortly.
Next update will be on the Famo.
Michael
airborne1
Queensland, Australia
Joined: April 15, 2006
KitMaker: 915 posts
Armorama: 797 posts
Joined: April 15, 2006
KitMaker: 915 posts
Armorama: 797 posts
Posted: Saturday, September 03, 2016 - 09:57 AM UTC
Hello again,
Here is the next stage of applying the primer on the panzer 3 with Mig Ammo primer along with the other current WIP. Opel radio van stowage , tyres and radio operator head.
I found the radio wires and smaller components that go with the radio's very tedious but well worth the effort.
Michael
Here is the next stage of applying the primer on the panzer 3 with Mig Ammo primer along with the other current WIP. Opel radio van stowage , tyres and radio operator head.
I found the radio wires and smaller components that go with the radio's very tedious but well worth the effort.
Michael
Thirian24
Oklahoma, United States
Joined: September 30, 2015
KitMaker: 2,493 posts
Armorama: 2,344 posts
Joined: September 30, 2015
KitMaker: 2,493 posts
Armorama: 2,344 posts
Posted: Saturday, September 03, 2016 - 02:42 PM UTC
Incredible work.
Cheers
Cheers
airborne1
Queensland, Australia
Joined: April 15, 2006
KitMaker: 915 posts
Armorama: 797 posts
Joined: April 15, 2006
KitMaker: 915 posts
Armorama: 797 posts
Posted: Sunday, September 04, 2016 - 12:08 PM UTC
Thanks Dustin,
Will attempt to ramp up the images in the next few weeks and get this Panzer 3 and famo finished.
Michael
Will attempt to ramp up the images in the next few weeks and get this Panzer 3 and famo finished.
Michael
guni-kid
Nordrhein-Westfalen, Germany
Joined: July 21, 2007
KitMaker: 521 posts
Armorama: 514 posts
Joined: July 21, 2007
KitMaker: 521 posts
Armorama: 514 posts
Posted: Sunday, September 04, 2016 - 03:08 PM UTC
Wow, that's a really nice build! I'm happy to have seen it, since I'm planning on starting the FAMO with trailer, loaded tank and ARV sometime soon. Thanks for the inspiration and bringing up the standard as you did! I like it a lot!
One questions comes, when looking at your radio setup: where do you have the headphones from? Did they come with the radio, are they some other AM product or did you just scratch them? If the latter: how did you do it? I'm still on the hunt for a pair of modern US headphones, but can't find any...
Cheers and keep on the excellent work!
airborne1
Queensland, Australia
Joined: April 15, 2006
KitMaker: 915 posts
Armorama: 797 posts
Joined: April 15, 2006
KitMaker: 915 posts
Armorama: 797 posts
Posted: Tuesday, September 06, 2016 - 04:58 PM UTC
Thanks Marian,
Apologies for the late reply.
The radios are all supplied in the Verlinden upgrade set(1571) for the opel Blitz Radio van.The upgrade set has 3 head sets of resin earphones.
The backup head sets I picked up from Royal models (217)
They include the hand and throat microphones.This upgrade set is very detailed.Ideal for upgrading your panzer crewman
Once again thanks for your inspiring words.
It drives me to move further into the build
Michael
airborne1
Queensland, Australia
Joined: April 15, 2006
KitMaker: 915 posts
Armorama: 797 posts
Joined: April 15, 2006
KitMaker: 915 posts
Armorama: 797 posts
Posted: Saturday, September 17, 2016 - 12:01 PM UTC
Hello,
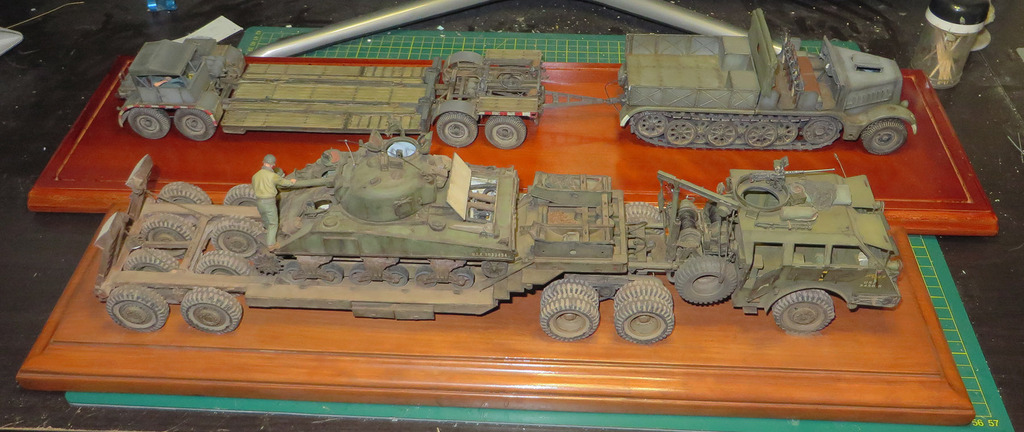
Next update with the famo and trailer.
I have been delaying this particular job off for a long time because it required a little more patience to do it right.
Holes have been drilled to allow pins be be glued to hold the famo and trailer in place on the display base.
The inner wheels on the trailer have a hole drilled in each resin tyre with the Famo front wheels also drilled to accomodate pins to help reduce any movement of the model.
It's not much but it will help keep it all together.
It was at this stage I wanted to check the size comparison of the Famo and trailer compaired against the M26 built back in 02 and as you can see the Famo is one hell of a huge beast.
Whilst doing that I have also been working on the 2 tankers which will be sitting on the panzer 3.
They are the kit figures which will have the heads changed out with hornet heads.
Both figures have been base coated in Humbrol Matt black with Vellajo acrylics highlight over the top of the matt black .Still working on the tankers, they need a coat of flat clear to reduce the shine and there will be uniform markings to go on both of them.
Michael
airborne1
Queensland, Australia
Joined: April 15, 2006
KitMaker: 915 posts
Armorama: 797 posts
Joined: April 15, 2006
KitMaker: 915 posts
Armorama: 797 posts
Posted: Sunday, October 02, 2016 - 08:55 AM UTC
Hello Again,
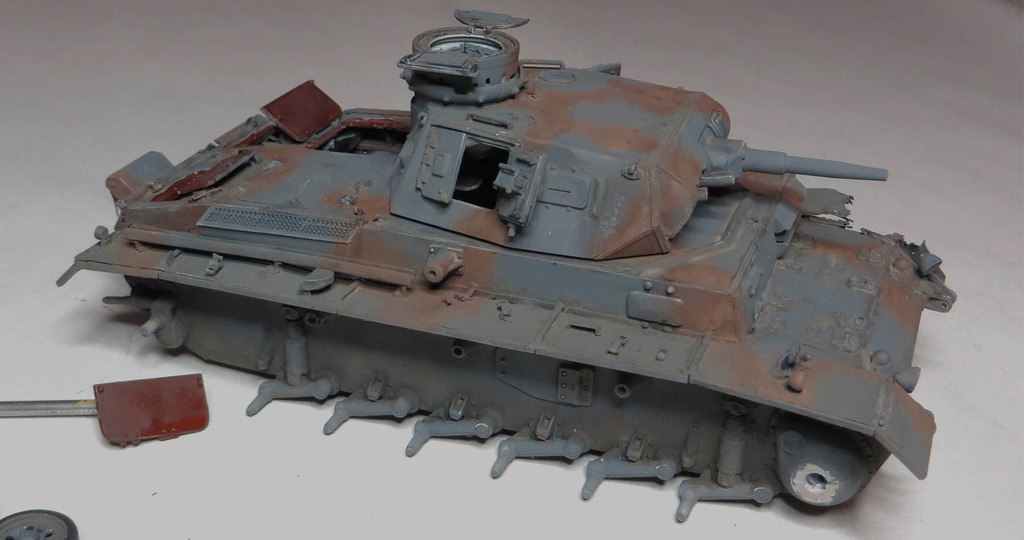
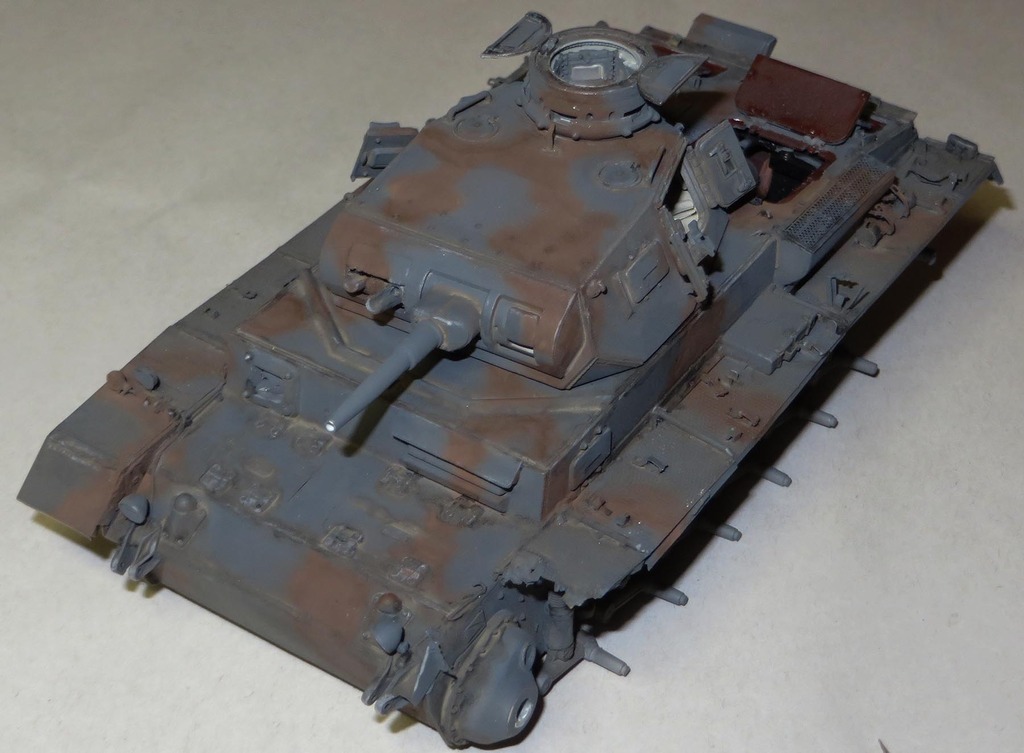
Today we have the early stage of having the grey and brown colours painted on the panzer 3
I chose Humbrol colours for the tank. The trailer and tractor had been painted in Ammo acrylics and I need to break up the grey to show variation between the tractor manufacturer and the panzer manufacturer.
The Panzer 3's rolled through France pretty quickly and the interpretation was to make the grey and brown look a little sun bleached.(faded grey)
It is early stages as there is a tone of work to do and this is the early stage at present.
Mecsweden
Västra Götaland, Sweden
Joined: January 24, 2016
KitMaker: 137 posts
Armorama: 136 posts
Joined: January 24, 2016
KitMaker: 137 posts
Armorama: 136 posts
Posted: Friday, October 07, 2016 - 12:41 PM UTC
Totaly awsome build , i realise that i am a real noob against you guys
Posted: Friday, October 07, 2016 - 04:33 PM UTC
Excellent work on the SdKfz.9 and trailer and figures so far. I'm bookmarking this for when I get around to my build.
ryally
New South Wales, Australia
Joined: July 29, 2005
KitMaker: 879 posts
Armorama: 330 posts
Joined: July 29, 2005
KitMaker: 879 posts
Armorama: 330 posts
Posted: Friday, October 07, 2016 - 06:27 PM UTC
Your doing a great job on this, nice base as well
airborne1
Queensland, Australia
Joined: April 15, 2006
KitMaker: 915 posts
Armorama: 797 posts
Joined: April 15, 2006
KitMaker: 915 posts
Armorama: 797 posts
Posted: Friday, October 07, 2016 - 06:49 PM UTC
Thanks Guys,
Your words are my inspiration to move forward on this project and they are very much appreciated.
Here is the work progress of where I am now.
There was a number of washes and pigments placed around the Tank using Mig Ammo Damp Earth thinned down with the Ammo thinner used in a combination with a mixed airfield dust pigment and thinner applied with a thin brush on the lower hull.
The upper hull was given a coat of the Ammo damp earth and thinned with Ammo Thinner then applied with a wide flat brush.
The upper part of the hull raised surfaces had the Ammo Dunklegrau High Lights and a mix of Ammo grey to bring out the raised sections.
Vellajo acrylic leather was painted on the commanders hatch and the side visors also received a touch of the same colour for the forehead pads.
Mig ammo steel was painted around various edges where the crew would access getting in and out of the tank.
The tyres had been painted in the Ammo Rubber and tire colour. This colour gives a presentation of worn rubber and it's about time someone released this paint. :good
The track received a coat of Humbrol Matt 29 with a coat of Flat clear.
I then used the Ammo track wash for the external side of the track to give a depth appearance of the track.
The track then received a coat of Humbrol Metal buff 27003 on both the inside and outside of the track to give a the track a worn appearance of travelling all those miles.
There are still a lot of areas around the tank that need rectifying with missing parts.
I hope you like where I am at present as there is a bucket load of work to be completed before mounting onto the trailer.
Michael
Your words are my inspiration to move forward on this project and they are very much appreciated.
Here is the work progress of where I am now.
There was a number of washes and pigments placed around the Tank using Mig Ammo Damp Earth thinned down with the Ammo thinner used in a combination with a mixed airfield dust pigment and thinner applied with a thin brush on the lower hull.
The upper hull was given a coat of the Ammo damp earth and thinned with Ammo Thinner then applied with a wide flat brush.
The upper part of the hull raised surfaces had the Ammo Dunklegrau High Lights and a mix of Ammo grey to bring out the raised sections.
Vellajo acrylic leather was painted on the commanders hatch and the side visors also received a touch of the same colour for the forehead pads.
Mig ammo steel was painted around various edges where the crew would access getting in and out of the tank.
The tyres had been painted in the Ammo Rubber and tire colour. This colour gives a presentation of worn rubber and it's about time someone released this paint. :good
The track received a coat of Humbrol Matt 29 with a coat of Flat clear.
I then used the Ammo track wash for the external side of the track to give a depth appearance of the track.
The track then received a coat of Humbrol Metal buff 27003 on both the inside and outside of the track to give a the track a worn appearance of travelling all those miles.
There are still a lot of areas around the tank that need rectifying with missing parts.
I hope you like where I am at present as there is a bucket load of work to be completed before mounting onto the trailer.
Michael
airborne1
Queensland, Australia
Joined: April 15, 2006
KitMaker: 915 posts
Armorama: 797 posts
Joined: April 15, 2006
KitMaker: 915 posts
Armorama: 797 posts
Posted: Saturday, October 08, 2016 - 05:28 AM UTC
Hello again,
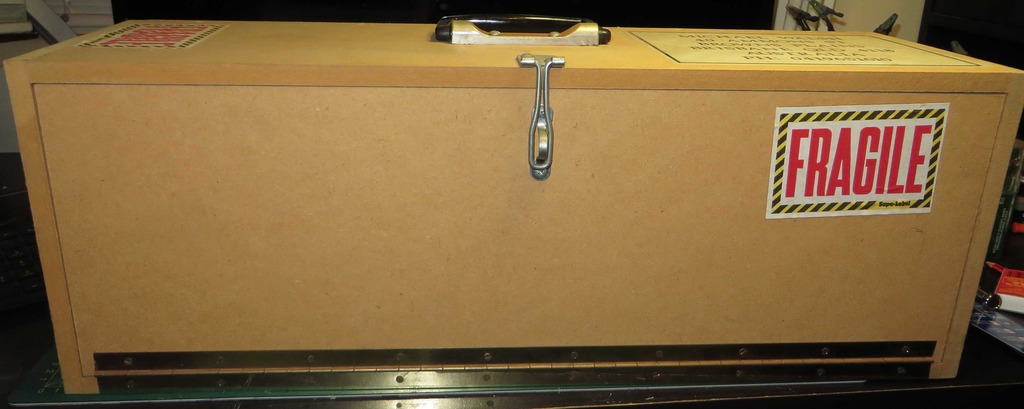
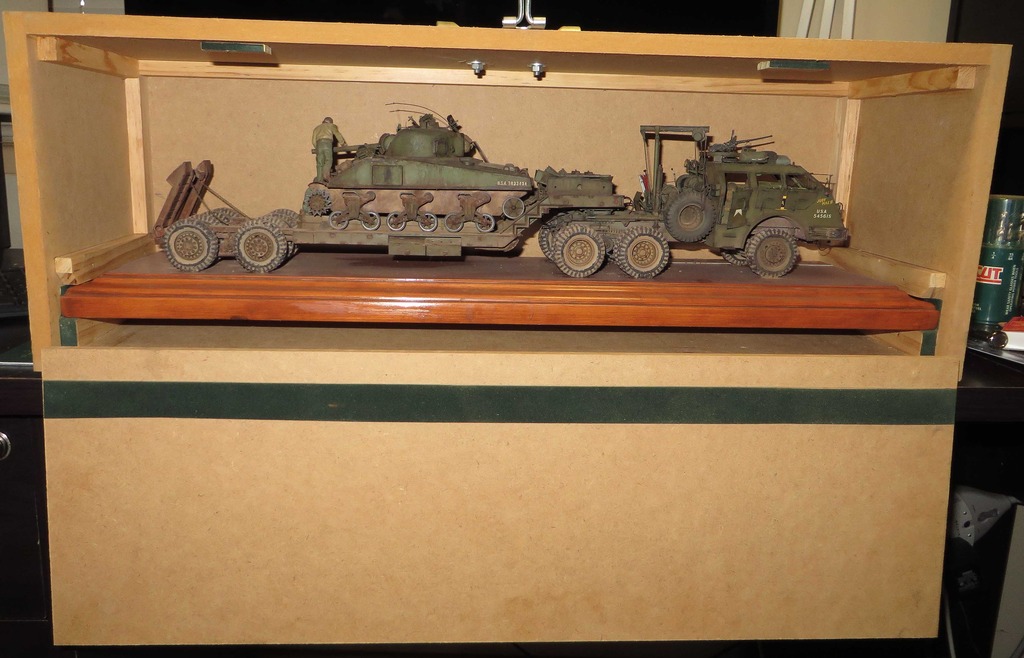
I do intend to Travel with the Famo and trailer overseas possibly to Euro, SMC or Moson depending on how the finances are sitting in the next 12 months and I would really enjoy catching up with you to show the workmanship up close and personal.
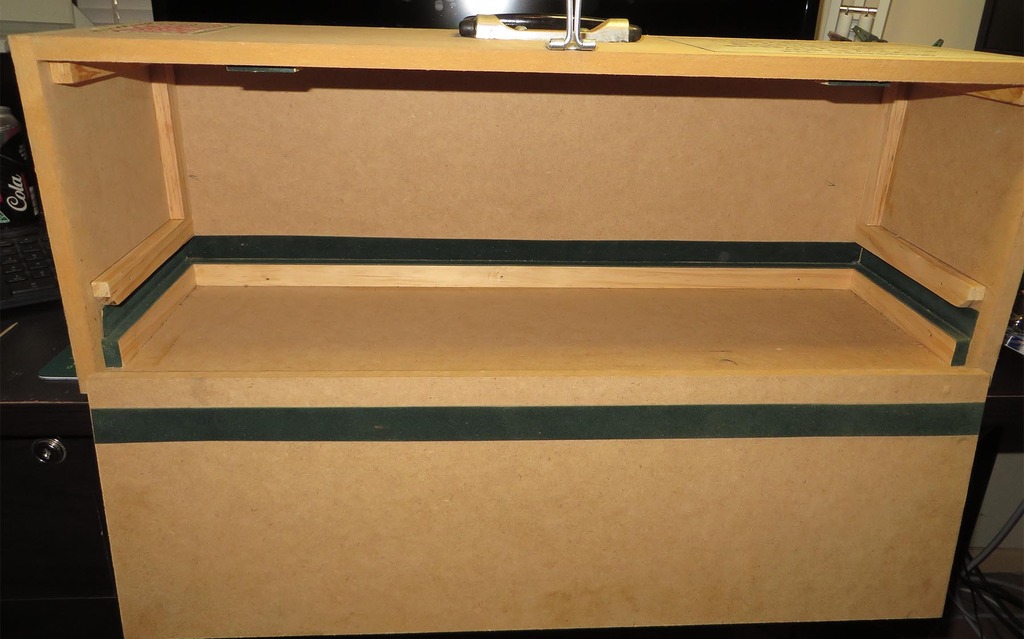
There will be a transport box made up specifically to hold the Famo and trailer in place for the journey.Similar to the box for the M26 Dragon Wagon that travelled to Euro Militaire back in 2002.
Here is the design below that will be used in the same format to hold and transport the Famo.
The design is to have any movement to be absorbed at the edge of the base.
Michael
Silantra
Putrajaya, Malaysia
Joined: March 04, 2004
KitMaker: 2,511 posts
Armorama: 913 posts
Joined: March 04, 2004
KitMaker: 2,511 posts
Armorama: 913 posts
Posted: Saturday, October 08, 2016 - 08:59 AM UTC
Wow...
What a marvelous work .. u are really a master ..
I like everthing including your nicely organised work area..
I wish i have the skill to start mine..
Did u make the wooden travelling case yourself..??
Been wondering my self on air transport finished model...
Sil
What a marvelous work .. u are really a master ..
I like everthing including your nicely organised work area..
I wish i have the skill to start mine..
Did u make the wooden travelling case yourself..??
Been wondering my self on air transport finished model...
Sil
airborne1
Queensland, Australia
Joined: April 15, 2006
KitMaker: 915 posts
Armorama: 797 posts
Joined: April 15, 2006
KitMaker: 915 posts
Armorama: 797 posts
Posted: Saturday, October 08, 2016 - 03:46 PM UTC
Thanks Sil,
The box was made by a cabinetry place down the road from where I worked. It was made out of MDF board to reduce weight.
I just gave them the board and the internal height clearance and they did the rest.
Took the model on in hand luggage to the UK and back.
The M26 had been fixed to the base arriving home safely in 1 piece.
Michael
airborne1
Queensland, Australia
Joined: April 15, 2006
KitMaker: 915 posts
Armorama: 797 posts
Joined: April 15, 2006
KitMaker: 915 posts
Armorama: 797 posts
Posted: Sunday, October 09, 2016 - 08:29 AM UTC
My apologies Sil,
Looking at you comment again I just want to say I am no master modeller just a person who likes plastic modelling.
There are a large number of people in the hobby way better than me.
Cheers
Michael
Looking at you comment again I just want to say I am no master modeller just a person who likes plastic modelling.
There are a large number of people in the hobby way better than me.
Cheers
Michael
airborne1
Queensland, Australia
Joined: April 15, 2006
KitMaker: 915 posts
Armorama: 797 posts
Joined: April 15, 2006
KitMaker: 915 posts
Armorama: 797 posts
Posted: Saturday, October 15, 2016 - 10:13 AM UTC
Hello Again,
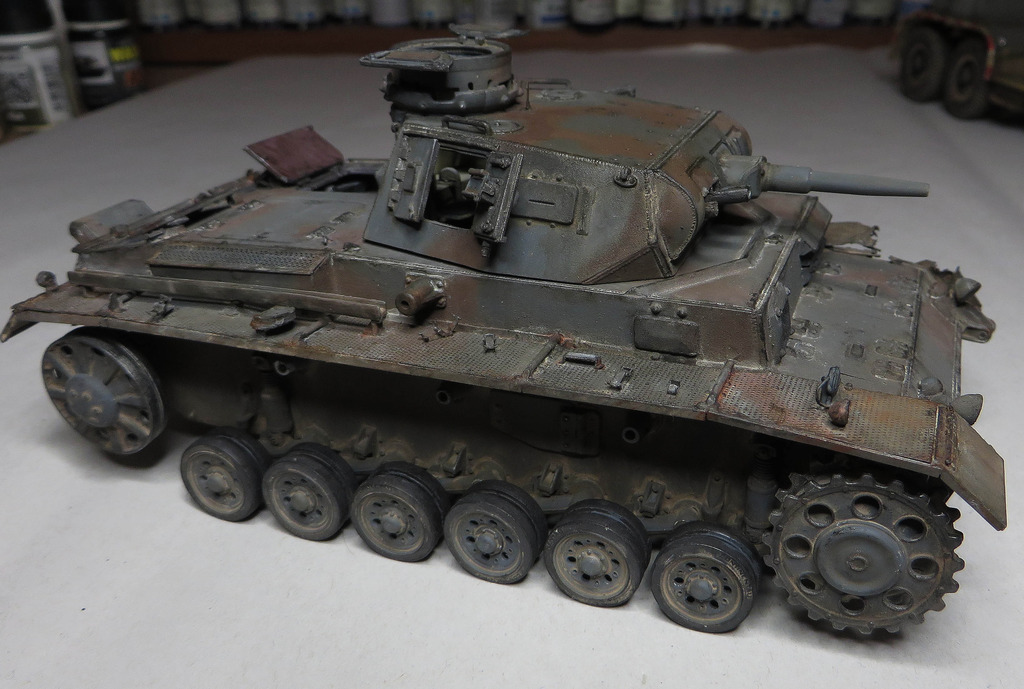
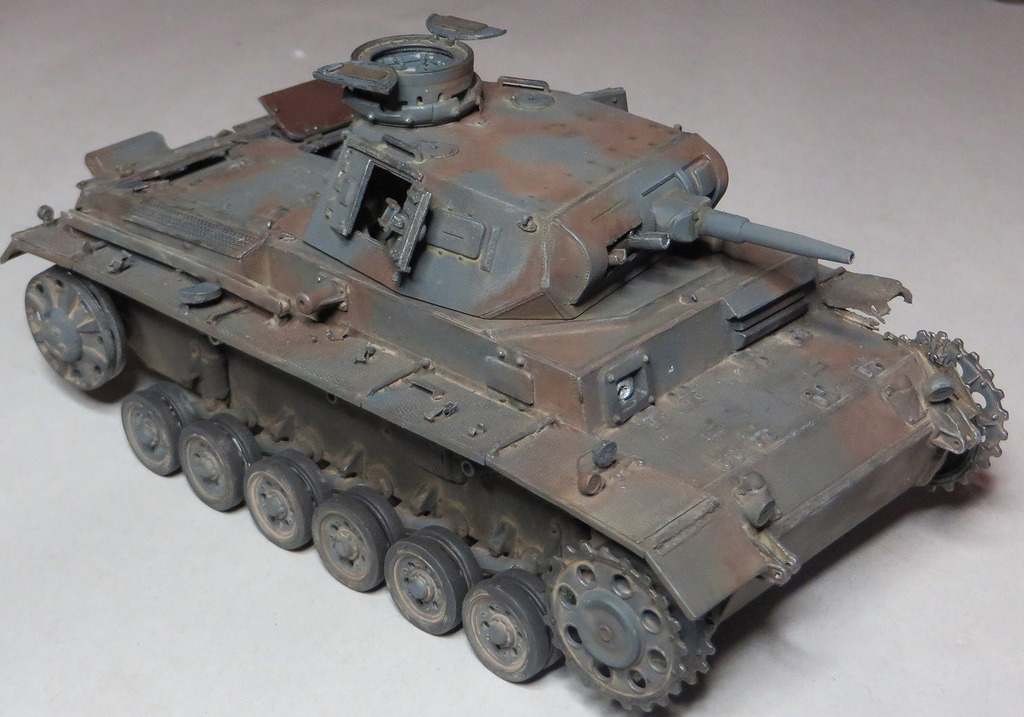
More weathering done to the Panzer 3 with chipping and washes.
Awaiting the numbered decals from Archer at present so it will remain in pieces for ease of handling.
There will be a little more work to finalize with the weathering, then the decals will be applied.
Michael
More weathering done to the Panzer 3 with chipping and washes.
Awaiting the numbered decals from Archer at present so it will remain in pieces for ease of handling.
There will be a little more work to finalize with the weathering, then the decals will be applied.
Michael
airborne1
Queensland, Australia
Joined: April 15, 2006
KitMaker: 915 posts
Armorama: 797 posts
Joined: April 15, 2006
KitMaker: 915 posts
Armorama: 797 posts
Posted: Saturday, November 26, 2016 - 10:07 AM UTC
Hello,
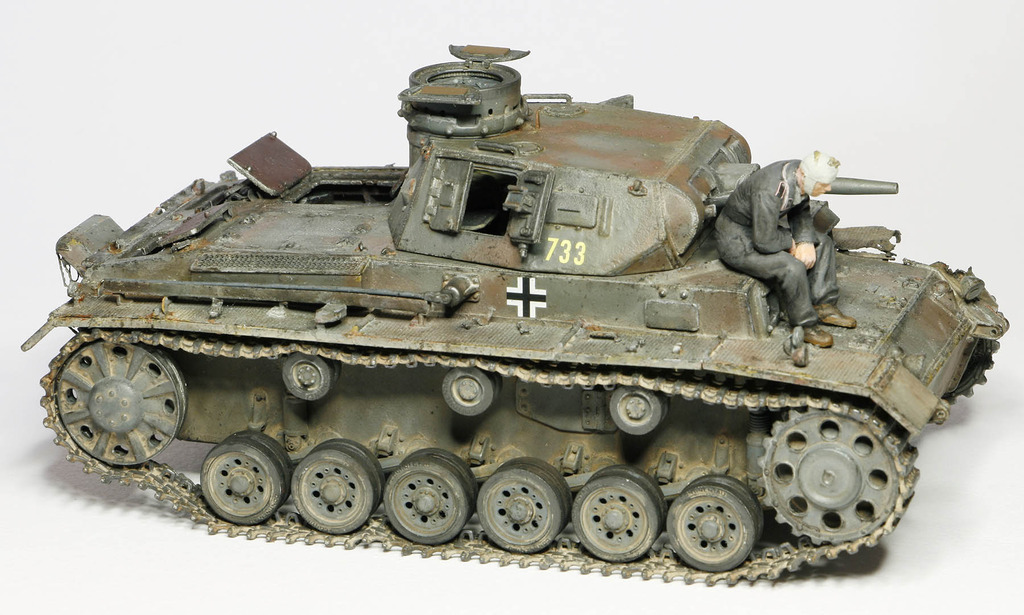
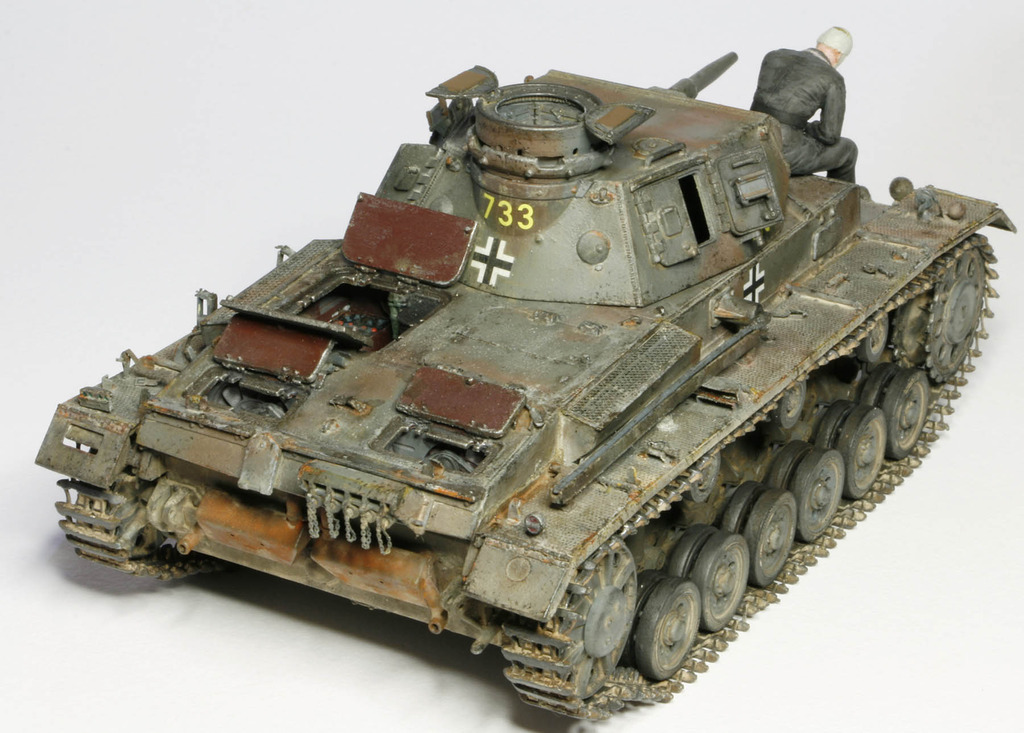
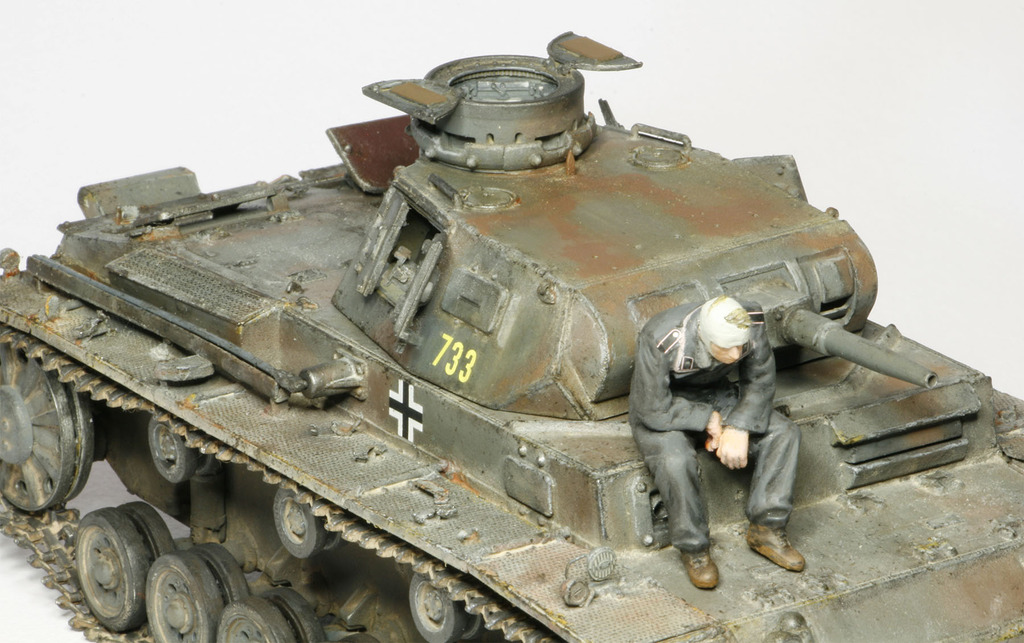
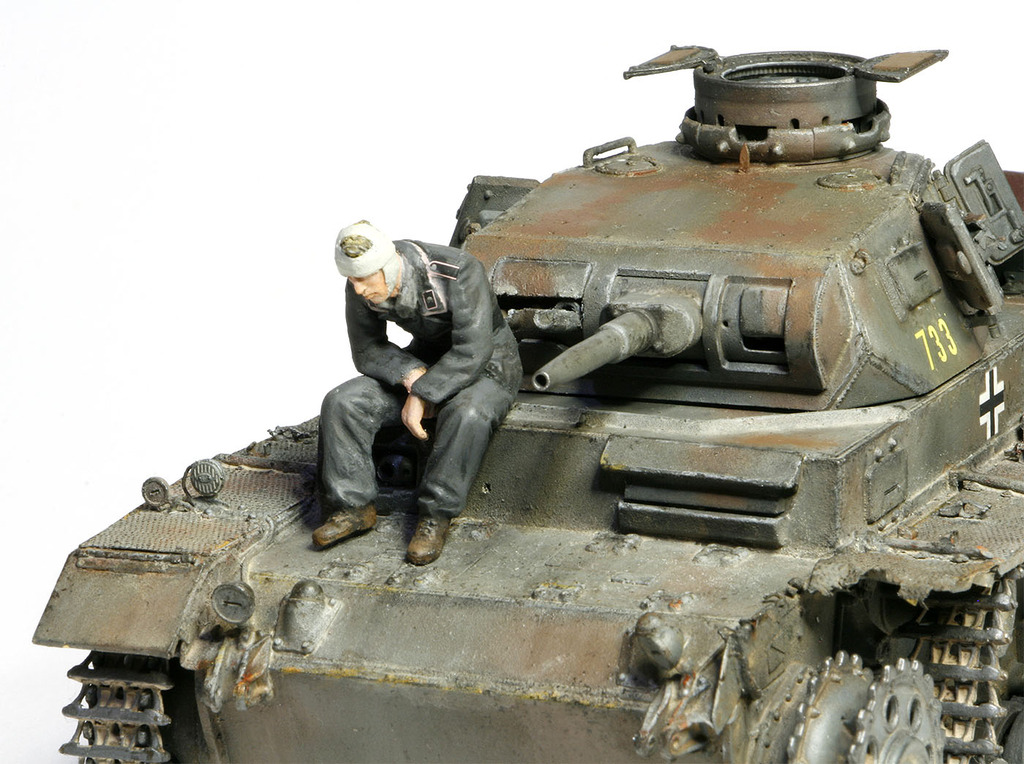
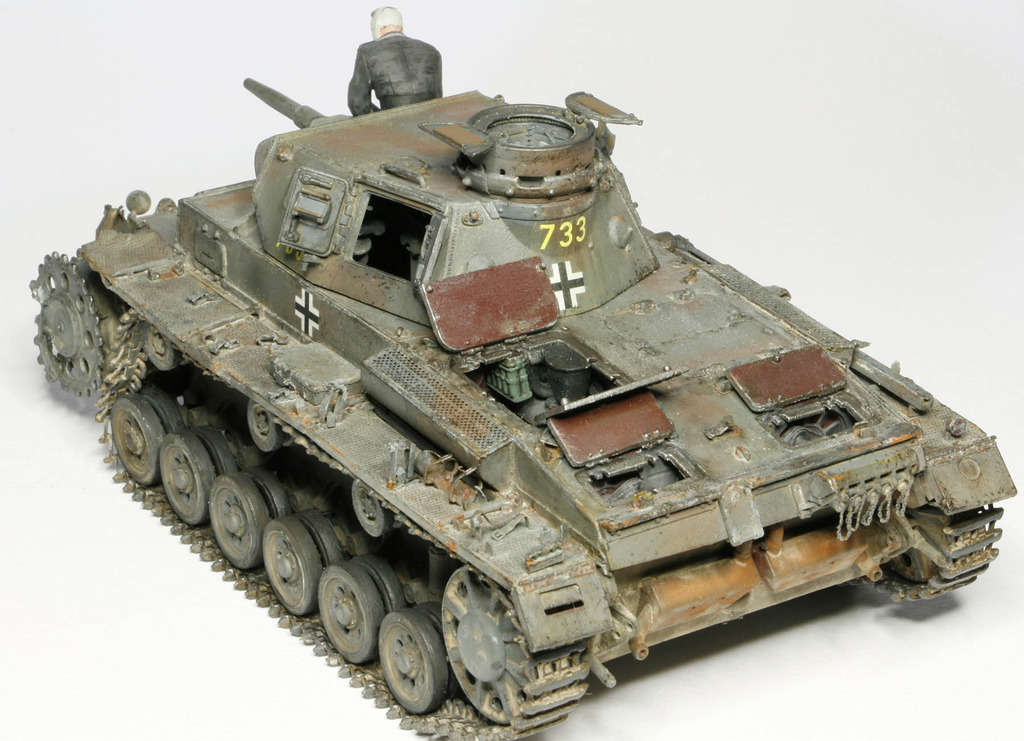
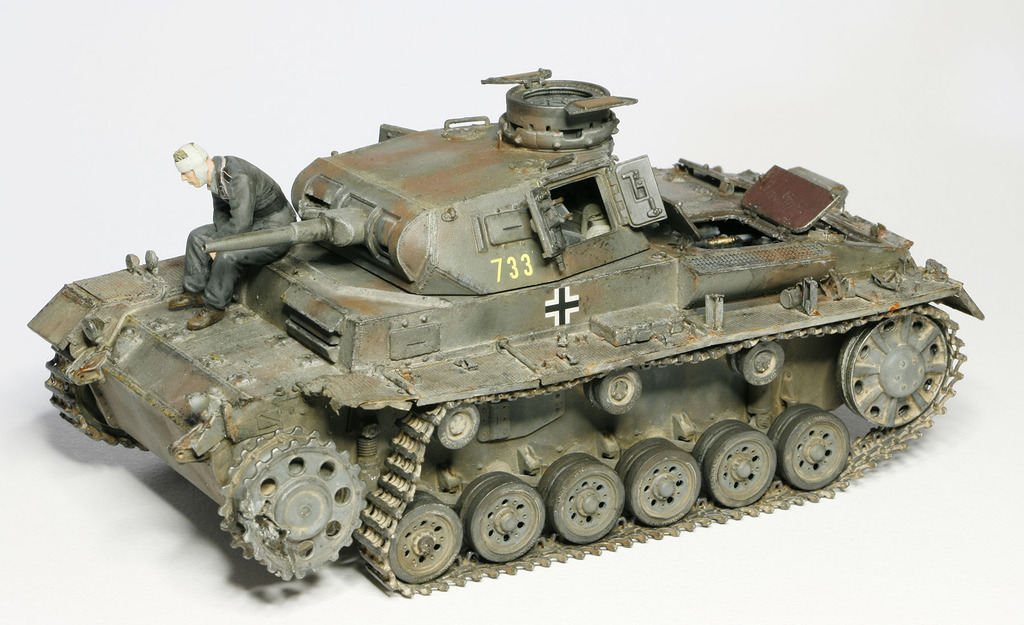
Here is the semi completed Dragon Panzer 3.After taking the photo's there is still some small tidy detail work to be done.
The model has been under construction for some 2+ years something and I look forward to finishing the panzer.
The model was painted in Humbrol colours Matt 27 Grey , Matt 160 Track colour mixed with Matt 29 Earth to break down the reddish colour.
The colours chosen for the Panzer had been done to break up the variation from the Famo and trailer being painted in Mig acrylics.
The figure is from the Famo and trailer kit with a hornet head change and the epauletts and collar tabs are provided by Tamiya decal sheet.
The vehicle numbers come from Archer with the Balkencruz supplied from the kit.
If there is anything I have overlooked I am happy with suggestions.
Thanks
Michael
airborne1
Queensland, Australia
Joined: April 15, 2006
KitMaker: 915 posts
Armorama: 797 posts
Joined: April 15, 2006
KitMaker: 915 posts
Armorama: 797 posts
Posted: Friday, December 23, 2016 - 05:01 PM UTC
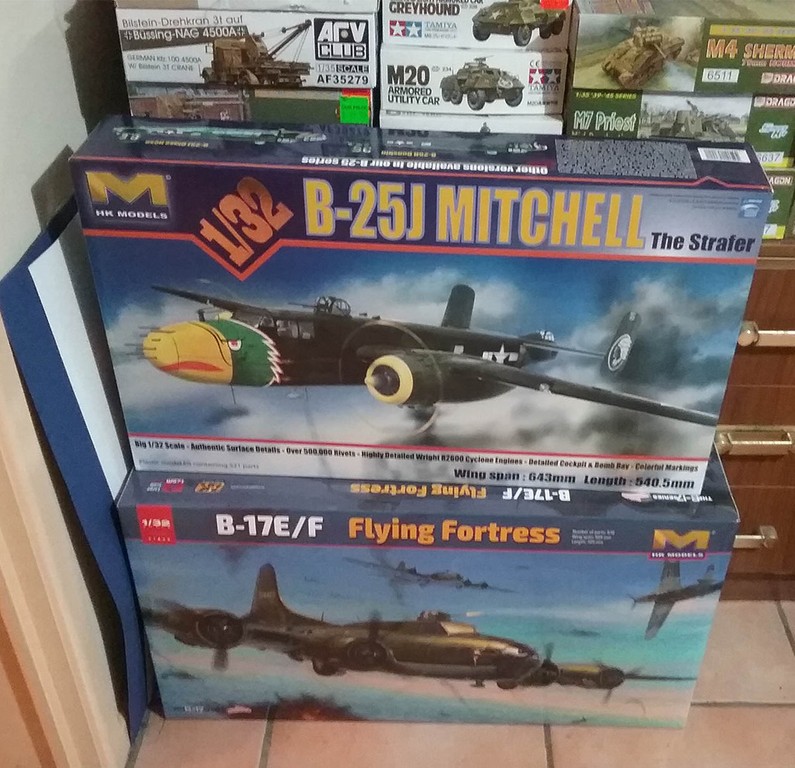
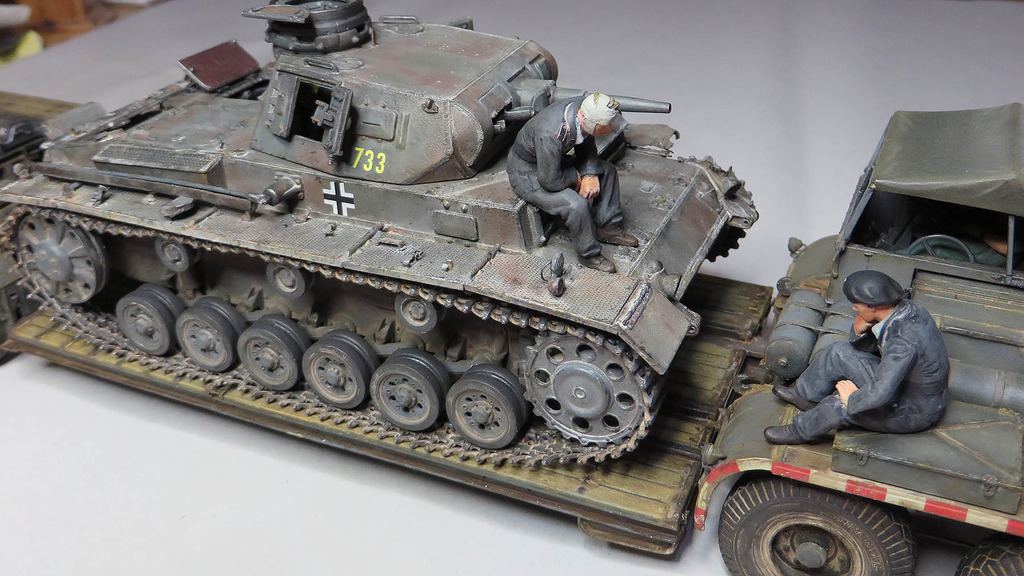
Ok next installment of work,slightly distracted with 1/32 aircraft and the HK models dwarf the Famo.
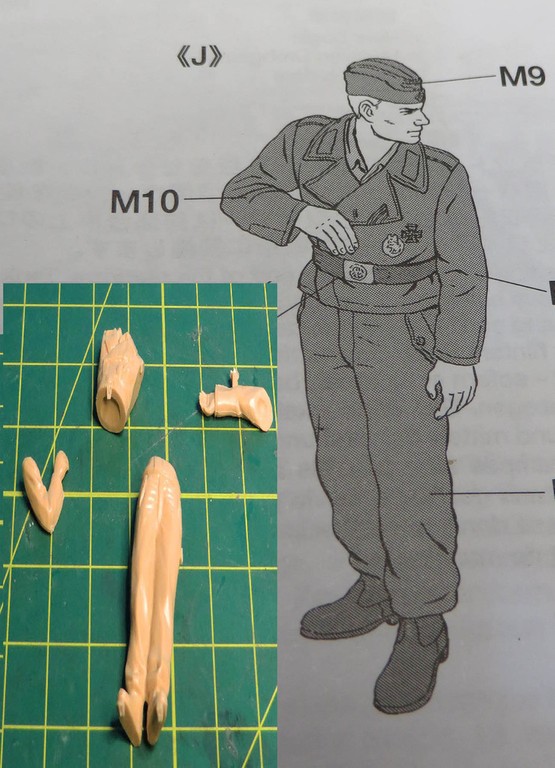
Currently working on the second tanker that will be sitting on the rear of the trailer deck. The tanker has been painted with Vallejo paints with the Humbrol pink used for his face and hands as a base colour for the oil paints.
Still Work in progress with more updated images to follow shortly.
The last figure will be the commander at the front looking back.There is a lot of seem work clean up before glueing together.
More work to follow over the Christmas Break.
Michael
easyco69
Ontario, Canada
Joined: November 03, 2012
KitMaker: 2,275 posts
Armorama: 2,233 posts
Joined: November 03, 2012
KitMaker: 2,275 posts
Armorama: 2,233 posts
Posted: Friday, December 23, 2016 - 05:22 PM UTC
Great painting & detail work!
airborne1
Queensland, Australia
Joined: April 15, 2006
KitMaker: 915 posts
Armorama: 797 posts
Joined: April 15, 2006
KitMaker: 915 posts
Armorama: 797 posts
Posted: Saturday, December 24, 2016 - 05:27 AM UTC
Thanks David,
The close up photo's give an impression that there is more detail work to clean off the Tanker figure. Like, little specs on the figures uniform and hands.
Rest assured the piping and emblems still to go on.The head is not glued in place yet but it is held with blu tac .
Michael
The close up photo's give an impression that there is more detail work to clean off the Tanker figure. Like, little specs on the figures uniform and hands.
Rest assured the piping and emblems still to go on.The head is not glued in place yet but it is held with blu tac .
Michael
airborne1
Queensland, Australia
Joined: April 15, 2006
KitMaker: 915 posts
Armorama: 797 posts
Joined: April 15, 2006
KitMaker: 915 posts
Armorama: 797 posts
Posted: Saturday, December 31, 2016 - 09:13 AM UTC
airborne1
Queensland, Australia
Joined: April 15, 2006
KitMaker: 915 posts
Armorama: 797 posts
Joined: April 15, 2006
KitMaker: 915 posts
Armorama: 797 posts
Posted: Saturday, February 11, 2017 - 06:06 PM UTC
Hi,
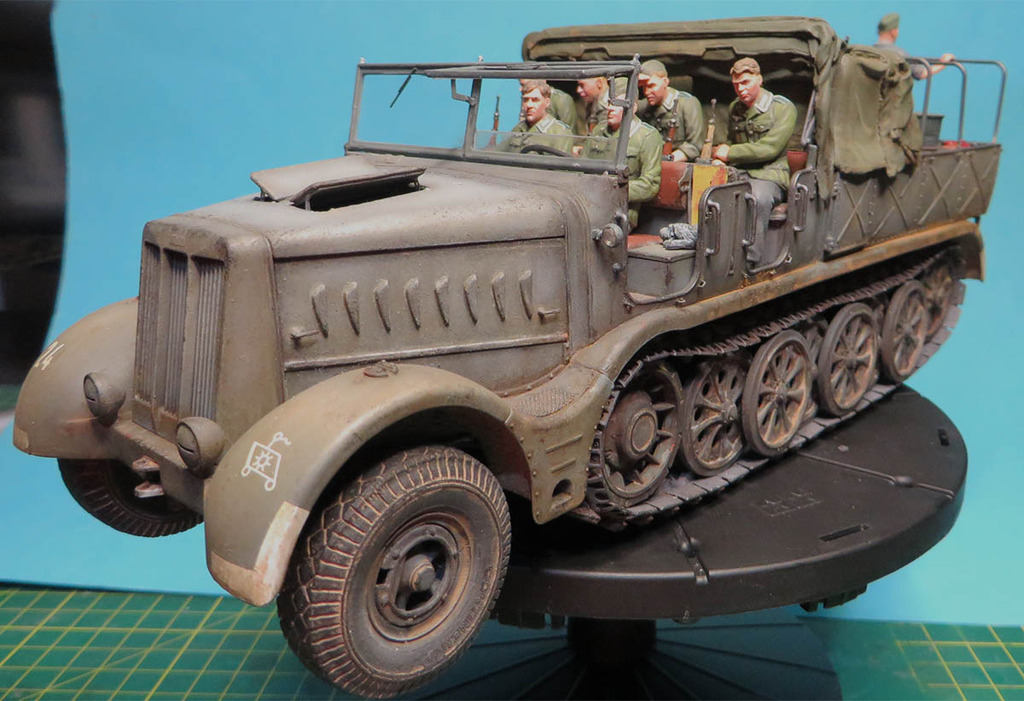
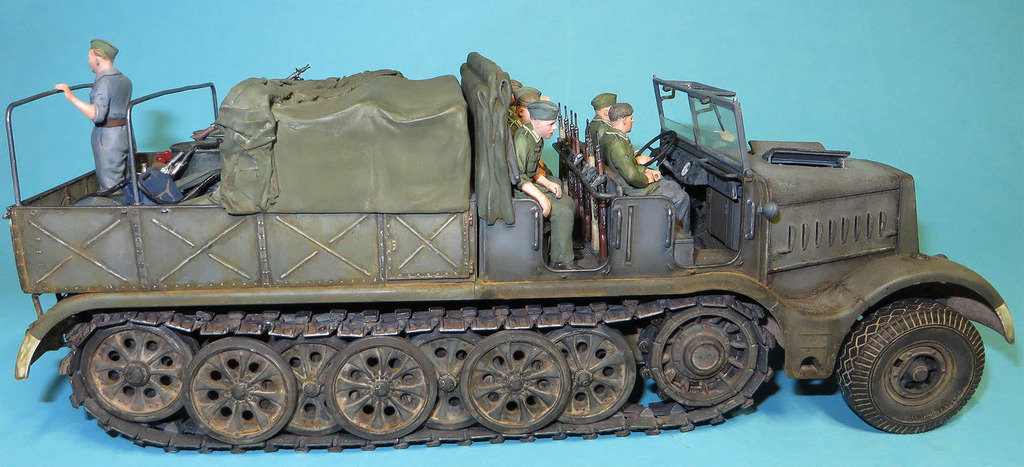
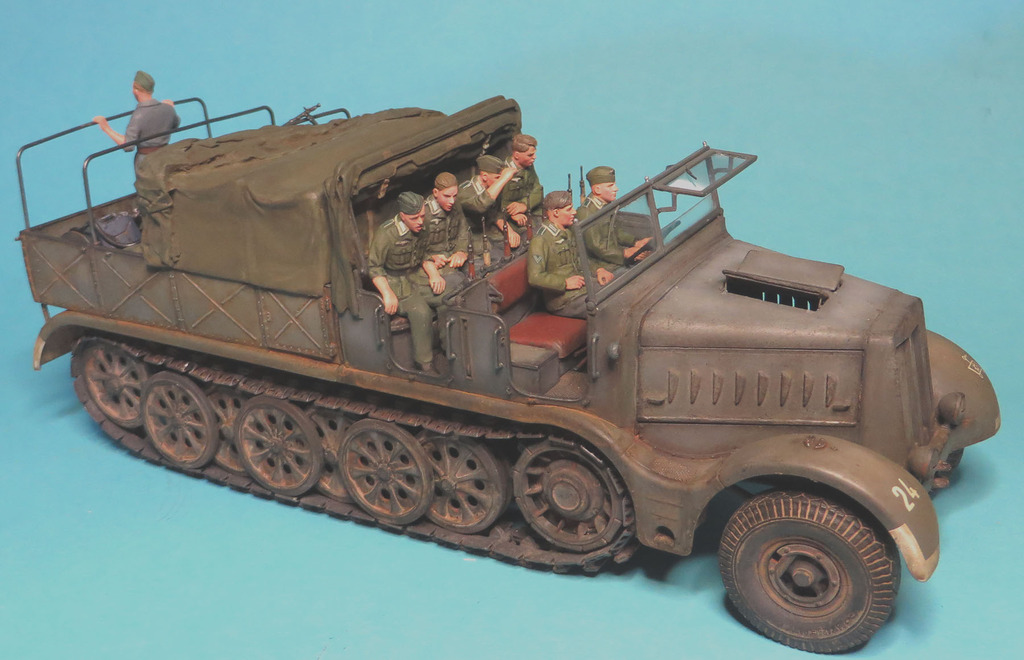
Been awhile since last posting and back again with a small update to the Sdkz9 Famo tractor. It's 95% done with the addition of adding the clearance markers on the fenders and the latch's on the tail gate. More detail work to be done around all of the Tractor.
The windscreen has been proved by far the hardest to get together in the whole build.I shaved off the windscreen wipers and used aber wipers with Edward latch's on the front windscreen.Way easier to work with than Abers's multiple hinge parts.
Till next time, happy modelling
Michael