'Lost Horizon' Diorama (update)
Colorado, United States
Joined: February 24, 2014
KitMaker: 3,033 posts
Armorama: 2,492 posts
Posted: Thursday, June 19, 2014 - 05:28 PM UTC
Wien, Austria
Joined: May 20, 2011
KitMaker: 1,744 posts
Armorama: 1,727 posts
Posted: Friday, June 20, 2014 - 06:49 AM UTC
Great job regarding the details!!
Are you going to tone down the colour of the vehicles??
I'm asking because the RAL code colours for DAK vehicles were darker!
http://www.dkw-nz.net/cms/upload/img_pdf_downloads/colour%20schemes-d.pdf Cheers
Romain
un pour tous et tous pour un!
Colorado, United States
Joined: February 24, 2014
KitMaker: 3,033 posts
Armorama: 2,492 posts
Posted: Friday, June 20, 2014 - 07:16 AM UTC
Quoted Text
Are you going to tone down the colour of the vehicles??
I'm asking because the RAL code colours for DAK vehicles were darker!
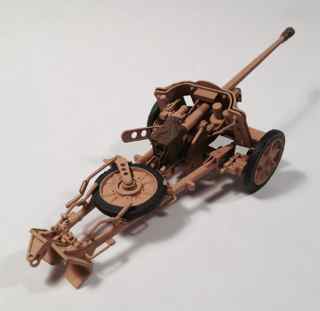
Definitely. What you're looking at (above) is Vallejo Desert Tan Base Primer (73.613). The base color will be Vallejo Desert Yellow (70.977).
I'm moving along very slowly, so the vehicles have been in the primer state and the figures in the shiny state for what seems like forever!
Here's the Pak 38 with base color painted (below). Is this color okay??? Now I'm sweating!!!
Thanks,
—mike
Wien, Austria
Joined: May 20, 2011
KitMaker: 1,744 posts
Armorama: 1,727 posts
Posted: Friday, June 20, 2014 - 07:27 PM UTC
Hi Mike,
that colour is dark enough for sure! A couple of years ago I would have chosen exactly the same tone (slightly reddish/brownish beige).
However the discussion started recently about DAK colours changed my mind a bit. The new evidence was from parts protected from long time sun exposure and they showed a tone like the ones I sent you in the link (more into khaki).
Colour production (even RAL) is never homogeneous! And I would readily accept reasonable variations!
So relax!!


Everything is fine!!
Cheers
Romain
un pour tous et tous pour un!
Colorado, United States
Joined: February 24, 2014
KitMaker: 3,033 posts
Armorama: 2,492 posts
Posted: Saturday, June 21, 2014 - 01:16 AM UTC
Quoted Text
... However the discussion started recently about DAK colours changed my mind a bit. The new evidence was from parts protected from long time sun exposure and they showed a tone like the ones I sent you in the link (more into khaki).
Thanks Romain,
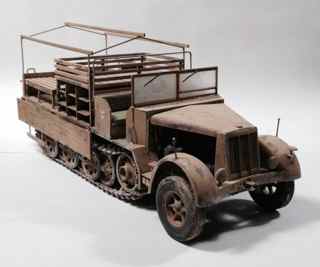
With highlighting (Vallejo Sand Yellow 70916) and weathering the overall color will lighten again, something like the vehicle below or somewhere in between. Will that still be okay?
Thanks in advance.
—mike
Wien, Austria
Joined: May 20, 2011
KitMaker: 1,744 posts
Armorama: 1,727 posts
Posted: Saturday, June 21, 2014 - 05:11 AM UTC
I like that a lot!!!!
Cheers
Romain
un pour tous et tous pour un!
Colorado, United States
Joined: February 24, 2014
KitMaker: 3,033 posts
Armorama: 2,492 posts
Posted: Saturday, June 21, 2014 - 05:58 AM UTC
Thank you, Sir. Your opinion is valued here.

—mike
West-Vlaaderen, Belgium
Joined: August 22, 2009
KitMaker: 1,491 posts
Armorama: 997 posts
Posted: Saturday, June 21, 2014 - 11:04 PM UTC
Hi mike ,
the pak and half-track are nicely built , for sure.
More important than the right color application is the contrast you create by using filters and washes , chipping...
So i agree with Romain.
i'm looking forward to see the diorama ...


Cheers
Kurt ( also known as flyboy)

Colorado, United States
Joined: February 24, 2014
KitMaker: 3,033 posts
Armorama: 2,492 posts
Posted: Sunday, June 22, 2014 - 12:52 AM UTC
Thanks Kurt! And thanks for the flyby!

I hope your project is going well.
—mike

Colorado, United States
Joined: February 24, 2014
KitMaker: 3,033 posts
Armorama: 2,492 posts
Posted: Tuesday, September 30, 2014 - 06:56 PM UTC

#362
California, United States
Joined: December 01, 2013
KitMaker: 1,661 posts
Armorama: 1,202 posts
Posted: Tuesday, September 30, 2014 - 07:36 PM UTC
Hi Mike - wow - this is looking great!! How many builds do you have going? Tough to keep track of them all - you are the model building machine!
Cheers
Nick
Colorado, United States
Joined: February 24, 2014
KitMaker: 3,033 posts
Armorama: 2,492 posts
Posted: Tuesday, September 30, 2014 - 08:45 PM UTC
Wow! … That’s quite the compliment, coming from you! Thanks Nick!
Quantity … not quality!

I’ve been bouncing between the two large dios = a total of six vehicles and sixteen figures. And in the last few weeks or so, I managed to finish a couple of smaller builds. In addition, I recently started three practice figures — hell-bent on improving my figure painting skills. … Are you listening Romain?!!!


Thanks for stopping by!

—mike
Wien, Austria
Joined: May 20, 2011
KitMaker: 1,744 posts
Armorama: 1,727 posts
Posted: Tuesday, September 30, 2014 - 09:48 PM UTC
I'm always listening Mike!!


Practice makes indeed perfect! In the meantime you can carefully analyse other peoples' works ...and learn from them!
I've just now noticed the horizontal cuts in the hollow of the knees of the guy standing on the tank. I would get rid of those if I were you. They produce a "Jungle Jim" feeling.
I love your Pak 38 and the additional details on the vehicles!! Great show there!!!
Keep up the good job Sir!!!! I'll be watching your progress in fig painting skills!!
Cheers
Romain
un pour tous et tous pour un!
Colorado, United States
Joined: February 24, 2014
KitMaker: 3,033 posts
Armorama: 2,492 posts
Posted: Wednesday, October 01, 2014 - 04:59 AM UTC
Quoted Text
Practice makes indeed perfect! In the meantime you can carefully analyse other peoples' works ...and learn from them!
I've just now noticed the horizontal cuts in the hollow of the knees of the guy standing on the tank. I would get rid of those if I were you. They produce a "Jungle Jim" feeling.
Romain,
I've been following some of the great figure painters on the site and taking in as much as I can. I'm shooting for just 1/10th of their skills ... and for me ... that's aiming high!

The "horizontal cuts" were actually an earlier (weak) attempt at painting shadows into the creases. I've set these guys aside for now and will revisit them after some practice on the three stand-alone figures which I've started. Maybe I'll post their progress.
As always, thanks for your comments!

—mike
West-Vlaaderen, Belgium
Joined: August 22, 2009
KitMaker: 1,491 posts
Armorama: 997 posts
Posted: Wednesday, October 01, 2014 - 07:58 AM UTC
Hi Mike ,
nice update , am looking forward to see the paintjob on the figures...


Cheers
Kurt
Colorado, United States
Joined: February 24, 2014
KitMaker: 3,033 posts
Armorama: 2,492 posts
Posted: Thursday, October 02, 2014 - 06:49 PM UTC
West-Vlaaderen, Belgium
Joined: August 22, 2009
KitMaker: 1,491 posts
Armorama: 997 posts
Posted: Friday, October 03, 2014 - 08:07 AM UTC
Hi mike ,
that tank is very nicely done , a real clean build, congratulations to you !
Cheers
Kurt
Colorado, United States
Joined: February 24, 2014
KitMaker: 3,033 posts
Armorama: 2,492 posts
Posted: Saturday, October 04, 2014 - 01:37 AM UTC
Thanks Kurt!
I think it won't be "clean" for much longer. Hopefully I'll get around to desertizing the two remaining vehicles and maybe some figure work next week ... cough!

—mike
Colorado, United States
Joined: February 24, 2014
KitMaker: 3,033 posts
Armorama: 2,492 posts
Posted: Saturday, October 04, 2014 - 10:52 AM UTC
I have a question:
The crank on the jack doesn't seem very practical in this position for travel mode. Should I just go ahead and clip it off and maybe stow it somewhere on the tank? The assembly instructions were a bit vague here.

Thanks in advance.
—mike
England - East Anglia, United Kingdom
Joined: August 12, 2005
KitMaker: 14,499 posts
Armorama: 11,675 posts
Posted: Saturday, October 04, 2014 - 09:02 PM UTC
Hi Mike,
Just came across this one. Great work going on here and a nice combination of vehicles. Look forward to developments.
Al


'Action this Day'
Winston Spencer Churchill
Colorado, United States
Joined: February 24, 2014
KitMaker: 3,033 posts
Armorama: 2,492 posts
Posted: Sunday, October 05, 2014 - 01:18 AM UTC
Thank you for the kind words Alan!
—mike
Colorado, United States
Joined: February 24, 2014
KitMaker: 3,033 posts
Armorama: 2,492 posts
Posted: Monday, October 06, 2014 - 06:49 PM UTC
Colorado, United States
Joined: February 24, 2014
KitMaker: 3,033 posts
Armorama: 2,492 posts
Posted: Thursday, October 09, 2014 - 11:21 AM UTC
Another small detail added to the Sd.Kfz.10 today:
I cut-out the original sun-visor lens and scratched a clear one out of the trash stash.

I used a mixture of red and yellow Food Coloring and Vallejo Gloss Varnish (70.510) to achieve a somewhat translucent look. My test-piece came out looking better than this, so I might do it over ... or not.

The windshield will be in the folded-down position as shown here.

Kind of reminds me of Colonel Klink's monocle from 'Hogan's Heroes!'


Not a whole lot of progress today but these little bits are kind of fun.

—mike
Ontario, Canada
Joined: March 01, 2002
KitMaker: 1,607 posts
Armorama: 1,581 posts
Posted: Thursday, October 09, 2014 - 11:36 AM UTC
Looking really nice Mike.
Will watch your progress .
Tom

Colorado, United States
Joined: February 24, 2014
KitMaker: 3,033 posts
Armorama: 2,492 posts
Posted: Thursday, October 09, 2014 - 03:54 PM UTC



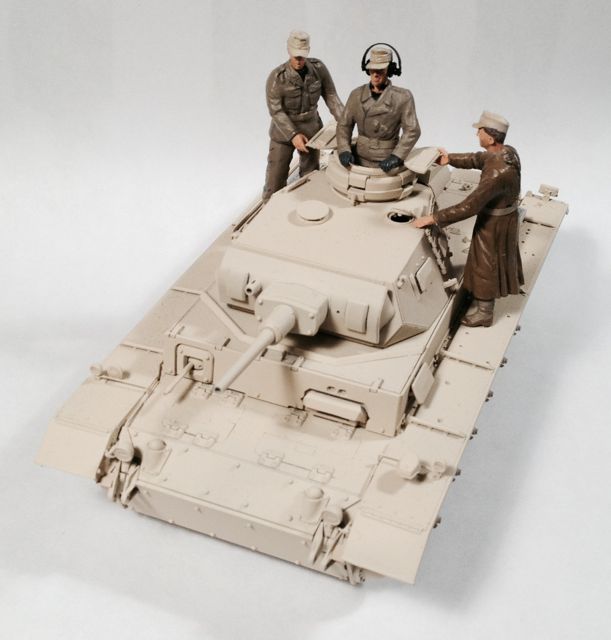
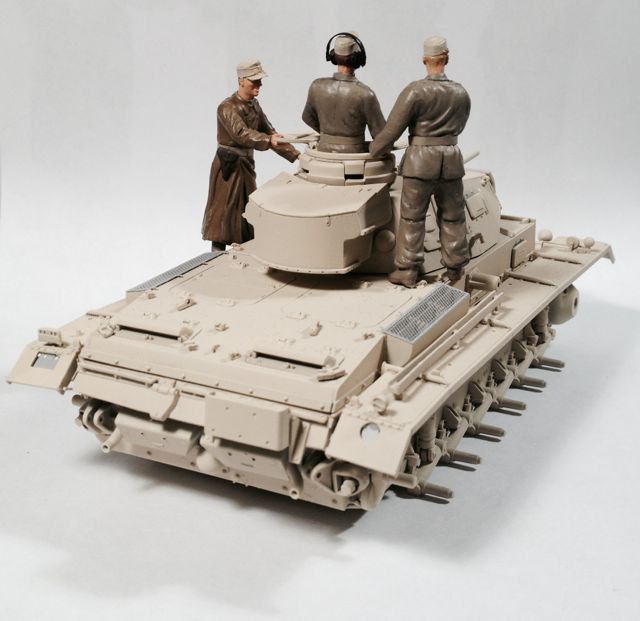
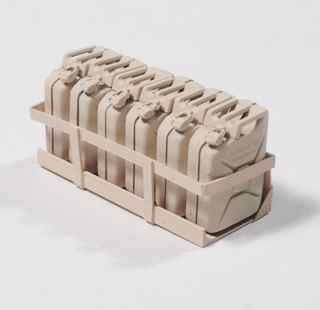
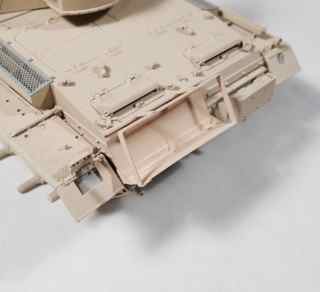


 Everything is fine!!


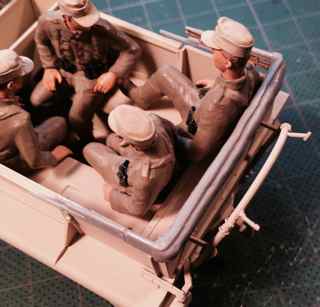
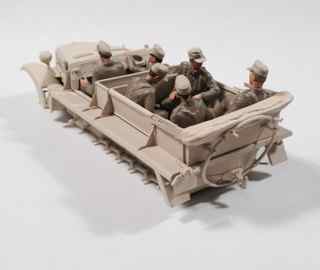
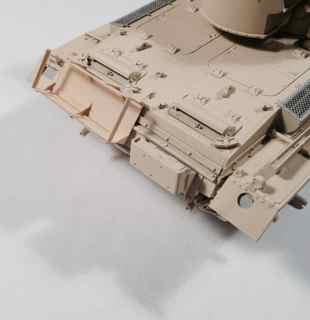
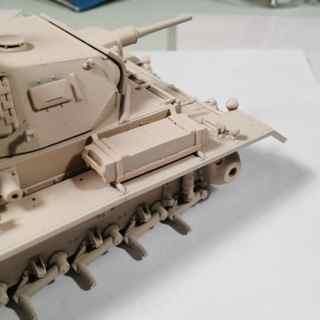
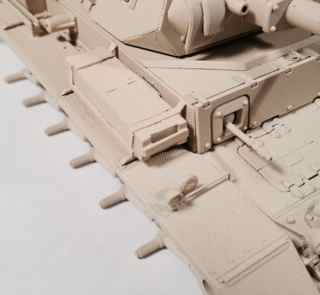
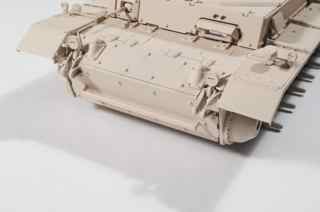
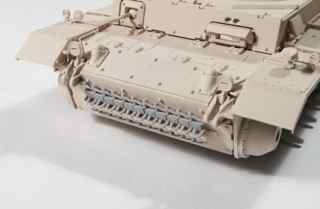
 Let's see what's left: Some minimal chipping/wear effects, washes, track paint and installation — actually this is getting close and the Sd.Kfz.10 isn't far behind. ... Oh ... let's not forget about finishing the nine figures!


 ... and the base!


