Hosted by Richard S.
Back to Basics
Posted: Tuesday, May 17, 2016 - 11:52 PM UTC
Some cool, well done models here. Man, that Tamiya Pzr II brings back fond memories. 


Bigrip74

Joined: February 22, 2008
KitMaker: 5,026 posts
Armorama: 1,604 posts

Posted: Thursday, May 19, 2016 - 07:04 PM UTC
Posted: Monday, May 23, 2016 - 01:10 AM UTC
To One and All,
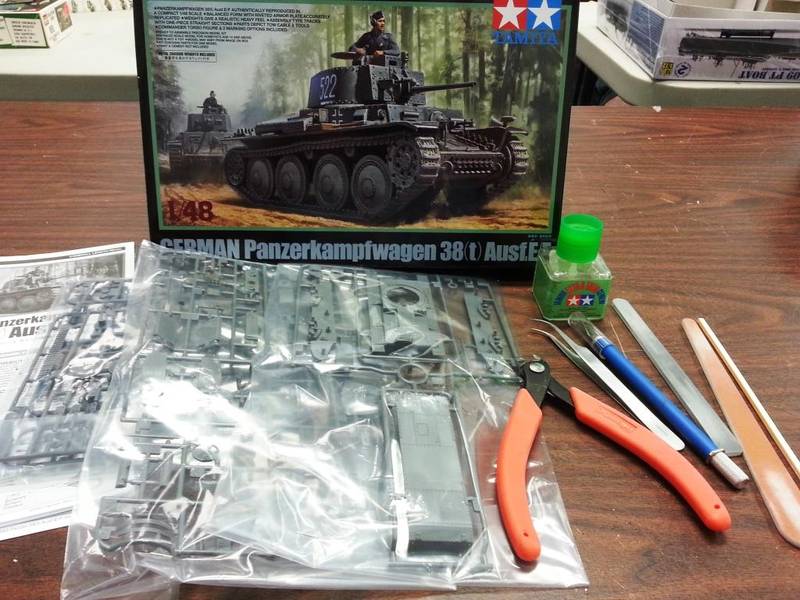
Here is the sprue and tool shot of my 'Back to Basics' entry; the Tamiya 1/48 Pz38t. For some odd reason, I was in the mood for something in Panzer Grey!
More to come!
Stephen
Here is the sprue and tool shot of my 'Back to Basics' entry; the Tamiya 1/48 Pz38t. For some odd reason, I was in the mood for something in Panzer Grey!

More to come!
Stephen
Posted: Wednesday, May 25, 2016 - 02:55 PM UTC
Hello,
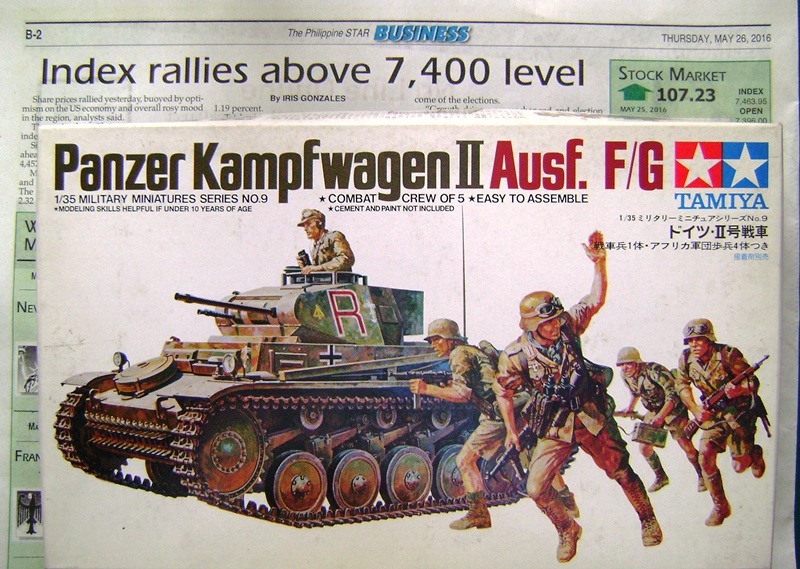
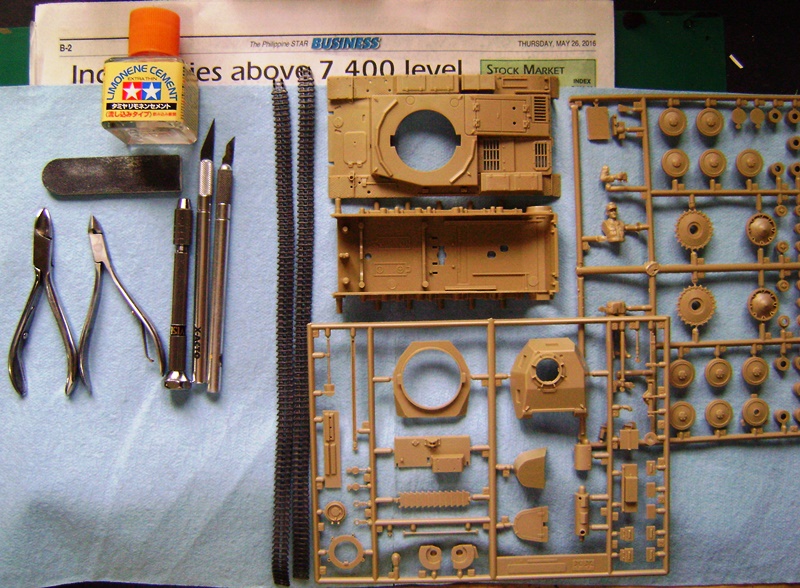
My start pics:
More to come.
Cheers,
Tat
My start pics:
More to come.
Cheers,
Tat

Bigrip74

Joined: February 22, 2008
KitMaker: 5,026 posts
Armorama: 1,604 posts

Posted: Wednesday, May 25, 2016 - 05:27 PM UTC
@ Tat: I have built that kit several times and love the ease of its construction.
@ Stephen: nice looking Pz.38t. I could not work in 1/48, my eye sight even with a magnify hood would be too hard.
Bob
@ Stephen: nice looking Pz.38t. I could not work in 1/48, my eye sight even with a magnify hood would be too hard.
Bob
Posted: Thursday, May 26, 2016 - 06:23 AM UTC
Thanks Bob -- I second that. The ease and simplicity in construction is very welcome break from more complex kits. My progress from a couple of hours work:
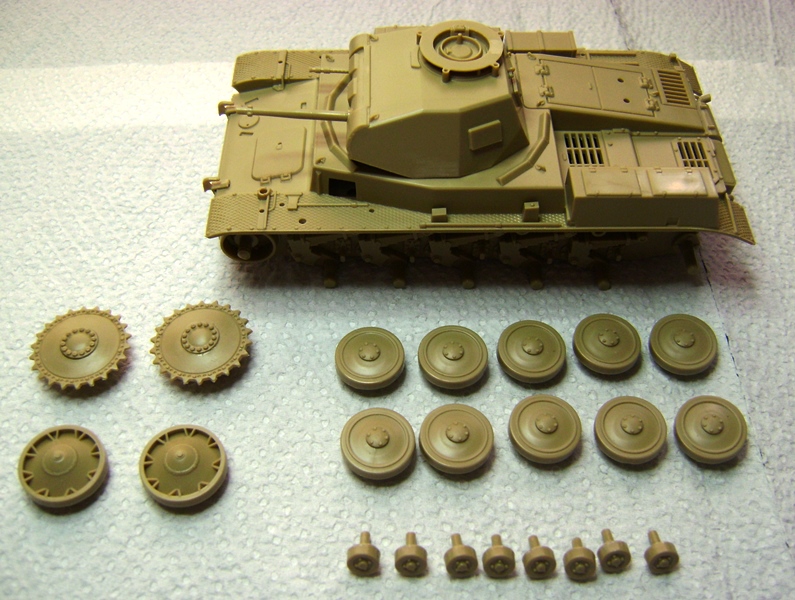
Just need to put on the tools and other small bits and it would be ready for painting.
Cheers,
Tat
Just need to put on the tools and other small bits and it would be ready for painting.
Cheers,
Tat
Posted: Saturday, May 28, 2016 - 07:31 AM UTC
Greetings Group,
Ian was generous enough to allow me to join. This is my subject:


These are the tools.
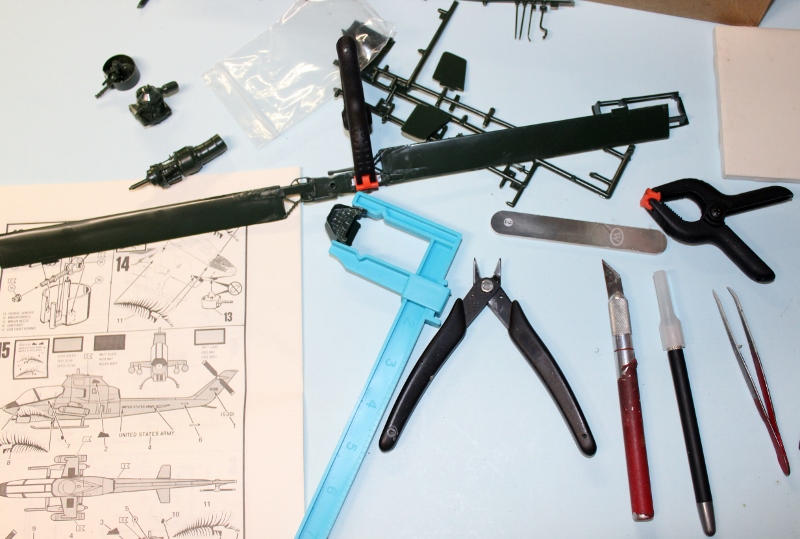
Ian was generous enough to allow me to join. This is my subject:


These are the tools.

Posted: Saturday, May 28, 2016 - 07:45 AM UTC
I just looked at the other participants' photos and noticed i didn't include my glue, and that it would make my number of tools 8. I will get rid of the black Xacto for glue. 

Posted: Thursday, June 02, 2016 - 08:40 AM UTC
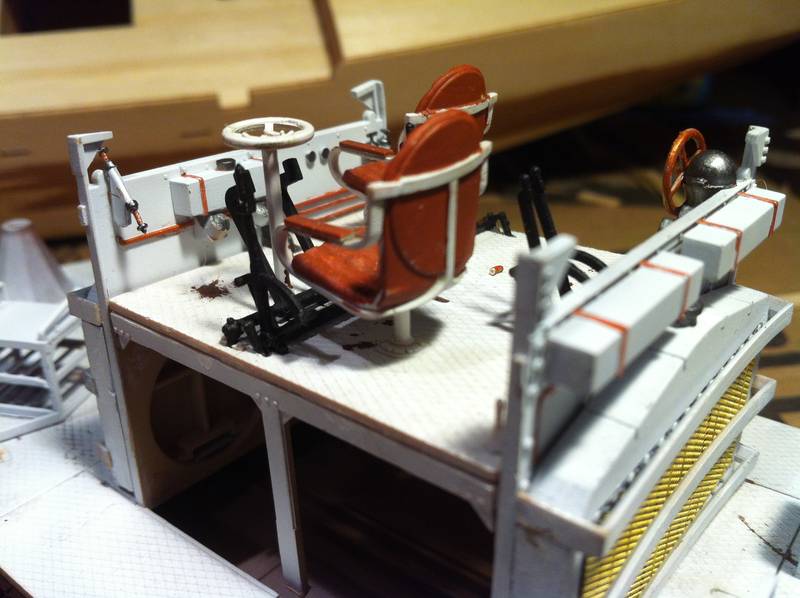
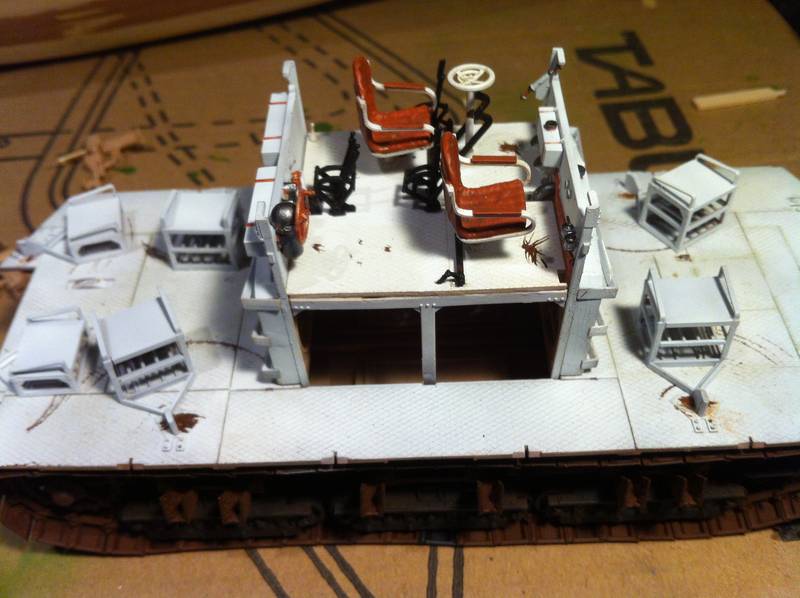
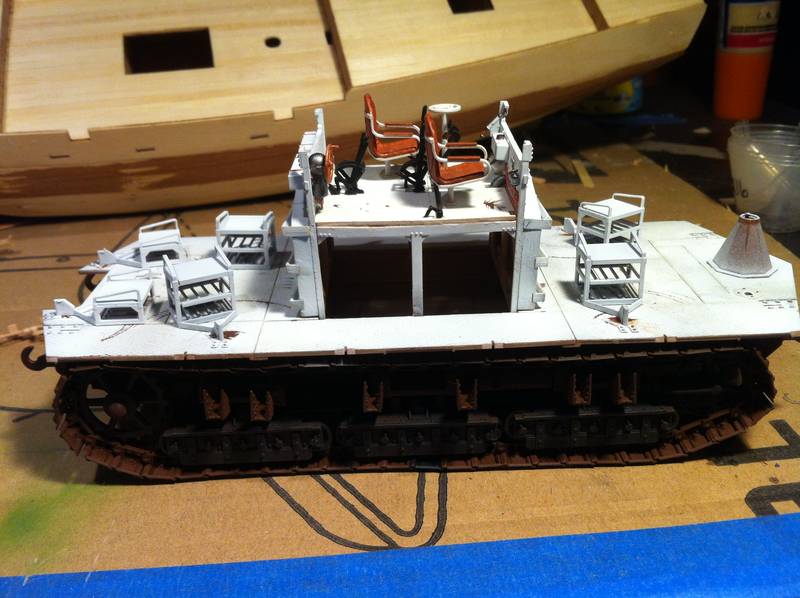
Some more progress pictures of Meng's A7V Tank.
Posted: Friday, June 24, 2016 - 07:21 PM UTC
Hello,
Quite an interior you have there Brenton -- looking good!
Tamiya's old Pz II exhaust looks really bare -- missing the heat shield / exhaust plate whatever it's called. Didn't want to spend on any AM stuff so I thought of making my own:

I slapped on a thin piece of styrene, taped a pattern I made from the computer and drilled holes. It definitely won't win points in scale and accuracy, but it'll do.
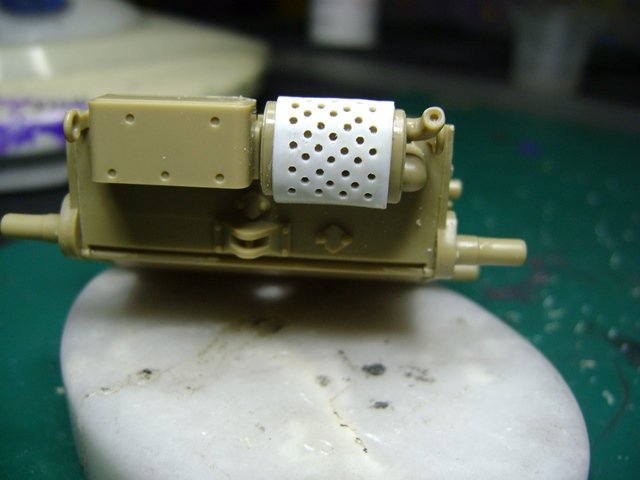
Come to think of it -- it may have been easier if I just taped on a piece of band aid!
I've primed it and put on the base coat -- Gunship Grey from a Tamiya rattle can.
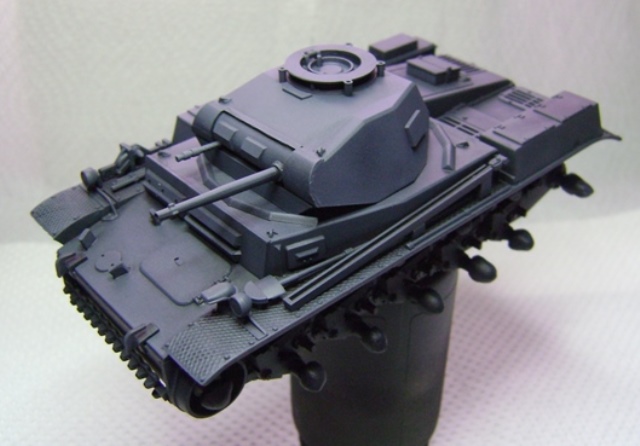
Decided not to use the spare road wheel as I'll put on a tow cable instead.
Been thinking of finishing this one in winter camo -- newly applied whitewash without much distress as yet.
Cheers,
Tat
Quite an interior you have there Brenton -- looking good!
Tamiya's old Pz II exhaust looks really bare -- missing the heat shield / exhaust plate whatever it's called. Didn't want to spend on any AM stuff so I thought of making my own:

I slapped on a thin piece of styrene, taped a pattern I made from the computer and drilled holes. It definitely won't win points in scale and accuracy, but it'll do.
Come to think of it -- it may have been easier if I just taped on a piece of band aid!

I've primed it and put on the base coat -- Gunship Grey from a Tamiya rattle can.
Decided not to use the spare road wheel as I'll put on a tow cable instead.
Been thinking of finishing this one in winter camo -- newly applied whitewash without much distress as yet.
Cheers,
Tat

barra733

Joined: January 03, 2015
KitMaker: 282 posts
Armorama: 255 posts

Posted: Friday, June 24, 2016 - 08:31 PM UTC
Well despite my initial post being over 10 months ago I've just finished this one. I did complete using just the tools shown and now have a new found appreciation of my Dremel!


Posted: Saturday, June 25, 2016 - 05:39 AM UTC
Nice one Ian -- congrats on your finish! Cheers, Tat
Posted: Saturday, June 25, 2016 - 06:35 AM UTC
Thanks Tat, yeah I think the A7V had a crew of 18! Ian excellent work, I wish I had a smidgen of your skills.
ltb073

Joined: March 08, 2010
KitMaker: 3,662 posts
Armorama: 3,078 posts

Posted: Saturday, June 25, 2016 - 06:55 PM UTC
Ian that Tow truck looks great is that a Mirror Models Diamond T 


Posted: Monday, June 27, 2016 - 01:07 AM UTC
To One and All,
There is some progress on my Pz38t. Some of the folks on my model club gather on Saturdays and hang out at the hobby shop and build for a few hours. This Back to Basics campaign was perfect for this, so here is a sort-of halfway there picture.
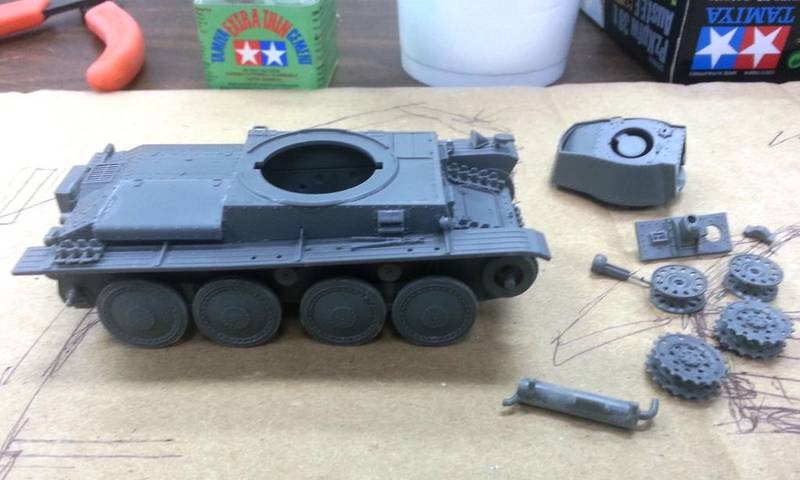
Thanks,
Stephen
There is some progress on my Pz38t. Some of the folks on my model club gather on Saturdays and hang out at the hobby shop and build for a few hours. This Back to Basics campaign was perfect for this, so here is a sort-of halfway there picture.

Thanks,
Stephen
Posted: Saturday, July 23, 2016 - 08:04 AM UTC
Hi Group,
Here are some pix of my long-delayed progress.
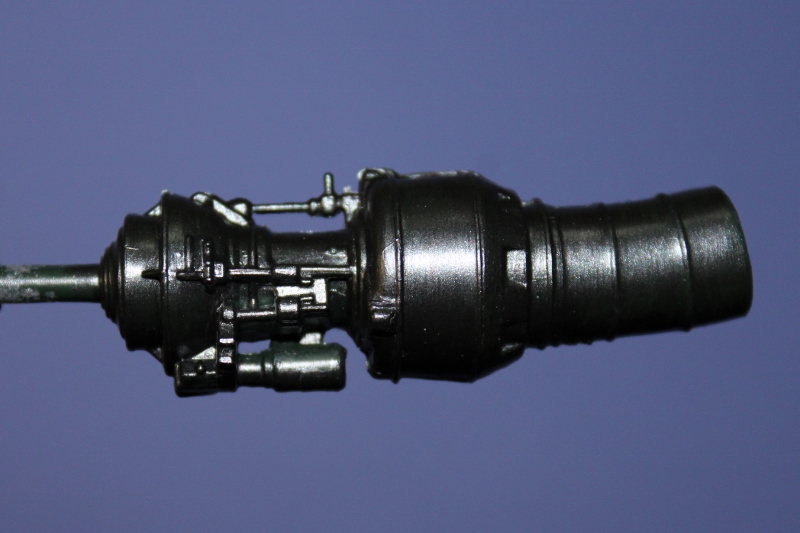
Nice engine:
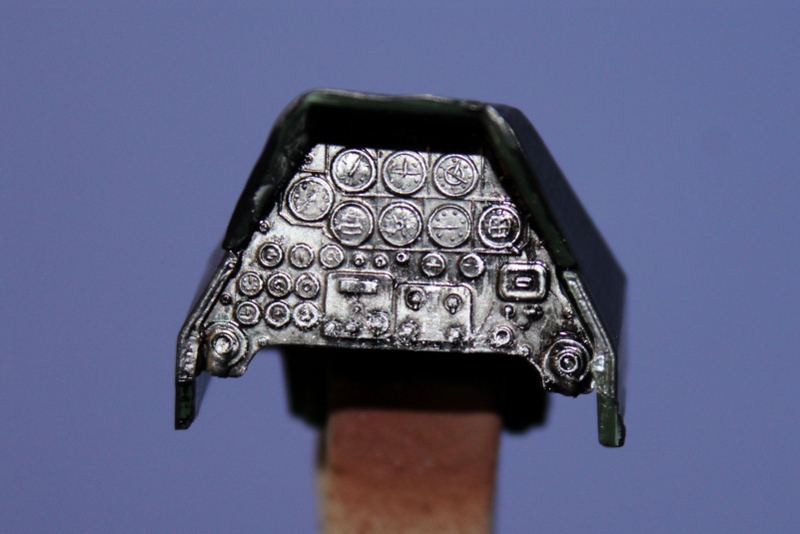
Instrument panel is better than I remembered.
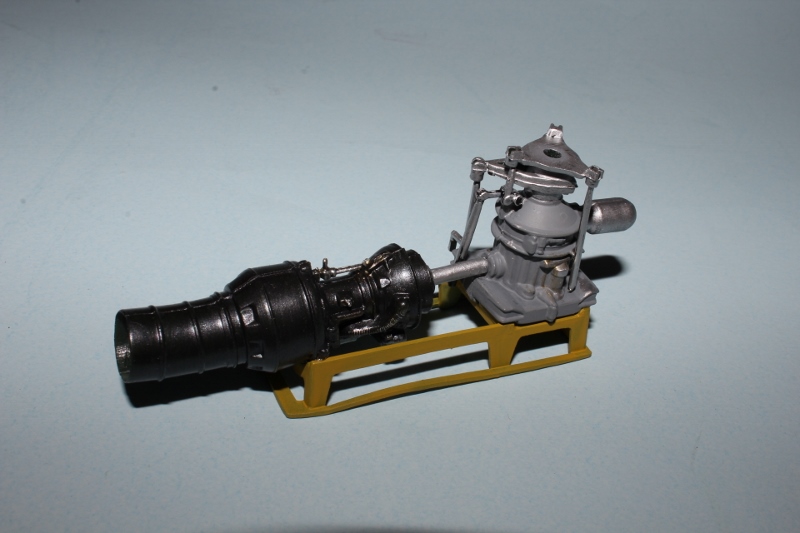
The powerplant and mount:
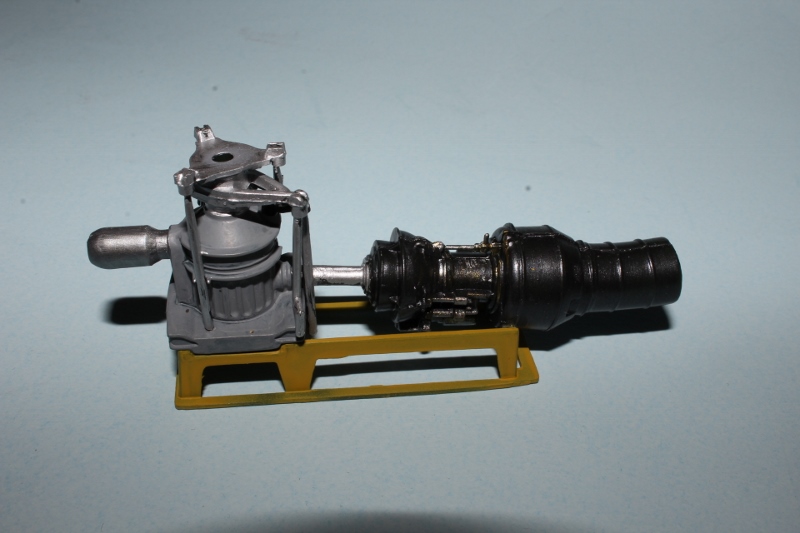
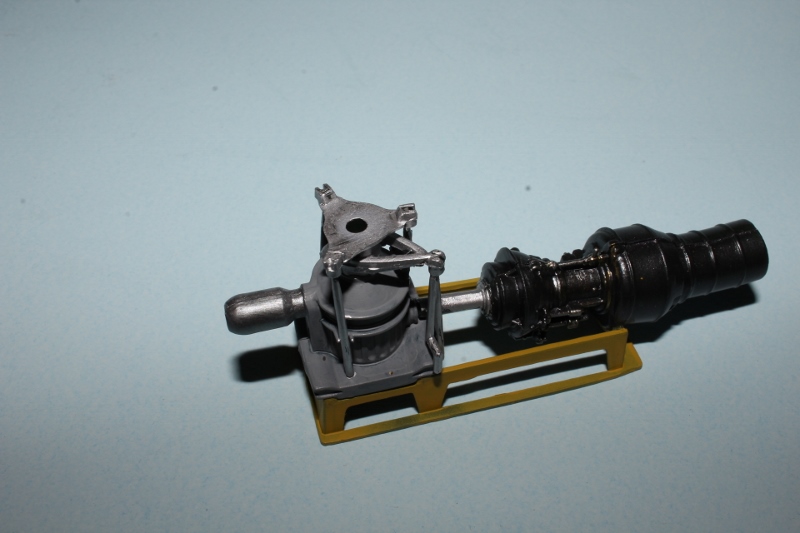
The engine and the cockpit are set:
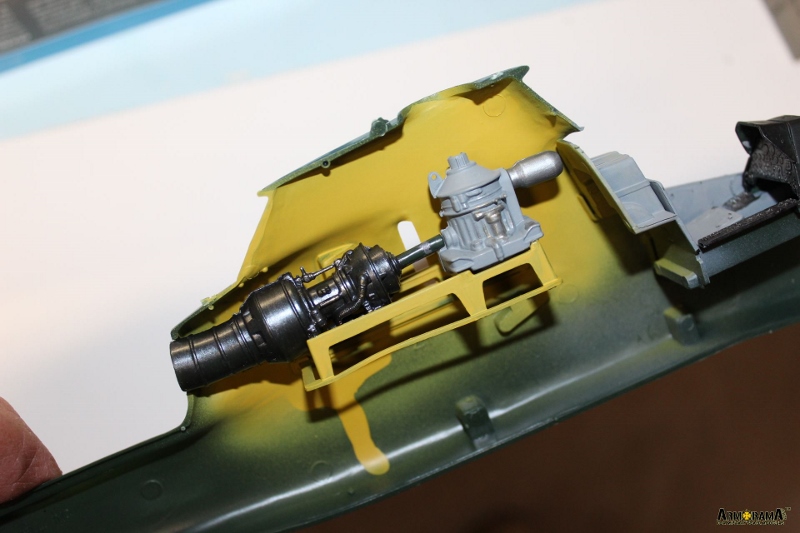
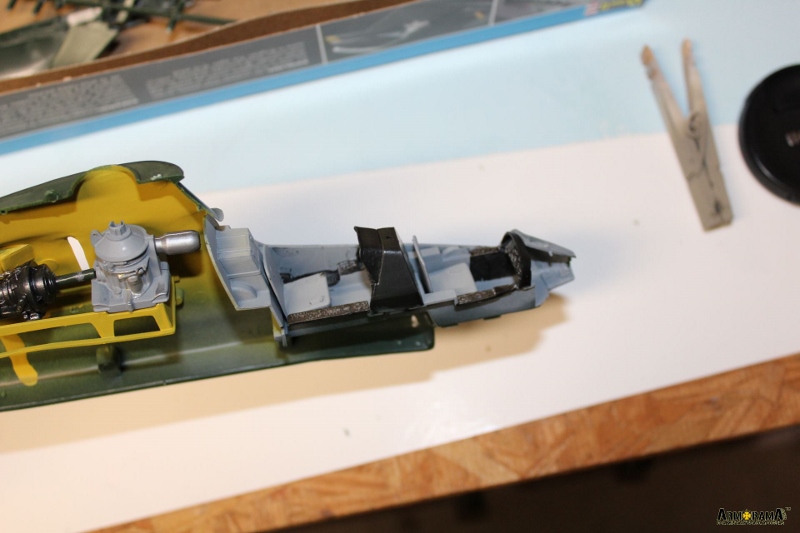
Last night I glued the fuselage together. Photos forthcoming.

Here are some pix of my long-delayed progress.

Nice engine:

Instrument panel is better than I remembered.

The powerplant and mount:


The engine and the cockpit are set:


Last night I glued the fuselage together. Photos forthcoming.

Posted: Saturday, July 23, 2016 - 04:14 PM UTC
Frederick, looks nice. It will be good to see what you get from the big old kit.
Looking forward to see more
Looking forward to see more

Posted: Sunday, July 24, 2016 - 07:35 PM UTC
Hi Jesper,
Thank you.
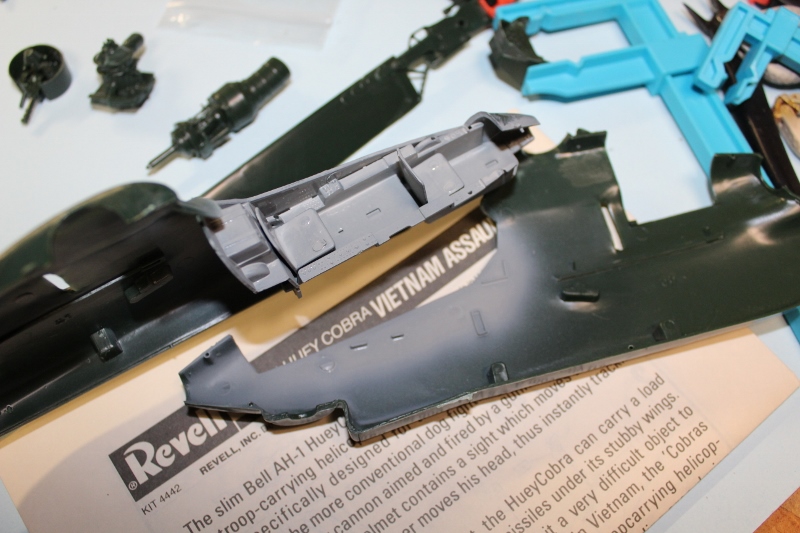
The fuselage has been mated together. Sanding reveals that there is some lip-sinking - where the edges of the halves warp inwards - but otherwise the fit is surprisingly good. The only gap was where a heavy sprue connector left a burr. Otherwise, filling was accomplished with liquid glue and firmly holding the halves together.
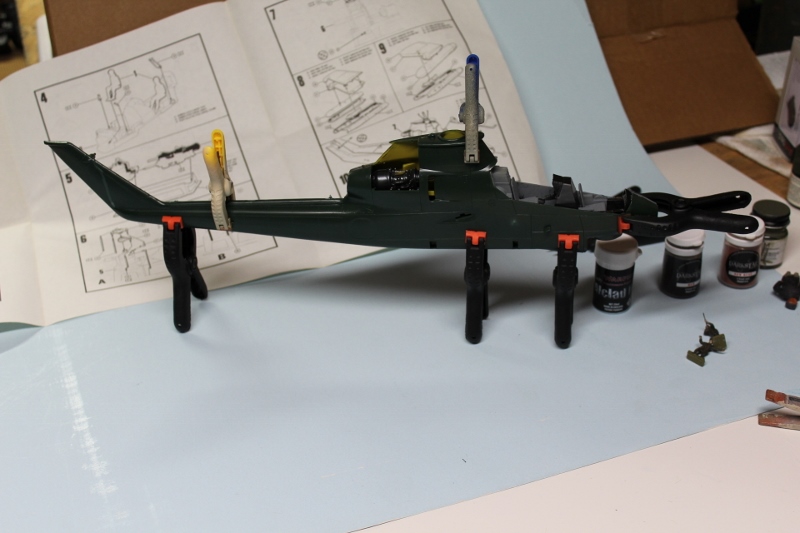
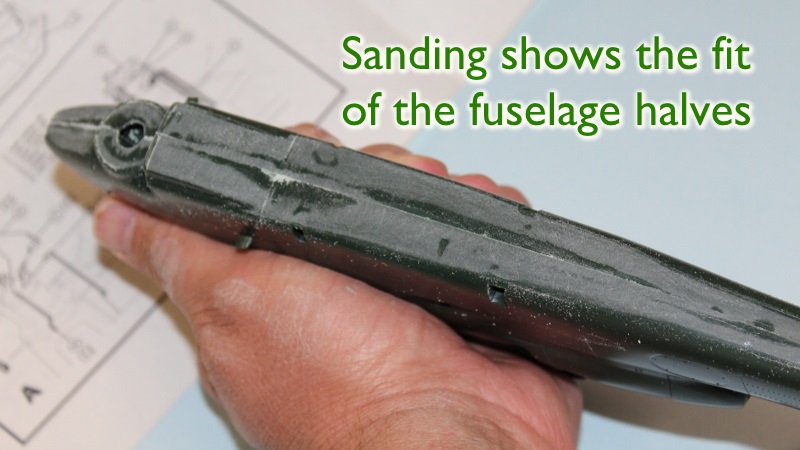
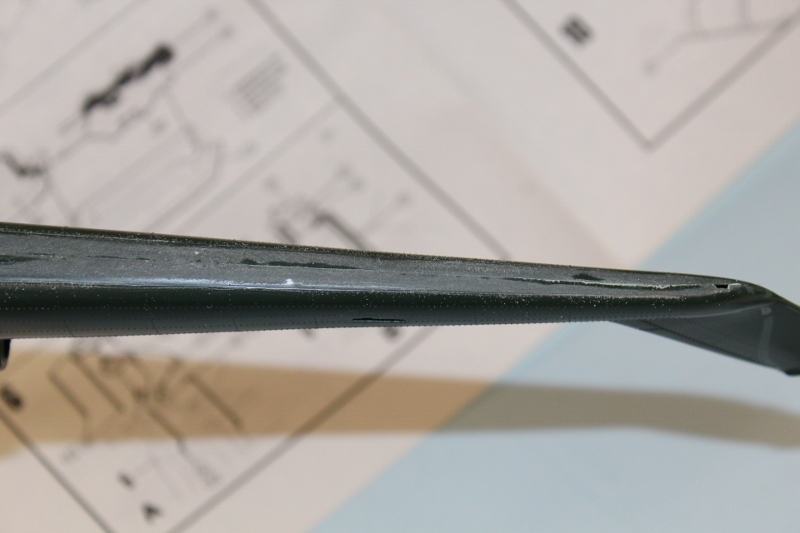
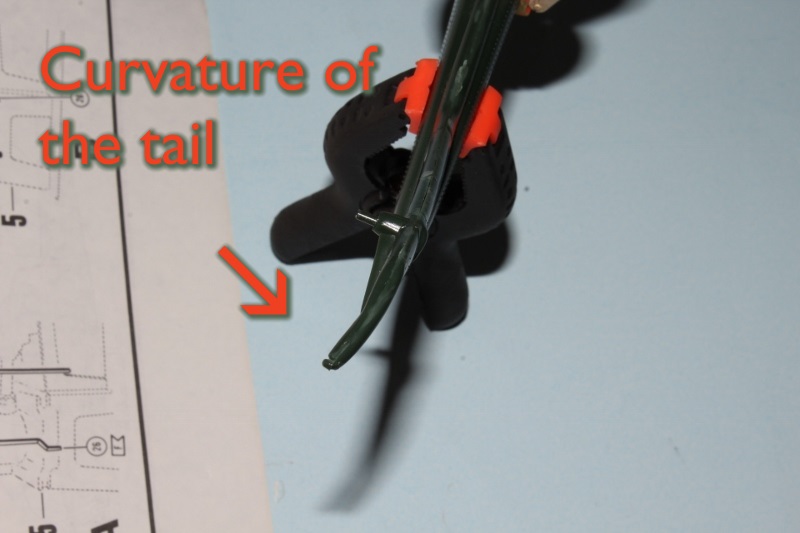
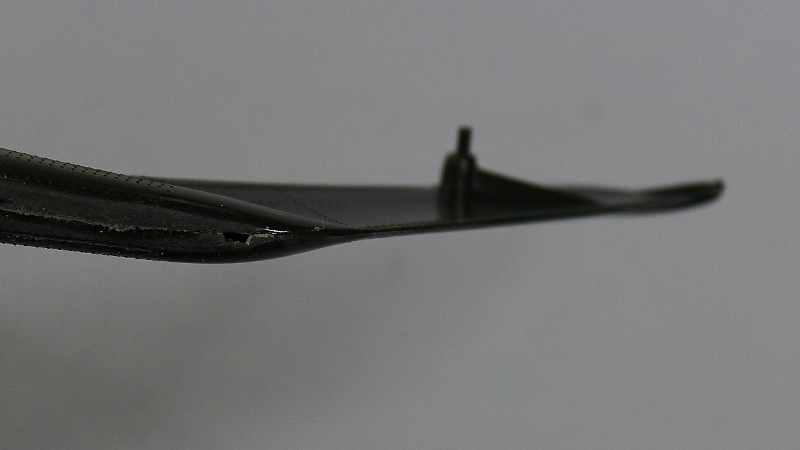
The engine compartment. Very basic and screaming for more detail.
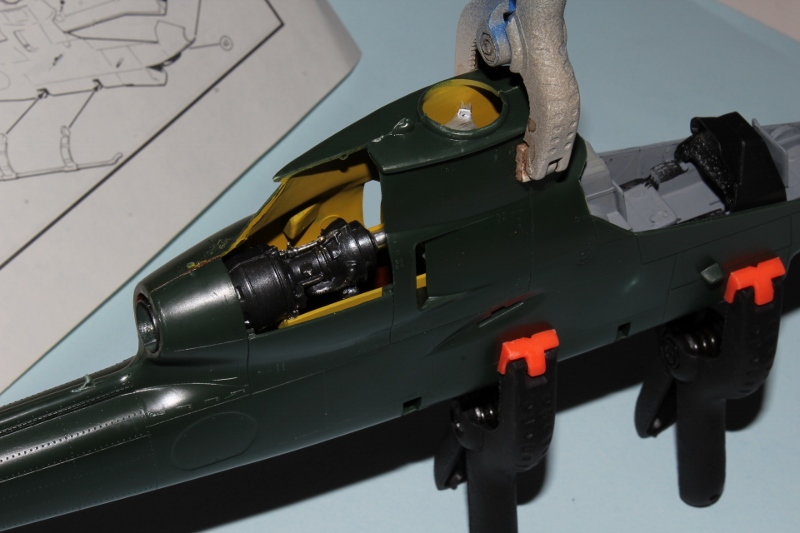
I may not be able to do much for another couple of weeks. Which is sad because all that's left at this point is attaching the skids, stabilizers, weapons pylon-wings, minigun and rocket pods, turret, canopy,paint and decals.

Thank you.
The fuselage has been mated together. Sanding reveals that there is some lip-sinking - where the edges of the halves warp inwards - but otherwise the fit is surprisingly good. The only gap was where a heavy sprue connector left a burr. Otherwise, filling was accomplished with liquid glue and firmly holding the halves together.


The engine compartment. Very basic and screaming for more detail.

I may not be able to do much for another couple of weeks. Which is sad because all that's left at this point is attaching the skids, stabilizers, weapons pylon-wings, minigun and rocket pods, turret, canopy,paint and decals.

ltb073

Joined: March 08, 2010
KitMaker: 3,662 posts
Armorama: 3,078 posts

Posted: Saturday, August 06, 2016 - 06:35 AM UTC

Bigrip74

Joined: February 22, 2008
KitMaker: 5,026 posts
Armorama: 1,604 posts

Posted: Saturday, August 06, 2016 - 07:40 AM UTC
I see some hard work with construction going on here.
I have a delima since I don't know much about the DAK.
Question: which color is appropriate for DAK?
RLM 79 (Tamiya XF59:3 + XF64:1
Tamiya XF 59
Tamiya XF 60
Bob
I have a delima since I don't know much about the DAK.
Question: which color is appropriate for DAK?
RLM 79 (Tamiya XF59:3 + XF64:1
Tamiya XF 59
Tamiya XF 60
Bob

Bigrip74

Joined: February 22, 2008
KitMaker: 5,026 posts
Armorama: 1,604 posts

Posted: Sunday, August 07, 2016 - 07:56 AM UTC
Posted: Sunday, August 07, 2016 - 03:06 PM UTC
Looking good Bob! While your Pz I hails from a hot and arid climate, I'll have my Pz II in a wet and freezing cold environment 
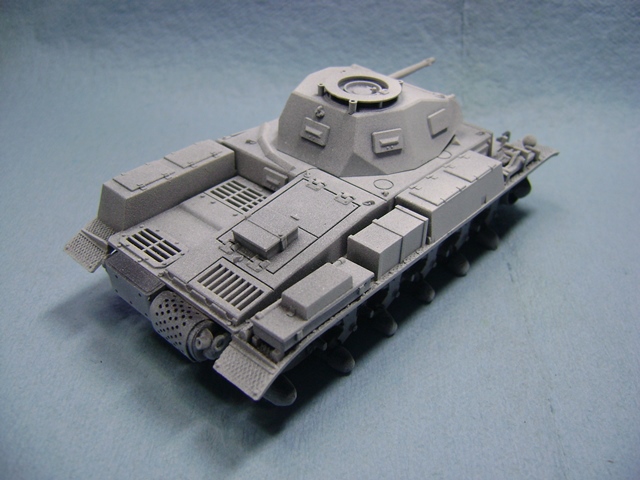
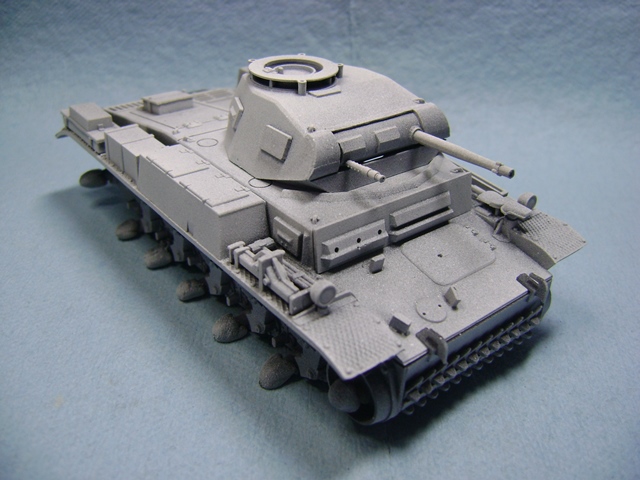
Cheers,
Tat

Cheers,
Tat

Bigrip74

Joined: February 22, 2008
KitMaker: 5,026 posts
Armorama: 1,604 posts

Posted: Sunday, August 07, 2016 - 05:38 PM UTC
Tat, what type of paint are you using? Acrylic or enamel?
Bob
Bob
Posted: Sunday, August 07, 2016 - 07:55 PM UTC
Hi Bob,
I used Tamiya enamels here. The finish is rough as I sprayed only a thin layer of white from a rattlecan over a base coat of german grey.
Cheers,
Tat
I used Tamiya enamels here. The finish is rough as I sprayed only a thin layer of white from a rattlecan over a base coat of german grey.
Cheers,
Tat
Posted: Tuesday, August 09, 2016 - 11:27 AM UTC
 |


