England - East Midlands, United Kingdom
Joined: January 17, 2006
KitMaker: 1,694 posts
Armorama: 1,584 posts
Posted: Sunday, August 14, 2016 - 06:52 PM UTC
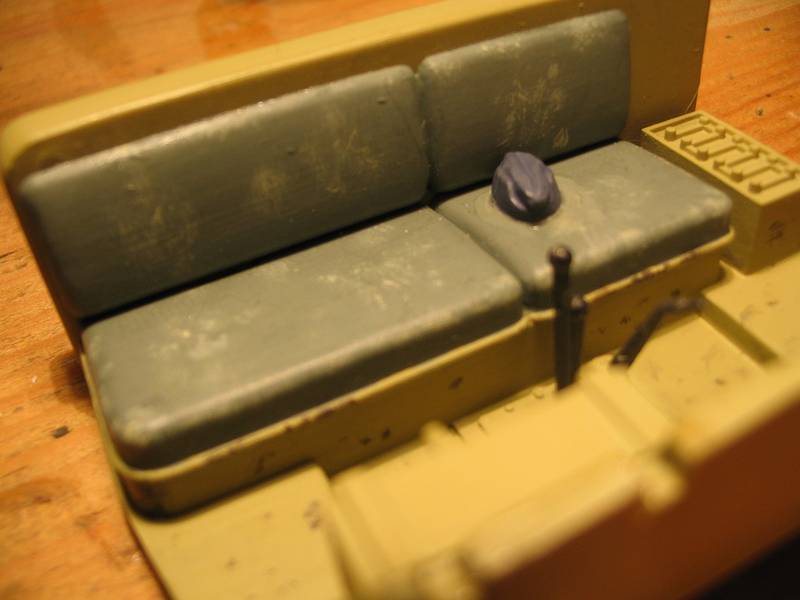
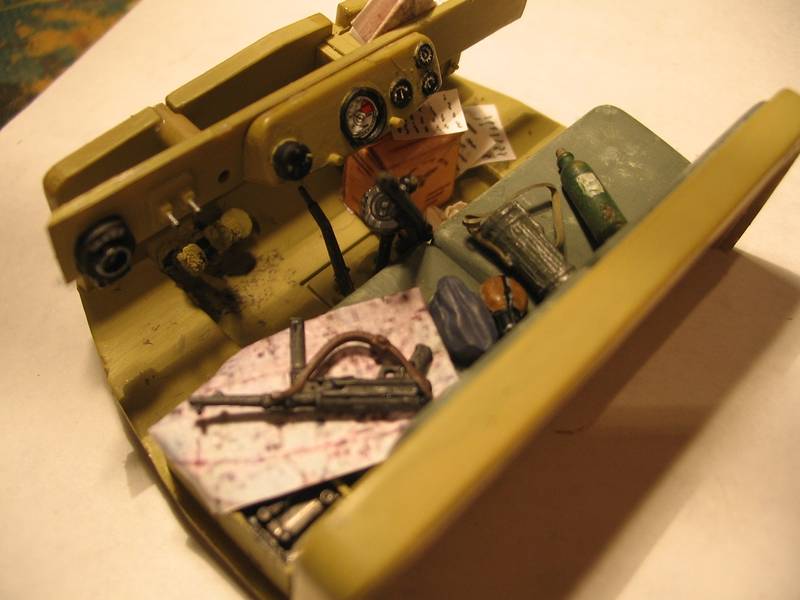
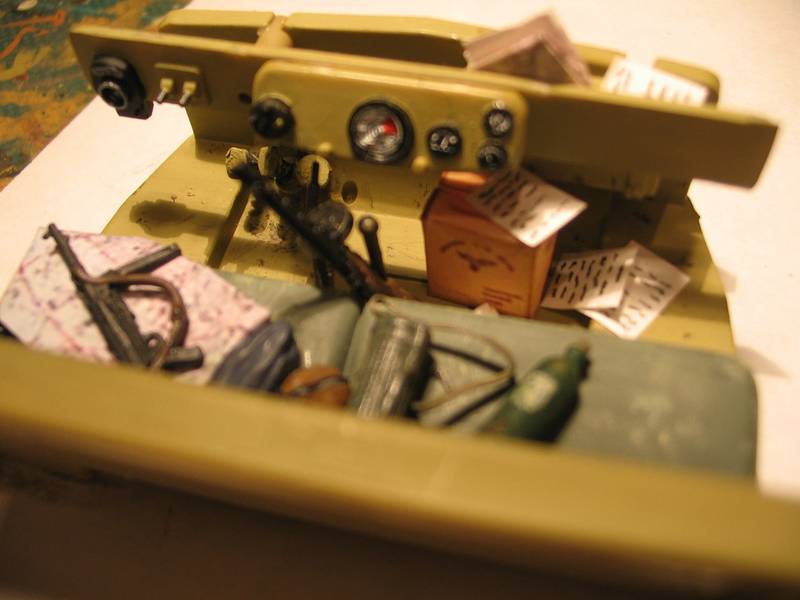
I made a start last night on the armoured Sdkfz7 mounting a Flak 37. It's been ages since I built a Tamiya kit and I'd forgotten how enjoyable they are. Clear instructions, parts that fit, no uneccessary bits that you need micro tweezers and a robotic third hand to attach. I struggled a bit finding decent pictures of the cab on one of these but having said that I didn't search as thoroughly as normal. I found one photo of an unrestored vehicle with greenish grey canvas seats rather than the usual black or red brown so thought I'd have a change. I've added a bit of wear to them which came out better than I expected.
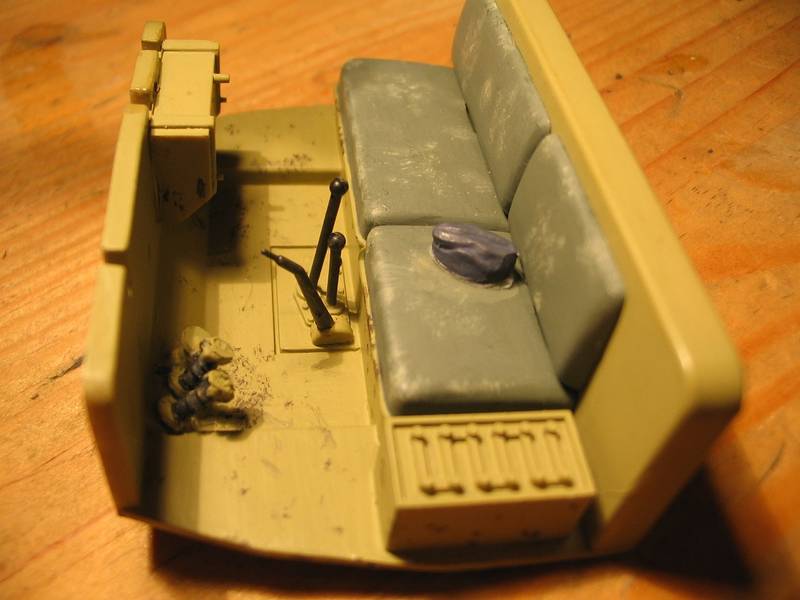
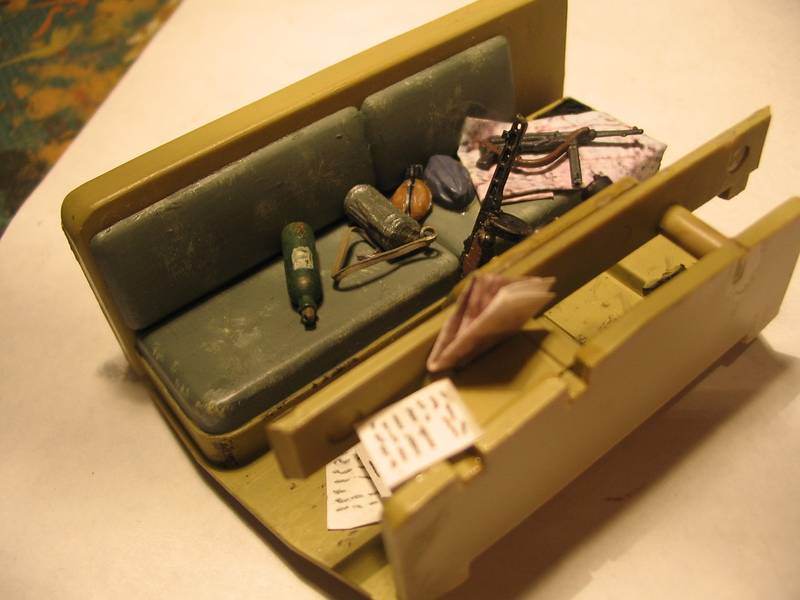
I wasn't sure what the box to the left of the driver's supposed to be. In view of that I decided to hide it under a map. I've added decals to the dials as I'd got some in my spare decals box. I forgot to level off the speedo dial so when I microsolled it it doesn't sit flat. Having said that I don't know how much wiil be seen through the open doors. I've put various bits and bobs in the cab and left it reasonably untidy as I would imagine that the Luftwaffe lacked the discipline of the Heer (rather like the RAF to the British Army. Any "Crabs" out there sorry

)
I made a start on one of the figures last night and decided to try undercutting for the first time as the detail is a bit soft to say the least. Made a massive difference once I got some paint on it. I used Vallejo 105 Luftwaffe Uniform but it's a bit dark so I need to lighten it a bit. The figures are a long way off anyway but I was in the mood for having a go at one. Will post some more pics once it starts going together. I don't work to the kits sequence anyway after some dreadful experiences with DML stuff where fragile stuff broke as it went on too early in my opinion so just work to what seems logical to me now.
Nothing is so exhilarating in life as to be shot at with no result.
- Winston Churchill
Canelones, Uruguay
Joined: December 27, 2006
KitMaker: 773 posts
Armorama: 765 posts
Posted: Monday, August 15, 2016 - 01:29 AM UTC
Hi
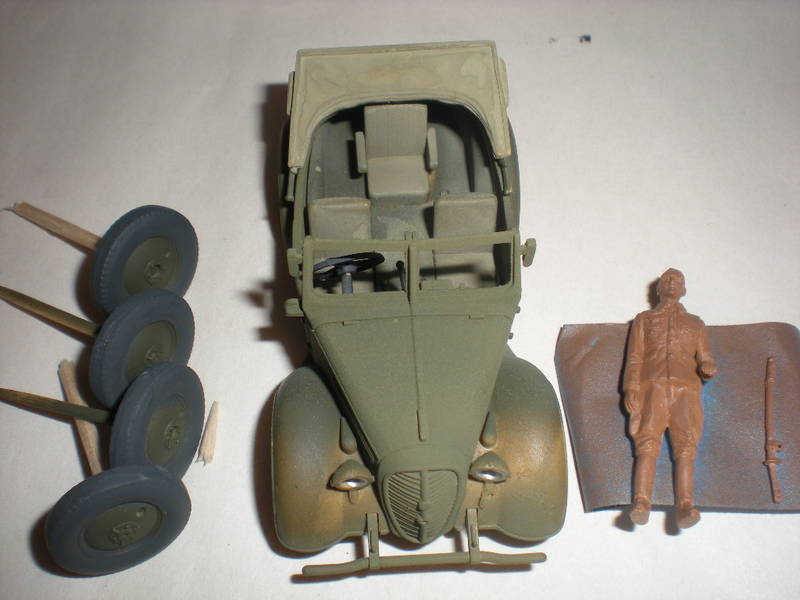
I hope end with this one!
Tamiya Kubelwagen + Eduard + DEF .
Regards from the south
Alvaro

United Kingdom
Joined: September 17, 2012
KitMaker: 462 posts
Armorama: 417 posts
Posted: Monday, August 15, 2016 - 07:41 PM UTC
Lots of great work is going on in this thread.
Colin, I am in awe of your very subtle and convincing weathering! Nice.
@ ComradeMP, youre doing fun things with a Tamiya T55 as well I see. Looks great!
I have a bit more progress to report on the T54 mod. 1949
.


I think Im going to have to fiddle with the wheels a bit as none of them sit quite straight
Grrr. They are Tank resin wheels and although they are nice and detailed they have a mould seem running round the wheel and the two halves do not fit to create a perfect circle.
Then the Friuls and its off to the paint shop for me!

Cheers
Matthew
United Kingdom
Joined: September 17, 2012
KitMaker: 462 posts
Armorama: 417 posts
Posted: Tuesday, August 16, 2016 - 12:05 AM UTC
Well... Less than two episodes of Oliver Stones' Untold History of the United States and three glasses of wine later...

... two track-runs of Friuls completed...
cheers
Matthew

#041
Kobenhavn, Denmark
Joined: July 20, 2006
KitMaker: 10,069 posts
Armorama: 4,677 posts
Posted: Tuesday, August 16, 2016 - 01:48 AM UTC
Looks very nice, Matthew. Hope you get the wheels to behave properly.
Looking forward to see more

Campaign'oholic - 252+ campaigns completed
United Kingdom
Joined: September 17, 2012
KitMaker: 462 posts
Armorama: 417 posts
Posted: Tuesday, August 16, 2016 - 05:50 PM UTC
Quoted Text
Looks very nice, Matthew. Hope you get the wheels to behave properly.
Looking forward to see more
Thanks, Jesper. The wheels are behaving a bit more now, but they could be improved further. Half the problem is that they don't fit on the axels properly and I don't have the poly caps so have inserted rolled up shim to keep them in place. I'll get there though...
cheers
Matthew
#041
Kobenhavn, Denmark
Joined: July 20, 2006
KitMaker: 10,069 posts
Armorama: 4,677 posts
Posted: Tuesday, August 16, 2016 - 06:19 PM UTC
Quoted Text
Half the problem is that they don't fit on the axels properly and I don't have the poly caps so have inserted rolled up shim to keep them in place. I'll get there though...
cheers
Matthew
Maybe put on the track temporarily to ensure everything lines up and use the guide horns for .... well.... guiding the wheels?
Not sure it will help, but worth a try.
Campaign'oholic - 252+ campaigns completed
United Kingdom
Joined: September 17, 2012
KitMaker: 462 posts
Armorama: 417 posts
Posted: Tuesday, August 16, 2016 - 06:45 PM UTC
[/quote]
Maybe put on the track temporarily to ensure everything lines up and use the guide horns for .... well.... guiding the wheels?
Not sure it will help, but worth a try.
[/quote]
Good idea! I'll give it try.
cheers
Matthew
Canelones, Uruguay
Joined: December 27, 2006
KitMaker: 773 posts
Armorama: 765 posts
Posted: Tuesday, August 16, 2016 - 11:35 PM UTC
Slow progress....
Regards from the south
Alvaro


#460
California, United States
Joined: September 16, 2014
KitMaker: 1,156 posts
Armorama: 1,024 posts
Posted: Wednesday, August 17, 2016 - 01:50 AM UTC
Karl - I love the way the bits you have added bring the cockpit to life. I'll remember the idea of adding wear to the seat itself. Too often I think these are new vehicles that didn't have time to get much wear on the fabric but i imagine that under the stress of wartime use wear accelerated considerably.
I like what you have done here.
Vintage Paul
I'd happily live in the past but for air conditioning, the internet, mobile phones, modern medicine & dentistry and, and, and . . .
England - East Midlands, United Kingdom
Joined: January 17, 2006
KitMaker: 1,694 posts
Armorama: 1,584 posts
Posted: Wednesday, August 17, 2016 - 03:04 AM UTC
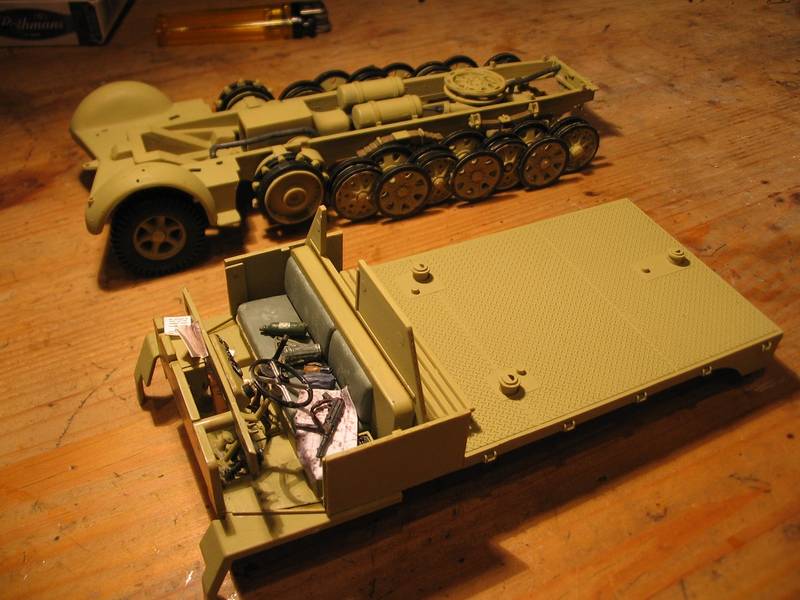
Paul, thanks for that. I always like to add various bits of kit to vehicles to make them look occupied plus it makes them a bit more interesting to look at. I'm not sure how much will be visible once the armoured cab's on but I do it as force of habit these days lol. I know what you mean about wear and tear. When you look at the weathering on some vehicles you'd expect them to have been in the field for a few years with all the rust etc which isn't very realistic when you consider how long a tank would actually last in action. I would imagine from factory to being blown up would be a few months if that. With this being an AA vehicle it would be pretty much out of harms way so would just get normal wear and tear with the crew being in and out of the vehicle all the time. Having used and driven military vehicles in the past, I know that squaddies don't take much care over the vehicle, be it whatever, as it's not actually theirs so a cigarette burn on the seat or using the cab floor as an ashtray is no big deal when compared to their own car..lol. Some 4 tonners and Land Rovers I had handed over to me looked like a dustbin in the cab so I'd empty all the last drivers crap before I'd take it anywhere. I've tried to create that mess here to add the human element.
Nothing is so exhilarating in life as to be shot at with no result.
- Winston Churchill
England - East Midlands, United Kingdom
Joined: January 17, 2006
KitMaker: 1,694 posts
Armorama: 1,584 posts
Posted: Thursday, August 18, 2016 - 10:37 PM UTC
I;ve done a bit more work on my project and it's going together nicely. I tried the top of the cab on and you can hardly see anything even without the doors on but such is life. I had some Griffon Models stuff arrive from Historex today. They really are on the ball with getting stuff out. There aren't that many clips of shells in the kit and they lack detail so I've ordered some PE clips, HE shells, AP shells and some spent shells. Came to about £25 which was more than I paid for the kit LOL. They do look nice albeit tiny and there's 10 clips so I can use some for the other Flak 37 I've got. I'm not looking forward to putting these together though. I think I'll paint the clips before I assemble them and put each shell into the respective clip which I've got to bend before I put them onto the base of the clip. Typical. I get a kit that's a doddle to build then something that's a nightmare to add some detail. I just didn't think about how small the shells would be. Hopefully they'll look nice when finished. I'm hoping to get the actual half track and Flak 37 built this weekend so all that's left is the cam. then I can start on the figures and ammo. Fingers crossed. This is where I am now
Nothing is so exhilarating in life as to be shot at with no result.
- Winston Churchill
New York, United States
Joined: March 08, 2010
KitMaker: 3,662 posts
Armorama: 3,078 posts
Posted: Friday, August 19, 2016 - 06:24 AM UTC
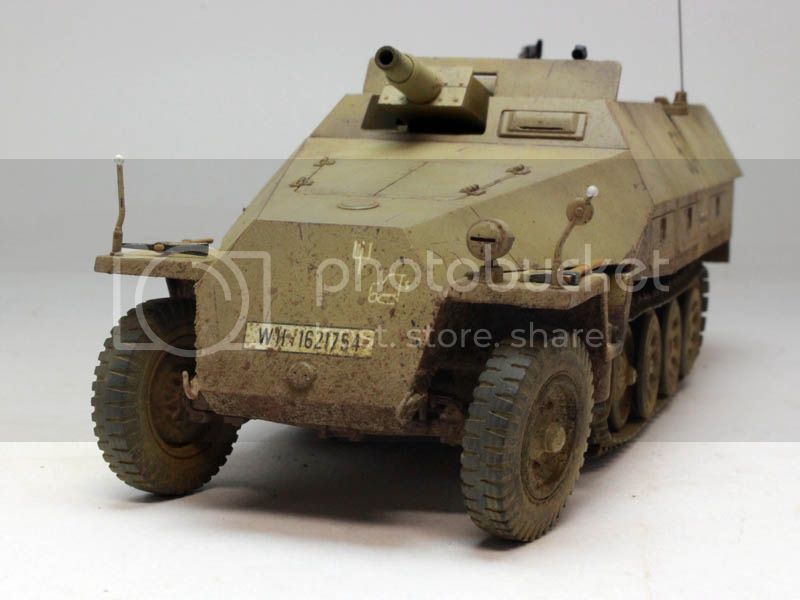
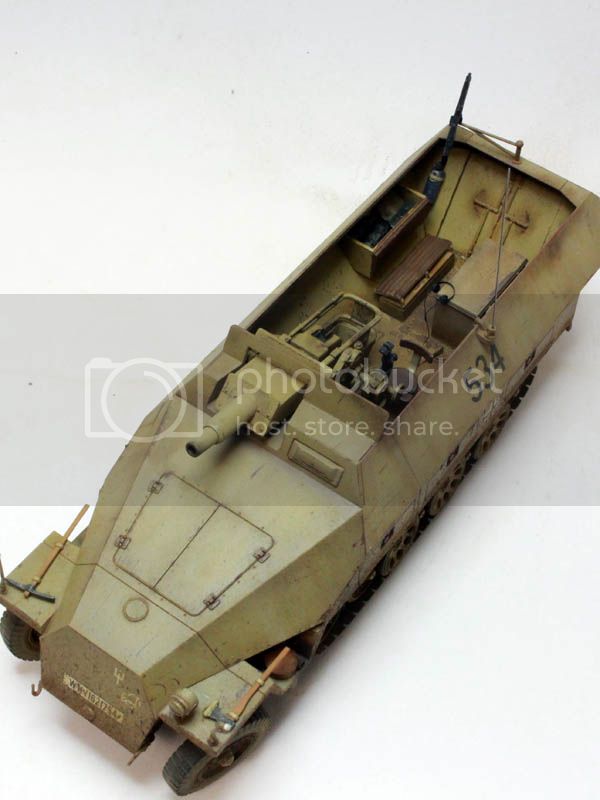
Some Progress and some gear I sourced from the spare parts box

and Desert basecoat applied

Active Campaigns on the bench:
Operation Fall Gelb - Pz.Kpfw. IV Ausf. C
Engineering the Future - M-26 Recovery Vehicle
115 Campaigns completed
England - East Midlands, United Kingdom
Joined: January 17, 2006
KitMaker: 1,694 posts
Armorama: 1,584 posts
Posted: Friday, August 19, 2016 - 02:26 PM UTC
Nothing is so exhilarating in life as to be shot at with no result.
- Winston Churchill
#123
New Mexico, United States
Joined: November 17, 2008
KitMaker: 1,202 posts
Armorama: 635 posts
Posted: Saturday, August 20, 2016 - 09:56 PM UTC
Howdy Y'all

Its been a busy summer but I got some modeling time in this weekend. Worked on my Tamiya Campaign project, the 1/48 Kurogane:
The projects are pretty interesting to follow the progress.
Take care,
Don "Lakota
Working on Campaigns:
1/72 Hasegawa Ki-84 Frank
1/144 Dragon Armor
ColinEdm
 Associate Editor
Alberta, Canada
Joined: October 15, 2013
KitMaker: 1,355 posts
Armorama: 1,229 posts
Posted: Sunday, August 21, 2016 - 12:26 AM UTC
The voices are back.....excellent....
South Carolina, United States
Joined: December 03, 2009
KitMaker: 2,160 posts
Armorama: 1,906 posts
Posted: Sunday, August 21, 2016 - 03:40 AM UTC
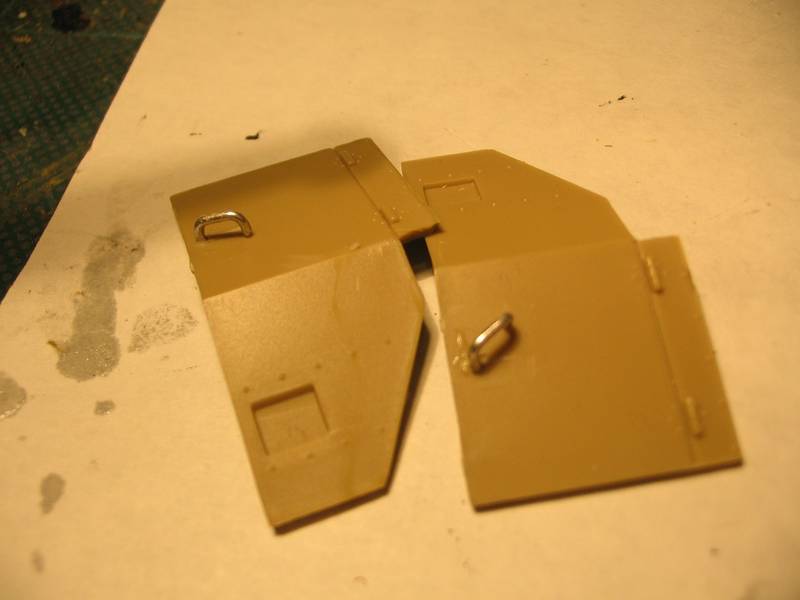
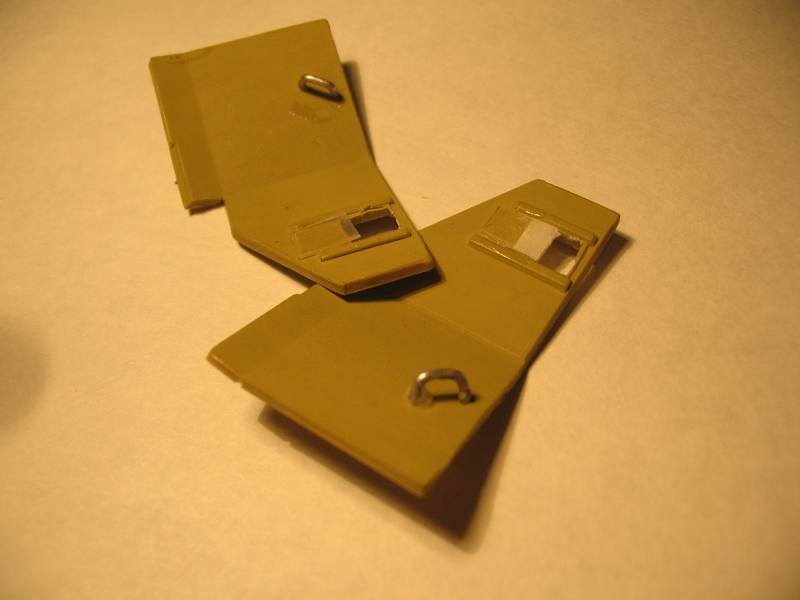
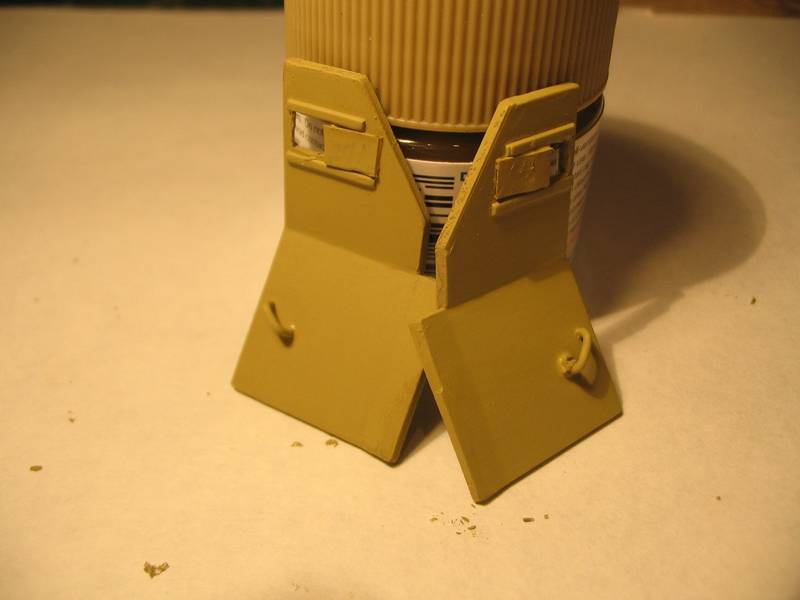
A quick update on the SU-76m.
Assembled the sie fighting compartment wall. I left the shells off their stowage racks until after the interior walls are painted. Also pictured are the ammo racks for the submachineguns and the radio.

All of the fighting compartment walls. All the details are added...though I am sure I'll have to go back and add something.

Added the upper hull body panels to the engine deck and front. The fit was a bit off and the instructions were a bit vague here. You line it up on the one side and allow overhang on the other.
Lot's of parts ready to be assembled.

Roadwheels, suspension arms, suspension fittings, drive sprockets, driver's hatch, and antenna assembly.

Fenders and exhaust. And I assume the air intake.

Assembled.

So far the build is coming together quite nicely. I'll probably pre-paint the crew compartment if the weather allows. Or I'll go ahead and start on the gun.
England - East Midlands, United Kingdom
Joined: January 17, 2006
KitMaker: 1,694 posts
Armorama: 1,584 posts
Posted: Sunday, August 21, 2016 - 10:47 AM UTC
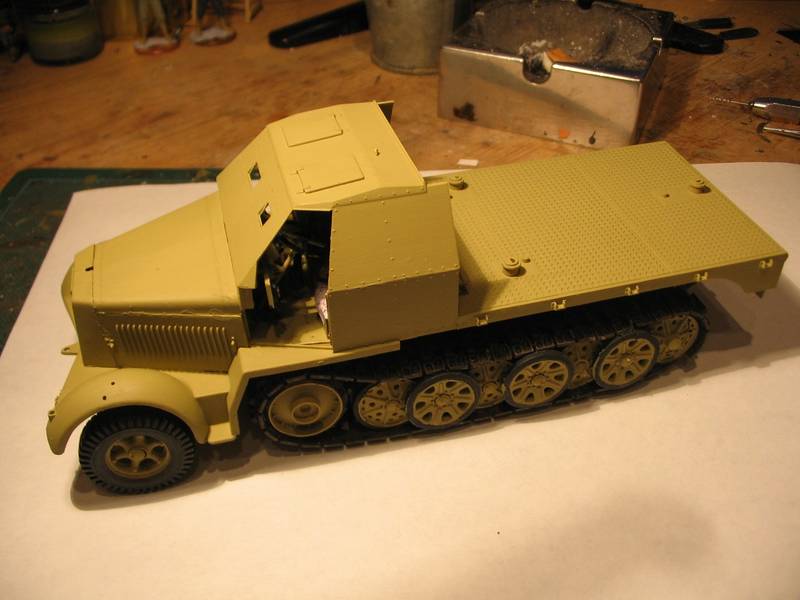
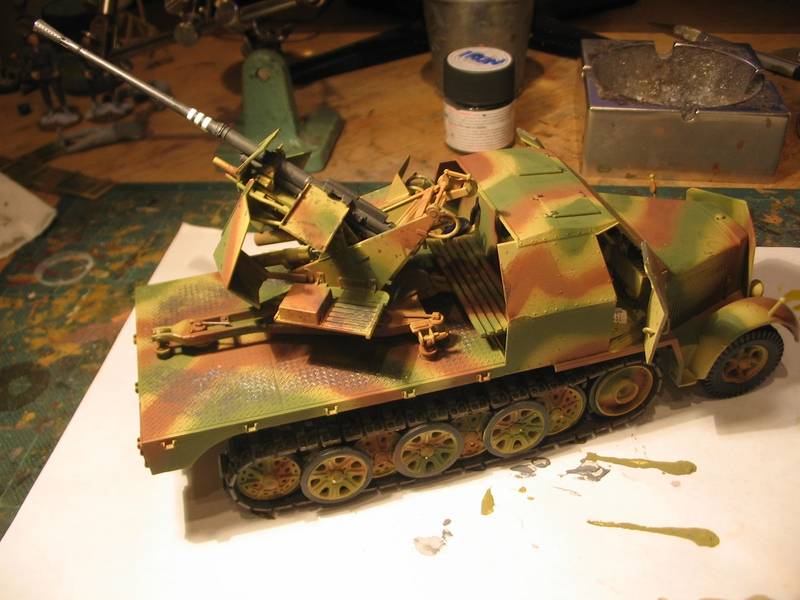
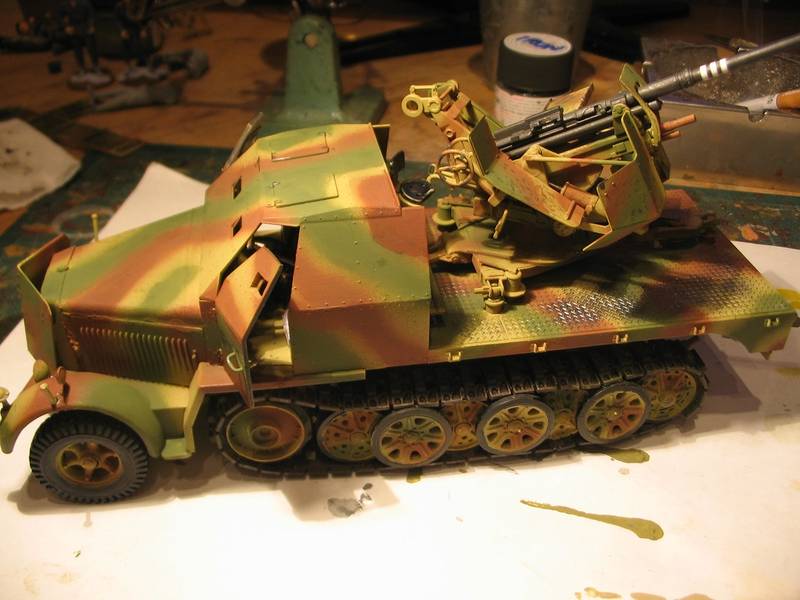
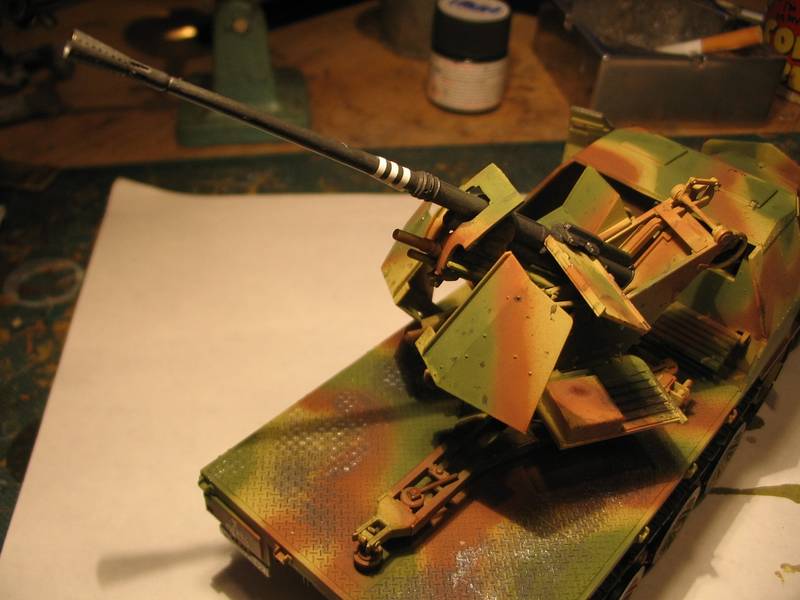
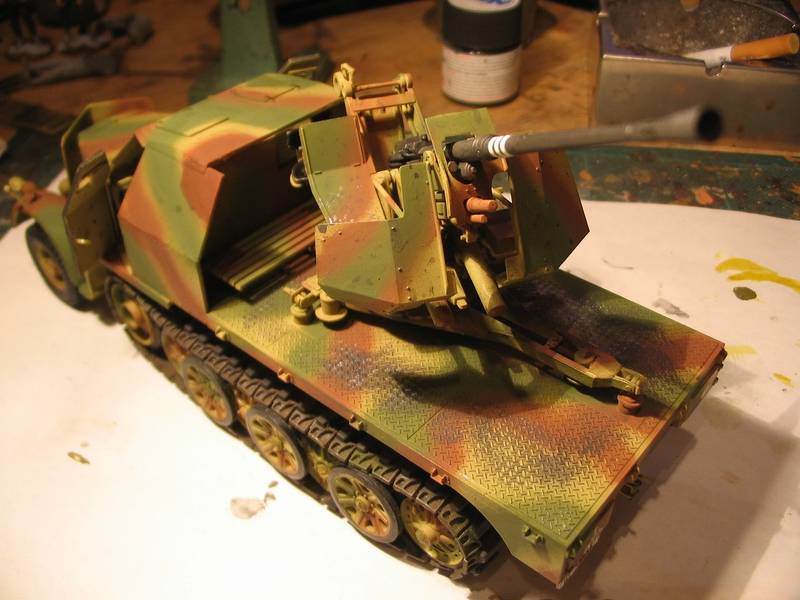
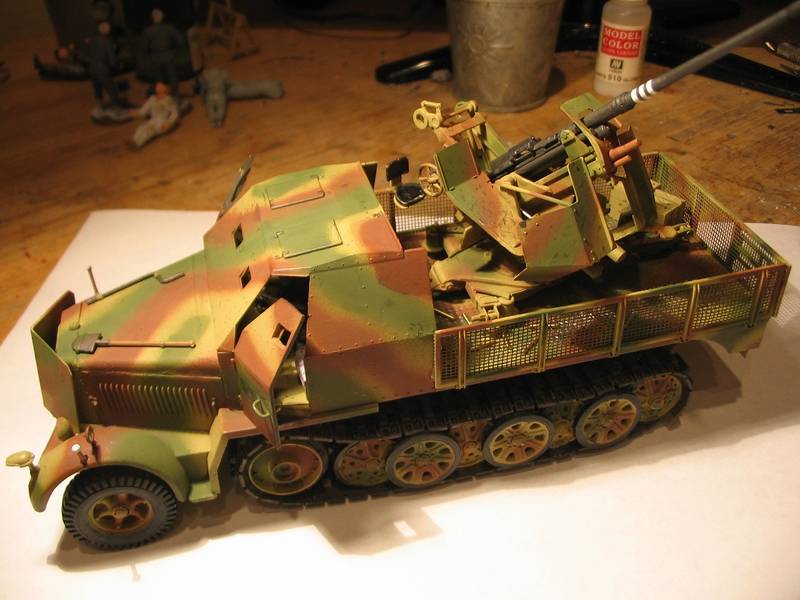
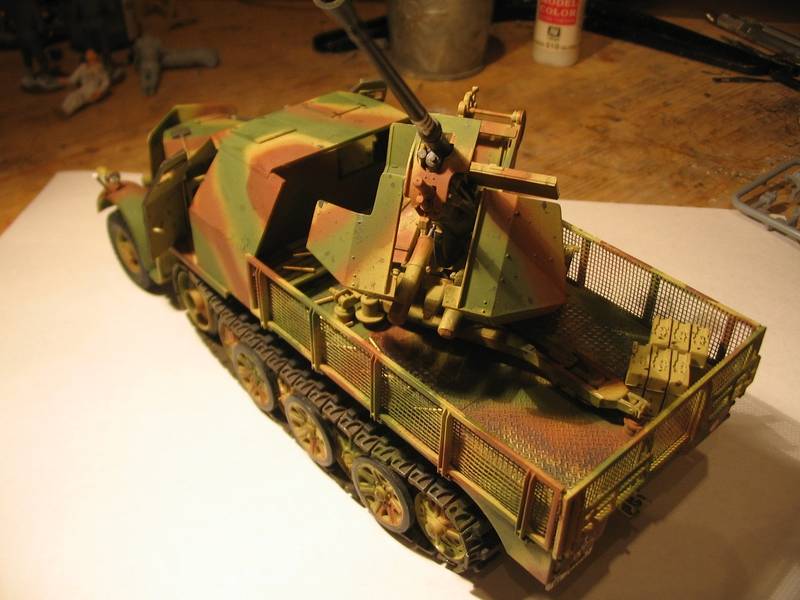
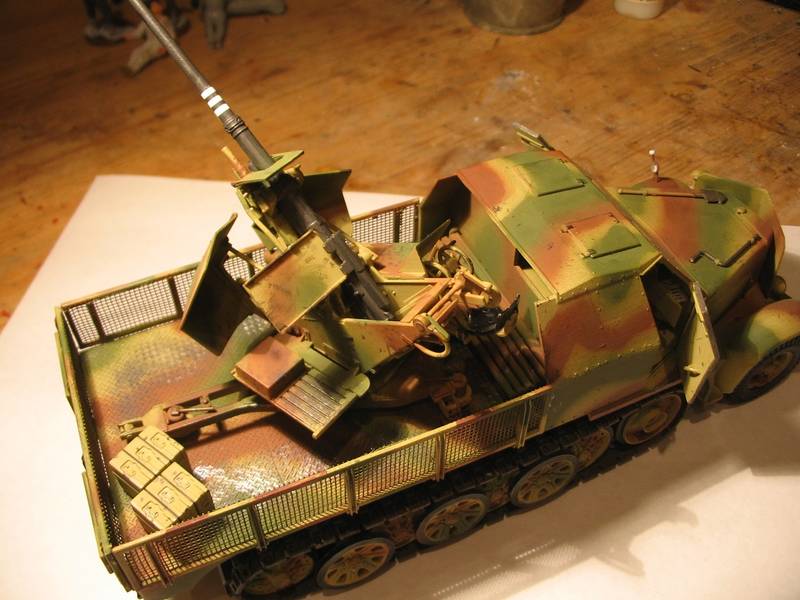
Almost there after a concerted effort this weekend. The Flak 37 went together without any real problems. Only minor tweak needed was when I was fitting the armour plate on the left it has to fit behind something (no idea what it is) that was attached earlier. I had to sand the bar quite thin so it would slip behind it. I've done some weathering on it which considering I'm spraying it may seem a bit pointless but some things like the shield that protects the gunner from ejected shells would take a lot of hammer. Anyone who's ever been hit in the face by an ejecting 7.62mm rifle round will tell you how much force that comes out with so imagine a 37mm shell hitting something solid.
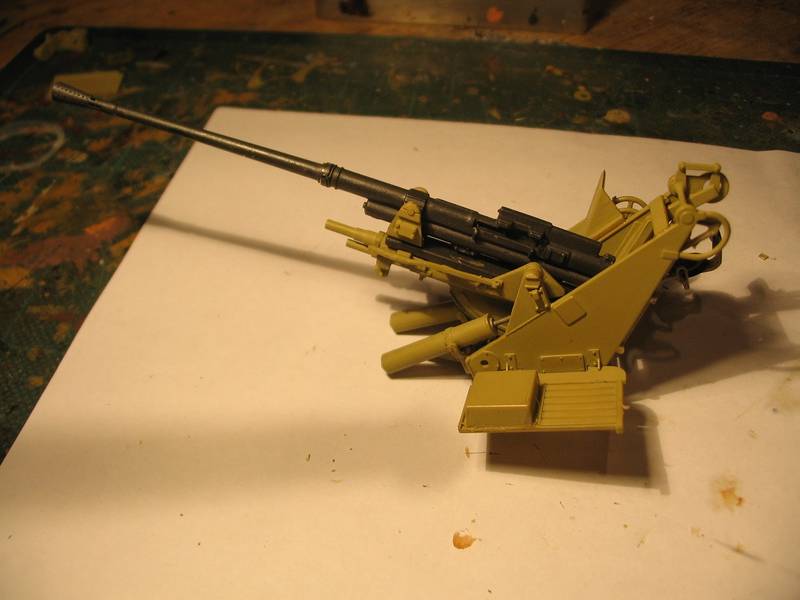
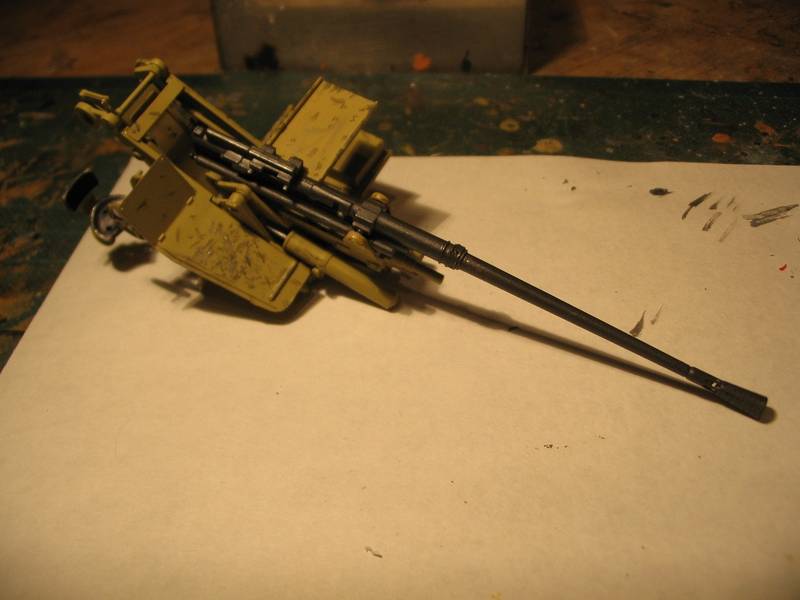
It's more for reference really as I never know how the cam's going to turn out until I spray it. I had some new paints come this week so may try some different greens and browns and see what they look like before I start spraying. I'm leaving the sides up as I can't find a decent picture of the supports for the side panels when they're down. Odd really as they've put the folded supports on the back panel but not the sides. I found a photo the other night with them down but it wasn't clear enough for me to scratch something. It's going in a dio anyway which will be a street scene providing cover so the sides would have to be up so it can move. I've given up on the Tamiya crew I was using out of the seperate Flak 37 kit. They're not too clever detailwise and considering I've bought stuff like a metal barrel and the Griffin ammo (HE and AP plus empties) and clips the nice bits would make the crap figures look even worse lol. I'd bought a DML crew for a Flak 38 in the stash but I'm going to use them on this. I made a start on them last night and I'll put some pics up once there's some real progress on them and before I put them on the vehicle.
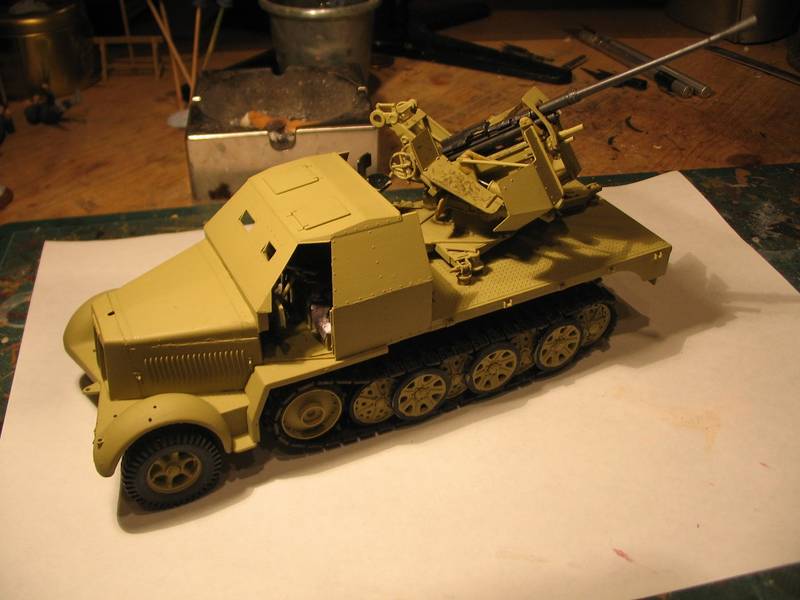
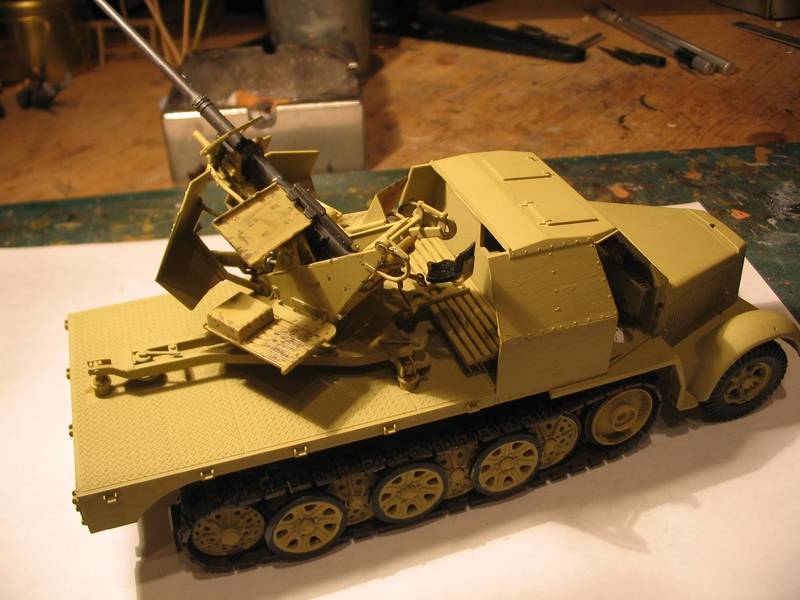
There's not a huge amount left to do on it now. Just a few little bits to glue on like headlights etc then finish off painting it then weathering. Oh and the figures. I think it should be done by the end of the week. Figures always slow things down with me because I make more mistakes painting which p***es me off so I have to strip them of paint and start again from scratch. Considering that I bought this on a whim a while back I'm glad I started this as it's given me an idea for a dio subject/plan I wouldn't have thought of.
Nothing is so exhilarating in life as to be shot at with no result.
- Winston Churchill
England - East Midlands, United Kingdom
Joined: January 17, 2006
KitMaker: 1,694 posts
Armorama: 1,584 posts
Posted: Sunday, August 21, 2016 - 10:56 AM UTC
Colin that looks superb mate. I've got the DML one sitting here waiting to be built. Seeing how well yours has turned out may motivate me into starting on it. (I need to reduce my stash a bit). Love the mud splatter effect. Doing it in different layers looks really effective. I think I'll give that technique a try or at least practice it for a while on some old wrecks I've got. The half track looks well used but not on it's last legs as some do when people cover them in rust and holes. Cracking build.
Nothing is so exhilarating in life as to be shot at with no result.
- Winston Churchill
#041
Kobenhavn, Denmark
Joined: July 20, 2006
KitMaker: 10,069 posts
Armorama: 4,677 posts
Posted: Sunday, August 21, 2016 - 04:01 PM UTC
Campaign'oholic - 252+ campaigns completed
England - East Midlands, United Kingdom
Joined: January 17, 2006
KitMaker: 1,694 posts
Armorama: 1,584 posts
Posted: Monday, August 22, 2016 - 03:44 AM UTC
Nothing is so exhilarating in life as to be shot at with no result.
- Winston Churchill
ColinEdm
Associate Editor Alberta, Canada
Joined: October 15, 2013
KitMaker: 1,355 posts
Armorama: 1,229 posts
Posted: Monday, August 22, 2016 - 06:26 AM UTC
Camo looks good Karl! It's nice to do a Tamiya kit once in a while just for the joy of everything coming together so easily even if detail suffers a tiny bit.
The voices are back.....excellent....
#041
Kobenhavn, Denmark
Joined: July 20, 2006
KitMaker: 10,069 posts
Armorama: 4,677 posts
Posted: Monday, August 22, 2016 - 10:13 AM UTC
Karl, very nice job on the camo. Sometimes it is great to just add glue into the Tamiya box and shake it for 5 min. Out comes a finished kit.

Looking forward to see more
Campaign'oholic - 252+ campaigns completed
United Kingdom
Joined: September 17, 2012
KitMaker: 462 posts
Armorama: 417 posts
Posted: Tuesday, August 23, 2016 - 02:17 AM UTC
England - East Midlands, United Kingdom
Joined: January 17, 2006
KitMaker: 1,694 posts
Armorama: 1,584 posts
Posted: Tuesday, August 23, 2016 - 06:34 AM UTC
Nothing is so exhilarating in life as to be shot at with no result.
- Winston Churchill