Meng M2A3 Bradley BUSK III
Dodecanese, Greece / Ελλάδα
Joined: April 04, 2015
KitMaker: 195 posts
Armorama: 191 posts
Posted: Wednesday, March 09, 2016 - 05:13 PM UTC
Next project on the bench is Meng's M2A3, which is something completely outside my comfort zone. I normally build Axis armour and the occasional Allied piece and I decided to have a go at something modern to put my skill to the test.
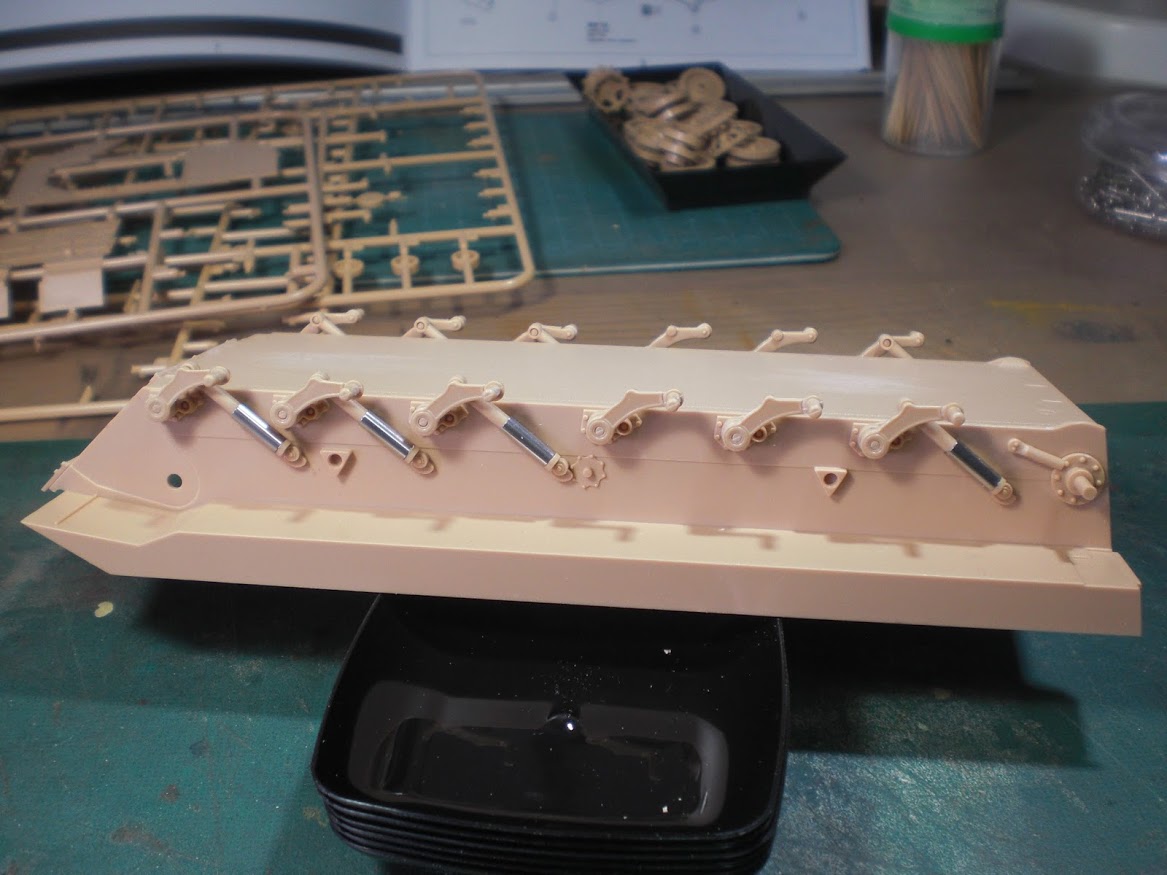
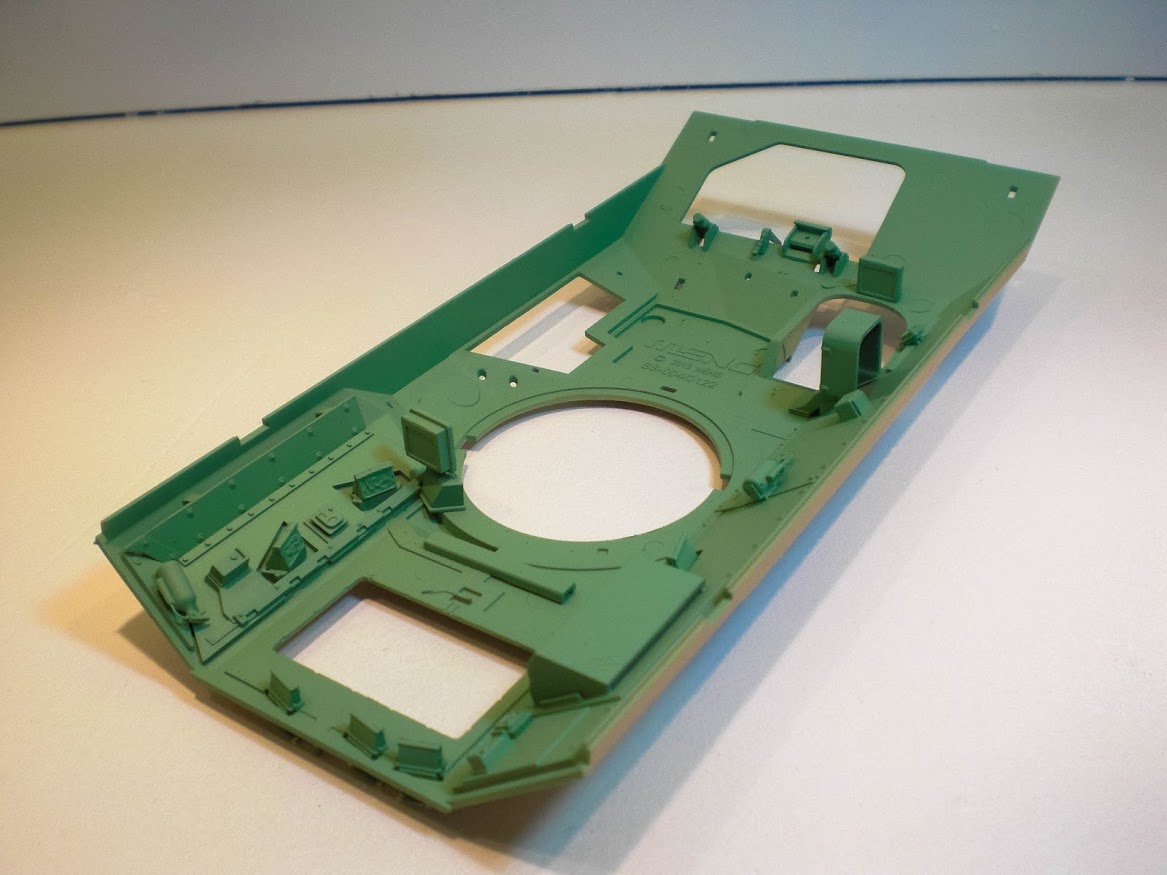
So far, I have assembled most parts of the running gear and everything seems to go on like a charm.


I will be needing all the assistance and guidance from modern armour modellers, so please do stop by and provide your input and feedback.
Thanks
Christos
Sun is shinning
CA Armour Models on FB
Florida, United States
Joined: May 16, 2002
KitMaker: 17,694 posts
Armorama: 13,742 posts
Posted: Wednesday, March 09, 2016 - 06:49 PM UTC
Looks like you are off to a great start. I too have been working on the Meng kit, backdating it to an M2A2 ODS, 3ID during the initial invasion of Iraq. You can check it out
here. I am almost finished with it. I just added all the gear and started weathering it last night. I hope to have an update soon. The kit is great and goes together really well. I found the working suspension a pain to keep all level and ended up gluing it solid as I didn't need it to articulate. That may be something you want to do. Keep up the great work on it.
Field Artillery --- The KING of BATTLE!!!
"People sleep peaceably in their beds at night only because rough men stand ready to do violence on their behalf." -- George Orwell
Showcase
Dodecanese, Greece / Ελλάδα
Joined: April 04, 2015
KitMaker: 195 posts
Armorama: 191 posts
Posted: Wednesday, March 09, 2016 - 07:41 PM UTC
Hi Gino,
I was kind of hoping you would show up and if you wouldn't, I would have gotten in touch!
Thank you for the thumbs up, much appreciated. And thank for sharing your blog, defo one to watch closely!
Cheers
Christos
Sun is shinning
CA Armour Models on FB
Dodecanese, Greece / Ελλάδα
Joined: April 04, 2015
KitMaker: 195 posts
Armorama: 191 posts
Posted: Thursday, March 10, 2016 - 08:57 PM UTC
Running gear is now fully assembled and mounted and I might follow Gino's advice and fix it in place, it seems just too unstable.

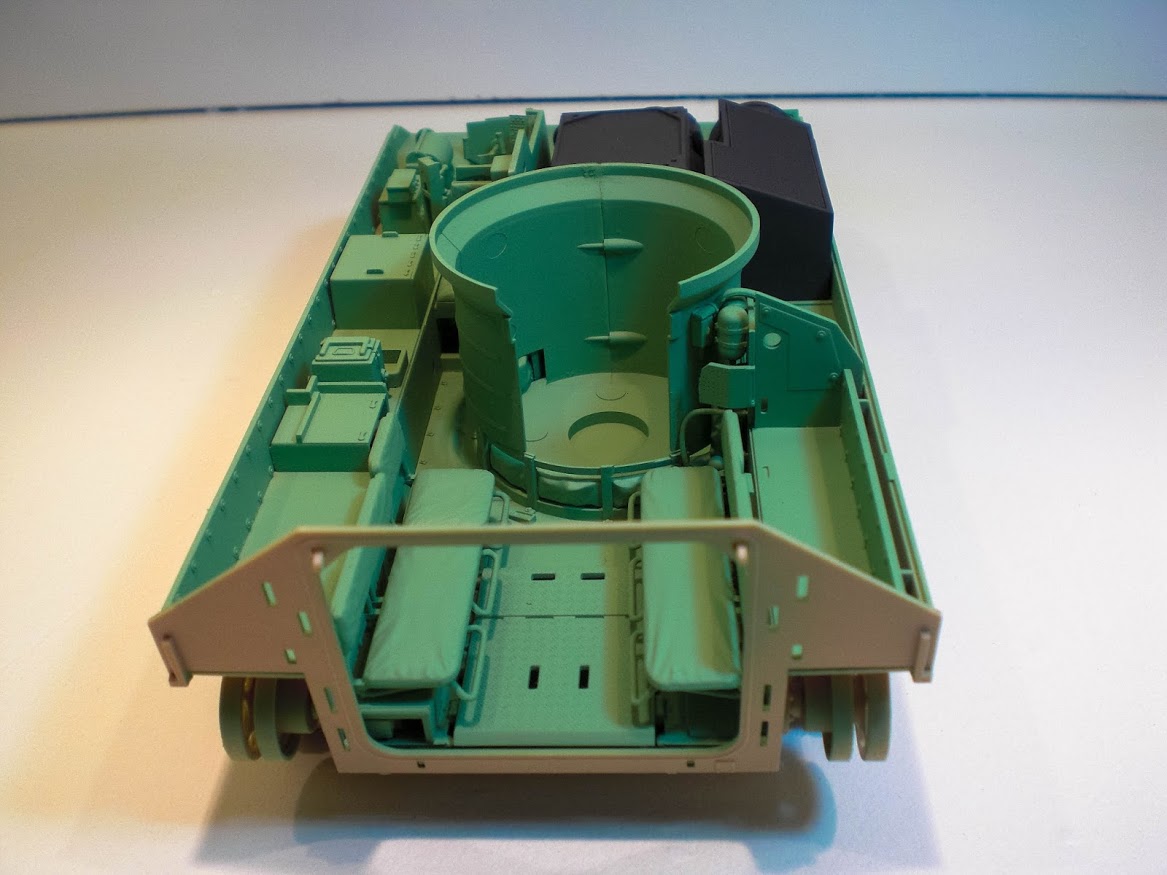
I have also started working on the interior and while I was anxious about fit and all, soon I realised this kit is engineered to near perfection. Everything goes on so easy, I just can't believe it!
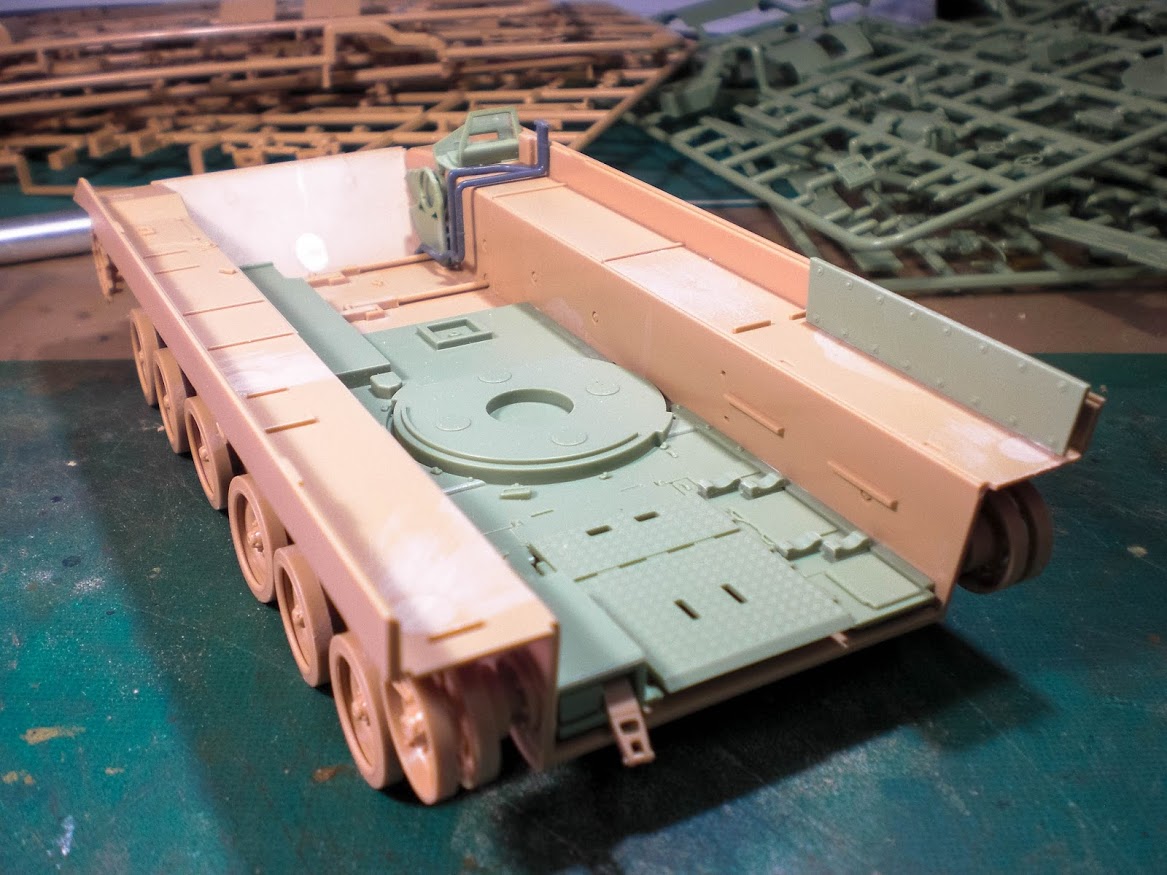


So far, so good. I am loving this bad boy!
Sun is shinning
CA Armour Models on FB
Dodecanese, Greece / Ελλάδα
Joined: April 04, 2015
KitMaker: 195 posts
Armorama: 191 posts
Posted: Sunday, March 13, 2016 - 06:11 PM UTC
Sun is shinning
CA Armour Models on FB
Florida, United States
Joined: May 16, 2002
KitMaker: 17,694 posts
Armorama: 13,742 posts
Posted: Sunday, March 13, 2016 - 06:32 PM UTC
Its coming along nicely. Keep up the good work.
Field Artillery --- The KING of BATTLE!!!
"People sleep peaceably in their beds at night only because rough men stand ready to do violence on their behalf." -- George Orwell
Showcase
Dodecanese, Greece / Ελλάδα
Joined: April 04, 2015
KitMaker: 195 posts
Armorama: 191 posts
Posted: Sunday, March 13, 2016 - 09:24 PM UTC
Thank you very much for the thumbs up, Gino! I'm loving this build and it's really fool-proof; if I can build it, anyone can!
On a different note, what's your opinion of Vallejo's Iraqi Sand as a base colour? I ordered it along with the Vallejo Desert Yellow to allow me to play with various tones on the ERA blocks
Sun is shinning
CA Armour Models on FB
Florida, United States
Joined: May 16, 2002
KitMaker: 17,694 posts
Armorama: 13,742 posts
Posted: Sunday, March 13, 2016 - 09:30 PM UTC
Sorry, I can't give an opinion on the Vallejo Iraqi Sand as I have never used it. A little variety in color is good though.
Field Artillery --- The KING of BATTLE!!!
"People sleep peaceably in their beds at night only because rough men stand ready to do violence on their behalf." -- George Orwell
Showcase
Dodecanese, Greece / Ελλάδα
Joined: April 04, 2015
KitMaker: 195 posts
Armorama: 191 posts
Posted: Sunday, March 13, 2016 - 10:12 PM UTC
ΟΚ, thanks.
I'll run some tests before I apply the base coat
Sun is shinning
CA Armour Models on FB
Dodecanese, Greece / Ελλάδα
Joined: April 04, 2015
KitMaker: 195 posts
Armorama: 191 posts
Posted: Monday, March 14, 2016 - 10:48 PM UTC
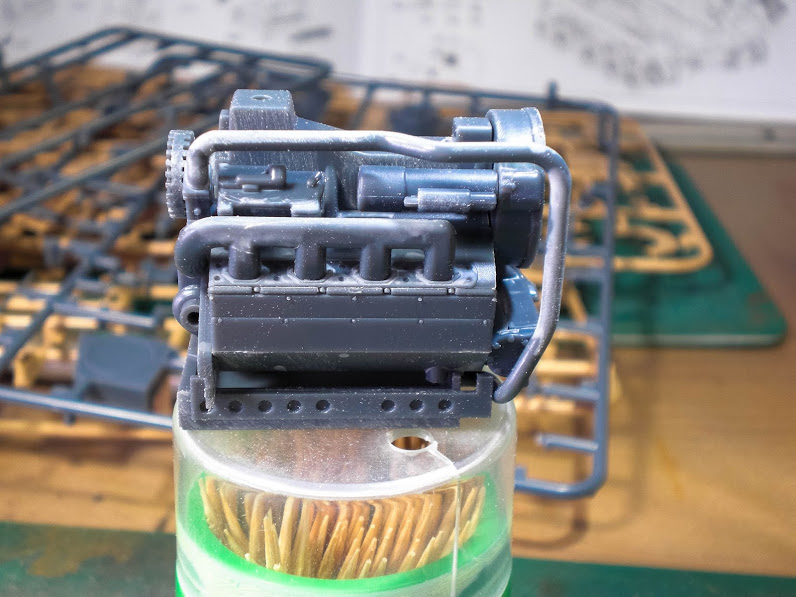
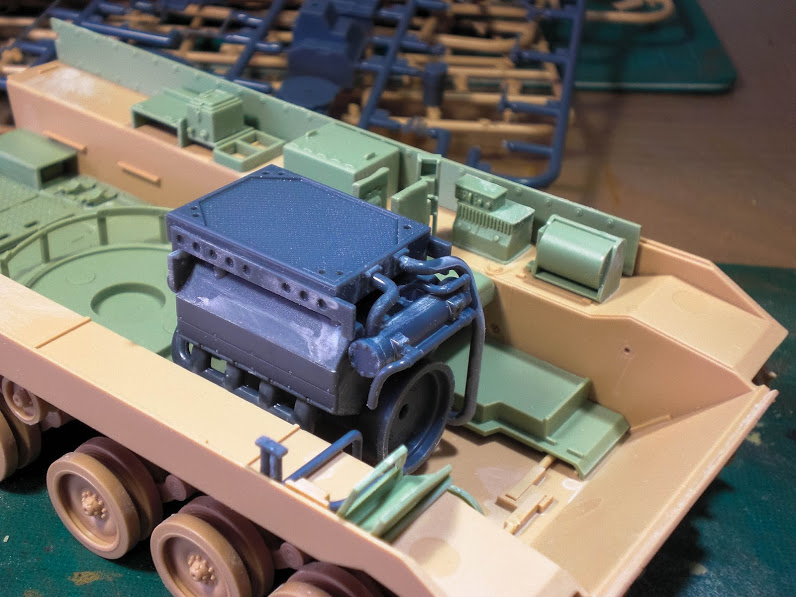
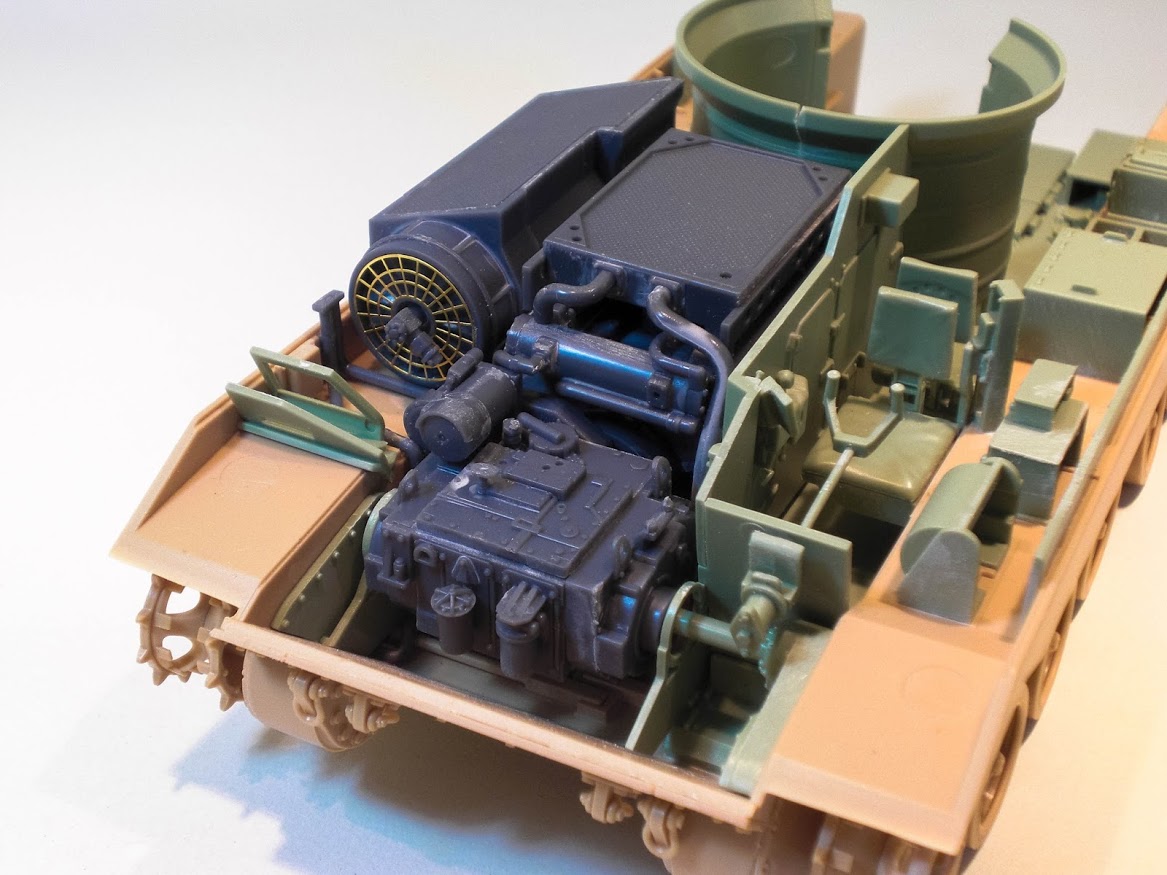
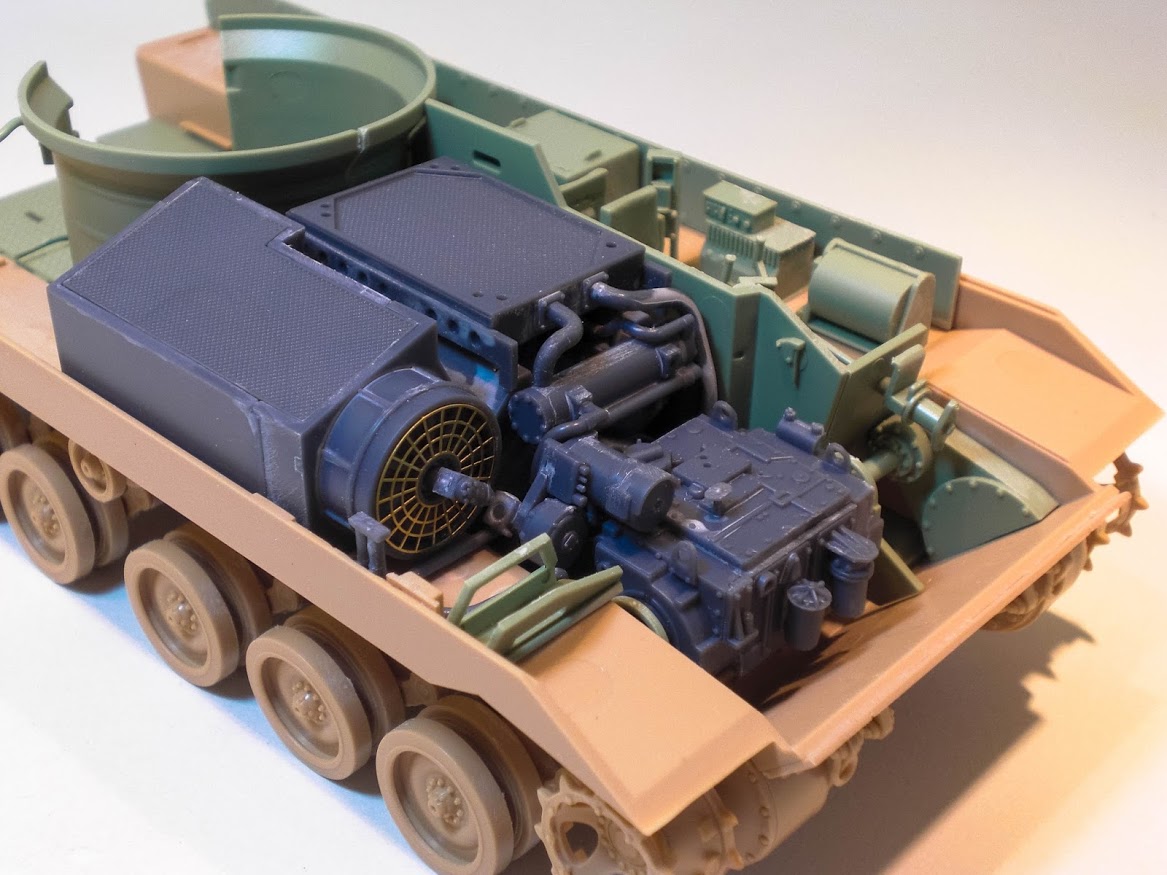
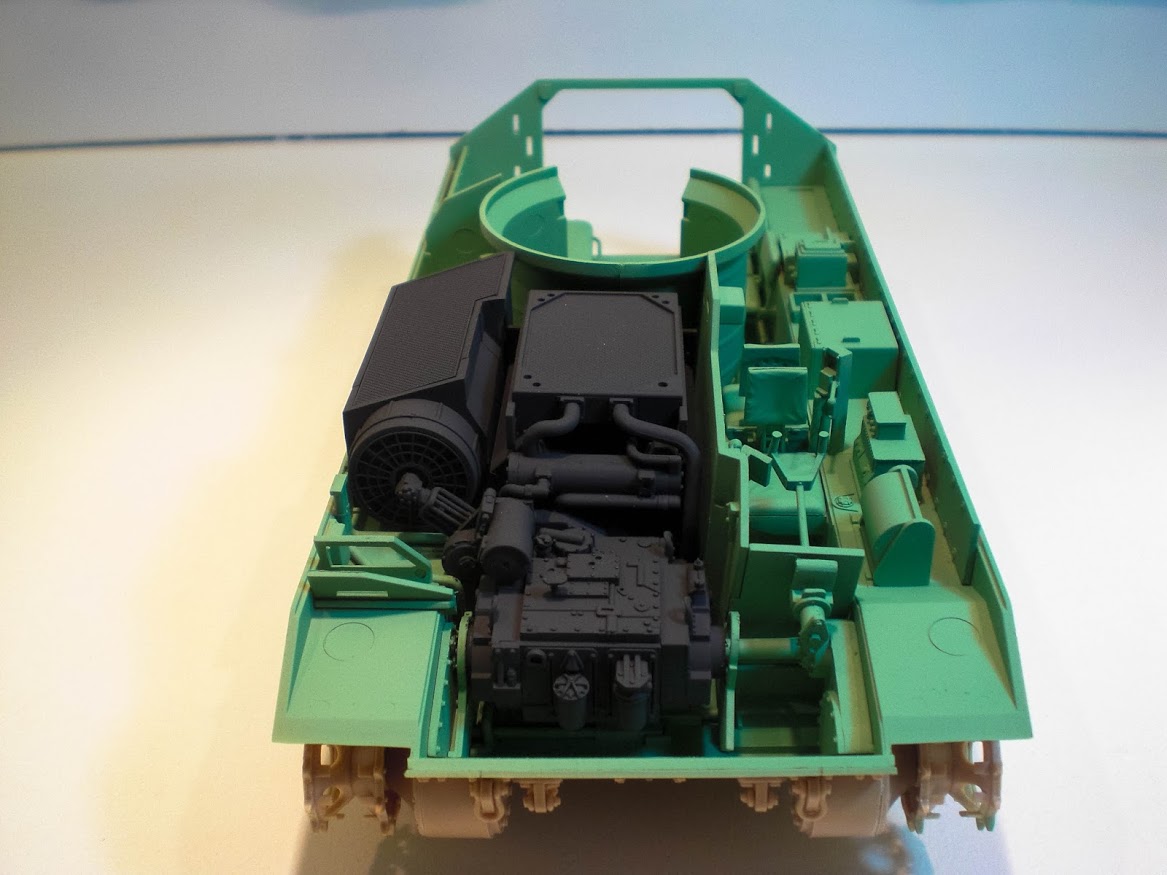
More progress on the M2A3 today. Engine, air intake, transmission and driver's compartment have been completed.


On a different note, I started my personal page on FB, where I have uploaded all of my builds so far. Some are bad, others are better. By doing so, I believe I can demonstrate my development and improvement. So, if you wish to follow or simply check out it, then click
here Thank you
Sun is shinning
CA Armour Models on FB
Attica, Greece / Ελλάδα
Joined: June 12, 2015
KitMaker: 921 posts
Armorama: 919 posts
Posted: Tuesday, March 15, 2016 - 02:34 AM UTC
Looking good so far Chris.
Have you fixed the suspension into place? In case you have not, take in mind that the vehicle might sit a little high on the suspension due to lack of weight.


Dodecanese, Greece / Ελλάδα
Joined: April 04, 2015
KitMaker: 195 posts
Armorama: 191 posts
Posted: Tuesday, March 15, 2016 - 10:18 AM UTC
Thank you very much for the good word Niko!
I did fix the suspension in place, but pushed it a bit down to try and simulate some pressure from the vehicle's weight - hope I got it right!
:)
Sun is shinning
CA Armour Models on FB
Florida, United States
Joined: May 16, 2002
KitMaker: 17,694 posts
Armorama: 13,742 posts
Posted: Tuesday, March 15, 2016 - 06:05 PM UTC
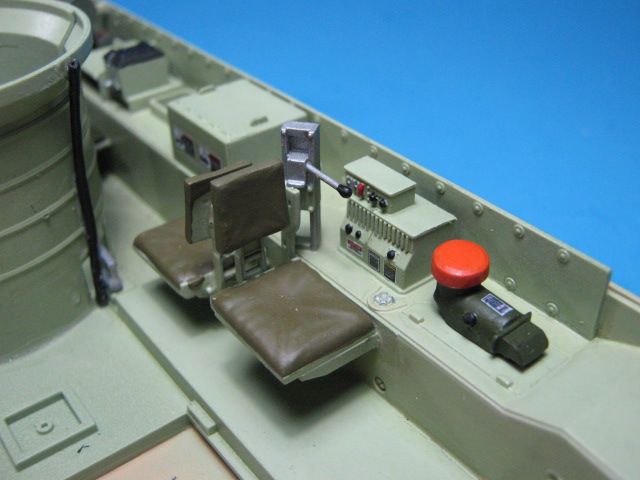
The interior is coming along nicely. You may want to add the height adjustment lever coming off the driver's seat mount. Tamiya had it in their interior, but Meng missed it. You can see it on mine in the below pic (silver rod w/black tip).
Field Artillery --- The KING of BATTLE!!!
"People sleep peaceably in their beds at night only because rough men stand ready to do violence on their behalf." -- George Orwell
Showcase
Dodecanese, Greece / Ελλάδα
Joined: April 04, 2015
KitMaker: 195 posts
Armorama: 191 posts
Posted: Tuesday, March 15, 2016 - 06:36 PM UTC
Hi Gino,
Thank you very much for the good word and the heads up regarding the lever; I know nothing about modern armour and even less about their interior, so it is easy to miss out on many things!
Another thing, how about the armour on the side skirts? I read that it is spaced and Meng missed it, what's your thought on this one?
Cheers,
Christos
Sun is shinning
CA Armour Models on FB
Florida, United States
Joined: May 16, 2002
KitMaker: 17,694 posts
Armorama: 13,742 posts
Posted: Tuesday, March 15, 2016 - 07:59 PM UTC
The lower portion of the side skirts do have two layers of spaced armor, but they are pretty close together and not really noticeable as separate pieces in 1/35. It is not a big deal to me and I would leave them as is.
You can see the spaced armor lower plates on this M6A2 Linebacker.

Field Artillery --- The KING of BATTLE!!!
"People sleep peaceably in their beds at night only because rough men stand ready to do violence on their behalf." -- George Orwell
Showcase
Dodecanese, Greece / Ελλάδα
Joined: April 04, 2015
KitMaker: 195 posts
Armorama: 191 posts
Posted: Tuesday, March 15, 2016 - 09:09 PM UTC
Once again, I'm indebted!
The tyres' wear is very interesting, I wouldn't think they'd let them get so worn out. I might try to replicate this, I didn't glue the "tyres" to the hubs and I can easily remove them!
p.s. M6? looks like an M2 to me!

Sun is shinning
CA Armour Models on FB
Warszawa, Poland
Joined: March 26, 2003
KitMaker: 4,342 posts
Armorama: 3,938 posts
Posted: Tuesday, March 15, 2016 - 09:43 PM UTC
Quoted Text
p.s. M6? looks like an M2 to me!
M6 Linebacker. It has anti aircraft Stinger missile launcher in place or TOW launcher
Pawel "Vodnik" Krupowicz
Professional Certified Rivet Counter.
Dodecanese, Greece / Ελλάδα
Joined: April 04, 2015
KitMaker: 195 posts
Armorama: 191 posts
Posted: Tuesday, March 15, 2016 - 10:13 PM UTC
Hi Pawel,
As soon as you mentioned the Stingers, I noticed the launcher is very different to the one on the M2s
Thanks,
Christos
Sun is shinning
CA Armour Models on FB
Dodecanese, Greece / Ελλάδα
Joined: April 04, 2015
KitMaker: 195 posts
Armorama: 191 posts
Posted: Monday, March 21, 2016 - 07:26 PM UTC
The interior has been painted and I now need to add the decals and paint the smaller details before I can move on to other assemblies.

I also added the missing height adjustment lever (Thanks Gino)

That's all for now, thanks for watching
Christos
Sun is shinning
CA Armour Models on FB
Dodecanese, Greece / Ελλάδα
Joined: April 04, 2015
KitMaker: 195 posts
Armorama: 191 posts
Posted: Wednesday, March 23, 2016 - 09:52 PM UTC
Having received some feedback, I decided to re-work the interior (and my photo settings) and revisited the paint job. I think I only need to add the decals a couple of tubes to the engine to mate the lower hull to the upper.


I repainted the interior with a lighter colour (sky green mixed with white) and painted the engine, transmission and air intake with the correct colours this time.
Looks far better now, what do think?
Christos
Sun is shinning
CA Armour Models on FB
Wyoming, United States
Joined: April 07, 2006
KitMaker: 64 posts
Armorama: 62 posts
Posted: Wednesday, March 23, 2016 - 10:45 PM UTC
My current workbench:
1/48 CJS Aviation Saturn V
1/350 AMT Klingon Bird of Prey
1/35 Dragon M1A2 SEP
Dodecanese, Greece / Ελλάδα
Joined: April 04, 2015
KitMaker: 195 posts
Armorama: 191 posts
Posted: Wednesday, March 23, 2016 - 10:53 PM UTC
Hi Carlos,
Thank you very much for the kind comment, much appreciated!
It's a great kit and really a joy to paint (and build).
Cheers,
Christos
Sun is shinning
CA Armour Models on FB
England - South West, United Kingdom
Joined: March 13, 2015
KitMaker: 418 posts
Armorama: 235 posts
Posted: Thursday, March 24, 2016 - 12:10 AM UTC
This is starting to look nicely. very nice tone of colour to it and paint detail.
Wyoming, United States
Joined: April 07, 2006
KitMaker: 64 posts
Armorama: 62 posts
Posted: Thursday, March 24, 2016 - 03:37 AM UTC
Quoted Text
Hi Carlos,
Thank you very much for the kind comment, much appreciated!
It's a great kit and really a joy to paint (and build).
Cheers,
Christos
You are quite welcome Christos. I practically lived in an M2A2 ODS version for a few years back in the day, watching your build really takes me back to the early 90's.
My current workbench:
1/48 CJS Aviation Saturn V
1/350 AMT Klingon Bird of Prey
1/35 Dragon M1A2 SEP
Dodecanese, Greece / Ελλάδα
Joined: April 04, 2015
KitMaker: 195 posts
Armorama: 191 posts
Posted: Thursday, March 24, 2016 - 06:43 PM UTC
@Hyder
Thank you very much for the good word, much appreciated!
@Carlos
I only hope my build brings up memories you are fond of, because the memories from my military service are a mixed bag!
Sun is shinning
CA Armour Models on FB