California, United States
Joined: April 26, 2016
KitMaker: 362 posts
Armorama: 285 posts
Posted: Wednesday, February 15, 2017 - 01:13 AM UTC
Hi Guys, WIP update first coat of paint on, attaching skirts. Oh did I mention I hate rubber tracks

 images
"Gonna start blastin"
...Stumpy
Rio Bravo 1959
France
Joined: February 20, 2012
KitMaker: 1,932 posts
Armorama: 1,907 posts
Posted: Wednesday, February 15, 2017 - 03:56 AM UTC
[quote]
Quoted Text
No name in the Tankograd Fennek Book. They say that:
'in order to prevent revealing light reflections from the windows, special, finely woven plastic screens can be mounted'.
OK thank you. The purpose of this element is interesting, however, I 'm not sure another vehicle has a similar system.
Distrito Federal, Mexico
Joined: May 31, 2013
KitMaker: 1,457 posts
Armorama: 1,440 posts
Posted: Wednesday, February 15, 2017 - 09:47 AM UTC
Done with washes, and dry brushing here and there. I thought originally to do some rain marks, but in all of my reference pictures I see none. Since this cammo was only used for exhibit purposes, it looks spotless on most pictures. Therefore, I am thinking not to go into any more weathering.


Distrito Federal, Mexico
Joined: May 31, 2013
KitMaker: 1,457 posts
Armorama: 1,440 posts
Posted: Wednesday, February 15, 2017 - 09:49 AM UTC
Added a couple of figures and I think I am pretty much done:


Distrito Federal, Mexico
Joined: May 31, 2013
KitMaker: 1,457 posts
Armorama: 1,440 posts
Posted: Wednesday, February 15, 2017 - 09:50 AM UTC

#454
Georgia, United States
Joined: July 10, 2016
KitMaker: 1,273 posts
Armorama: 1,138 posts
Posted: Wednesday, February 15, 2017 - 08:15 PM UTC
Superb work, Marcos, Very Nice!
"I can make armored cars, safe and unassailable...and behind these our infantry will be able to follow quite unharmed and without any opposition."
-Leonardo da Vinci, 1487
California, United States
Joined: April 26, 2016
KitMaker: 362 posts
Armorama: 285 posts
Posted: Wednesday, February 15, 2017 - 08:42 PM UTC
Very well done, unique camo
"Gonna start blastin"
...Stumpy
Rio Bravo 1959

#465
Nordrhein-Westfalen, Germany
Joined: September 12, 2014
KitMaker: 398 posts
Armorama: 394 posts
Posted: Wednesday, February 15, 2017 - 09:02 PM UTC
Hi Marcos,
Great job on the T-90.
Jerry
Niedersachsen, Germany
Joined: July 11, 2013
KitMaker: 100 posts
Armorama: 72 posts
Posted: Wednesday, February 15, 2017 - 10:29 PM UTC
The T-90 looks really fantastic. The figures too.
Best
Chris
France
Joined: February 20, 2012
KitMaker: 1,932 posts
Armorama: 1,907 posts
Posted: Wednesday, February 15, 2017 - 10:37 PM UTC
This T90 looks original with his angular camouflage scheme.
Distrito Federal, Mexico
Joined: May 31, 2013
KitMaker: 1,457 posts
Armorama: 1,440 posts
Posted: Thursday, February 16, 2017 - 12:02 AM UTC
Thank you guys. It was a fun build.cheers!
Pennsylvania, United States
Joined: April 22, 2012
KitMaker: 344 posts
Armorama: 315 posts
Posted: Saturday, February 18, 2017 - 09:29 PM UTC
Hi all, I am in with Trumpeter's SA-8 Gecko.

I was leaning towards a vehicle in Ukrainian service, I have a nice set of decals from Echelon. The only issue being that all of the Ukrainian vehicles I have seen have a small radar (IFF?) mounted above the target acquisition radar. The Trumpeter kit is an earlier version without it.
Marcos - Terrific looking T-90!!!
-Nate
Lisboa, Portugal
Joined: March 04, 2008
KitMaker: 5,386 posts
Armorama: 4,727 posts
Posted: Monday, February 20, 2017 - 04:56 AM UTC
@Marcos
Great work on the T-90 !! Congrats
Don't forget to post a photo in the KitMaker Campaign Gallery.
@Nate
I started that one in December, still working on the interior decals.
Anyway I forgot to post my build,
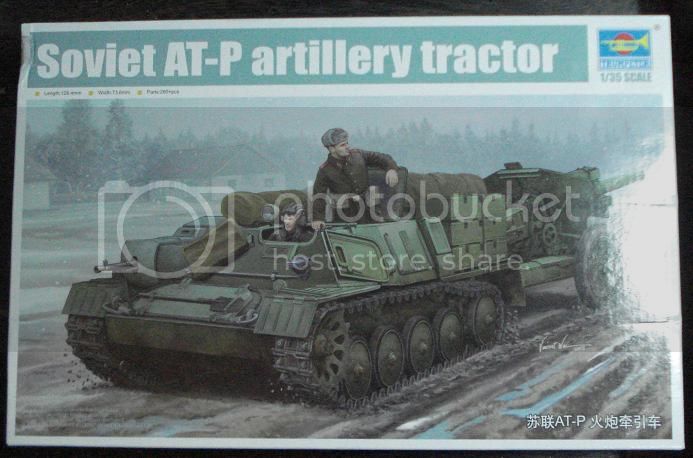
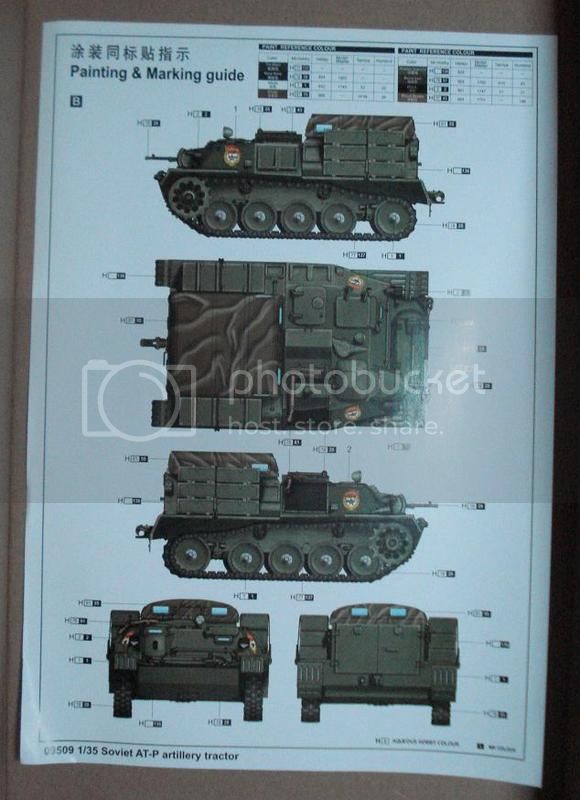
Active Builds: 0
Active Campaigns: 0
Lisboa, Portugal
Joined: March 04, 2008
KitMaker: 5,386 posts
Armorama: 4,727 posts
Posted: Monday, February 20, 2017 - 04:59 AM UTC
Active Builds: 0
Active Campaigns: 0
Alberta, Canada
Joined: November 18, 2003
KitMaker: 61 posts
Armorama: 57 posts
Posted: Tuesday, February 21, 2017 - 01:30 AM UTC
All finished my C1 Ariete! this was a nice kit to build and the tank itself looks cool. With the paint job being green overall, including all of the tools, i tried to layer shades of Nato green of different shades to give it a different look.
Pre Shading

Base Coat & Road Wheels was done with a mixture of 85% Vallejo Nato Green and 15% white as Italian tanks tend to look like a lighter shade compared to the Nato Green on German Leopards
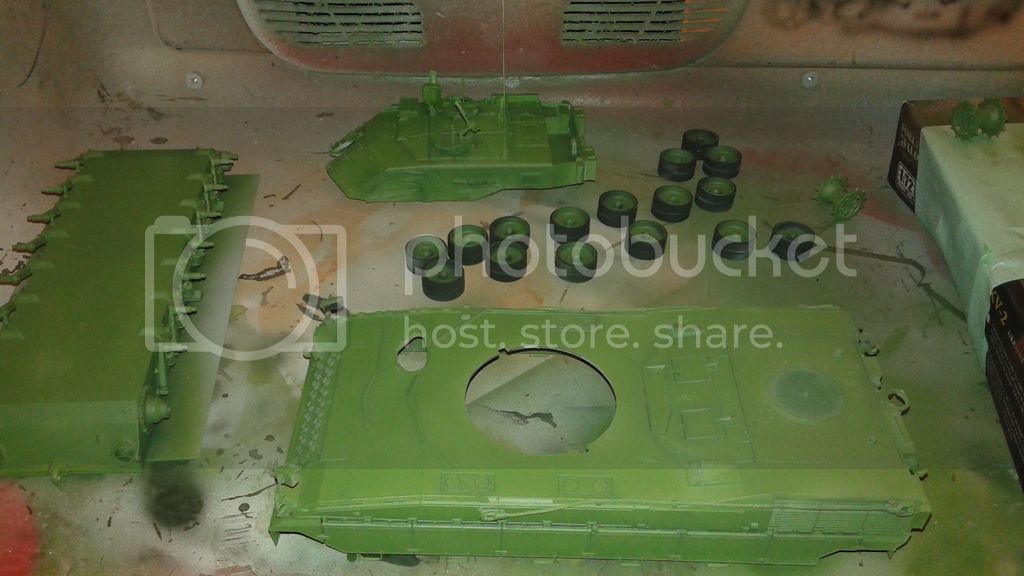

After the base coat i dry brushed on darker Tamiya Nato Green to give it a more two toned look. I also wanted this Ariete to look well used so i gave it some mud which helped it break up the green as well.

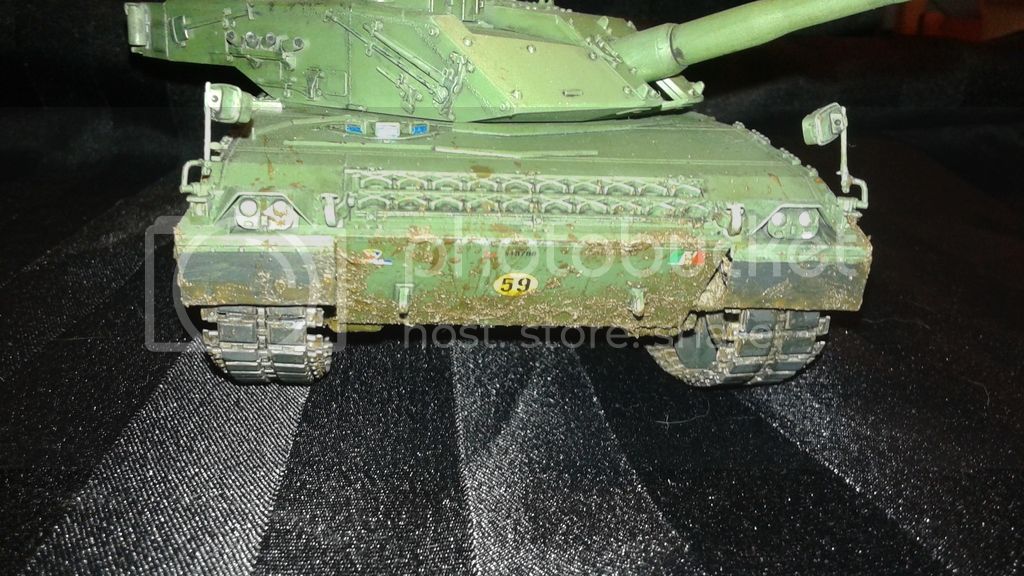


I know the tracks are free of mud! That will be coming as i am adding a simple base, and will get them done then.
California, United States
Joined: April 26, 2016
KitMaker: 362 posts
Armorama: 285 posts
Posted: Tuesday, February 21, 2017 - 10:17 PM UTC
Hi Guys, WIP update, finished Assembly, base coat of paint and clear coat. Will do the decals and some weathering. Straightforward build although the skirts are a tad to long
 upload gif from url
"Gonna start blastin"
...Stumpy
Rio Bravo 1959
France
Joined: February 20, 2012
KitMaker: 1,932 posts
Armorama: 1,907 posts
Posted: Friday, February 24, 2017 - 10:00 PM UTC
Hi guys ! Just finished another campaign, I'm ready for this great one ! Thank you for your enthousiasm about Trumpeter kits.
For this campaign I choose to build a Puma 6x6.
Nice little wheeled vehicle used for reconaissance.
I want to depict a vehicle seen in Afghanistan in 2005 during the ISAF mission.
A picture of the real one in a book from Tankograd editions:


Registration numbers correspond to the trumpeter decals


#454
Georgia, United States
Joined: July 10, 2016
KitMaker: 1,273 posts
Armorama: 1,138 posts
Posted: Friday, February 24, 2017 - 10:52 PM UTC
Good looking choice, Alex!
"I can make armored cars, safe and unassailable...and behind these our infantry will be able to follow quite unharmed and without any opposition."
-Leonardo da Vinci, 1487
France
Joined: February 20, 2012
KitMaker: 1,932 posts
Armorama: 1,907 posts
Posted: Saturday, February 25, 2017 - 04:15 AM UTC
Thank you, I will see how you make your BRDM.
Colorado, United States
Joined: December 25, 2004
KitMaker: 3,770 posts
Armorama: 2,263 posts
Posted: Saturday, February 25, 2017 - 04:22 AM UTC
The thrid Artillery unit I was assigned to as Battalion FDC had the Early M198's. Ft. Lewis, Washington - 1985, 3rd Bn, 34th FA, 9th ID.
With that, here's my entry:

Mike

Colorado, United States
Joined: December 25, 2004
KitMaker: 3,770 posts
Armorama: 2,263 posts
Posted: Saturday, February 25, 2017 - 08:11 AM UTC
Sat down and did a bit or work, steps 1-7 which results in most of the barrel/recoil/frame being done.
The underside had a cross-member that was too short, so I made one from aluminum tube with a piece of brass rod that fits nicely inside.

I had to make my own springs because the styrene springs were - garbage.

As of right now, everything moves freely. I haven't decided if it'll get assembled in travel mode or firing.
Mike

Colorado, United States
Joined: December 25, 2004
KitMaker: 3,770 posts
Armorama: 2,263 posts
Posted: Sunday, February 26, 2017 - 02:04 AM UTC
Work between tiling in the bathroom.
Barrel and trails - pretty basic at the moment:

This howitzer has quite a large footprint considering it's 1/35th. Imagine the space needed for a realistic dio of a firing position.


Alas, this is how I'll be building this one - travel position. I just need to look and see how much of the kit sight assemblies need to be "cut back/removed" for travel.

IF I recall correctly, our M198's in 1985 at Lewis were Green.
More to follow....
Mike

Colorado, United States
Joined: December 25, 2004
KitMaker: 3,770 posts
Armorama: 2,263 posts
Posted: Sunday, February 26, 2017 - 07:40 AM UTC
There was a second "travel" position (?). Liking it being towed this way (or parked in the motorpool until the M923 is ready):

For the most part, it's all primed and ready for paint. Tomorrow?
Did some picture searching. None of the pictures of an actual M198 show those small wheels/tires...it's like they're kept in the motorpool or in the back of the prime mover...so those will come off. Same for the spool for wire...can't find that either.
Mike

Colorado, United States
Joined: December 25, 2004
KitMaker: 3,770 posts
Armorama: 2,263 posts
Posted: Monday, February 27, 2017 - 05:42 AM UTC
NATO Green. Hmmmm....

Still a fair amount to do...

Mike


#335
Auckland, New Zealand
Joined: September 03, 2013
KitMaker: 1,808 posts
Armorama: 36 posts
Posted: Friday, March 03, 2017 - 09:56 AM UTC
So much heavy weaponry going on here time for an update on more graceful Marine firepower.
Finished with the resin intakes and got the fuselage halves together.
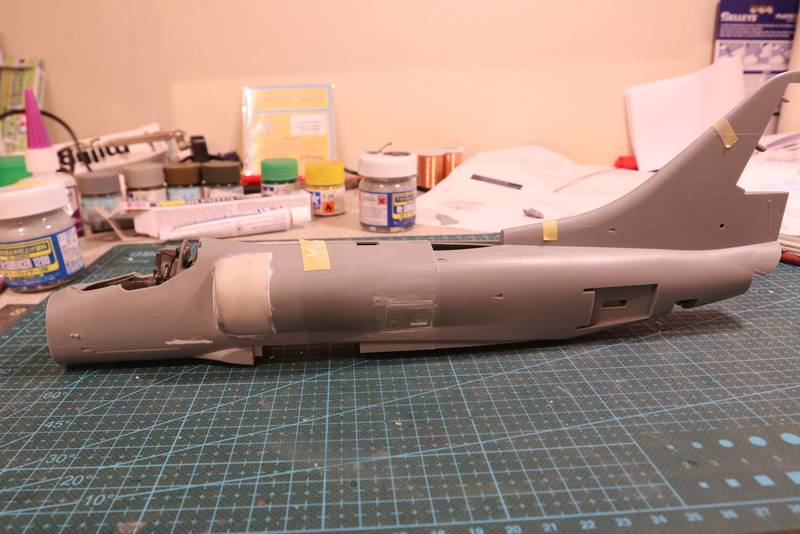
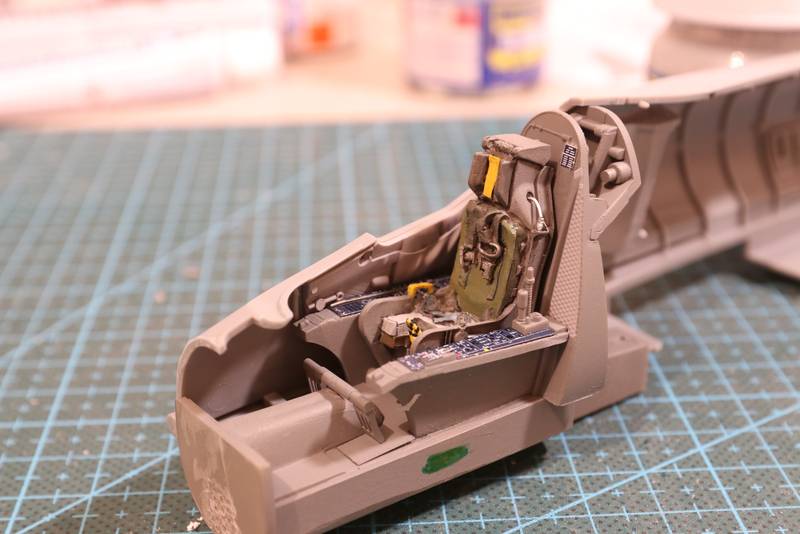
with the cockpit assembled and painted
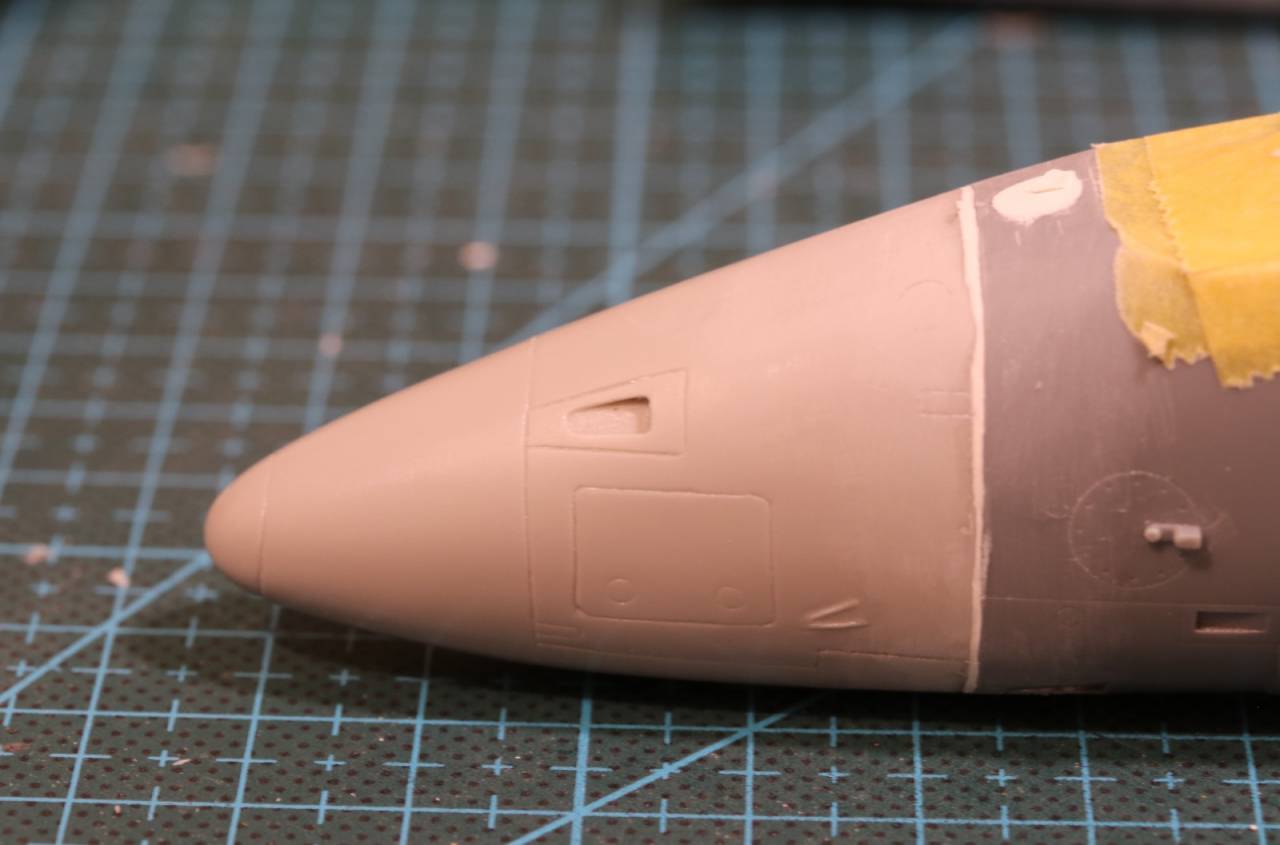
The nose job is done.
And the wings taped up for a dry fitting.
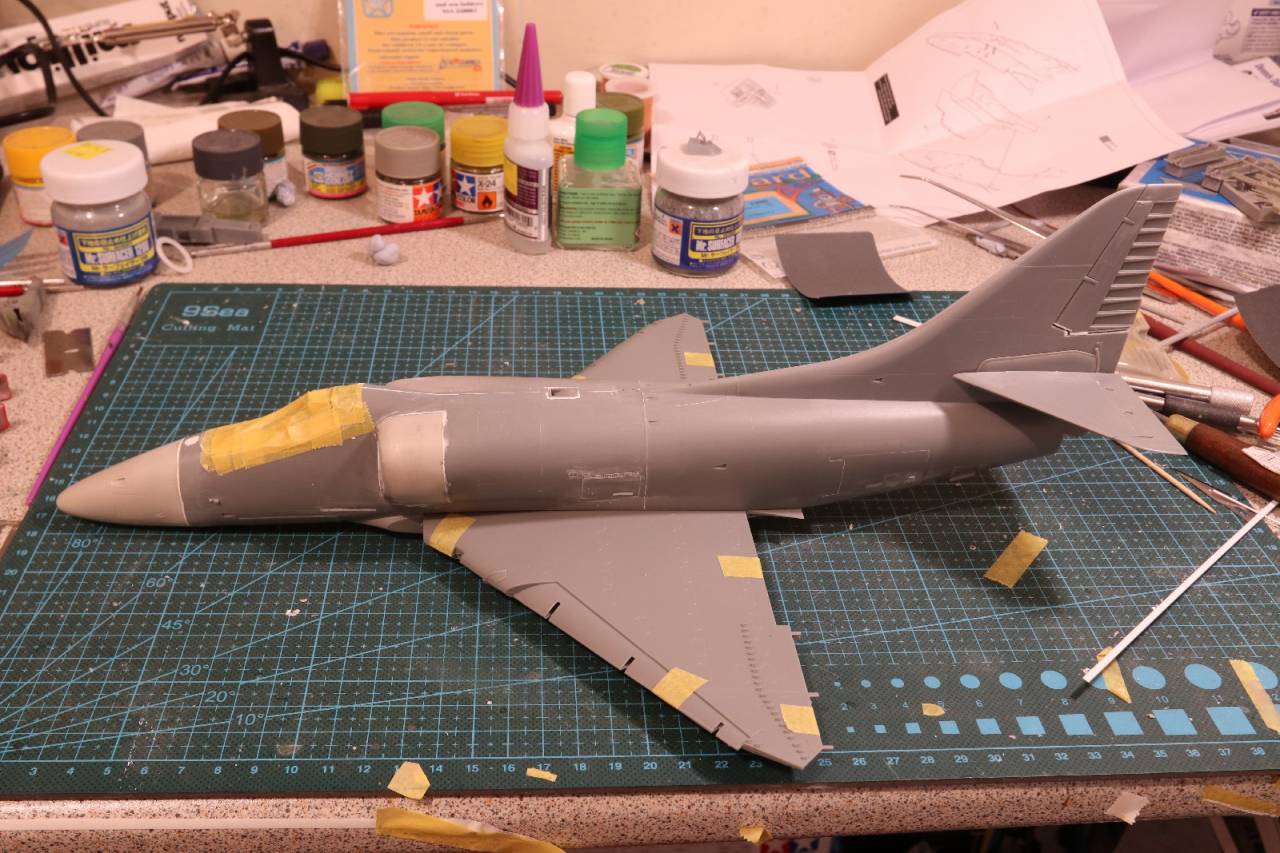
A Skyhawk is emerging from the resin and plastic pieces.
cheers
Michael
Campaign:
Strip, Track and Trail - Porsche 917/20 - On the bench
Phantoms at 60 - F-4J Marines
Below 1000 tons - M50 minesweeper - Sailed for duty

 images



 images






 upload gif from url


