Building the 1/16th. Jagdtiger from Trumpeter
United States
Joined: October 14, 2012
KitMaker: 2,663 posts
Armorama: 2,649 posts
Posted: Saturday, January 14, 2017 - 09:06 PM UTC
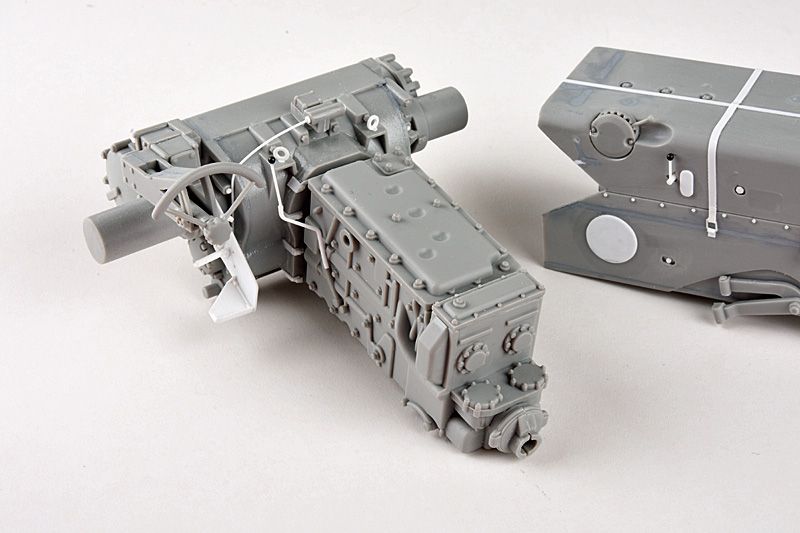
The top needs some filling, and I removed the detail from the top of the plate shown.

I added some bolt head detail and painted it Field Grey, it could have been Red Oxide but at that time period the different manufactures of the parts used what they had at hand so almost any color is possible.

Be careful you use the right drive shafts as the one for the Tiger II is included in the kit.

United States
Joined: October 14, 2012
KitMaker: 2,663 posts
Armorama: 2,649 posts
Posted: Saturday, January 14, 2017 - 09:15 PM UTC
It might be easier if you assemble the short and long sections of the piping before instalation.


There are some nicely detailed battery boxes, but they go under the Ammo Boxes and can't be seen.

Man I shure wouldn't want to have to service them on the real vehicle.
that's all for now.
Donald
Minnesota, United States
Joined: July 20, 2004
KitMaker: 1,513 posts
Armorama: 1,449 posts
Posted: Saturday, January 14, 2017 - 10:26 PM UTC
Don, the tanks probably didn't last long enough to get serviced.
Dan
Looking to meet other MN Armor modellers. I live in Buffalo.
United States
Joined: October 14, 2012
KitMaker: 2,663 posts
Armorama: 2,649 posts
Posted: Sunday, January 15, 2017 - 05:14 PM UTC
Quoted Text
Don, the tanks probably didn't last long enough to get serviced.
Dan
I figured that, that's why I don't do a lot of heavy weathering.
I don't think that this type of armor would be very pratical for mobile combat. If you cant move it easily it would be easy to bypass it.
Donald
United States
Joined: October 14, 2012
KitMaker: 2,663 posts
Armorama: 2,649 posts
Posted: Sunday, January 15, 2017 - 05:18 PM UTC
Now back to the build.
I'm still working on the engine area.
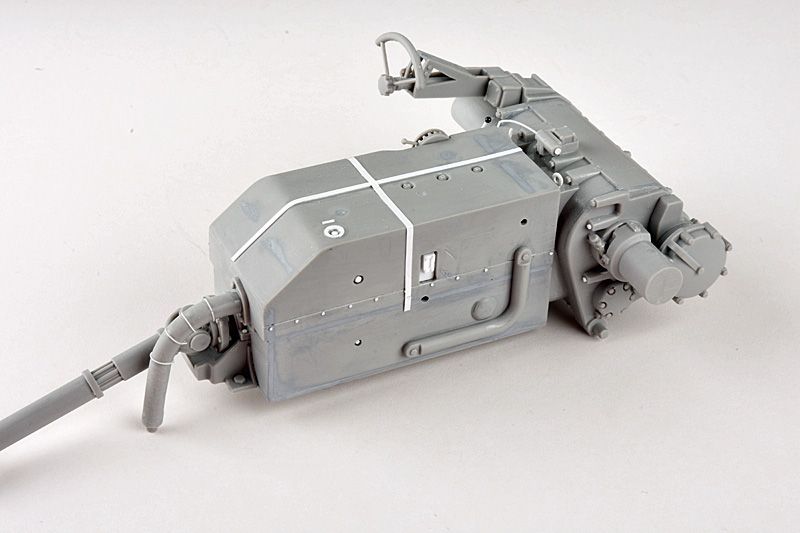
Here is the coolant tank, the hose goes to the water pump on the side of the engine. You could leave it off as it can't be seen.

I clipped off the Track adjusting screws they aren't workable and get in the way of fitting the rear plate.


That's all for now.
Donald
Alabama, United States
Joined: March 09, 2015
KitMaker: 281 posts
Armorama: 273 posts
Posted: Sunday, January 15, 2017 - 07:14 PM UTC
I'll be watching.I saw at Great Lakes Hobby in Sterling Heights Michigan for $249.99.A friend was looking at the box and said said if he got it ,it would be a divorce in a box! Looks nice.What is the battery box for?
United States
Joined: October 14, 2012
KitMaker: 2,663 posts
Armorama: 2,649 posts
Posted: Monday, January 16, 2017 - 01:52 AM UTC
Quoted Text
I'll be watching.I saw at Great Lakes Hobby in Sterling Heights Michigan for $249.99.A friend was looking at the box and said said if he got it ,it would be a divorce in a box! Looks nice.What is the battery box for?
The kit has the Battery Box going under the Floor Ammo Storage Box.
I just wanted to show you guys what it looked like. I'm not going to use it as it can't be seen, that's just extra work that doesn't need doing. It's the same with the Fuel Tanks & Fuel Lines that go under the Radiators .
Regards
Donald
Victoria, Australia
Joined: November 03, 2008
KitMaker: 294 posts
Armorama: 291 posts
Posted: Monday, January 16, 2017 - 03:24 AM UTC
Very little is seen once the floor plates and under floor ammo locker is added, sadly.


Sam
United States
Joined: October 14, 2012
KitMaker: 2,663 posts
Armorama: 2,649 posts
Posted: Monday, January 16, 2017 - 04:48 PM UTC
Hey Sam,
Do you know how the covers opened?
I've been looking on line and found some Pics. where the center two panels were missing.
It looks obvious that the covers have to slide to the side as there's no room to open them like a door.
Regards
Donald
United States
Joined: October 14, 2012
KitMaker: 2,663 posts
Armorama: 2,649 posts
Posted: Monday, January 16, 2017 - 04:51 PM UTC
United States
Joined: October 14, 2012
KitMaker: 2,663 posts
Armorama: 2,649 posts
Posted: Monday, January 16, 2017 - 04:57 PM UTC
United States
Joined: October 14, 2012
KitMaker: 2,663 posts
Armorama: 2,649 posts
Posted: Monday, January 16, 2017 - 05:02 PM UTC
United States
Joined: October 14, 2012
KitMaker: 2,663 posts
Armorama: 2,649 posts
Posted: Monday, January 16, 2017 - 05:08 PM UTC


Could have left everything to the rear and bolt details as it will be covered with the Ammo Box.
That's all for now.
Donald
Victoria, Australia
Joined: November 03, 2008
KitMaker: 294 posts
Armorama: 291 posts
Posted: Tuesday, January 17, 2017 - 02:11 AM UTC
Quoted Text
Hey Sam,
Do you know how the covers opened?
I've been looking on line and found some Pics. where the center two panels were missing.
It looks obvious that the covers have to slide to the side as there's no room to open them like a door.
Regards
Donald
Hi Donald,
Im guessing you mean the floor plates? I believe they sat on top of the ammo locker, though im not sure how they were secured in at either end. Each floor plate had a lifting handle though, sadly not depicted in trumpeters' kit:

Sam

#436
Pennsylvania, United States
Joined: August 10, 2014
KitMaker: 196 posts
Armorama: 182 posts
Posted: Tuesday, January 17, 2017 - 04:15 AM UTC
This comment may seem trivial compared to the scope of the project you are doing, but excellent work on the fire extinguisher. To me it actually looks like real metal. What did you use to get such an effect on the extinguisher? Thanks for sharing your work on this machine it has been extremely educational and fun following for me.
Minnesota, United States
Joined: July 20, 2004
KitMaker: 1,513 posts
Armorama: 1,449 posts
Posted: Tuesday, January 17, 2017 - 06:50 AM UTC
Is there some type of shield over the transmission?
Dan
Looking to meet other MN Armor modellers. I live in Buffalo.
Victoria, Australia
Joined: November 03, 2008
KitMaker: 294 posts
Armorama: 291 posts
Posted: Tuesday, January 17, 2017 - 07:03 AM UTC
Quoted Text
Is there some type of shield over the transmission?
Dan
Yep:

New South Wales, Australia
Joined: July 29, 2005
KitMaker: 879 posts
Armorama: 330 posts
Posted: Tuesday, January 17, 2017 - 07:13 AM UTC
Thanks for doing the build log!! (I'm not on Bookface)
Would like to see how you handle the rear back plate as that seems to be the worst issue you have shown for me.
Still thinking about getting one I was hoping that Tamiya would bring one out in a static form without R/C but it doesn't look like its going to happen
Minnesota, United States
Joined: July 20, 2004
KitMaker: 1,513 posts
Armorama: 1,449 posts
Posted: Tuesday, January 17, 2017 - 07:32 AM UTC
Quoted Text
Quoted Text
Is there some type of shield over the transmission?
Dan
Yep:

Sam,
What was it made of? Is it common?
Thanks, Dan
Looking to meet other MN Armor modellers. I live in Buffalo.
Victoria, Australia
Joined: November 03, 2008
KitMaker: 294 posts
Armorama: 291 posts
Posted: Tuesday, January 17, 2017 - 08:14 AM UTC
HI Dan,
Yes its on all king tigers and jagdtigers. It was a thin sheet metal cover, its use was to cover the oily bits of the transmission (obviously) but also directed cooling air over the transmission too. It was connected to a fan at the back of the vehicle and cold air was drawn in to the front section, over the transmission part then out the back of the casing via the curved pipe:

United States
Joined: October 14, 2012
KitMaker: 2,663 posts
Armorama: 2,649 posts
Posted: Thursday, January 19, 2017 - 01:31 AM UTC
Quoted Text
This comment may seem trivial compared to the scope of the project you are doing, but excellent work on the fire extinguisher. To me it actually looks like real metal. What did you use to get such an effect on the extinguisher? Thanks for sharing your work on this machine it has been extremely educational and fun following for me.
It depends on what you mean , The gage was painted with Model Masters Chrome. If you mean the Label, that is a rub on decal from Archer Fine Transfers.
Regards.
Donald
United States
Joined: October 14, 2012
KitMaker: 2,663 posts
Armorama: 2,649 posts
Posted: Thursday, January 19, 2017 - 01:36 AM UTC
Now I'm on the Floor Ammo Box.
I used the larger of the Floor Panels thinning the slide edges.

Here the left side is slid in.

Here they are both slid in. It's obvious you wouldn't slide them both at the same time, this was just for demonstration .

United States
Joined: October 14, 2012
KitMaker: 2,663 posts
Armorama: 2,649 posts
Posted: Thursday, January 19, 2017 - 01:43 AM UTC
I made some Handles for sliding the Floor Plates, I know they aren't accurate, but they are better than what Trumpeter gives you.

Above was folded up, and below is in the down position.

And for those of you who say the floor pannels didn't slide, here are a couple of Pics. I got off the net.
The first clearly shows the slide channel.

The second shows the open box with a round in it.

With 4 Floor pannels there wouldn't be any place for them to slide, besides they really aren't needed under the Gun Breech '
That's it for now.
Donald
Victoria, Australia
Joined: November 03, 2008
KitMaker: 294 posts
Armorama: 291 posts
Posted: Thursday, January 19, 2017 - 02:46 AM UTC
Ive been having a think about the floor plates. Perhaps they're captive in the channel that runs front and back, and that to get to the ammo underneath, you'd have to lift the plate up and slide it to one side, over the other plate its next to.
So to get to the ammo near the centre of the bin, you'd lift an inner plate, and slide it towards the hull side, over the top of the outer plate, then return it to its normal position. Same with moving the outer plate, you'd lift it up and slide it inwards, over the top of the inner plate. Now obviously the handles would stop the plates from moving too far either way, as would the hull side, and the gun travel lock assembly.
Just thinking out loud here..
Sam
United States
Joined: October 14, 2012
KitMaker: 2,663 posts
Armorama: 2,649 posts
Posted: Friday, January 20, 2017 - 08:31 PM UTC
Quoted Text
Thanks for doing the build log!! (I'm not on Bookface)
Would like to see how you handle the rear back plate as that seems to be the worst issue you have shown for me.
Still thinking about getting one I was hoping that Tamiya would bring one out in a static form without R/C but it doesn't look like its going to happen
Here's how the inner plate went in, you have to spring open the rear bottom of the hull and insert the inner plate up against the engine compartment devider walls.

Glue Parts N32 & N33 to the outer plate as shown, but be sure to clean up the edges first

Then glue the outer plate to the hull being careful to get the joints as tight as possible, you will still have to do some filling.


