_GOTOBOTTOM
Armor/AFV: Axis - WWII
Armor and ground forces of the Axis forces during World War II.
Hosted by Darren Baker
Takom Tiger 2 Repair Dio
airborne1
Visit this Community
Queensland, Australia
Joined: April 15, 2006
KitMaker: 915 posts
Armorama: 797 posts
Posted: Monday, April 24, 2017 - 12:23 PM UTC
Hello,

Here is the next build with the Takom King Tiger being the centerpiece of the diorama.

Work has commenced on the smaller subjects which will be strategically placed around the King Tiger and hopefully come together to make the overall story.

It's a balancing act to see what looks right and what doesn't. Some items may be excluded some smaller items may be included. Here is the current work so far.

The Miniart 170V saloon has been broken down in sub sections for ease of painting. Some minor work to do before I move onto other models.


Diorama size


Michael
Blaubar
Visit this Community
Rheinland-Pfalz, Germany
Joined: December 15, 2016
KitMaker: 261 posts
Armorama: 246 posts
Posted: Monday, April 24, 2017 - 12:31 PM UTC
Interesting one there.
I will be watching the progress for sure, this should keep you busy for quite a long period of time. Enjoy the build, I will crack a bottle of beer while enjoying the show.
/Stefan
wedgetail53
Visit this Community
Queensland, Australia
Joined: October 02, 2008
KitMaker: 658 posts
Armorama: 629 posts
Posted: Monday, April 24, 2017 - 02:08 PM UTC
G'day Mike

Great minds think alike. I've just started the same King Tiger and also plan to put it into a dio, albeit not as big or complex as yours.

We'll have to compare notes as we go.

Regards

Rob
Thirian24
Visit this Community
Oklahoma, United States
Joined: September 30, 2015
KitMaker: 2,493 posts
Armorama: 2,344 posts
Posted: Monday, April 24, 2017 - 02:28 PM UTC
Very cool. Those buildings really do look nice. Love the variation in the roof tiles.
airborne1
Visit this Community
Queensland, Australia
Joined: April 15, 2006
KitMaker: 915 posts
Armorama: 797 posts
Posted: Tuesday, April 25, 2017 - 08:09 AM UTC
Thanks Guys,

Started the Flak 38T 20mm yesterday and found this is not a shake and bake plastic kit. Dml have done well to include the interior and engine and overall it is a comprehensive build.

Both the Riich models field kitchen and Miniart SALOON V170 have also extensive detail. The V170 engine is a challenge consisting of very small intricate parts.
It was like building a real engine.
Still contemplating whether to have the engine hood open to show the detail.

Close up images of the saloon engine and FLAK 38T progress will follow shortly.

Michael
guni-kid
Visit this Community
Nordrhein-Westfalen, Germany
Joined: July 21, 2007
KitMaker: 521 posts
Armorama: 514 posts
Posted: Tuesday, April 25, 2017 - 02:36 PM UTC
Nice one, count me in as another addition to the audience!
airborne1
Visit this Community
Queensland, Australia
Joined: April 15, 2006
KitMaker: 915 posts
Armorama: 797 posts
Posted: Friday, April 28, 2017 - 08:38 AM UTC
Thanks Marian,

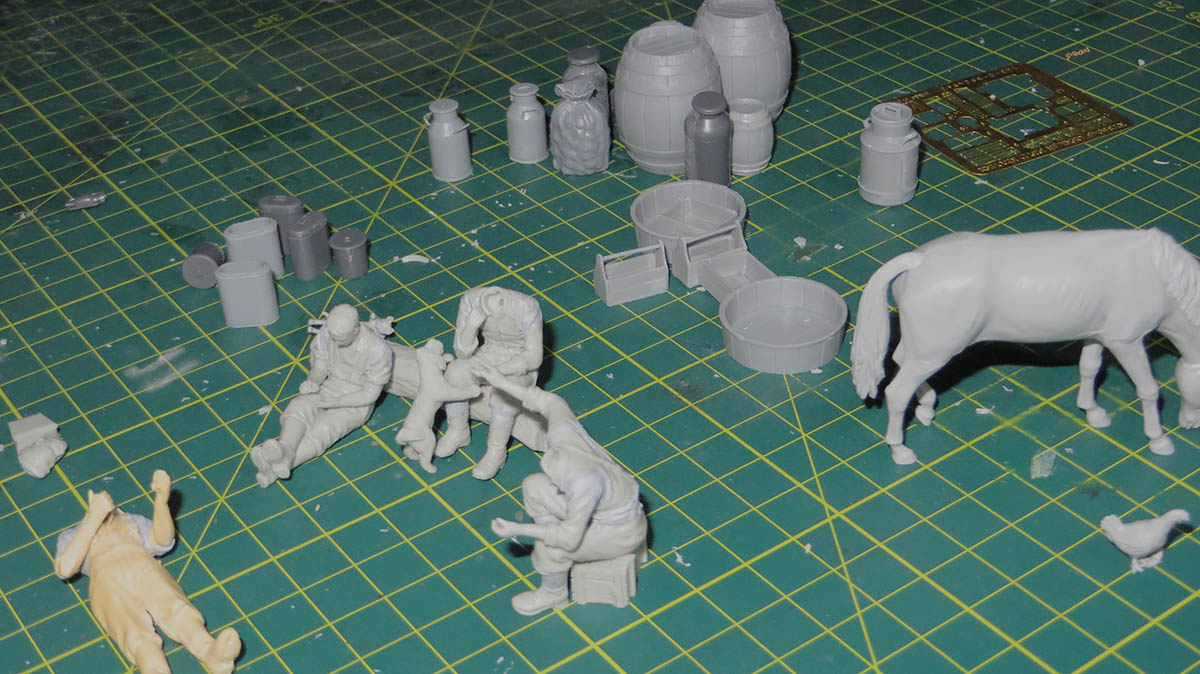
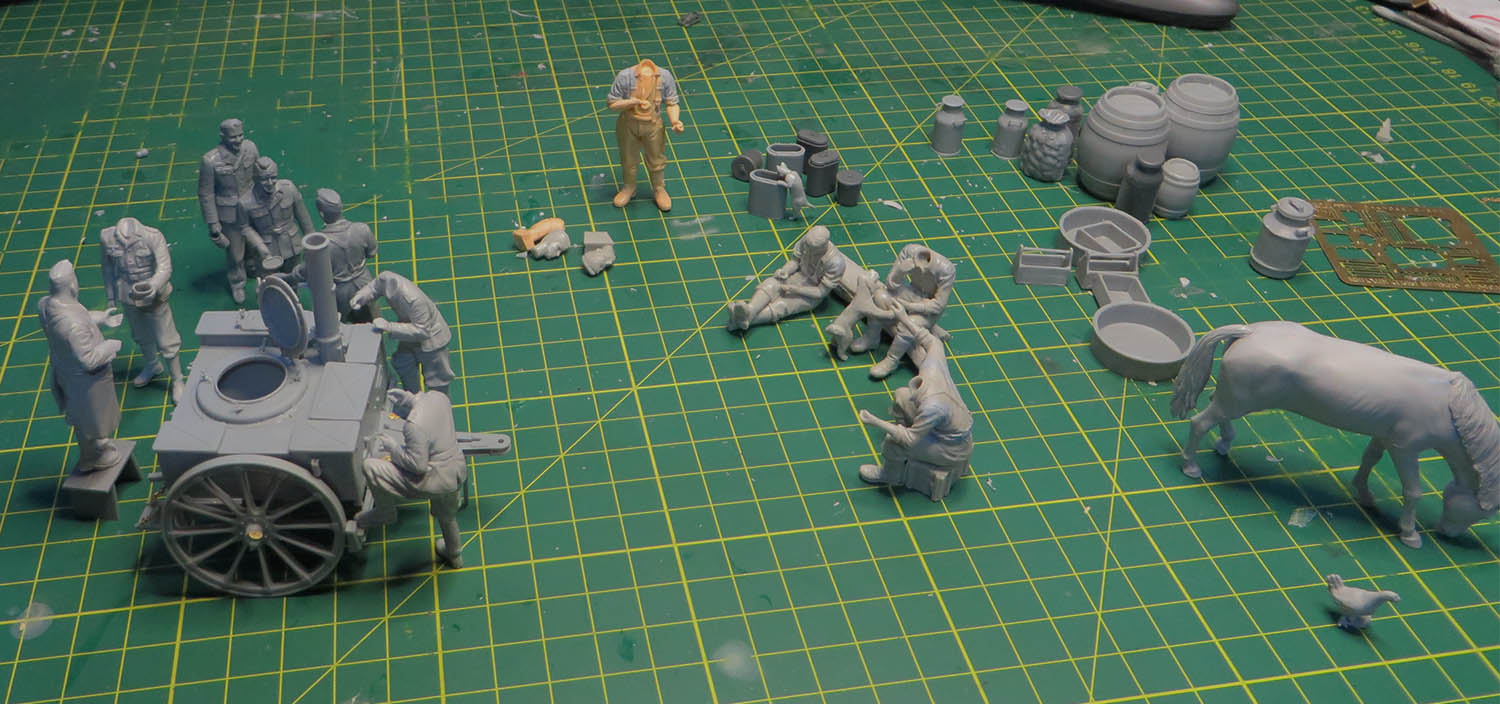
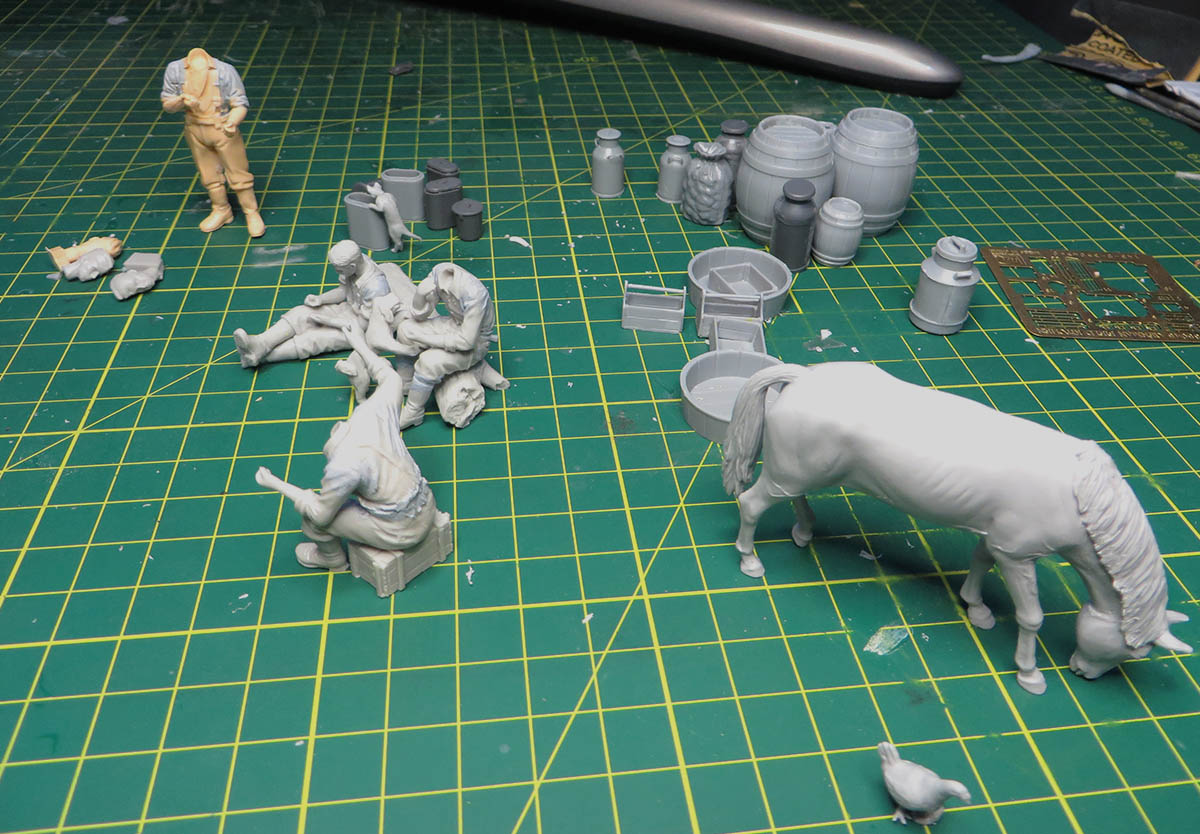
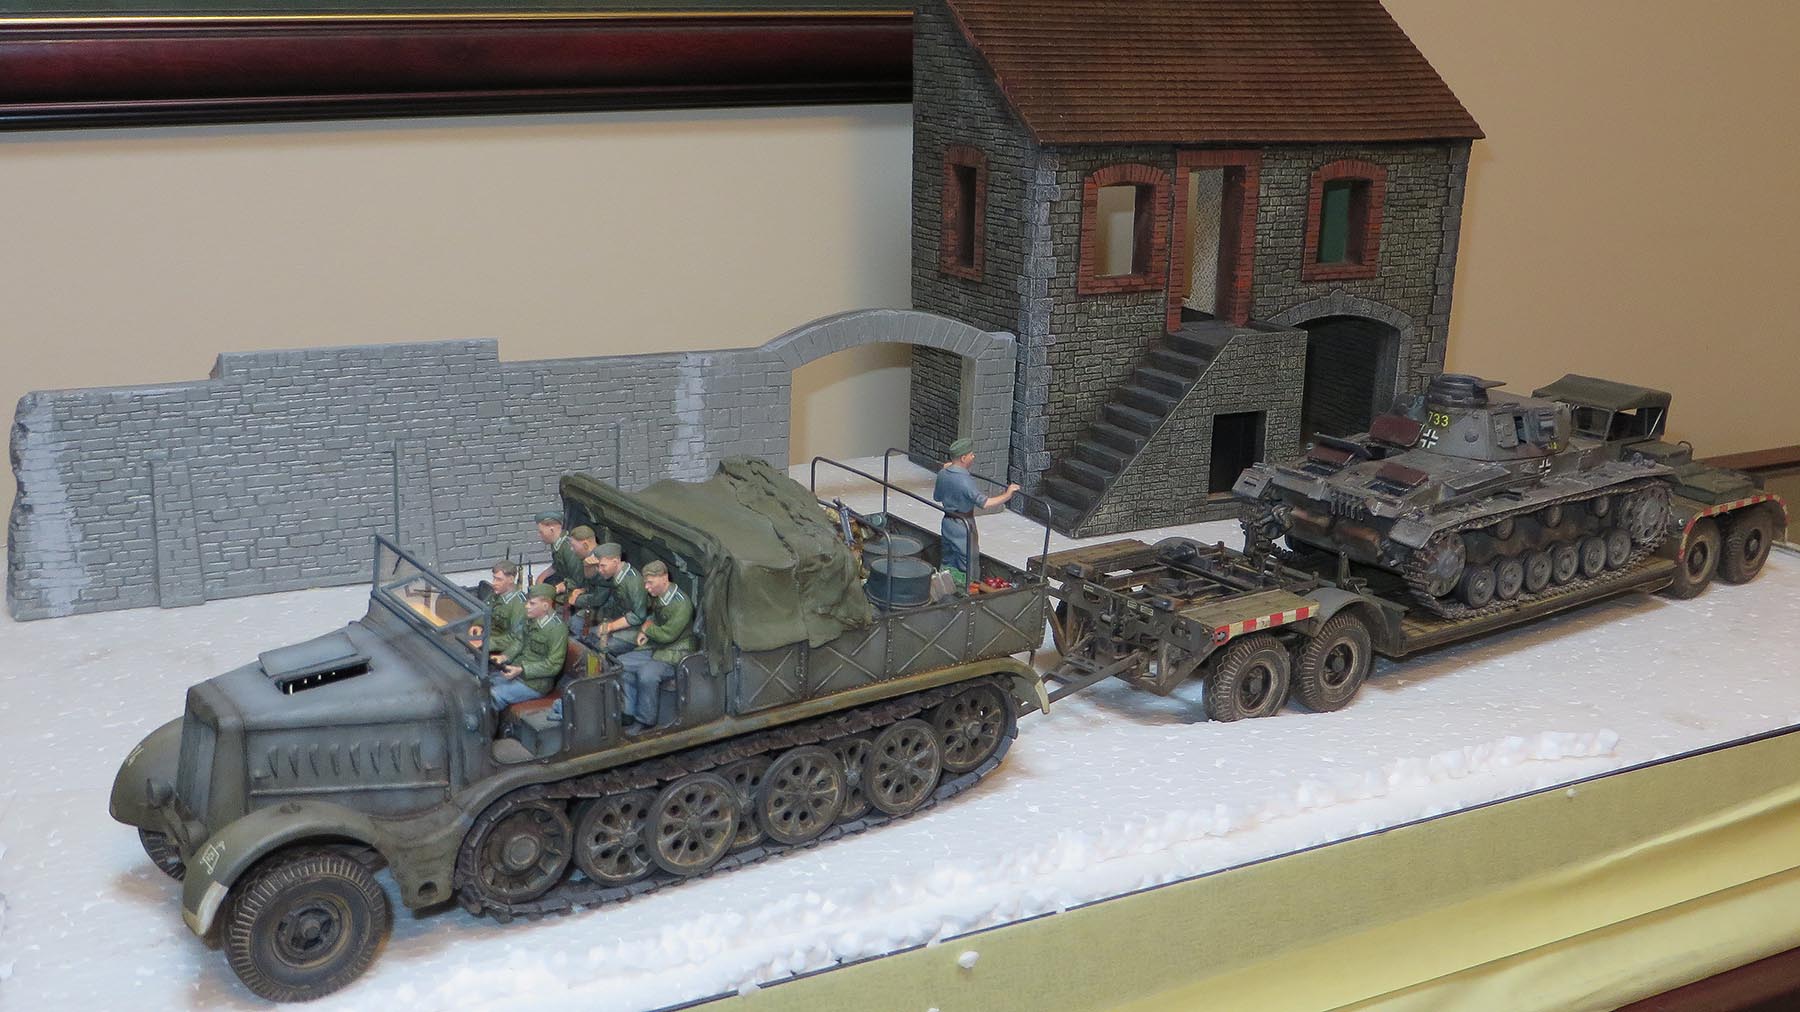
Once again, back with the next update. Changing in between building the diorama and vehicles is interesting.
Keeps up with the motivation to build models as well as reduce the collection.
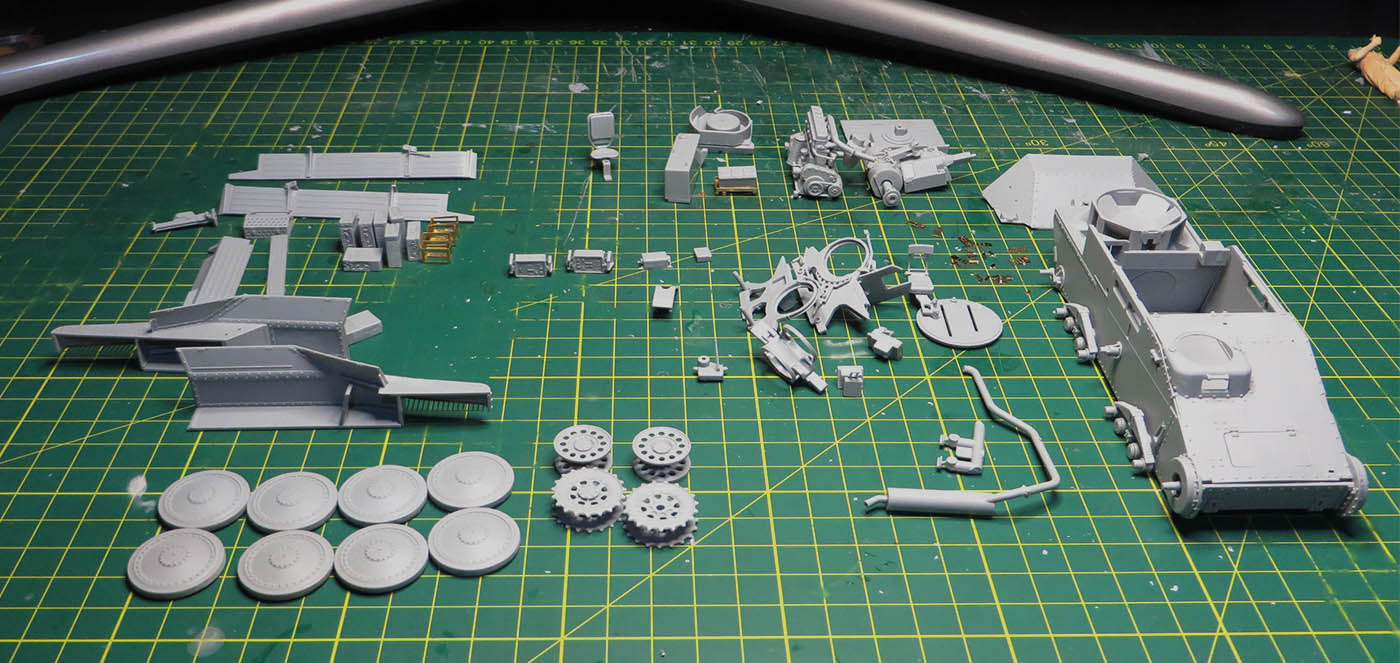
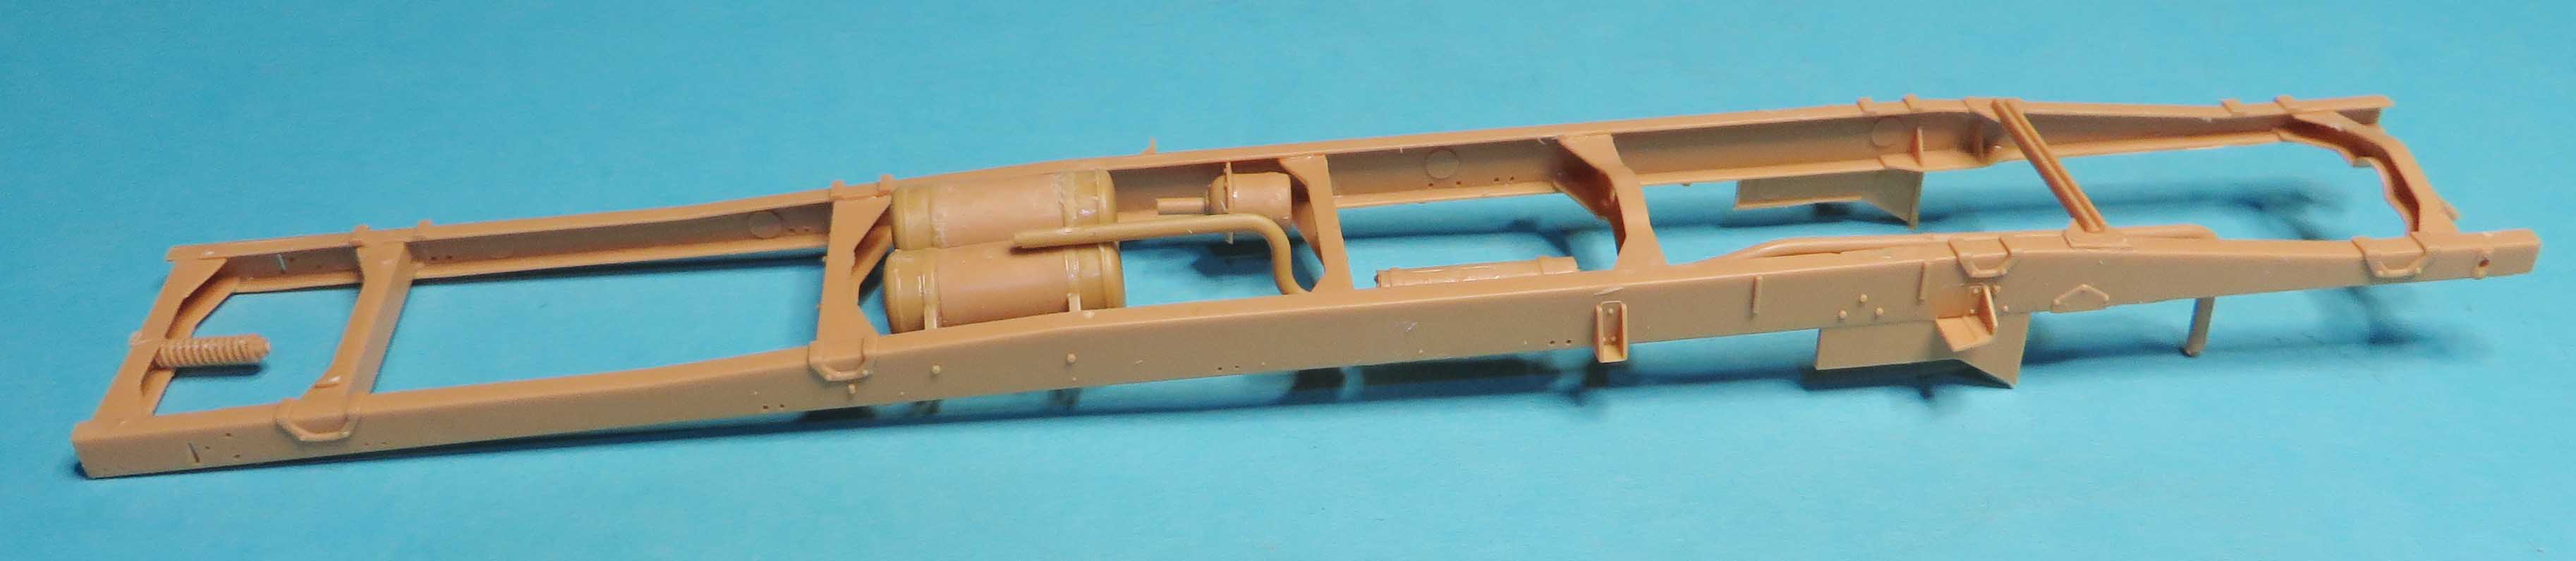
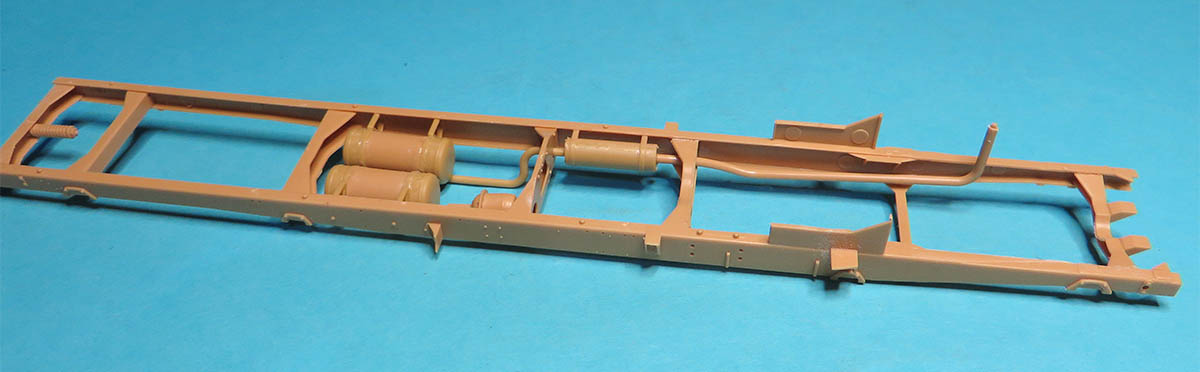
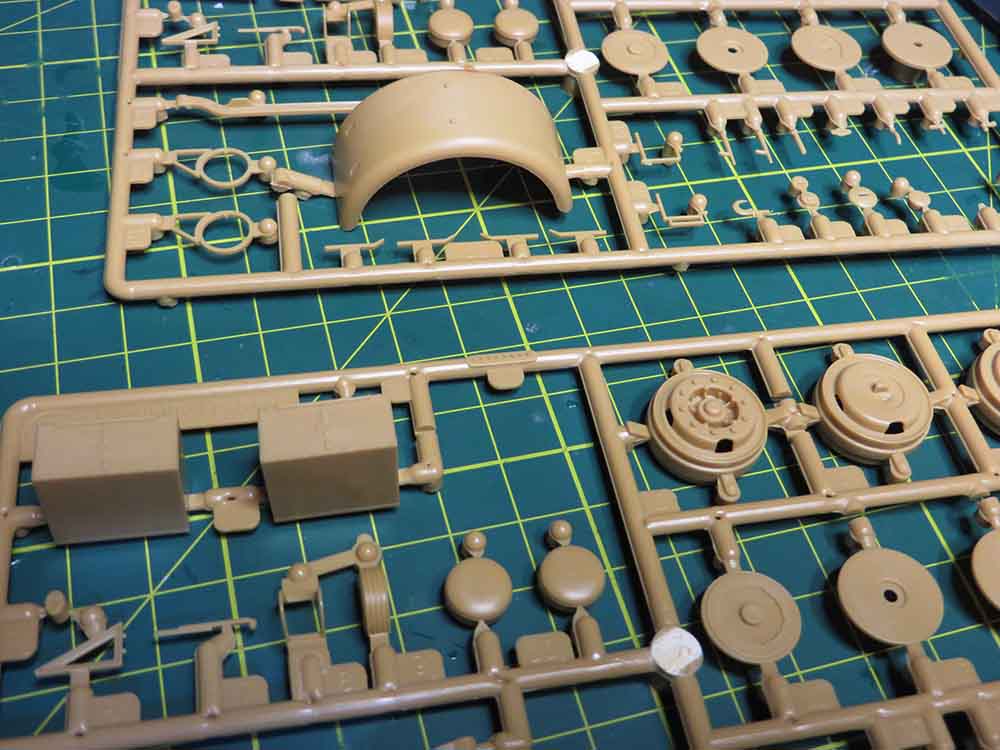
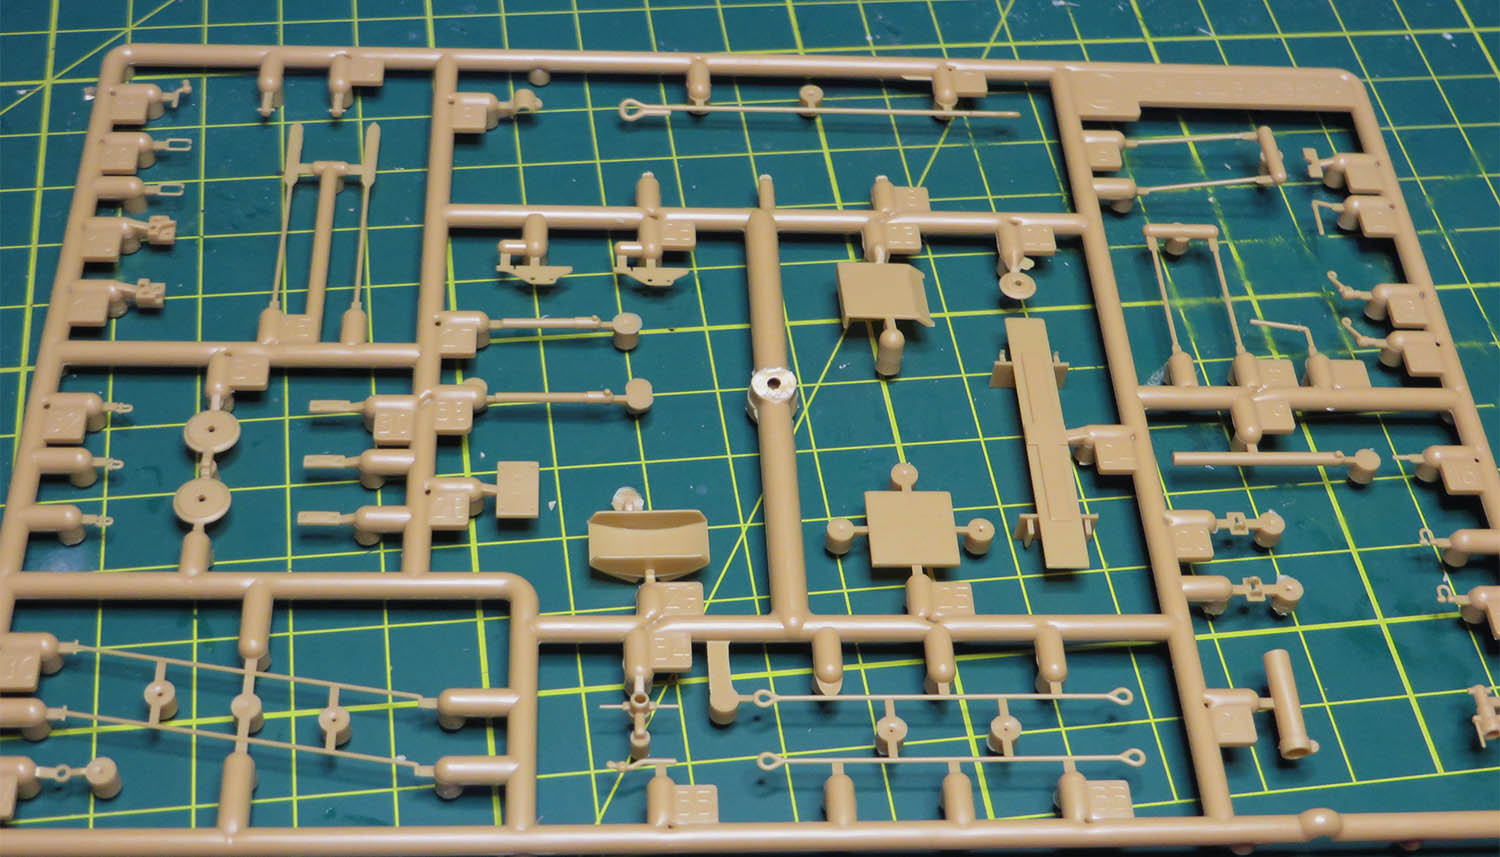
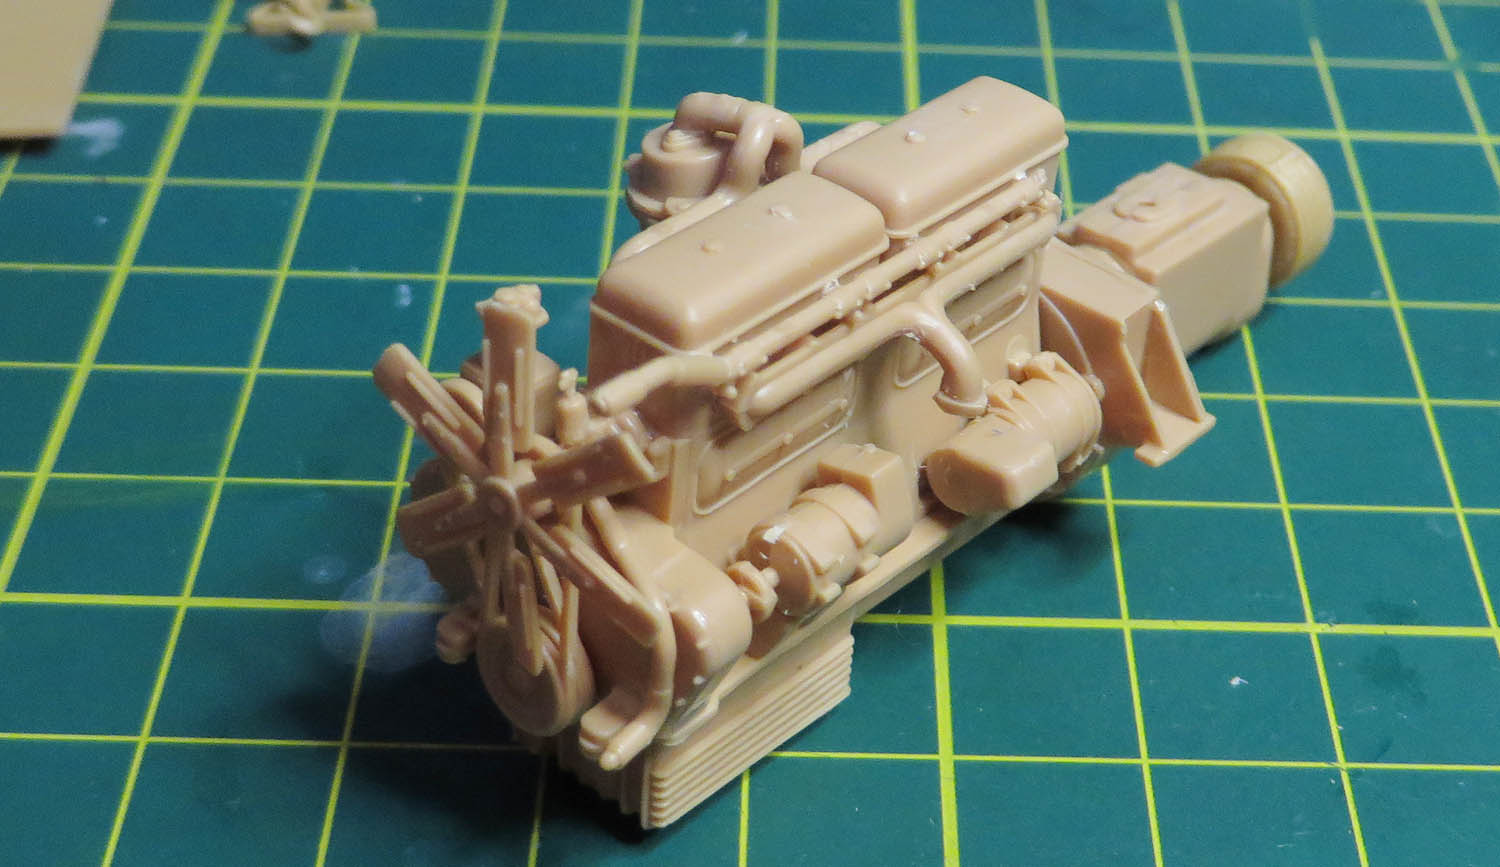
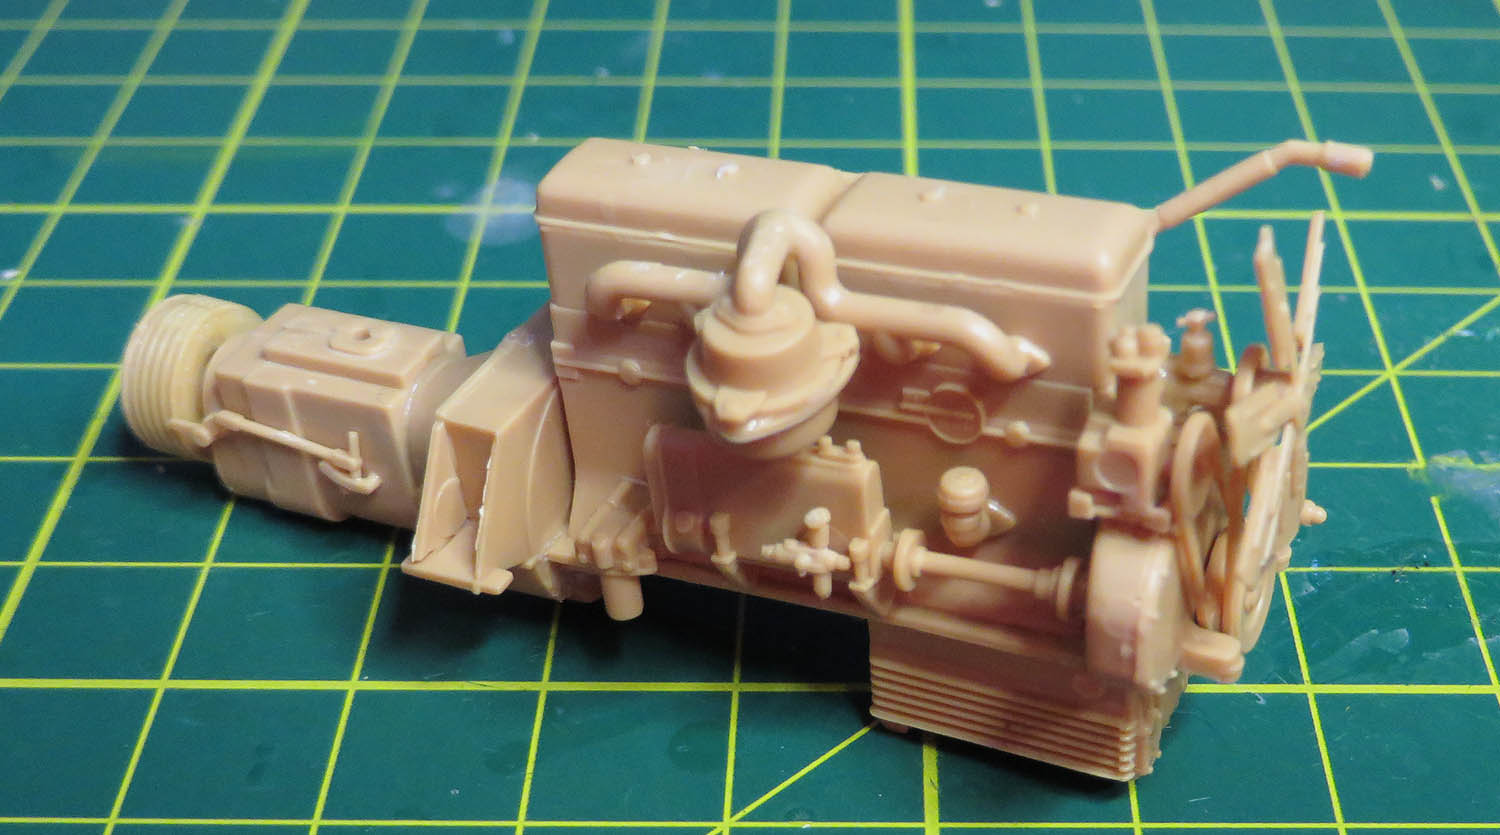
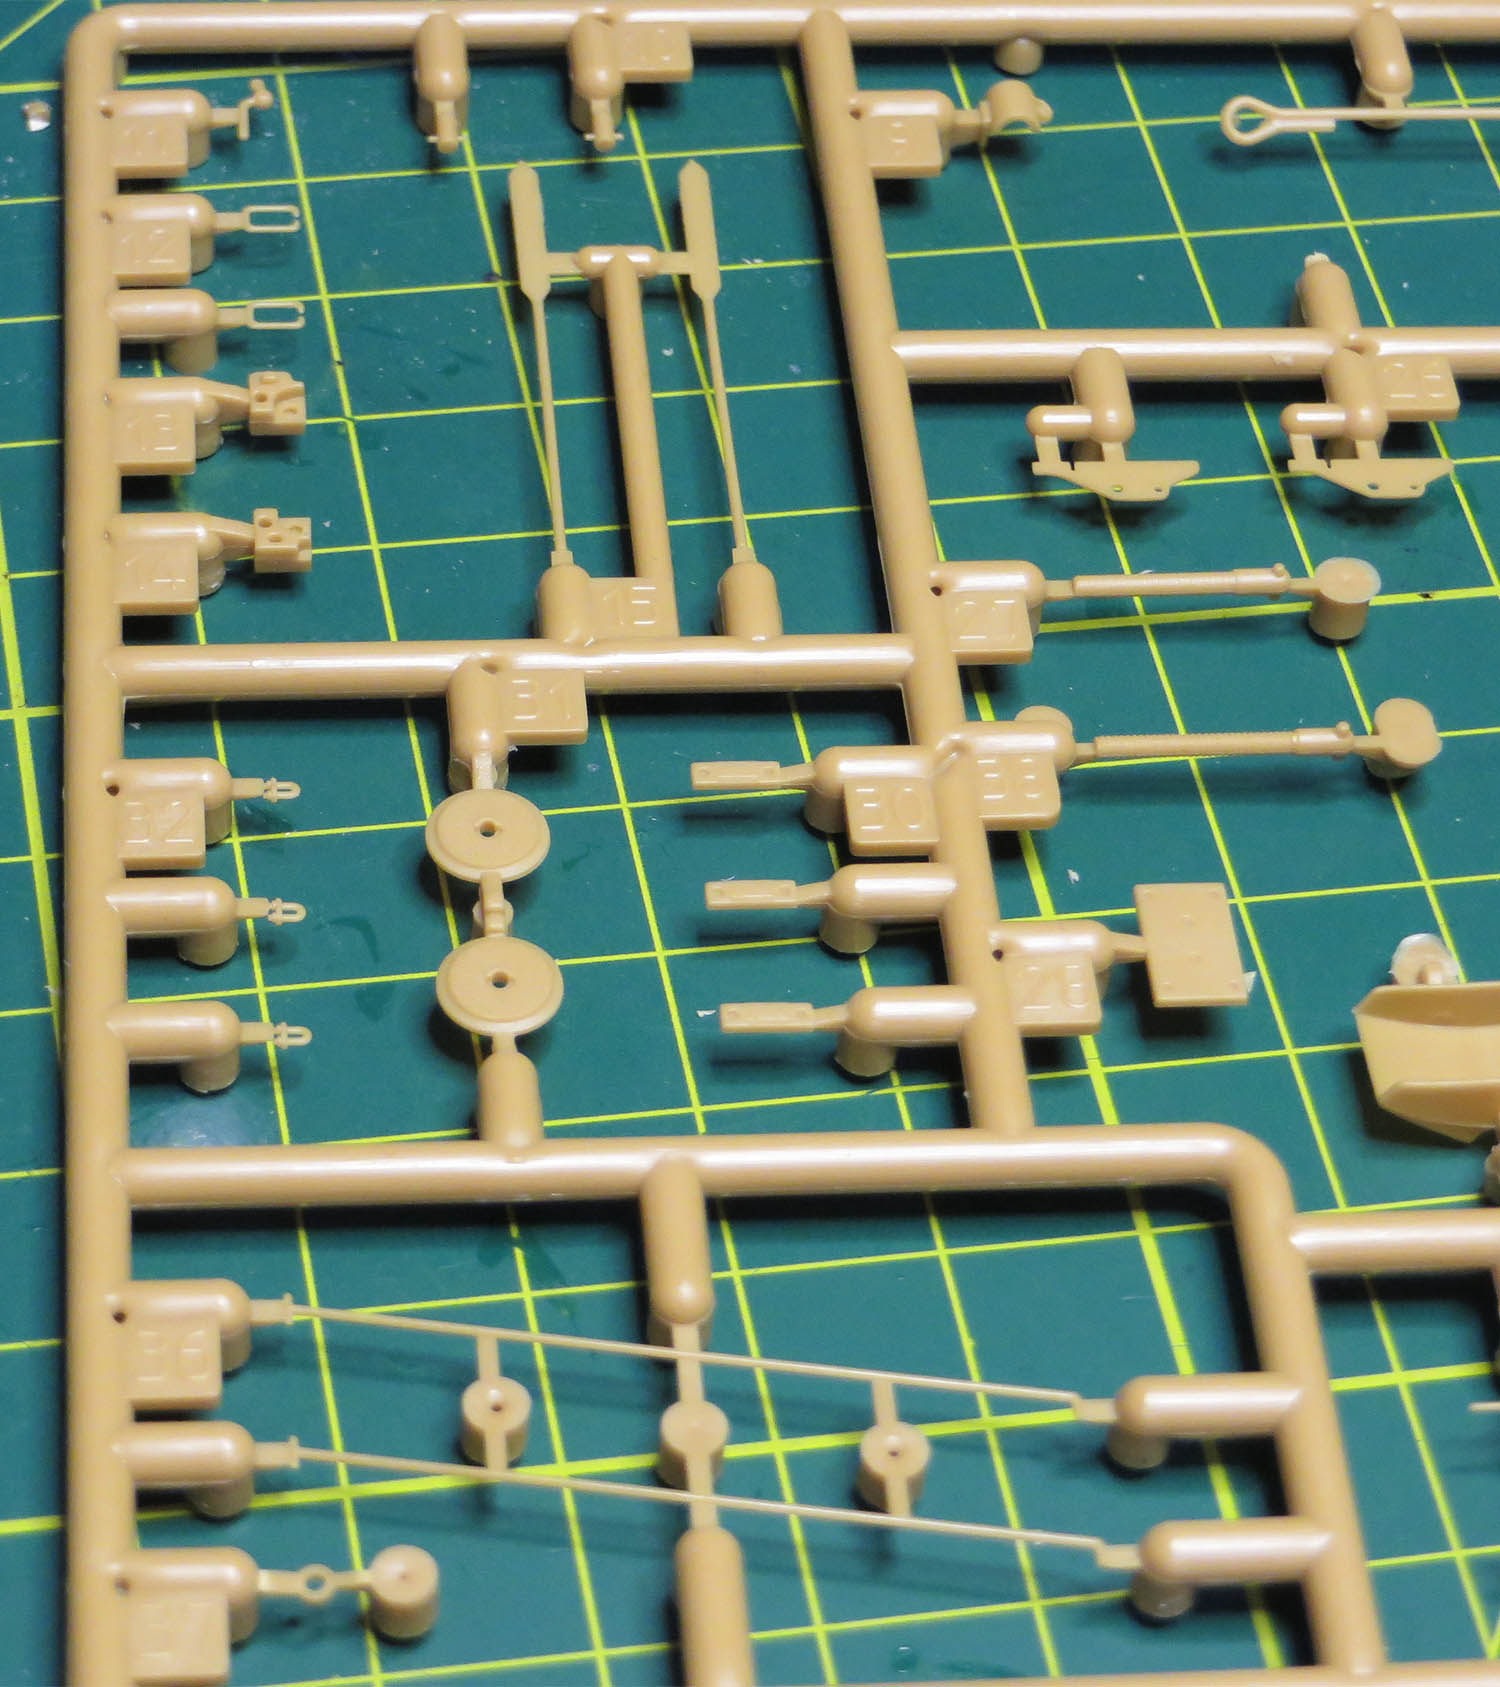
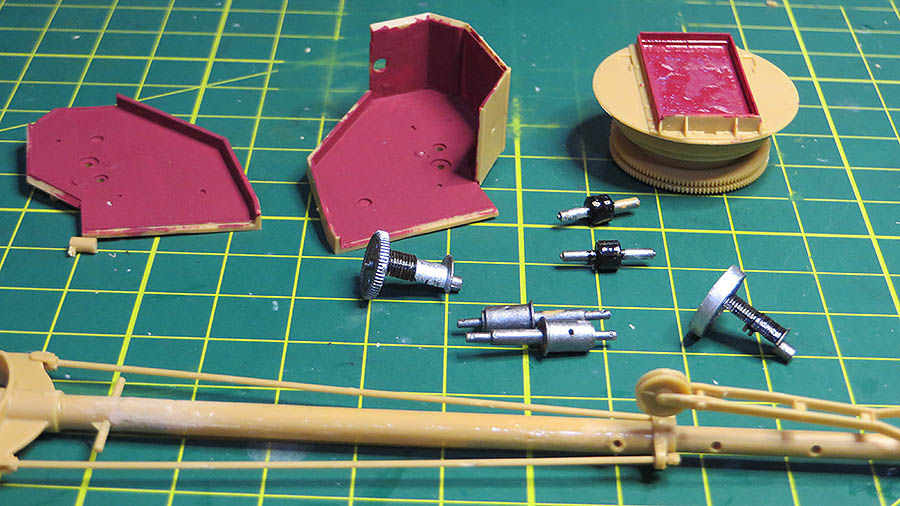
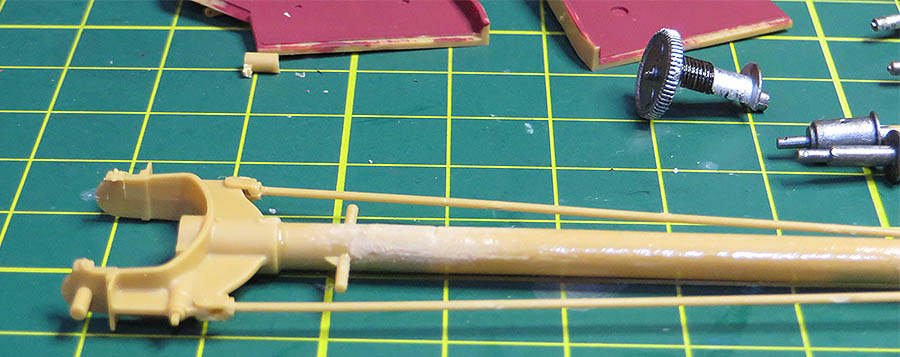
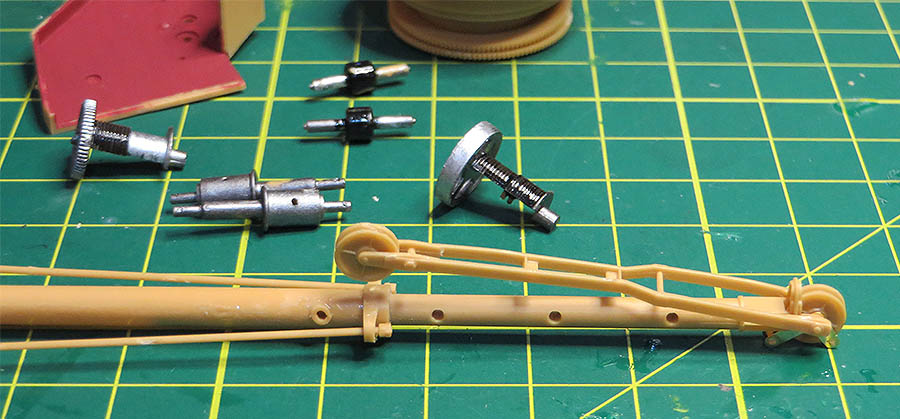
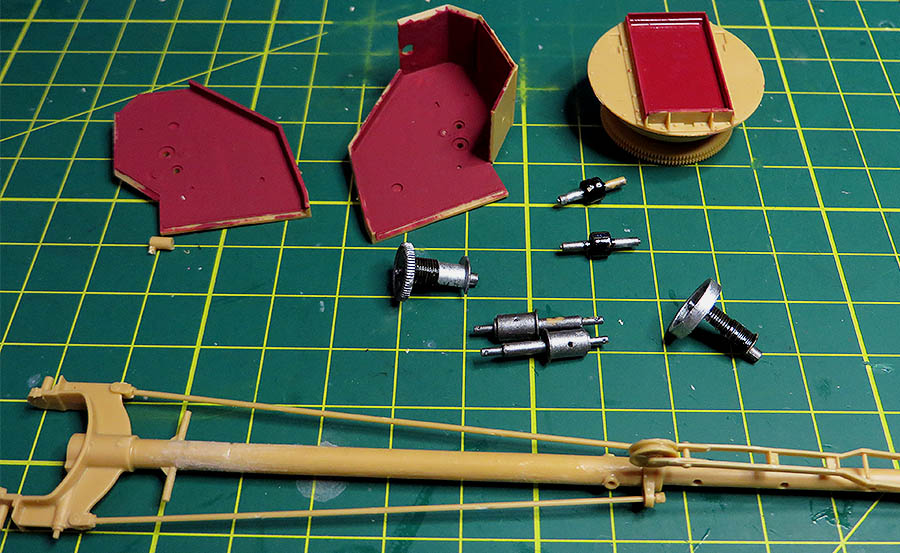
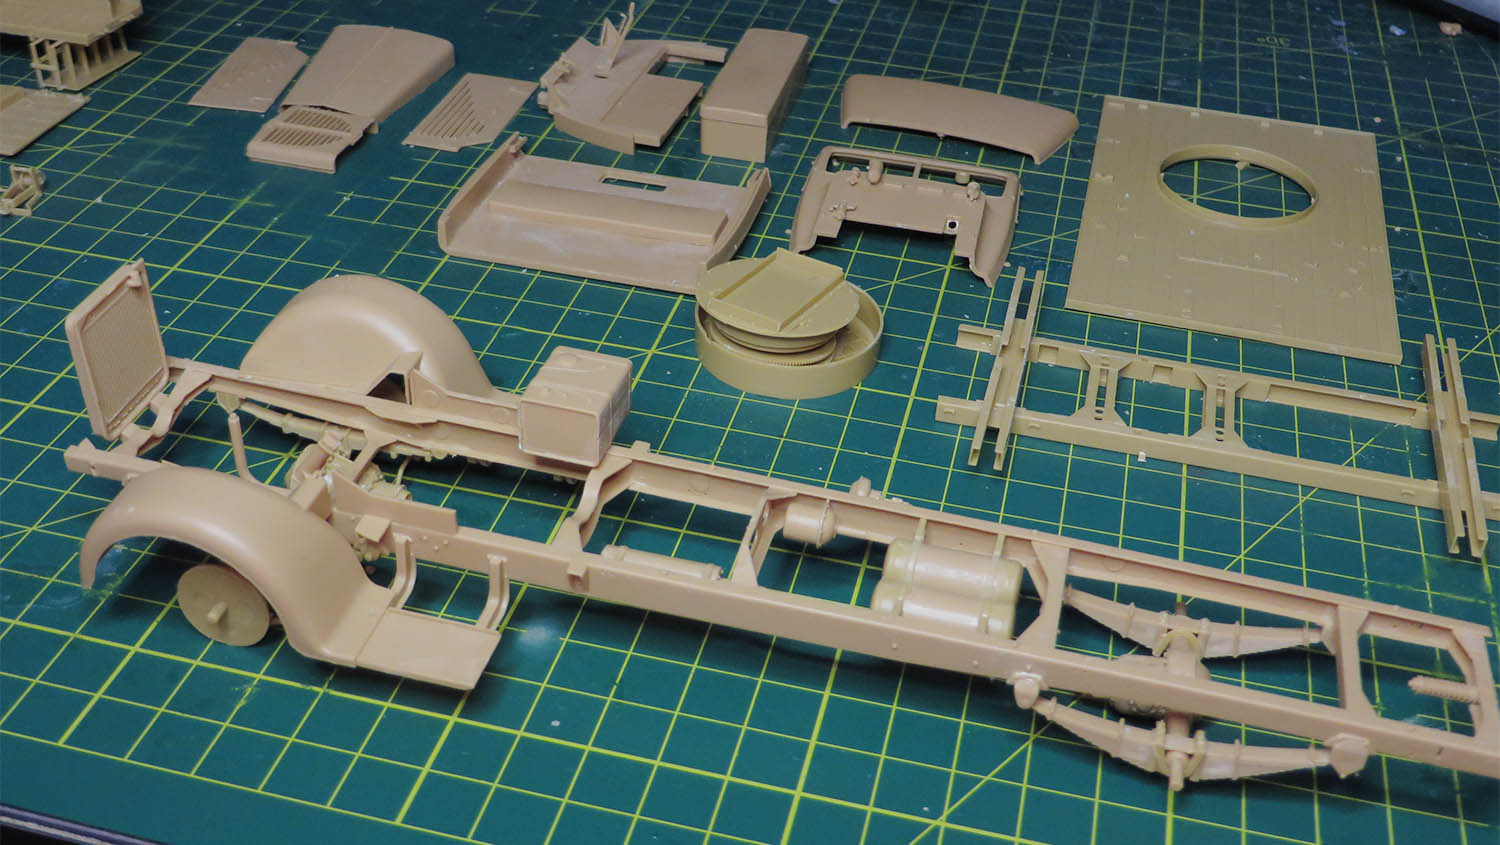
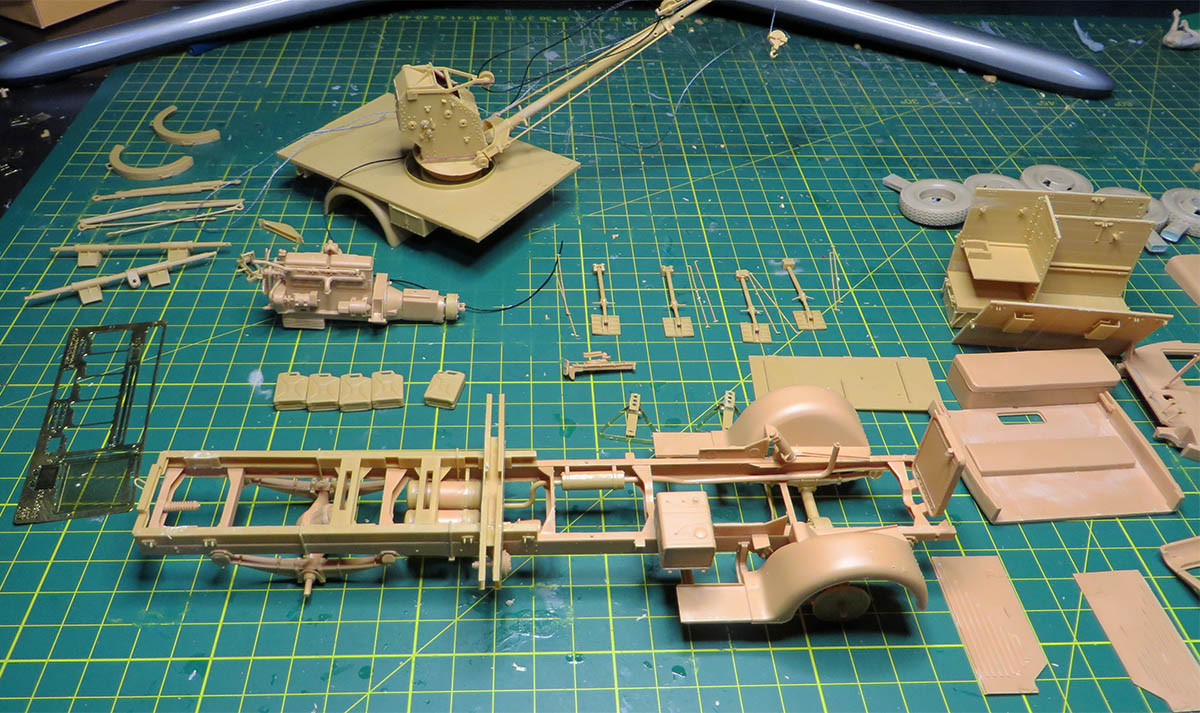
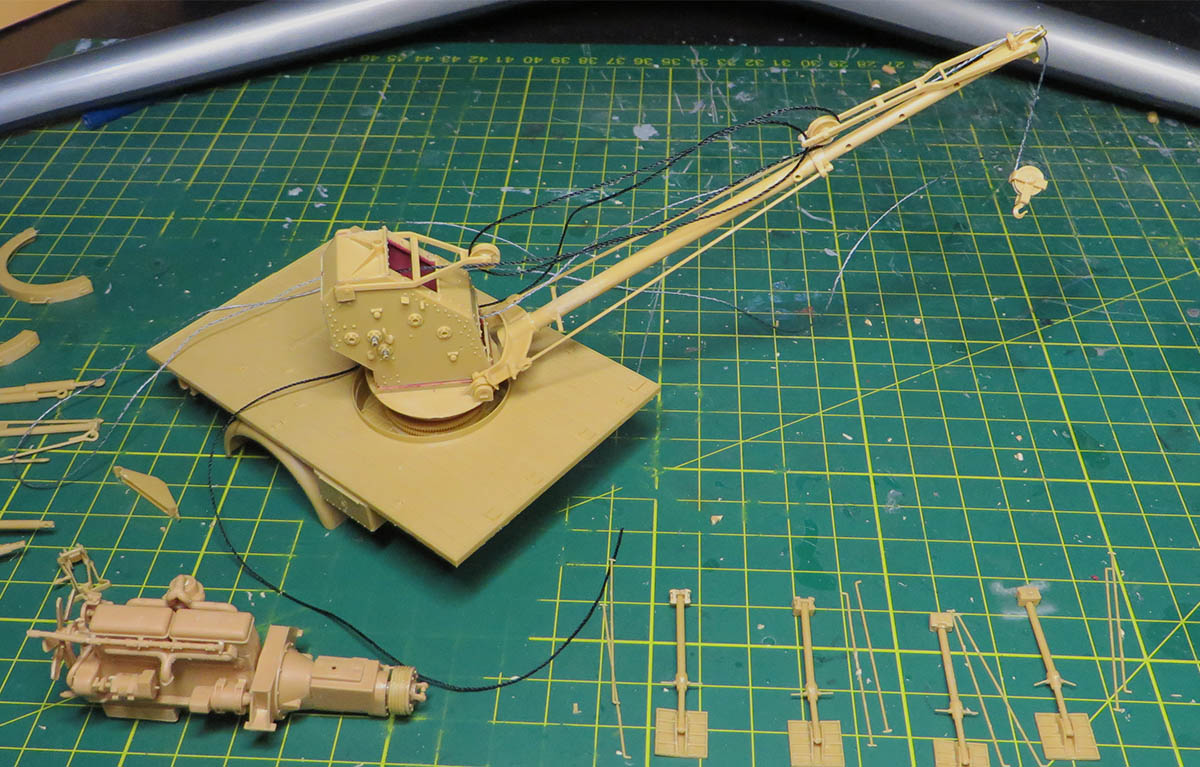
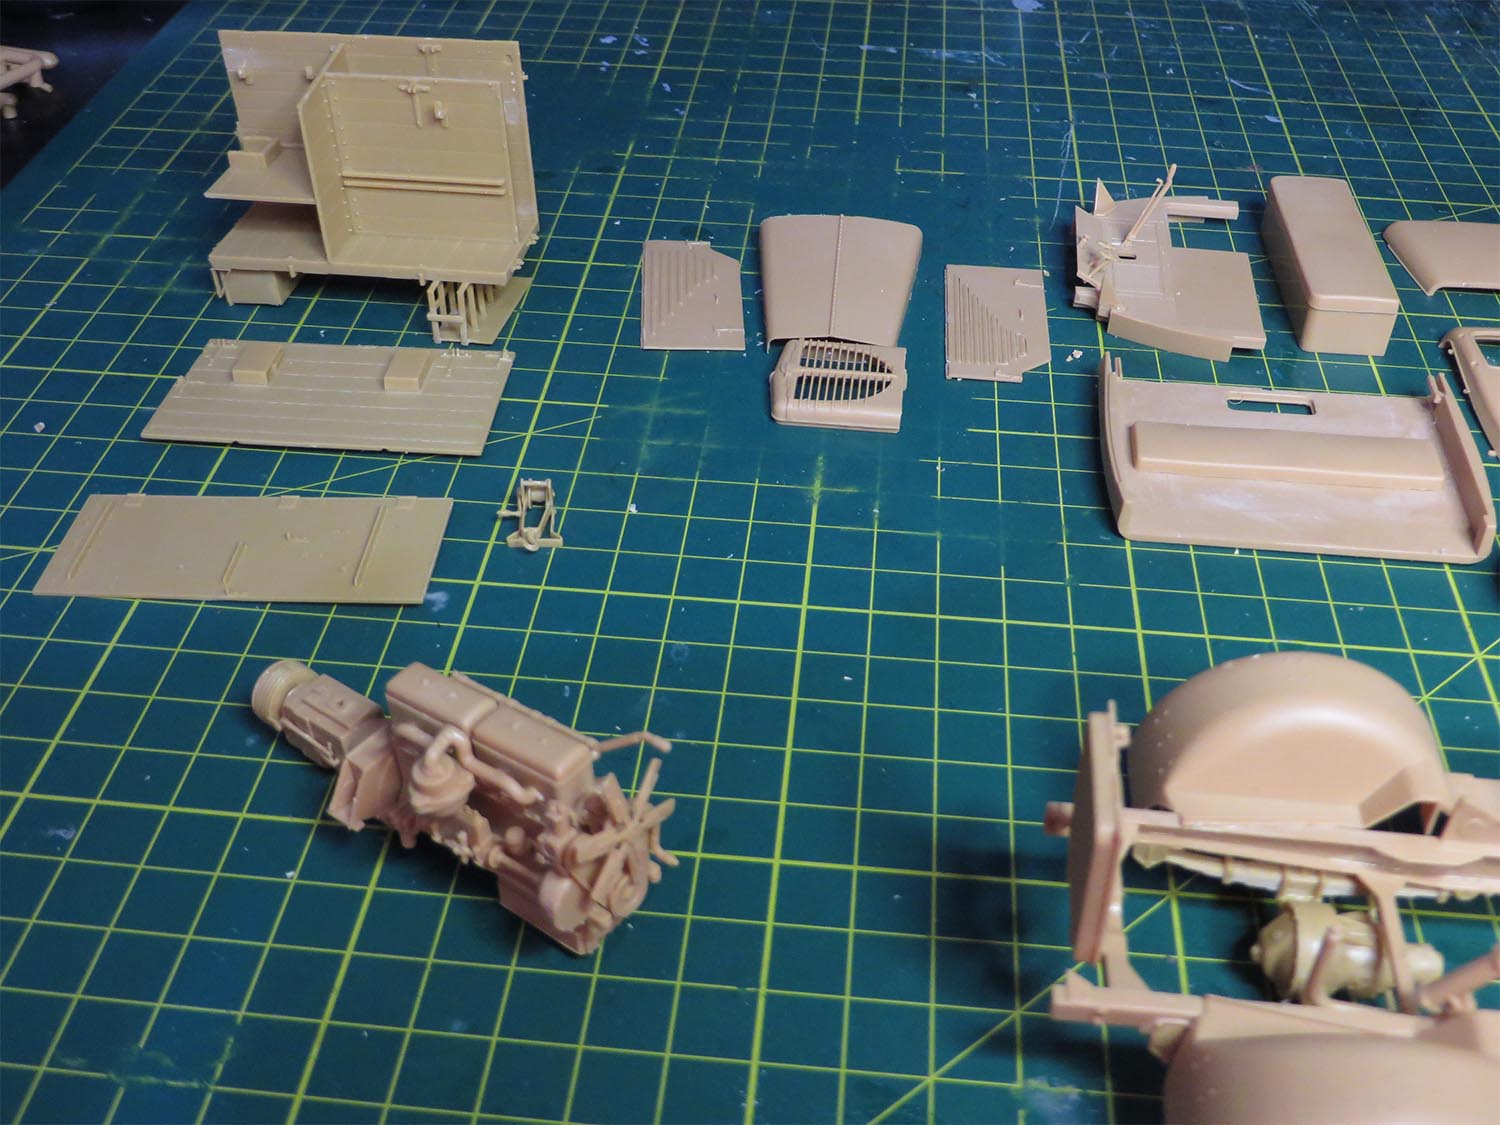
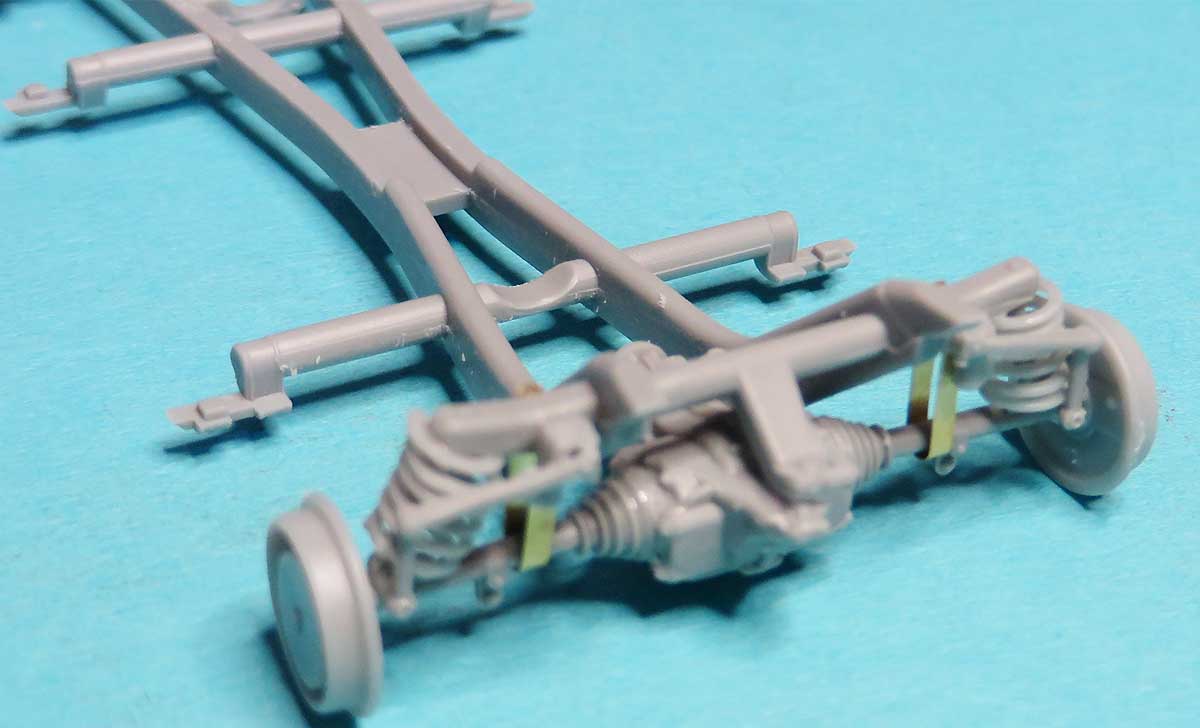
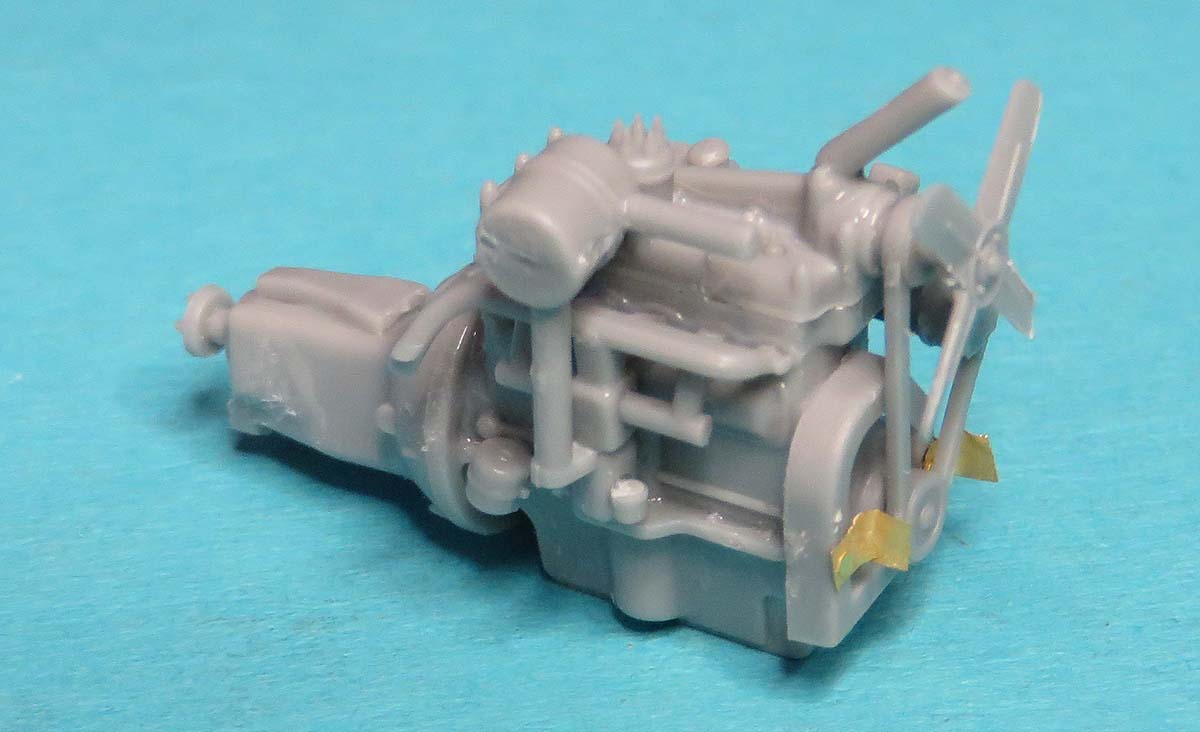
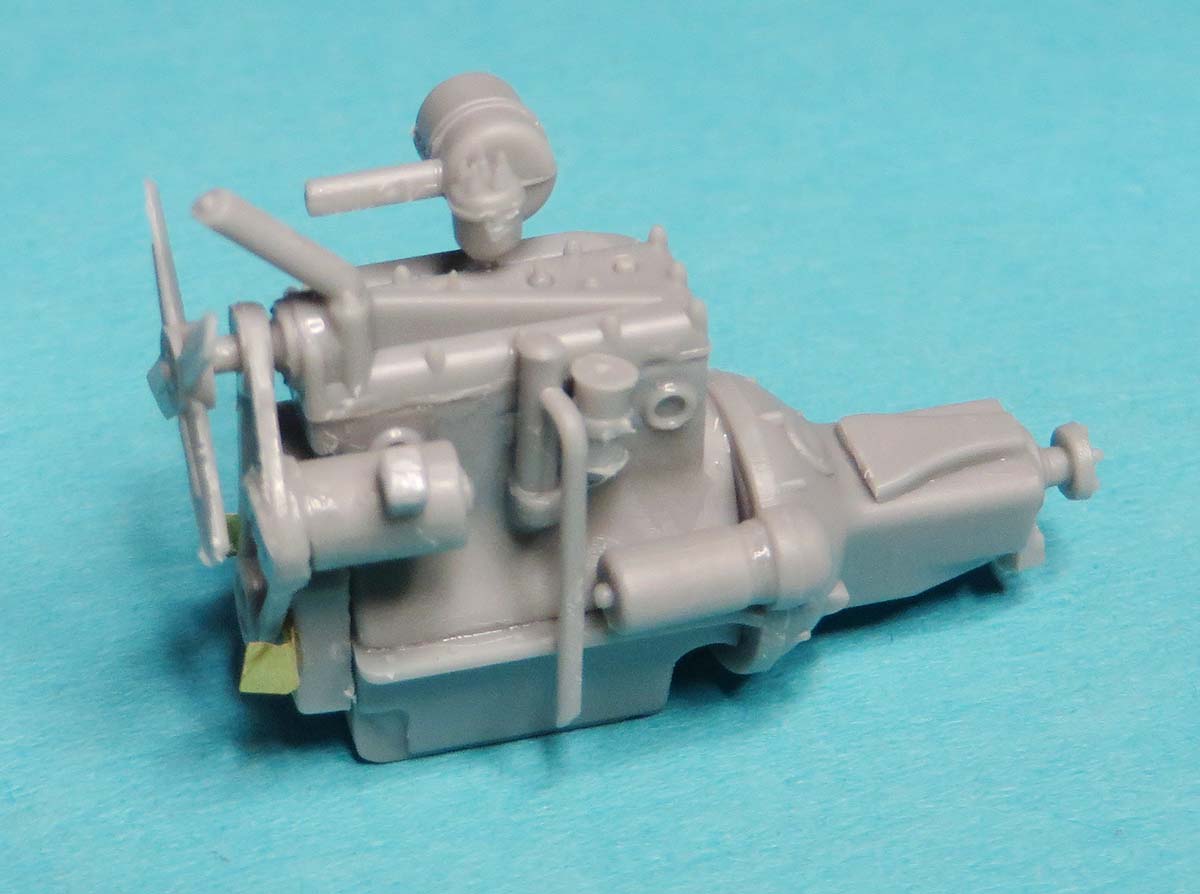
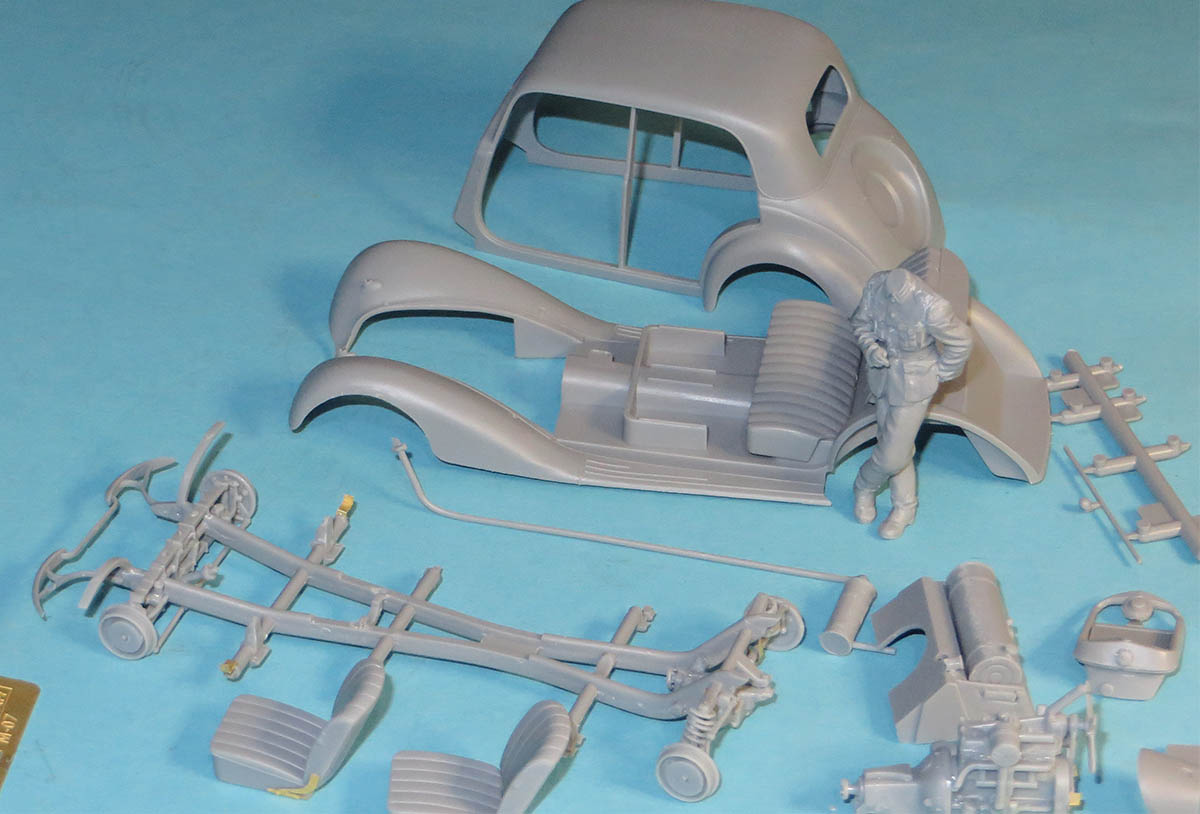
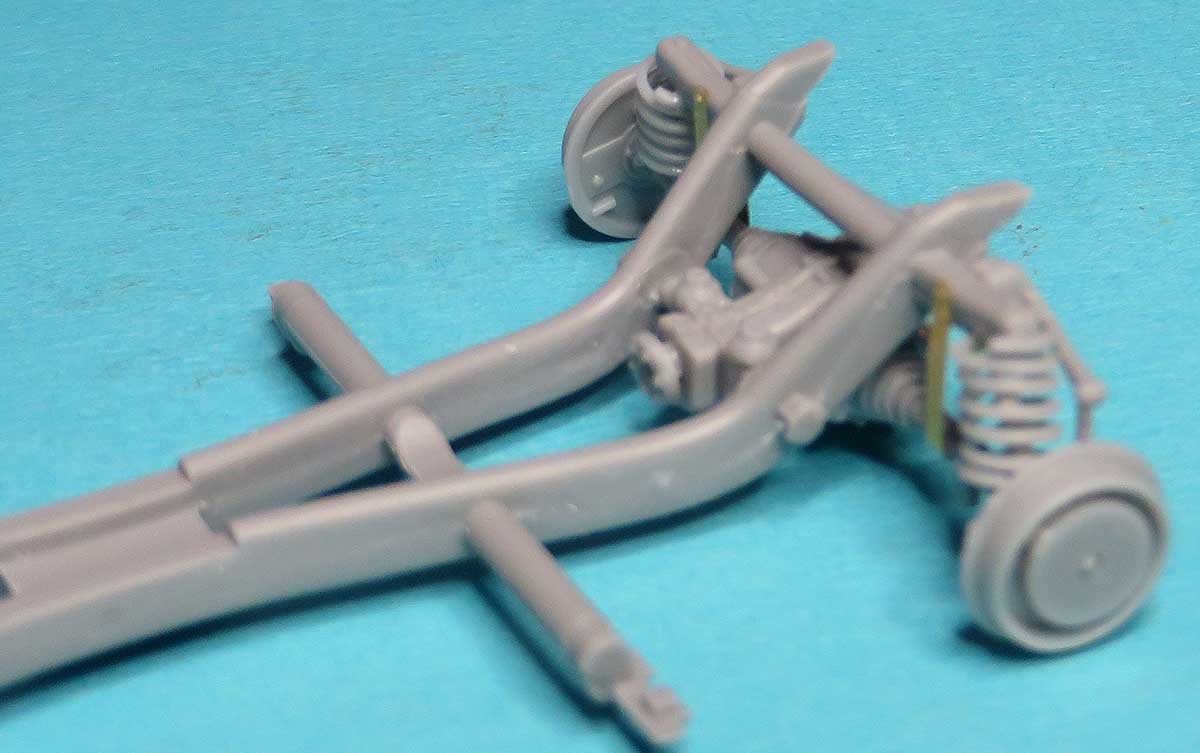
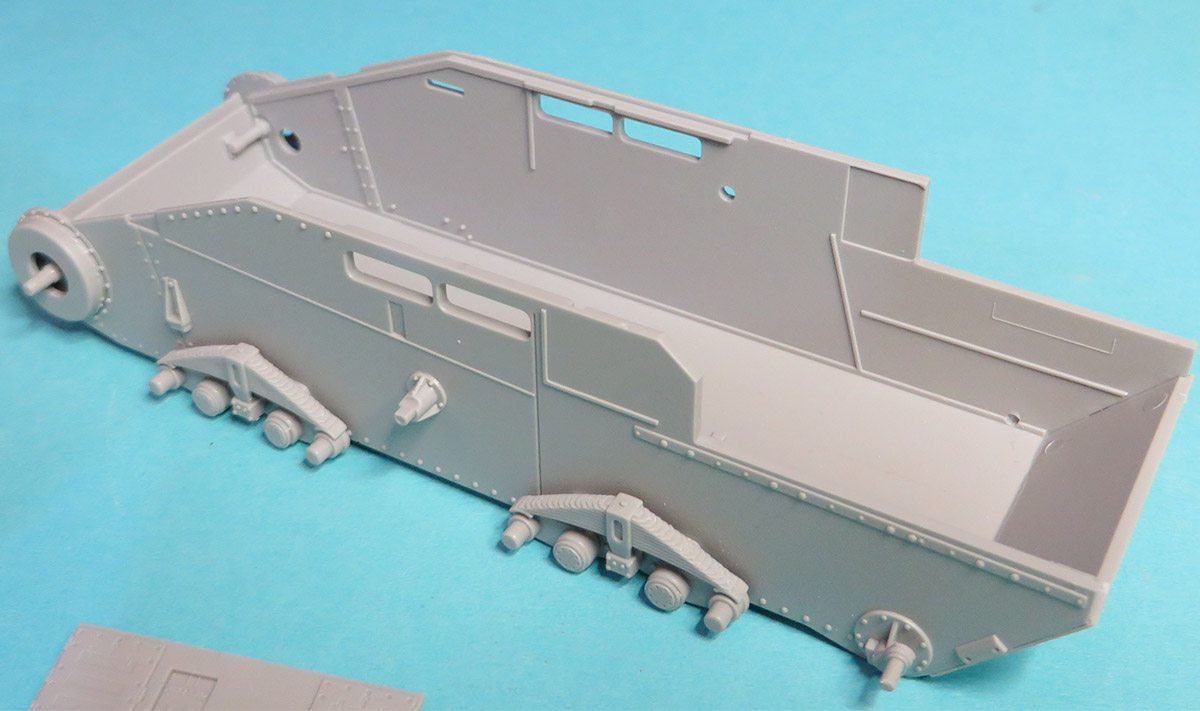
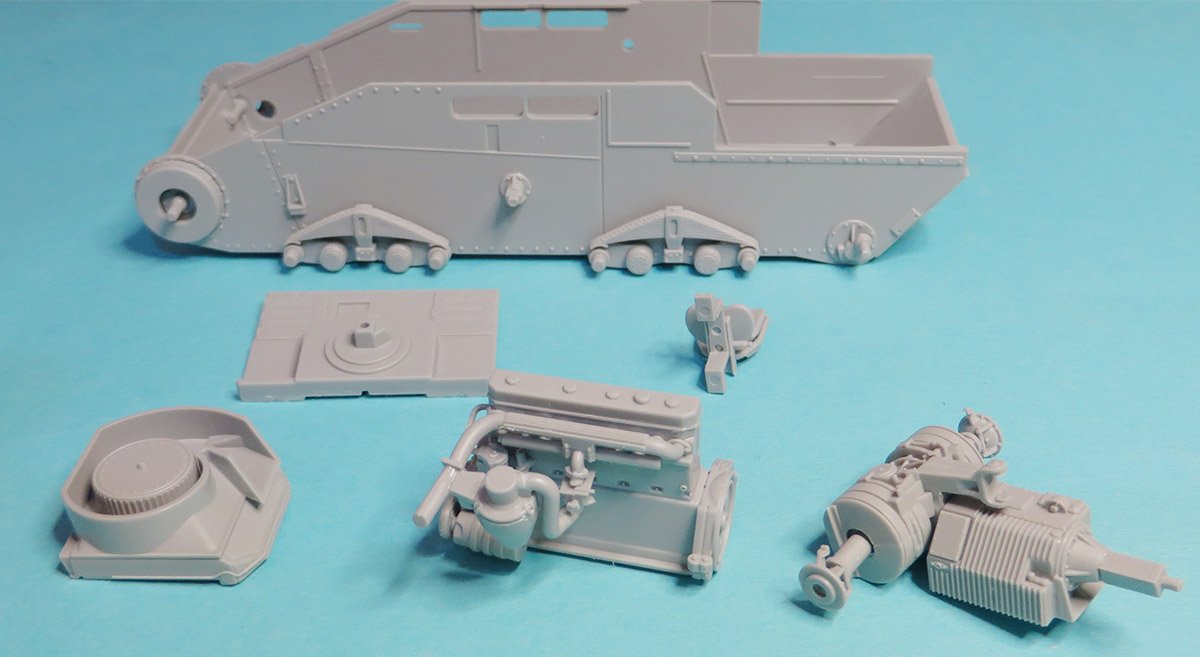
Here are some close images of the detail of the Miniart saloon engine and the interior of the Dragon Flak 38T
It is a good example to show how much detail the Manufacturers have gone into in today's world to produce there models.
My hat's off to both these companies on what they have given us.

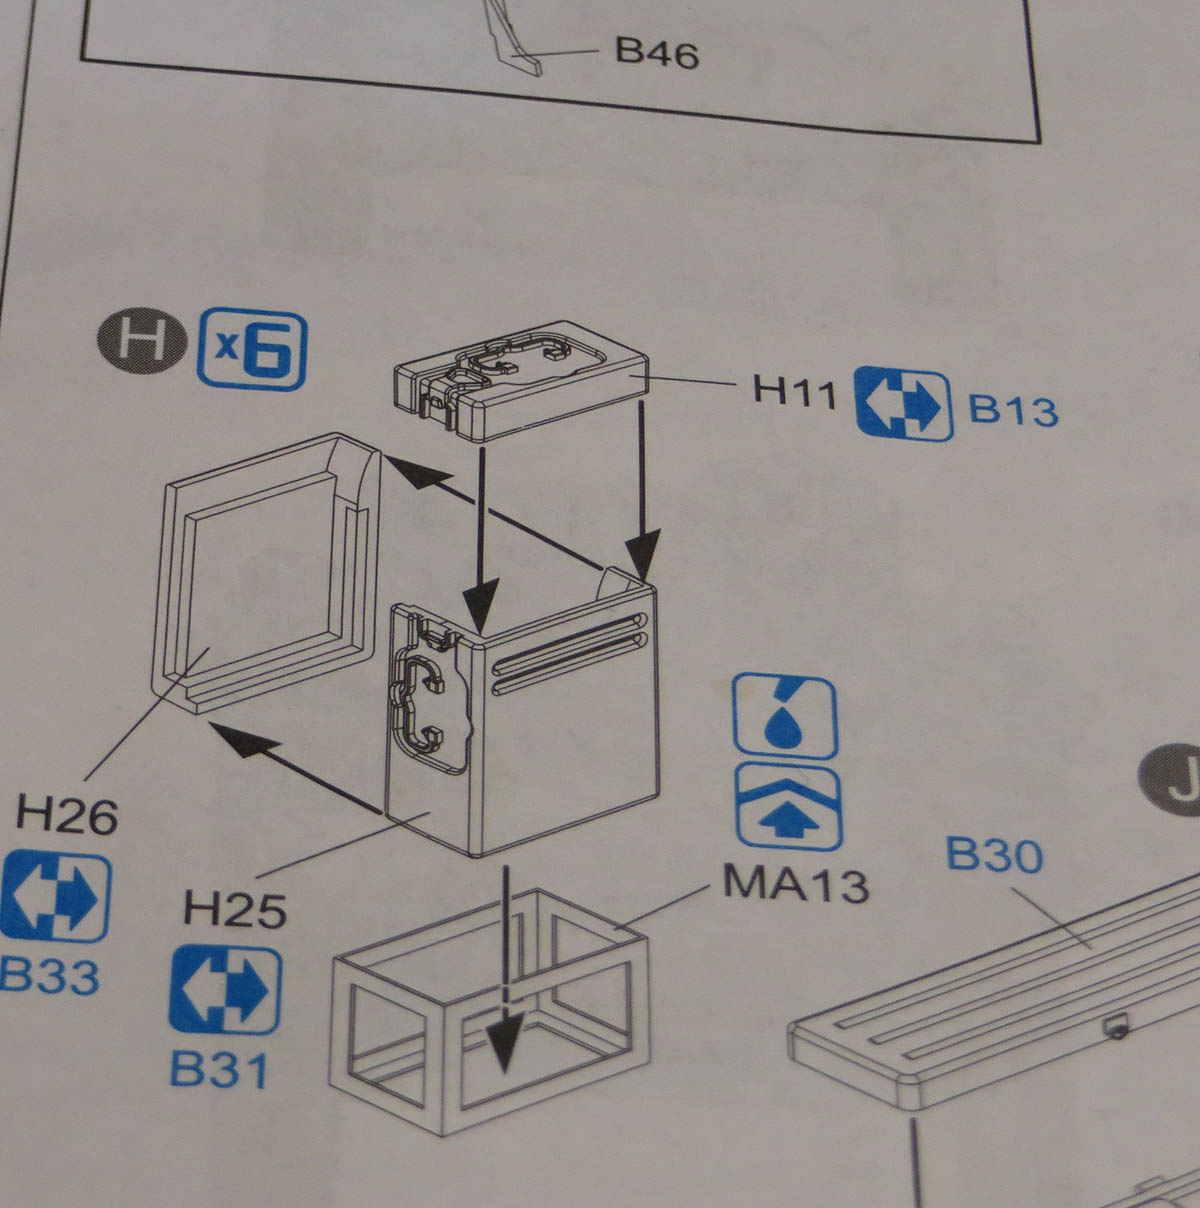
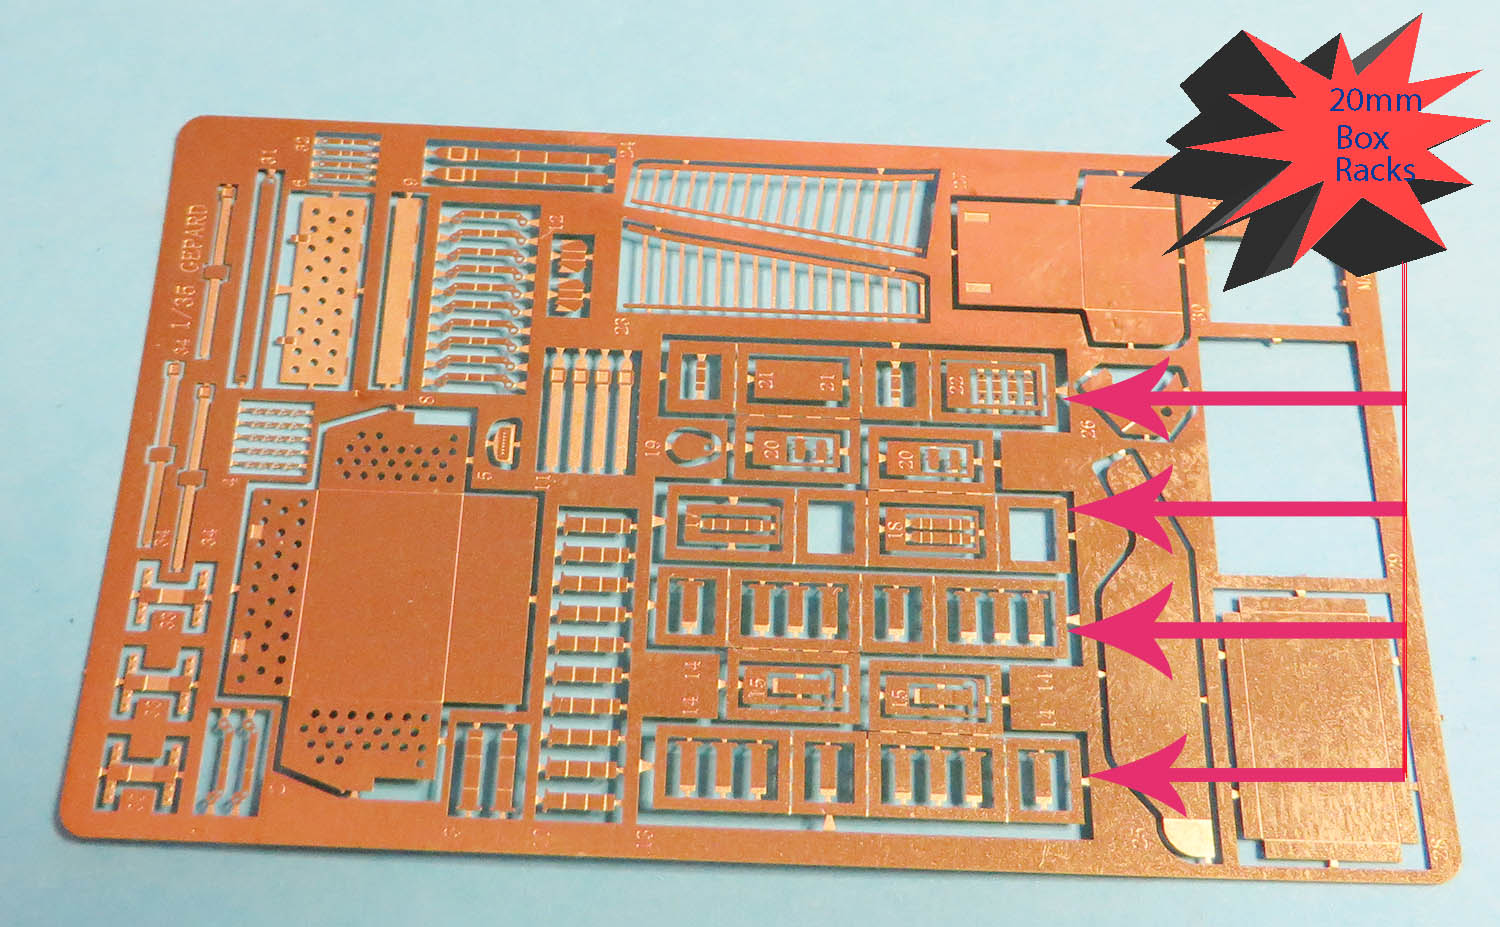
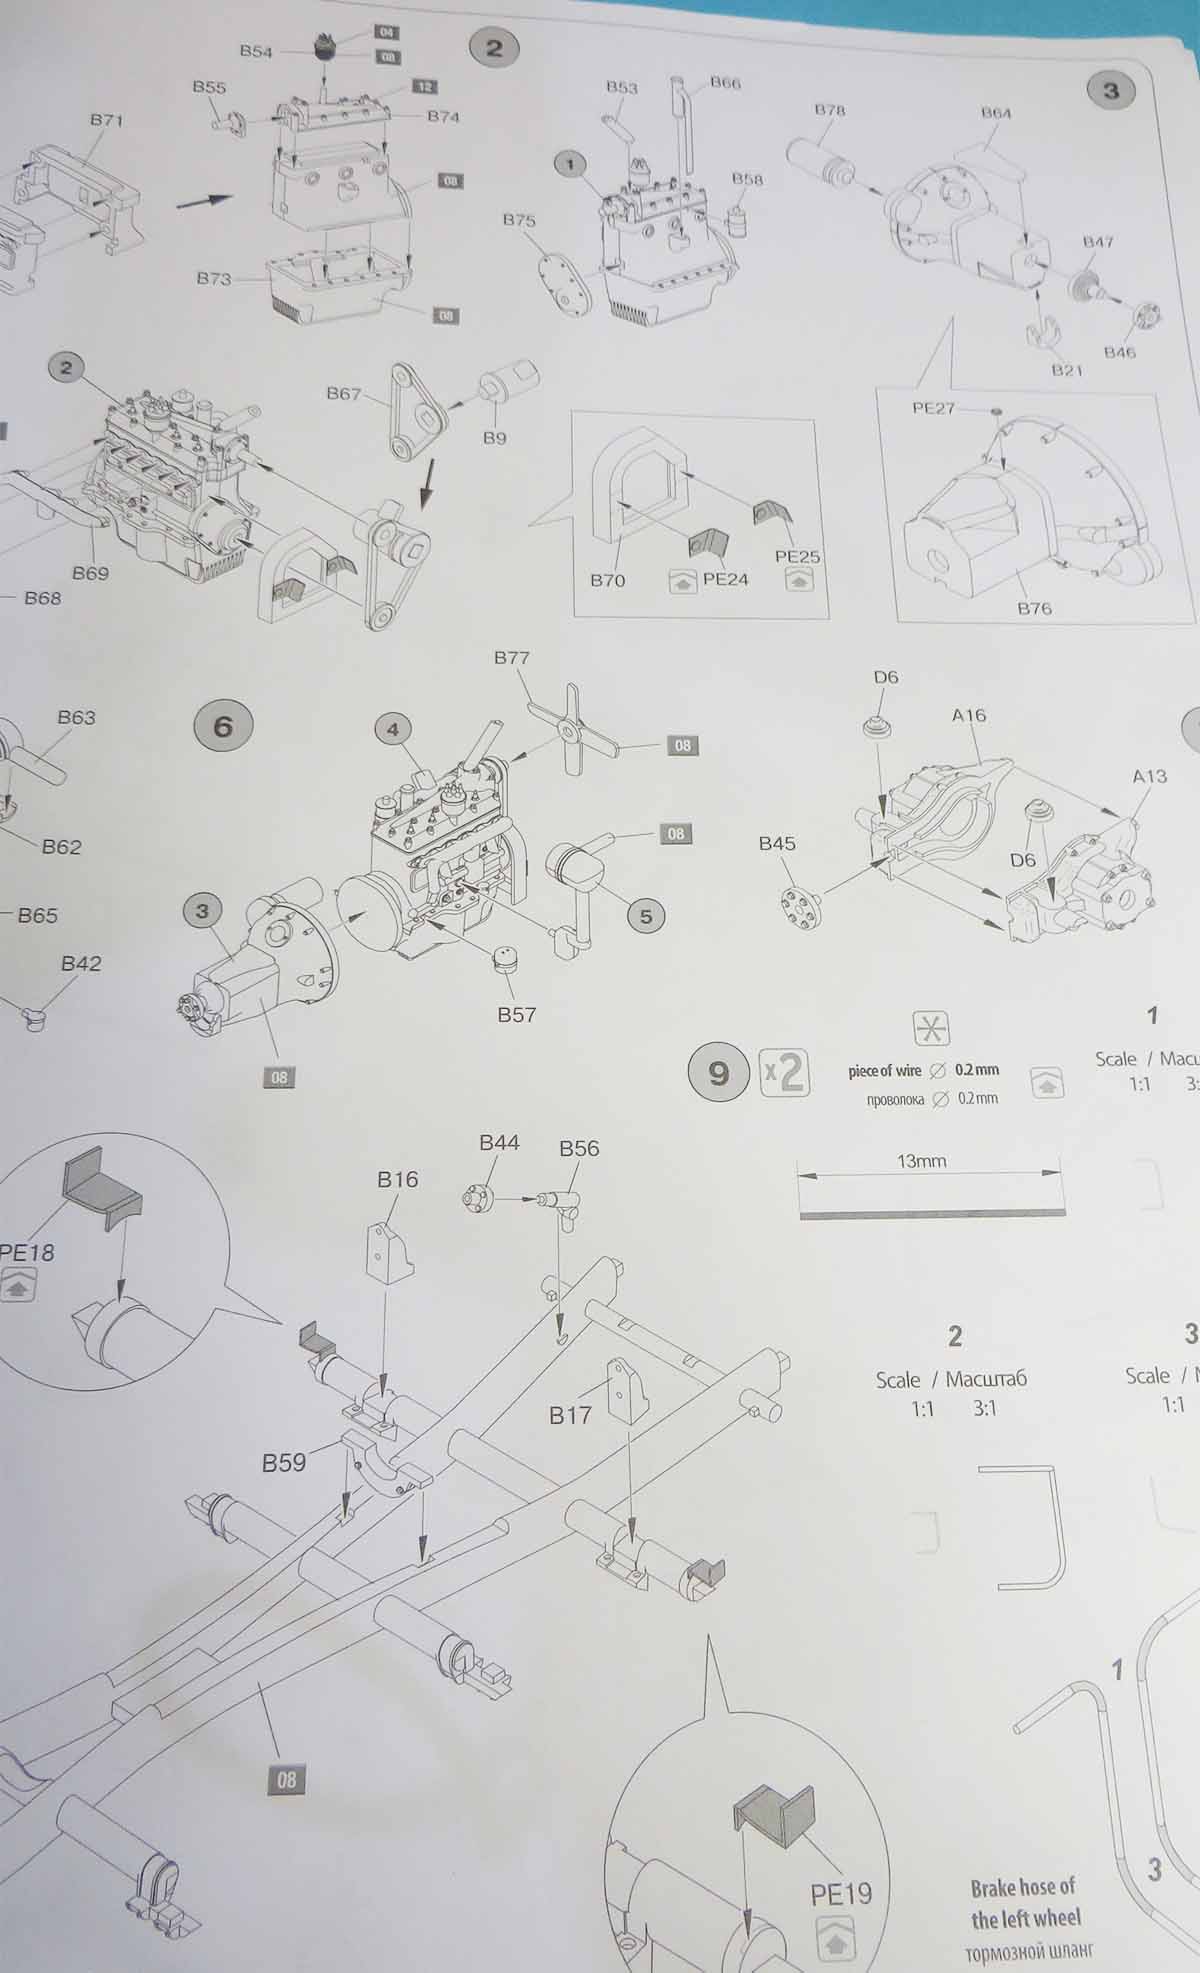
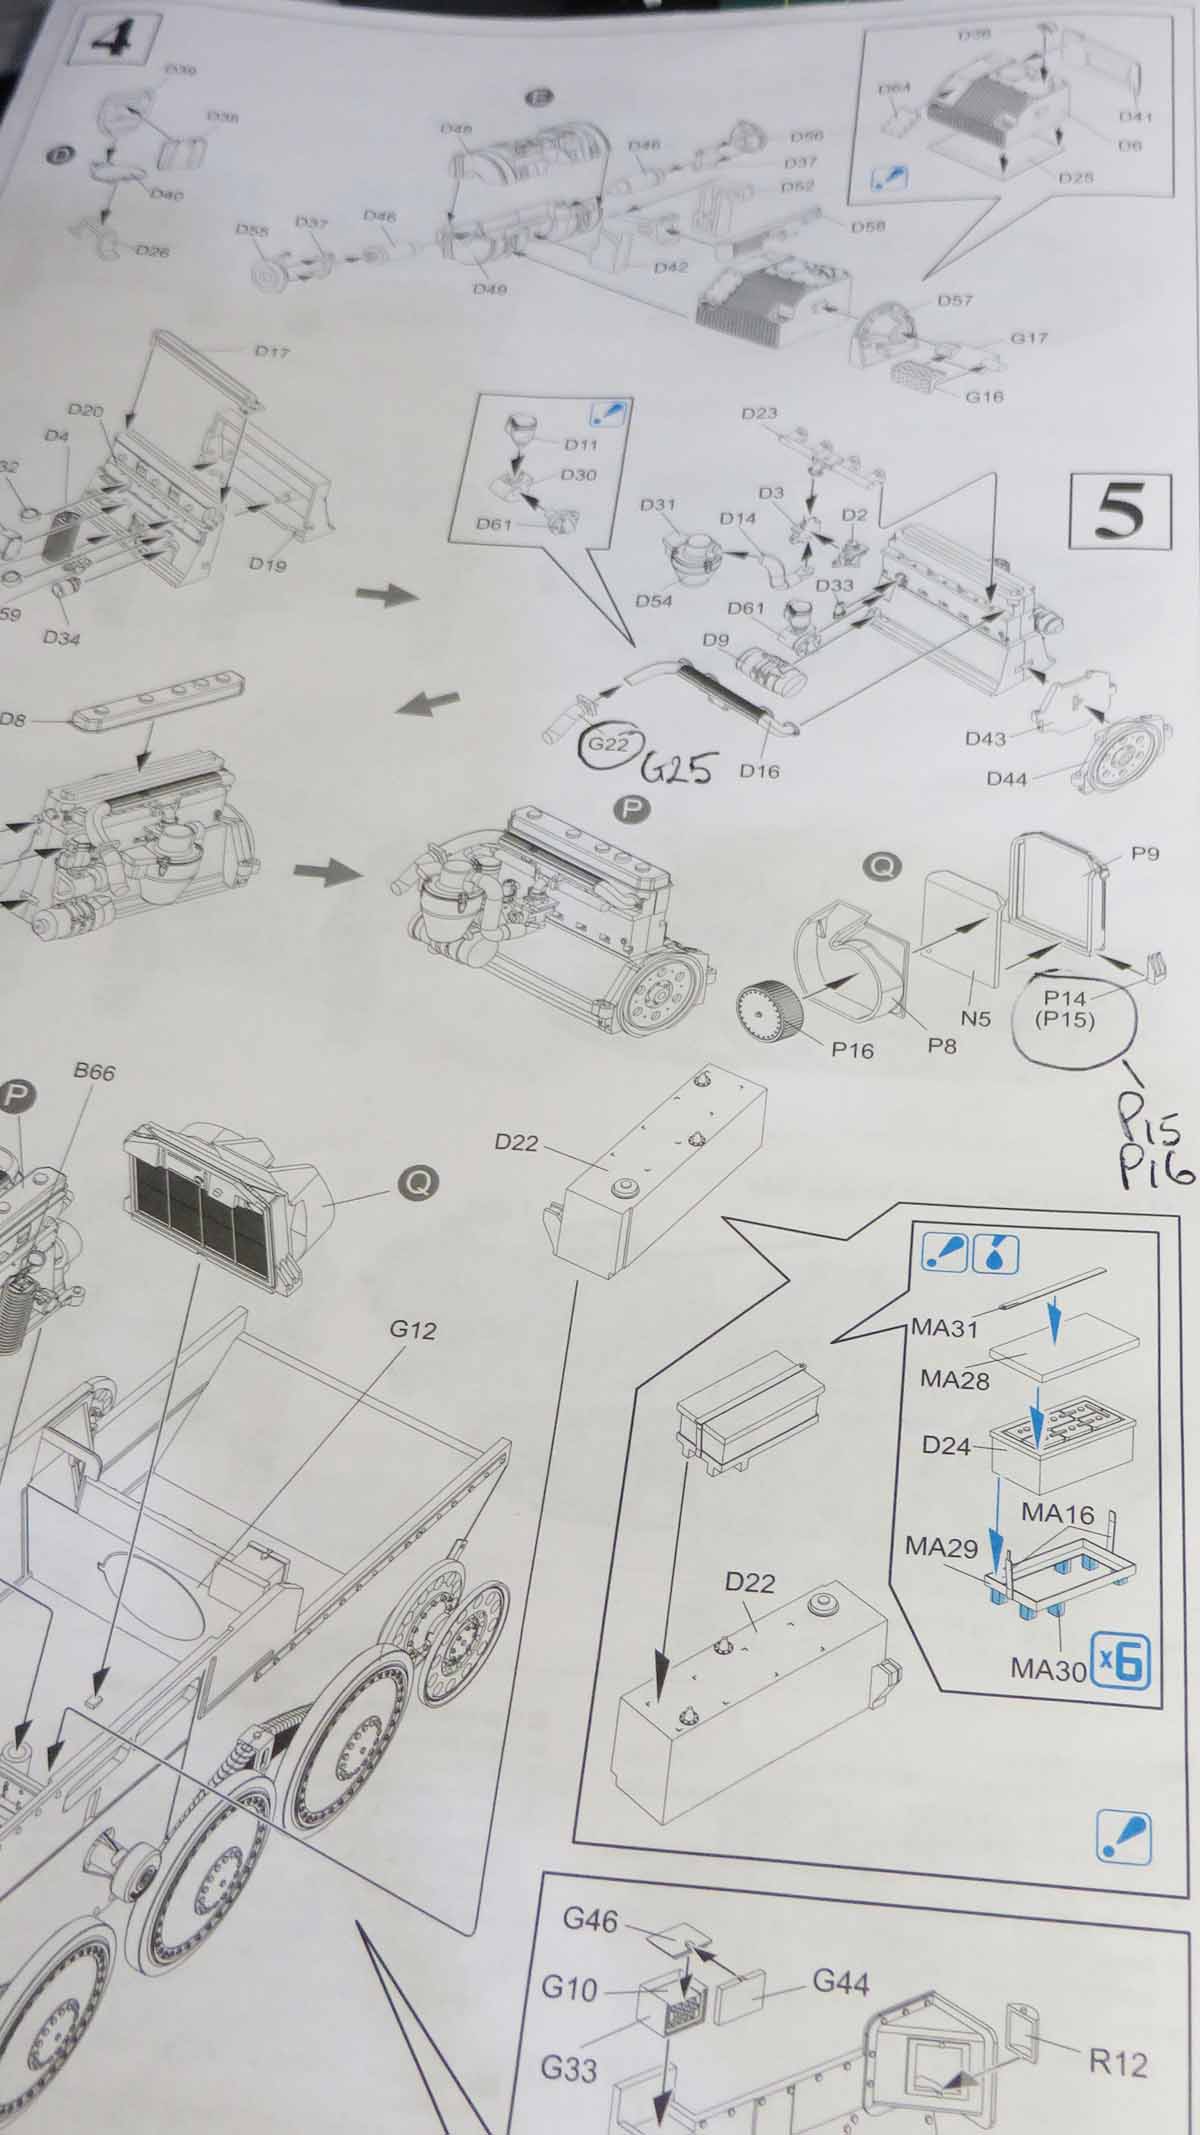
There was a few corrections on the DML Falk 38t instructions noted in the image what the sprue numbers should be.
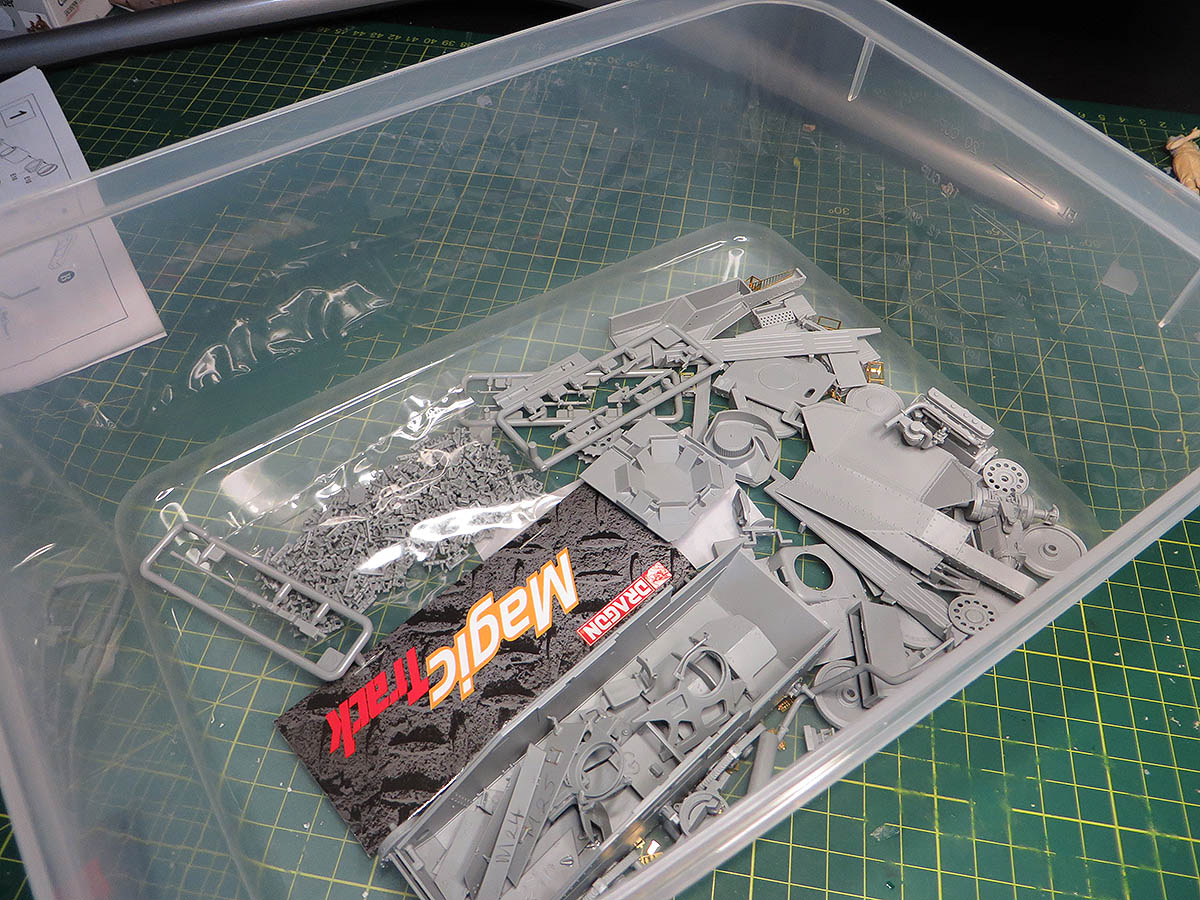
It was not easy glueng the parts together as they are intricate parts and I spent 1 or 2 times on the tiled floor trying to locate parts.
The Tamiya thin was perfect for this application.

The tamiya thin glue was the main glue used but on the bigger parts the Revell Contacta was substituted.


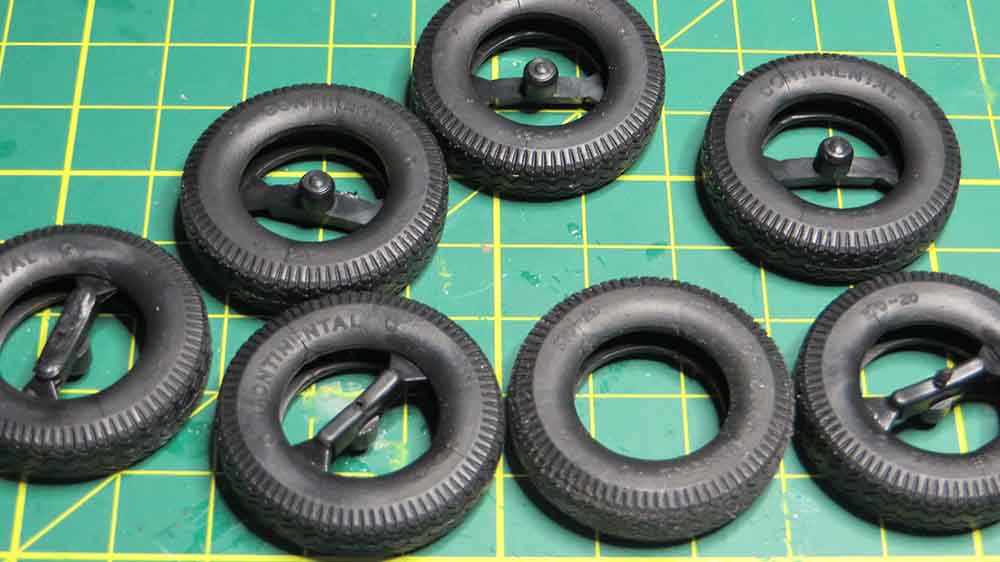
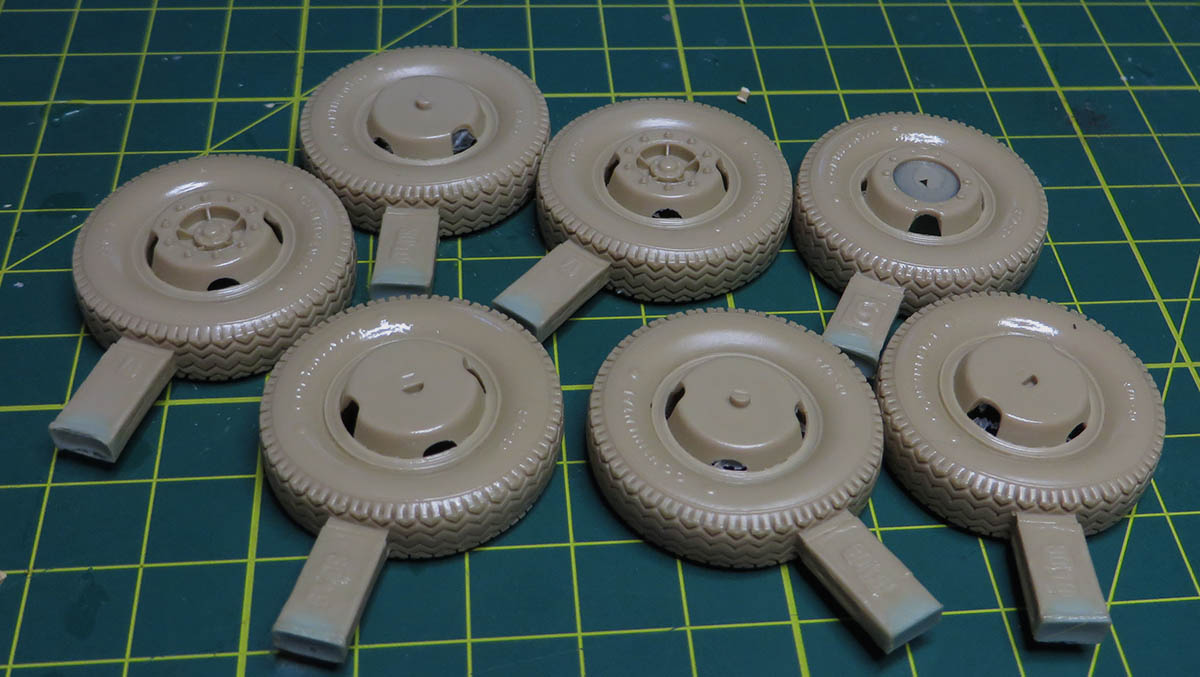
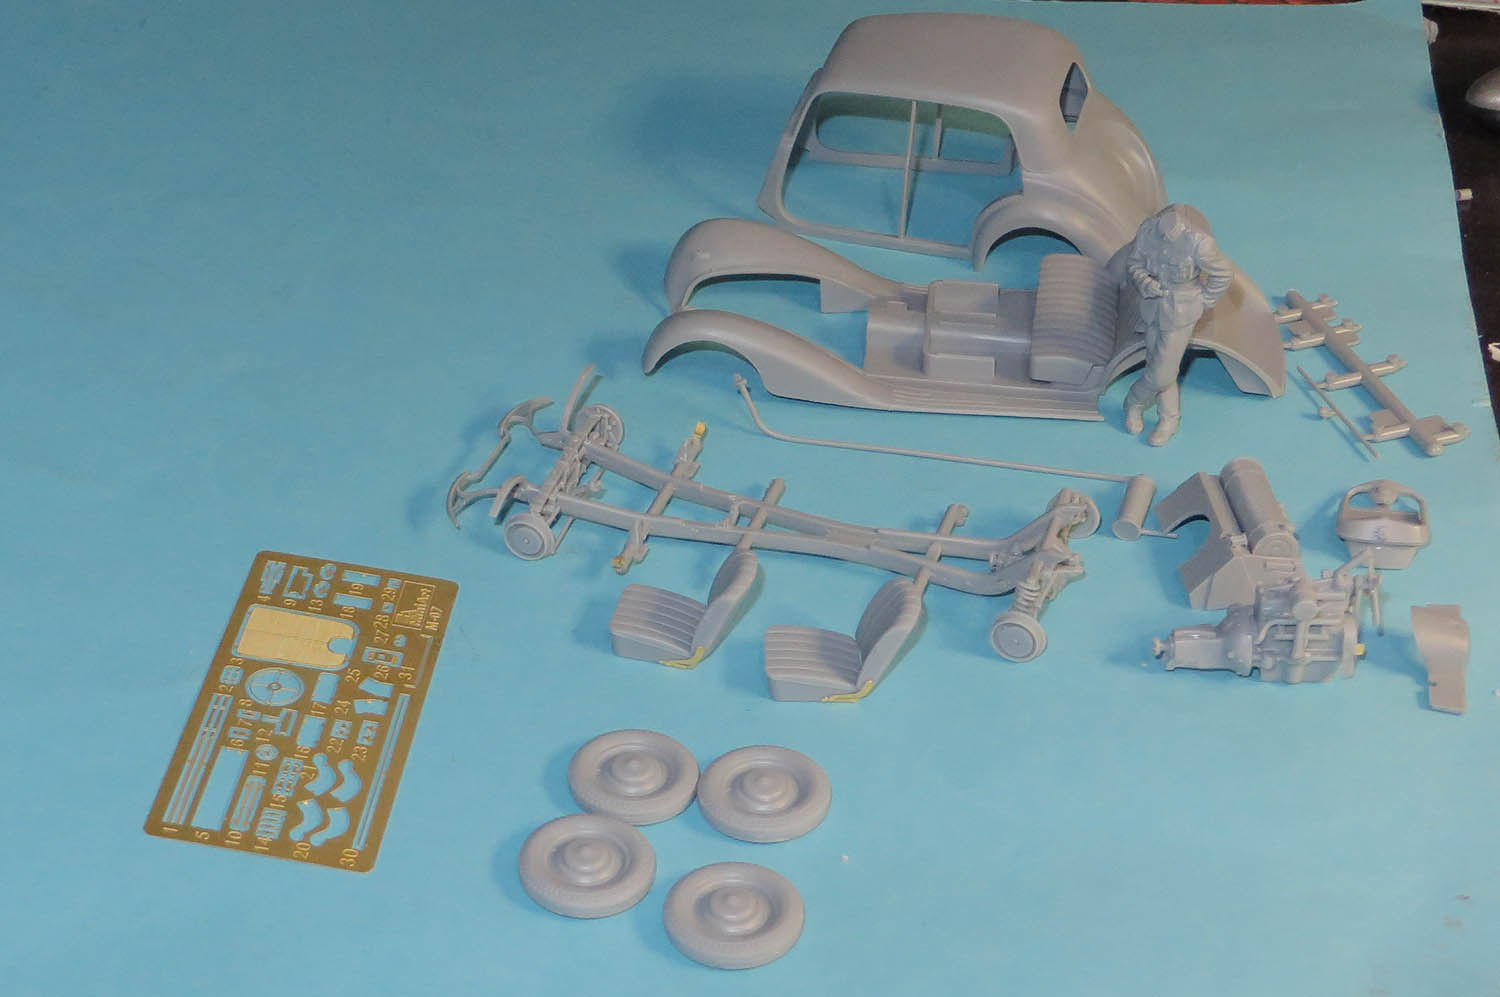
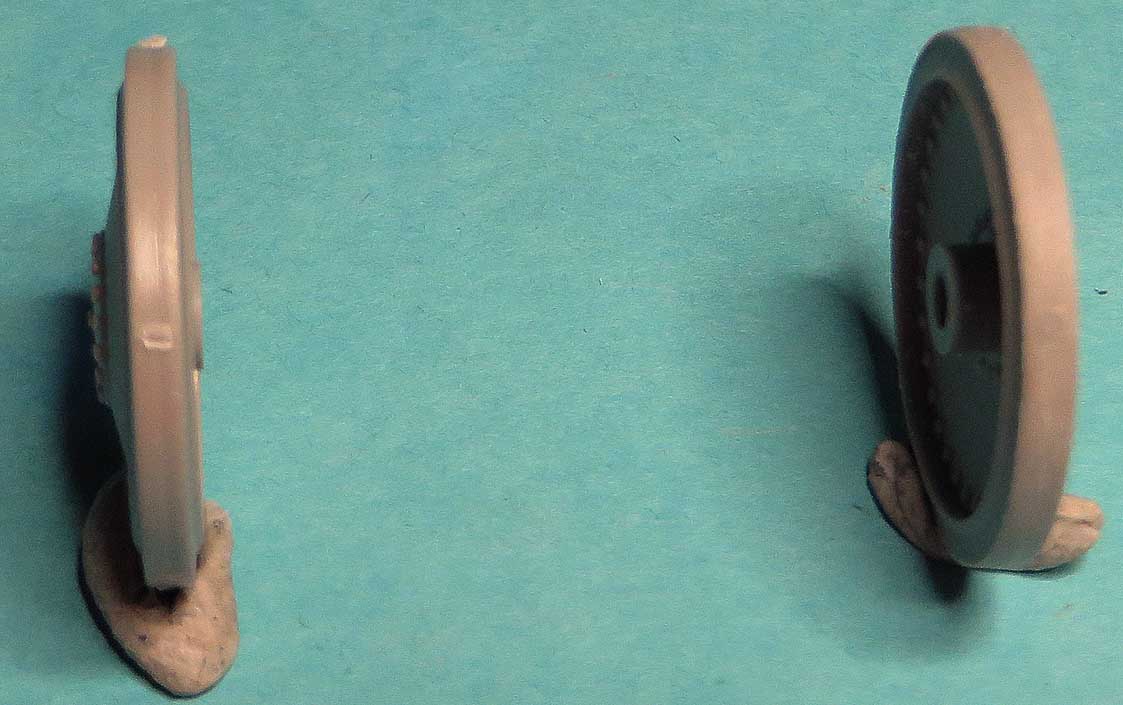
The Flak 38t wheels also get a mention here as there was a little sanding and trimming to clean the wheels.
With a big seam line and 4 connection marks and a slight rise on 1 half.Not happy

I'm not placing too much emphasis on adding too much extra detail into the engines as once it's in the vehicle it will be absorbed into the diorama and may not get seen.


Michael
wedgetail53
Visit this Community
Queensland, Australia
Joined: October 02, 2008
KitMaker: 658 posts
Armorama: 629 posts
Posted: Saturday, April 29, 2017 - 05:11 AM UTC
G'day Mike

Yes, I agree about the two different cements. I find (as, probably, do you) that too much of the extra thin has evaporated on large parts before a successful join can be achieved.

What's with the "quick setting" extra thin and where did you get it?

Thanks

Regards

Rob
airborne1
Visit this Community
Queensland, Australia
Joined: April 15, 2006
KitMaker: 915 posts
Armorama: 797 posts
Posted: Saturday, April 29, 2017 - 01:28 PM UTC
Hi Rob,

The Tamiya quick setting can be ordered from BNA Models.Have not seen it on the shelves at Hobbyrama or Mr Toys Springwood.

It works the same as the extra thin but as it says bonds quicker and also evaporates if you take too long.Also it emits a pungent smell

Had good success with thinning the Tamiya putty down.
Great for closing in joint seams on figures on the arms and shoulders.

Michael

alanmac
Visit this Community
United Kingdom
Joined: February 25, 2007
KitMaker: 3,033 posts
Armorama: 2,953 posts
Posted: Saturday, April 29, 2017 - 03:11 PM UTC

Quoted Text

G'day Mike

I find (as, probably, do you) that too much of the extra thin has evaporated on large parts before a successful join can be achieved.

Regards

Rob


Best method, if possible, for using the extra thin is to put the two parts together that you wish to join then put extra thin on the join area. It wicks into the join giving good adhesion.

Brushing on like "normal" cement will indeed see it evoparate before you can bring the parts together. If you wish to use that method you are better of with something like the Revell Contaca as shown.

Alan
wedgetail53
Visit this Community
Queensland, Australia
Joined: October 02, 2008
KitMaker: 658 posts
Armorama: 629 posts
Posted: Sunday, April 30, 2017 - 04:40 AM UTC

Quoted Text

Hi Rob,

The Tamiya quick setting can be ordered from BNA Models.Have not seen it on the shelves at Hobbyrama or Mr Toys Springwood.

It works the same as the extra thin but as it says bonds quicker and also evaporates if you take too long.Also it emits a pungent smell

Had good success with thinning the Tamiya putty down.
Great for closing in joint seams on figures on the arms and shoulders.

Michael


Thanks for that. As for filler, I have had success with a method suggested by Dan Moore a few meetings ago. I waited until my bottle of Tamiya Extra Thin had dropped to about the 1/4 full mark, then add about a heaped spoonful of all those pesky little nodes which adorn DML kits.

Shake well, wait a couple of hours, and voila - instant filler.

Regards

Rob
airborne1
Visit this Community
Queensland, Australia
Joined: April 15, 2006
KitMaker: 915 posts
Armorama: 797 posts
Posted: Sunday, April 30, 2017 - 07:12 AM UTC
Thanks Alan and Rob

Alan, the way you mentioned the bonding application is exactly what I do. The figure below needed a lot of filler around the arms and it is a good example of the tamiya thin glue breaking the putty down.
The figure will be extensively cleaned before painting.


There is also something else which needs to be brought up with the etch 20mm ammo racks.Have not seen this in any reviews on this kit but DML has included all the tool handles inside each rack which is an annoyance that each internal part of the rack has to be trimmed neatly. It is extra work and if Dml added more extra etch brass they could have been positioned into a different part of the etch fret. As below


Michael
airborne1
Visit this Community
Queensland, Australia
Joined: April 15, 2006
KitMaker: 915 posts
Armorama: 797 posts
Posted: Thursday, May 04, 2017 - 06:05 PM UTC
Hi,

Further progress on the Flak 38T, built in sub sections for painting and detailing.
Some of the Soga 2cm crew will be used to man the 2cm. It will depend on the space around the gun on which figures can be used.
Very nicely detailed figures , more image to follow shortly.


Michael
airborne1
Visit this Community
Queensland, Australia
Joined: April 15, 2006
KitMaker: 915 posts
Armorama: 797 posts
Posted: Sunday, May 07, 2017 - 05:15 PM UTC
Hello again,

With the Flak 38T near completion in regards to the construction side it has been stored in a plastic container free of dust and other particles that form up on the plastic. It is awaiting a 20mm metal barrel. Once this comes in I will get to work with test fitting the Soga gunner to the seat .


I have moved my attention over to commencing the Bussing nag with the bilstien crane and looking at what is in the box will be more challenging to work with than the tiger 2.
Reason : Way more fiddly parts which can be broken off and kid gloves is a must.


AFV club did a good job overall in replicating the Bussing Nag in detail.
This is not a model for a beginner. The parts are very fine and they will need extra care and attention when removing them from the sprue cage.
I use the No 11 Exacto to trim off the excess sprue indents on the plastic part and found the plastic to be a little soft on the chassis.
Early days so time will tell.


AFV Club added a nice touch by the inclusion of little bolt heads on the sprue cage. As below


Here is step1 and 2 done for the night.

More to follow on the truck, it's a beast

Michael
airborne1
Visit this Community
Queensland, Australia
Joined: April 15, 2006
KitMaker: 915 posts
Armorama: 797 posts
Posted: Saturday, May 13, 2017 - 11:48 AM UTC
Hi,

Quick update on progress of the Bussing nag.

lower half of chassis completed and moving onto the tyres and too my dismay all the tyres have cracks in them.

For AFV club to release an extremely highly detailed vehicle the tyres have let them down severely.
Every tyre has a line through them.Ie once fitted the tyre will split at the indent line. Have seen this once before when DML released the BRDM in the mid nineties. We get some fine hot days in Brisbane and the tyres simply split open.

In the meantime other items can be addressed for the build till the def models resin tyres show up.


Michael
Blaubar
Visit this Community
Rheinland-Pfalz, Germany
Joined: December 15, 2016
KitMaker: 261 posts
Armorama: 246 posts
Posted: Saturday, May 13, 2017 - 03:10 PM UTC
Michael,
good progress there.
Good luck with the tyres. I got the normal AFV club 4500 (stuck at the engine atm), reading your build progress with interest. The dio will be awesome.
airborne1
Visit this Community
Queensland, Australia
Joined: April 15, 2006
KitMaker: 915 posts
Armorama: 797 posts
Posted: Friday, May 26, 2017 - 11:03 AM UTC
Thanks Stefan,

Apologies for the late reply, head down doing the bussing nag.

I can see now why AFV Club chose to have the normal softer plastic than other manufacturers. The items on the sprue cage are extremely fragile and with having a softer plastic it makes them a little more flexible to remove from the sprue cage.
There are a couple of close up photo's below to show some extremely small D shackles which would scare any modeller away to take of the sprue cage.


As mentioned before the Bussing Nag is not a shake and bake kit and the best way to takle the painting and building side of it is to build in sub assemblies. It will make it way easier to paint and detail in this format.

Item 20 on sprue cage L is missing 1 side of a shackle. There are 4 sprues and this is a very very small manufacturing error.
All of the 4 L sprue cages have this inconsistency.
Ie: the bottom item in the image L20 is what they should look like.


The resin tyres from Def Models are different to what has been displayed on the box art. The tyres look like the same style of resin the Verlinden Productions used. It is a lot more stronger resin but the box art does not give a proper identification of what's inside.


More to follow....

Michael
airborne1
Visit this Community
Queensland, Australia
Joined: April 15, 2006
KitMaker: 915 posts
Armorama: 797 posts
Posted: Saturday, June 03, 2017 - 06:45 AM UTC
Hello again,

This truck is by far the hardest kit built for a long time, very similar to the Mirror models T969 wrecker but way harder with the jib boom.

The work is all around the crane area at the moment soaks up the time with the build. I have painted the interior of the crane as when the dust covers go on they may be some view to the internals of the crane housing. I'm not leaving no stone unturned.
Special attention is required for handling the boom rollers, intricate and easily to break.


Work is slow as the components are easy to break.

Michael
Dioramartin
Visit this Community
New South Wales, Australia
Joined: May 04, 2016
KitMaker: 1,476 posts
Armorama: 1,463 posts
Posted: Saturday, June 03, 2017 - 04:19 PM UTC
Michael, impressive output, detailing & excellent build photos. Glad you went with MiniArt’s Merc 170, it doesn’t need shooting up like Masterbox’s version…and I see you’ve got Riich’s dobbin too, let me know if you want some spare fur sent up for the main & tail.

Go the Blues oops sorry mate. Go BNA instead, my trusted modeling source too.

Cheers, Tim
airborne1
Visit this Community
Queensland, Australia
Joined: April 15, 2006
KitMaker: 915 posts
Armorama: 797 posts
Posted: Sunday, June 04, 2017 - 01:16 PM UTC
Thanks Tim,

All good at present no extra's needed and thanks for the offer.

Hopefully the boys might pull a rabbit out of the hat for game 2

Wishful thinking

Michael
airborne1
Visit this Community
Queensland, Australia
Joined: April 15, 2006
KitMaker: 915 posts
Armorama: 797 posts
Posted: Tuesday, June 06, 2017 - 05:13 PM UTC
Back with a quick update on the bussing Nag with Crane

Now ready for paint in sub sections, will have to work now with the Takom tiger 2 engine and the crane jib to see if the jib will hold the weight of the engine.


Michael
airborne1
Visit this Community
Queensland, Australia
Joined: April 15, 2006
KitMaker: 915 posts
Armorama: 797 posts
Posted: Wednesday, June 07, 2017 - 01:18 PM UTC
The Bussing nag packed away from the dust


The 2 kings

Super king and Takom King


Michael
wedgetail53
Visit this Community
Queensland, Australia
Joined: October 02, 2008
KitMaker: 658 posts
Armorama: 629 posts
Posted: Thursday, June 08, 2017 - 04:31 AM UTC
G'day Michael

I didn't use the book, I downloaded the articles from AFV Modeller website. Even these were invaluable, although I found that Takom have made a lot, but not all, of the corrections made by David Parker.

A particular area that needs work is the radio rack. Have fun.

Regards

Rob
airborne1
Visit this Community
Queensland, Australia
Joined: April 15, 2006
KitMaker: 915 posts
Armorama: 797 posts
Posted: Thursday, June 08, 2017 - 08:15 AM UTC
Thanks Rob.

The Youtube video reviews had been very helpful to make the
decision to get the book. David's work covers each area up close and personal, good clear images for model reference and is a must for any modeller.

I'm not intending to go too much on detail or enhancing the inside because once in a diorama setting it will be consumed by the other vehicles,figures and equipment.

The best thing is all the hatch's will be open and the viewer will be able to look inside.

Michael
Bodeen
#026
Visit this Community
Pennsylvania, United States
Joined: June 08, 2002
KitMaker: 1,744 posts
Armorama: 1,359 posts
Posted: Thursday, June 08, 2017 - 08:38 AM UTC
Great so far. I am following this build. Thanks for sharing your work.
 _GOTOTOP