Nigel, that AS-90 looks solid, I wouldn't be upset over that build.
Alex, I look forward to seeing that one finished, that conversion looks pretty interesting.
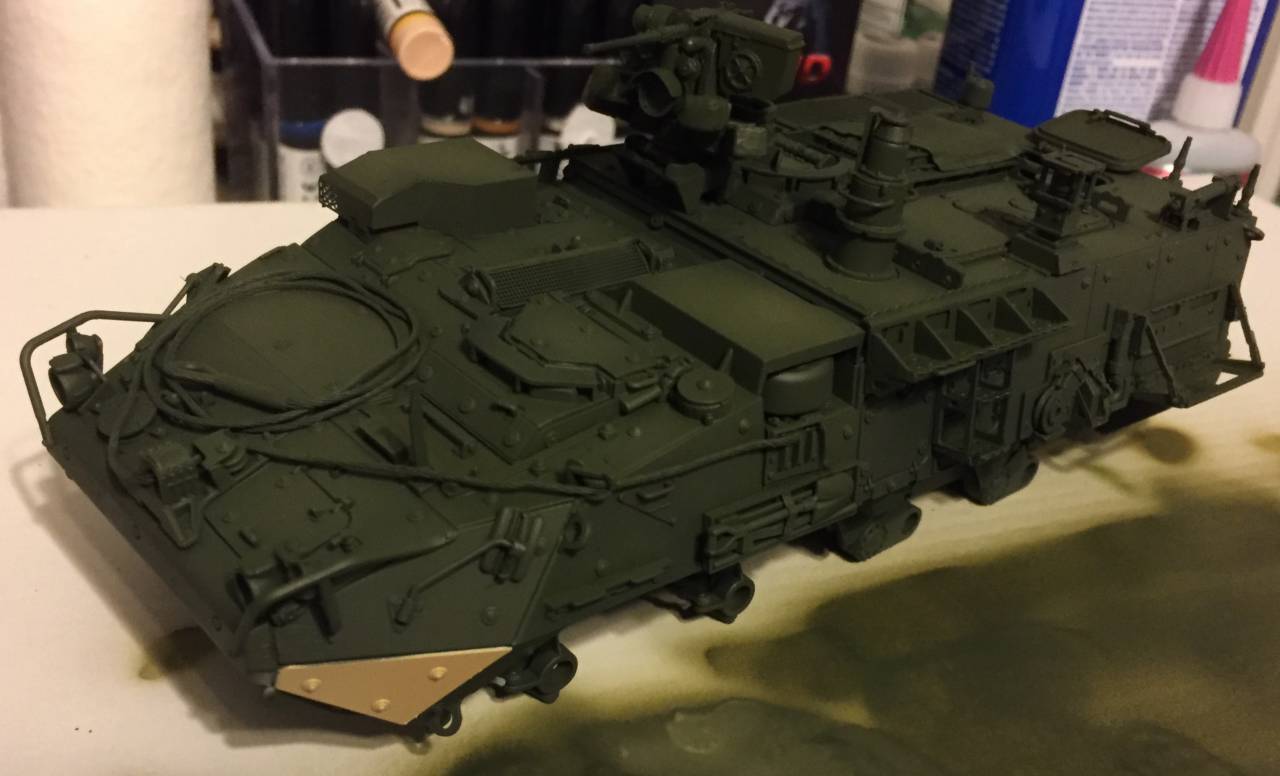
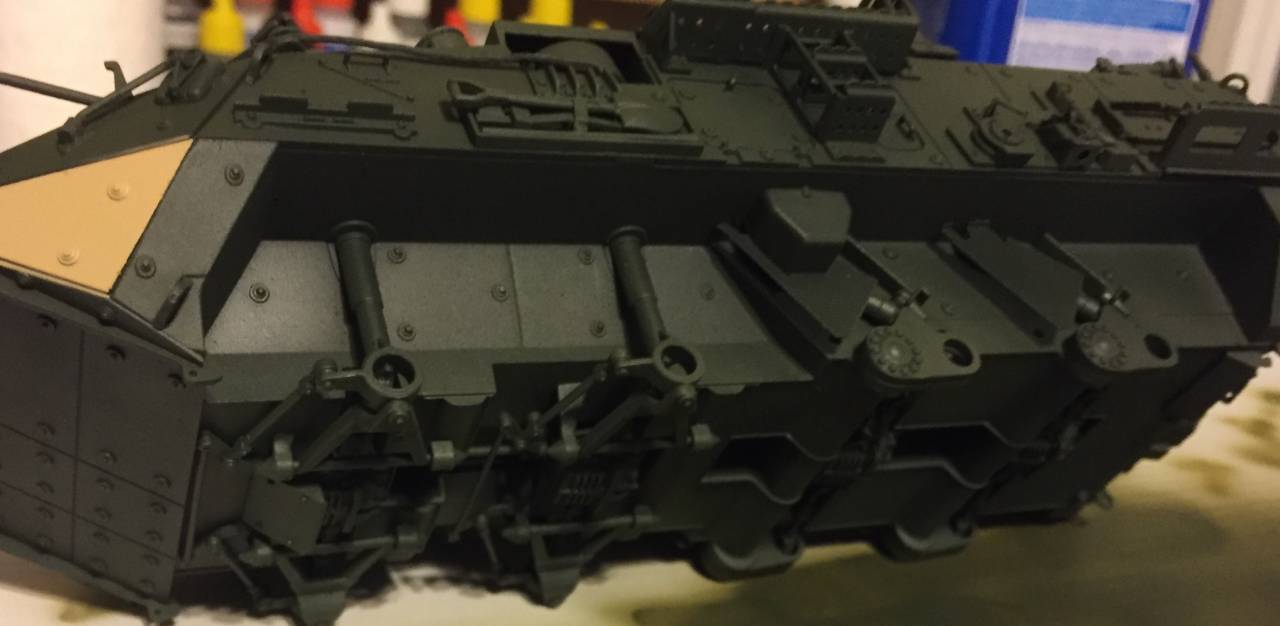
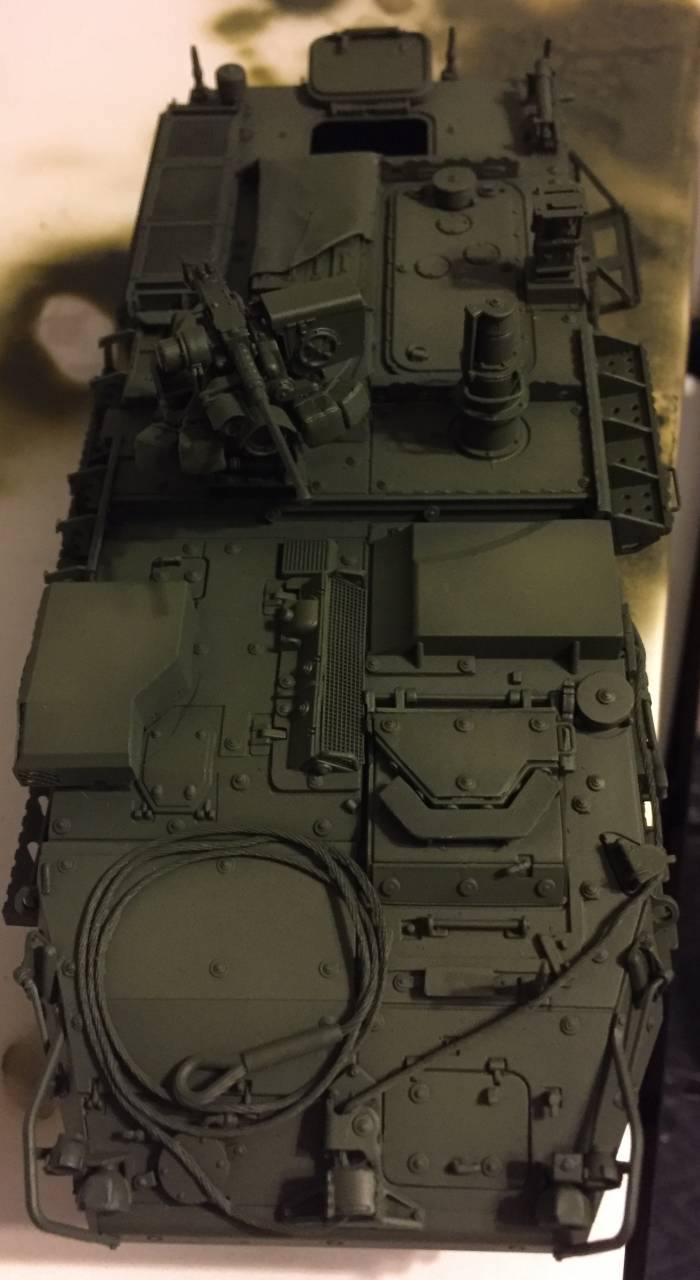
The surface detail on the Stryker has made it much more difficult to get the base coat down. I am so used to the slab sided German AFV's that don't take as much effort to paint. I've finished the base coat and worked on some color modulation. Ill be starting to paint all of the stowage next.
Hosted by Richard S.
Trumpeter Mk. 4 Campaign
Posted: Thursday, March 29, 2018 - 05:54 AM UTC
Posted: Thursday, March 29, 2018 - 03:11 PM UTC
Quoted Text
...Nice models here and some already finished !
While some(ATS 712 & KS-19M2) are almost finished and idle in-wait-for-weathering-mood for the last 2 months...
Next big weekend(orthodox Easter) I hope to find the right mood to finish them.
Meanwhile-I'll continue lurking around enjoying the quality of builds participating!
Posted: Thursday, March 29, 2018 - 05:10 PM UTC
Shawn,
With all those nooks and crannies it no wonder getting the color modulation you wanted. The paint work looks wonderful and clean. Hope you have an easier time with weathering.
Mark
With all those nooks and crannies it no wonder getting the color modulation you wanted. The paint work looks wonderful and clean. Hope you have an easier time with weathering.
Mark
greif8
Bayern, Germany
Joined: January 17, 2006
KitMaker: 673 posts
Armorama: 116 posts
Joined: January 17, 2006
KitMaker: 673 posts
Armorama: 116 posts
Posted: Sunday, April 01, 2018 - 11:31 AM UTC
Shawn - nice work on the Stryker Vehicle thus far. I live and work about 15-20 minutes from one of the U.S. Army's Stryker Brigades and see them up close frequently. Your build look pretty accurate at this stage.
Ernest
Ernest
Northern_Lad
United Kingdom
Joined: September 17, 2012
KitMaker: 462 posts
Armorama: 417 posts
Joined: September 17, 2012
KitMaker: 462 posts
Armorama: 417 posts
Posted: Tuesday, April 03, 2018 - 01:54 AM UTC
At last!....
Finished the VK3001H tracks... a labour of love (and hate)... but now the heavy lifting is over, I can get on with the turret.
Cheers
Matthew
Finished the VK3001H tracks... a labour of love (and hate)... but now the heavy lifting is over, I can get on with the turret.
Cheers
Matthew
Northern_Lad
United Kingdom
Joined: September 17, 2012
KitMaker: 462 posts
Armorama: 417 posts
Joined: September 17, 2012
KitMaker: 462 posts
Armorama: 417 posts
Posted: Wednesday, April 04, 2018 - 07:27 PM UTC
Made a start last night on the VK3001H turret… As this is a slightly paper-ish panzer, I decided to add turret-mounted smoke launchers (liberated from an excess Dragon Panzer iv sprue). At least, this configuration would be contemporary with when the VK3001H was under development.
I plan to swap the commander’s cupola. The kit part looks like the cupola of the ausf J panzer iv, which the development of the VK3001H came well ahead of. I also plan to up-gun it to a 75 mm long version as seen on the panzer iv ausf G…
I also liberated extra tools from various Dragon kits in the stash as the Trumpeter VK3001H comes bereft of tools… If I'm up gunning the tank, I'll have to find the longer barrel cleaning rods. The one in the picture below is intended for he 75mm short barrel I think...
A bit more clean required on the 5 ton jack, especially around the bolt where the handle attaches to the jack...
Cheers
Matthew
Posted: Wednesday, April 04, 2018 - 08:09 PM UTC
Ernest,
Thanks. I am modeling this Stryker after one of the vehicles in my platoon from years ago, so I'm detailing it from memory.
Matthew,
Great progress on that VK3001H. I almost always swap out the pioneer toold on Trumpy kits with leftover Dragon tools. I really enjoy Trumpeter kits but the OVM tools are always lacking in details.
Bluestab
South Carolina, United States
Joined: December 03, 2009
KitMaker: 2,160 posts
Armorama: 1,906 posts
Joined: December 03, 2009
KitMaker: 2,160 posts
Armorama: 1,906 posts
Posted: Thursday, April 12, 2018 - 08:24 AM UTC
It's been a bit since I posted any build updates. As a refresher, I'm building Trumpeter's E-10.
We jump back in with starting on the paint and deciding on those side skirts. The kit comes with plastic as well as PE side skirts.
I decided to do something different and hand-paint to E10. I actually began pre-painting the hatches, and side skirts (both styrene and PE). And I decided to go ahead and start on the rest of the tank. The light gray and dark yellow actually look pretty good. I might use that with some of my What-If Privateer camo schemes.
By the way, the hatches have horrible ejector marks. I decided to use some styrene to make some pads to cover them. Simple and less frustrating fix than filling and trying to sand around the kit's handle detail.
Added the secondary color...olive green. Again, I dabbed it on with a brush and sponge. I had only planned on a two-color scheme but ...well you'll see.
Time for the tracks. This release comes with early and late tracks and drive sprockets. Both era of tracks are offered in rubberband and indie links...you get four sets of tracks. So find a friend that bought the initial release and give them your extra set of indie links. To be fair, the rubberband links probably would work well with the side skirts on.
The tracks went together well. I fit the sections on the kit to let the cement set up, then removed them for paint.
I painted the tracks with Rustoleum dark gray auto primer. What I like is it has a grainy texture and gives the tracks a texture that works well with dry-brushing and pigments.
Once the tracks dried, I heavily drybrushed them with red-brown. I then drybrushed them with steel. A dabble of dust pigments helped blend the tracks together.
Finished up the odd bits like pioneer tools, tow cables, etc. I decided to give the plastic side skirts a go and they ended up looking pretty good so I'll keep them for now.
I painted the outward surfaces of the skirts. I added the olive green. On a whim I decided to add a third color...red-brown.
I like the rough look of the camo. The kit comes with a generic decal sheet. The paint schemes do not use any markings. I decided to forego and markings.
And with that I am calling this one done. It wasn't a tough build and it looks nice up on the shelf. I'd recommend it. The gun is loose and flops around. Some of the parts require a bit of extra clean-up. Overall, it's as good as their E-25. And, the E-10 does come with a gunner's sight...Trumpy left that detail out of the E-25 kit.
Posted: Friday, April 13, 2018 - 08:06 AM UTC
Alex,
Nice finish with the E-10. Thanks for the idea on the injector pin marks. The camo is wonderful and like how the colors are mixed up and worn in places.
Again very nice finish.
Mark
Nice finish with the E-10. Thanks for the idea on the injector pin marks. The camo is wonderful and like how the colors are mixed up and worn in places.
Again very nice finish.
Mark
Posted: Friday, April 13, 2018 - 08:13 AM UTC
I finished my Soviet KV-8S Heavy Tank from Trumpeter. Really liked how easy this one was to put together with hardly any fit issues.
The decals sucked, they refuse to release from their backing. First time I had to soak decals for five minutes.
Anyway here are a few photos that will be posted in the gallery.
Mark
The decals sucked, they refuse to release from their backing. First time I had to soak decals for five minutes.
Anyway here are a few photos that will be posted in the gallery.
Mark
Bluestab
South Carolina, United States
Joined: December 03, 2009
KitMaker: 2,160 posts
Armorama: 1,906 posts
Joined: December 03, 2009
KitMaker: 2,160 posts
Armorama: 1,906 posts
Posted: Friday, April 13, 2018 - 08:47 AM UTC
Thanks. I was going for a rough look. The green and red-brown were applied using the cheapest brushes I could find. I paid $1 for a pack of 20 of them. I usually use them for applying glue to dioramas...stuff like that. They also work well for crude painting like with the E-10. I also use them for white camo for WW2 vehicles. Often, those were applied using rags, brooms, and branches. I actually have a M4a3 Sherman that will be white-washed for the Workhorse Campaign.
Anyway, I took a couple extra pics of the E-10 and loaded them to the campaign gallery.
And nice work guys. There's some nice work in this thread.
Anyway, I took a couple extra pics of the E-10 and loaded them to the campaign gallery.
And nice work guys. There's some nice work in this thread.
LinusB
Western Australia, Australia
Joined: March 21, 2016
KitMaker: 247 posts
Armorama: 126 posts
Joined: March 21, 2016
KitMaker: 247 posts
Armorama: 126 posts
Posted: Saturday, April 14, 2018 - 01:38 PM UTC
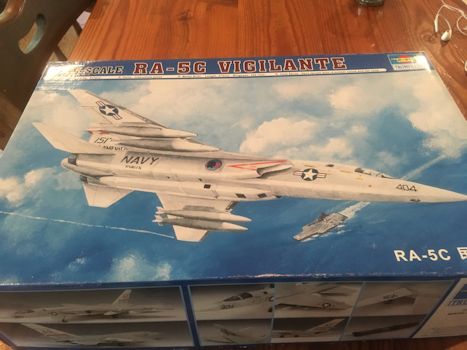
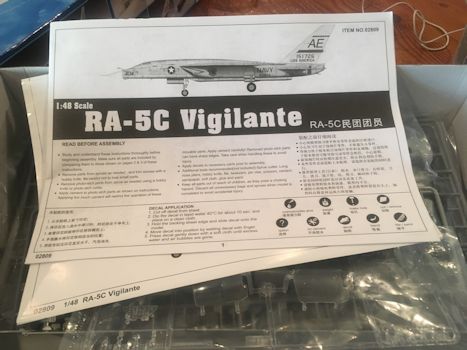
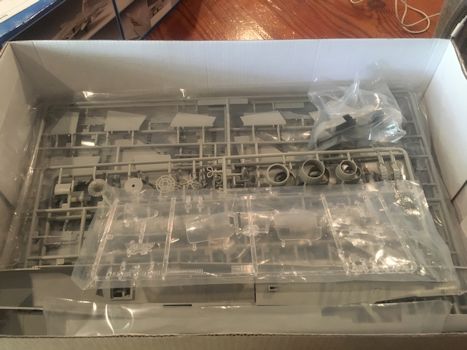
Hi everyone I am starting on Trumpeter's RA-5C Vigilante.
terminators
France
Joined: February 20, 2012
KitMaker: 1,932 posts
Armorama: 1,907 posts
Joined: February 20, 2012
KitMaker: 1,932 posts
Armorama: 1,907 posts
Posted: Saturday, April 21, 2018 - 01:34 PM UTC
In progress.
Impressive number of parts in this kit. A little detail can be composed in four parts, a bit exaggerated in my mind.
I've made a little modification on front axle to have turned wheels.
Impressive number of parts in this kit. A little detail can be composed in four parts, a bit exaggerated in my mind.
I've made a little modification on front axle to have turned wheels.
Northern_Lad
United Kingdom
Joined: September 17, 2012
KitMaker: 462 posts
Armorama: 417 posts
Joined: September 17, 2012
KitMaker: 462 posts
Armorama: 417 posts
Posted: Sunday, April 22, 2018 - 10:50 AM UTC
Hello,
A bit more progress to report on the VK1003H. Build is kinds complete. I played down Vallejo German grey primer then added progressively lighter german grey regular. Am going for a high contrast look.
Endless wheels… Lots of tyres to paint…
Still lots to do...
Cheers
Matthew
A bit more progress to report on the VK1003H. Build is kinds complete. I played down Vallejo German grey primer then added progressively lighter german grey regular. Am going for a high contrast look.
Endless wheels… Lots of tyres to paint…
Still lots to do...
Cheers
Matthew
Buckeye198
Ohio, United States
Joined: May 02, 2010
KitMaker: 596 posts
Armorama: 265 posts
Joined: May 02, 2010
KitMaker: 596 posts
Armorama: 265 posts
Posted: Tuesday, May 08, 2018 - 07:27 PM UTC
A little late to the party, but I'm in with Trumpy's RF-8 Aerosan. About 8 years ago, I went through a major Soviet phase and had to build an aerosan. Unfortunately, the only offering was Kirin's resin kit...a turd of a kit if ever there was one. Instructions were unintelligible at best, incorrect at worst; pieces were poorly molded; the kit fit together like a mashup from the spares box. In spite of that, I managed to get a pretty good result.
End of the nearly-decade-old rant When I finally saw Trumpeter released a mass-produced styrene aerosan, I jumped for the kit, and here I am now.
Kit looks good overall, minimal flash, pin marks will (mostly) be well hidden, engine detail is okay, and the seated crew members are very appreciated. There are some historical inaccuracies -- namely, the engine isn't the precise model used on most aerosans, and the rivets should be flush with the body -- but I'm going to build this more as a test of craftsmanship rather than my usual rivet-counter tendencies at the expense of good modeling technique.
Back to the build...finally. Engine is coming together nicely, and yesterday I focused on the body. Aerosans were mostly plywood, so I wanted to try out a wood grain technique with oils. Worst case scenario, it looks bad and it just gets covered over with white. Best case, I'll lay the white down very lightly and maybe some of the grain can show through as if the paint got severely worn down.
I messed around with the thickness/darkness of the oil layers. Outer surfaces turned out lighter, inners were darker. Figured that an unpainted interior should make for good contrast with the otherwise all-white exterior.
And for as long as I don't have a proper photobooth setup, I'll keep apologizing for the whack picture quality
panzerIV
England - North West, United Kingdom
Joined: January 02, 2007
KitMaker: 781 posts
Armorama: 676 posts
Joined: January 02, 2007
KitMaker: 781 posts
Armorama: 676 posts
Posted: Tuesday, May 08, 2018 - 09:54 PM UTC
some fabulous looking builds so far.
I have made a start on mine just haven't got round to post anything pictures. im wondering does anyone make 1/72 t55 tracks or something similar that can be used on a t55. from the pic I want to create some road wheels rubber has melted in fire but some hasn't so look to create the sag. though the trumpy kit comes with vynl tracks any ideas?
Removed by original poster on 05/23/18 - 22:28:12 (GMT).
hetzer44
Maryland, United States
Joined: December 21, 2005
KitMaker: 241 posts
Armorama: 124 posts
Joined: December 21, 2005
KitMaker: 241 posts
Armorama: 124 posts
Posted: Wednesday, May 23, 2018 - 03:30 AM UTC
Here's my latest progress on the Trumpeter KV II which is a great kit. Base coated and decals applied. (Thanks Panzerman for that suggestion). Now it's ready for the next gloss coat to seal the decals and start the weathering process.
Cheers!
chuck
Posted: Thursday, May 24, 2018 - 07:48 AM UTC
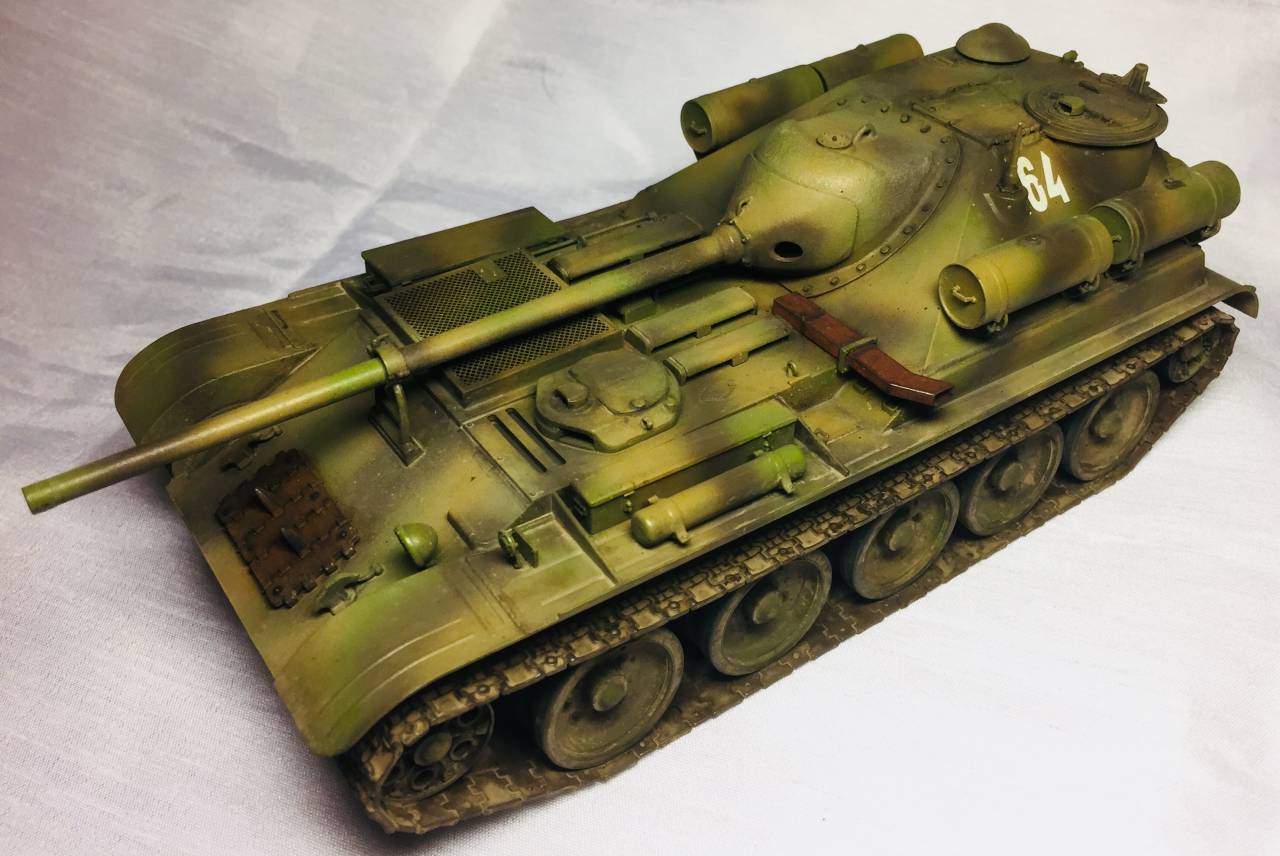
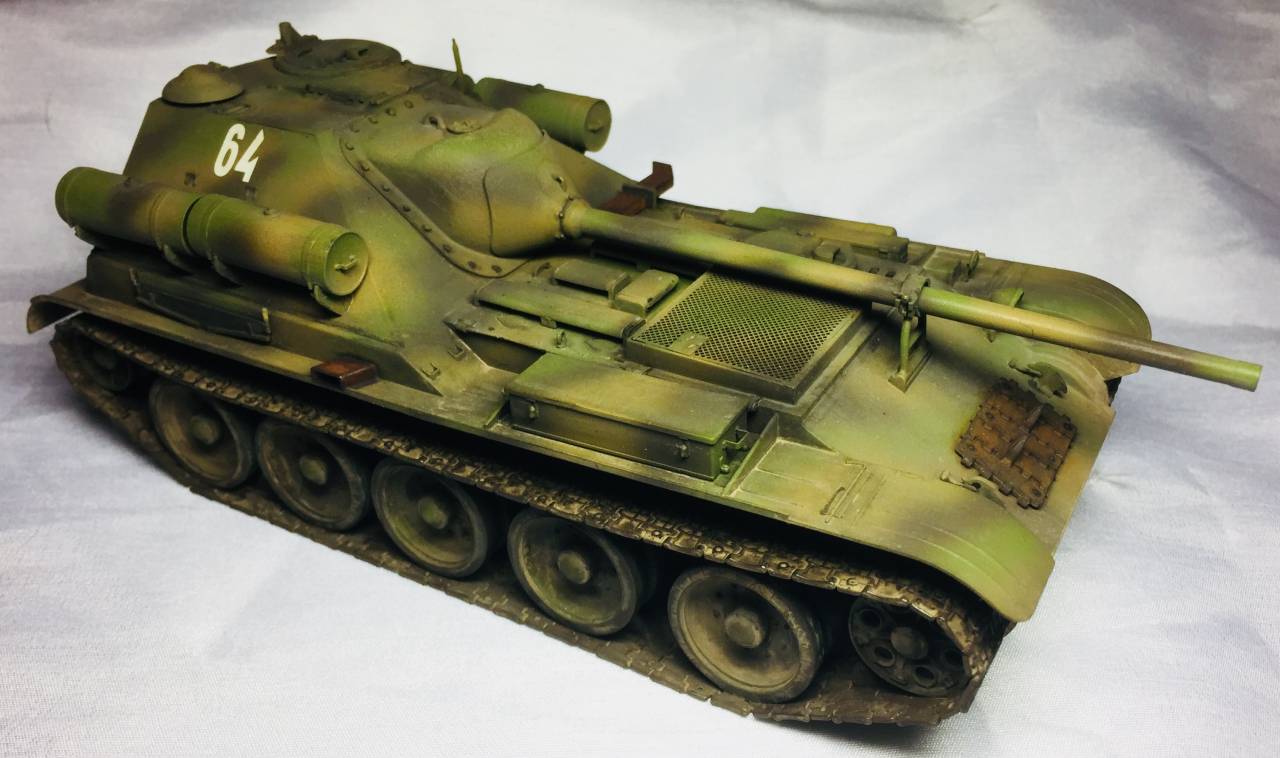
So I have shelved the NBCRV project for the time being. I am about to go on the road for three months and the NBCRV project was too big to take along, and was going to require too much effort to rush to finish before I left.
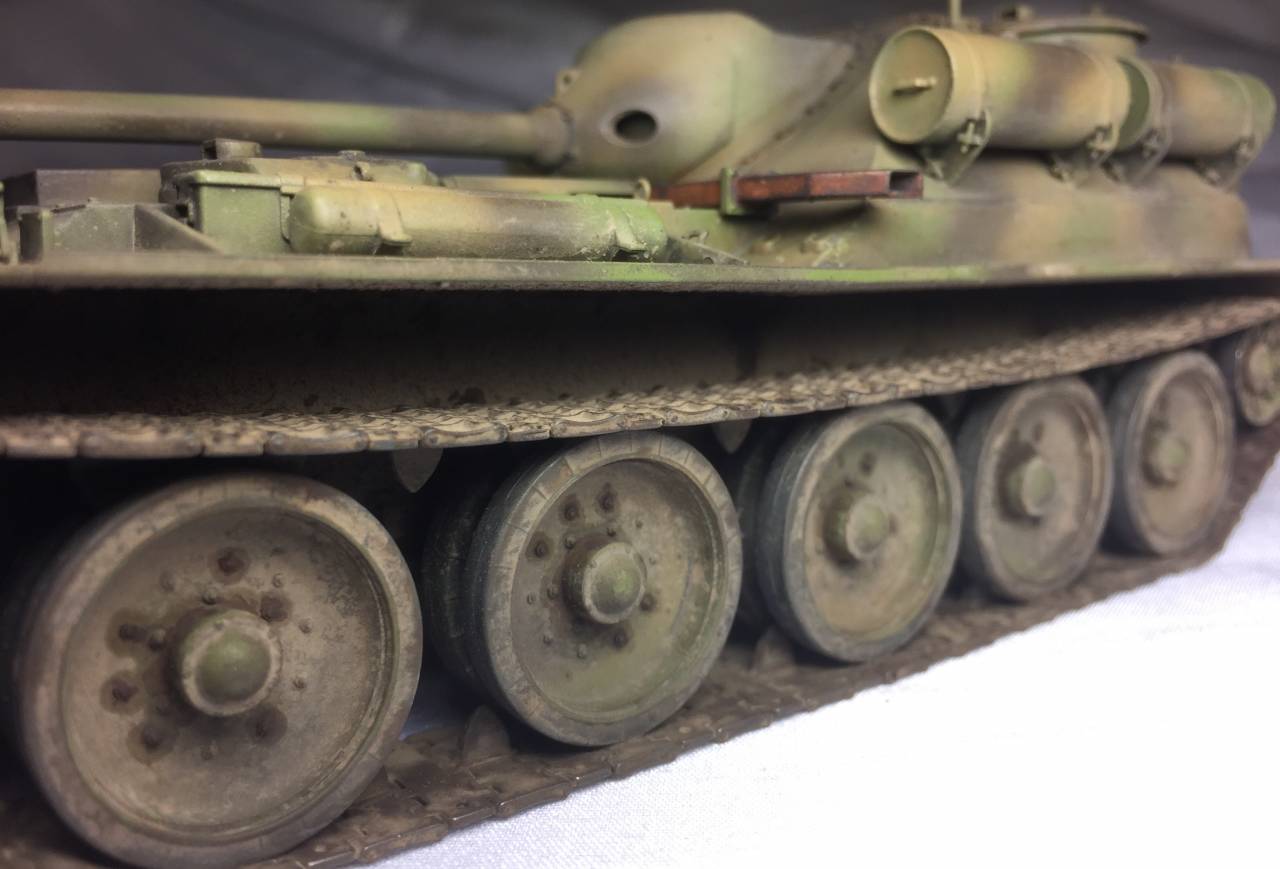
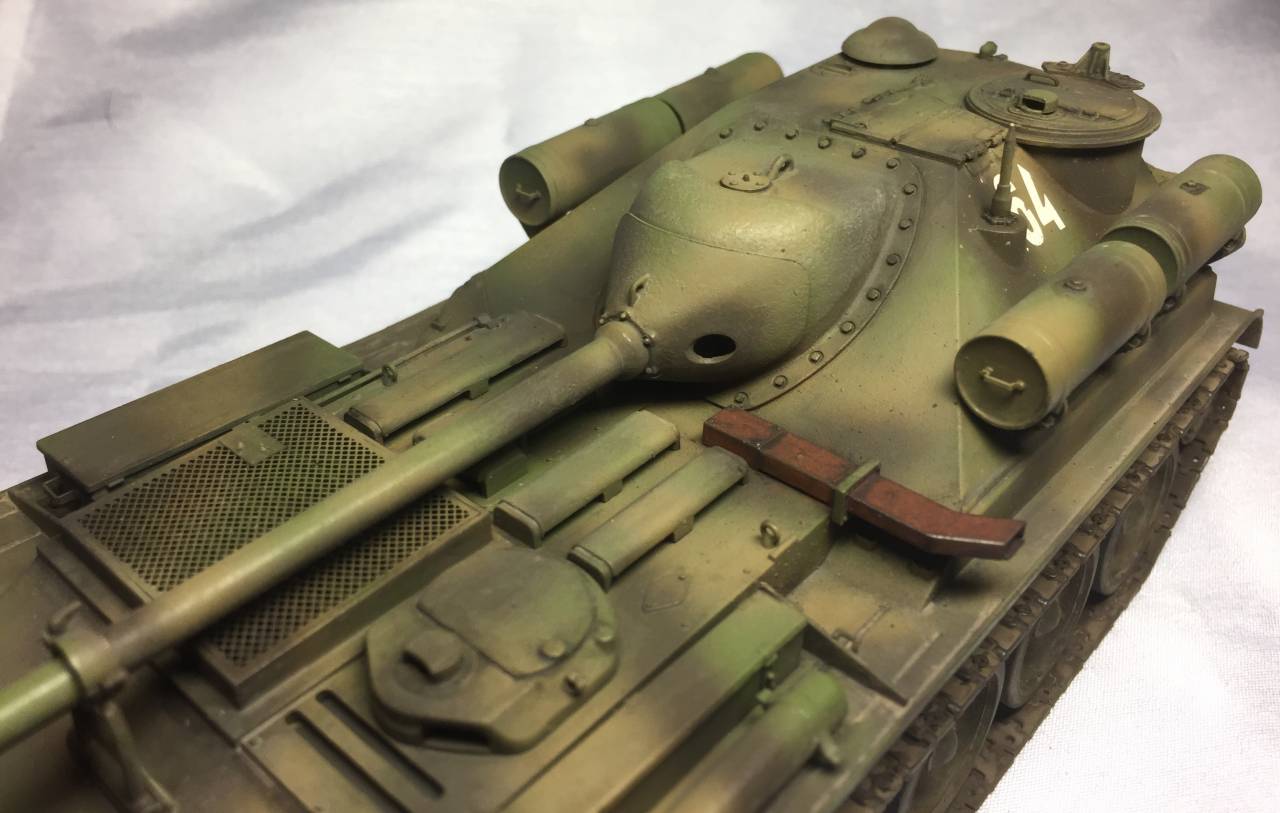
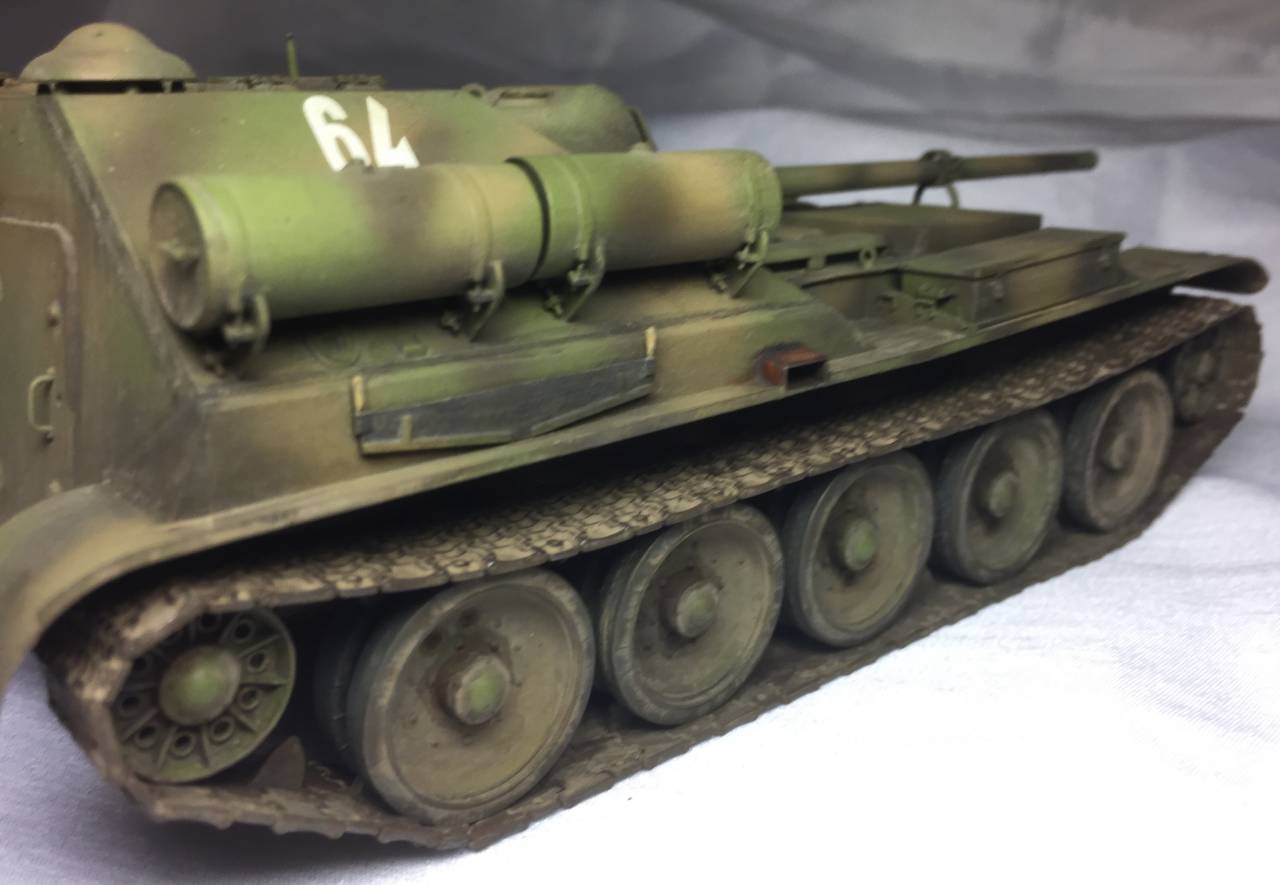
So, that being said, I decided to build the SU-101. I love Soviet AFV's and I immediately loved the design of this one. The SU-101 was a prototype designed at the end of the war and never entered production. I built mine to depict the prototype as if it had been committed to the Manchurian Campaign in 1945. I broke away from the traditional 4BO scheme to do a fictional soft edge three tone scheme.
Comments welcome,
Nito74
Lisboa, Portugal
Joined: March 04, 2008
KitMaker: 5,386 posts
Armorama: 4,727 posts
Joined: March 04, 2008
KitMaker: 5,386 posts
Armorama: 4,727 posts
Posted: Thursday, May 24, 2018 - 02:58 PM UTC
Great work fellas !!!
Modern, WWII, Flying things and wheeled 8x8,
These Trumpeter Campaigns are becoming a
Classic Masterpiece Campaign !!!
So many different builds , congrats everyone !!!
Modern, WWII, Flying things and wheeled 8x8,
These Trumpeter Campaigns are becoming a
Classic Masterpiece Campaign !!!
So many different builds , congrats everyone !!!
Posted: Thursday, May 24, 2018 - 04:22 PM UTC
Shawn,
That is one very nice build you did there. Fine paint and weathering work.
Very interesting vehicle but I wouldn't feel very secure knowing that those fuel barrels were just hanging right outside of the working compartment.
Enjoyed your work.
Mark
That is one very nice build you did there. Fine paint and weathering work.
Very interesting vehicle but I wouldn't feel very secure knowing that those fuel barrels were just hanging right outside of the working compartment.
Enjoyed your work.
Mark
Buckeye198
Ohio, United States
Joined: May 02, 2010
KitMaker: 596 posts
Armorama: 265 posts
Joined: May 02, 2010
KitMaker: 596 posts
Armorama: 265 posts
Posted: Wednesday, June 06, 2018 - 07:10 AM UTC
I'm nearing the end of the aerosan build. The engine went together easily enough, aside from some minor adjustments for fit into the nacelle.
Customization included:
a - fan belt fashioned out of thin copper wire with black insulation (I knew I kept that around for a good reason!)
b - exhaust pipe fashioned from a spare AFV grab bar cut in half and hollowed out with a pin vise
c - the kit included a large flywheel to house the prop shaft, but I don't think many aerosans had them and it would end up obstructing any possible views of the already-mostly-hidden engine when finished...so I left it off, instead finding a poly cap in my spares box to act as the prop shaft housing
d - my usual telescoping brass rods technique to achieve free-spinning props
(sorry for the fuzzy pic...didn't realize it until afterwards)
Fuselage was problem-free. A touch of putty in one or two spots, but otherwise very well done on Trumpeter's part. I've never built one of their kits before, so I don't know if this is standard quality for them.
I attached the headlamp mount when I was sick with a head cold, so I wasn't thinking too straight. I glued the piece on upside-down, realized it after it was dry, then tried to pry it off and ended up sending it stratospheric. Fortunately it was a very basic shape and I was able to fashion a new mount out of Evergreen.
Final assembly before painting it all white. Same high-quality fit as noted before.
I painted the ski/shock struts separately, then added them on to try to break up the uniformity of the white paint job. Assembly of those struts was effortless. In fact, the diagonal supports between the struts and the fuselage didn't even require glue, the kit simply holds them tightly in place! Engine is installed and my custom exhaust pipe fits perfectly in the hole I drilled for it. Proud moment right there
Nacelle is closed up, seats are painted and installed, and dashboard is painted. The dash was surprisingly bare...I don't know that I can blame Trumpeter, the actual aerosans were likely just as spartan. The dash was painted black, dials painted white, tick marks picked out in black and needles in red, and all dials sealed with Future for a glassy look. I had no reference for what the dials actually reported, so I made a little mix of possibilities.
From here, it's all about touch-ups, final assembly, and weathering. And maybe the figures, if I ever feel like getting around to that. I start work again in July, so I'm really hoping to be done in the next week or two.
Customization included:
a - fan belt fashioned out of thin copper wire with black insulation (I knew I kept that around for a good reason!)
b - exhaust pipe fashioned from a spare AFV grab bar cut in half and hollowed out with a pin vise
c - the kit included a large flywheel to house the prop shaft, but I don't think many aerosans had them and it would end up obstructing any possible views of the already-mostly-hidden engine when finished...so I left it off, instead finding a poly cap in my spares box to act as the prop shaft housing
d - my usual telescoping brass rods technique to achieve free-spinning props
(sorry for the fuzzy pic...didn't realize it until afterwards)
Fuselage was problem-free. A touch of putty in one or two spots, but otherwise very well done on Trumpeter's part. I've never built one of their kits before, so I don't know if this is standard quality for them.
I attached the headlamp mount when I was sick with a head cold, so I wasn't thinking too straight. I glued the piece on upside-down, realized it after it was dry, then tried to pry it off and ended up sending it stratospheric. Fortunately it was a very basic shape and I was able to fashion a new mount out of Evergreen.
Final assembly before painting it all white. Same high-quality fit as noted before.
I painted the ski/shock struts separately, then added them on to try to break up the uniformity of the white paint job. Assembly of those struts was effortless. In fact, the diagonal supports between the struts and the fuselage didn't even require glue, the kit simply holds them tightly in place! Engine is installed and my custom exhaust pipe fits perfectly in the hole I drilled for it. Proud moment right there
Nacelle is closed up, seats are painted and installed, and dashboard is painted. The dash was surprisingly bare...I don't know that I can blame Trumpeter, the actual aerosans were likely just as spartan. The dash was painted black, dials painted white, tick marks picked out in black and needles in red, and all dials sealed with Future for a glassy look. I had no reference for what the dials actually reported, so I made a little mix of possibilities.
From here, it's all about touch-ups, final assembly, and weathering. And maybe the figures, if I ever feel like getting around to that. I start work again in July, so I'm really hoping to be done in the next week or two.
Buckeye198
Ohio, United States
Joined: May 02, 2010
KitMaker: 596 posts
Armorama: 265 posts
Joined: May 02, 2010
KitMaker: 596 posts
Armorama: 265 posts
Posted: Wednesday, June 13, 2018 - 06:55 AM UTC
As predicted, done in a week! I accidentally scratched the body somewhere, but found that it actually didn't look too bad exposing the "wood" underneath the white paint. So I scratched it up a bit more in high-traffic areas (around crew compartments, engine nacelle, underside, etc) before continuing on with the more traditional weathering techniques.
I opted for an all-over oil wash, choosing Payne gray to subdue the white without warming up the color scheme. I started at the front, lopping the wash on and then using the airbrush on ~10psi to blow the wash backwards (ie, along the vehicle's airflow). The effect was a nice subtle discoloration that I believe mimics reality more than anything I could brush on myself. The workbench pictures don't do it much justice...hopefully the light box pictures are better.
The finished product! So much better than the resin kit I made all those years ago. Prop is free-spinning, MG is too (I haven't done the figures yet...if I ever get around to them, it'll be easier to move the MG to the gunner than vice versa).
Windscreen was scratched up modestly. It looked thin enough without Future, and I didn't want it looking too new.
I think this picture shows off the oil wash "flow" a bit better, as well as the thinness of the white coat; the wood is still slightly visible underneath, as is the metal undercoat of the nacelle.
Another look inside the crew compartments.
I washed the back-left ski more than the others...I attribute this to a field repair, replacing a broken ski with one from a different set, thus the variable coloration.
Free-spinning prop is also removable, allowing for a better look at my engine mods.
The kit's decals were simple: three red stars and two "slogans" that appear on everyone's aerosan builds. It's not your usual "to victory!" or "for Stalin!" slogan, but rather "Lembitu". It only took a minute's research to learn that this doesn't translate to anything, but rather is an Estonian male name. In other words, it's like painting "Leonard" on a jeep. Sure, someone somewhere might've done that, but it would be a touch weird to only ever see jeeps named Leonard TL;DR I put the Lembitu decals in the spares bag and just used the stars.
There's my completed entry, "Not-Leonard the Aerosan" A thoroughly enjoyable build with very few build issues to speak of. A few historical accuracy nit-picks, but an impressive and convincing finished model for anyone who isn't a rivet-counting aerosan expert...and that seems to be pretty much everyone who hasn't built an aerosan model before! Thanks for hosting the campaign and finally getting me to build a Trumpeter kit
I opted for an all-over oil wash, choosing Payne gray to subdue the white without warming up the color scheme. I started at the front, lopping the wash on and then using the airbrush on ~10psi to blow the wash backwards (ie, along the vehicle's airflow). The effect was a nice subtle discoloration that I believe mimics reality more than anything I could brush on myself. The workbench pictures don't do it much justice...hopefully the light box pictures are better.
The finished product! So much better than the resin kit I made all those years ago. Prop is free-spinning, MG is too (I haven't done the figures yet...if I ever get around to them, it'll be easier to move the MG to the gunner than vice versa).
Windscreen was scratched up modestly. It looked thin enough without Future, and I didn't want it looking too new.
I think this picture shows off the oil wash "flow" a bit better, as well as the thinness of the white coat; the wood is still slightly visible underneath, as is the metal undercoat of the nacelle.
Another look inside the crew compartments.
I washed the back-left ski more than the others...I attribute this to a field repair, replacing a broken ski with one from a different set, thus the variable coloration.
Free-spinning prop is also removable, allowing for a better look at my engine mods.
The kit's decals were simple: three red stars and two "slogans" that appear on everyone's aerosan builds. It's not your usual "to victory!" or "for Stalin!" slogan, but rather "Lembitu". It only took a minute's research to learn that this doesn't translate to anything, but rather is an Estonian male name. In other words, it's like painting "Leonard" on a jeep. Sure, someone somewhere might've done that, but it would be a touch weird to only ever see jeeps named Leonard TL;DR I put the Lembitu decals in the spares bag and just used the stars.
There's my completed entry, "Not-Leonard the Aerosan" A thoroughly enjoyable build with very few build issues to speak of. A few historical accuracy nit-picks, but an impressive and convincing finished model for anyone who isn't a rivet-counting aerosan expert...and that seems to be pretty much everyone who hasn't built an aerosan model before! Thanks for hosting the campaign and finally getting me to build a Trumpeter kit
Posted: Wednesday, June 13, 2018 - 07:54 AM UTC
Robby,
Very nice finish, she is keeper.
Mark
Very nice finish, she is keeper.
Mark
Northern_Lad
United Kingdom
Joined: September 17, 2012
KitMaker: 462 posts
Armorama: 417 posts
Joined: September 17, 2012
KitMaker: 462 posts
Armorama: 417 posts
Posted: Sunday, June 24, 2018 - 08:02 AM UTC
Beautiful little Aerosan!
I'm almost there with the VK 3001H… Just need to add oil paint, and then remove oil paint from the hickory-lovely tool handles, and mist on flat varnish (at which point the pigments will all blow away, and so I’ll add them again). Also need to paint the retaining straps for the fire extinguisher, and probably a load more small details I've missed.
Should get this one finished quite soon I hope…
And yes, the long 7.5 cm pak 40 is a complete what-if…. So too is the super-duper aerial at the back...
Cheers
Matthew