Campaigns: Completed Campaigns
Campaigns that are completed should be grouped here.
Hosted by Richard S.
Interiors Campaign
SGTJKJ
#041
Visit this Community
Kobenhavn, Denmark
Joined: July 20, 2006
KitMaker: 10,069 posts
Armorama: 4,677 posts
Posted: Friday, June 22, 2018 - 09:56 PM UTC
Some really cool builds here. Great works!

I have finished my Sd.Kfz. 251. I made the interior look a bit more busy by adding various weapons and bits.


bison126
Visit this Community
Correze, France
Joined: June 10, 2004
KitMaker: 5,329 posts
Armorama: 5,204 posts
Posted: Saturday, June 23, 2018 - 03:45 AM UTC
It is looking good Jesper. And your interior remains fully visible.

Here is my Bushmaster nearly completed. I think I'll add some streaking here and there but not more as I don't want to turn it into a piece of mud.
I changed the decals for the spare wheel and mudflaps covers for a reference from Mouse House Enterprise which is far better even though the tan still looks too light.
As the MGs in the box are awful. I decided not to use them. I only used the stock of the M249 which I glued on a Tamiya MG.


Olivier
ReconTL3-1
Visit this Community
Texas, United States
Joined: June 07, 2006
KitMaker: 726 posts
Armorama: 687 posts
Posted: Saturday, June 23, 2018 - 06:35 AM UTC
Your models turned out quite well, Jesper and Olivier.

Jesper, I just started a SdKfz 251 this morning for the In Captivity/Under New Management Campaign. It will represent one that was captured and put to use by a US Artillery unit in France. I hope mine turns out half a good as your did.

Cheers,
James
Pave-Hawk
Visit this Community
Western Australia, Australia
Joined: May 05, 2006
KitMaker: 900 posts
Armorama: 510 posts
Posted: Saturday, June 23, 2018 - 04:26 PM UTC
That's a really nice bushmaster Olivier. From the photo that wheel cover looks spot on colour wise.

Like the soft top land rovers, those covers tended to fade quickly in the sun, and get dirt and dust embedded in them, and cleaning was generally a basic hosing, so colours would vary quite a bit.

bison126
Visit this Community
Correze, France
Joined: June 10, 2004
KitMaker: 5,329 posts
Armorama: 5,204 posts
Posted: Sunday, June 24, 2018 - 09:47 PM UTC
Thank you Iain.

Olivier
SGTJKJ
#041
Visit this Community
Kobenhavn, Denmark
Joined: July 20, 2006
KitMaker: 10,069 posts
Armorama: 4,677 posts
Posted: Sunday, June 24, 2018 - 10:12 PM UTC
Great looking build, Olivier.

Thanks for the comments, guys. Much appreciated.
ayovtshev
#490
Visit this Community
Sofiya, Bulgaria
Joined: September 22, 2016
KitMaker: 1,432 posts
Armorama: 1,390 posts
Posted: Saturday, July 14, 2018 - 05:44 PM UTC
Progress on my build(CV3/33 by Bronco):


k_mero4
Visit this Community
Sofiya, Bulgaria
Joined: November 26, 2017
KitMaker: 393 posts
Armorama: 369 posts
Posted: Sunday, July 15, 2018 - 03:31 AM UTC
Yovchev, in a small model, could not you do in this campaign. Just by looking at it and ...
Good job.
ayovtshev
#490
Visit this Community
Sofiya, Bulgaria
Joined: September 22, 2016
KitMaker: 1,432 posts
Armorama: 1,390 posts
Posted: Sunday, July 15, 2018 - 06:42 AM UTC
Thanks Kalin!
Sure it is tiny vehicle, the CV 3/33.
And packed with details.

Painted the interior and started weathering(engine oil on transmission and engine, engine grime in engine compartment and lavishly applied home made black wash).


Next will be interior wash and interior streaking grime,
Bluestab
Visit this Community
South Carolina, United States
Joined: December 03, 2009
KitMaker: 2,160 posts
Armorama: 1,906 posts
Posted: Tuesday, July 17, 2018 - 05:26 PM UTC
I figured it was time to post something. Big update.

I was originally going to build the Academy M3a1 Stuart, but decided to go with their M36/M36B2 "Battle of the Bulge" kit.

The kit allows you to build either a M36 or a M36B2. These are the 90mm open turret mounted on a M10 or M10a1 chassis. Alternatively, the M36B1 was the 90mm turret mounted on a M4a3 chassis. Most B2s were built post-war. If you want a late-late-war Jackson or a post-war Jackson, your best shot is the B2. Of course, surplus M36s were sold abroad. For example, Iran were sold some. However, South Korea and Yugoslavia are probably best known operators.

Academy's kit is their normal M36/M36B2 kit, but tagged as a Battle of the Bulge TD. Of the six marking options, only two are BotB vehicles. The rest includes a M36 of 2nd Cav in Germany March 1945. The other three are post-war (1951-53) M36B2s in South Korean and French service. The two French TDs are based in Tonkin.

The kit shares alot of parts from Academy's Sherman and M10 kits. Detail is pretty nice. Obviously, it comes with a pretty nice interior. There's even sidewall detail in the engine compartment, but no actual engine. As an aside, their M36B1 kit (M4a3 chassis) has no interior for the chassis. It uses the same 90mm turret but you'll have to enlarge the turret ring for the 90mm turret to fit. It would have been nice to have a M4a3 interior for the M36B1 as well as their M4a3 kits.
interior_m36_00

The suspension assemblies are pretty much in-line with most Sherman kits. The hub inserts are keyed so a little care is needed to make sure they sit correctly. The detail is nice though.
interior_m36_01

I jumped to the interior. There's a good bit of detail there, plus you can go all-out on detail if you want. I kept the hull interior pretty much OOB for this build.
The trans looks really nice.
interior_m36_02
interior_m36_03

Lower hull assembly was typical. You add the drive mounts as extensions.
interior_m36_04

Lower hull done. Front interior painted and ready to go in. I painted it flat white (rattle-can). Before anyone says anything, the instructions call for the whole interior to be white. There's variation on actual M36s. Since the turret is open and you can see part of the chassis interior, I went with an OD fighting compartment floor and rear firewall. Sides (ammo stowage) and the front driver and co-driver areas are white.
interior_m36_05

I then turned to the rear hull interior. This will be OD. While I waited for paint to dry, I jumped ahead and assembled the lower turret. This is not the old Italeri M36/M36B2. It has more detail...like a more realistic turret bastket and some added interior detail. There's still room to add junction boxes and wiring.....but more on that later.
interior_m36_06

Interior mounted in lower chassis. Placement is a bit vague. This was further complicated by the fit of the trans in the cast front-end. I used the rear placement tabs as a common spot for the interior sections. Test fit it like a maniac.
Anyway, I went ahead and gave the interior a wash and drybrushed it.
interior_m36_07
interior_m36_08

Back to the turret. It has most of the core details. I added a few electric boxes and some wiring (thanks Jeff). As an aside, the turret ammo rack looks a bit wonky and the kit does not come with any rounds or round ends to go in them.
interior_m36_09
interior_m36_10
interior_m36_11

Back to the hull...the rear to be precise. Again, pretty standard assembly. The M36 and M36B2 has different exhaust and rear ends. I had to decide to go with a M36 so I went with the M36 rear. The exhaust grills are left off for now.
Note the engine compartment has detailed sidewalls but no engine.
interior_m36_12

I shot some olive drab on the turret interior and lower hull. I thought I had a picture of the ammo placed but I guess I was mistaken. The ammo is stored in tubes and sit in racks. These are a bit fiddly and placement of the middle and forward rack supports are a bit vague.
interior_m36_13

Turret time. The kit gun has a guard assembly....and it eats up alot of the turret interior space. I've seen M36s without the guard so I was worried it might be a post-war (B2) option.
interior_m36_14
interior_m36_15

I finished up assembly on the upper hull. Engine hatch varies between the M36 and M36B2. By the way, I want to add that the instructions are pretty clear on which parts are specific for each version.
One thing they mess-up on are considering the hull details in with the markings. For example, the rear jerry can racks are where the side stars go for several examples. I would take some artistic license with mine....I moved the side stars to the turret sides.
I didn't hang all the cleats. I wanted to use the mounts for stowage.
interior_m36_16

Base coat of Olive Drab. I used Testors OD for the exterior and Tamiya OD for the interior. I tend to prefer Testors' OD for exteriors. To me, the lighter shade looks more worn and weathered.
Tracks are rubberband type. They look pretty good. They are tight so you have to be careful when putting them on the vehicle. The front roadwheels will actually pivot up. You may want to glue those in position.
And yeah that rear view is missing the tracks. The original post-painting pictures did not have the tracks on yet. I had to retake some pictures.
interior_m36_17
interior_m36_18
interior_m36_19

Finished her up with light washes and drybrushing. Painted on mud on running gear and bottom edge of lower hull. Decals utilized some artistic license on their placement. I had planned to add a good bit of stowage, but decided against it at the 11th hour.
interior_m36_20
interior_m36_21
interior_m36_22
interior_m36_23
interior_m36_24

And I proclaim it done. This was a build I started and stopped on a few times for about 4 months. It wasn't a bad build. Academy cut a few corners, which seems to be their deal. A shame there was no engine included. I'll probably use it in a diorama at some point.
I would recommend it and I wouldn't mind picking up another copy to make a Cold War M36B2....but not right now.
Thanks for the campaign and I've enjoyed watching the work.

petbat
Visit this Community
Queensland, Australia
Joined: August 06, 2005
KitMaker: 3,353 posts
Armorama: 3,121 posts
Posted: Thursday, July 19, 2018 - 08:10 PM UTC
Looks great Alex. Nice one.
Kaktusas
Visit this Community
Vilnius, Lithuania
Joined: April 12, 2017
KitMaker: 196 posts
Armorama: 196 posts
Posted: Thursday, July 26, 2018 - 07:37 PM UTC
Finished:


Nito74
Visit this Community
Lisboa, Portugal
Joined: March 04, 2008
KitMaker: 5,386 posts
Armorama: 4,727 posts
Posted: Thursday, July 26, 2018 - 10:15 PM UTC
Great work Alex and Darius.

I love the weathering of that little Panzer.
petbat
Visit this Community
Queensland, Australia
Joined: August 06, 2005
KitMaker: 3,353 posts
Armorama: 3,121 posts
Posted: Friday, July 27, 2018 - 07:46 AM UTC
Very well done Darius. Hope you had fun building it.
SGTJKJ
#041
Visit this Community
Kobenhavn, Denmark
Joined: July 20, 2006
KitMaker: 10,069 posts
Armorama: 4,677 posts
Posted: Friday, July 27, 2018 - 08:19 PM UTC
Alex, love the internal weathering! Very nice and looks realistic.

Darius, great little build.


Congrats on very nice builds, gentlemen.
Kaktusas
Visit this Community
Vilnius, Lithuania
Joined: April 12, 2017
KitMaker: 196 posts
Armorama: 196 posts
Posted: Sunday, July 29, 2018 - 06:23 PM UTC
Thanks for comments guys. Indeed, it was very enjoyable kit to build Peter. There are some puzzling places, such as included glass visor blocks, but no instructions what to do with them. I think i am going to get munition panzer and flak panzer from them too
Its sad Tristar is not around anymore.
kunjuro
Visit this Community
Philippines
Joined: October 27, 2013
KitMaker: 520 posts
Armorama: 488 posts
Posted: Tuesday, August 14, 2018 - 03:20 AM UTC
Hi folks! Jumping in a bit late into this one. I've been meaning to build this kit for over a year now. Hoping this campaign will provide me with teh chance to do so. Kinda daunting though - seeing all the wonderful work already done here. Hope I can do this kit justice.

petbat
Visit this Community
Queensland, Australia
Joined: August 06, 2005
KitMaker: 3,353 posts
Armorama: 3,121 posts
Posted: Tuesday, August 14, 2018 - 03:11 PM UTC

Quoted Text


Its sad Tristar is not around anymore.


Hobby Boss picked up the molds and is selling the kits under their label, but Tristar did show better quality and detail than some of the Hobby Boss offerings. The Marder 3 Ausf H for example is excellent and far more accurate than Dragon's. A lot more parts in it too, especially etch, so would be a stretch for someone new to the hobby, but a great kit otherwise.


Welcome Nigel
WombatWal
#496
Visit this Community
Australian Capital Territory, Australia
Joined: August 09, 2018
KitMaker: 10 posts
Armorama: 4 posts
Posted: Wednesday, August 15, 2018 - 03:26 PM UTC
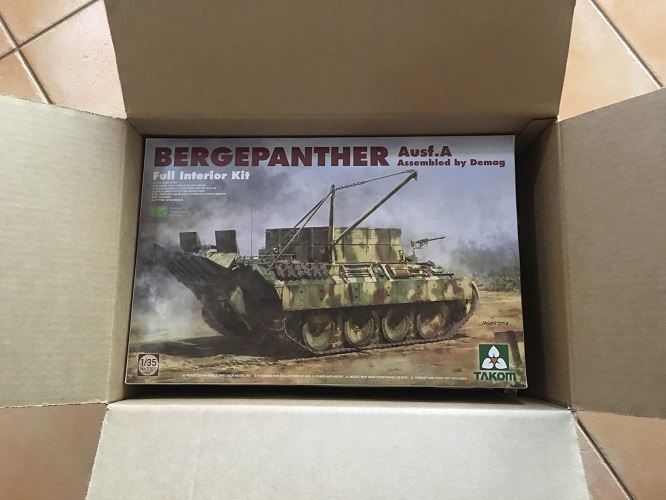
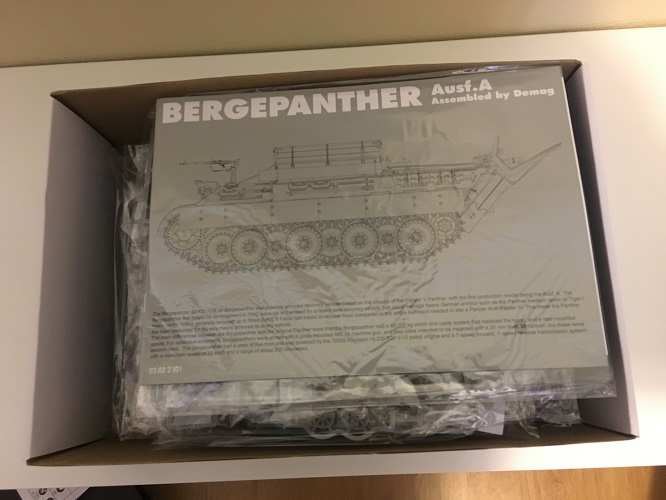
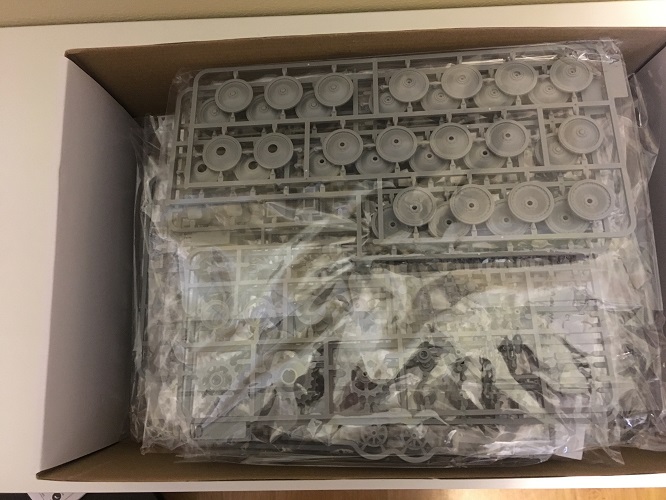
This large box landed on my doorstep yesterday. With good planning I will get her finished.

Kit Takom Bergepanther Ausf. A Assembled by Demag
Start Date 16 August 2018


BogiBg
Visit this Community
Västra Götaland, Sweden
Joined: May 29, 2018
KitMaker: 397 posts
Armorama: 388 posts
Posted: Thursday, August 16, 2018 - 04:58 AM UTC
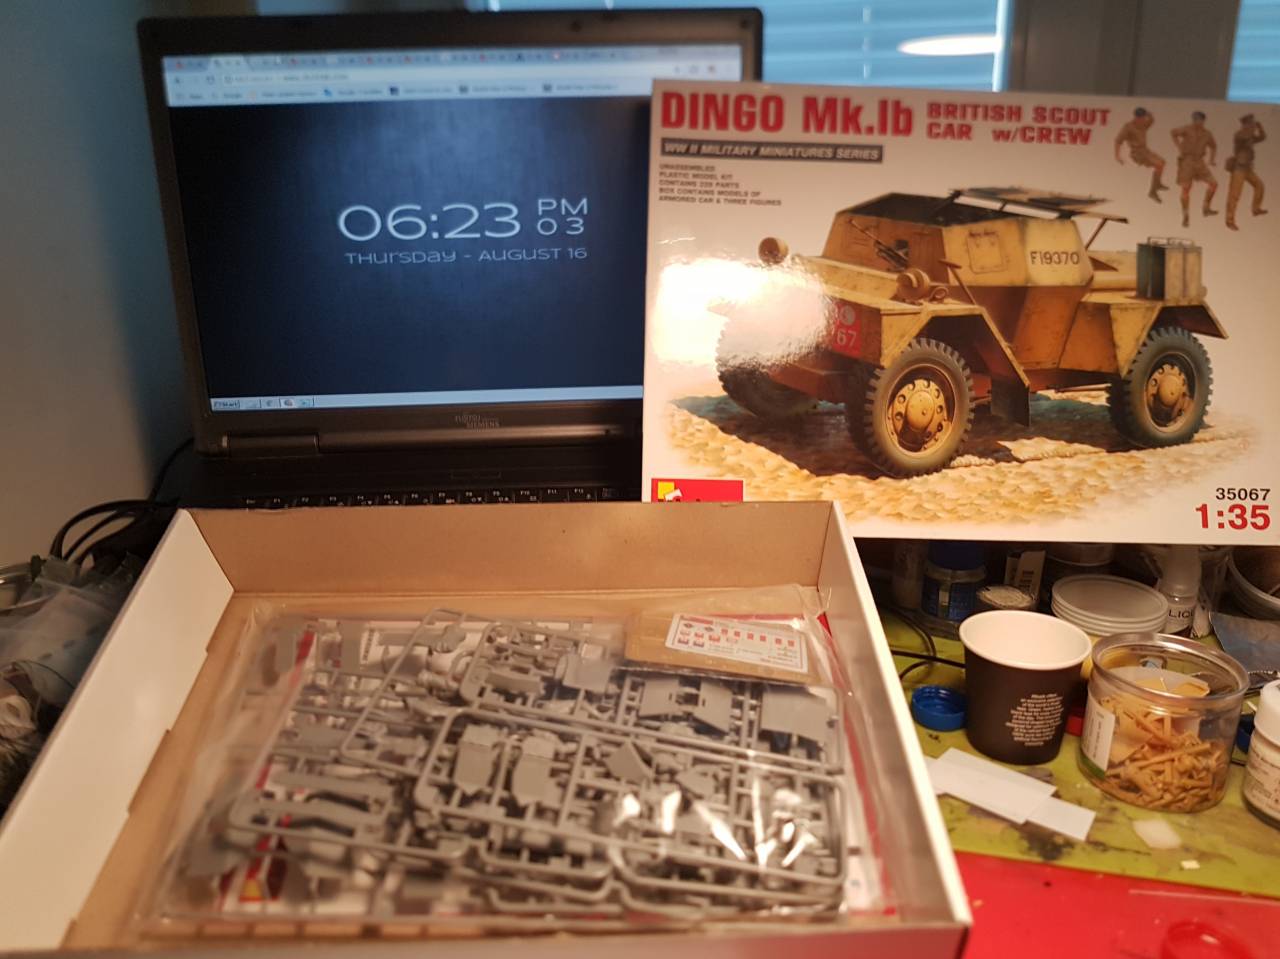
Hi all, I am in with this
WombatWal
#496
Visit this Community
Australian Capital Territory, Australia
Joined: August 09, 2018
KitMaker: 10 posts
Armorama: 4 posts
Posted: Thursday, August 16, 2018 - 11:23 AM UTC
BogiBg

I have always enjoyed the look of the Dingo, so brutally simple in the role it was mean to play
BogiBg
Visit this Community
Västra Götaland, Sweden
Joined: May 29, 2018
KitMaker: 397 posts
Armorama: 388 posts
Posted: Saturday, August 25, 2018 - 02:14 AM UTC
Progress update


BogiBg
Visit this Community
Västra Götaland, Sweden
Joined: May 29, 2018
KitMaker: 397 posts
Armorama: 388 posts
Posted: Saturday, August 25, 2018 - 08:51 AM UTC

petbat
Visit this Community
Queensland, Australia
Joined: August 06, 2005
KitMaker: 3,353 posts
Armorama: 3,121 posts
Posted: Saturday, August 25, 2018 - 06:38 PM UTC
Sweet Bogibg, just like the morning's first brew of the day... and I bet it smells like it too


Really quick build, but looks fantastic.
BogiBg
Visit this Community
Västra Götaland, Sweden
Joined: May 29, 2018
KitMaker: 397 posts
Armorama: 388 posts
Posted: Saturday, August 25, 2018 - 07:48 PM UTC
Yeah Peter. And, since winter is coming, I am thinking on inventing some tea technique. 😀 Still have some work on it...