Hosted by Richard S.
Interiors Campaign
Posted: Thursday, April 26, 2018 - 10:06 PM UTC
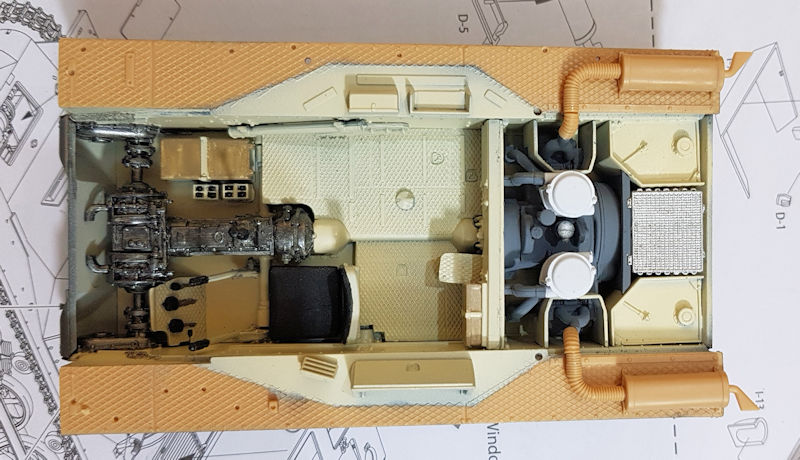
The engine is now installed. Muffler is just dry fitted.


Posted: Friday, April 27, 2018 - 05:36 PM UTC
More progress
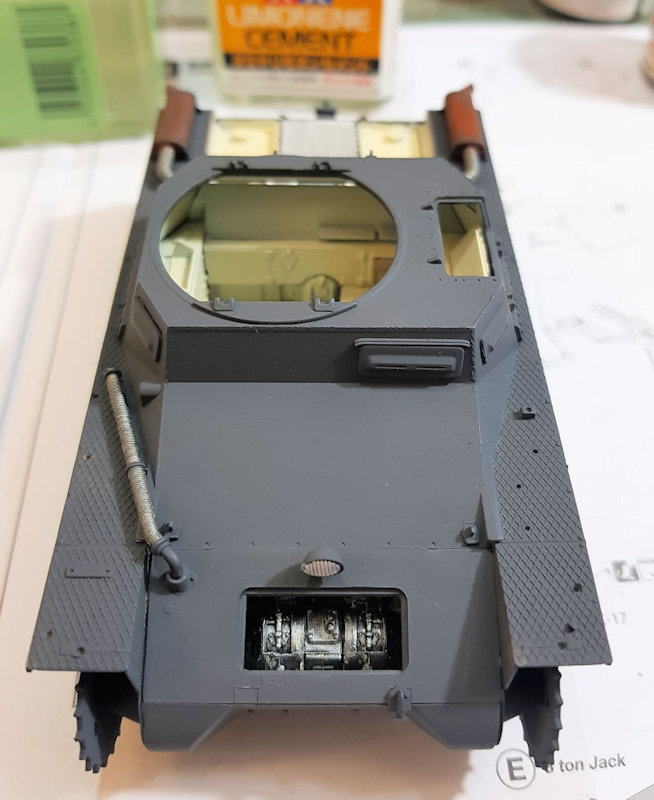
The upper hull is on. Most of the interior is now not visible.
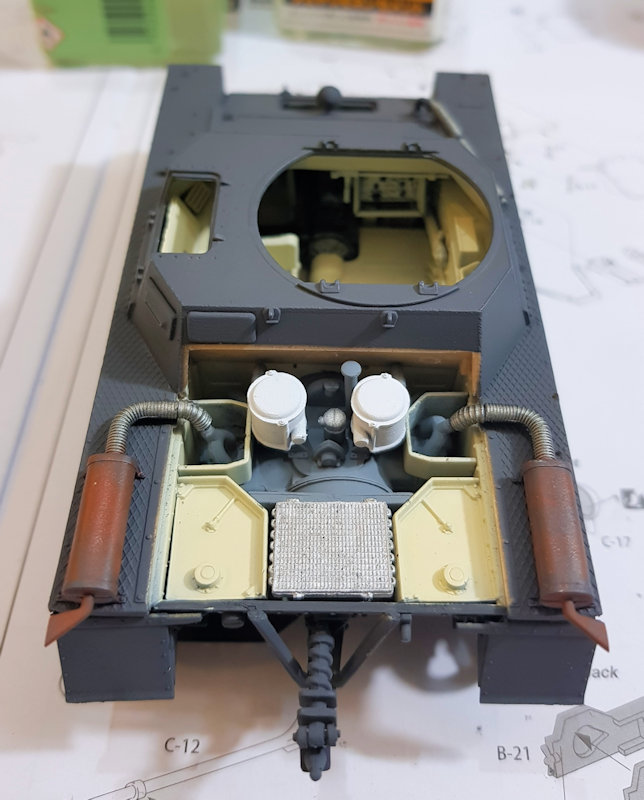
The engine deck is on and covers most of the details.
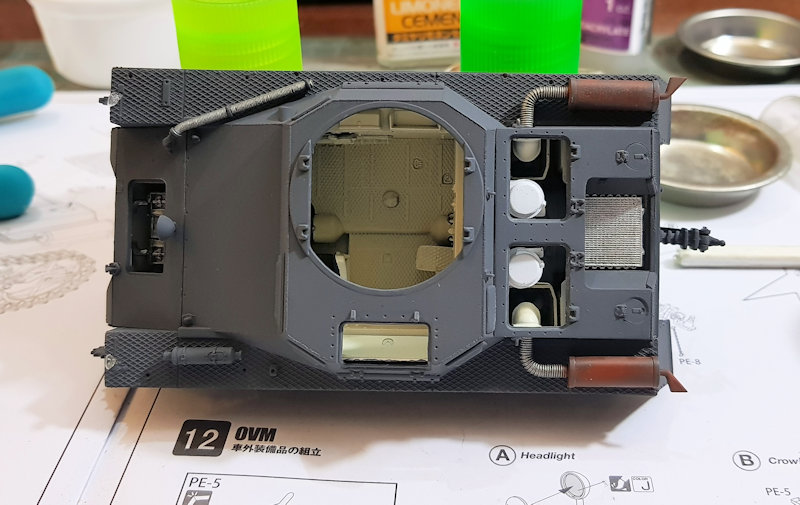
The upper hull is on. Most of the interior is now not visible.


The engine deck is on and covers most of the details.

Posted: Sunday, April 29, 2018 - 03:10 PM UTC
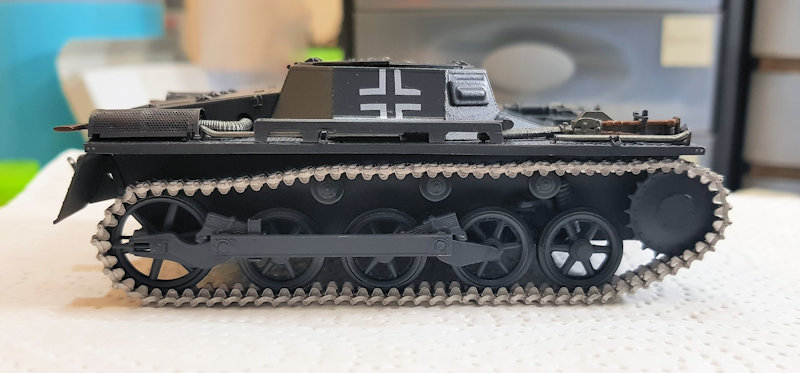
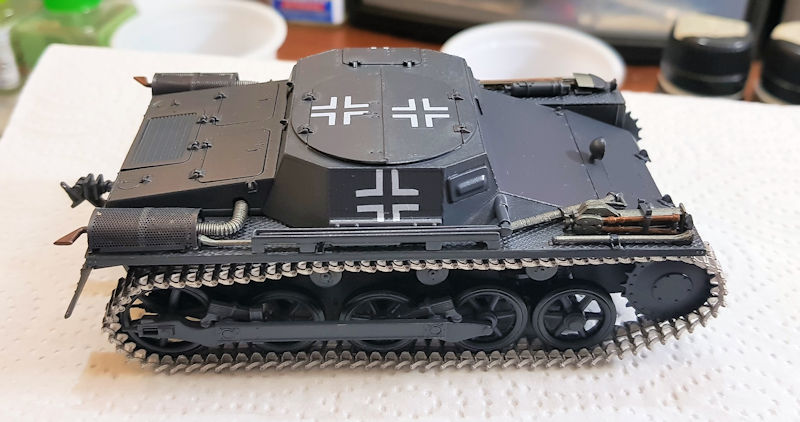
I've assembled the Friulmodel track links for the right track. Test fitting on the model shows only 88 links needed. The real vehicle had 89 links per side. However, 89 links had too much sag, and didn't look right. So, I removed one link.


Posted: Sunday, April 29, 2018 - 04:01 PM UTC
Well done,Mark!!!


Posted: Tuesday, May 01, 2018 - 09:24 PM UTC
Quoted Text
Well done,Mark!!!

Thanks Angel
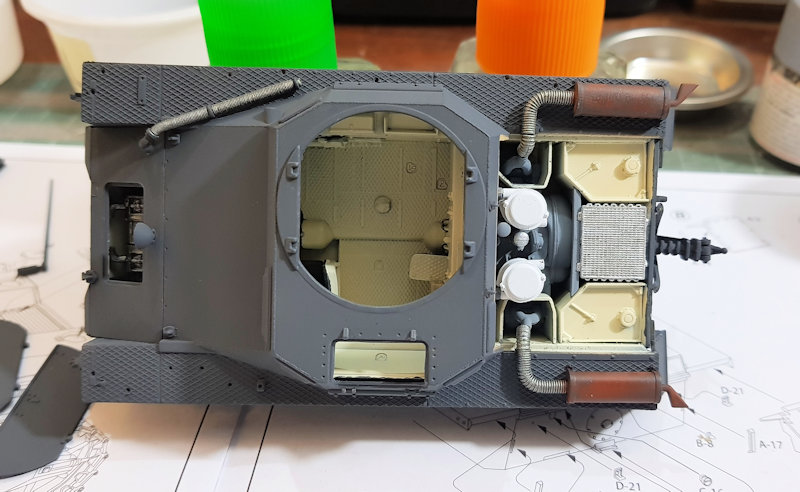
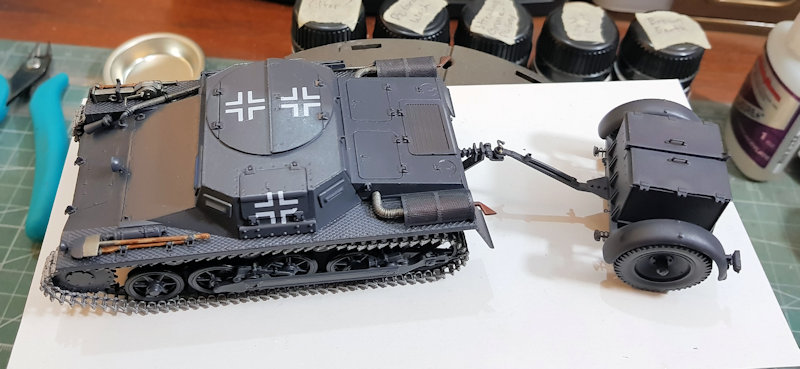
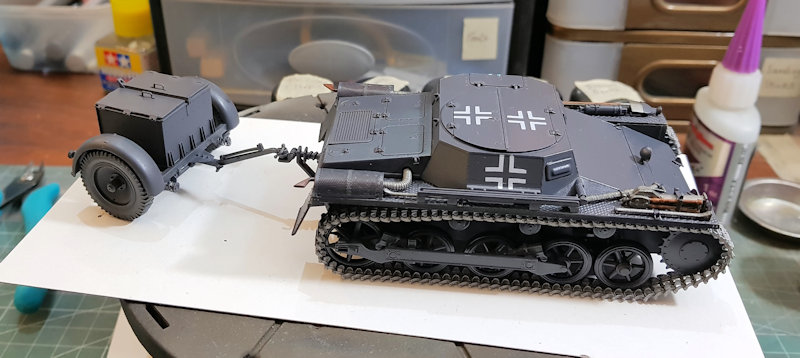
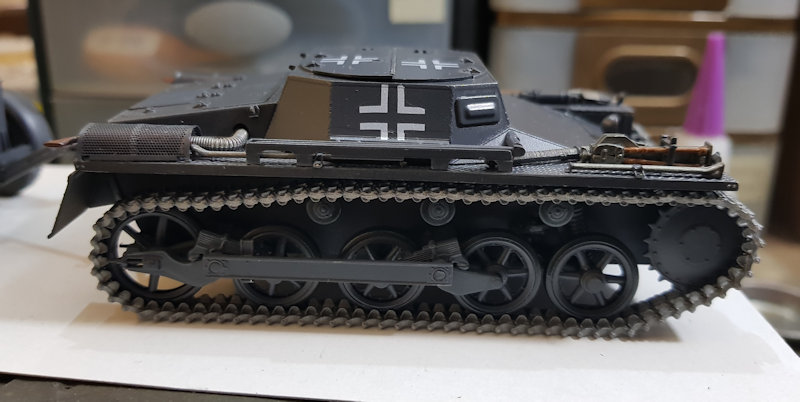
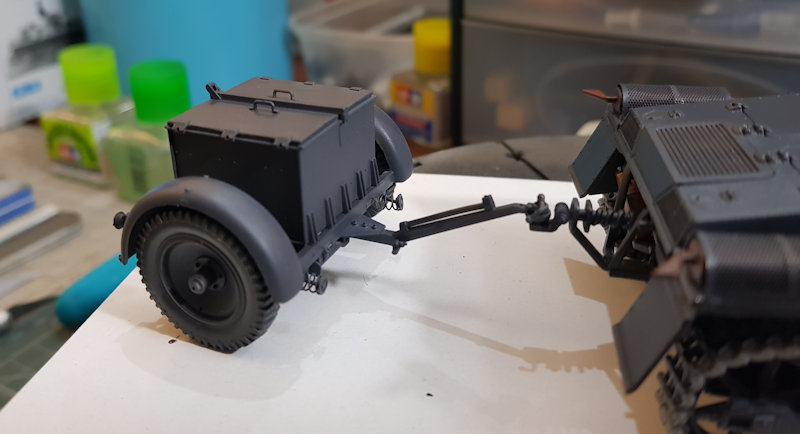
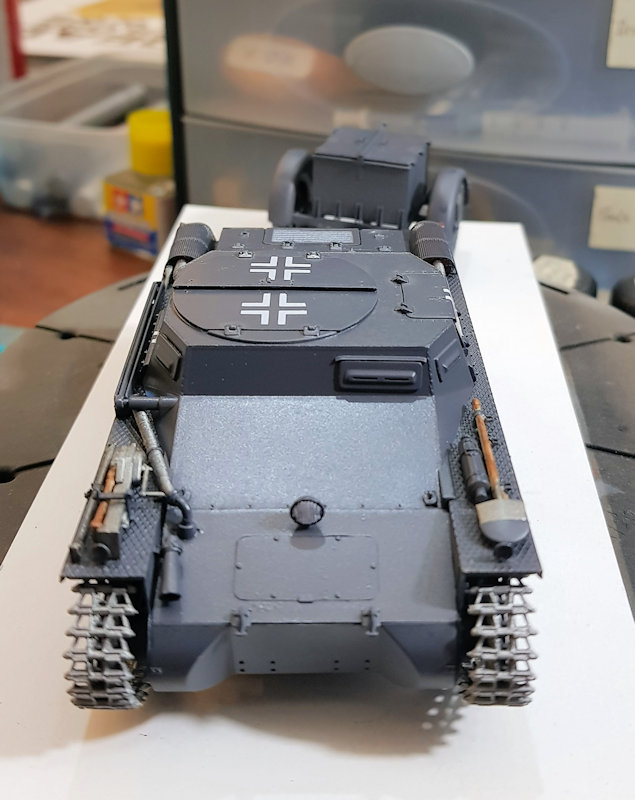
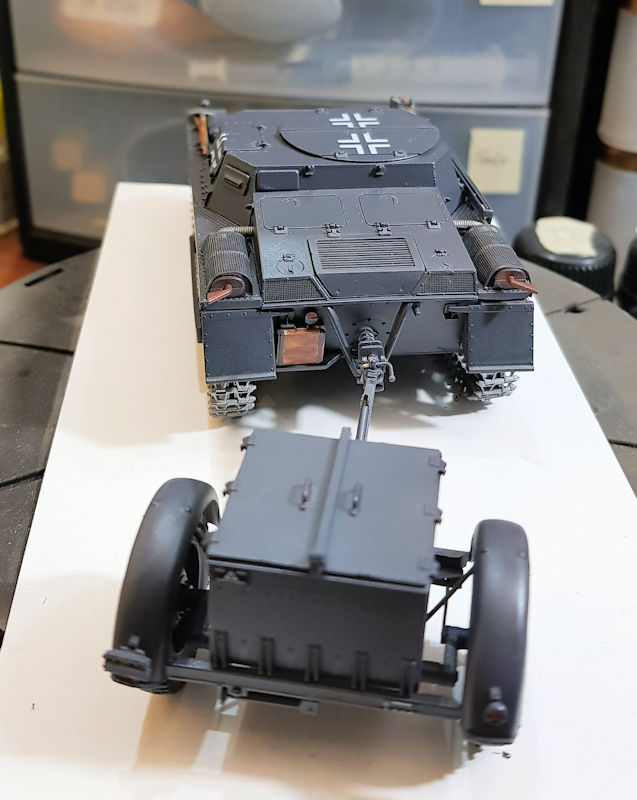
I've finished principle assembly. The hatches are only held in place with micro liquid tape so that I can easily remove any time I want. I will do a little weathering as it was dusty during the French campaign in 1940.

petbat

Joined: August 06, 2005
KitMaker: 3,353 posts
Armorama: 3,121 posts

Posted: Tuesday, May 01, 2018 - 11:38 PM UTC
Looking very good indeed Mark.
RivetCounter

Joined: October 26, 2012
KitMaker: 65 posts
Armorama: 62 posts

Posted: Friday, May 04, 2018 - 02:28 PM UTC
I'm doing a Pz.I for the Spanish Civil War campaign. And I was thinking about a Pz.I ohne Aufbau for this campaign. But there are at least two panzer in here. So I'm considering an sd.kfz. 251 ohne Aufbau. Something like this

Will it count for this campaign or it is too naked?

Will it count for this campaign or it is too naked?
Posted: Saturday, May 05, 2018 - 03:24 PM UTC
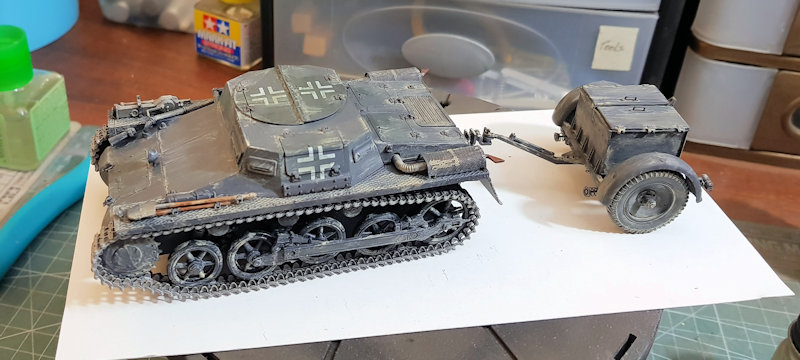
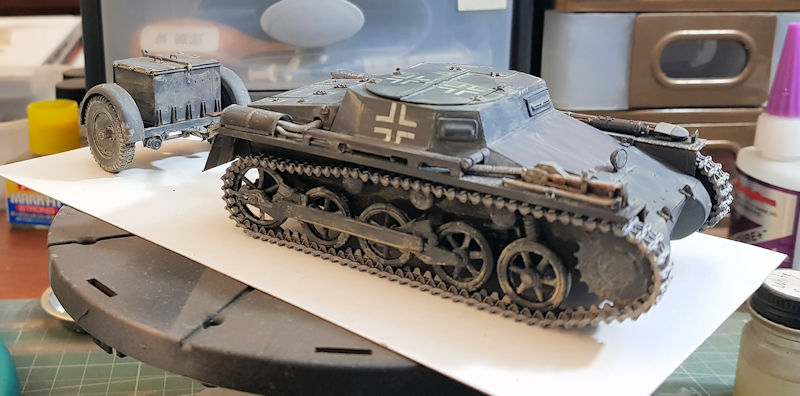
Another campaign completed. Of course, the interior is hidden with the hatches closed.



ReconTL3-1

Joined: June 07, 2006
KitMaker: 726 posts
Armorama: 687 posts

Posted: Saturday, May 05, 2018 - 08:32 PM UTC
That looks really good, Mark.
Cheers,
James
Cheers,
James
ReconTL3-1

Joined: June 07, 2006
KitMaker: 726 posts
Armorama: 687 posts

Posted: Saturday, May 05, 2018 - 08:51 PM UTC
It's been a couple of weeks since I posted any progress on this model. I have been working on a few pieces here and there now that it is mainly down to the tiny pieces. Cleanup of the small parts and the search for those that shoot themselves away from the tweezers onto the floor took up most of the time I have spent on this kit recently.
Here's how far I have gotten as of last night...I started working on the ramp (still have two more hinge things for the bottom and the hinges and locking lever to be installed - I probably won't have the tow cable attached), the gun shield for the M60, the commander's cupola, and the driver's hatch.

And here are several views with the M60 gun shield mounted. It will remain a sub-assembly for painting and will be permanently attached after painting. I still need to attach the ammo chute, side handle, and weapon attachment hardware.
I installed the headlights. Prior to installing the parts that the headlight guards will attach to, I cut the front portion off since I am modeling a gas-powered M113 and the mounting bracket thing was not as long as the one on the M113A1.
There would be one more tiny piece on the top of the hull, but that shoot away when I was cutting it from the sprue and I was never able to find it. I will either take one from another kit or will cover the area with crew gear.


The ramp in the AFV Club kit is pretty nice. You can have the smaller door either open or shut. Not sure which I am going to do, but the open ramp would show the personal affects ammo can.


I have mixed feelings about the clear plastic periscopes. They are nice, but I have to paint them before I put the rest of the items on the cupola so I can reach them easily to paint in order for them to have the effect that I want them to have.

The driver's hatch is pretty nice in that it has the piece that the lever that holds the hatch open interfaces with.

It might not seem like much progress was made in terms of parts count, but it did take a bit of time to do what has been done.
Thanks for looking.
Cheers,
James
Here's how far I have gotten as of last night...I started working on the ramp (still have two more hinge things for the bottom and the hinges and locking lever to be installed - I probably won't have the tow cable attached), the gun shield for the M60, the commander's cupola, and the driver's hatch.
And here are several views with the M60 gun shield mounted. It will remain a sub-assembly for painting and will be permanently attached after painting. I still need to attach the ammo chute, side handle, and weapon attachment hardware.
I installed the headlights. Prior to installing the parts that the headlight guards will attach to, I cut the front portion off since I am modeling a gas-powered M113 and the mounting bracket thing was not as long as the one on the M113A1.
There would be one more tiny piece on the top of the hull, but that shoot away when I was cutting it from the sprue and I was never able to find it. I will either take one from another kit or will cover the area with crew gear.
The ramp in the AFV Club kit is pretty nice. You can have the smaller door either open or shut. Not sure which I am going to do, but the open ramp would show the personal affects ammo can.
I have mixed feelings about the clear plastic periscopes. They are nice, but I have to paint them before I put the rest of the items on the cupola so I can reach them easily to paint in order for them to have the effect that I want them to have.
The driver's hatch is pretty nice in that it has the piece that the lever that holds the hatch open interfaces with.
It might not seem like much progress was made in terms of parts count, but it did take a bit of time to do what has been done.
Thanks for looking.
Cheers,
James
Posted: Sunday, May 06, 2018 - 12:32 PM UTC
Quoted Text
That looks really good, Mark.
Cheers,
James
Thanks James

Kaktusas

Joined: April 12, 2017
KitMaker: 196 posts
Armorama: 196 posts

Posted: Monday, May 07, 2018 - 11:43 AM UTC
Its been a while since i posted progress picture. By now, assembly and painting is complete, the next stage weathering.
I decided to keep engine closed at moment, but hatches aren't glued to place. Open engine bay distorts outline of the lil tank. However, if i will get set of figures for diorama, i will certainly pop them open.
Some comments on the colors. Im little unhappy about contrast and shade of RAL 8000, however, i guess filters will help to partly sort this out. As well, will do some work on exhaust pipes. I concentrated too much on chambers looking like they have paint burnt, however, there is no way to see the effect. And pipes themselves left without too much attention. Will work on this later on.
As for the paint scheme, well, i couldn't find the picture of 833 tank, so unless single existing photo of the tank is in destroyed state, paint scheme should be plausible. As it received Ral8000 coat over panzergrey, can of Ral7008 had to be nearby. Having scientific background, i don't understand why manufacturers don't add reference paint schemes. It is not hard to write down what book contains picture of given tank, if modeler wants further research. All we get is unidentified units now days


bison126

Joined: June 10, 2004
KitMaker: 5,329 posts
Armorama: 5,204 posts

Posted: Tuesday, May 08, 2018 - 12:56 AM UTC
Still working on my Bushmaster interior. It got a light weathering before I glued the upper hull.
I got some fit issues and needed to trim a bit more the front left large PE part.


Olivier
I got some fit issues and needed to trim a bit more the front left large PE part.


Olivier
Removed by original poster on 05/08/18 - 22:20:32 (GMT).
BigSmitty

Joined: October 01, 2008
KitMaker: 597 posts
Armorama: 439 posts

Posted: Tuesday, May 08, 2018 - 03:31 AM UTC
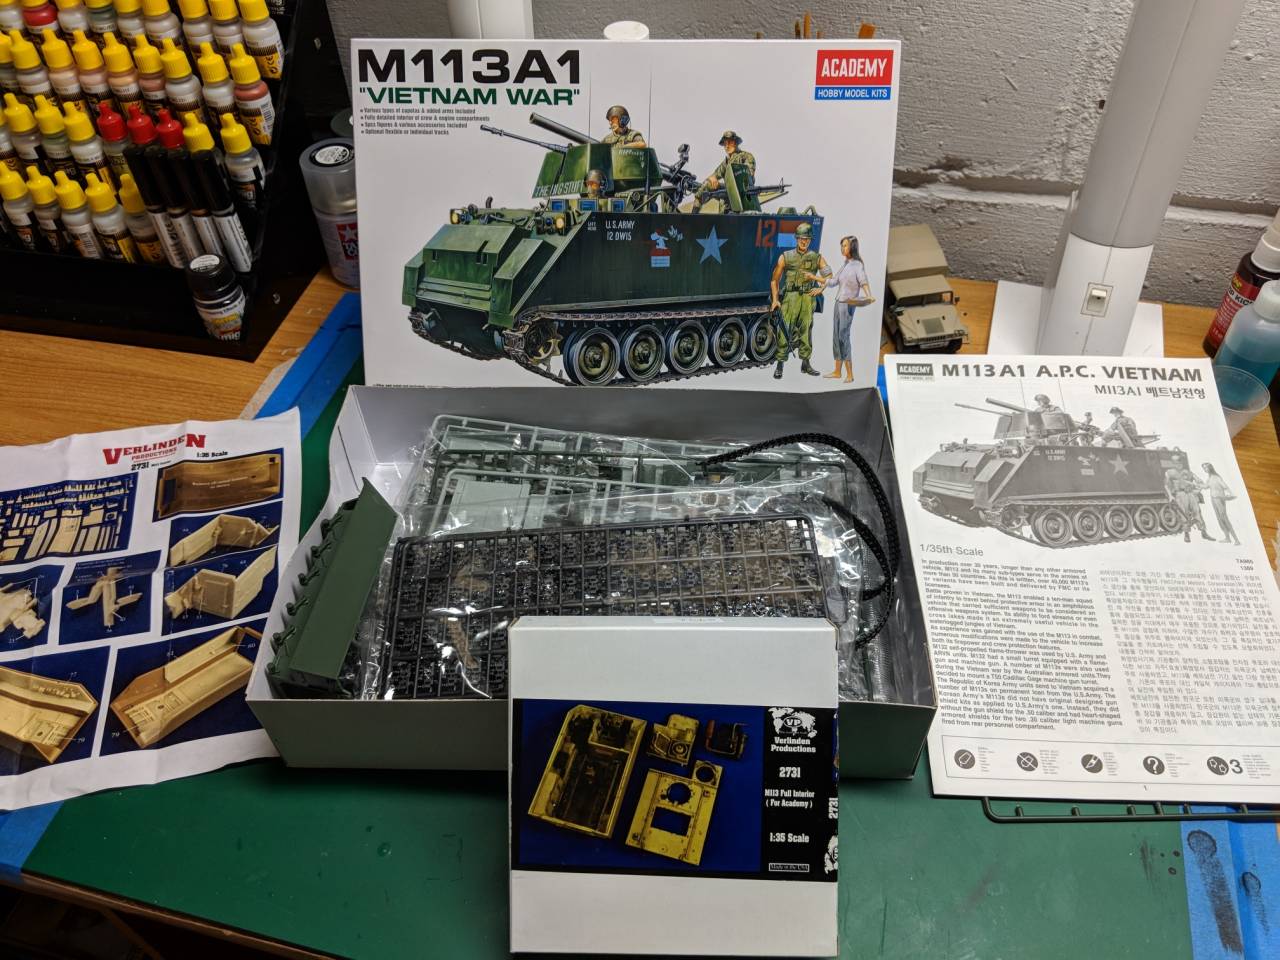
Finally getting some time back at the bench, so I joined up with this campaign today. For my subject I have two options:
1. 1/35 Academy M113A1 with Verlinden Full Interior
2. 1/48 Tamiya T34/76 (1941 Cast Turret) with Verlinden Full Interior
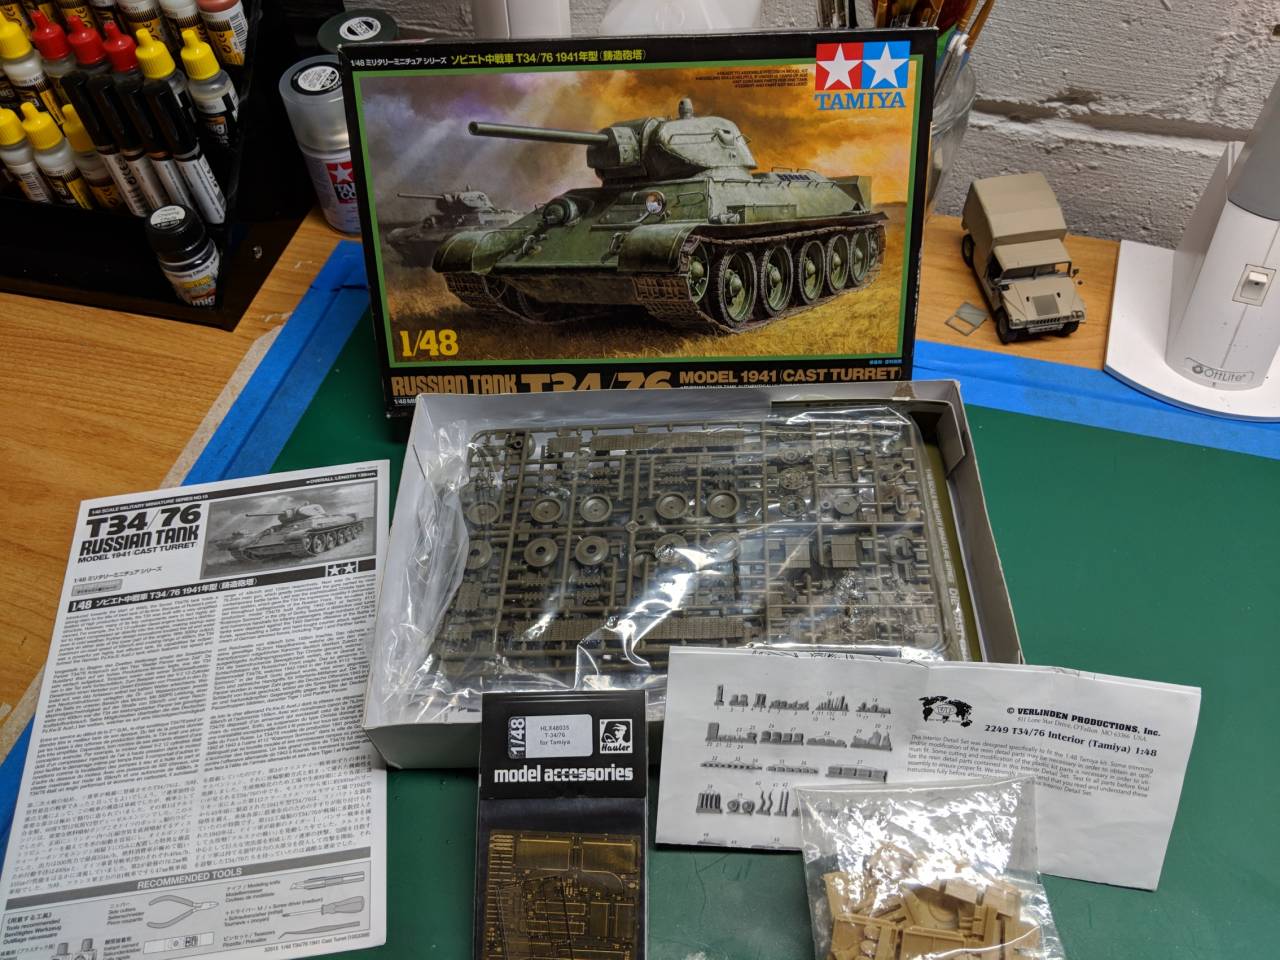
Leaning towards the M113 as the interior will be seen more easily since I can pose the rear open... thoughts?
1. 1/35 Academy M113A1 with Verlinden Full Interior

2. 1/48 Tamiya T34/76 (1941 Cast Turret) with Verlinden Full Interior

Leaning towards the M113 as the interior will be seen more easily since I can pose the rear open... thoughts?
petbat

Joined: August 06, 2005
KitMaker: 3,353 posts
Armorama: 3,121 posts

Posted: Tuesday, May 08, 2018 - 01:26 PM UTC
Coming along very nicely guys.

strongarden

Joined: May 14, 2012
KitMaker: 730 posts
Armorama: 624 posts

Posted: Thursday, May 10, 2018 - 04:16 AM UTC
Nice work goin' on here, haven't been able to start w mine yet.
Excellent results Mark, the "dusting" came out just right, not too much. IMHO
Darius I like your final camo finish, that side hatch really allows for a nice peek in.
James you've reflected your time served perfectly w this beautiful build
Thanks and - Bravo man! Inspiring to see, and about those figures...
Mark Short and sweet! Looks good.
Smitty I'm partial to the T34, I have quite a few in the stash , but you'd have to pull the turret clear every time to see the interior. Which could be a good thing.
T-34/76 - one vote.
Congrats to all on some cool builds!
Cheers


Dave
Excellent results Mark, the "dusting" came out just right, not too much. IMHO
Darius I like your final camo finish, that side hatch really allows for a nice peek in.
James you've reflected your time served perfectly w this beautiful build

Thanks and - Bravo man! Inspiring to see, and about those figures...
Mark Short and sweet! Looks good.
Smitty I'm partial to the T34, I have quite a few in the stash
 , but you'd have to pull the turret clear every time to see the interior. Which could be a good thing.
T-34/76 - one vote.

Congrats to all on some cool builds!
Cheers


Dave


oldbean

Joined: July 05, 2004
KitMaker: 769 posts
Armorama: 461 posts

Posted: Sunday, May 13, 2018 - 05:29 PM UTC
Update on my Nashorn. Dragons 3 in 1 kit is FULL of details. Lots of little bits and bobs, but the instructions are HORRIBLE (I think I've mentioned that a few times  ) This is definitely a "paint as you go" kit. Lots of sub assemblies and sub-sub assemblies. I think I've finally gotten to the point where I can put it all together and start the camouflage.
Here is an overall view:

Side view
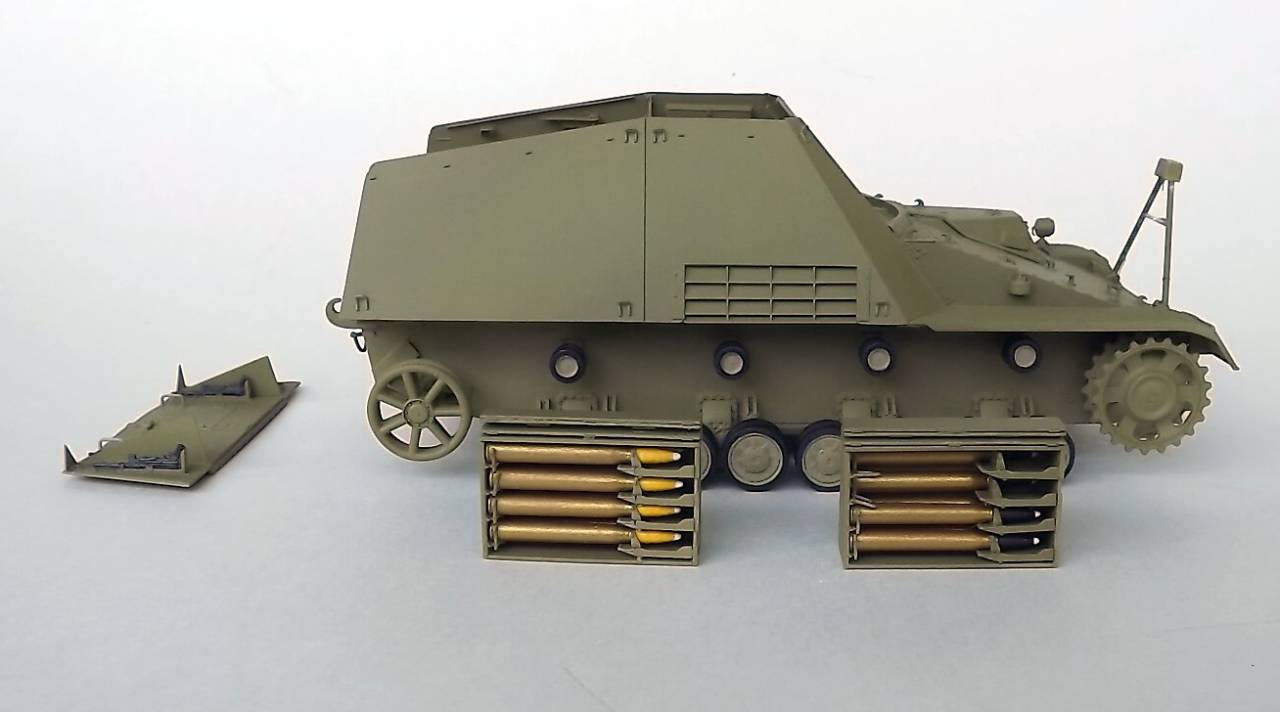
Ammo bins. The kit only includes armor piercing shells, so I had to fudge it a bit.
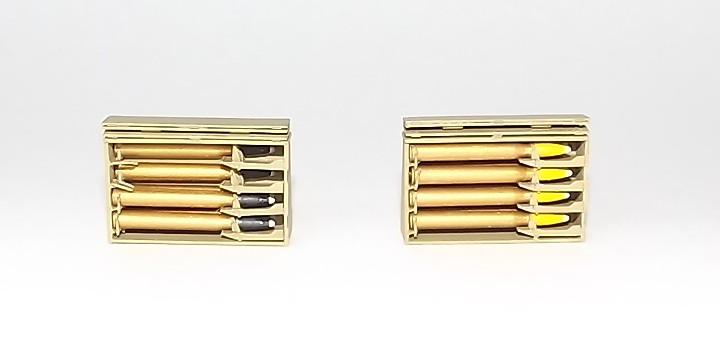
from the back:
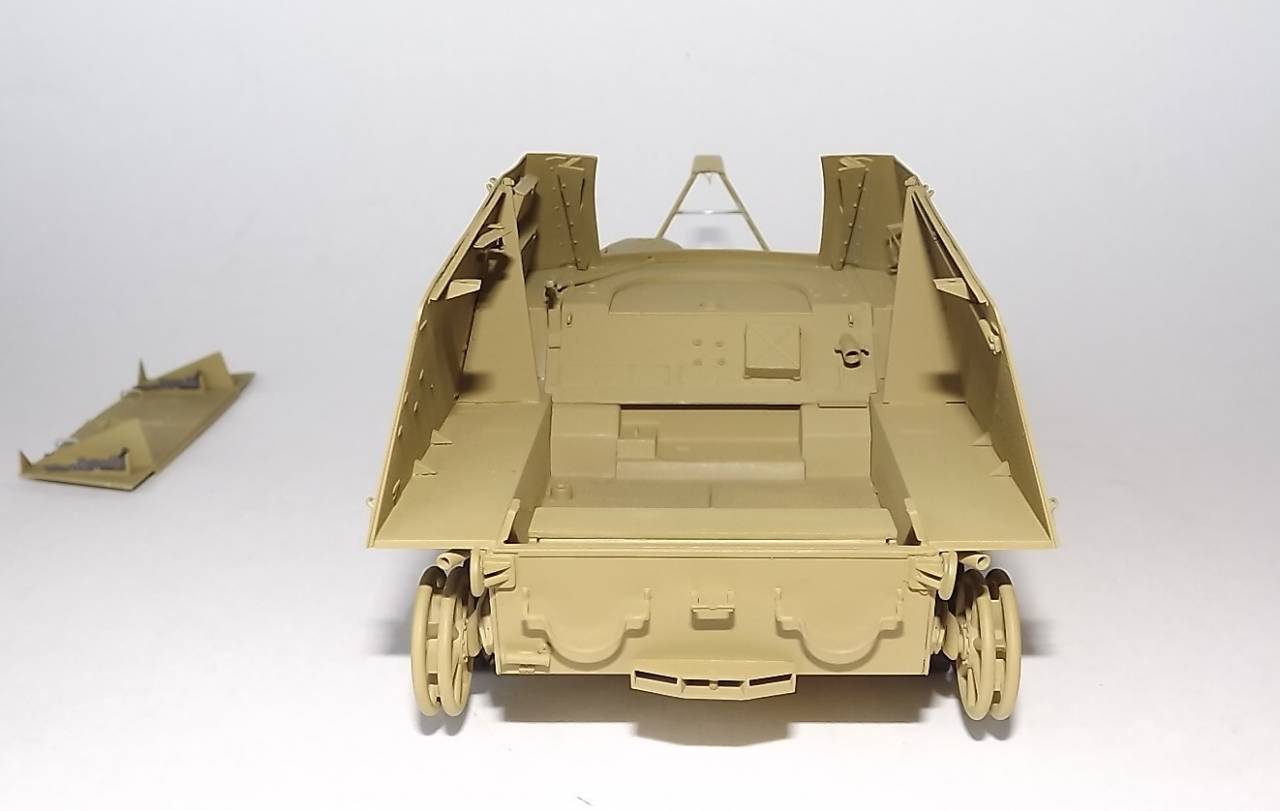
Comments welcome.
Jesse
 ) This is definitely a "paint as you go" kit. Lots of sub assemblies and sub-sub assemblies. I think I've finally gotten to the point where I can put it all together and start the camouflage.
 Here is an overall view:

Side view

Ammo bins. The kit only includes armor piercing shells, so I had to fudge it a bit.

from the back:

Comments welcome.
Jesse

bison126

Joined: June 10, 2004
KitMaker: 5,329 posts
Armorama: 5,204 posts

Posted: Sunday, May 13, 2018 - 09:08 PM UTC
Interior is over. I had some hard times to close the box. The PE parts needed to be trimmed a bit more.
Now I'm adding all the tiny parts around the hull. Some are just insane a la Bronco.
Before I glue the windows, i'd like to know what color are glasses. From the different angles, they appear to have either a green or grey hue.
I started one of the Platt MG mount and I'm notthat impressed. The details are a bit coarse and there is not a single pin or hole to properly position the parts. They also look a bit large when I compare with the Trumpeter Platt mount. However I don't take the latter for an accurate one either.


Olivier
Now I'm adding all the tiny parts around the hull. Some are just insane a la Bronco.
Before I glue the windows, i'd like to know what color are glasses. From the different angles, they appear to have either a green or grey hue.
I started one of the Platt MG mount and I'm notthat impressed. The details are a bit coarse and there is not a single pin or hole to properly position the parts. They also look a bit large when I compare with the Trumpeter Platt mount. However I don't take the latter for an accurate one either.


Olivier
aralviar

Joined: November 20, 2013
KitMaker: 26 posts
Armorama: 26 posts

Posted: Saturday, May 19, 2018 - 02:34 PM UTC
Here is my latest progress guys. Almost done. Put some bits from my spares and bedroll made from milliput to dress it. 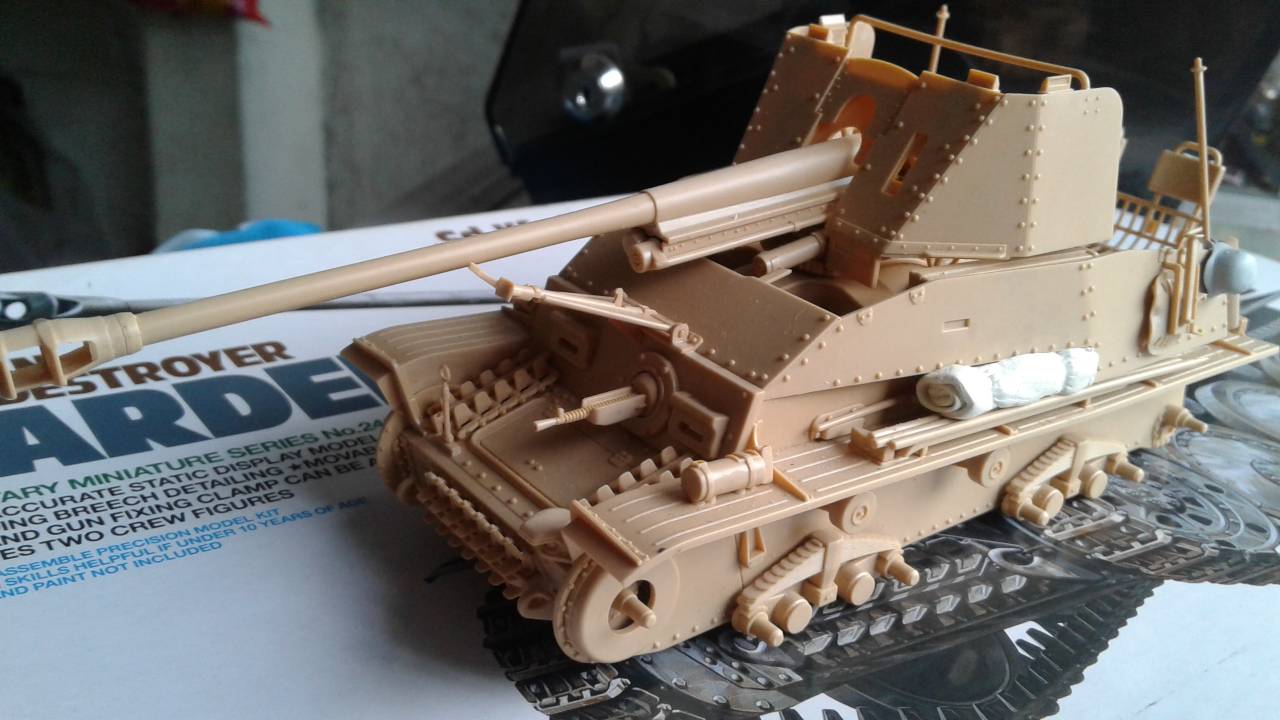
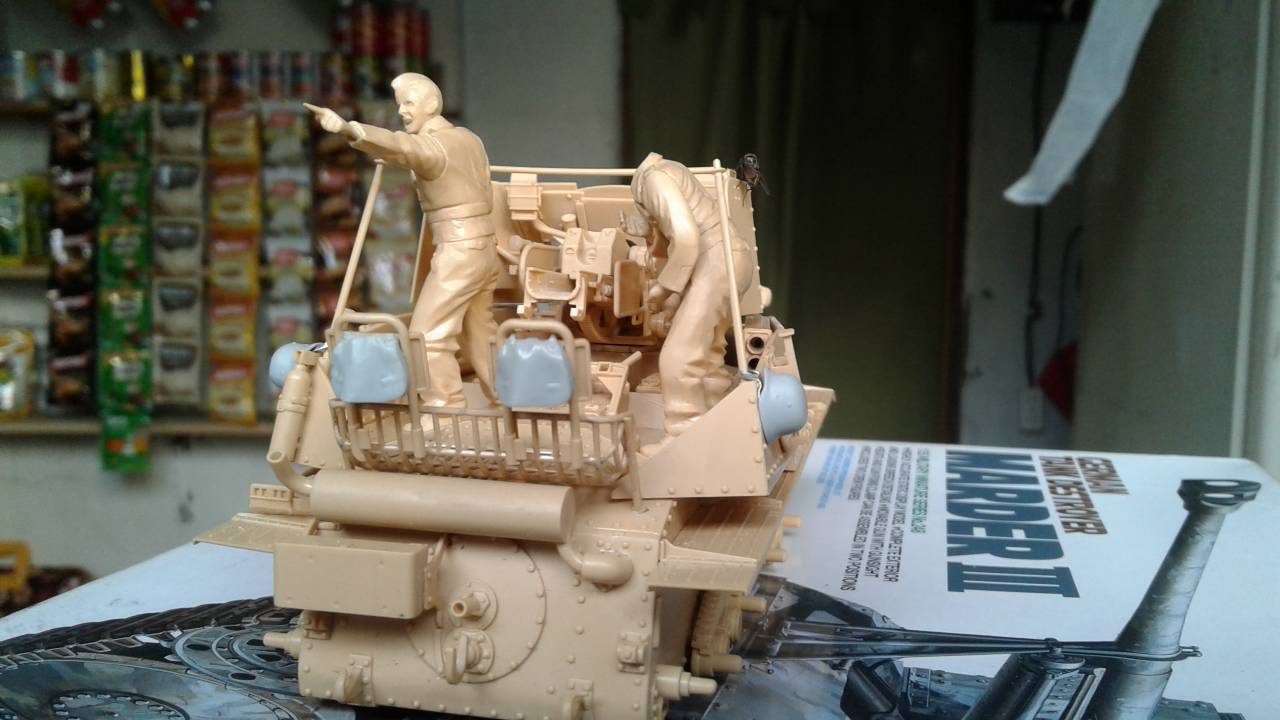
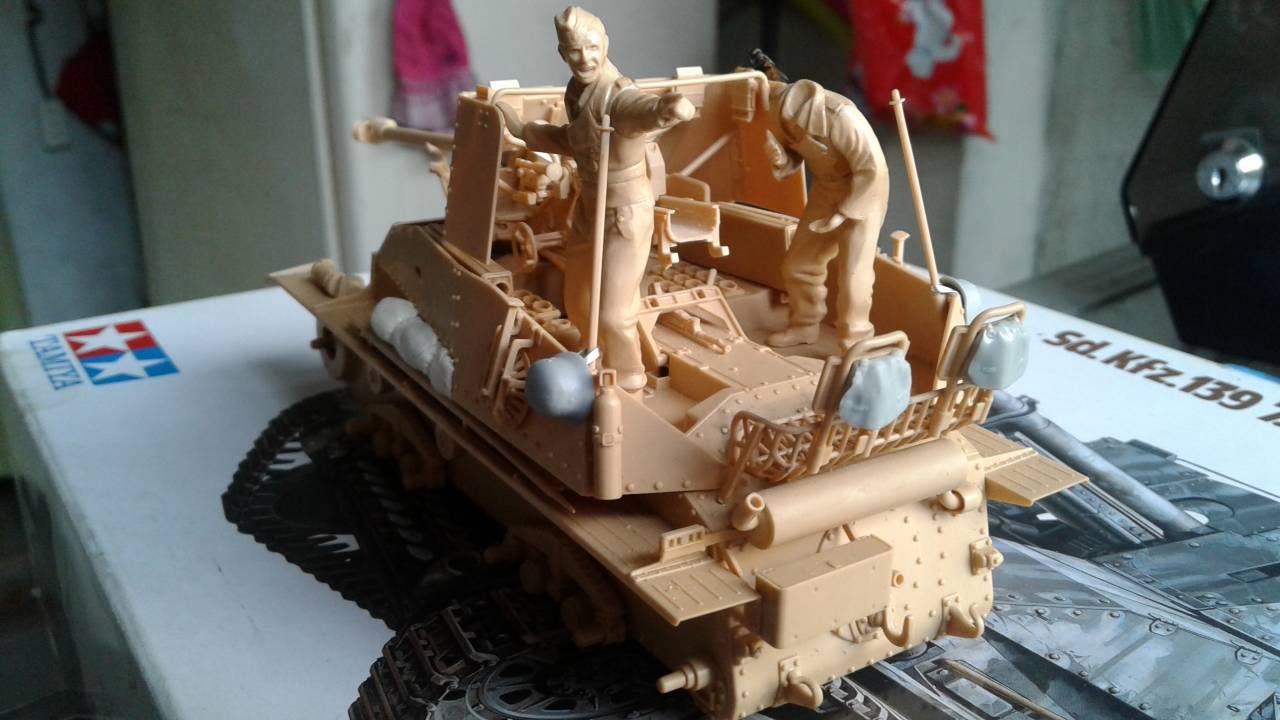
Thanks for viewing.


Thanks for viewing.
aralviar

Joined: November 20, 2013
KitMaker: 26 posts
Armorama: 26 posts

Posted: Saturday, May 19, 2018 - 02:43 PM UTC
Your nashorn looks good jesse,
also your work olivier, beauty inside and out.
also your work olivier, beauty inside and out.

bison126

Joined: June 10, 2004
KitMaker: 5,329 posts
Armorama: 5,204 posts

Posted: Saturday, May 19, 2018 - 04:53 PM UTC
Thank you Angelo.
Here are the first pictures with the base coat on. I used Tamiya Wooden Tan. Now I have to find a proper mix for the Olive Green and I'll be able to start the camo.


Olivier
Here are the first pictures with the base coat on. I used Tamiya Wooden Tan. Now I have to find a proper mix for the Olive Green and I'll be able to start the camo.


Olivier

strongarden

Joined: May 14, 2012
KitMaker: 730 posts
Armorama: 624 posts

Posted: Saturday, May 19, 2018 - 10:05 PM UTC
Looks great Olivier, really too bad the interior gets closed up.
Jesse, Angelo, Olivier looking frwd to how you guys finish these gems off!
Dave
Jesse, Angelo, Olivier looking frwd to how you guys finish these gems off!

Dave


bison126

Joined: June 10, 2004
KitMaker: 5,329 posts
Armorama: 5,204 posts

Posted: Sunday, May 20, 2018 - 08:56 PM UTC
Thank you Dave. The large windscreen will let a great part of the interior visible.
Here are some pictures with the basic camo.


And with its stalemate I'm also building at the same time.


Olivier
Here are some pictures with the basic camo.


And with its stalemate I'm also building at the same time.


Olivier
petbat

Joined: August 06, 2005
KitMaker: 3,353 posts
Armorama: 3,121 posts

Posted: Monday, May 21, 2018 - 01:42 AM UTC
Looking great Guys. Some nice crisp builds here.
Olivier, the glass has a slight green tinge to it when you look from a distance, but right up close, it is barely discernible.
Olivier, the glass has a slight green tinge to it when you look from a distance, but right up close, it is barely discernible.
 |


