MichaelSatin
 Campaigns Administrator
Colorado, United States
Joined: January 19, 2008
KitMaker: 3,909 posts
Armorama: 510 posts
Posted: Saturday, February 10, 2018 - 07:29 PM UTC
Lots of really good work going on here. I have really got to get going on mine!
Michael

On the bench:
Sorta depends on your definition of "on the bench"...
RobinNilsson
TOS Moderator Stockholm, Sweden
Joined: November 29, 2006
KitMaker: 6,693 posts
Armorama: 5,562 posts
Posted: Sunday, February 11, 2018 - 01:45 AM UTC
Decided to jump aboard this train since I recently bought this little jewel:
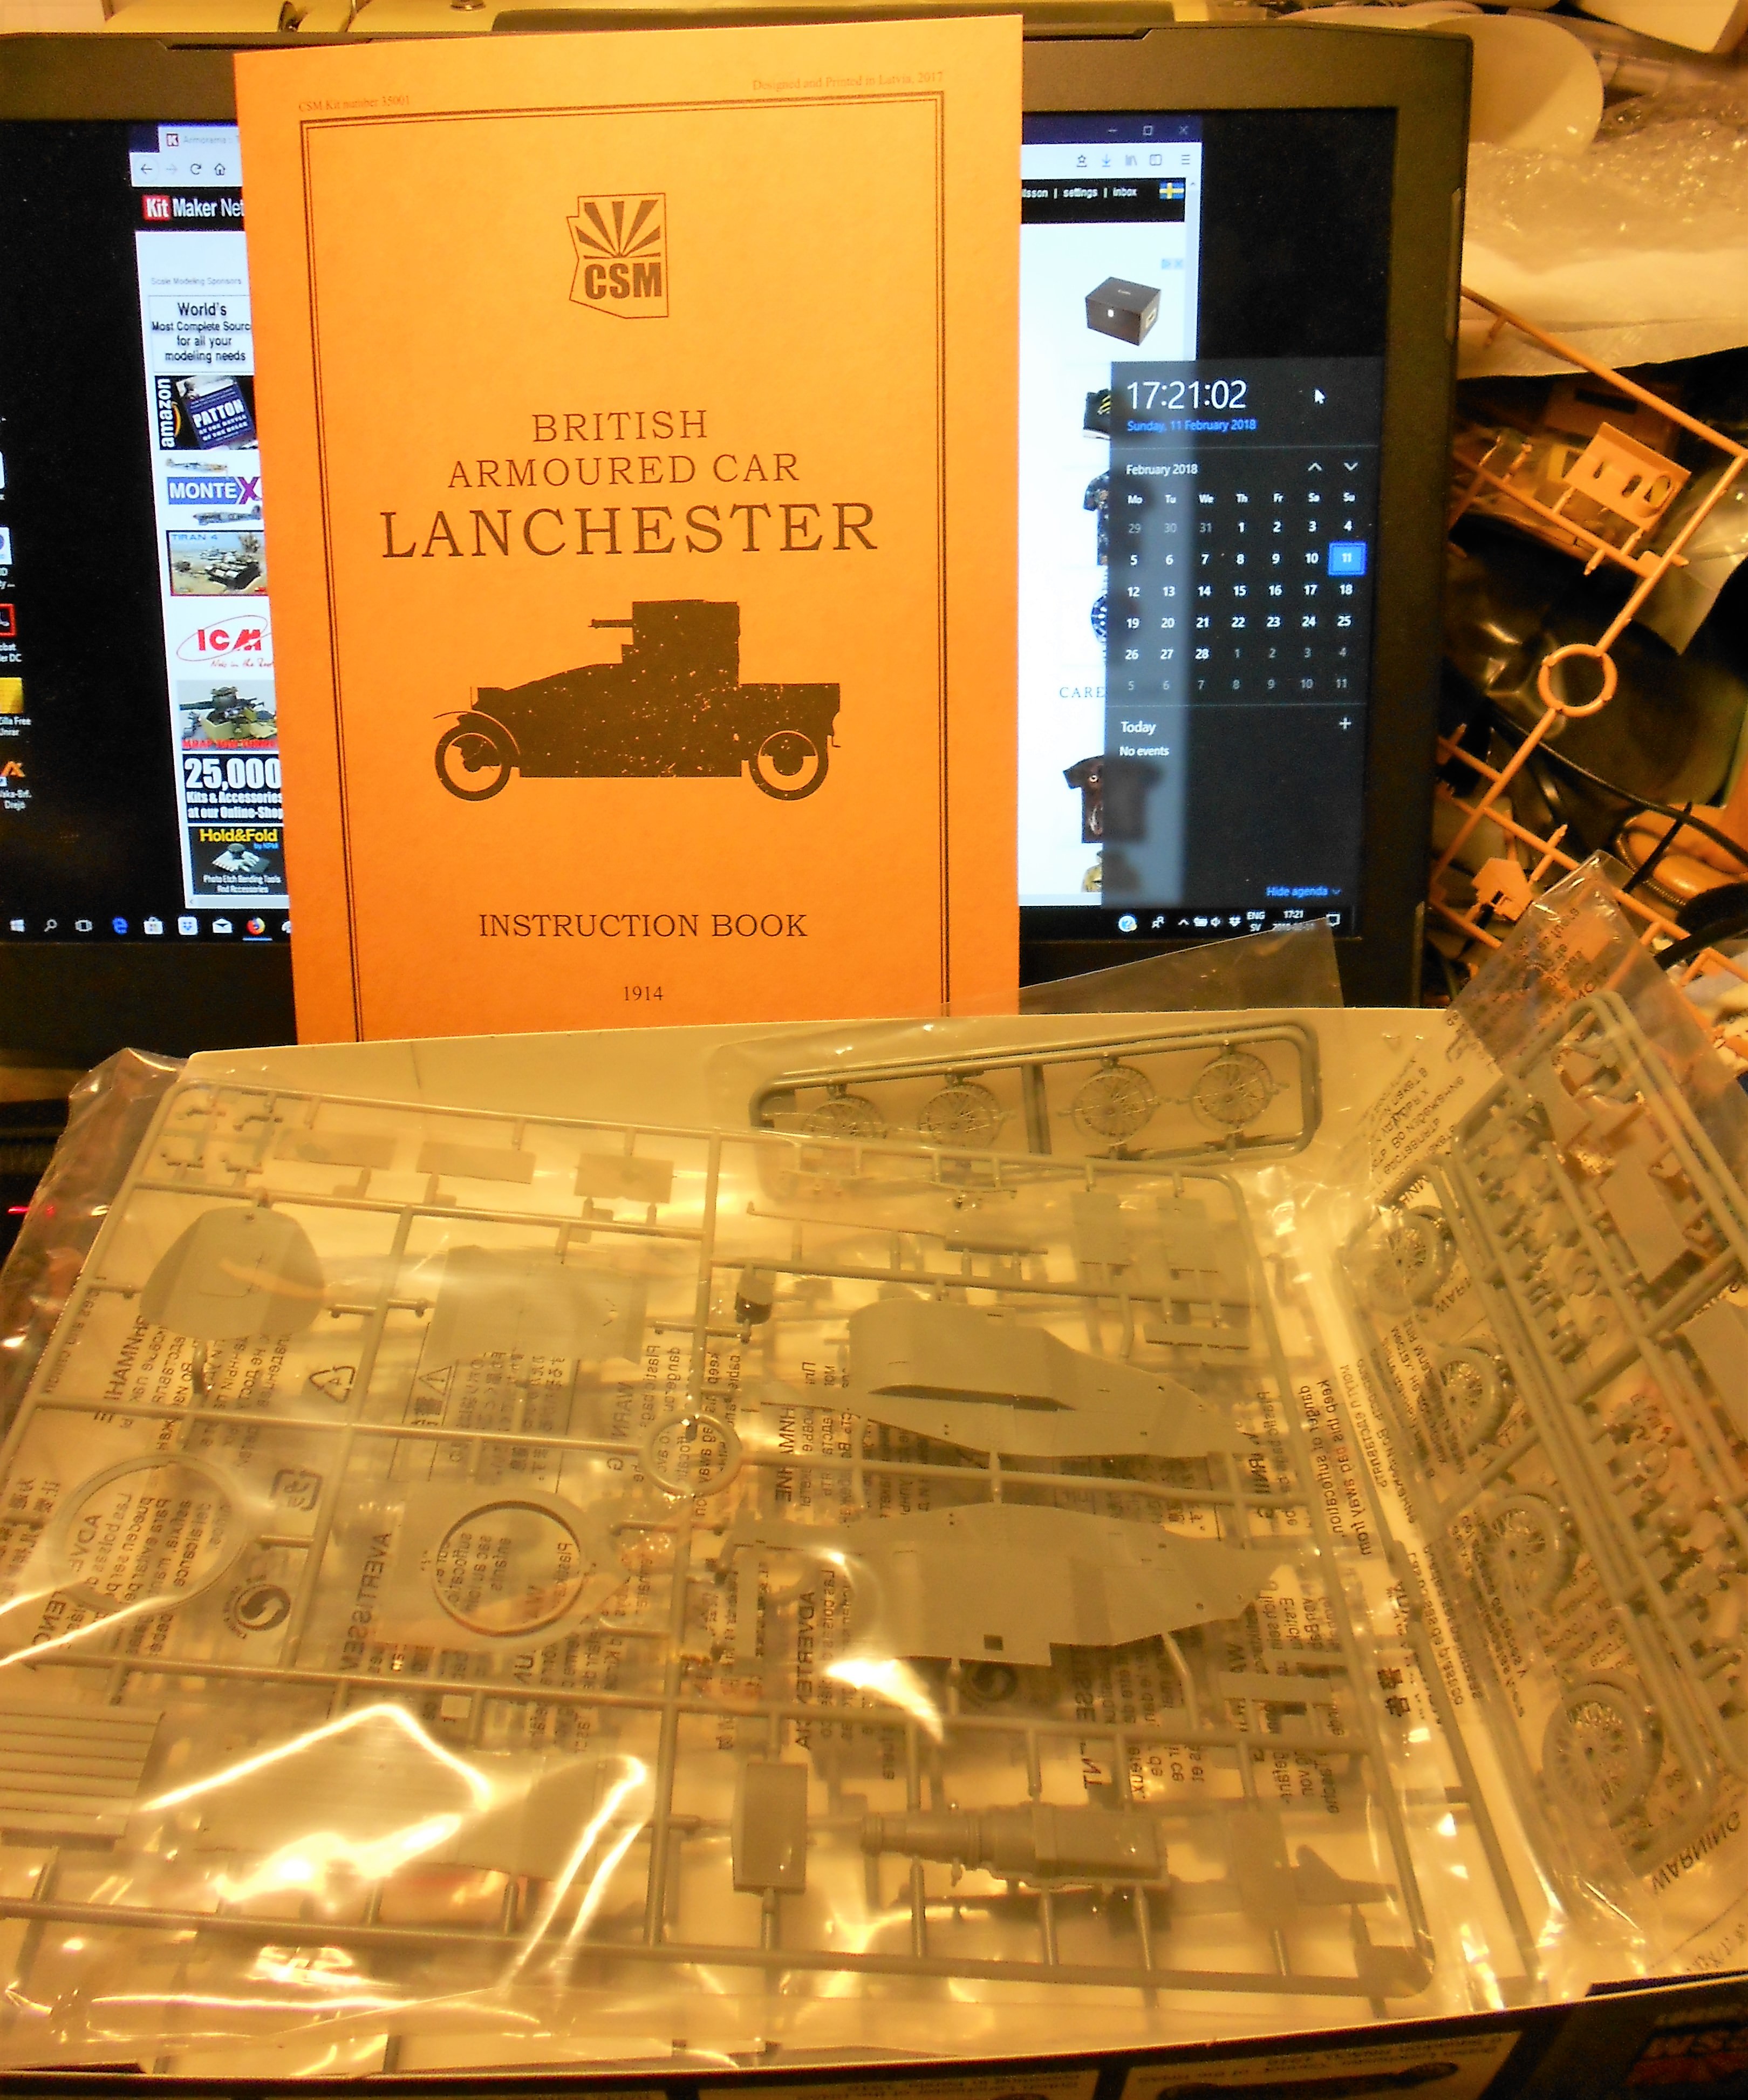
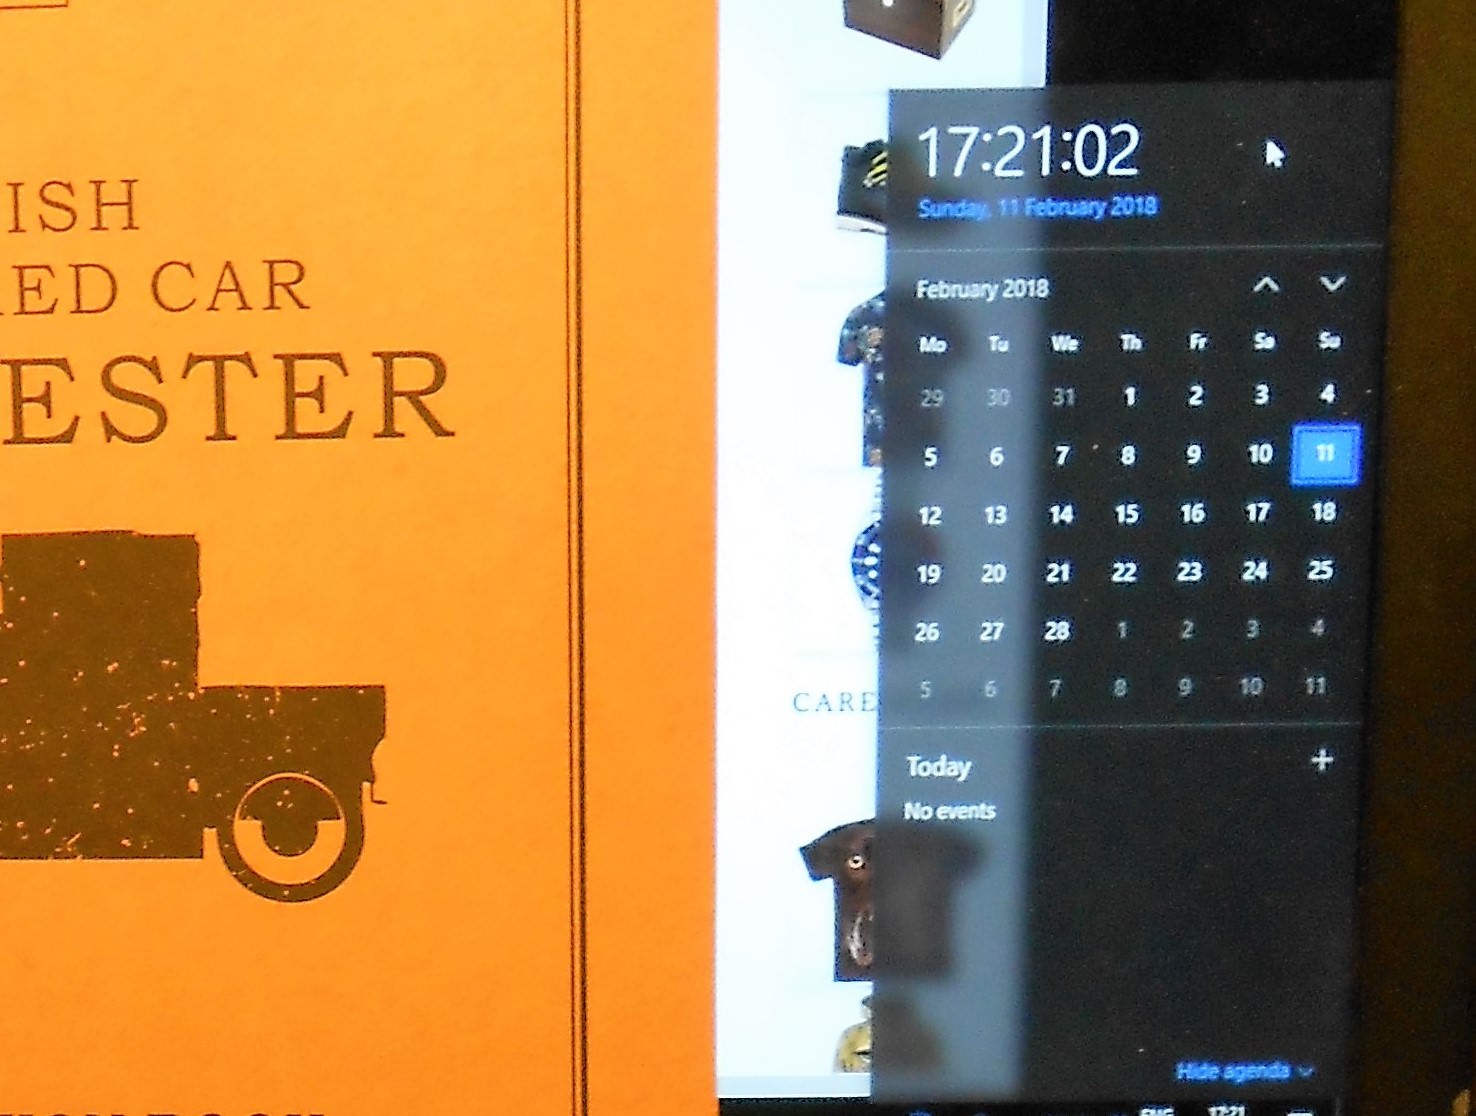
Lanchester armoured car from Copper State Models
Enlarged part to show the date:
/ Robin
In memory of Al Superczynski:
"Build what YOU want, the way YOU want to....
and the critics will flame you every time"
Colorado, United States
Joined: January 25, 2018
KitMaker: 3 posts
Armorama: 3 posts
Posted: Sunday, February 18, 2018 - 05:59 AM UTC
Majority of the painting done.

RobinNilsson
TOS Moderator Stockholm, Sweden
Joined: November 29, 2006
KitMaker: 6,693 posts
Armorama: 5,562 posts
Posted: Monday, February 19, 2018 - 06:08 PM UTC
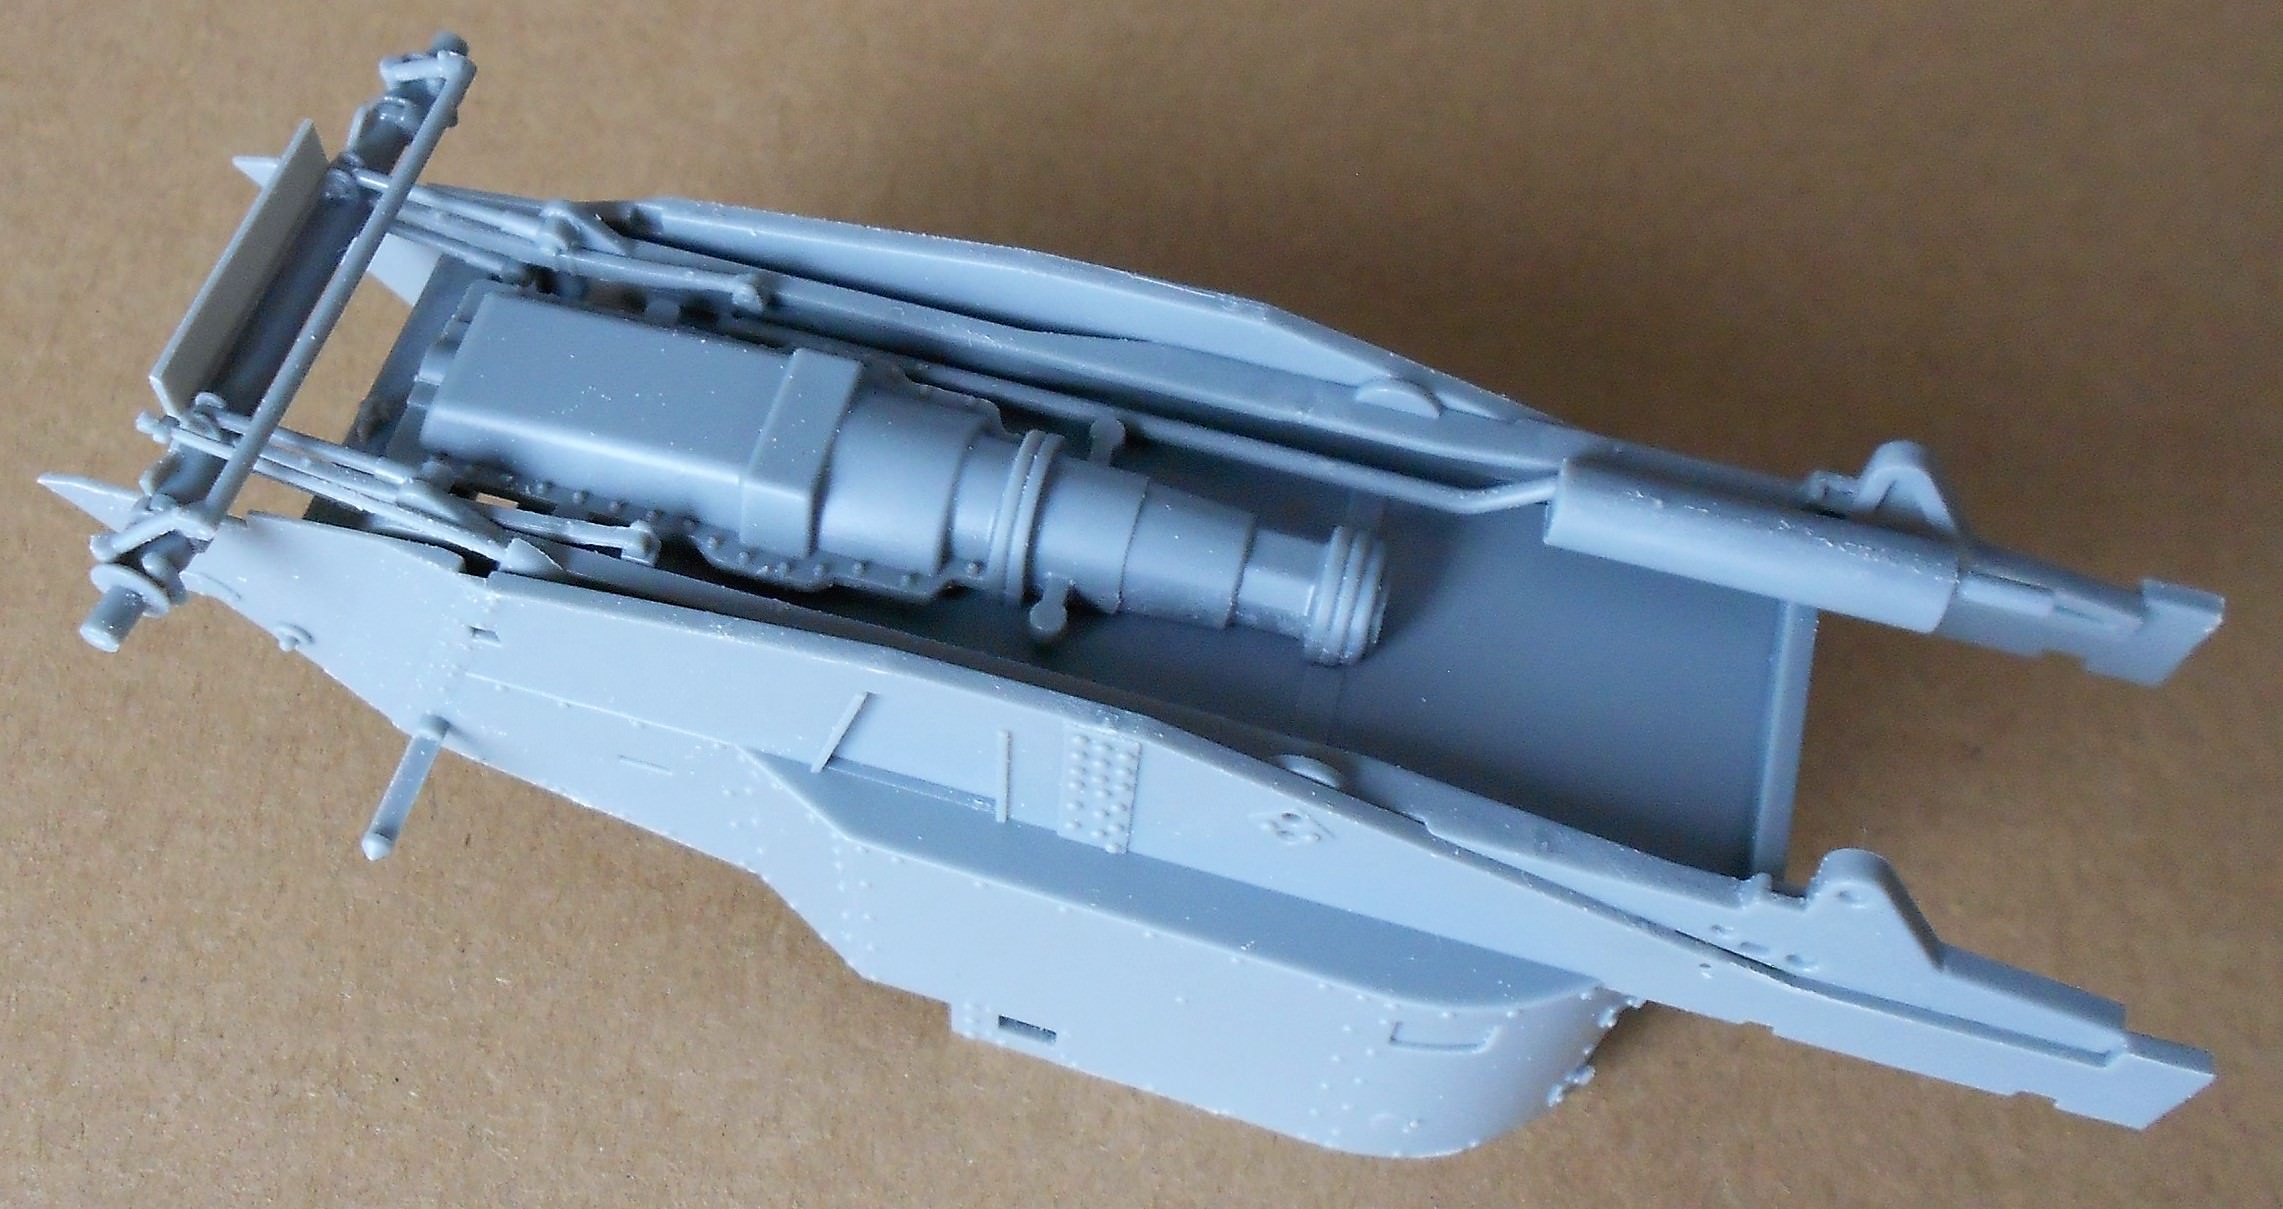
Done some assembly work on the Lanchester.
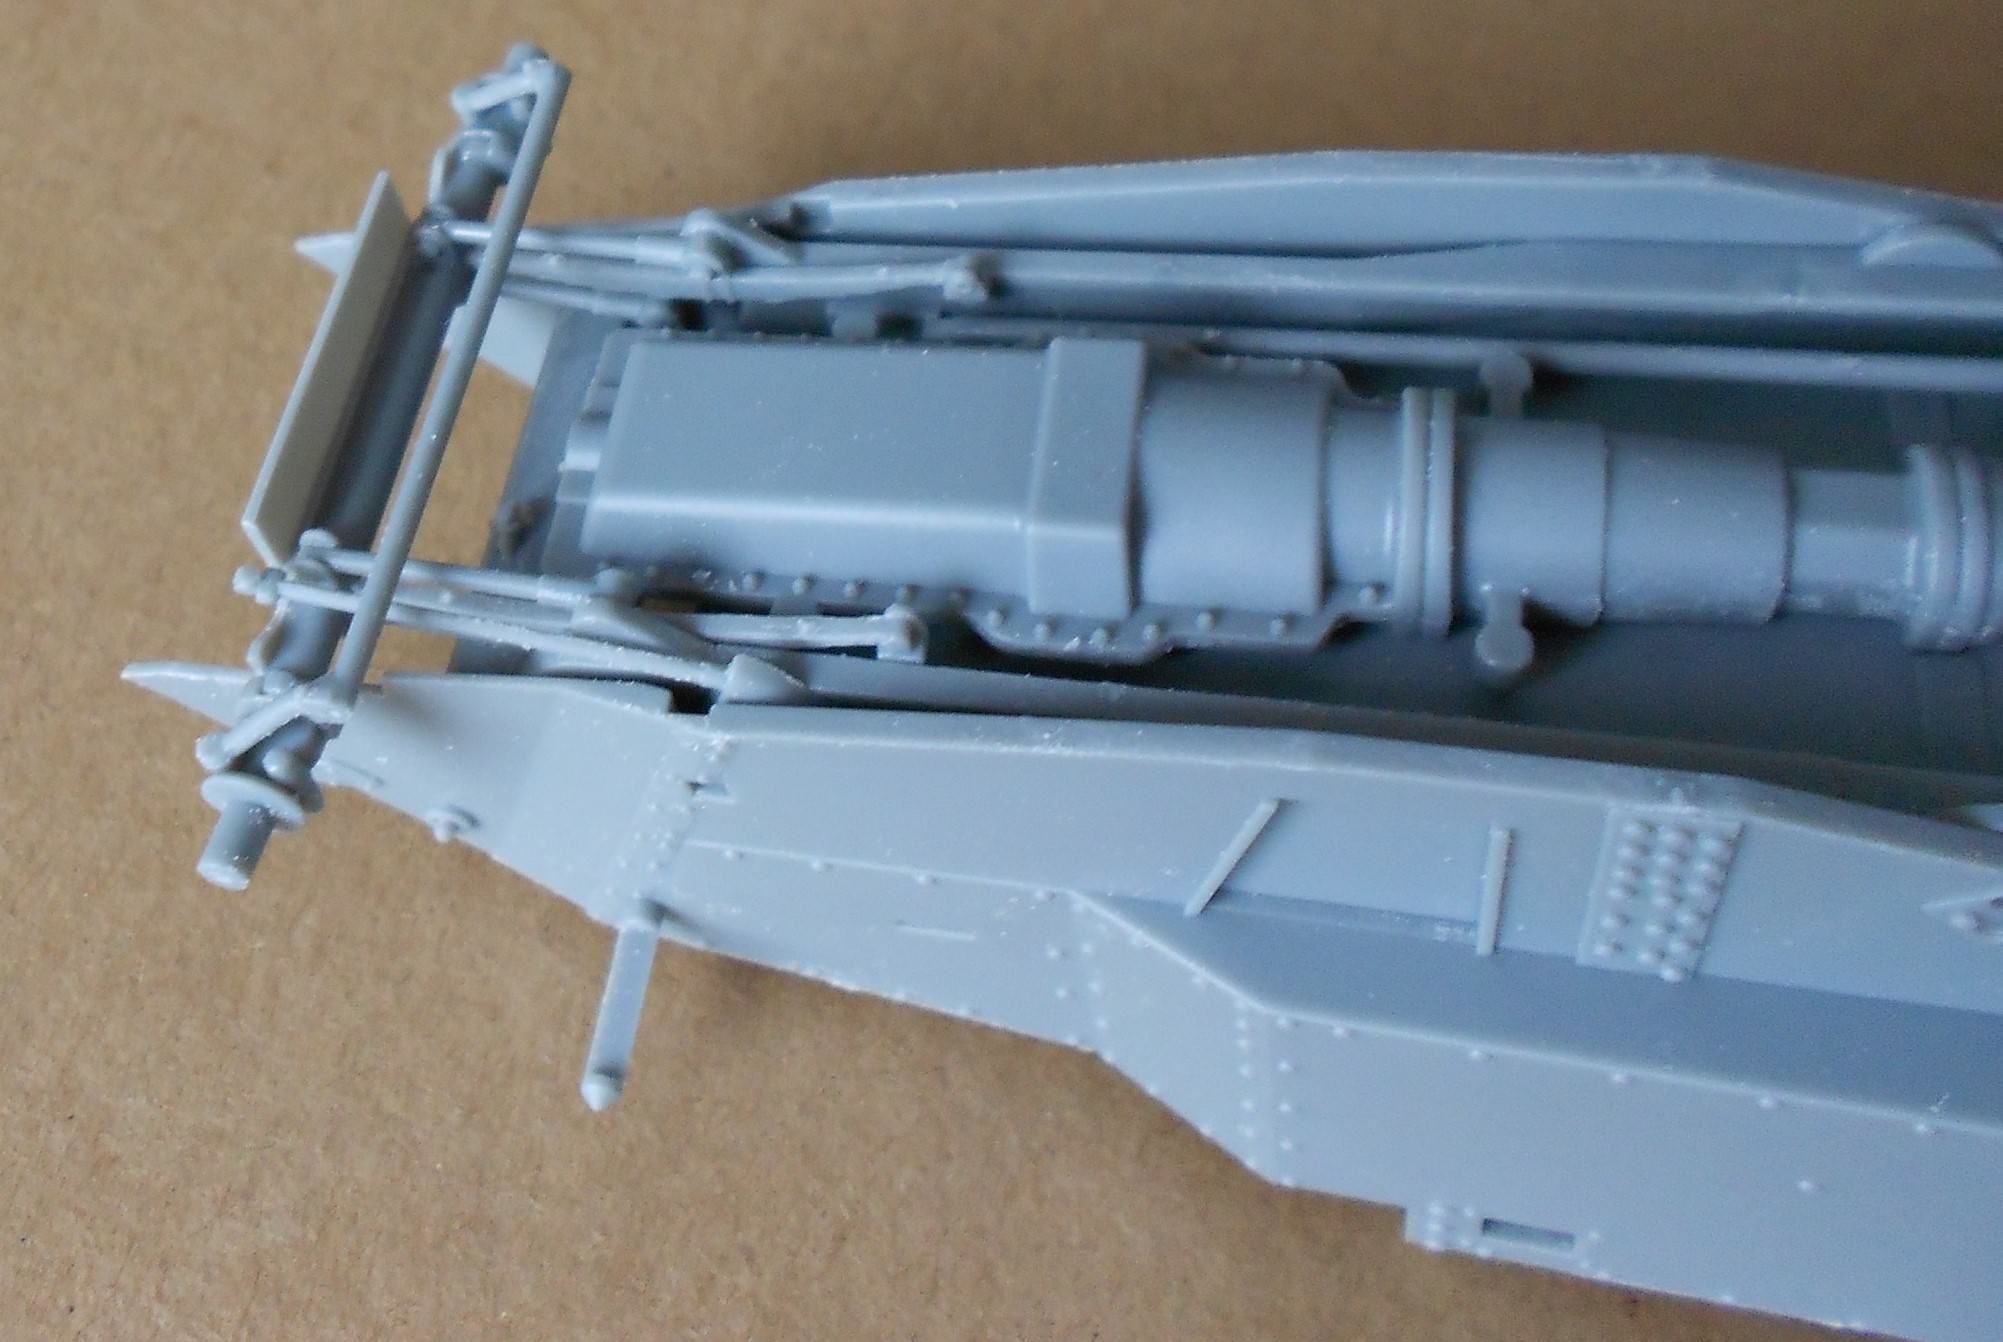
a small part of the steering linkage is missing from this image, I wanted to let the other joints harden/dry first.
Adding the sides of the armour before getting all the front suspension parts in place is not a good idea. It gets unnecessarily fiddly. Follow the steps and be a little careful when adding the sides. The fit is very good so adding large parts to assemblies with small and delicate parts attached is not a problem.
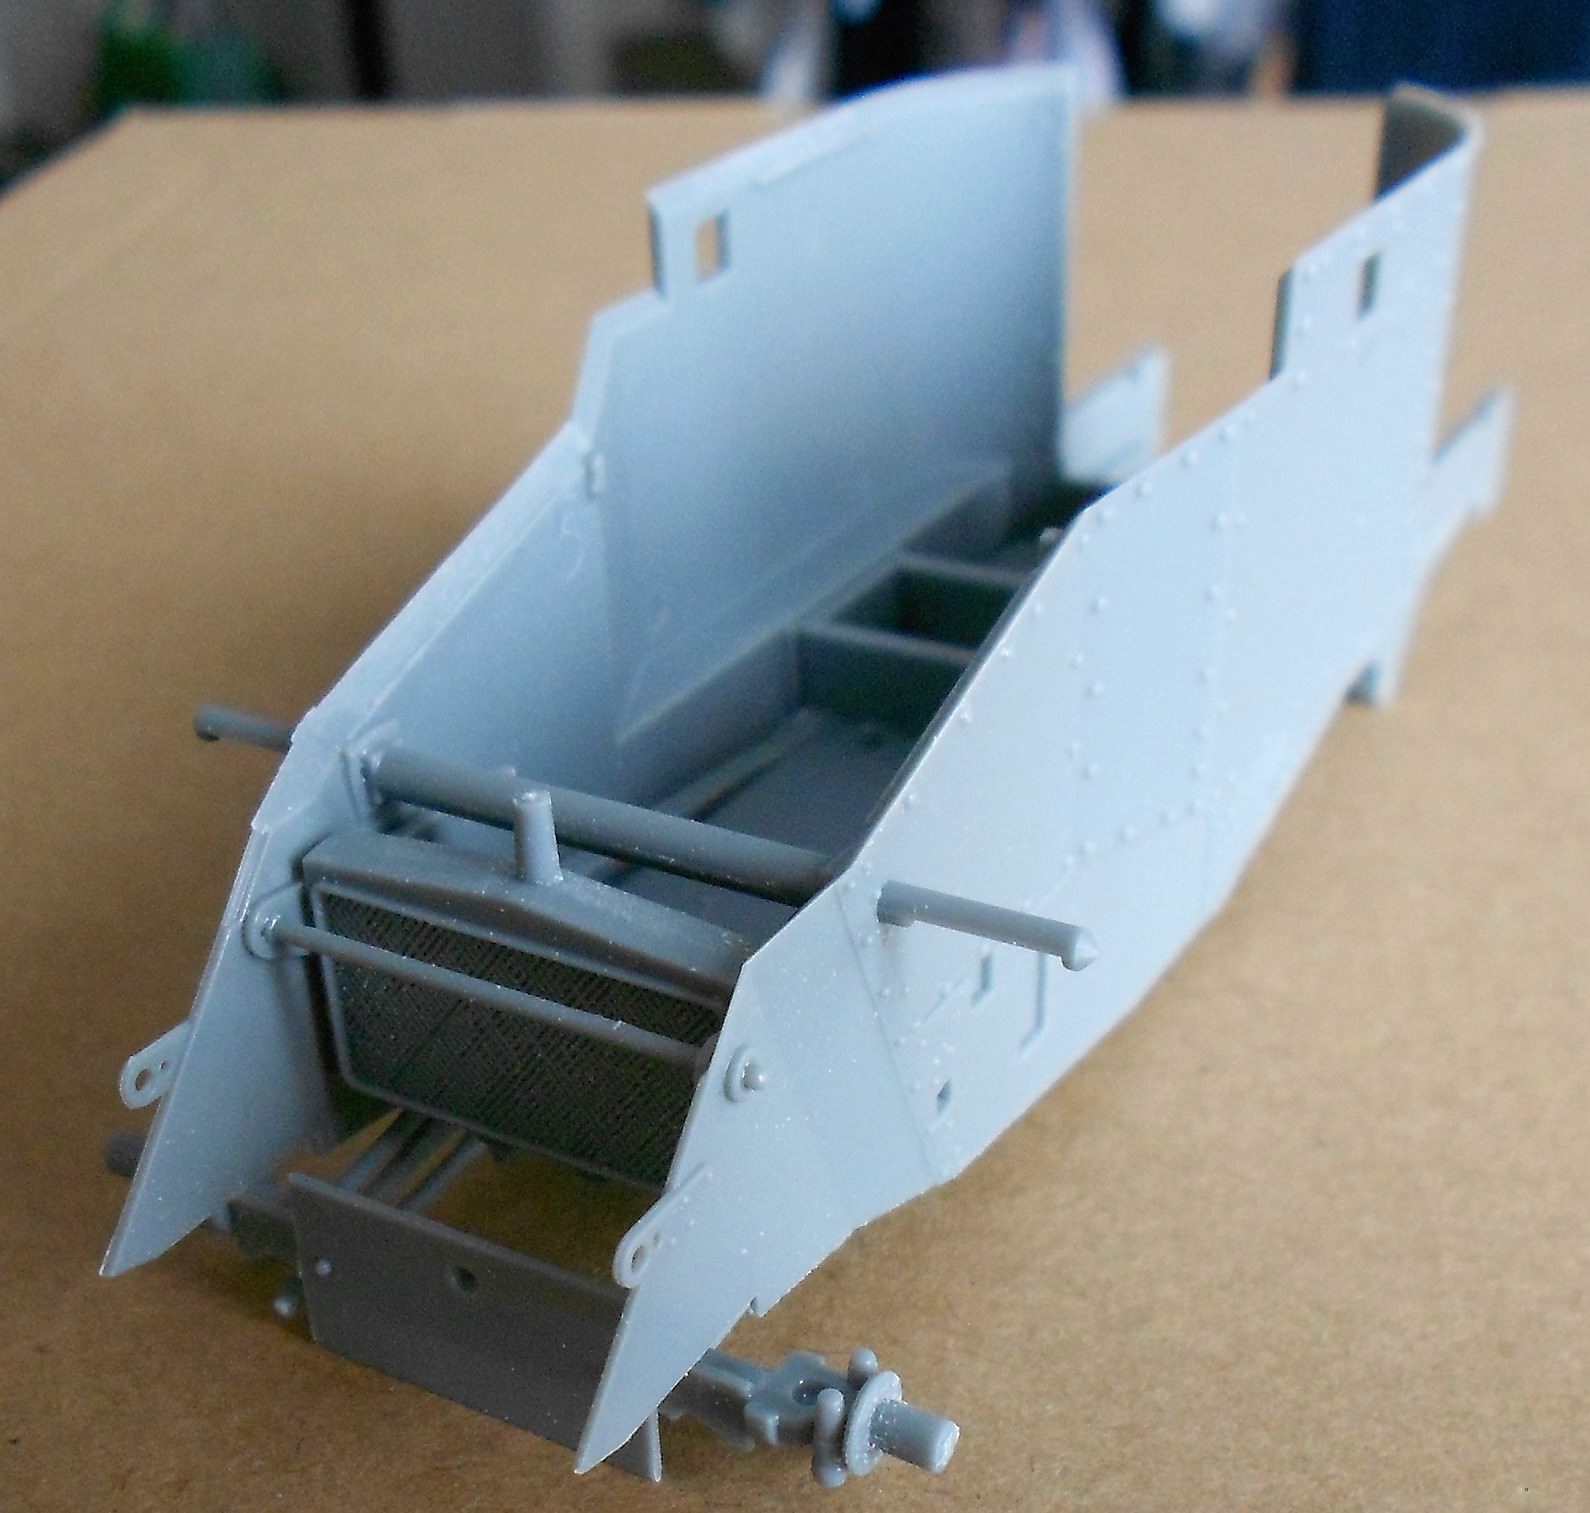
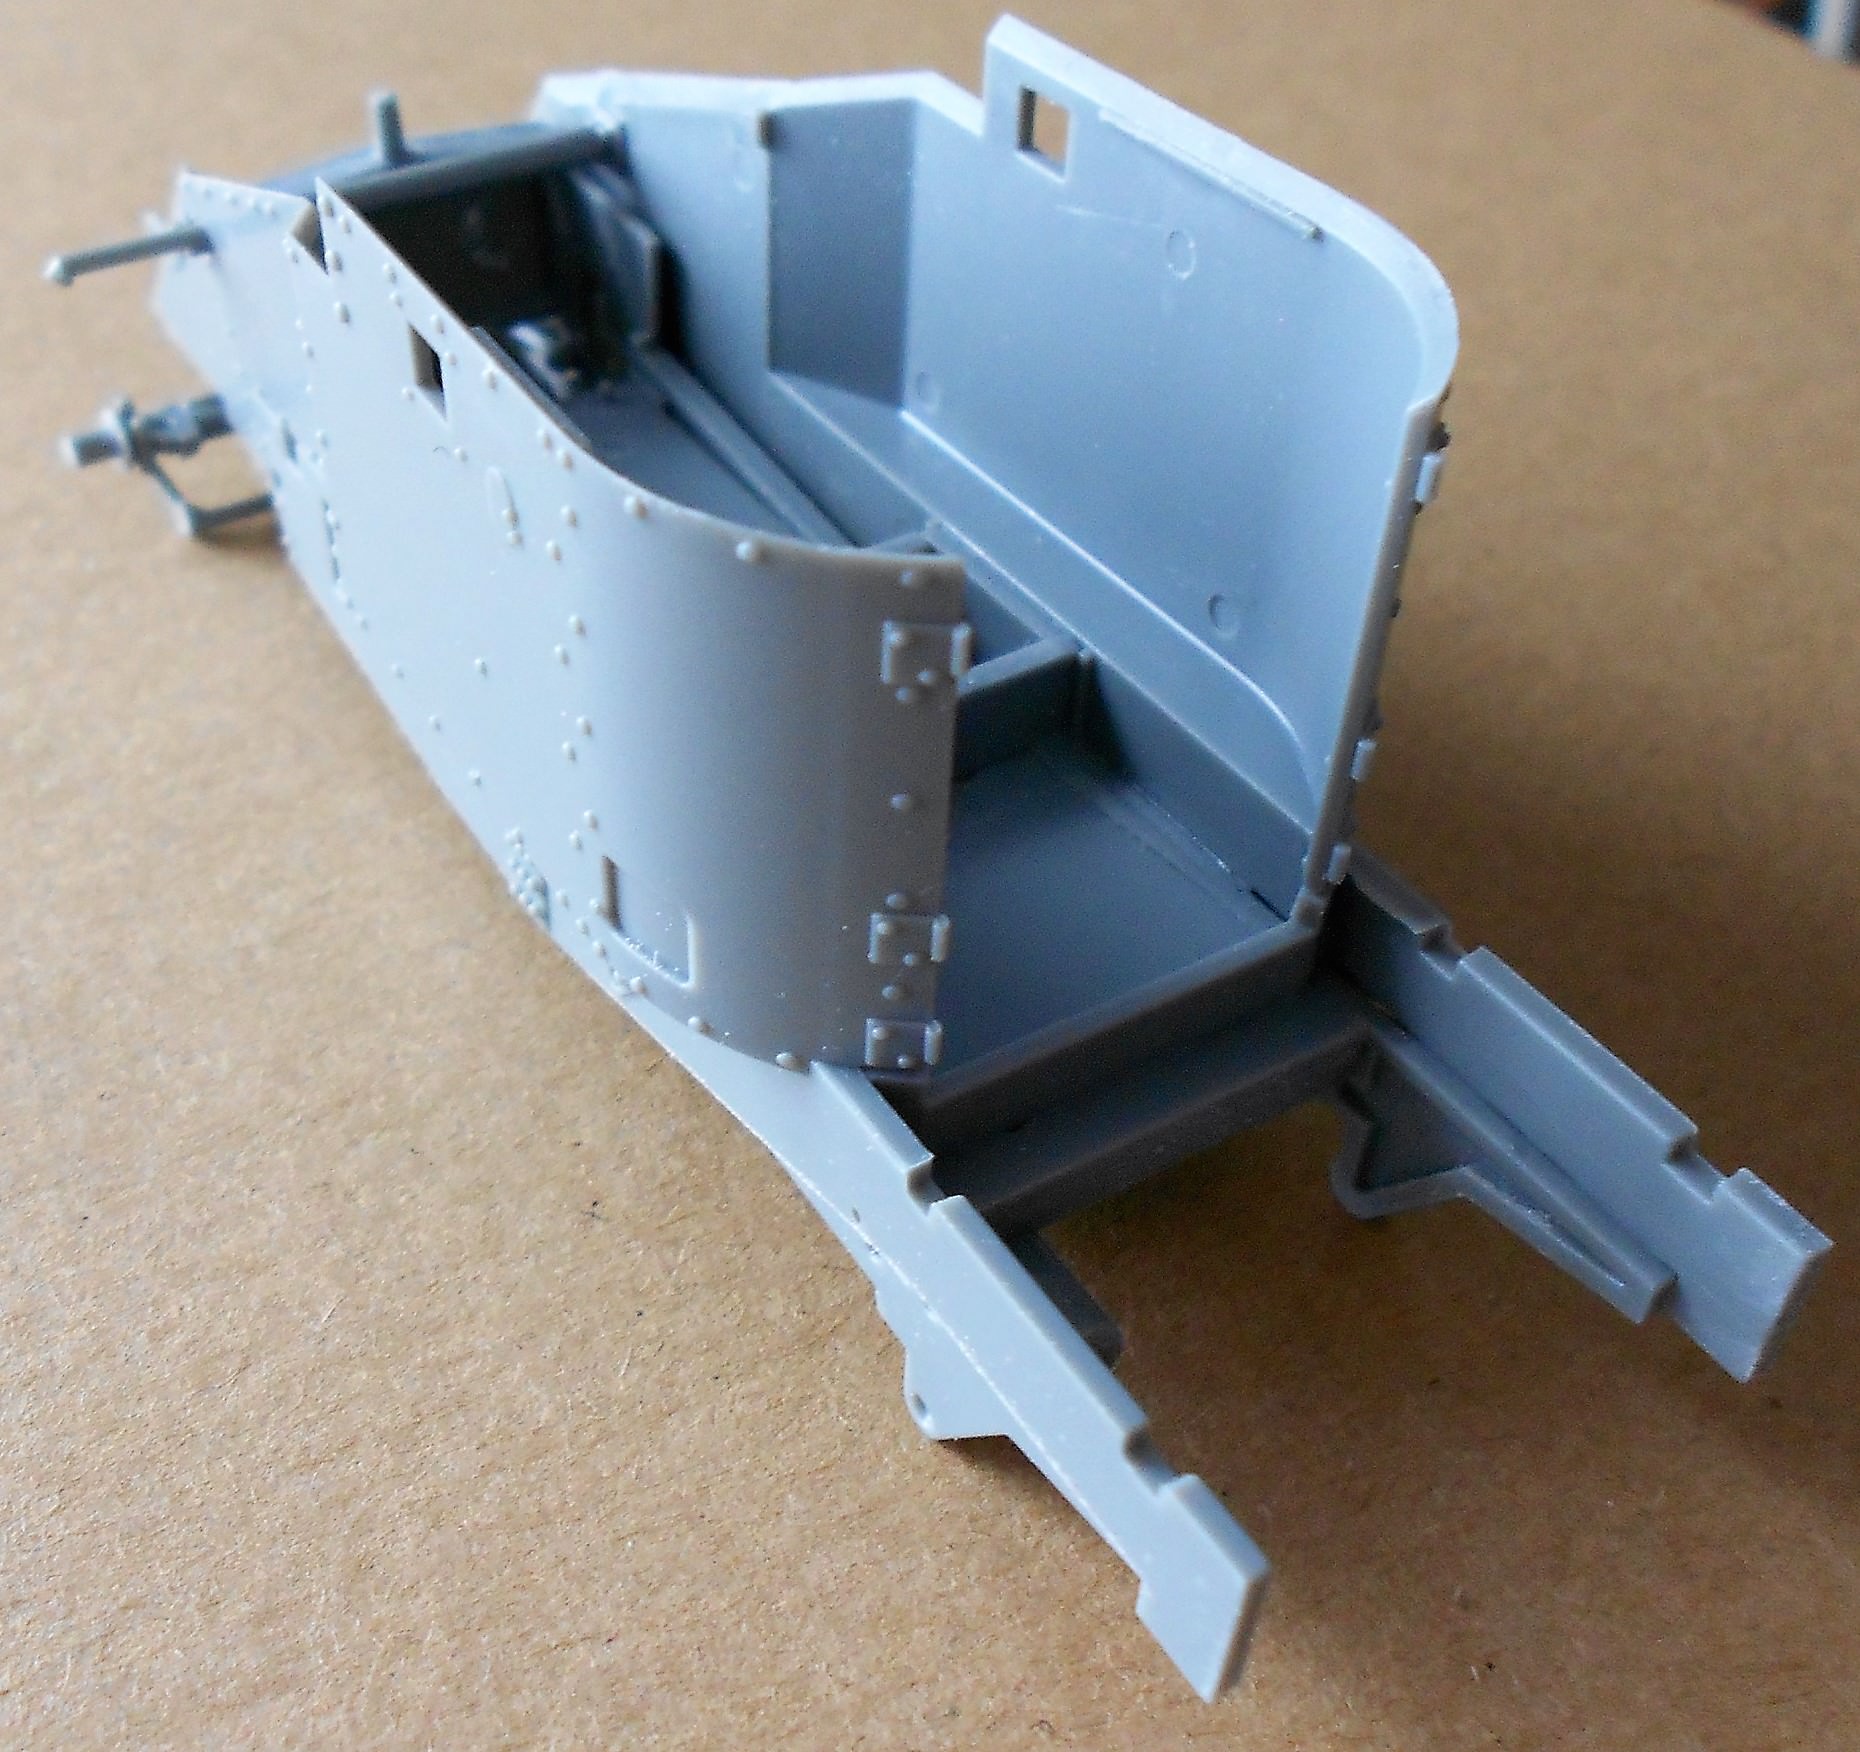
Some dry fitting is needed, a few of the locating tabs are a fraction longer than the depth of the corresponding hole and need to be filed down. On the whole I would refer to a Tom Cromwells signature field:
"Glue, or Glue Not - there is no Dry-Fit" - Yoda
More pictures later, the build has progressed since the last photos were taken

/ Robin
In memory of Al Superczynski:
"Build what YOU want, the way YOU want to....
and the critics will flame you every time"
Klaus-Adler
Campaigns Administrator Scotland, United Kingdom
Joined: June 08, 2015
KitMaker: 1,505 posts
Armorama: 840 posts
Posted: Tuesday, February 20, 2018 - 08:53 PM UTC
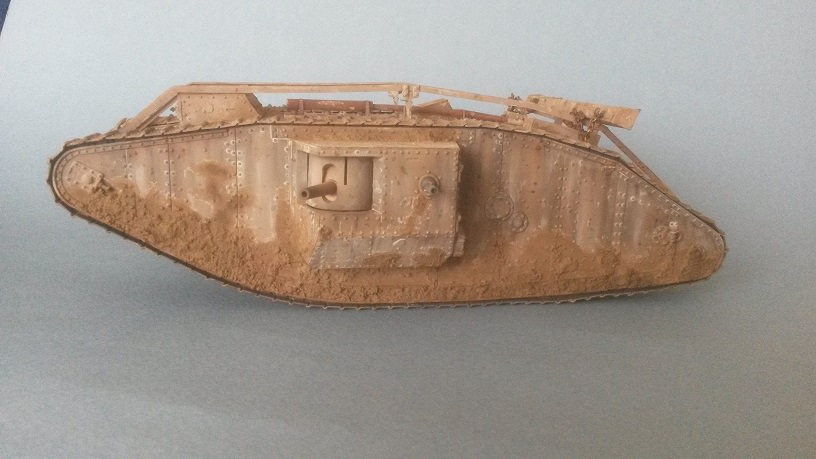
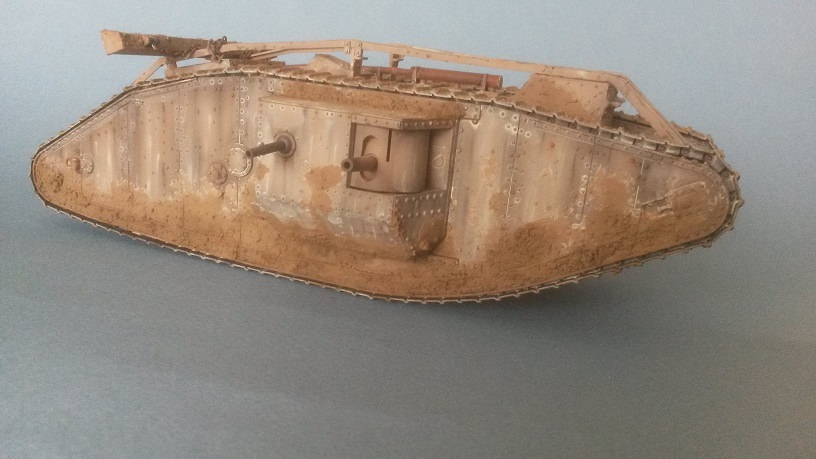
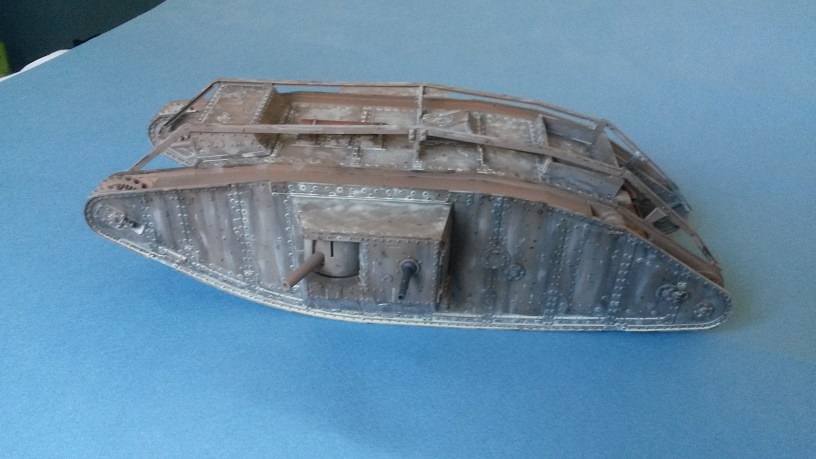
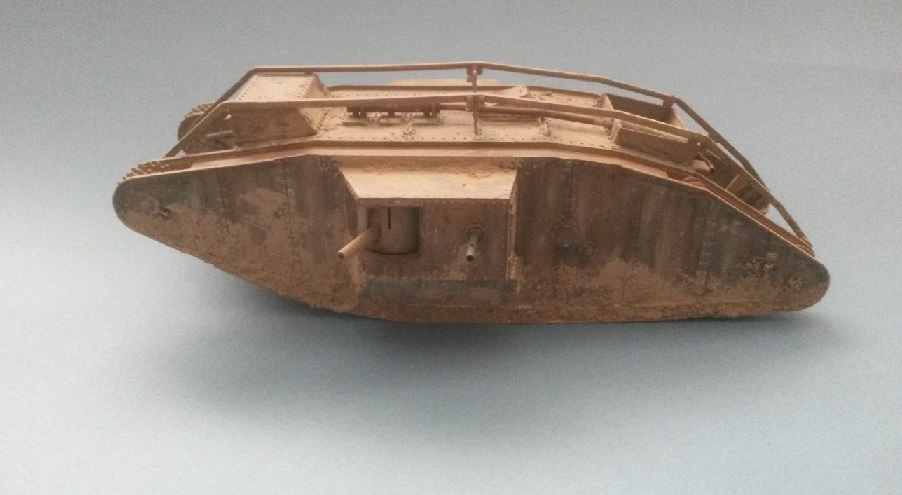
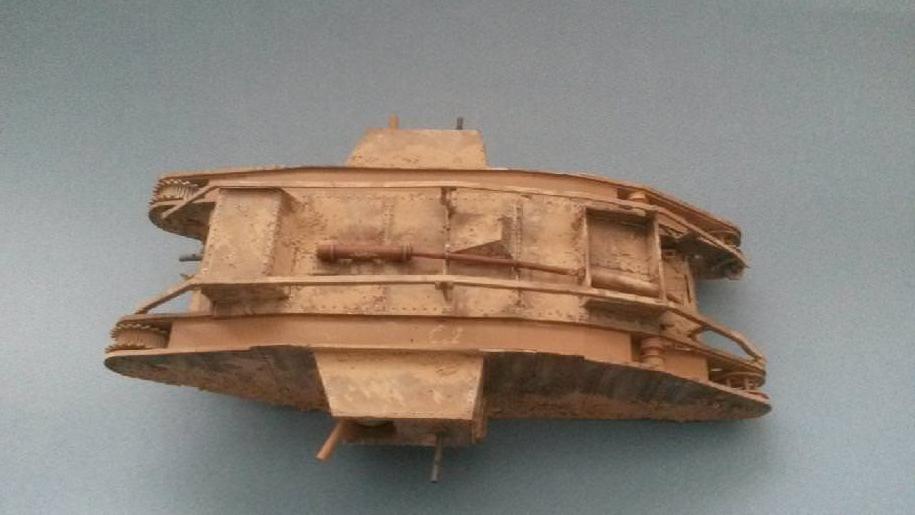
well here i am again posting an update regarding my tamiya WW1 British tank.
as you can see the weathering process is just about finished, i still need to add the actual mud to the vehicle and the tracks which are not in the pictures, thoughts and opinions welcomed.
Uusimaa, Finland
Joined: October 01, 2016
KitMaker: 514 posts
Armorama: 171 posts
Posted: Monday, March 12, 2018 - 01:20 AM UTC
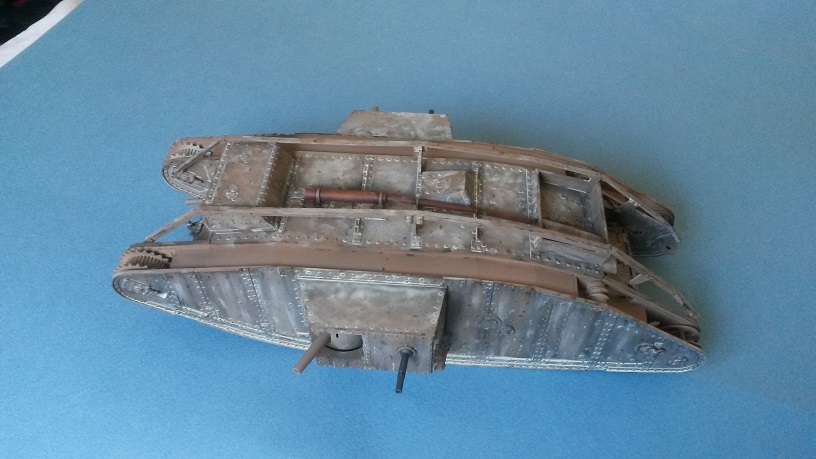
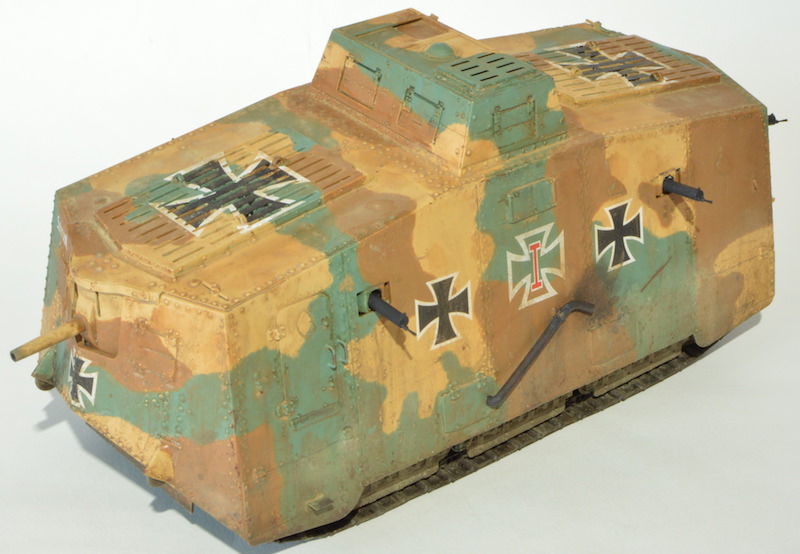
Solution for the inverted MGs was Aber's barrel set and needle nose pliers (for a moment I felt like a dentist). This also simplifies painting.
Next: decals and weathering.
Uusimaa, Finland
Joined: October 01, 2016
KitMaker: 514 posts
Armorama: 171 posts
Posted: Sunday, March 25, 2018 - 09:59 PM UTC
Almost done:
MG barrels and bit more weathering to do.
Klaus-Adler
Campaigns Administrator Scotland, United Kingdom
Joined: June 08, 2015
KitMaker: 1,505 posts
Armorama: 840 posts
Posted: Tuesday, March 27, 2018 - 07:13 PM UTC
Hi all,
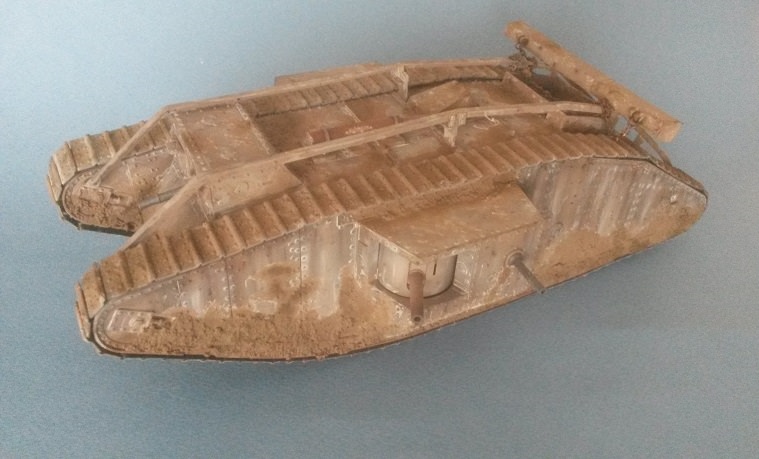
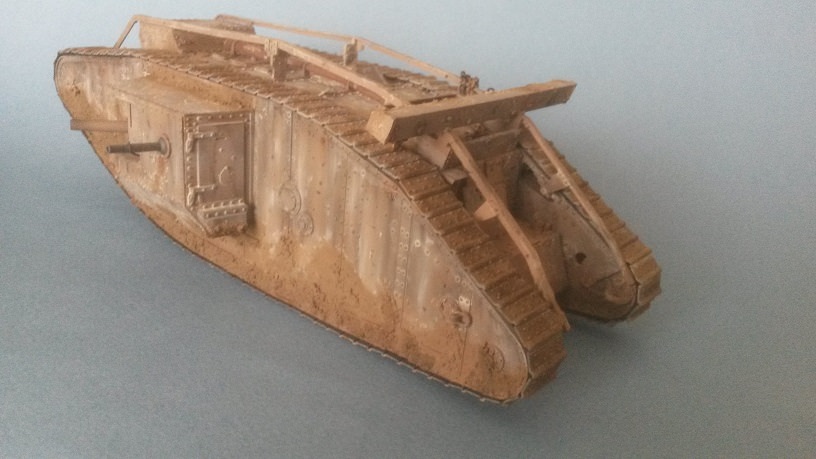
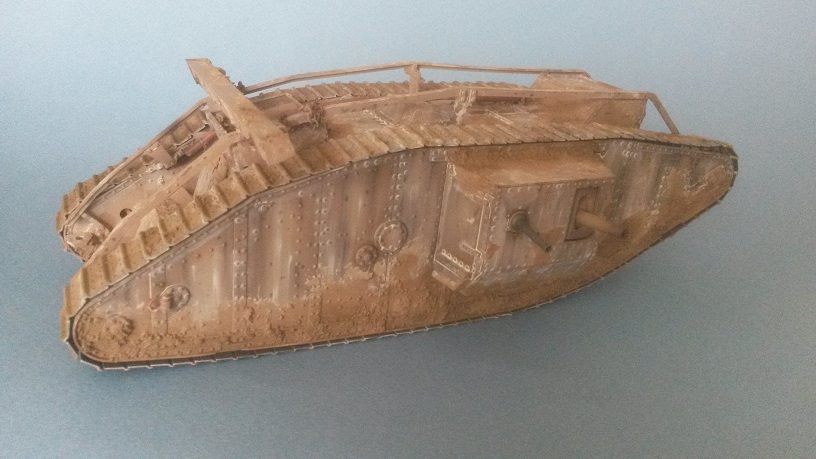
well i'm the home stretch now as i have added the mud although i have had a small set back.
I created my own mud effects using perfect putty which i mixed with water and added some tamiya flat earth as well as a few drops of matt black. then i added some soil i had collected from the garden, it mixed well and i added it to the kit using an old brush and it looked great, the wet looking mud was great and then it dried out and ended up looking like dry mud which is what you see in the picturse below, which means i will have to go over it with the flat earth paint again to get the desired effect.
Uusimaa, Finland
Joined: October 01, 2016
KitMaker: 514 posts
Armorama: 171 posts
Posted: Friday, March 30, 2018 - 05:31 PM UTC
And this is done:
Two more pictures are in
campaign gallery.
Klaus-Adler
Campaigns Administrator Scotland, United Kingdom
Joined: June 08, 2015
KitMaker: 1,505 posts
Armorama: 840 posts
Posted: Sunday, April 01, 2018 - 01:09 AM UTC
Western Australia, Australia
Joined: March 21, 2016
KitMaker: 247 posts
Armorama: 126 posts
Posted: Monday, April 02, 2018 - 10:35 AM UTC
Nice builds going on.
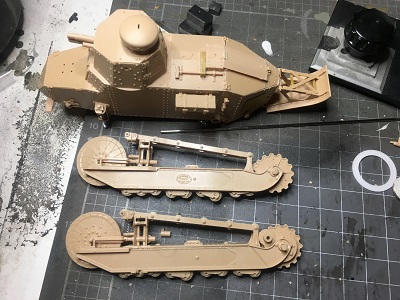
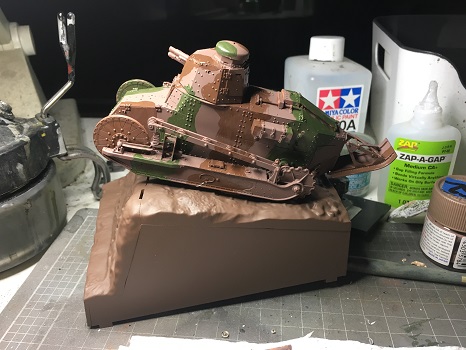
Here is my update on my FT-17
Removed by original poster on 04/04/18 - 04:42:01 (GMT).
Alberta, Canada
Joined: February 10, 2008
KitMaker: 221 posts
Armorama: 217 posts
Posted: Tuesday, April 03, 2018 - 09:42 AM UTC
Okay here is another quick update. Just out of the paint booth I have post shaded all the panel lines with Tamiya NATO black.

Then I hit it with MIG Ammo British moss green.


Cheers

Todd
http://www.mvpa.org/
"Live, So That You May Live Forever".
MichaelSatin
Campaigns Administrator Colorado, United States
Joined: January 19, 2008
KitMaker: 3,909 posts
Armorama: 510 posts
Posted: Tuesday, April 03, 2018 - 04:06 PM UTC
Great work going on here. Wish I could say the same for my Mark IV, but I'm stalled out right now. Hopefully I'll get my mojo back in time.
Michael
On the bench:
Sorta depends on your definition of "on the bench"...
Western Australia, Australia
Joined: March 21, 2016
KitMaker: 247 posts
Armorama: 126 posts
Posted: Sunday, April 08, 2018 - 04:35 AM UTC
Some very nice builds indeed.
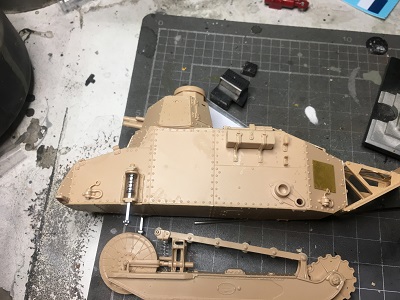
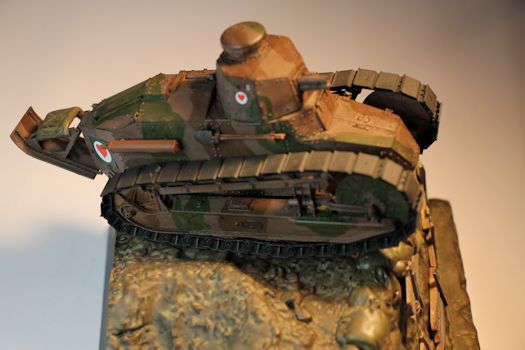
Here is a bit more progress on my FT-17
Alberta, Canada
Joined: February 10, 2008
KitMaker: 221 posts
Armorama: 217 posts
Posted: Tuesday, April 10, 2018 - 10:46 PM UTC
Very nice camouflage on that FT-17 Linus.
Okay time for another update on my Mk V.
So it was time to get some paint and weathering effects on the tracks. First I loaded the airbrush with Vallejo Model color natural steel and let that dry for forty-eight hours. Then I sprayed on a layer of MIG chipping solution and finally a coat of Vallejo Panzer Aces track color. After the paint dried I took some water a toothbrush and a bit of elbow grease and started to scrub off the top layer of paint. This is the first time I have used this technique and I am very happy with the result.


After I was satisfied with the tracks I moved onto the final step of paint for the tank and the markings. I loaded up my airbrush with MIG moss green once again and added a couple of drops of MIG white and yellow to lighten it up a shade or two. I then started in the middle of each panel and in the immortal words of Bob Ross I made happy little clouds with the lighter moss green. It is subtle and I dont know if you can see it very well in the picture but Im quite happy with the way it turned out. Then I applied all the markings (all the numbers are from Archer Fine Transfers) and rusted up the exhaust system. Now it is ready for a gloss coat and the rest of the weathering.


Until next time.
Cheers
Todd
http://www.mvpa.org/
"Live, So That You May Live Forever".
Western Australia, Australia
Joined: March 21, 2016
KitMaker: 247 posts
Armorama: 126 posts
Posted: Wednesday, April 11, 2018 - 07:04 AM UTC
That Mk V is looking sharp Todd.
My completed FT-17

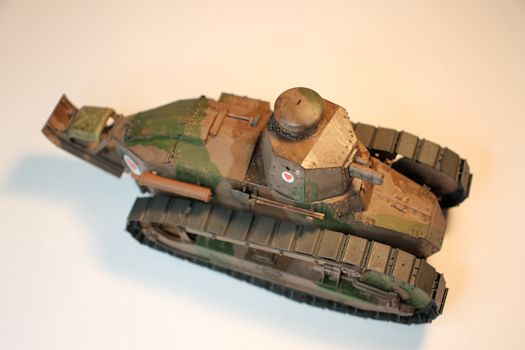
Removed by original poster on 04/13/18 - 14:23:05 (GMT).
Alberta, Canada
Joined: February 10, 2008
KitMaker: 221 posts
Armorama: 217 posts
Posted: Thursday, April 12, 2018 - 07:30 PM UTC
Great work Linus.
Thats some nice looking cammo. Congratulations on crossing the finish line.

I think I might have to get me a FT-17 now.

Cheers
Todd
http://www.mvpa.org/
"Live, So That You May Live Forever".
Western Australia, Australia
Joined: March 21, 2016
KitMaker: 247 posts
Armorama: 126 posts
Posted: Friday, April 13, 2018 - 06:42 AM UTC
Thanks Todd
It was a fun kit to do. I airbrushed the base coat but hand painted the rest.
Alberta, Canada
Joined: February 10, 2008
KitMaker: 221 posts
Armorama: 217 posts
Posted: Friday, April 13, 2018 - 06:18 PM UTC
Hand painted wow!

I acutely thought you might have used a putty method with the airbrush. Very impressive Linus.
Cheers
Todd
http://www.mvpa.org/
"Live, So That You May Live Forever".
TimReynaga
Associate Editor California, United States
Joined: May 03, 2006
KitMaker: 2,500 posts
Armorama: 297 posts
Posted: Sunday, May 06, 2018 - 05:25 PM UTC
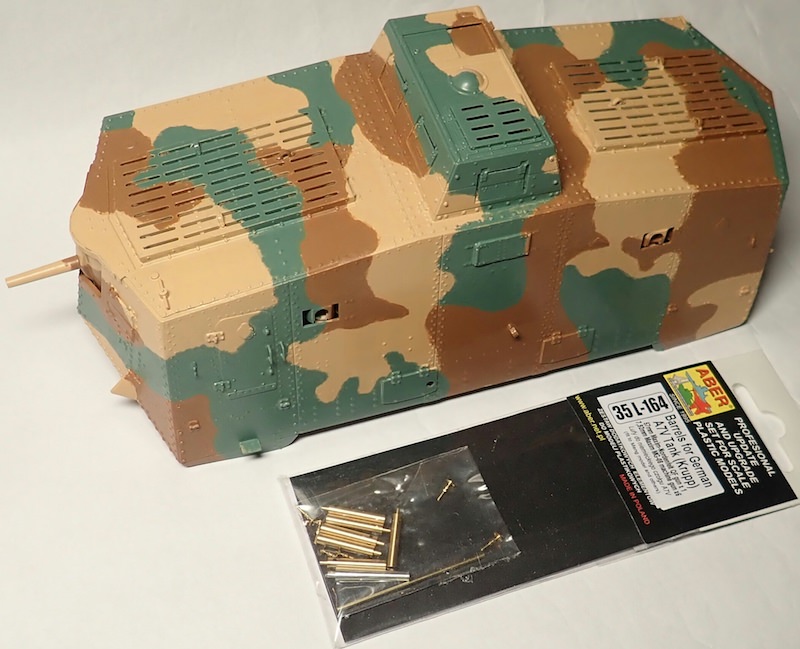
Im in for a late start with a pair of Imperial German Army
A7V tanks in 1/100 scale!

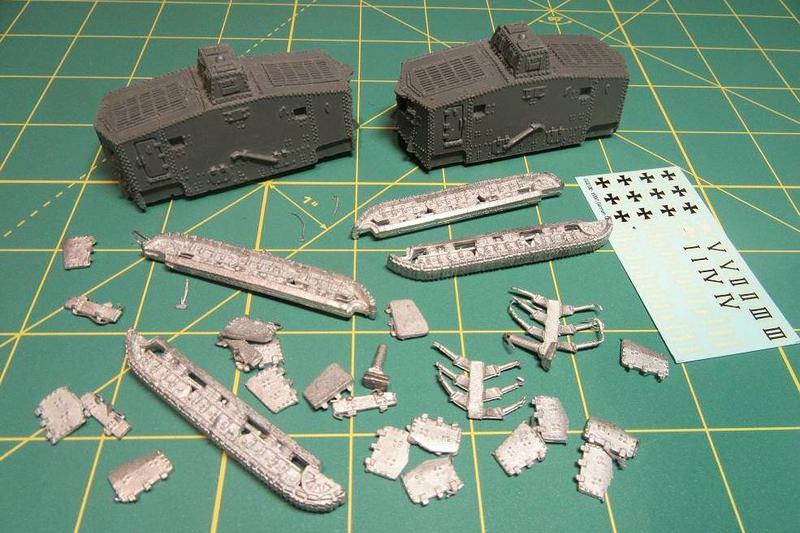
With the campaign end date of June 1 I have only three weeks, but these are small builds...
TimReynaga
Associate Editor California, United States
Joined: May 03, 2006
KitMaker: 2,500 posts
Armorama: 297 posts
Posted: Monday, May 07, 2018 - 09:37 AM UTC
These little resin and metal wargaming pieces are basic but attractive, and they assemble rapidly.
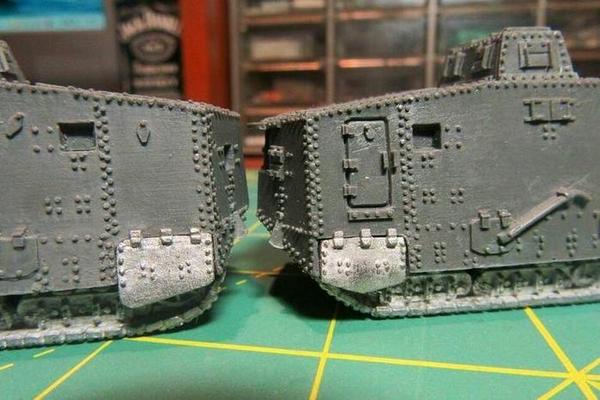
The set even offers the choice of two types of mudguards.
TimReynaga
Associate Editor California, United States
Joined: May 03, 2006
KitMaker: 2,500 posts
Armorama: 297 posts
Posted: Tuesday, May 08, 2018 - 06:47 PM UTC
The 57mm guns are a little chunky, but with some careful cleanup, theyll do.
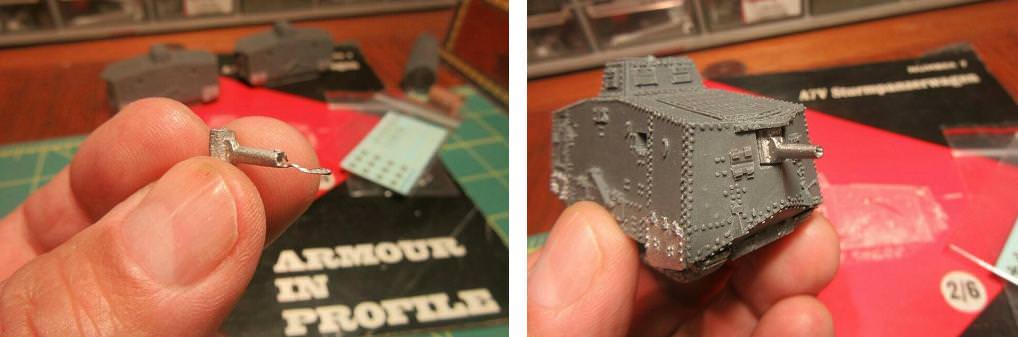
Im no fan of white metal kit parts...
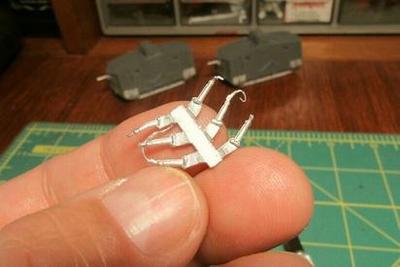
but I guess they do help keep costs down for limited run kits such as these.
TimReynaga
Associate Editor California, United States
Joined: May 03, 2006
KitMaker: 2,500 posts
Armorama: 297 posts
Posted: Thursday, May 10, 2018 - 09:12 PM UTC
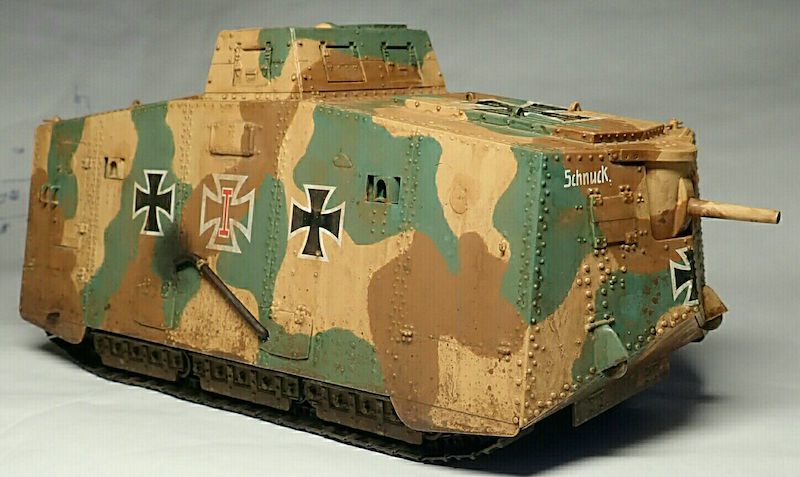
The tiny monsters are assembled and ready for paint!
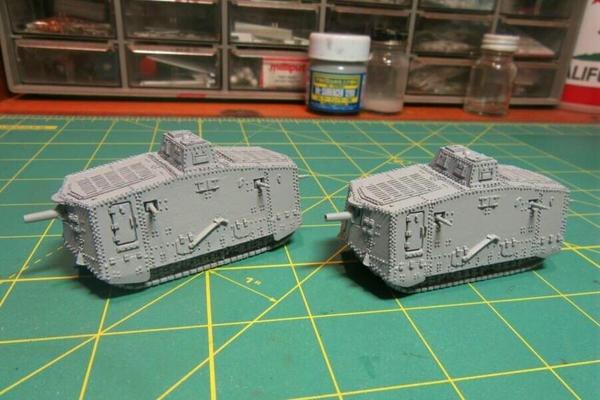
I think for variety Ill do one in Feldgrau and one in three-color camouflage.