Alabama, United States
Joined: September 22, 2008
KitMaker: 476 posts
Armorama: 447 posts
Posted: Tuesday, July 17, 2018 - 03:28 AM UTC
Västra Götaland, Sweden
Joined: May 29, 2018
KitMaker: 397 posts
Armorama: 388 posts
Posted: Tuesday, July 17, 2018 - 09:06 PM UTC
Hi everybody. I am in.

Vilnius, Lithuania
Joined: April 12, 2017
KitMaker: 196 posts
Armorama: 196 posts
Posted: Thursday, July 26, 2018 - 07:24 PM UTC
Seine-Saint-Denis, France
Joined: July 26, 2018
KitMaker: 1 posts
Armorama: 1 posts
Posted: Thursday, July 26, 2018 - 09:19 PM UTC
this is for k_mero4
Hi !!! you have done a great job with your camo for a first shot ! and the schürzen camo is absolutely great.... for that, and those colours, you can locate your sturmgeschutz on kursk Area (summer 1943) or in France,Normandy, (summer 44)
I particulary appreciate the effect on the schurzen... very nice job and effect !


#453
Texas, United States
Joined: August 28, 2016
KitMaker: 1,925 posts
Armorama: 601 posts
Posted: Thursday, July 26, 2018 - 11:36 PM UTC
Darius,
Very nice work on that RSO. The camo work is mighty nice. She should will look great the brass shells casings and extras.
Mark


#152
Texas, United States
Joined: December 07, 2002
KitMaker: 487 posts
Armorama: 441 posts
Posted: Saturday, July 28, 2018 - 01:29 PM UTC
Here are my finished photos of the Sd Kfz 231 Schwerer Panzerspahwagen (8-Rad)
The same photos are in the campaign Gallery
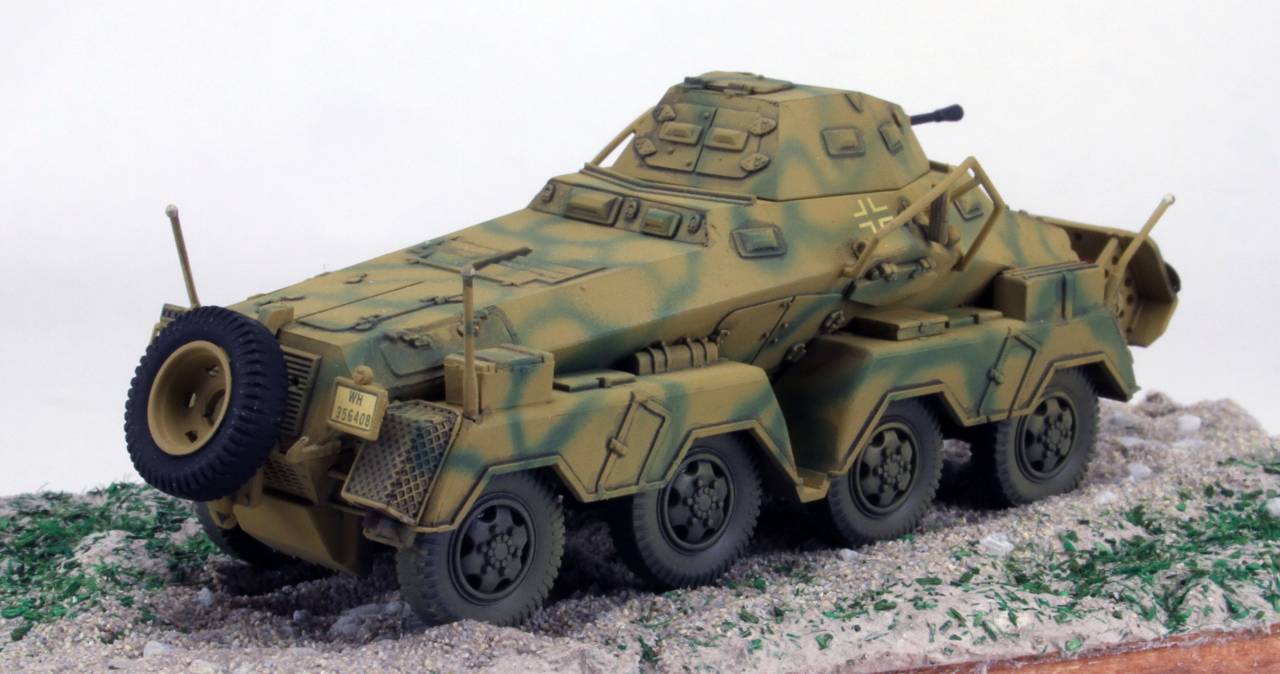
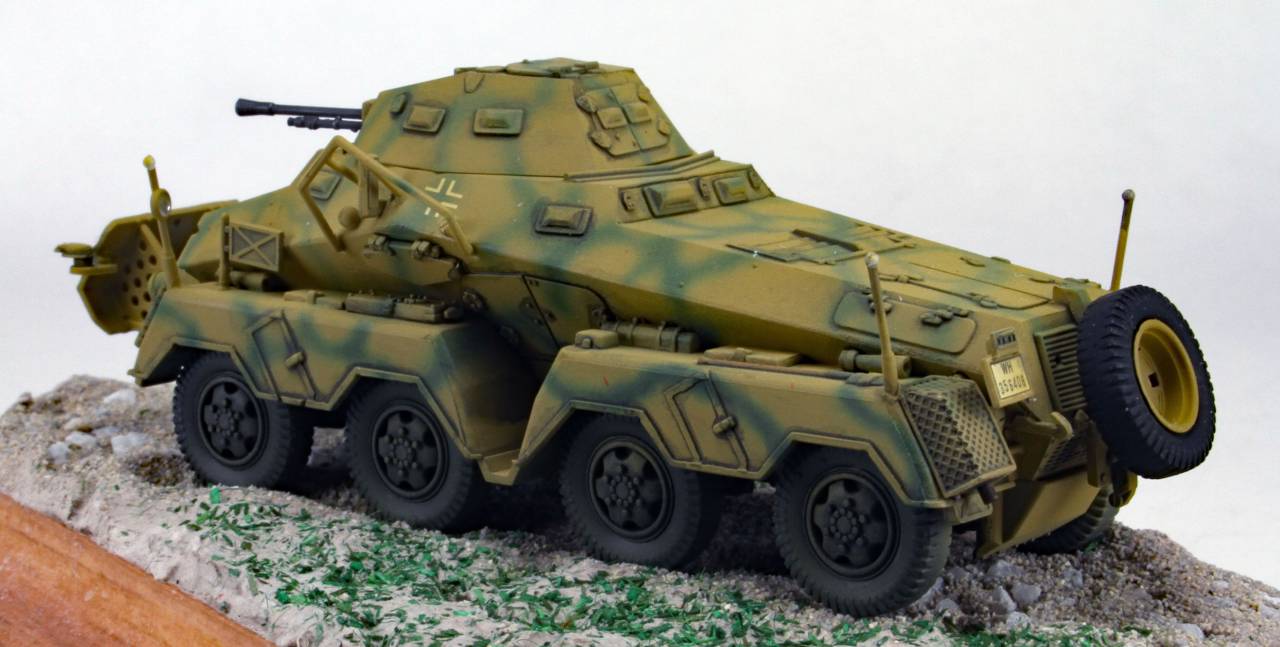
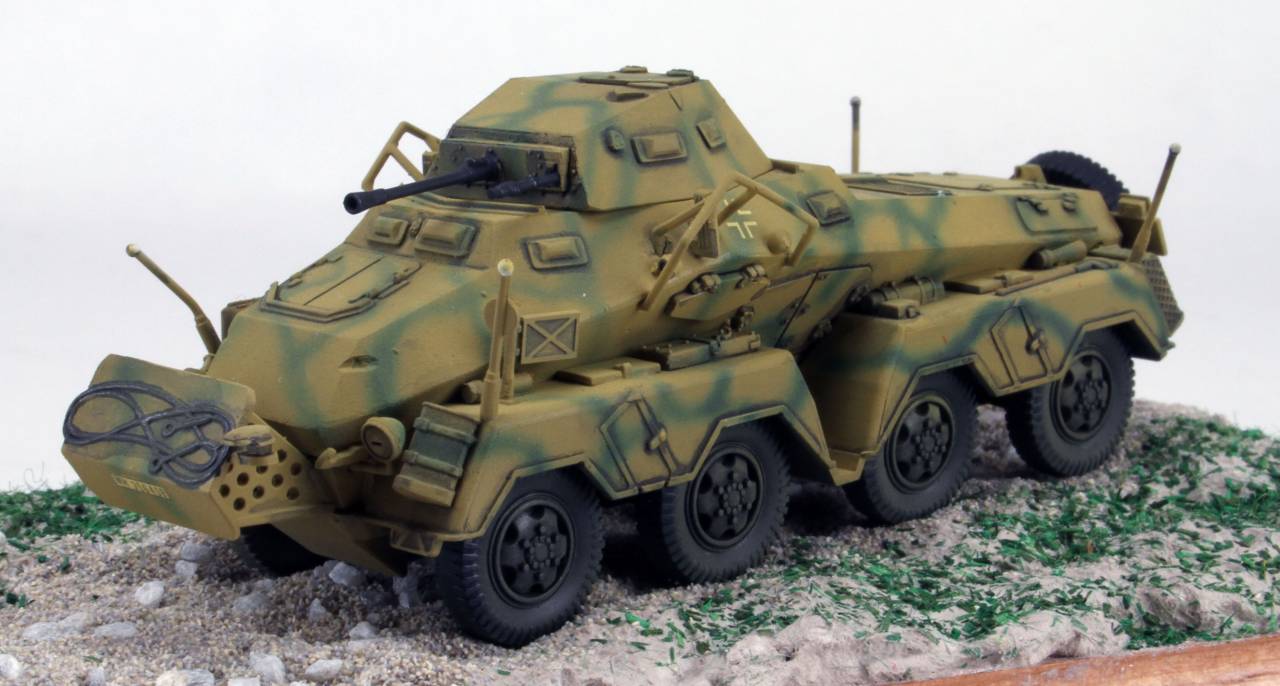
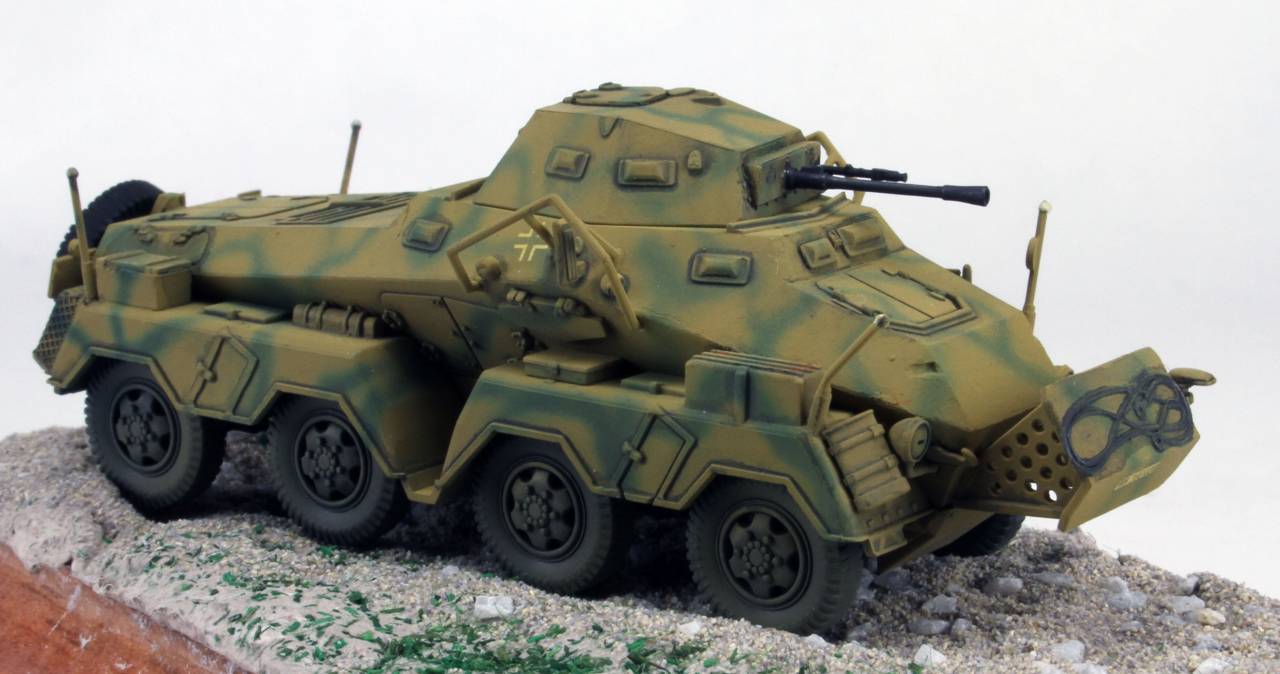
There are a lot of great models in this campaign, I can't wait for the Dragon 2019 Campaign.
Tom
Long time modeller. Starting when I was a teenager, then I found out about girls and college and work and kids. But now that I have one girl, no school, no work and the kids are grown, I'm back to full time modelling. My prime area of interest is armor, b
Klaus-Adler
 Campaigns Administrator
Scotland, United Kingdom
Joined: June 08, 2015
KitMaker: 1,505 posts
Armorama: 840 posts
Posted: Sunday, July 29, 2018 - 02:10 AM UTC
Well i finally managed to find some time to get back to work on this kit and decipher the instructions regarding the guns!
so I managed to build up the guns into their little house whilst watching combat dealers and here is the result.


#453
Texas, United States
Joined: August 28, 2016
KitMaker: 1,925 posts
Armorama: 601 posts
Posted: Sunday, July 29, 2018 - 04:39 AM UTC
Tom,
Really nice work on your 231. I am really digging on the camo work.
Mark

Västra Götaland, Sweden
Joined: May 29, 2018
KitMaker: 397 posts
Armorama: 388 posts
Posted: Sunday, July 29, 2018 - 10:44 AM UTC
Progress update

Everything is in place, ready for painting. Now I wait for Eduard Flak 30 shield.

#453
Texas, United States
Joined: August 28, 2016
KitMaker: 1,925 posts
Armorama: 601 posts
Posted: Sunday, July 29, 2018 - 11:34 AM UTC
Bogicevic,
That's a lot of vehicle. Looks like a nice clean build. Looking forward to final.
Mark

Georgia, United States
Joined: July 26, 2013
KitMaker: 2,272 posts
Armorama: 1,860 posts
Posted: Sunday, July 29, 2018 - 04:35 PM UTC
I'm in with this kit:


The DS wheel well inserts were coated with an oily residue inside the zip-loc baggy, and upon removal one broke, as you can see. The DS is now brittle; not the normal flexible vinyl. Like something you'd find in one of those stores in Manhattan between Houston and Canal. Anyway...

...haven't looked at it yet to see what I plan to do about it but it should be no big deal.
On the Campaign Trail:
Tank Destroyer 2020
Vilnius, Lithuania
Joined: April 12, 2017
KitMaker: 196 posts
Armorama: 196 posts
Posted: Sunday, July 29, 2018 - 06:46 PM UTC
Thank you Mark.
Tom, great looking 8 wheeler.
Virginia, United States
Joined: July 05, 2004
KitMaker: 769 posts
Armorama: 461 posts
Posted: Monday, July 30, 2018 - 11:58 PM UTC
Quick update on my Elefant: Got the hull and suspension finished, now to throw some zimm on it. I like to pre-paint the areas that will be hard to reach after assembly, like suspension and mantlet.


I'm using Cavalier brand zimm, and even though it says it's made for this model number, it's about 1/8 inch too short on every piece. Can I heat it up in hot water and stretch it, or would it be better just to cut it and fill in the places with textured putty?
Jesse
Time is a great teacher. Unfortunately, it kills all it's students.
Klaus-Adler
 Campaigns Administrator
Scotland, United Kingdom
Joined: June 08, 2015
KitMaker: 1,505 posts
Armorama: 840 posts
Posted: Wednesday, August 01, 2018 - 03:39 AM UTC
well after some trimming and cutting some areas of the gun assembly i finally managed to get it located and glued into position in the turret.

Removed by original poster on 08/06/18 - 01:20:12 (GMT).
California, United States
Joined: August 20, 2004
KitMaker: 16 posts
Armorama: 14 posts
Posted: Sunday, August 05, 2018 - 01:32 PM UTC
Guys I am Trying to Upload my Progress pics ,How do you upload them here on the thread ? Can anyone Help ?
Connecticut, United States
Joined: November 02, 2003
KitMaker: 984 posts
Armorama: 846 posts
Posted: Sunday, August 05, 2018 - 02:27 PM UTC
Quoted Text
Guys I am Trying to Upload my Progress pics ,How do you upload them here on the thread ? Can anyone Help ?
Are you using imgur or some other web based photo hosting?
California, United States
Joined: August 20, 2004
KitMaker: 16 posts
Armorama: 14 posts
Posted: Sunday, August 05, 2018 - 05:44 PM UTC
Not using anything there is no upload option ,when I click (upload Photo's ) it says Kitmaker photos are not allowed ,I am trying to upload pics from my computer not Kitmaker
Klaus-Adler
 Campaigns Administrator
Scotland, United Kingdom
Joined: June 08, 2015
KitMaker: 1,505 posts
Armorama: 840 posts
Posted: Sunday, August 05, 2018 - 11:10 PM UTC
ok so the assembly part is pretty much over and now it's time for a primer coat to help spot the imperfections

California, United States
Joined: August 20, 2004
KitMaker: 16 posts
Armorama: 14 posts
Posted: Monday, August 06, 2018 - 07:00 PM UTC

#453
Texas, United States
Joined: August 28, 2016
KitMaker: 1,925 posts
Armorama: 601 posts
Posted: Tuesday, August 07, 2018 - 12:07 AM UTC
Jose,
Looks like you are off to a fine start.
Mark

Vilnius, Lithuania
Joined: April 12, 2017
KitMaker: 196 posts
Armorama: 196 posts
Posted: Tuesday, August 07, 2018 - 07:15 PM UTC
Finished:


Got to get crew now, and make display base. Im thinking of showing it reversed into ambush position between some bushes. But that already new build

I enjoyed this build very much, nice, well detailed kit, with only minor issues (read usual dragon instructions

). My only nag is type of munition included with their Pak40 kits. The only types included are HEAT and HE rounds, with no hard hitting ones. Altho HEAT is anti armor round, i believe that the regular PzGr 39 should have been included too. Oh well, no one who will see it on my shelf digs that deep anyway.
California, United States
Joined: August 20, 2004
KitMaker: 16 posts
Armorama: 14 posts
Posted: Tuesday, August 14, 2018 - 02:41 PM UTC
Thank you it's actually finished you can see it in the campaign gallery
United States
Joined: August 28, 2015
KitMaker: 319 posts
Armorama: 308 posts
Posted: Friday, August 17, 2018 - 01:49 AM UTC
Klaus-Adler
 Campaigns Administrator
Scotland, United Kingdom
Joined: June 08, 2015
KitMaker: 1,505 posts
Armorama: 840 posts
Posted: Sunday, August 19, 2018 - 02:26 AM UTC
well after all the fun of sanding (yes that is sarcasm) i finally managed to get the rear area sorted out and i have coated the kit in standard car primer paint. (actually i coated it twice, first with grey and then a less pronounced white coating was applied before i then sprayed the whole kit with tamiya XF-78 Wooden deck-tan)







 I enjoyed this build very much, nice, well detailed kit, with only minor issues (read usual dragon instructions
  ). My only nag is type of munition included with their Pak40 kits. The only types included are HEAT and HE rounds, with no hard hitting ones. Altho HEAT is anti armor round, i believe that the regular PzGr 39 should have been included too. Oh well, no one who will see it on my shelf digs that deep anyway.


