England - South East, United Kingdom
Joined: March 01, 2010
KitMaker: 7,078 posts
Armorama: 248 posts
Posted: Monday, February 05, 2018 - 01:19 AM UTC
Thanks Mark,
I do get what you mean, still fiddling around with small stuff.
Anchor cables, some left overs from another kit.

The bridge, wash added to the ports & window, and the wood gratings.

Fitting the seaboat davits, they fit tidily between the gun platforms on the midships superstructure, hence it is test fitted to ensure the davits are in the correct place.

Construction of the davits done.

One thing I do like, the winches and cable reels for the davits are in the kit, not something I have to add.
More soon.
Cheers
Si

#456
Oklahoma, United States
Joined: September 22, 2016
KitMaker: 654 posts
Armorama: 638 posts
Posted: Monday, February 05, 2018 - 12:27 PM UTC
Quoted Text
Mark,
The dust did tone down the brightness of the base coat and camo. She will look awesome when those tracks are on.
Mark
Thanks. I'm still debating on doing a bit more weathering as I'm waiting for the tracks to arrive. Eventually, I'll give it a light coat of ultra matte varnish to knock back the rest of the shiny areas.

#453
Texas, United States
Joined: August 28, 2016
KitMaker: 1,925 posts
Armorama: 601 posts
Posted: Tuesday, February 06, 2018 - 07:04 AM UTC
SI,
Those cable reels look nice, are you going to add cable to reel? I found thin solder easy to wrap around them and looks good after painting.
Mark
Sofiya, Bulgaria
Joined: November 26, 2017
KitMaker: 393 posts
Armorama: 369 posts
Posted: Wednesday, February 07, 2018 - 12:58 AM UTC

#453
Texas, United States
Joined: August 28, 2016
KitMaker: 1,925 posts
Armorama: 601 posts
Posted: Wednesday, February 07, 2018 - 06:17 PM UTC
Kalin,
Nice progress, looks to be a very clean build so far.

#186
Texas, United States
Joined: May 24, 2006
KitMaker: 771 posts
Armorama: 750 posts
Posted: Wednesday, February 07, 2018 - 08:14 PM UTC
Mark, that Japanese tank looks really nice. I have one in the stash I need to get to. Happy with it so far?
England - South East, United Kingdom
Joined: March 01, 2010
KitMaker: 7,078 posts
Armorama: 248 posts
Posted: Friday, February 09, 2018 - 05:43 PM UTC
Quoted Text
SI,
Those cable reels look nice, are you going to add cable to reel? I found thin solder easy to wrap around them and looks good after painting.
Mark
Hi Mark,
I have to admit, the thought hadn't crossed my mind, good idea though, might do on the more exposed ones, those will be almost invisible under the gun platforms. Thanks for the tit though.
Cheers
Si
RobinNilsson
 TOS Moderator
Stockholm, Sweden
Joined: November 29, 2006
KitMaker: 6,693 posts
Armorama: 5,562 posts
Posted: Sunday, February 11, 2018 - 02:35 AM UTC
Time for my kick-off photo.
Dragon 6829, untouched, haven't even gotten around to bin the DS-tracks yet. I'll have to swap with the Magic-Tracks in some other Dragon box ....

/ Robin
In memory of Al Superczynski:
"Build what YOU want, the way YOU want to....
and the critics will flame you every time"
England - South East, United Kingdom
Joined: March 01, 2010
KitMaker: 7,078 posts
Armorama: 248 posts
Posted: Monday, February 12, 2018 - 02:54 AM UTC
A little bit of tinkering on Z39 over the weekend.
the lower section of the bridge and the fore funnel glued down.

The boats


The rafts, the kit parts.

The etched webbing on the eduard fret.

The first few fitted.

More soon.
Si

#453
Texas, United States
Joined: August 28, 2016
KitMaker: 1,925 posts
Armorama: 601 posts
Posted: Tuesday, February 13, 2018 - 05:23 AM UTC
Boats and life rafts, the fun stuff. Off to a nice start with them, it won't be soon before the ship really takes shape.
Philippines
Joined: October 27, 2013
KitMaker: 520 posts
Armorama: 488 posts
Posted: Tuesday, February 13, 2018 - 06:23 PM UTC
Hey folks. Joining in with an Initial Tiger I (#6600). Started this yesterday.

Removed by original poster on 02/14/18 - 13:32:36 (GMT).
Washington, United States
Joined: March 29, 2017
KitMaker: 157 posts
Armorama: 122 posts
Posted: Tuesday, February 13, 2018 - 06:35 PM UTC
Texas, United States
Joined: June 04, 2017
KitMaker: 503 posts
Armorama: 477 posts
Posted: Wednesday, February 14, 2018 - 01:09 PM UTC
ken are those the tracks that comes with the kit?
RobinNilsson
 TOS Moderator
Stockholm, Sweden
Joined: November 29, 2006
KitMaker: 6,693 posts
Armorama: 5,562 posts
Posted: Wednesday, February 14, 2018 - 06:01 PM UTC
Quoted Text
ken are those the tracks that comes with the kit?
Cookie Sewell wrote a review of this kit
http://www.missing-lynx.com/reviews/german/dml6613reviewcs_1.html and had the following to say about the contents:
"460 parts (326 in grey styrene, 106 etched brass, 23 clear styrene, 2 twisted steel wire, 2 DS plastic track runs, 1 turned aluminum barrel)"
I am 100 % certain that this:

is not DS-tracks

Looks more like Friul or some other metal tracks to me


/ Robin
In memory of Al Superczynski:
"Build what YOU want, the way YOU want to....
and the critics will flame you every time"
Washington, United States
Joined: March 29, 2017
KitMaker: 157 posts
Armorama: 122 posts
Posted: Wednesday, February 14, 2018 - 07:07 PM UTC
Hey guys, I'm using the MASTERCLUB MTL35153 - 1:35 VK4501(P) tracks on this build. It's Ferdinand tracks, but with every link having guide horns. The box art appears to show this track being used, but Dragon included DS elefant tracks instead. Since it's essentially a paper panzer, I decided to go with the VK4501 set to make it interesting. I'm mostly done with the build portion of the kit (including the tracks) and will post more pictures later tonight showing the end result.
Washington, United States
Joined: March 29, 2017
KitMaker: 157 posts
Armorama: 122 posts
Posted: Thursday, February 15, 2018 - 06:11 AM UTC
RB Models German antenna mount and 2 meter antenna.

Front view of the tank. The fenders are a little thick and I'm still debating on how much to thin them out. I wanted to keep it mostly OOB, so no crazy fender PE.

PE tool mounts that came with the kit. I could have gone with molded in mounts, but these will give it that extra pizazz. Also replaced the stiff kit wire with Eureka 0.9mm copper cable.

Decided the back sloped deck needed some spare tracks hung on it. The jack and jack block will be added after painting.

It's been a busy year so far for Dragon builds. All kits my wife bought me for Christmas.


#456
Oklahoma, United States
Joined: September 22, 2016
KitMaker: 654 posts
Armorama: 638 posts
Posted: Friday, February 16, 2018 - 03:02 PM UTC
My package finally arrived. I choose this version of tracks as they are similar to the ones on a pic of the Hornisse in Panzer Tracts 7-3.
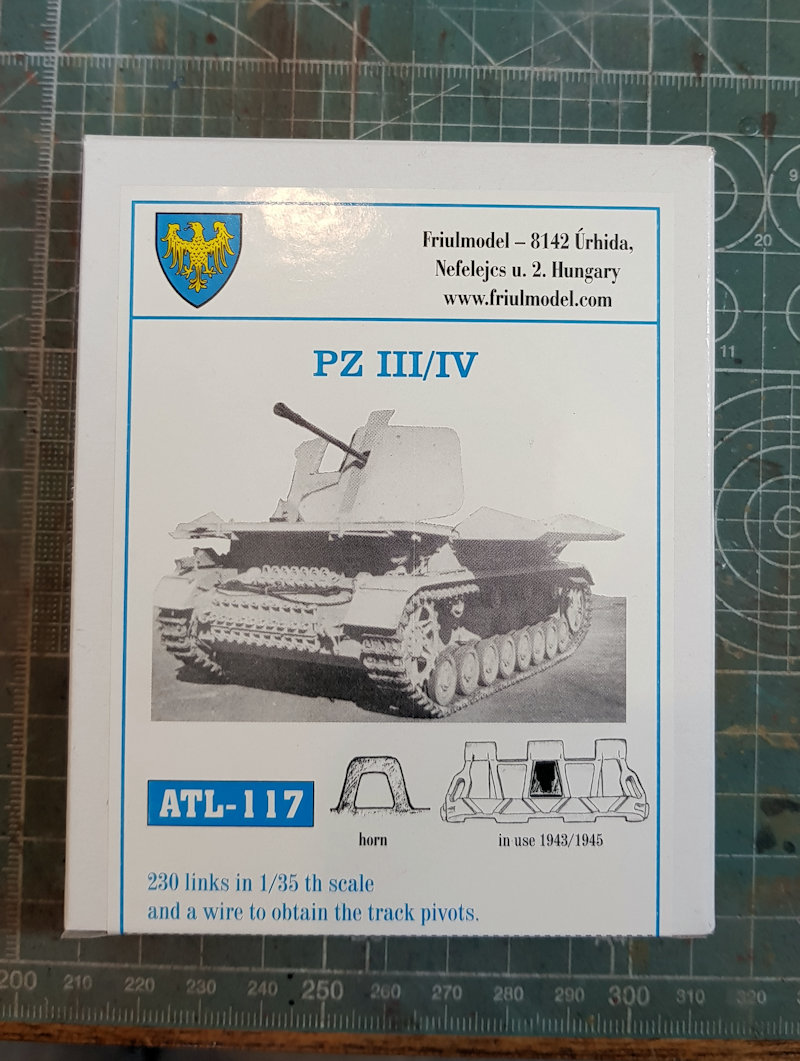
Need to finish my 150- campaign build (10 days left) then I'll get back to this one. Will start on the tracks this week.
Philippines
Joined: October 27, 2013
KitMaker: 520 posts
Armorama: 488 posts
Posted: Saturday, February 17, 2018 - 03:24 PM UTC
This is where I am at right now. The road wheels took quite long to take off the sprue and clean up. Thankfully, I had several history podcasts on the mp3 when doing this.


England - South East, United Kingdom
Joined: March 01, 2010
KitMaker: 7,078 posts
Armorama: 248 posts
Posted: Sunday, February 18, 2018 - 01:58 AM UTC
Thanks Dave,
Odd that dragon don't include anything for the centres of the rafts.
On with today's progress
Torpedo tubes built, these have to be in place before the min and after superstructure, otherwise they can be interesting.

painted and washed.

Detail going on the lower bridge, the twin 20mm still to go on.

The bridge in place.

Boats ready for fitting, the oars for the pulling boat come from the eduard fret.

Boats and forward tubes.

after tubes

A quick overview.

Still a very long way to go,
Cheers
Si
Sofiya, Bulgaria
Joined: November 26, 2017
KitMaker: 393 posts
Armorama: 369 posts
Posted: Sunday, February 18, 2018 - 02:03 AM UTC
Hi!
Slight developments in the construction of StuG IV (late production). I did a camouflage attempt at the end of WWII, but something did not get me.
Here are some photos.


Kalin

#456
Oklahoma, United States
Joined: September 22, 2016
KitMaker: 654 posts
Armorama: 638 posts
Posted: Tuesday, February 20, 2018 - 06:41 PM UTC
Kalin, your camo paint job looks great.
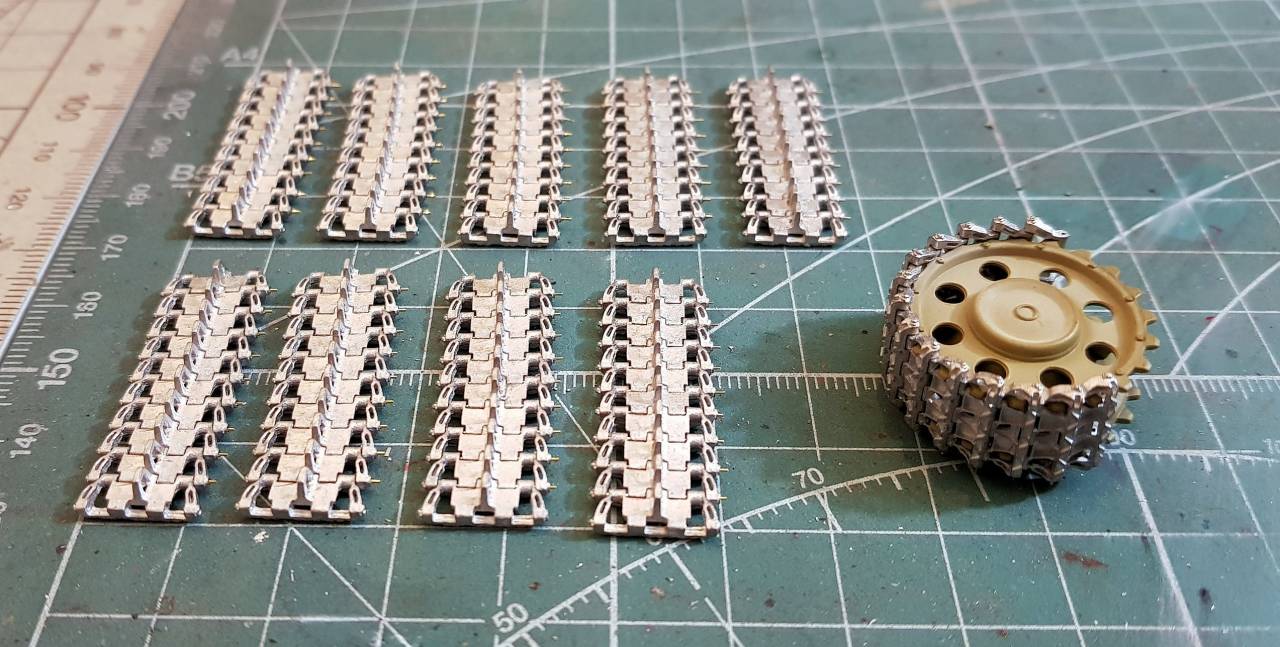
I've started working on the tracks. Based on my reference material, the GW III/IV chassis uses 104 links per side.
I usually assemble the links in groups of 10. Then I put together the sections to make up the full track for the side.
The fit on the sprocket is perfect.

#456
Oklahoma, United States
Joined: September 22, 2016
KitMaker: 654 posts
Armorama: 638 posts
Posted: Wednesday, February 21, 2018 - 04:01 PM UTC
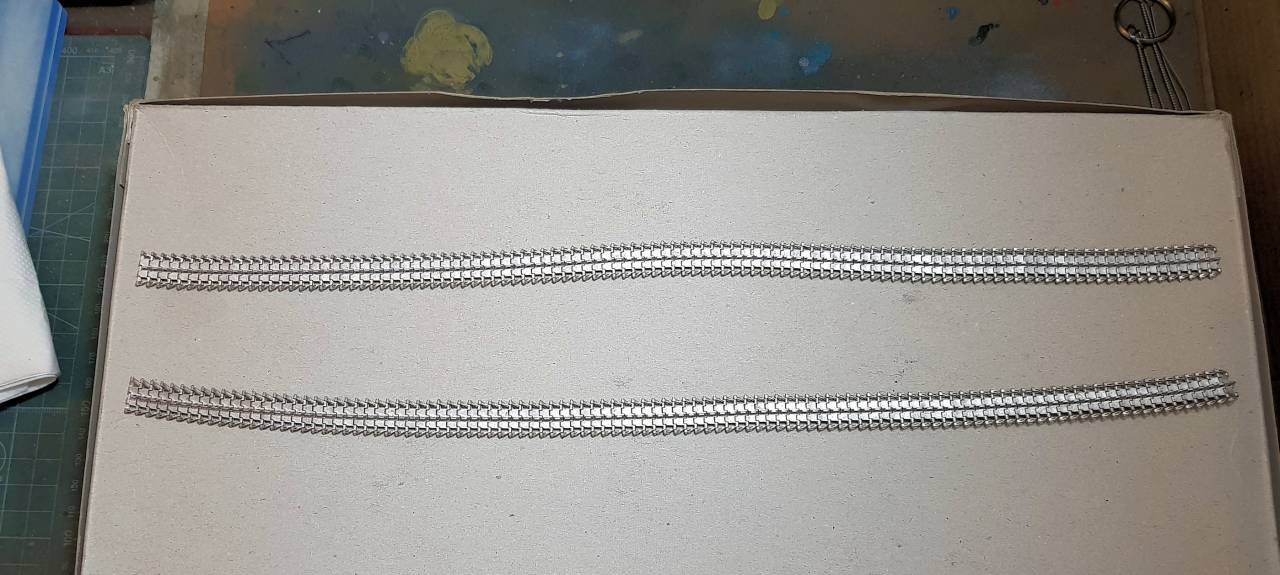
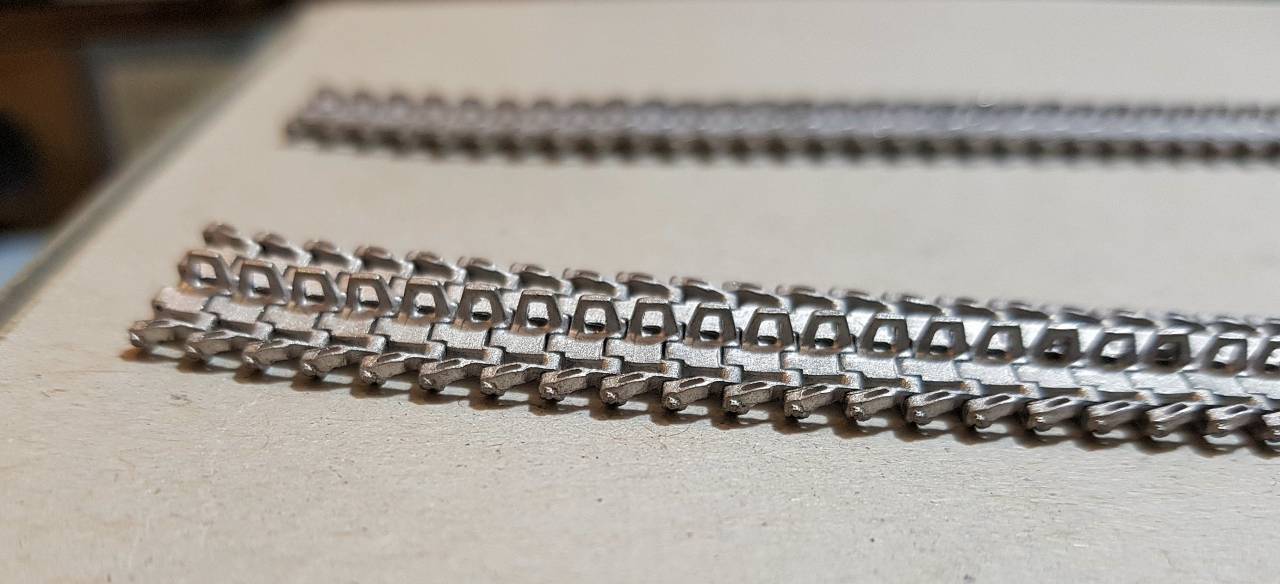
Tracks are assembled. Priming and painting next.
The real vehicle used 104 links. I had to use 107 to get a proper fit.

#456
Oklahoma, United States
Joined: September 22, 2016
KitMaker: 654 posts
Armorama: 638 posts
Posted: Wednesday, February 21, 2018 - 09:41 PM UTC
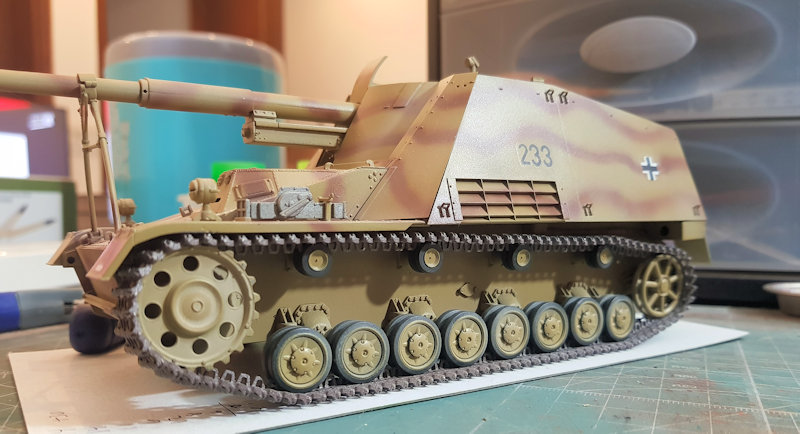
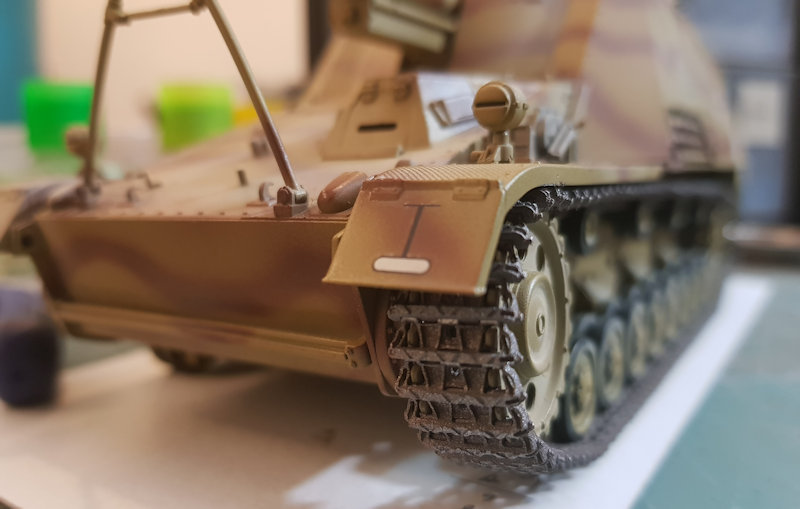
The left track is now on.
Ontario, Canada
Joined: November 03, 2012
KitMaker: 2,275 posts
Armorama: 2,233 posts
Posted: Wednesday, February 21, 2018 - 11:02 PM UTC
lol guys, not sure if changing the tracks are allowed.


