United States
Joined: December 26, 2008
KitMaker: 288 posts
Armorama: 92 posts
Posted: Tuesday, September 11, 2018 - 01:53 AM UTC
Martin
That is really patient work on the launch tubes. Well done!
Have fun modeling
Mike

United States
Joined: December 26, 2008
KitMaker: 288 posts
Armorama: 92 posts
Posted: Tuesday, September 11, 2018 - 02:00 AM UTC
I've started my build at the top with assembling the launcher box. At this stage I am just making sure the box is aligned correctly and the seams filled in. Looking closely at photos of the TOS-1, I decided to remove the ridges on top as I haven't seen these in any photos.


I'll do a little more detailing and then it is on to the rest of the turret.
Have fun modeling
Mike
Noord-Brabant, Netherlands
Joined: February 13, 2011
KitMaker: 322 posts
Armorama: 300 posts
Posted: Tuesday, September 11, 2018 - 03:51 AM UTC
Quoted Text
Martin
That is really patient work on the launch tubes. Well done!
Have fun modeling
Mike
Thank you
I'm still working on - filling a small gaps in the connection of the tubes

And small new update - some molding problems:
Before:

right now:

So I will wait to get dry and sand it.

#465
Nordrhein-Westfalen, Germany
Joined: September 12, 2014
KitMaker: 398 posts
Armorama: 394 posts
Posted: Tuesday, September 11, 2018 - 06:21 AM UTC
Hey everybody,
Even though this campaign is already underway, would it be okay if I sprung on board (sorry for the ship metaphor

) with this bad boy?

Since I have another campaign to finish by November, I won't be able to make lots of headway for a while but afterwards I can.
Jerry
GulfWarrior
 Campaigns Administrator
Texas, United States
Joined: January 05, 2010
KitMaker: 1,051 posts
Armorama: 1,029 posts
Posted: Tuesday, September 11, 2018 - 06:40 AM UTC
Welcome to the group, Jerry.
Be sure to enlist in the campaign if you haven't already!

Current campaigns:
I Like Big GUNS...And I Cannot Lie (2S1 Gvozdika)
Operation Snow White (Maultier w/ 37mm Flak Gun)
Stryker Campaign (AFV Club Stryker Dragoon)
1st Gulf War, 30th Anniversary (Dragon MLRS)
#465
Nordrhein-Westfalen, Germany
Joined: September 12, 2014
KitMaker: 398 posts
Armorama: 394 posts
Posted: Tuesday, September 11, 2018 - 07:04 AM UTC
Hi Richard,
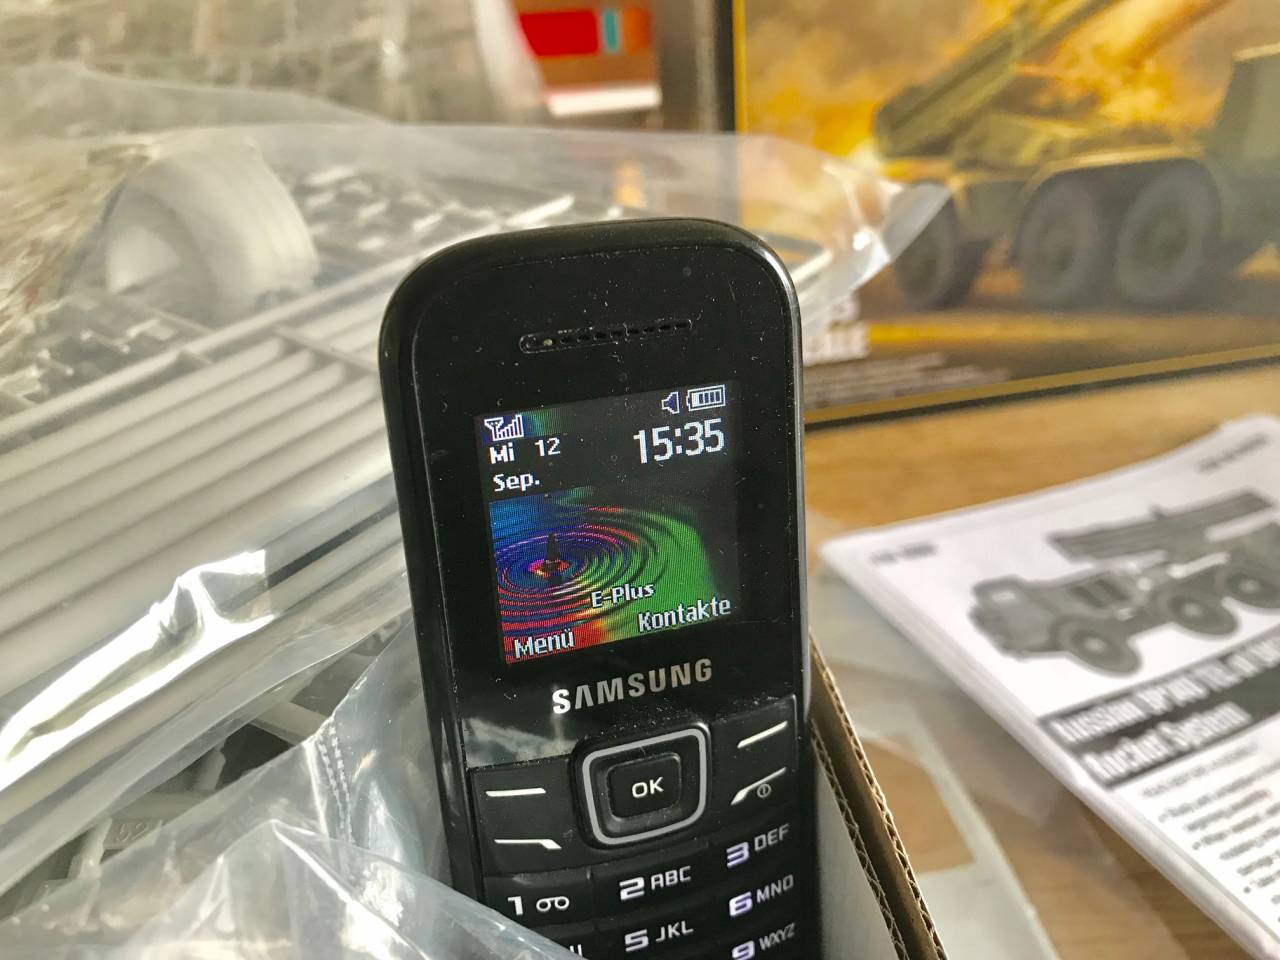
Thank you! I'll get my start picture with the box + sprues + my phone showing the date posted in a day or two. I just enlisted, too....
You guys are off to a good start with some of these builds. Martin, you have to do what I'll have to with many launch tubes, just that you're doing it in 1/72, with moulding problems, and resin recasting - impressive.
Jerry
Namabiiru
Associate Editor #399
Rhode Island, United States
Joined: March 05, 2014
KitMaker: 2,888 posts
Armorama: 1,920 posts
Posted: Tuesday, September 11, 2018 - 10:11 AM UTC
Got the tracks and undercarriage of the Type 89 primed for painting:

Once those are painted, I'll put on the tracks, mask, and mate with the superstructure. Speaking of which, construction is nearly complete:

The magazine and launcher turret are just dry-fit for the photo. I'll take those off for painting.
The launch tubes were a pain since they were molded in halves. Needed Mr Surfacer 1200 and a needle file to fill the gaps and get them looking more like tubes:
That's it for now. Hopefully some good painting weather this weekend.
#465
Nordrhein-Westfalen, Germany
Joined: September 12, 2014
KitMaker: 398 posts
Armorama: 394 posts
Posted: Wednesday, September 12, 2018 - 08:16 AM UTC
Mark, good work so far on the Type 89 - those tubes were a pain I bet, but they came out well.
Anyway, here's my belated start photo:
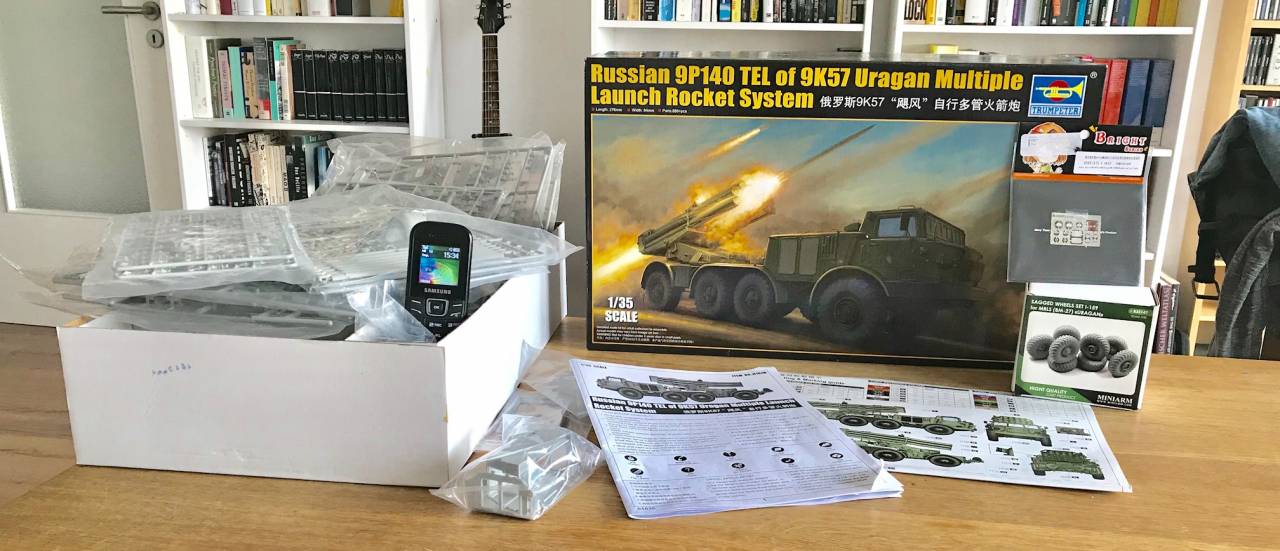
Some progress pics soon.
Have fun,
Jerry
Queensland, Australia
Joined: August 06, 2005
KitMaker: 3,353 posts
Armorama: 3,121 posts
Posted: Wednesday, September 12, 2018 - 09:08 AM UTC
A really great selection of vehicles being built here. Variety id the spice of life.
To the three M's, all your builds are looking great guys. Some of you using a little more putty than styrene, but the craftsmanship on that is looking good.
On the Bench:
Dust, styrene scraps, paint splotches and tears.
England - North West, United Kingdom
Joined: January 02, 2007
KitMaker: 781 posts
Armorama: 676 posts
Posted: Thursday, September 13, 2018 - 05:06 AM UTC
some good looking builds from what I can see
( on works pc on lunch doesn't allow all pics to show)
mark inventive use of the coregated cardboard stack for painting im pinching your method

im still currently waiting for my kit, the seller emailed me to say he is still on holiday atm but once hes back he will post out straight away. coming from france so hopfully wont take long to arrive *fingers crossed*
Namabiiru
Associate Editor #399
Rhode Island, United States
Joined: March 05, 2014
KitMaker: 2,888 posts
Armorama: 1,920 posts
Posted: Thursday, September 13, 2018 - 05:35 AM UTC
Thanks, guys, for the positive comments.
Anthony, the idea for the corrugated paint stands actually came from seeing some for sale in a hobby store in Japan at a price WAY too high for a block of cardboard. So I just cut an old box into strips and then glued the strips together. I learned toothpicks tend to fall through them if you pick them up, so I glued another piece of cardboard to the bottom.
United States
Joined: December 26, 2008
KitMaker: 288 posts
Armorama: 92 posts
Posted: Saturday, September 15, 2018 - 02:18 AM UTC
The "Boom Box" is now finished for my TOS-1 and ready for a coat of primer. I substituted some brass rod as the kit handholds seemed rather flimsy. I also added a few small details.


I started on some of the other subsections but not much to report on those.
Have fun modeling!
Mike
#465
Nordrhein-Westfalen, Germany
Joined: September 12, 2014
KitMaker: 398 posts
Armorama: 394 posts
Posted: Saturday, September 15, 2018 - 02:47 AM UTC
Hi Mike,
The launcher unit looks great - Good work!
Jerry
Queensland, Australia
Joined: August 06, 2005
KitMaker: 3,353 posts
Armorama: 3,121 posts
Posted: Saturday, September 15, 2018 - 09:10 AM UTC
Nice to see the little details added Mike. These will really make this build.
On the Bench:
Dust, styrene scraps, paint splotches and tears.
GulfWarrior
Campaigns Administrator Texas, United States
Joined: January 05, 2010
KitMaker: 1,051 posts
Armorama: 1,029 posts
Posted: Saturday, September 15, 2018 - 12:36 PM UTC
Yeah, it looks great. 1/72 is waaaay too small for me. I'm looking to pick one up in 1/35th though.
I've got everything primed on the Type 63 107mm rocket launcher and am hoping to get to slinging some paint this weekend. Got all my Honey-Do's done today so I get to play tomorrow.

Current campaigns:
I Like Big GUNS...And I Cannot Lie (2S1 Gvozdika)
Operation Snow White (Maultier w/ 37mm Flak Gun)
Stryker Campaign (AFV Club Stryker Dragoon)
1st Gulf War, 30th Anniversary (Dragon MLRS)
Namabiiru
Associate Editor #399
Rhode Island, United States
Joined: March 05, 2014
KitMaker: 2,888 posts
Armorama: 1,920 posts
Posted: Sunday, September 16, 2018 - 08:09 AM UTC
Undercarriage and running gear all painted and assembled and superstructure in place. I used plastic cling wrap to mask off the underside so I can paint the top. I used clear plastic wrap so I can align the camo pattern on top with the underside.

GulfWarrior
Campaigns Administrator Texas, United States
Joined: January 05, 2010
KitMaker: 1,051 posts
Armorama: 1,029 posts
Posted: Sunday, September 16, 2018 - 08:25 AM UTC
Looks good, Mark. What color is that lighter shade of green?
Current campaigns:
I Like Big GUNS...And I Cannot Lie (2S1 Gvozdika)
Operation Snow White (Maultier w/ 37mm Flak Gun)
Stryker Campaign (AFV Club Stryker Dragoon)
1st Gulf War, 30th Anniversary (Dragon MLRS)
Namabiiru
Associate Editor #399
Rhode Island, United States
Joined: March 05, 2014
KitMaker: 2,888 posts
Armorama: 1,920 posts
Posted: Sunday, September 16, 2018 - 09:50 AM UTC
Quoted Text
Looks good, Mark. What color is that lighter shade of green?
Vallejo Olive Green. It's bit brighter than I had intended. Hoping some washes and filters will tone things down a bit.
Pennsylvania, United States
Joined: May 09, 2009
KitMaker: 561 posts
Armorama: 553 posts
Posted: Monday, September 17, 2018 - 01:32 AM UTC
Quoted Text
Undercarriage and running gear all painted and assembled and superstructure in place. I used plastic cling wrap to mask off the underside so I can paint the top. I used clear plastic wrap so I can align the camo pattern on top with the underside.
Nice trick !
Noord-Brabant, Netherlands
Joined: February 13, 2011
KitMaker: 322 posts
Armorama: 300 posts
Posted: Monday, September 17, 2018 - 05:58 PM UTC
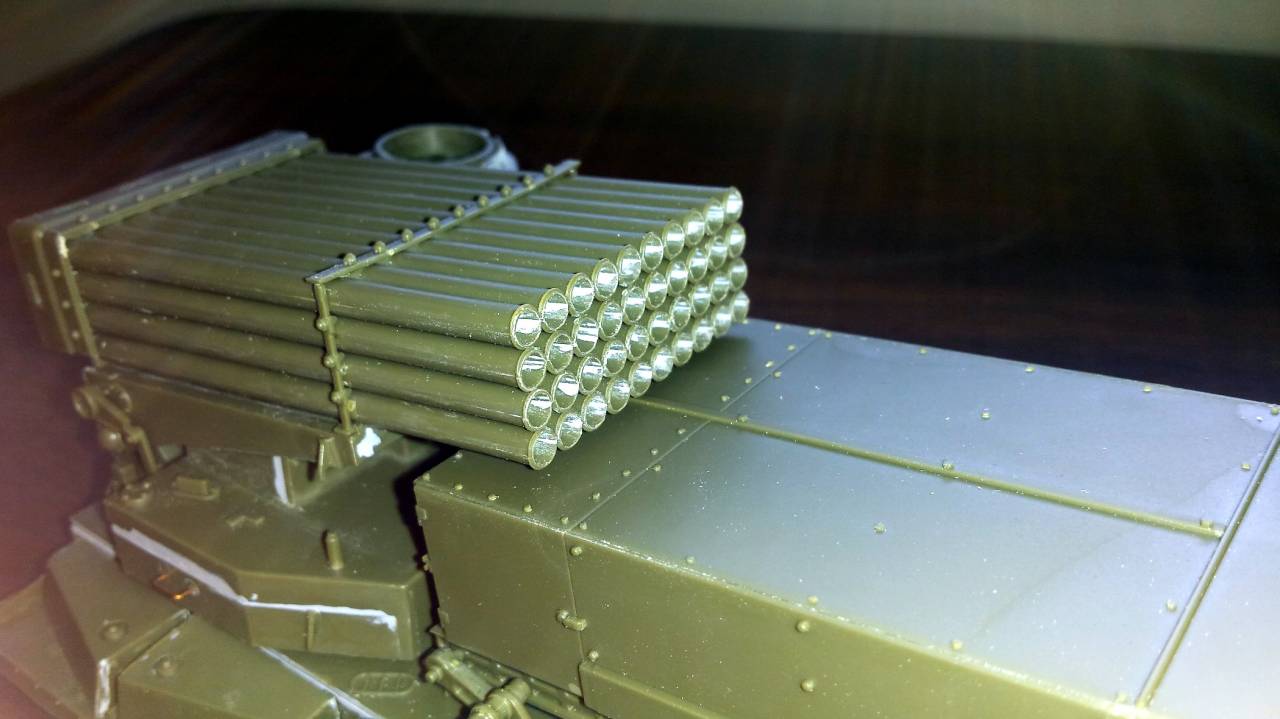
Those are my small updates for the past few days:
1. Launcher is done - after casting, drilling, gluing and sanding:

2. Chassis - I started with the inner assemblies. Now everything is on place and glued.


It was tricky and time consuming, but in the end looks OK.
Namabiiru
Associate Editor #399
Rhode Island, United States
Joined: March 05, 2014
KitMaker: 2,888 posts
Armorama: 1,920 posts
Posted: Monday, September 17, 2018 - 11:47 PM UTC
Nice detail there. You'll need to display it on a glass shelf.
#465
Nordrhein-Westfalen, Germany
Joined: September 12, 2014
KitMaker: 398 posts
Armorama: 394 posts
Posted: Tuesday, September 18, 2018 - 04:05 AM UTC
Hi Martin,
Good work on the Smerch undercarriage + launchers - even if it was tricky, you got everything to line up well.
Jerry
Queensland, Australia
Joined: August 06, 2005
KitMaker: 3,353 posts
Armorama: 3,121 posts
Posted: Tuesday, September 18, 2018 - 08:01 AM UTC
Quoted Text
Nice detail there. You'll need to display it on a glass shelf.
Or on a mirror. That is a lot of detail and great work. It needs to be seen!
On the Bench:
Dust, styrene scraps, paint splotches and tears.
Noord-Brabant, Netherlands
Joined: February 13, 2011
KitMaker: 322 posts
Armorama: 300 posts
Posted: Wednesday, September 19, 2018 - 12:04 AM UTC
Noord-Brabant, Netherlands
Joined: February 13, 2011
KitMaker: 322 posts
Armorama: 300 posts
Posted: Wednesday, September 19, 2018 - 08:15 AM UTC


