Thanks for the kind words, Jerry !
Tim, do you remember the Polski-Fiat 508 kit ?
I've just read that the Fiat 508 and its variants were licence-built by Walter Motors in Czechoslovakia until 1936 (not in large number though...). It was called Walter Junior : the only visible difference was the radiator grille...
Here's a Fiat 508A (three-speed transmission) "Furgoneta" :
Pick-up :
According to Wikipedia, all the Walter Junior models were based on the 3-speed 508.
So this kit looks it's indeed a military variant and not a "militarized/converted" civilian variant, thus it can't be used as such :
H.P.
Dioramas
Do you love dioramas & vignettes? We sure do.
Hosted by Darren Baker, Mario Matijasic
Operation Anthropoid
Frenchy
Rhone, France
Joined: December 02, 2002
KitMaker: 12,719 posts
Armorama: 12,507 posts
Joined: December 02, 2002
KitMaker: 12,719 posts
Armorama: 12,507 posts
Posted: Wednesday, May 02, 2018 - 02:12 AM UTC
Dioramartin
New South Wales, Australia
Joined: May 04, 2016
KitMaker: 1,476 posts
Armorama: 1,463 posts
Joined: May 04, 2016
KitMaker: 1,476 posts
Armorama: 1,463 posts
Posted: Thursday, May 03, 2018 - 08:02 PM UTC
Thanks Hans – so you guessed, shots fired by Ingrid in the polka-dot dress from the grassy knoll. A lousy shot but she got the tram real good.
Thanks H.P. – the military kit looks very different to the civilian, hard to believe they’re both 508’s – mudguards, bonnet side-grilles, windscreen, rear end…I don’t fancy hacking that much resin around, the Wespe kit still looks a better prospect but I’ll keep an open mind – as Jerry said yo’ da man when it comes to Research.
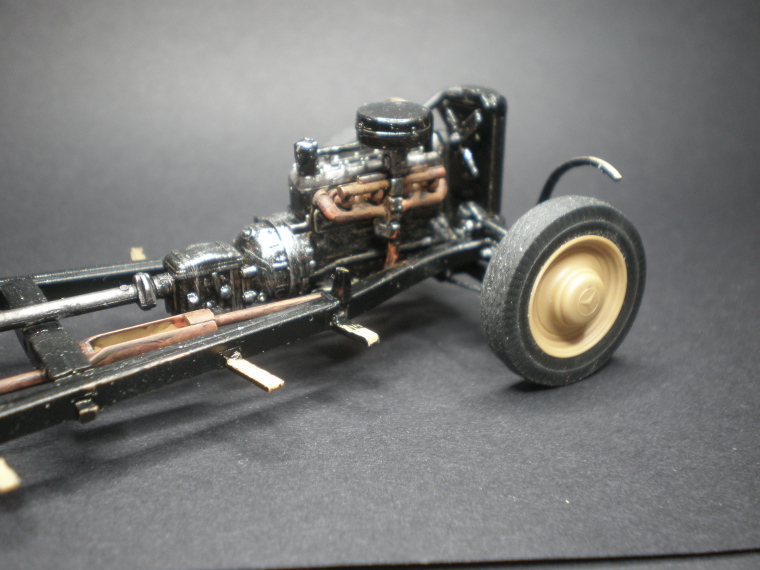
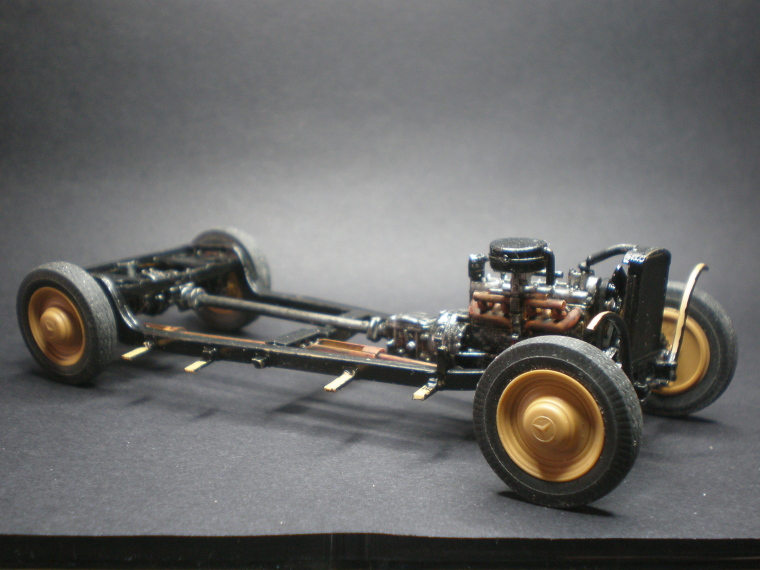
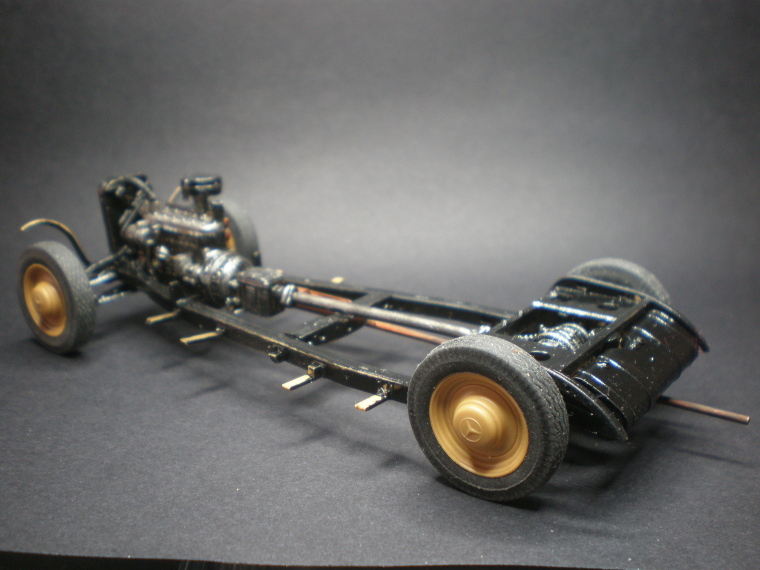
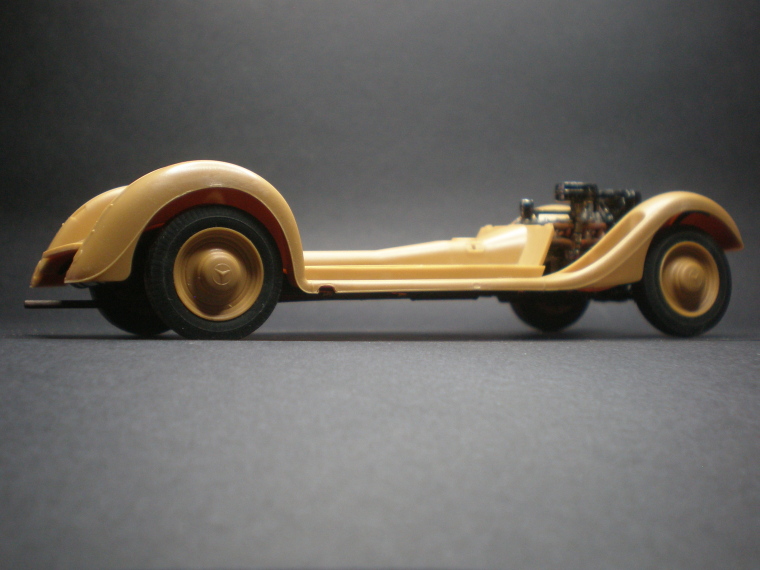
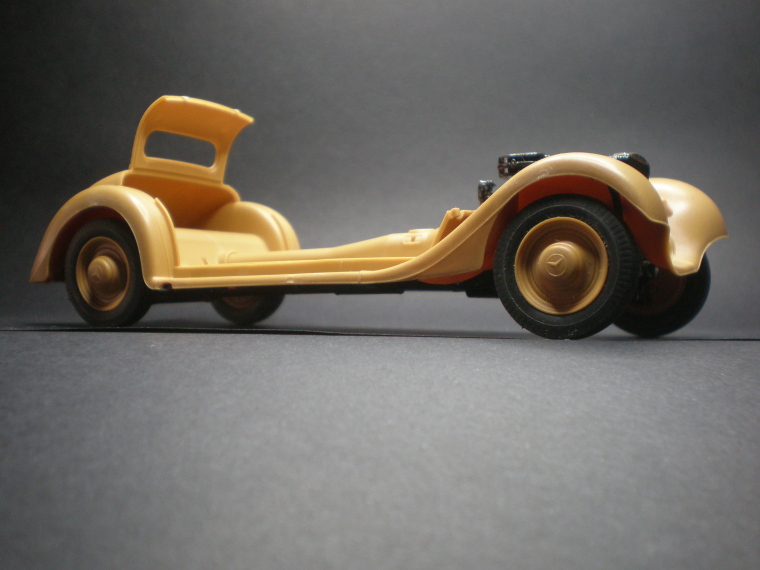
And so, finally, to actual construction. First a quick review so skip to the pix unless you’re planning to build it. Overall a good car kit for the money, and unlike some other manufacturers of recent experience ICM knows how to make locating pins & positive attachment points. Virtually zero flash or warping, logical assembly steps, good standard of detail, OK decals. Instructions are clear except: Step 6/part A64 should read part A10; Step 18/sub-assembly #s 16 & 17 are transposed; Step 19/none of the parts are A78, should read A42-C-A32, & similarly Step 20 should read A43-C-A32. And after completing the engine, all painting calls are abandoned for the rest of the chassis assembly & its components. The plastic’s good quality i.e. fragile parts were intact on the sprue and forgiving when being detached. The only glitch was part A21 track-rod lacking its connection to the steering linkage – no sign of breakage, it was seemingly un-formed in the mo*ld. The vinyl t*res are quite responsive to sanding which was a pleasant surprise; the seam lines aren’t very proud but the treads are quite fine so it’s still a tricky compromise. Overall accuracy seems acceptable although I’m not paying too much attention given the amount of conversion to do.
Strictly OOB, detailing was futile because it’ll never be seen again. Painting was also pointless but I just couldn’t leave it bare plastic - the IKIT syndrome, I Know It’s There. Note to self: never ever use Humbrol Satin Black, it takes 789 years to dry.
Still a bit of flash on the t*re side walls…
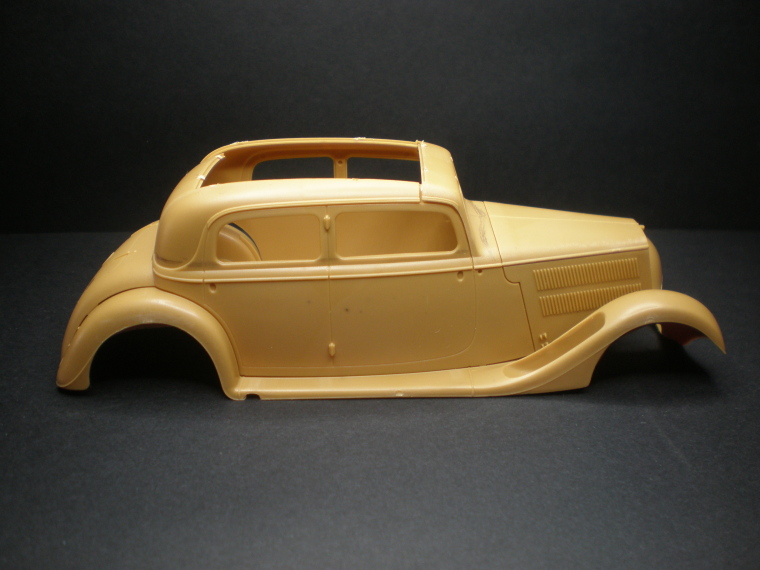
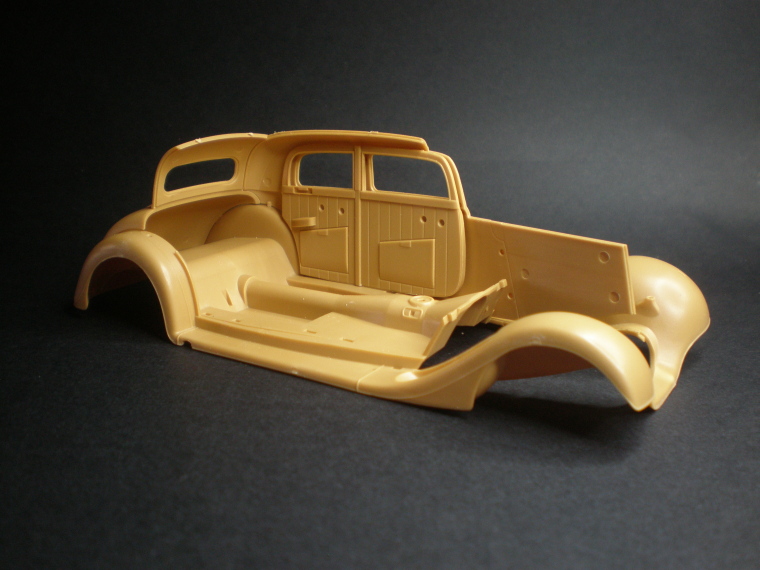
Loosely dry-fitting the body shell to check for warps/joints, & sketchy pencil lines marking the hard-top surgery - yes they’re wrong, later corrected. I’m gonna need an anaesthetic myself before cutting those front doors out, they both have to open on hinges…
Test fitting shell to chassis – all good…
…but the front left’s off the ground...
Now it’s square/level after a touch of scary chassis-bending. Alas ICM didn’t provide for turning front wheels, a necessity for this dio. I could have wasted time making pins etc but they only need to be turned a little for the bend, so I just sliced two-thirds through the swivel-points. It’ll be a one-time-only job using small pliers to bend the wheels just enough when it comes to final photography.
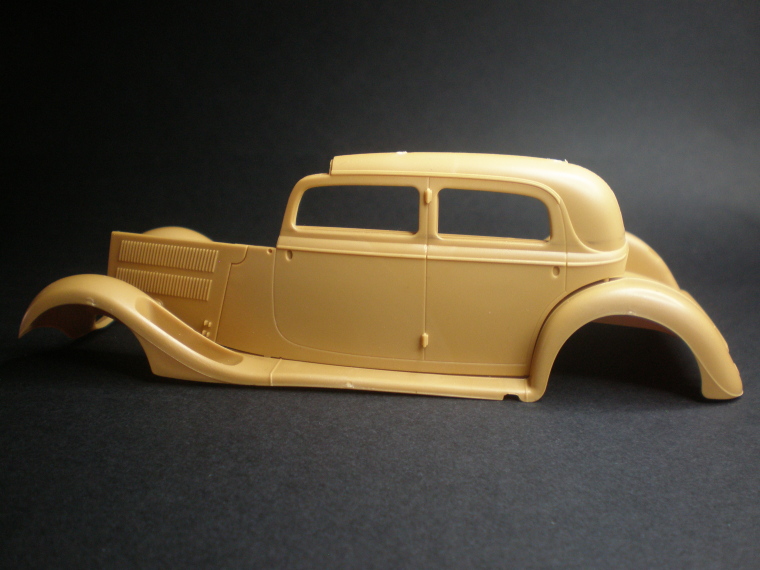
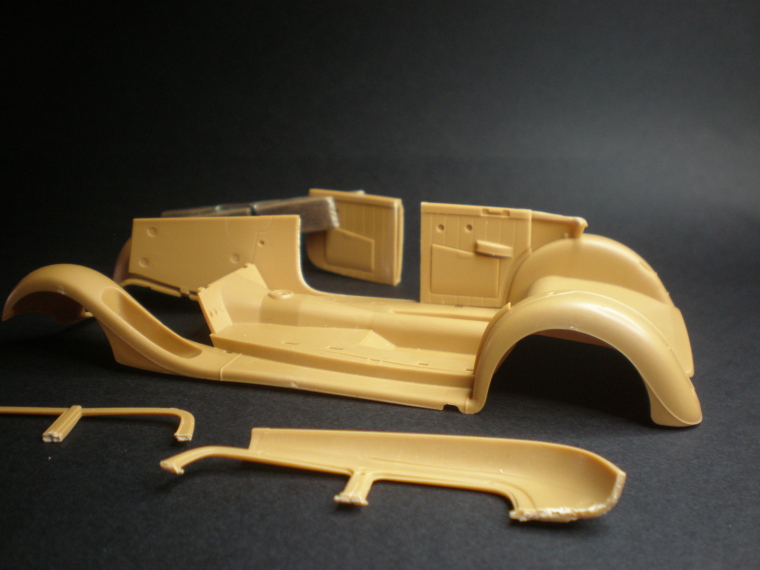
So much to look forward to...check out the difference in front door size between the kit & the 2nd image on p.1…anyone like to paint the wheel hubs for me…
…all six of ‘em?
Posted: Thursday, May 03, 2018 - 10:02 PM UTC
Hey Tim - wow - the chassis and drivetrain looks great! It is a bummer lots of it won't be visible! Nonetheless, I fully appreciate the work - nice!
JGphins
Florida, United States
Joined: July 19, 2014
KitMaker: 249 posts
Armorama: 249 posts
Joined: July 19, 2014
KitMaker: 249 posts
Armorama: 249 posts
Posted: Thursday, May 03, 2018 - 11:50 PM UTC
Hi Tim, what a wonderful looking kit you got there my friend. Can't wait to see the progression pictures and results.
The backdrop image that you have chosen for this diorama provides so many elements that you can incorporate later on into the foreground objects.... I'm looking forward to how you handle these challenges later on.
Thanks for sharing and happy modeling!
JGphins
The backdrop image that you have chosen for this diorama provides so many elements that you can incorporate later on into the foreground objects.... I'm looking forward to how you handle these challenges later on.
Thanks for sharing and happy modeling!
JGphins
Frenchy
Rhone, France
Joined: December 02, 2002
KitMaker: 12,719 posts
Armorama: 12,507 posts
Joined: December 02, 2002
KitMaker: 12,719 posts
Armorama: 12,507 posts
Posted: Friday, May 04, 2018 - 01:05 AM UTC
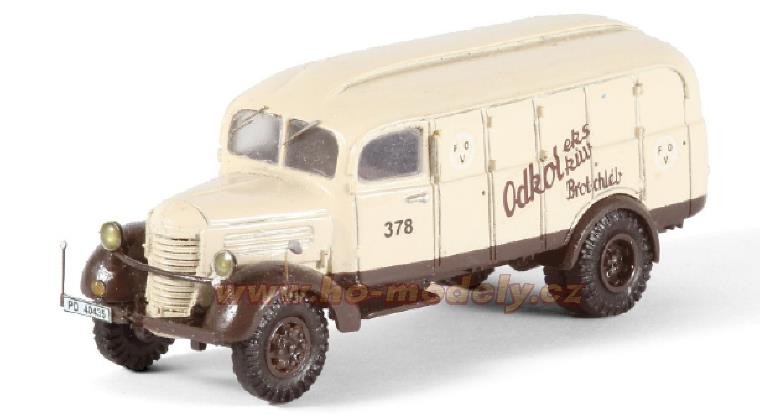
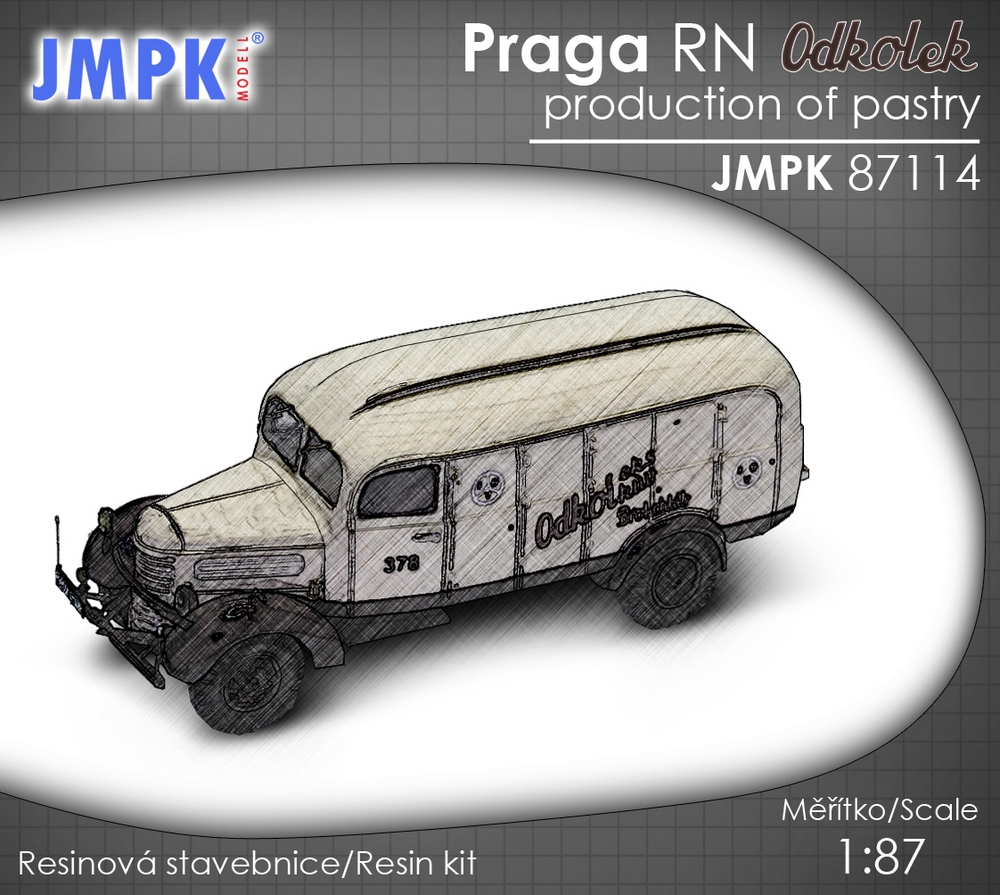
Just came across this that may help with the Odkolek van colors (HO scale model). It's hard to tell but the logo cog appears to be white .. :
I agree with you about sticking to the Skoda option BTW
H.P.
I agree with you about sticking to the Skoda option BTW
H.P.
cheyenne
New Jersey, United States
Joined: January 05, 2005
KitMaker: 2,185 posts
Armorama: 1,813 posts
Joined: January 05, 2005
KitMaker: 2,185 posts
Armorama: 1,813 posts
Posted: Friday, May 04, 2018 - 07:24 PM UTC
Very cool Tim , the MB is a beauty .
I'm still amazed at all the research and planning going on , I'm lovin following this !!!
Dioramartin
New South Wales, Australia
Joined: May 04, 2016
KitMaker: 1,476 posts
Armorama: 1,463 posts
Joined: May 04, 2016
KitMaker: 1,476 posts
Armorama: 1,463 posts
Posted: Saturday, May 05, 2018 - 06:33 PM UTC
Thanks Nick, Joaquin, Cheyenne – such a relief to be just building a kit again (first time since the GAZ Quad 6+ months ago) although those few carefree days are gone now I’m spending hours administering surgery to it - like Gene Wilder in Young Franken...stone: “LIVE! LIVE damn you!!”
Awesome H.P. - I would have guessed light grey with black lettering & been comprehensively wrong. The Parag RN’s logo must therefore be plain white/brown letters - the horse wagon’s version obviously an earlier/redundant scheme & the cog’s missing from this diecast (post-war?) version. Many thanks for the colo*r correction.
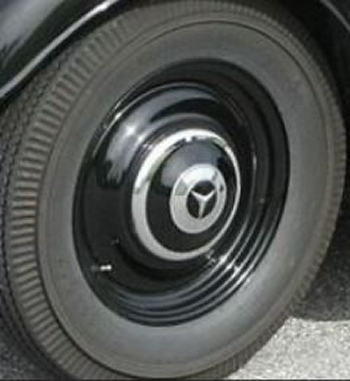
No surprise anyone wants to paint my hubs. OK then has anyone used Bare-Metal Foil? :
https://billandwalt.com/collections/bare-metal-foil/products/ultra-bright-chrome-bare-metal-foil
I imagine it would be virtually impossible to cut perfectly circular tiny rings of “chrome” out of it (let alone the Merc logo) but maybe applying gloss black onto a disc of the foil would be relatively easier? Emphasis on “relatively”.
Frenchy
Rhone, France
Joined: December 02, 2002
KitMaker: 12,719 posts
Armorama: 12,507 posts
Joined: December 02, 2002
KitMaker: 12,719 posts
Armorama: 12,507 posts
Posted: Saturday, May 05, 2018 - 06:48 PM UTC
The cogs are there indeed on the Praga :
just like they are on the 1:1 1942 one.
H.P.
just like they are on the 1:1 1942 one.
H.P.
Dioramartin
New South Wales, Australia
Joined: May 04, 2016
KitMaker: 1,476 posts
Armorama: 1,463 posts
Joined: May 04, 2016
KitMaker: 1,476 posts
Armorama: 1,463 posts
Posted: Saturday, May 05, 2018 - 07:03 PM UTC
Aha OK on my screen the die-cast logo looked like a solid white disc, but on closer inspection etc – as you surmised I was referring to your photo of the RN posted April 29. PS unexpected sub-title on the JMPK box art...maybe that's what its made of.
BUTA46
Maine, United States
Joined: May 05, 2015
KitMaker: 117 posts
Armorama: 113 posts
Joined: May 05, 2015
KitMaker: 117 posts
Armorama: 113 posts
Posted: Saturday, May 05, 2018 - 07:16 PM UTC
Tim~not sure of the availability on the far side but I like the look of the “Liquid Chrome “ by Molotow
Kevlar06
Washington, United States
Joined: March 15, 2009
KitMaker: 3,670 posts
Armorama: 2,052 posts
Joined: March 15, 2009
KitMaker: 3,670 posts
Armorama: 2,052 posts
Posted: Saturday, May 05, 2018 - 08:22 PM UTC
I have a solution for your Mercedes wheel hubs. Take a look at the photo below from 72 land, and the article from Large Scale Planes below. You're probably wondering why I'm sending a photo of an aircraft in 72 scale-- it's because the name plate was made with a black decal, allowing a silver design to show through. You can use the same method to make your Mercedes symbol hub cap designs. You'll need access to a computer program like PowerPoint or some other graphics program, a good quality printer (bubble jet is fine), and clear decal paper. First, flat coat your decal paper (gives bubble jet ink something to grab). Using your graphics program, create the Mercedes circles and symbols, with a black background, leaving the actual symbols in white (no fill color in the case of PowerPoint). Scale the symbols to fit, replicate however many you need, and then print on the flat coated decal paper (you may need to run the paper through your printer a second time to get a deeper depth of color). Wait a few hours for the ink to dry thourouhgly, and then coat the decals in Microscale decal film solution (used to make the decals-- not the softening solutions). When dry, cut out the decals and apply them over previously painted chrome hubs. The chrome will show through the black/clear decal paper brilliantly. That's how the name plate and placards were done for the 1/72 Douglas B-18 And 1/16th Scale B-17 diorama in the photos linked below. Works for just about any design you can print on a computer. See below.
http://72land.blogspot.com/2018/04/2018-ipms-seattle-spring-show-part-1-of.html
(The third photo in the blog)
http://www.largescaleplanes.com/articles/article.php?aid=3273
(Towards the end of the article, second row, last photo-“secure gun...”)
An alternative is to photoshop a photo of the hub cap, and print it onto decal film following the process above. The only issue is that you will need to have a clear, straight on photo with no distortions.
VR, Russ
Dioramartin
New South Wales, Australia
Joined: May 04, 2016
KitMaker: 1,476 posts
Armorama: 1,463 posts
Joined: May 04, 2016
KitMaker: 1,476 posts
Armorama: 1,463 posts
Posted: Tuesday, May 08, 2018 - 04:05 PM UTC
Thanks Phil & Russ – both of your suggestions are viable on the Far Side (but hey it’s you guys that are upside down!) & either/both may well be the eventual solution – I’d been trawling the net for ready-made decals/stickers without success, closest are 1/24 scale and/or not adaptable. I’ve even considered approaching Mercedes direct but somehow I doubt their Marketing Dept would view this as a particularly attractive sponsorship opportunity
Frenchy
Rhone, France
Joined: December 02, 2002
KitMaker: 12,719 posts
Armorama: 12,507 posts
Joined: December 02, 2002
KitMaker: 12,719 posts
Armorama: 12,507 posts
Posted: Tuesday, May 08, 2018 - 06:55 PM UTC
Just stumbled across this :
All I can say is the accuracy of some reconstructions is at least questionnable (Spot the Differences game anyone ?)...It should not be the case with yours
H.P.
All I can say is the accuracy of some reconstructions is at least questionnable (Spot the Differences game anyone ?)...It should not be the case with yours
H.P.
Dioramartin
New South Wales, Australia
Joined: May 04, 2016
KitMaker: 1,476 posts
Armorama: 1,463 posts
Joined: May 04, 2016
KitMaker: 1,476 posts
Armorama: 1,463 posts
Posted: Wednesday, May 09, 2018 - 03:55 PM UTC
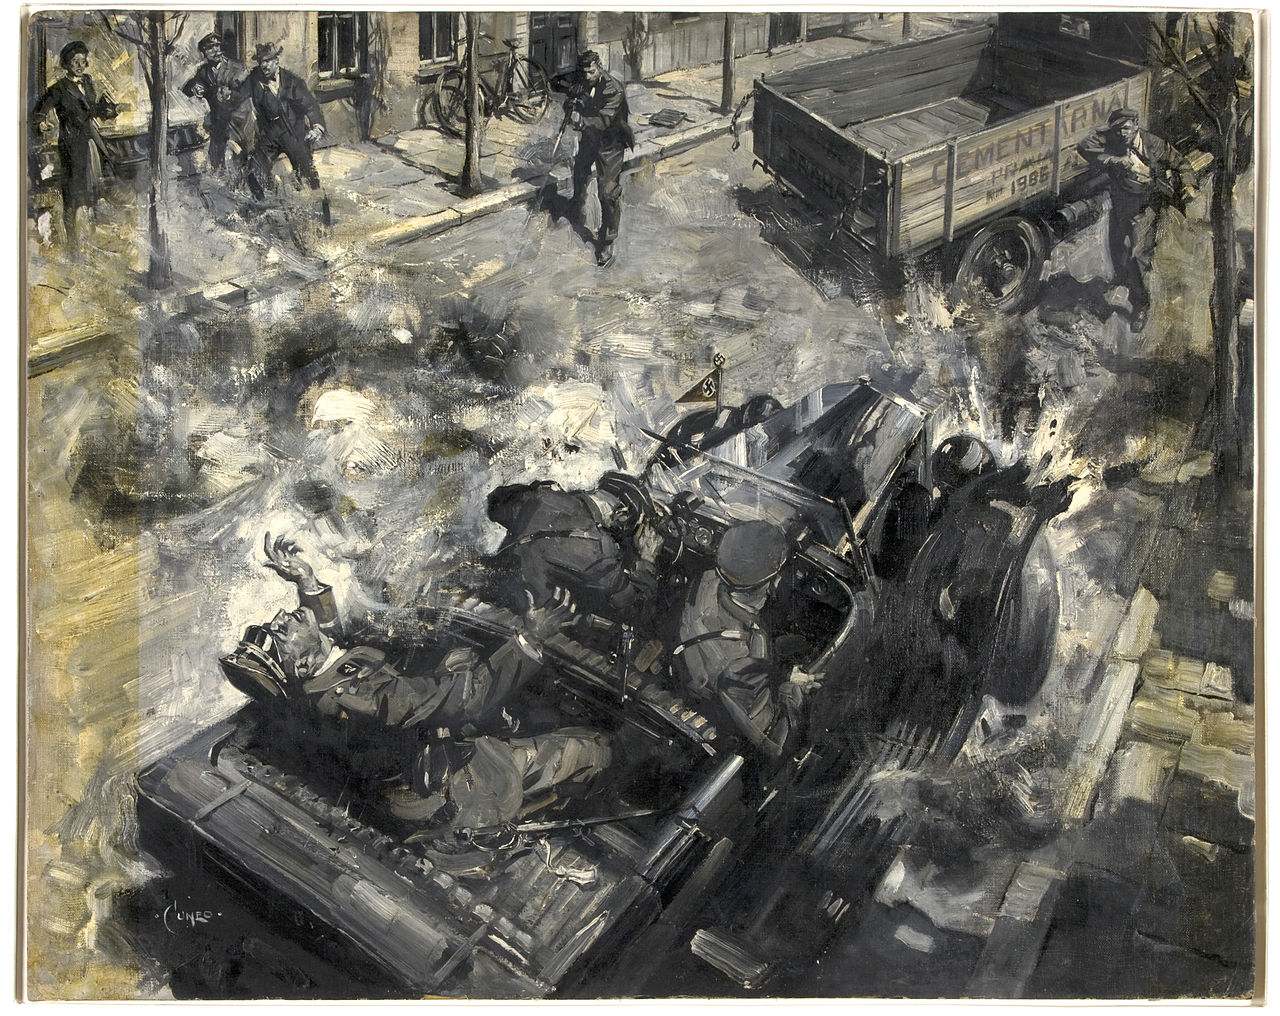
Yes H.P. saw that one way back when we first started sifting the sites. Rather than spot the inaccuracies it saves time to spot the accuracies, there might be one: Heydrich’s hat…although I’ll stand corrected if someone knows better.
Apart from that…completely wrong in every single way, an astounding achievement. It reminds me of that old Monty Python skit where members of the Womens’ Institute in twin-sets re-enacted military engagements in a field armed only with handbags, they’d have done a better job than this
BootsDMS
England - South West, United Kingdom
Joined: February 08, 2012
KitMaker: 978 posts
Armorama: 965 posts
Joined: February 08, 2012
KitMaker: 978 posts
Armorama: 965 posts
Posted: Wednesday, May 09, 2018 - 04:15 PM UTC
Quoted Text
Yes H.P. saw that one way back when we first started sifting the sites. Rather than spot the inaccuracies it saves time to spot the accuracies, there might be one: Heydrich’s hat…although I’ll stand corrected if someone knows better.
Apart from that…completely wrong in every single way, an astounding achievement. It reminds me of that old Monty Python skit where members of the Womens’ Institute in twin-sets re-enacted military engagements in a field armed only with handbags, they’d have done a better job than this
In fairness to Terence Cuneo (the artist) at the time he painted that - 1942 - I doubt he would have had any confirmatory information whatsoever, the op being so highly classified. I would estimate he had to produce something - not least for home consumption - based on what he could glean from press reports and the like. The rest would probably be sheer imagination; he was hardly able to get hold of an after action review or the like.
In the dark days of 1942 any publication of even his imagined event would probably have been used as a tonic for the British population, during what were still fraught times.
Terence Cuneo, already an accomplished artist went on to produce endless accurate renditions of British Army regiments, events and equipment, and to achieve this was afforded much access to pretty much all he desired, but this would not have been the case in 1942, even if the Allied authorities had a comprehensive report, which I strongly suspect they didn't.
Brian
Frenchy
Rhone, France
Joined: December 02, 2002
KitMaker: 12,719 posts
Armorama: 12,507 posts
Joined: December 02, 2002
KitMaker: 12,719 posts
Armorama: 12,507 posts
Posted: Wednesday, May 09, 2018 - 05:19 PM UTC
I see your point Brian. The problem is that this period painting is sometimes used "without caution" to illustrate articles dealing with Heydrich's assassination :
Example #1
Example #2
Example #3
...etc
H.P.
Example #1
Example #2
Example #3
...etc
H.P.
Dioramartin
New South Wales, Australia
Joined: May 04, 2016
KitMaker: 1,476 posts
Armorama: 1,463 posts
Joined: May 04, 2016
KitMaker: 1,476 posts
Armorama: 1,463 posts
Posted: Wednesday, May 09, 2018 - 06:09 PM UTC
Agreed Brian - you’re absolutely right & Cuneo was incidentally a superb artist. It’s just a pity this work wasn’t re-titled after WW2 “An impression of the Assassination etc” or similar, to distinguish it from most of his other paintings which really were meticulously accurate - and also prevent what HP’s illustrating
BootsDMS
England - South West, United Kingdom
Joined: February 08, 2012
KitMaker: 978 posts
Armorama: 965 posts
Joined: February 08, 2012
KitMaker: 978 posts
Armorama: 965 posts
Posted: Wednesday, May 09, 2018 - 07:14 PM UTC
Quoted Text
I see your point Brian. The problem is that this period painting is sometimes used "without caution" to illustrate articles dealing with Heydrich's assassination :
Example #1
Example #2
Example #3
...etc
H.P.
Henri-Pierre and Tim,
Well that really is a bit sad and rather unprofessional; 3 apparently learned publications/sites and yet they can't be bothered with the fine-tuning. Thank Heavens for Modellers eh?
A still or two from one of the films or reconstructions would have been better perhaps (I can only think of Op Daybreak as that's the only one I've seen).
Oh well, as I say, Modellers to the fore!
Brian
Dioramartin
New South Wales, Australia
Joined: May 04, 2016
KitMaker: 1,476 posts
Armorama: 1,463 posts
Joined: May 04, 2016
KitMaker: 1,476 posts
Armorama: 1,463 posts
Posted: Thursday, May 10, 2018 - 06:20 PM UTC
Brian – regarding movies/stills unfortunately they’re not much better - I’ve yet to see a single cinematic image without fault(s) of some kind, as compared to the original sources (or as original as possible/accessible) that I’ve read. I guess it’s all about maxing the drama but was the actuality ever lacking any? Same goes for the written descriptions, endlessly rehashed errors. Incidentally I’m happy to report Macdonald’s narrative is not defective after all, I did him (or rather his memory) a disservice by earlier saying there were two errors - it was just missing a clarifying phrase which if restored cancels both errors.
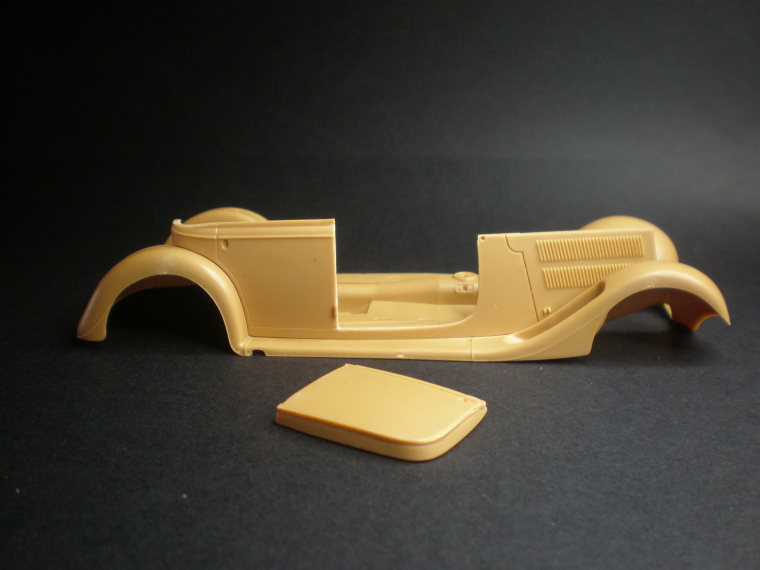
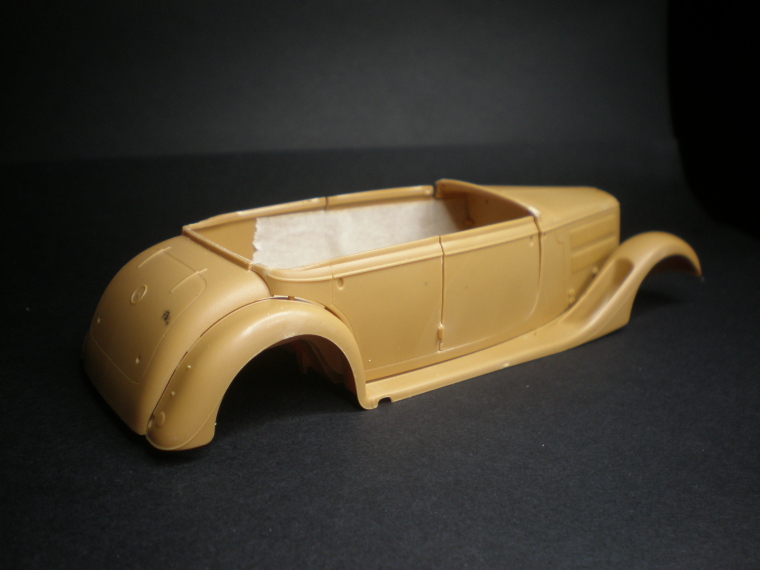
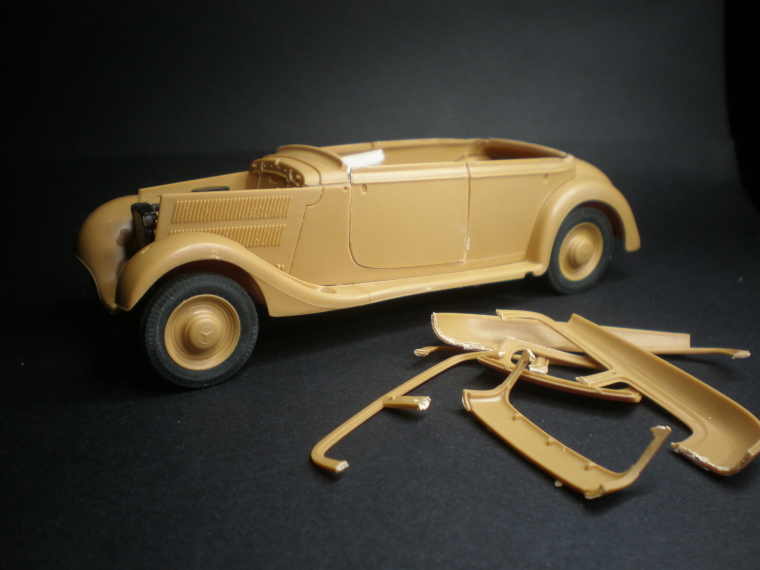
Time to prep the patient – here she is dry-fitted in pre-op condition as per kit specs…
…and then after several hours under the knife. Avert your eyes if you’re easily offended or turned on, she’s gone topless:
So many wordplays, so little time… I made a couple of boobs, one each side…
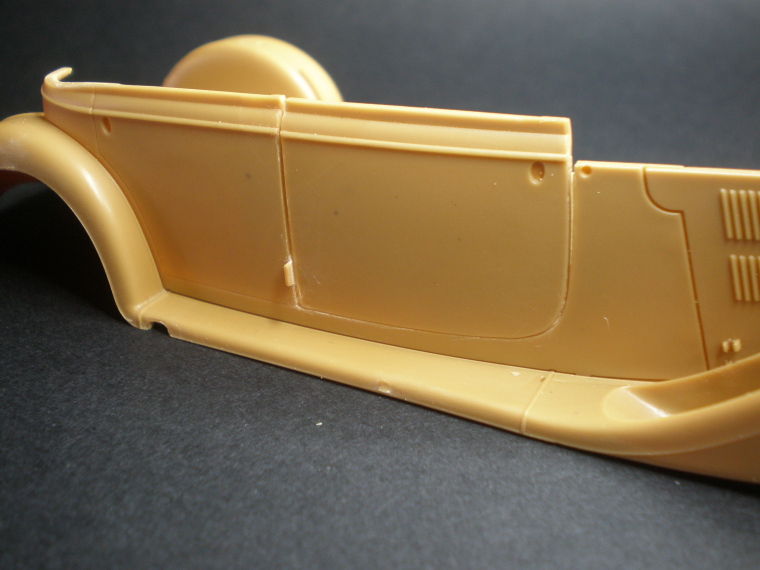
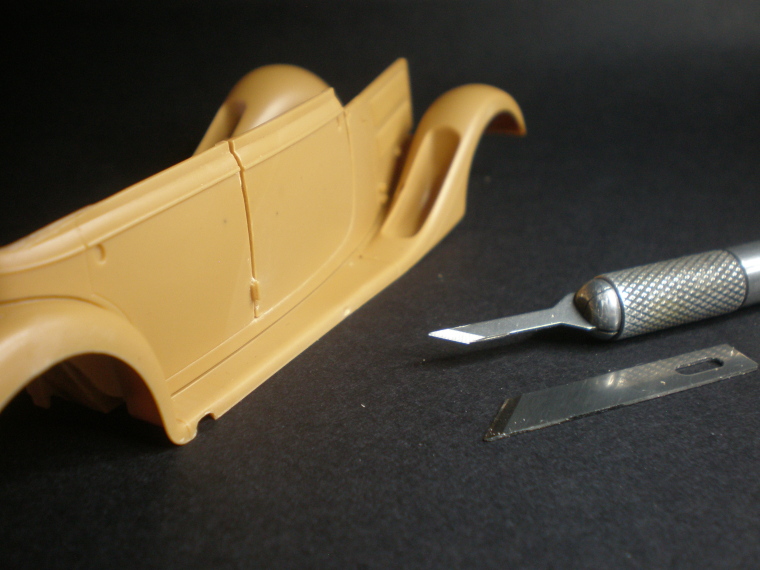
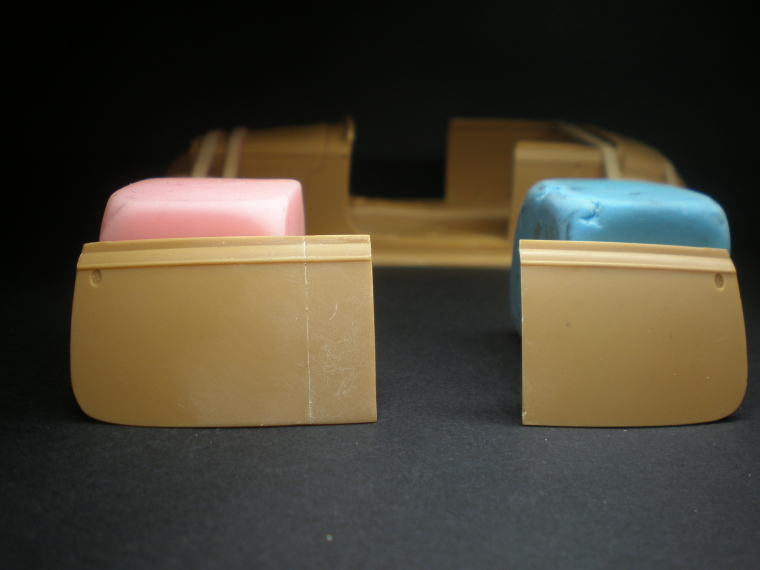
Specifically, after cutting both so-called suicide-doors along the kit’s panel-lines I realised – duh - I should have cut the hinge-end much further back straight off, because the 2-door’s are much longer as you can see below - correct 2-door length port-side vs. 4-door size starboard side:
Revised door on left after bonding the extra length from the side-panel:
Test-fits showing how much plastic was lost during surgery, restorable with Evergreen endplates:
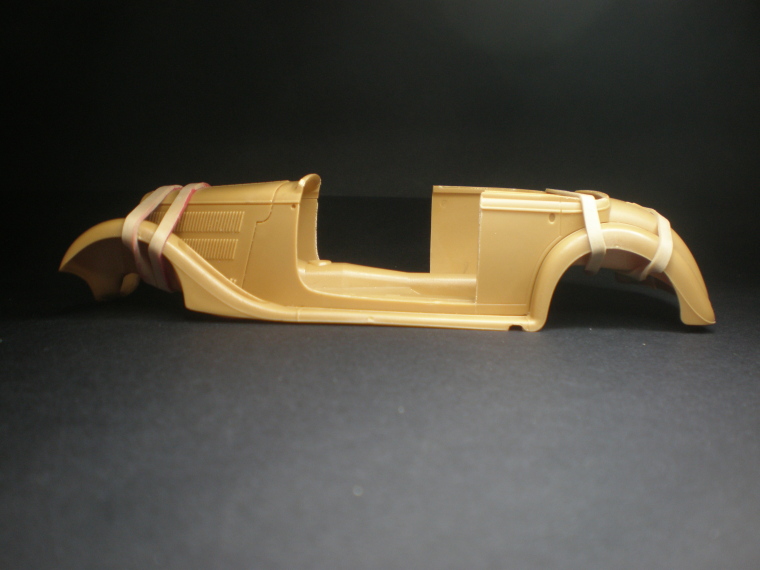
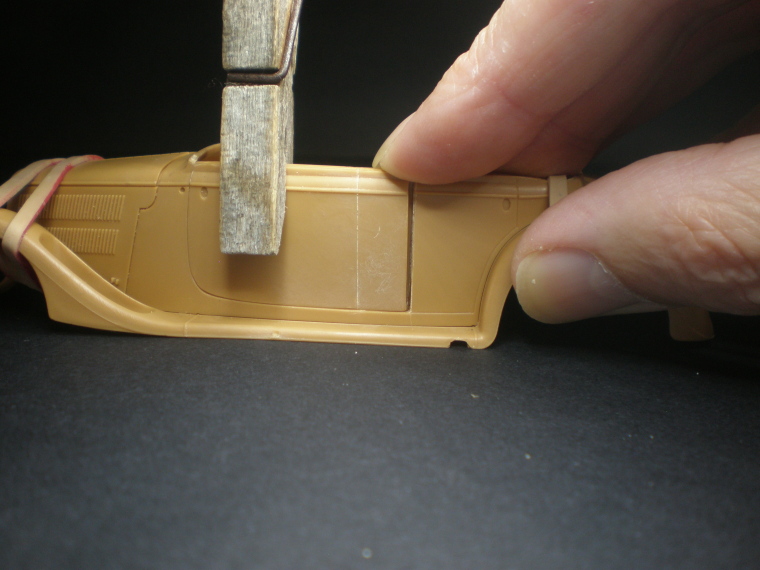
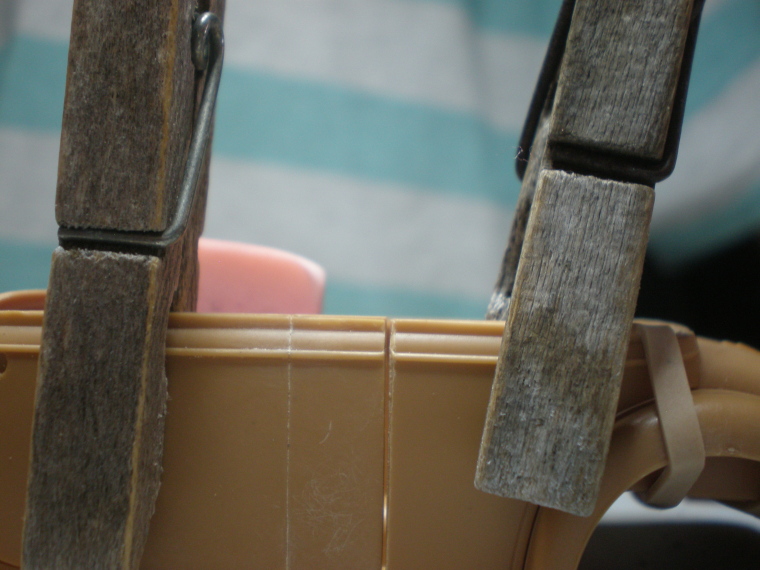
I’m avoiding gluing anything for as long as possible, the only cement used so far is holding the engine/chassis together. The old wooden pegs (& rubber bands) exert just enough pressure without warping or denting the parts. From this point on I’ll take the driver’s side to completion - any further mistakes will hopefully be conceal-able & hopefully I won’t repeat them on Heydrich’s side, where more/most of the close-up photography will be. Much more sanding & filling to come to get the doors plumb & tight, then some scratched/working hinges – a task guaranteed to put more bite-marks in the workbench when you look at how small they are (p1/2nd image).
For Heydrich’s side I need to meditate further on how to make the pristine door/running-board/rear wing detachable, so they can be replaced by a duplicate section with blast-damage at the relevant point in final photography. There’s no escape because there’ll be close-ups taken of that side of the car before the grenade’s thrown, & then post-blast. At least I don’t have to make that door’s hinges workable because it was half blown off before Heydrich got out.
I’ve talked myself out of the alternative - building a 2nd stunt-double car, even though there’s a risk the IED could cause “unexpected” damage - how ironic if it does. I should be able to video that event from the other side of the car, so that the damaged sections are in place to take the blast & would be easier to repair…back to the right amount of damage, if that makes any sense.
Frenchy
Rhone, France
Joined: December 02, 2002
KitMaker: 12,719 posts
Armorama: 12,507 posts
Joined: December 02, 2002
KitMaker: 12,719 posts
Armorama: 12,507 posts
Posted: Thursday, May 10, 2018 - 06:58 PM UTC
Impressive example of plastic surgery
H.P.
H.P.
Dioramartin
New South Wales, Australia
Joined: May 04, 2016
KitMaker: 1,476 posts
Armorama: 1,463 posts
Joined: May 04, 2016
KitMaker: 1,476 posts
Armorama: 1,463 posts
Posted: Saturday, May 12, 2018 - 06:45 PM UTC
Gee tough crowd HP, made me laugh anyway. So while we have the place to ourselves here’s a question for you…
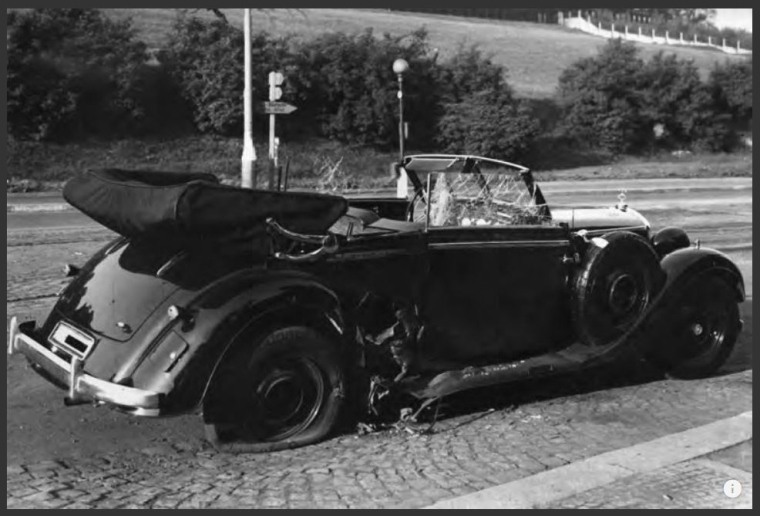
The reconstruction photos (which I believe were taken late the same day) show the car with no license plates or pennants. All the movies/re-enactments have “SS 3” on the plates (& various pennants), but I’m not sure if this is another case of everyone copying a possibly suspect original factoid. I could understand the Gestapo removing those items – it was an embarrassing security lapse. I doubt anyone could/would have risked souvenier-ing them.
On the other hand I wonder if the car never had plates or pennants, as Heydrich’s only concession to other requests from Himmler for increased security which he chose to ignore?
Just a point of conjecture I doubt can be proved one way or the other, but I have a slightly irrational preference for not having plates/pennants at all.
BootsDMS
England - South West, United Kingdom
Joined: February 08, 2012
KitMaker: 978 posts
Armorama: 965 posts
Joined: February 08, 2012
KitMaker: 978 posts
Armorama: 965 posts
Posted: Saturday, May 12, 2018 - 07:47 PM UTC
Quoted Text
Gee tough crowd HP, made me laugh anyway. So while we have the place to ourselves here’s a question for you…
The reconstruction photos (which I believe were taken late the same day) show the car with no license plates or pennants. All the movies/re-enactments have “SS 3” on the plates (& various pennants), but I’m not sure if this is another case of everyone copying a possibly suspect original factoid. I could understand the Gestapo removing those items – it was an embarrassing security lapse. I doubt anyone could/would have risked souvenier-ing them.
On the other hand I wonder if the car never had plates or pennants, as Heydrich’s only concession to other requests from Himmler for increased security which he chose to ignore?
Just a point of conjecture I doubt can be proved one way or the other, but I have a slightly irrational preference for not having plates/pennants at all.
Tim,
Very impressive work; I only wish I had the nerve let alone the skill to modify plastic like that.
Re the Pennant and Number Plate issue. To my mind it would be inconceivable the vehicle not having a registration. The German mind just doesn't work like that - especially the military one. In fact, any military would insist on whatever equipment being registered etc. Otherwise, say, fuel issues, workshop schedules just don't happen.
Whether or not it was SS 3 or not begs another question; I would like to think it was SS 3 - perhaps Heydrich saw himself as No 3 in the SS hierarchy - although surely in that case he would have been deemed second only to Himmler therefore the plates would be "SS 2"; did Himmler ever use a vehicle with "SS 1"? But this perhaps is chasing the error.
Alternately, such a senior officer would have more than one vehicle available, conceivably SS 3 was Heydrich's favourite, and perhaps he did indulge in a small vanity of such a personalised number plate of some sort? (I'm probably not being much help here!) So his secondary vehicle - ie the "spare" when his favourite was being serviced etc could have been "SS 2" perhaps?
As for a pennant; again, I would assume that some sort of pennant would be flown (these being the rigid encased type not the fluttering small Swastikas shown in various films). A quick bit of Googling produced these examples
https://www.crwflags.com/fotw/flags/de%7Dns%5Ess.html#rfss
but I haven't finished studying it all yet. I am sure that Heydrich would have had something on his vehicle - it's the Nazi/military way where hierarchical instantly recognizable emblems were/are everything.
There may well have been pennants on both sides of the vehicle - I just haven't worked out what these might have been yet - but I'm no SS expert - but perhaps someone else will spark. Conceivably, a secondary pennant could have been a version of the national flag.
As you point out, the Gestapo would have removed both as soon as possible, that must be a given surely, "Secure the crime scene but don't embarrass the Reich" or similar lines of thought.
As I say, I'm not sure I'm adding much here; I would encourage "SS 3" and pennants; just imagine the colour contrasts, Heydrich's Field Grey (and blood?), black/dark green vehicle (are we still going with black?), brown leather upholstery, black and white and silver pennants? National flag on the opposing wing?
However, I am well aware that such a diorama should not be dictated to by a colour chart!
Keep it up, whatever you decide.
Brian
Frenchy
Rhone, France
Joined: December 02, 2002
KitMaker: 12,719 posts
Armorama: 12,507 posts
Joined: December 02, 2002
KitMaker: 12,719 posts
Armorama: 12,507 posts
Posted: Saturday, May 12, 2018 - 07:53 PM UTC
Hi Tim
Heydrich's other cars have pennant and plates, like at least this one he used for official travels, a 770 with the "SS-3" plate :
I guess you can see the pennant holder base on the front right fender :
AFAIK, the 320 above had the "SS-4" plate...
H.P.
Heydrich's other cars have pennant and plates, like at least this one he used for official travels, a 770 with the "SS-3" plate :
I guess you can see the pennant holder base on the front right fender :
AFAIK, the 320 above had the "SS-4" plate...
H.P.
Dioramartin
New South Wales, Australia
Joined: May 04, 2016
KitMaker: 1,476 posts
Armorama: 1,463 posts
Joined: May 04, 2016
KitMaker: 1,476 posts
Armorama: 1,463 posts
Posted: Sunday, May 13, 2018 - 09:34 AM UTC
Thanks Brian – as expected I did need an anaesthetic in pre-op to steady the hands (for fine motor I’m ambidextrous), the kind found in large dimpled bottles…
I agree about the German need for assertion over their “subjects” although see below. And yes I thought the pennants were no-brainers but have recently lost some confidence about which one(s).
Thanks HP - your 1st & 2nd images must be from the same sequence – snow/slush on the ground, the 770/SS-3 followed by Pol -12 – is there a date/location for them? I’ve made an ineffectual attempt to trace a reference I read weeks ago which (if memory serves) claimed Heydrich had SS-1 to SS-4 (i.e. 4 cars) in the garage for official use. What stuck in my mind from that was SS-3 therefore wasn’t necessarily his personal plate. His Deputy Karl Frank would have used one of the others but perhaps it just depended on what was available – otherwise RH would surely have always rode around in SS-1, Frank in SS-2 etc.
So going back to my first para – and depending whether those photos were taken in Prague 1942 or another place/time – we could construe that SS-3 was in fact on that 770 all the time (particularly if in Prague) & thus couldn’t have been on the 320. The received wisdom that it was may be exactly because the photos you posted are reasonably well-known & everyone has just assumed SS-3 was RH’s personal plate, given the reconstruction photos leave everyone guessing.
The only other scrap of information that might be relevant is that RH was on that very day heading for the airport, flying out to meetings in Berlin with Hitler & Himmler & then onwards to Paris, regarding his probable new assignment (Reich-Protector France, he was not returning to Prague) so he had his suitcases in the boot/trunk & dress uniforms laid out on the back seat, which incidentally got blown up onto the overhead powerlines…a wonderful image although I’m not altogether convinced it happened (Ivanov/MacDonald). Whatever, the 320 was perhaps more suited to such domestic tasks rather than the big limos & may not normally have been used RH. And so like you I’m coming round (via a slightly different route) to thinking “SS-4” is more – or just as - likely, particularly if the hierarchy was based on car-type.
Yep going black for sure now; as for the upholstery - burgundy-red, based on the apparently meticulous restoration-or-replica (p1/2nd image yet again) and some b&w’s hint it was a slightly lighter tone than brown e.g. the pic I posted yesterday. That’s for later, I’m still wrangling the body-shell right now
Frenchy
Rhone, France
Joined: December 02, 2002
KitMaker: 12,719 posts
Armorama: 12,507 posts
Joined: December 02, 2002
KitMaker: 12,719 posts
Armorama: 12,507 posts
Posted: Sunday, May 13, 2018 - 11:27 PM UTC
Quoted Text
Your 1st & 2nd images must be from the same sequence – snow/slush on the ground, the 770/SS-3 followed by Pol -12 – is there a date/location for them?
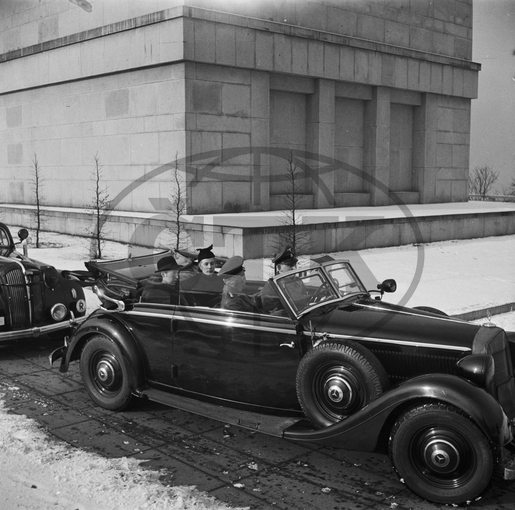
Here's the caption I've found for the second one on the CTK Photobank website (Google translation) :
"Hitler's architect and creator of the Nazi monumental structures Albert Speer visited in December 1941 at the invitation of Reinhard Heydrich of Prague. Pictured a Mercedes column with Speer, Heydrich and their escort on Vítkov Hill before the Liberation Monument." The date is December 4, 1941.
Here are two other pics from the same sequence showing a 320 : I guess one of the women should be Frau Heydrich...
H.P.