Joe,
I do not have a blog on the kit. It looks nice to me so far and I have a buddy who built a takom Type 69 and then the HB kit and he said he likes the HB kit better.
D
Constructive Feedback
For in-progress or completed build photos. Give and get contructive feedback!
For in-progress or completed build photos. Give and get contructive feedback!
Hosted by Darren Baker, Dave O'Meara
Binge Build: Takom T-55s
panamadan

Joined: July 20, 2004
KitMaker: 1,513 posts
Armorama: 1,449 posts

Posted: Thursday, January 30, 2020 - 09:54 AM UTC

BravoTwoZero

Joined: June 11, 2009
KitMaker: 461 posts
Armorama: 370 posts

Posted: Tuesday, February 04, 2020 - 06:26 AM UTC
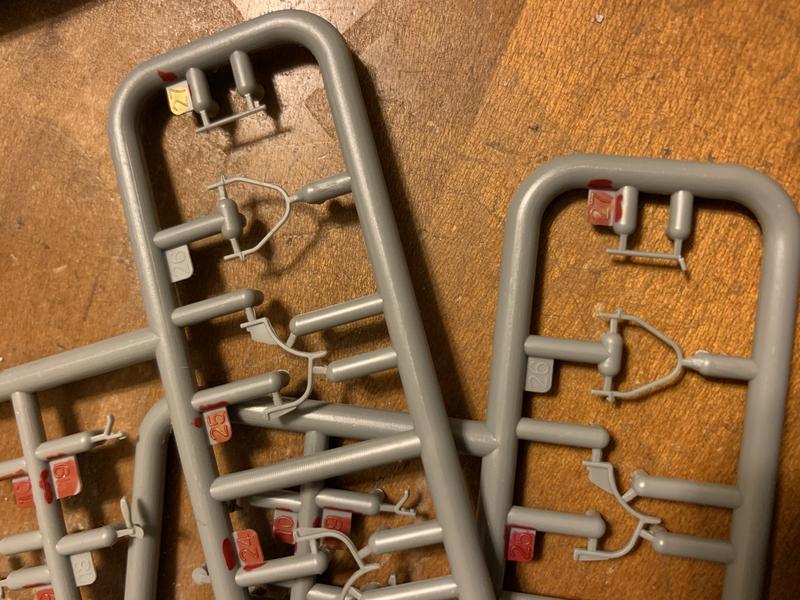
Here's the latest on my Tiran 4! Worked on some more fiddly parts. There are two part 26s, these are to secure the fire extinguishers. They are so thin that there is a high risk of breaking or mangling them as I try to remove them from the sprues. BTW, the red marks on the sprue numbers are the ones identified in the instruction as parts that will not be used for this kit. I figured I can just skip these when I'm looking for parts that I will use! The left over parts will go to the greeblies bin. 
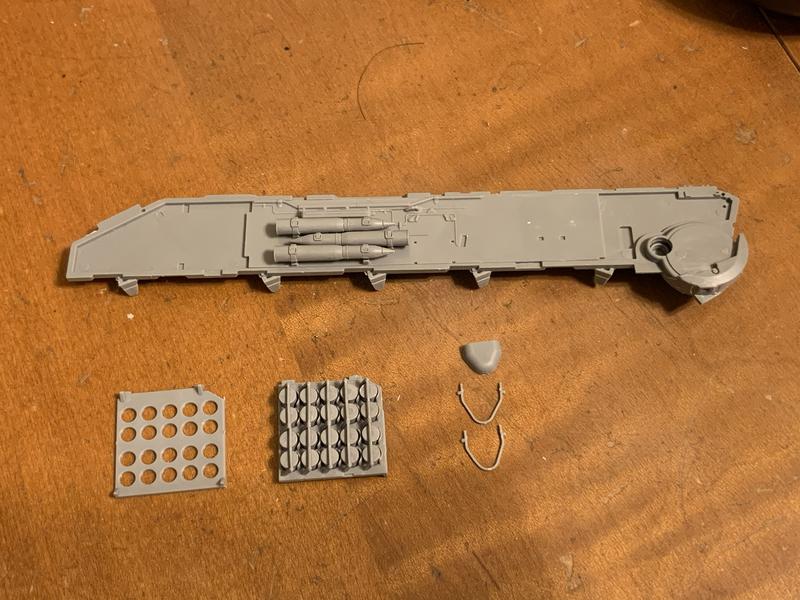
To my relief, I was able to take them off successfully. Here is the layout of the right side interior.
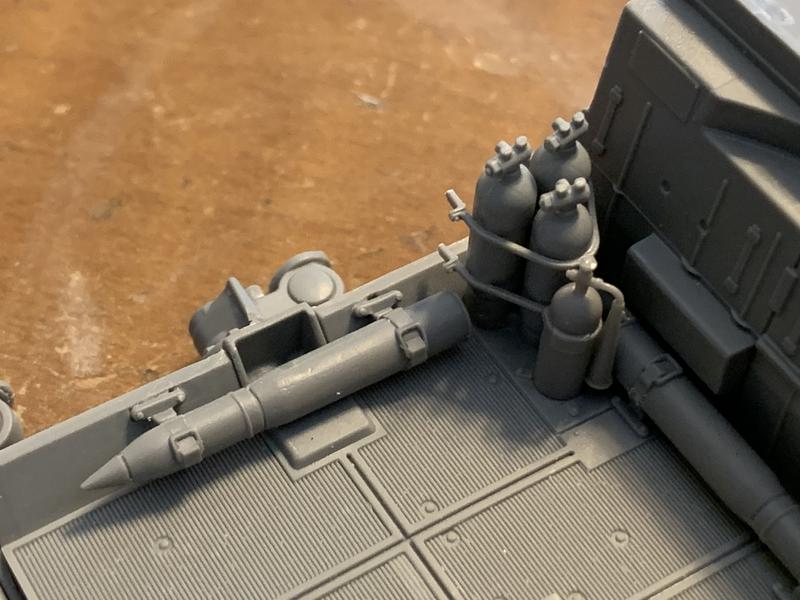
I decided to glue the straps right on to the extinguishers instead of on to the walls per instruction. Here they are in place.

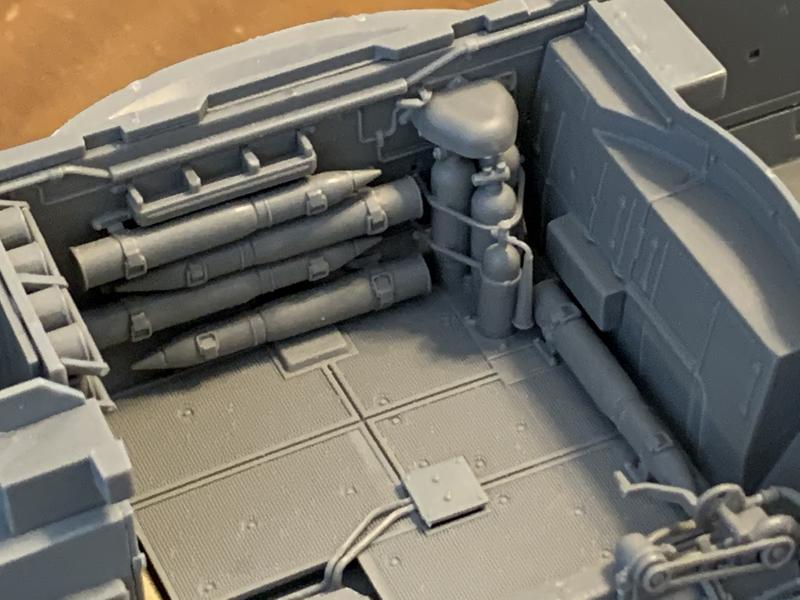
And here is the right side hull dry fitted.

Got one fiddly part out of the way...on to the next one. This time it is for something that looks like a compressor to me. It has a lot of parts!

I gave up on smoothing down the sprue connections from the "pipes". Here's how it looks like assembled.
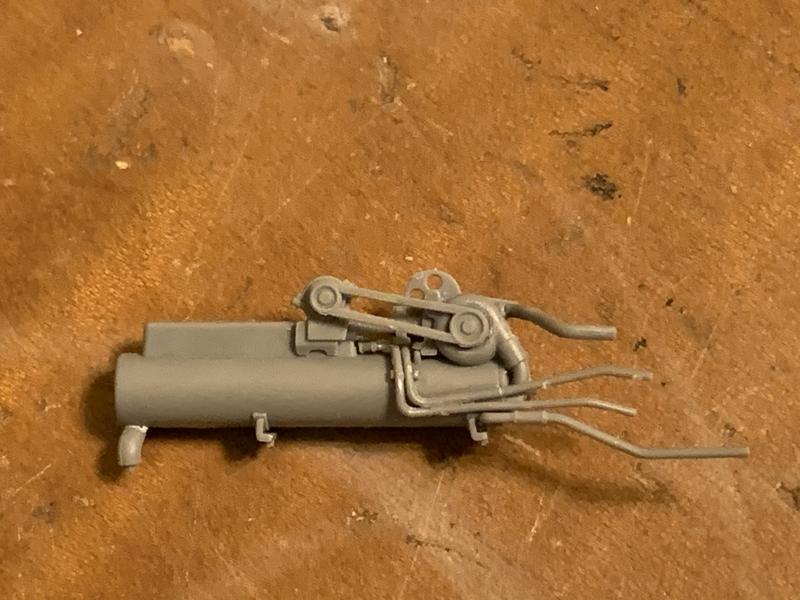

I also worked on the rear wall of the fighting compartment. Here's the parts layout.

And as completed.

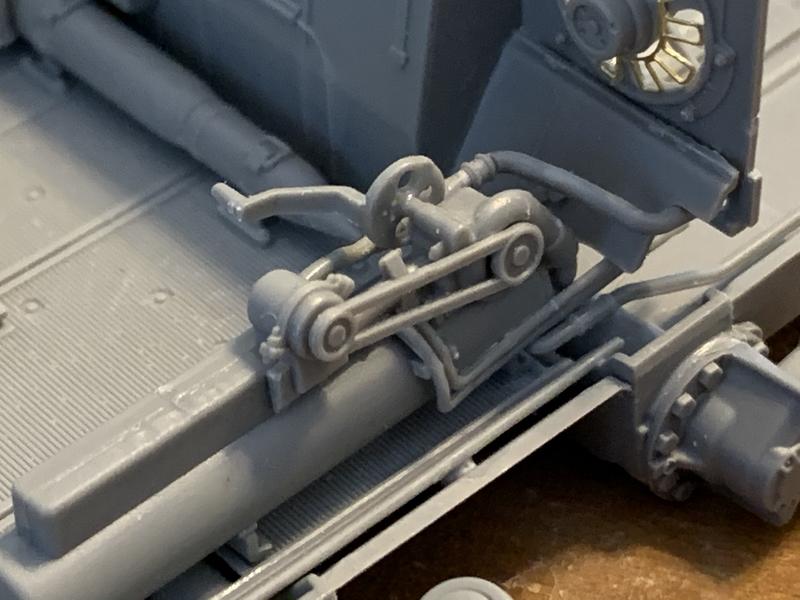
Here they are dry fitted.

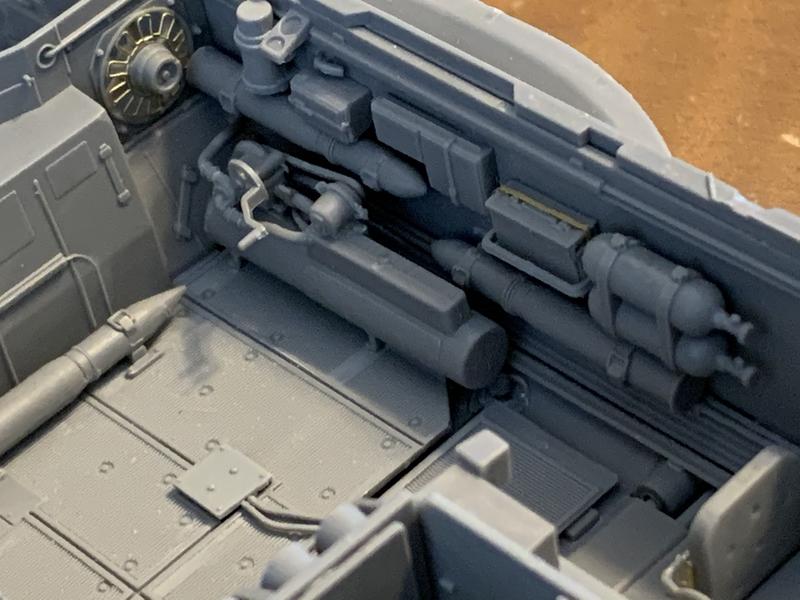
Glad I didn't put a lot of effort on cleaning up the compressor pipes as they are not visible at all when the left side of the hull is installed! Now you see them...
Now you don't!
I'm almost nearing completion of the hull interior build phase. I'll be taking some "before" shots prior to primer application.
-Joseph


To my relief, I was able to take them off successfully. Here is the layout of the right side interior.

I decided to glue the straps right on to the extinguishers instead of on to the walls per instruction. Here they are in place.


And here is the right side hull dry fitted.


Got one fiddly part out of the way...on to the next one. This time it is for something that looks like a compressor to me. It has a lot of parts!

I gave up on smoothing down the sprue connections from the "pipes". Here's how it looks like assembled.


I also worked on the rear wall of the fighting compartment. Here's the parts layout.

And as completed.

Here they are dry fitted.

Glad I didn't put a lot of effort on cleaning up the compressor pipes as they are not visible at all when the left side of the hull is installed! Now you see them...

Now you don't!

I'm almost nearing completion of the hull interior build phase. I'll be taking some "before" shots prior to primer application.
-Joseph

BravoTwoZero

Joined: June 11, 2009
KitMaker: 461 posts
Armorama: 370 posts

Posted: Thursday, February 06, 2020 - 05:11 AM UTC
Here are the "glamour" shots of the completed interior of my Tiran.


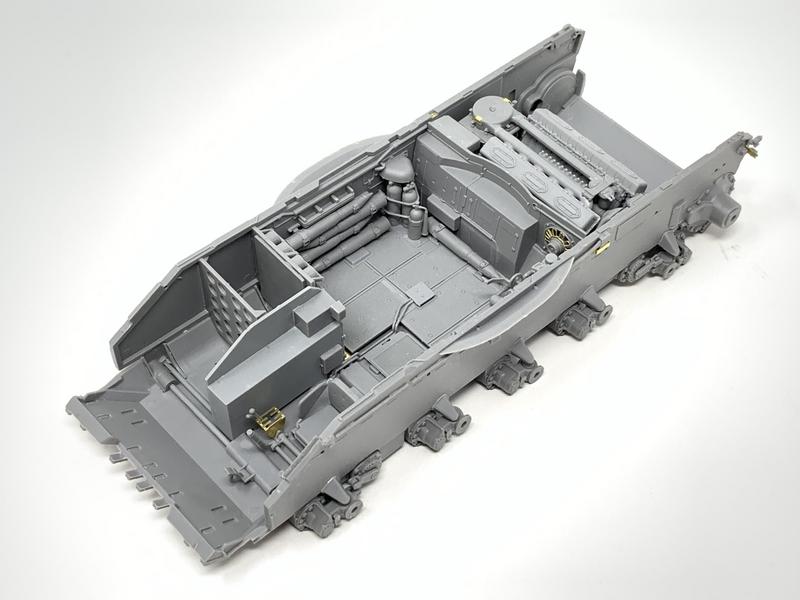
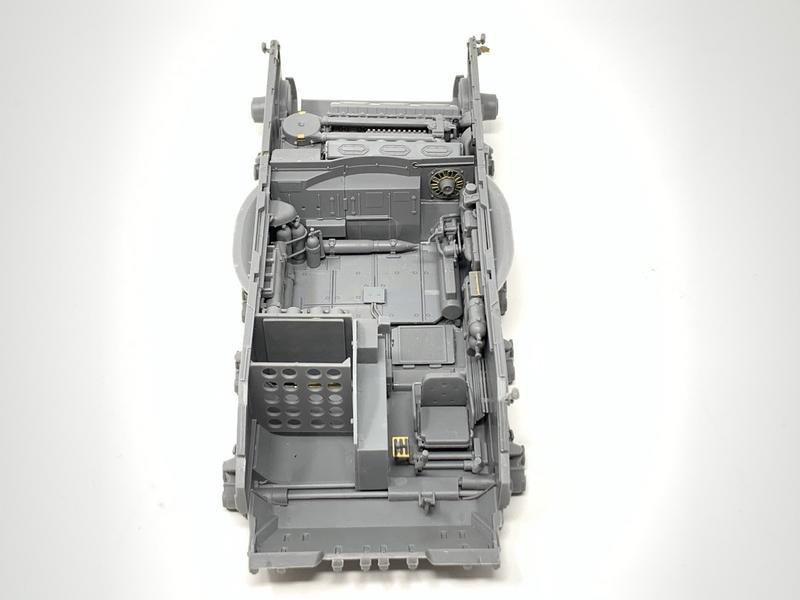

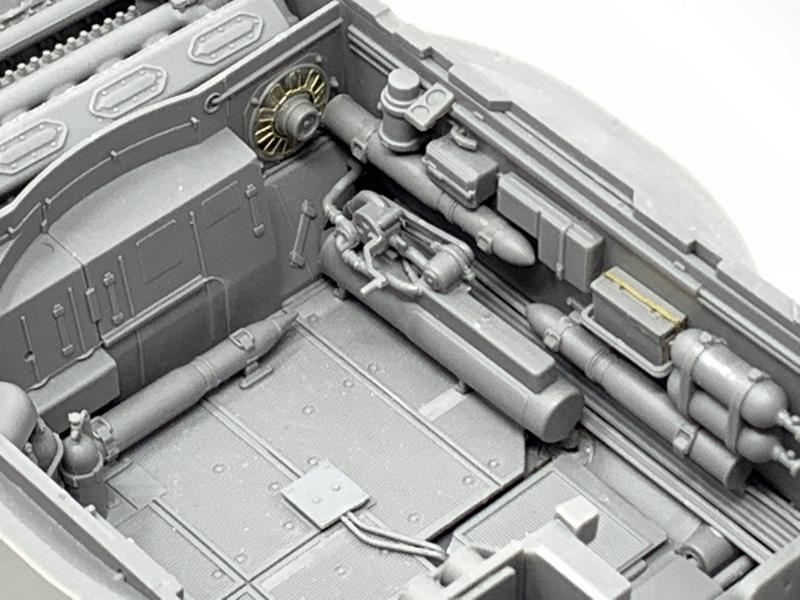

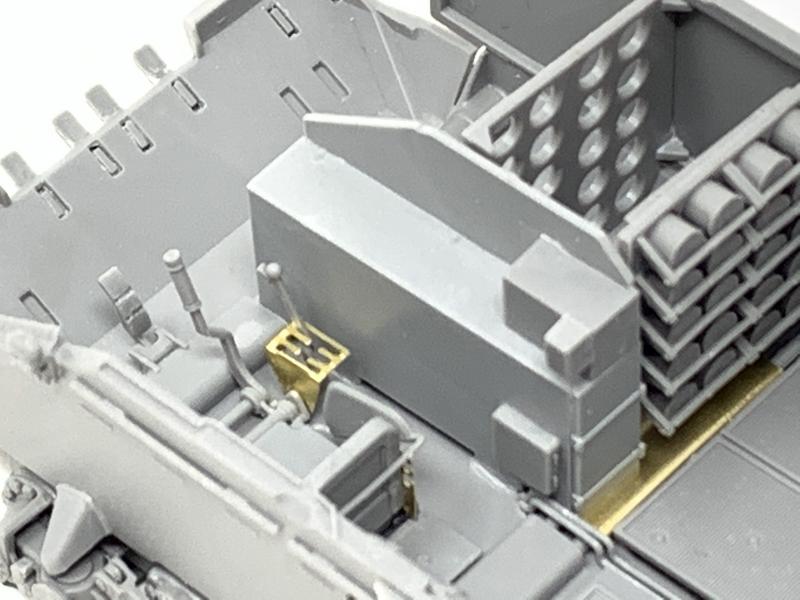


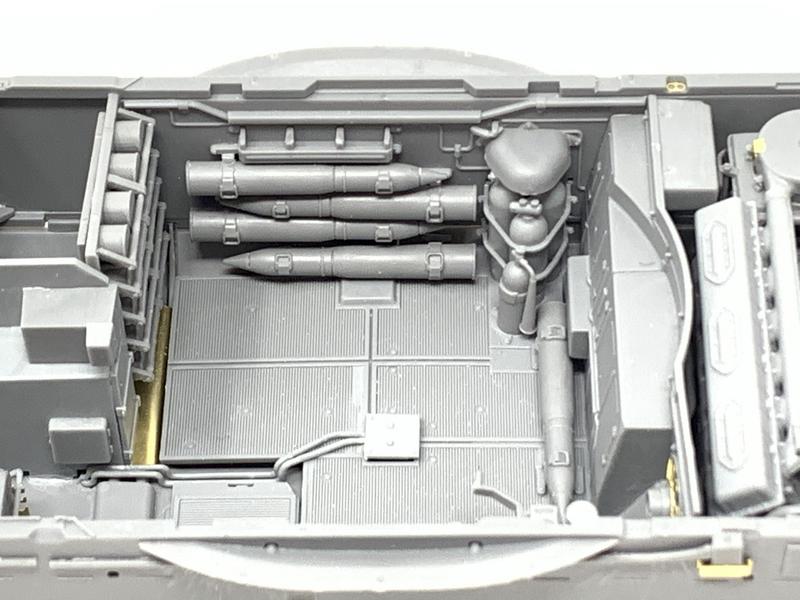
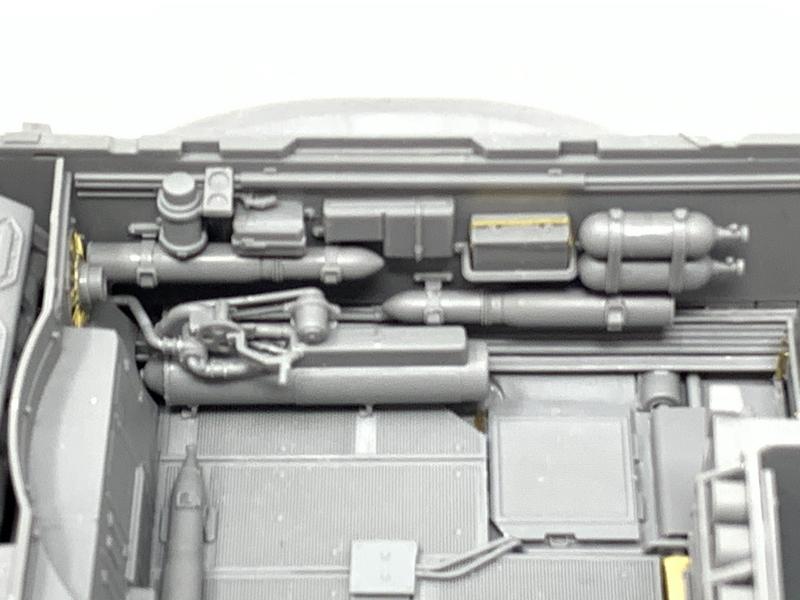
I will be applying primer soon.
-Joseph


I will be applying primer soon.
-Joseph
panamadan

Joined: July 20, 2004
KitMaker: 1,513 posts
Armorama: 1,449 posts

Posted: Thursday, February 06, 2020 - 05:44 AM UTC
You make it look easy.
Dan
Dan

BravoTwoZero

Joined: June 11, 2009
KitMaker: 461 posts
Armorama: 370 posts

Posted: Friday, February 07, 2020 - 05:02 AM UTC
Quoted Text
You make it look easy.
Dan
Thanks Dan! This kit is quite the challenge but I am trying hard to keep focus.
Update on the Tiran 4 build. I started working on the glacis. Here are the components inside.

And outside.

The two headlights are nicely detailed consisting of three pieces each.

It assembled pretty well too. I painted the inside with Molotow liquid chrome. It looks pretty convincing.
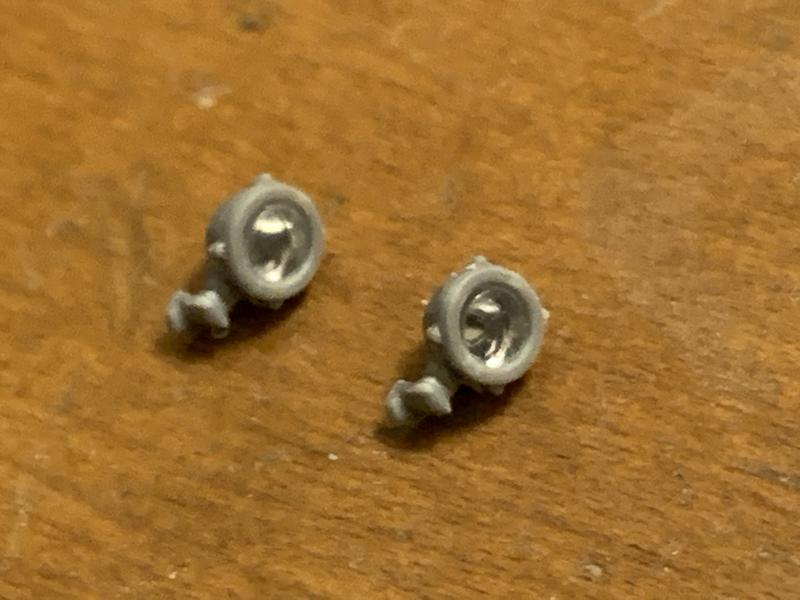
Unfortunately, these will not be visible when the shield is installed. Speaking of the shield, it is made of photoetch.
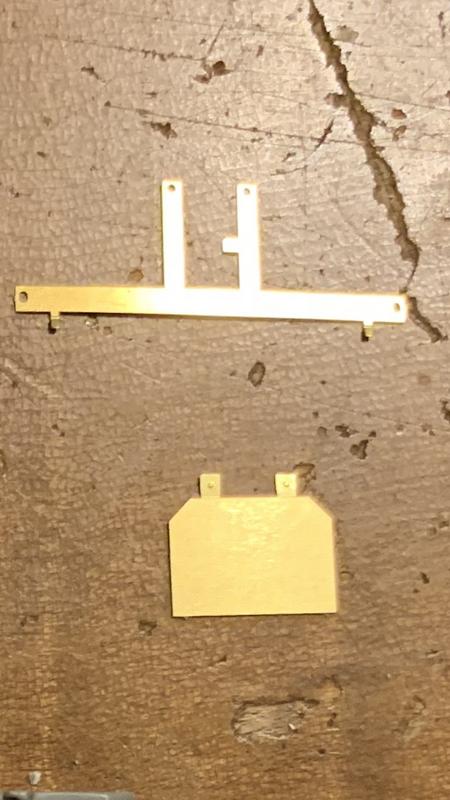
It did not have any bend/fold guides. I had to approximate where to fold it. This was the most frustrating/challenging piece of the glacis. Here is how it ended up.


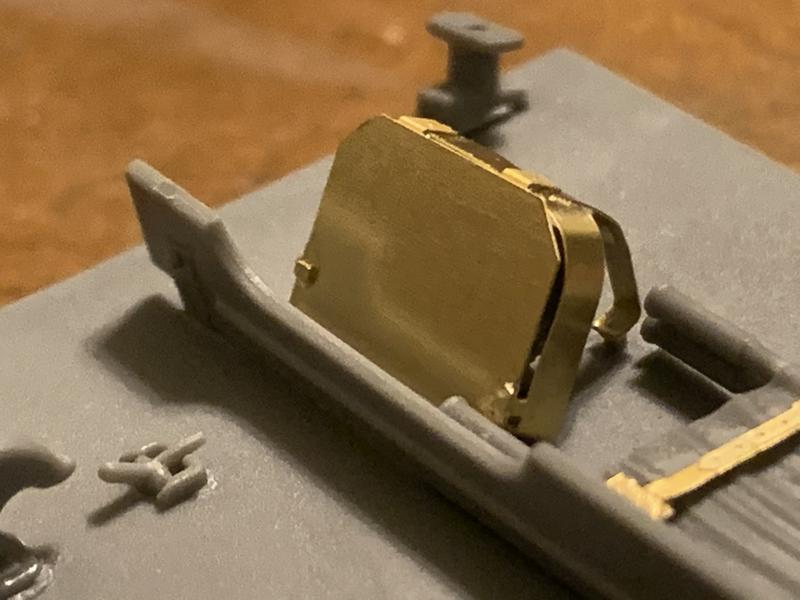

Here is the completed glacis.

The straps that hold the stretcher in place also did not have any guides. I'm pretty sure it is not folded correctly but I'll have to stick with it.
-Joseph
seanmcandrews

Joined: May 09, 2009
KitMaker: 561 posts
Armorama: 553 posts

Posted: Friday, February 07, 2020 - 05:11 AM UTC
so how did you manage to fold the headlight guard so nicely without any bend lines, did you make a form of some sort ?
Sean
Sean

BravoTwoZero

Joined: June 11, 2009
KitMaker: 461 posts
Armorama: 370 posts

Posted: Friday, February 07, 2020 - 06:44 AM UTC
Quoted Text
so how did you manage to fold the headlight guard so nicely without any bend lines, did you make a form of some sort ?
Sean
Hey Sean, I didn't create a form. The edges of the frame, although, they do not have bend guides, they are different color/shade. You can use that as a guide to fold in 90 degrees. But, because there are no bend guides, the 90 degree corners are not sharp.
On the curved portions of the frame, I guestimated it. It's hard to describe but I used a drill bit that would fit the corner of the shield and fold it also at 90 degrees.
The angled rear part of the frame was a matter of trial and error, until it fits in the glacis slope.
One major problem here is that the PE is soft. You can see in the last picture of the frame that it is no longer straight. This is as close as I can get it to be. Glad you think it looks nice.
-Joseph

BravoTwoZero

Joined: June 11, 2009
KitMaker: 461 posts
Armorama: 370 posts

Posted: Tuesday, February 11, 2020 - 04:50 AM UTC
While on a holding pattern to apply primer (too cold in my garage to airbrush), I went about and worked on the road wheels. The following is my personal observation. I am merely pointing out differences that I have seen between Takom and Miniart. Here's my take, for an interior kit, I'm surprised that Takom beats Miniart on this. Takom has the rubber for the road wheels as separate parts. Miniart opted to have them molded on to the steel wheels. Takom has detail inside the hubs, Miniart has a plain pin inside to allow rotation. You can't have the option of lost hub covers. And lastly, Takom has two types of road wheels, the larger hub (barely noticeable next to the regular ones but still different size) for the front and the regular sized hub for the remaining wheels. Miniart has all the hubs as same size. Not that I wanted more parts for Miniart's interior kits. I'm just surprised that they lost to Takom on this aspect.
Anyway, back to my build. Here are the road wheels prior to clean up.

There are additional cleanup work on the road wheels because of the flash. These are on both sides of the wheels. Here you can see them on the space between the starfish holes.

And on the hub rim.

Here they are after the flash clean up.
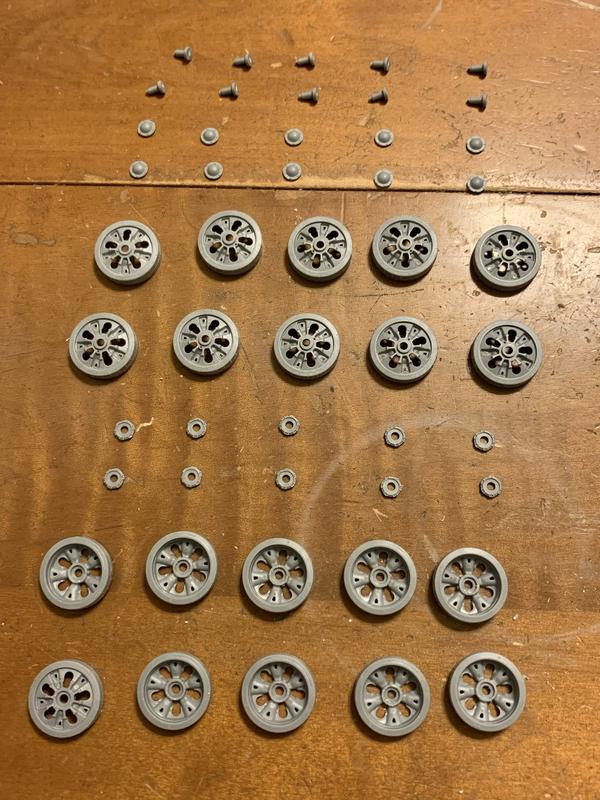
Look at all those debris! I have to give credit on Miniart's road wheels here, they are easier to clean up compared to Takom's. On the separately molded rubber rims for Takom, it is difficult to clean up the sprue gates because they are located right on the rubber rim details.

On to the next labor intensive pieces, the tracks!

Again, Takom beats Miniart on this aspect. I don't remember performing a lot of clean up on the Takom tracks. Miniart tracks, you have to remove them from sprues, plus, there are 4 sprue gates/ connectors for each track that require cleanup!
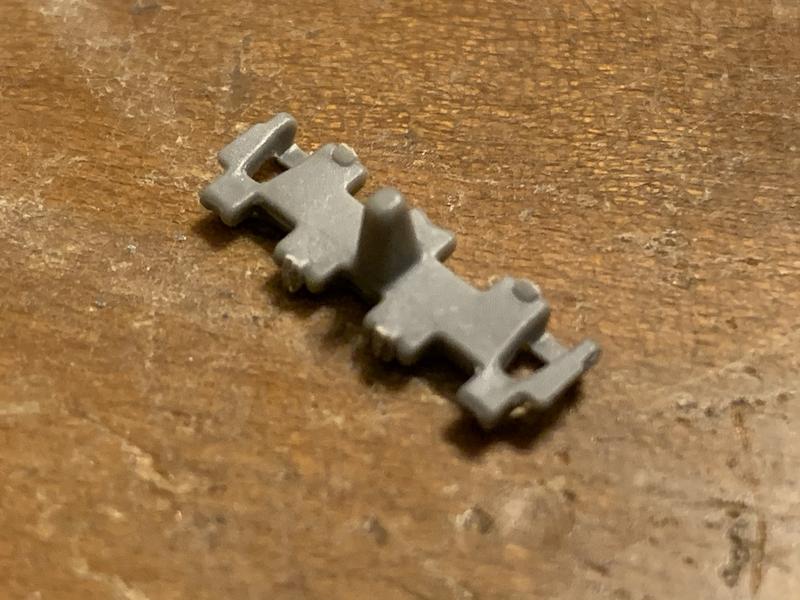
You have to literally work on each individual tracks! On some of the connectors, you have to perform some carving to bring out the correct detail! Oh well, I signed up for this. I think I'll take a break and work on the tracks another night.
-Joseph
Anyway, back to my build. Here are the road wheels prior to clean up.

There are additional cleanup work on the road wheels because of the flash. These are on both sides of the wheels. Here you can see them on the space between the starfish holes.

And on the hub rim.

Here they are after the flash clean up.

Look at all those debris! I have to give credit on Miniart's road wheels here, they are easier to clean up compared to Takom's. On the separately molded rubber rims for Takom, it is difficult to clean up the sprue gates because they are located right on the rubber rim details.

On to the next labor intensive pieces, the tracks!

Again, Takom beats Miniart on this aspect. I don't remember performing a lot of clean up on the Takom tracks. Miniart tracks, you have to remove them from sprues, plus, there are 4 sprue gates/ connectors for each track that require cleanup!

You have to literally work on each individual tracks! On some of the connectors, you have to perform some carving to bring out the correct detail! Oh well, I signed up for this. I think I'll take a break and work on the tracks another night.
-Joseph
panamadan

Joined: July 20, 2004
KitMaker: 1,513 posts
Armorama: 1,449 posts

Posted: Tuesday, February 11, 2020 - 05:24 AM UTC
HBs wheels and tracks in their Type 59 are quite nice.
stephane

Joined: October 10, 2005
KitMaker: 432 posts
Armorama: 429 posts

Posted: Thursday, February 13, 2020 - 05:22 AM UTC
hello
the first reinforced road wheel is a features of T55. The tiran 4 is based on T54A or B so it must have the all identicals wheels-> Miniart is right.
I have the Takom T69II and it has the T55 wheels that is wrong. So i'll have to use some wheels from a Tamiya T55A kit that has the all same wheels (one of the many Tamiya's errors). Or exchange all the wheels from both kits.

BravoTwoZero

Joined: June 11, 2009
KitMaker: 461 posts
Armorama: 370 posts

Posted: Thursday, February 13, 2020 - 06:02 AM UTC
Quoted Text
hello
the first reinforced road wheel is a features of T55. The tiran 4 is based on T54A or B so it must have the all identicals wheels-> Miniart is right.
I have the Takom T69II and it has the T55 wheels that is wrong. So i'll have to use some wheels from a Tamiya T55A kit that has the all same wheels (one of the many Tamiya's errors). Or exchange all the wheels from both kits.
Hi Stephane, I did not know that. Thank you for that information! I have some MiniArt T-55s in my stash. I'll most likely see the non-identical wheels there.
sinsling

Joined: January 16, 2007
KitMaker: 86 posts
Armorama: 85 posts

Posted: Thursday, February 13, 2020 - 08:05 AM UTC

BravoTwoZero

Joined: June 11, 2009
KitMaker: 461 posts
Armorama: 370 posts

Posted: Wednesday, February 26, 2020 - 10:49 AM UTC
Primer has been applied to the interior of the Tiran.
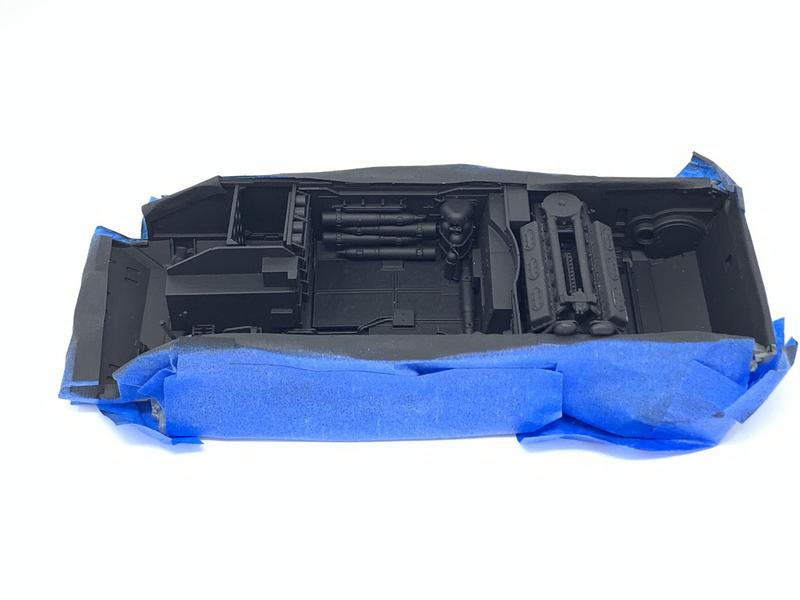
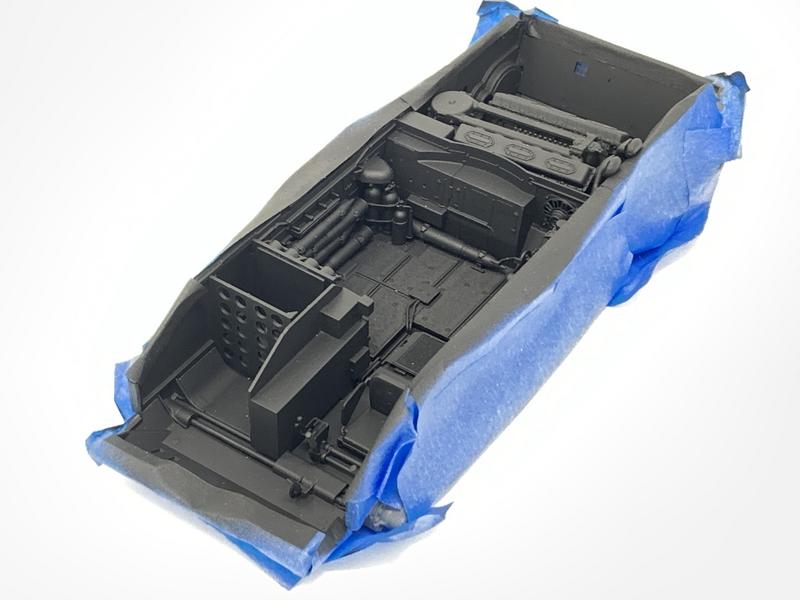


-Joseph


-Joseph
 |


