Campaigns
Where Armorama group builds can be discussed, organized, and updates posted.
Where Armorama group builds can be discussed, organized, and updates posted.
Hosted by Darren Baker, Richard S.
Once More Unto the Breach

k_mero4

Joined: November 26, 2017
KitMaker: 393 posts
Armorama: 369 posts

Posted: Sunday, December 29, 2019 - 09:38 AM UTC
No comment. Just watching.
petbat

Joined: August 06, 2005
KitMaker: 3,353 posts
Armorama: 3,121 posts

Posted: Sunday, December 29, 2019 - 09:49 AM UTC
Wow, wow. wow...….Angel.
54 metal balls soldered to 54 lengths of chain..... hours worth of work that sits in the middle of your palm. Now to make 54 wire loops, to fit in the other end of the chain, to fit around 54 pieces of styrene rod cut to length, to sandwich between 108 tiny etch brackets to fit on 54 roller mounts.
Do I have a problem with numbers????

SpeedyJ

Joined: September 17, 2013
KitMaker: 1,617 posts
Armorama: 1,150 posts

Posted: Monday, December 30, 2019 - 01:57 AM UTC
Working on my final update for this campaign. Little details killing time.
Robert Jan

Robert Jan


Posted: Monday, December 30, 2019 - 03:46 AM UTC
Thanks Kalin!
I hear you, Peter! I know you can!
Looking forward to it, Robert!

I hear you, Peter! I know you can!
Looking forward to it, Robert!


SpeedyJ

Joined: September 17, 2013
KitMaker: 1,617 posts
Armorama: 1,150 posts

Posted: Monday, December 30, 2019 - 09:21 PM UTC
Took it over the finish line.
Have to examine some pictures to see if I need to correct something, but overall it call these done.
Have to make selection for the Campaign Gallery, but here is a first shot of what I finished:
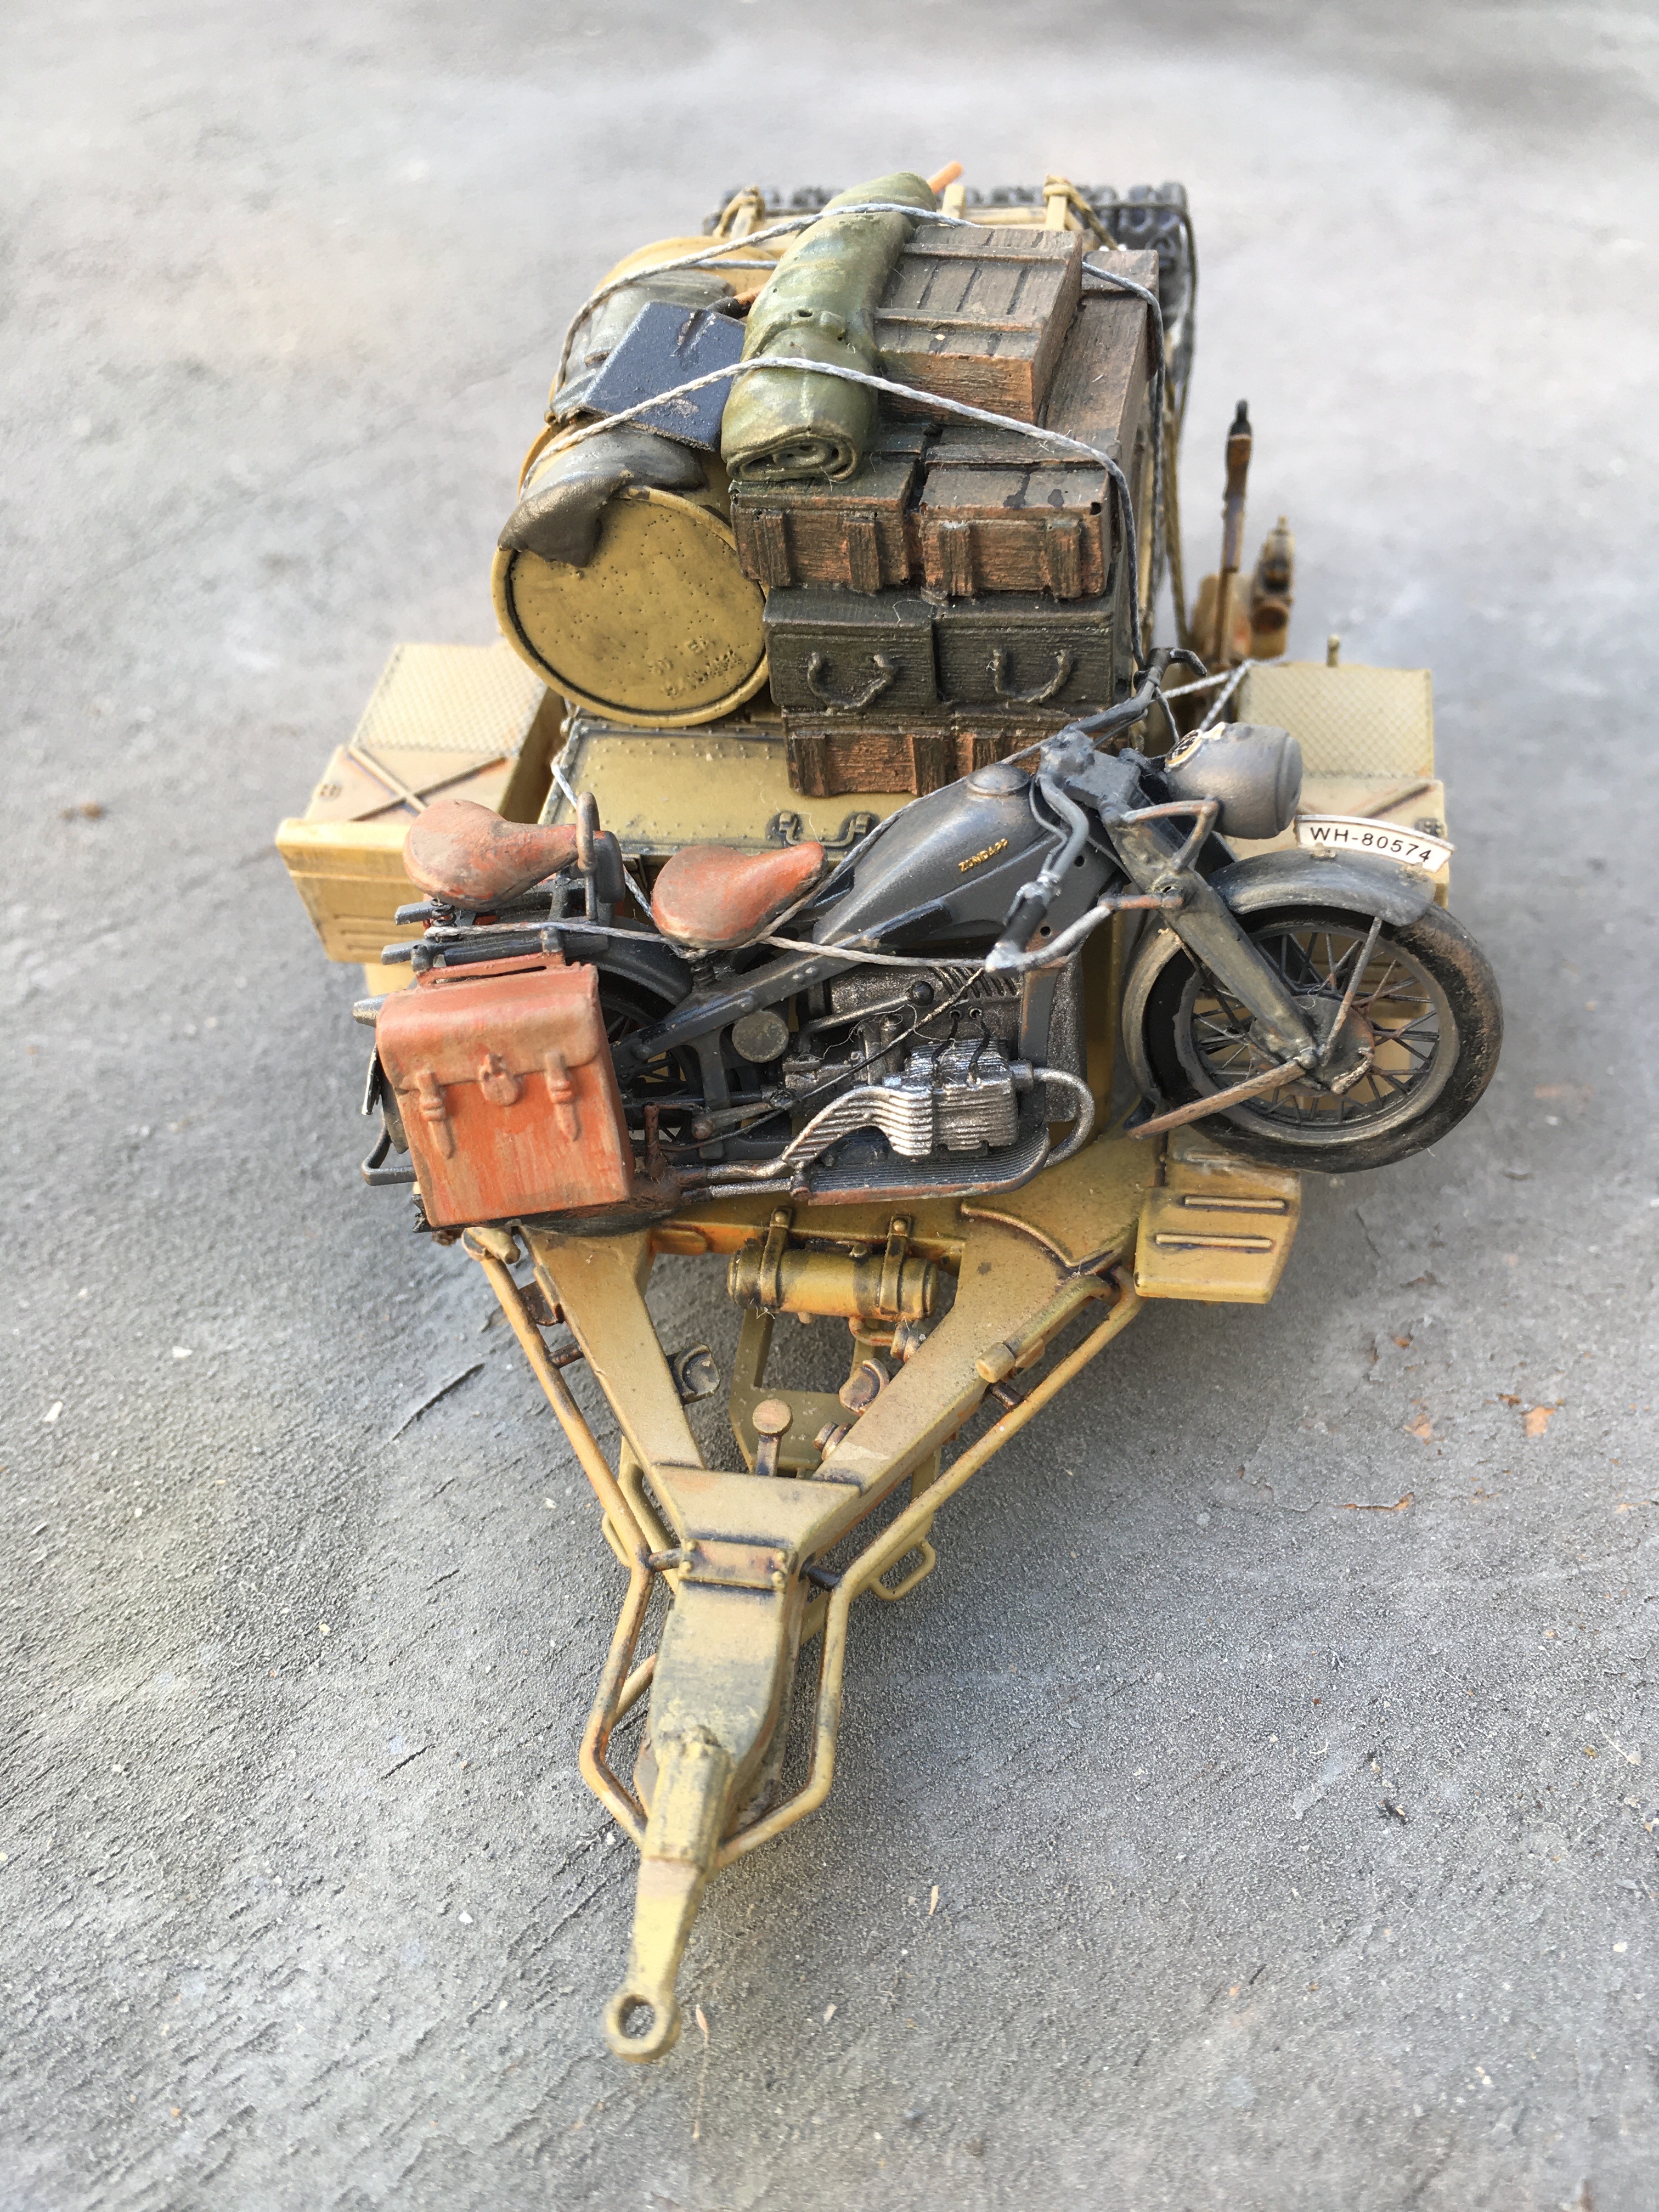
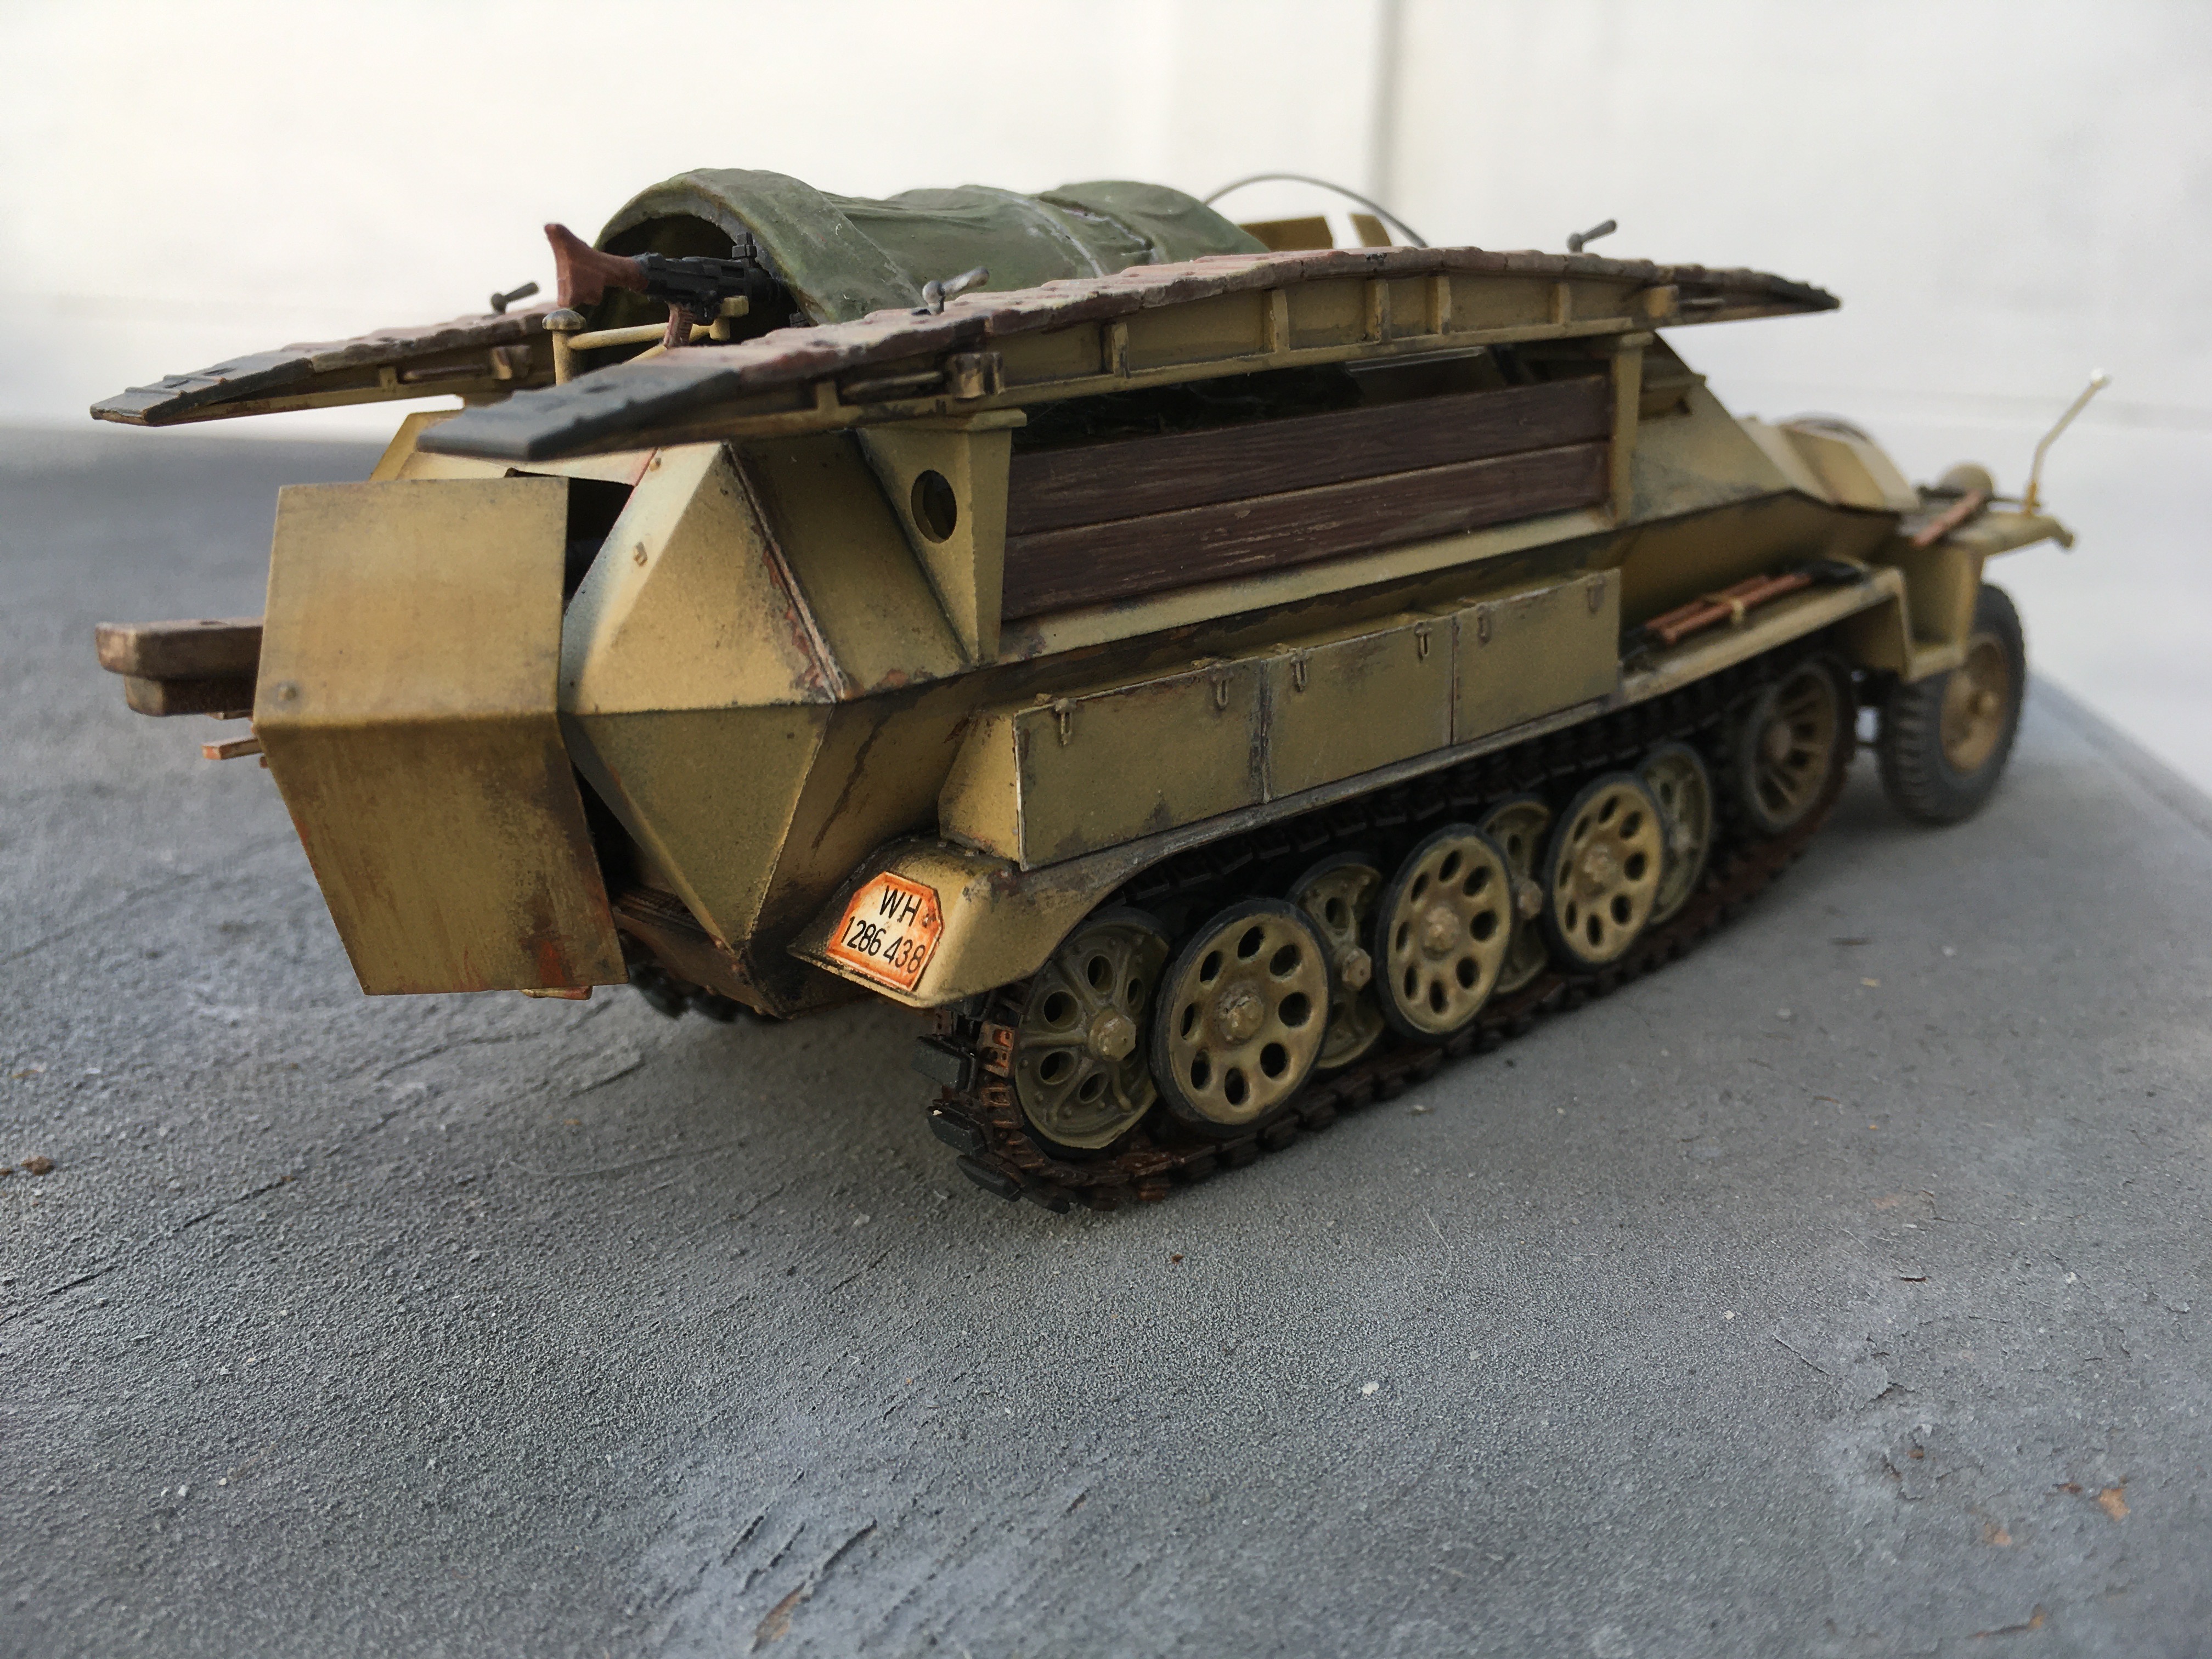
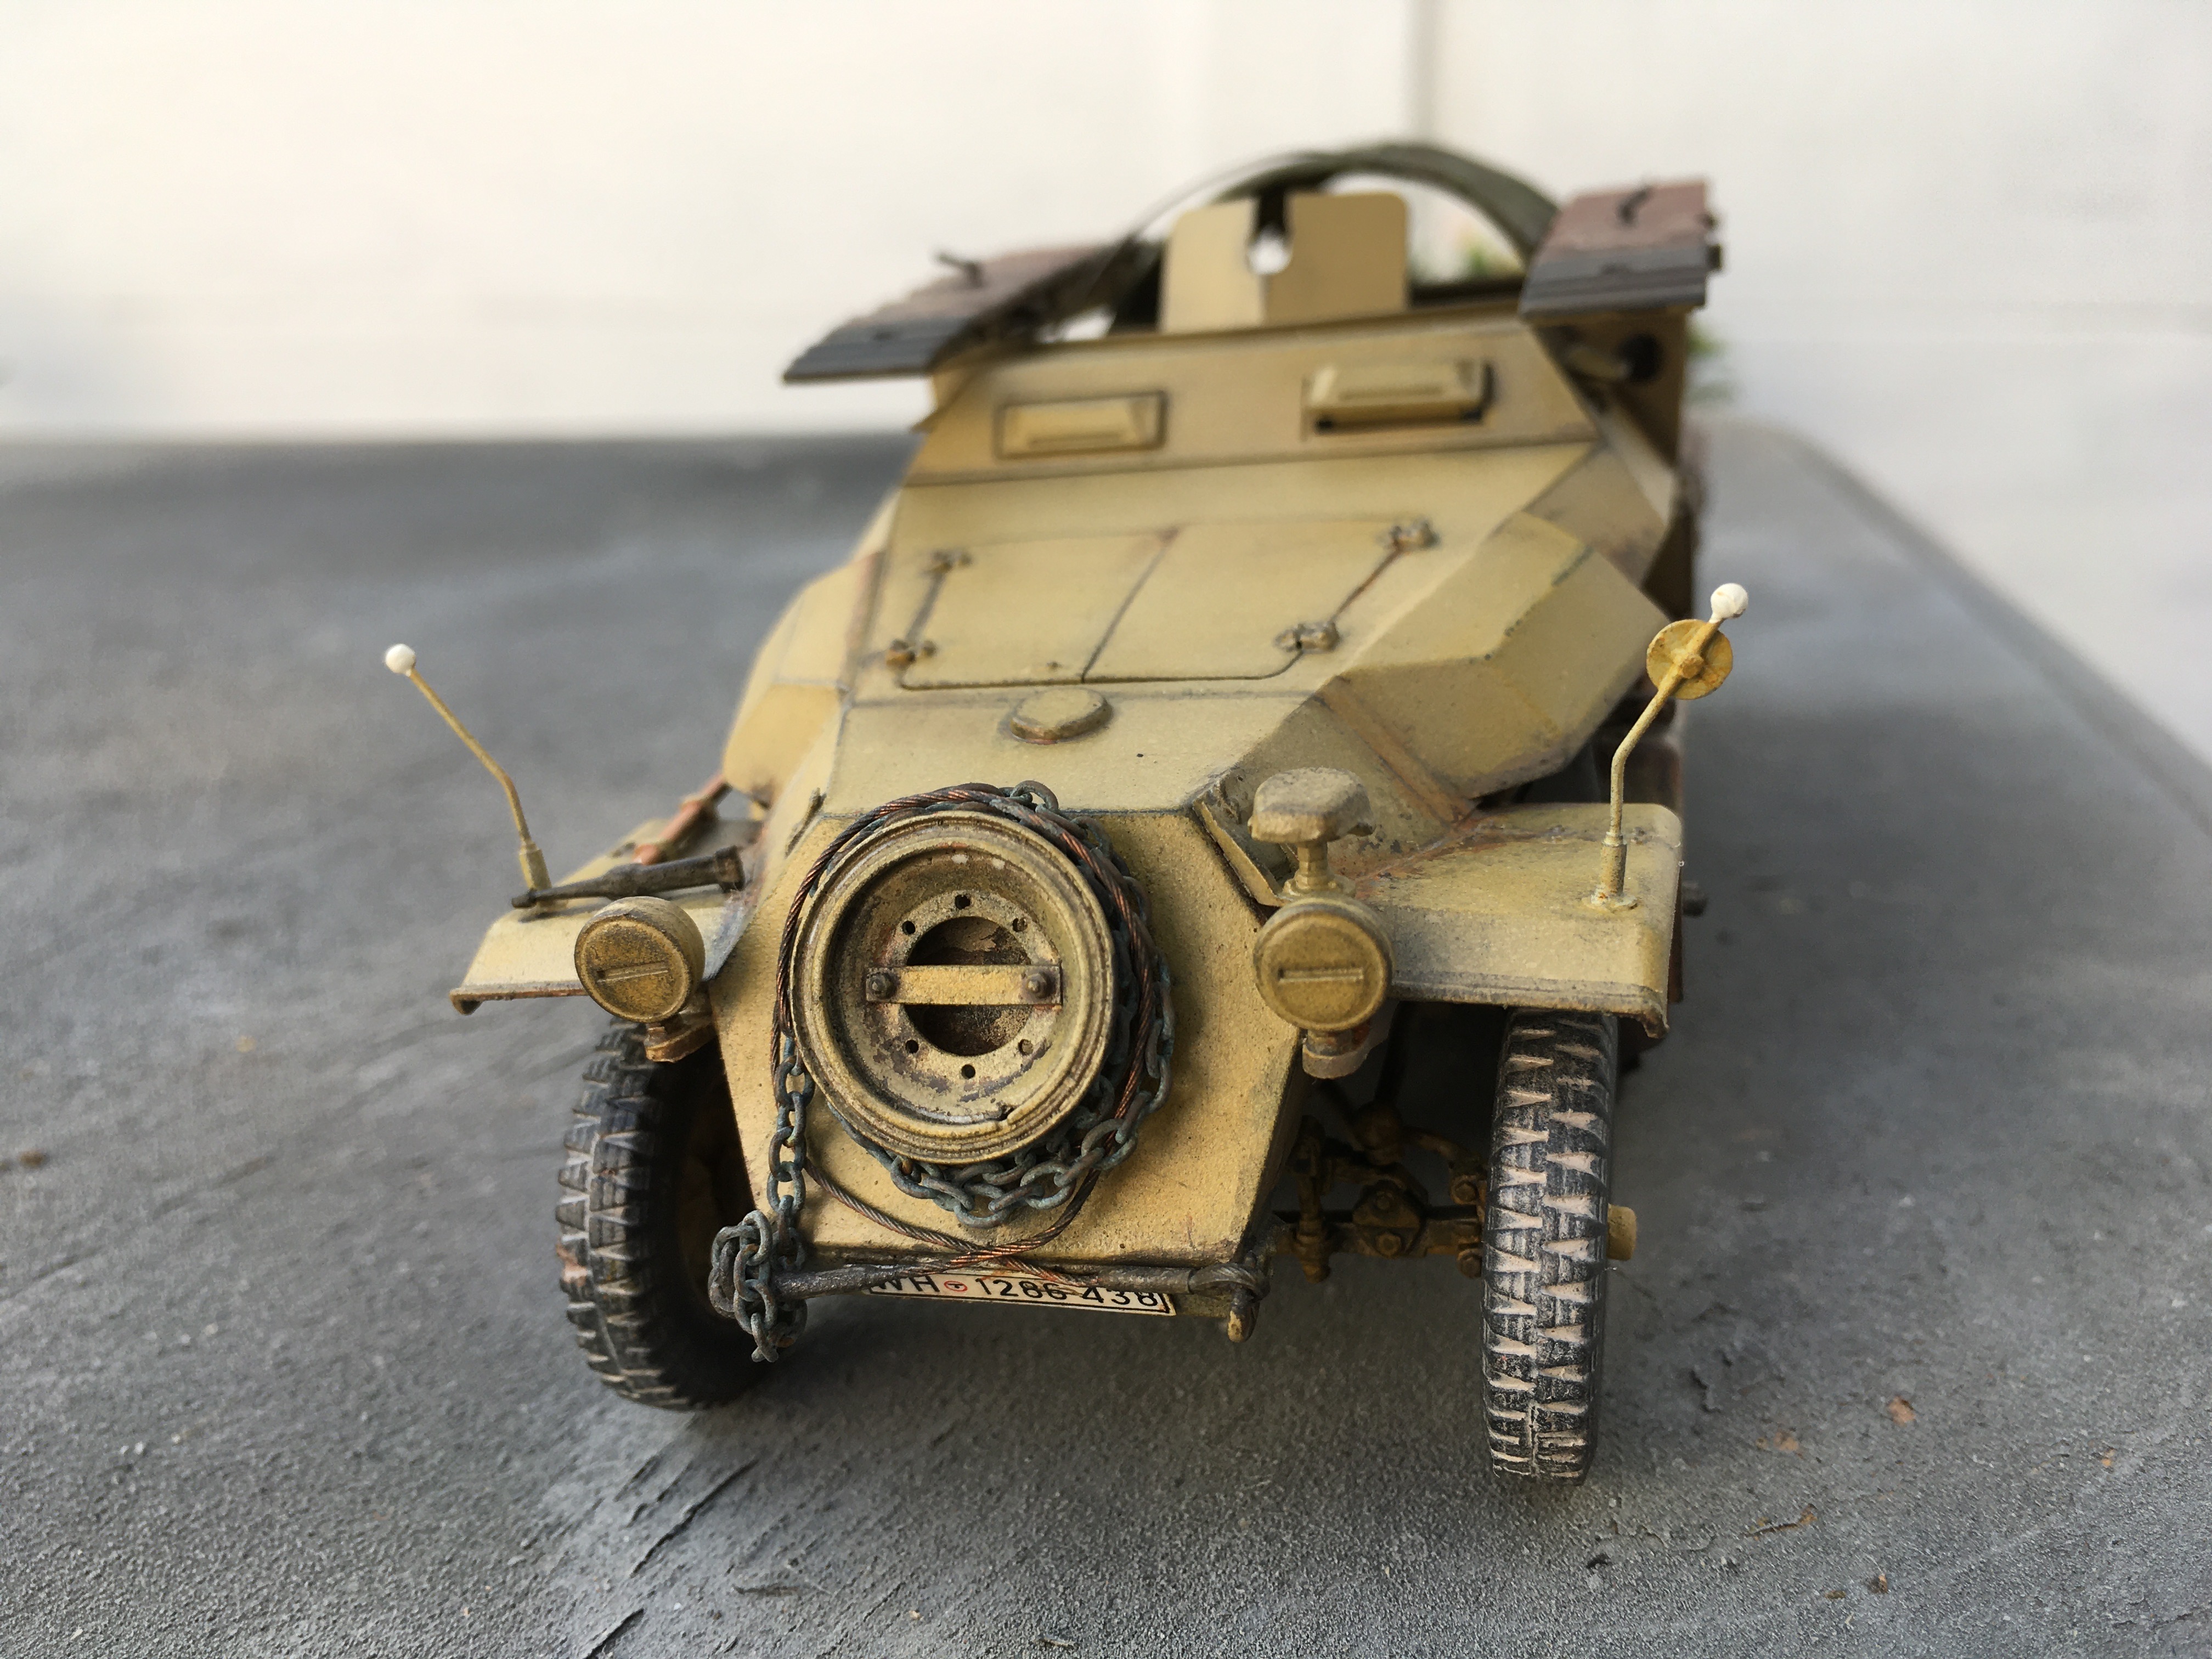
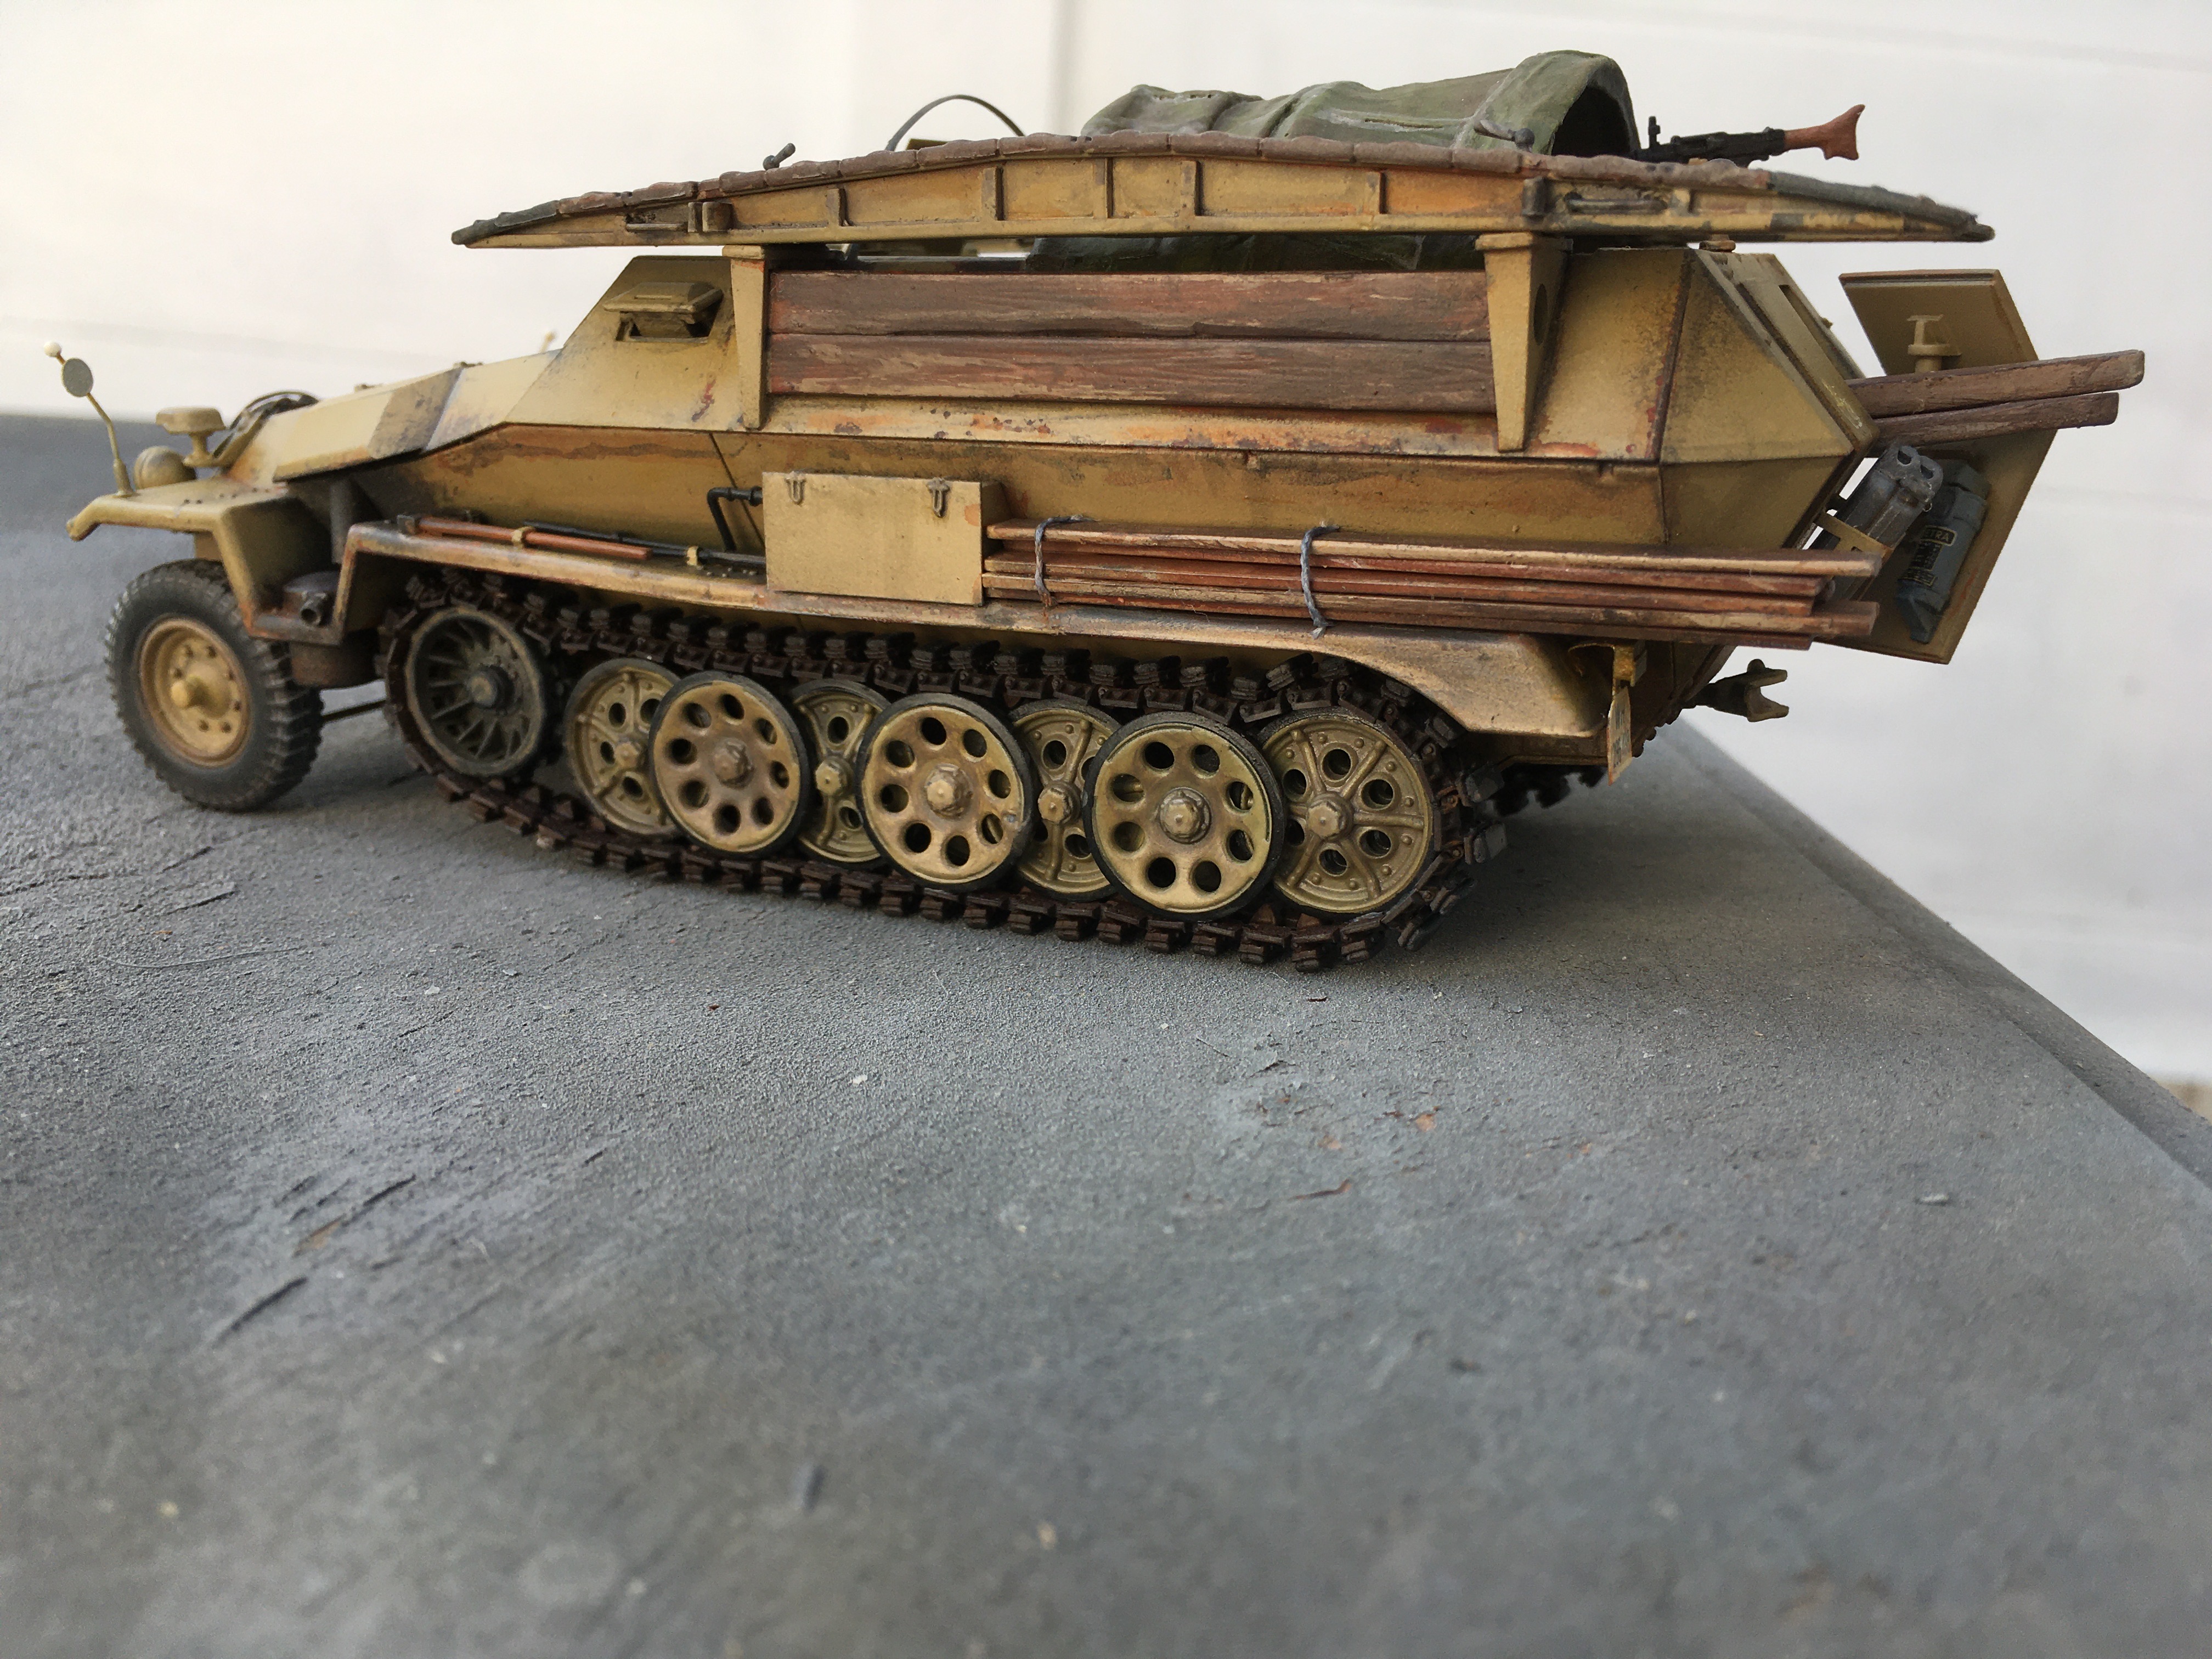
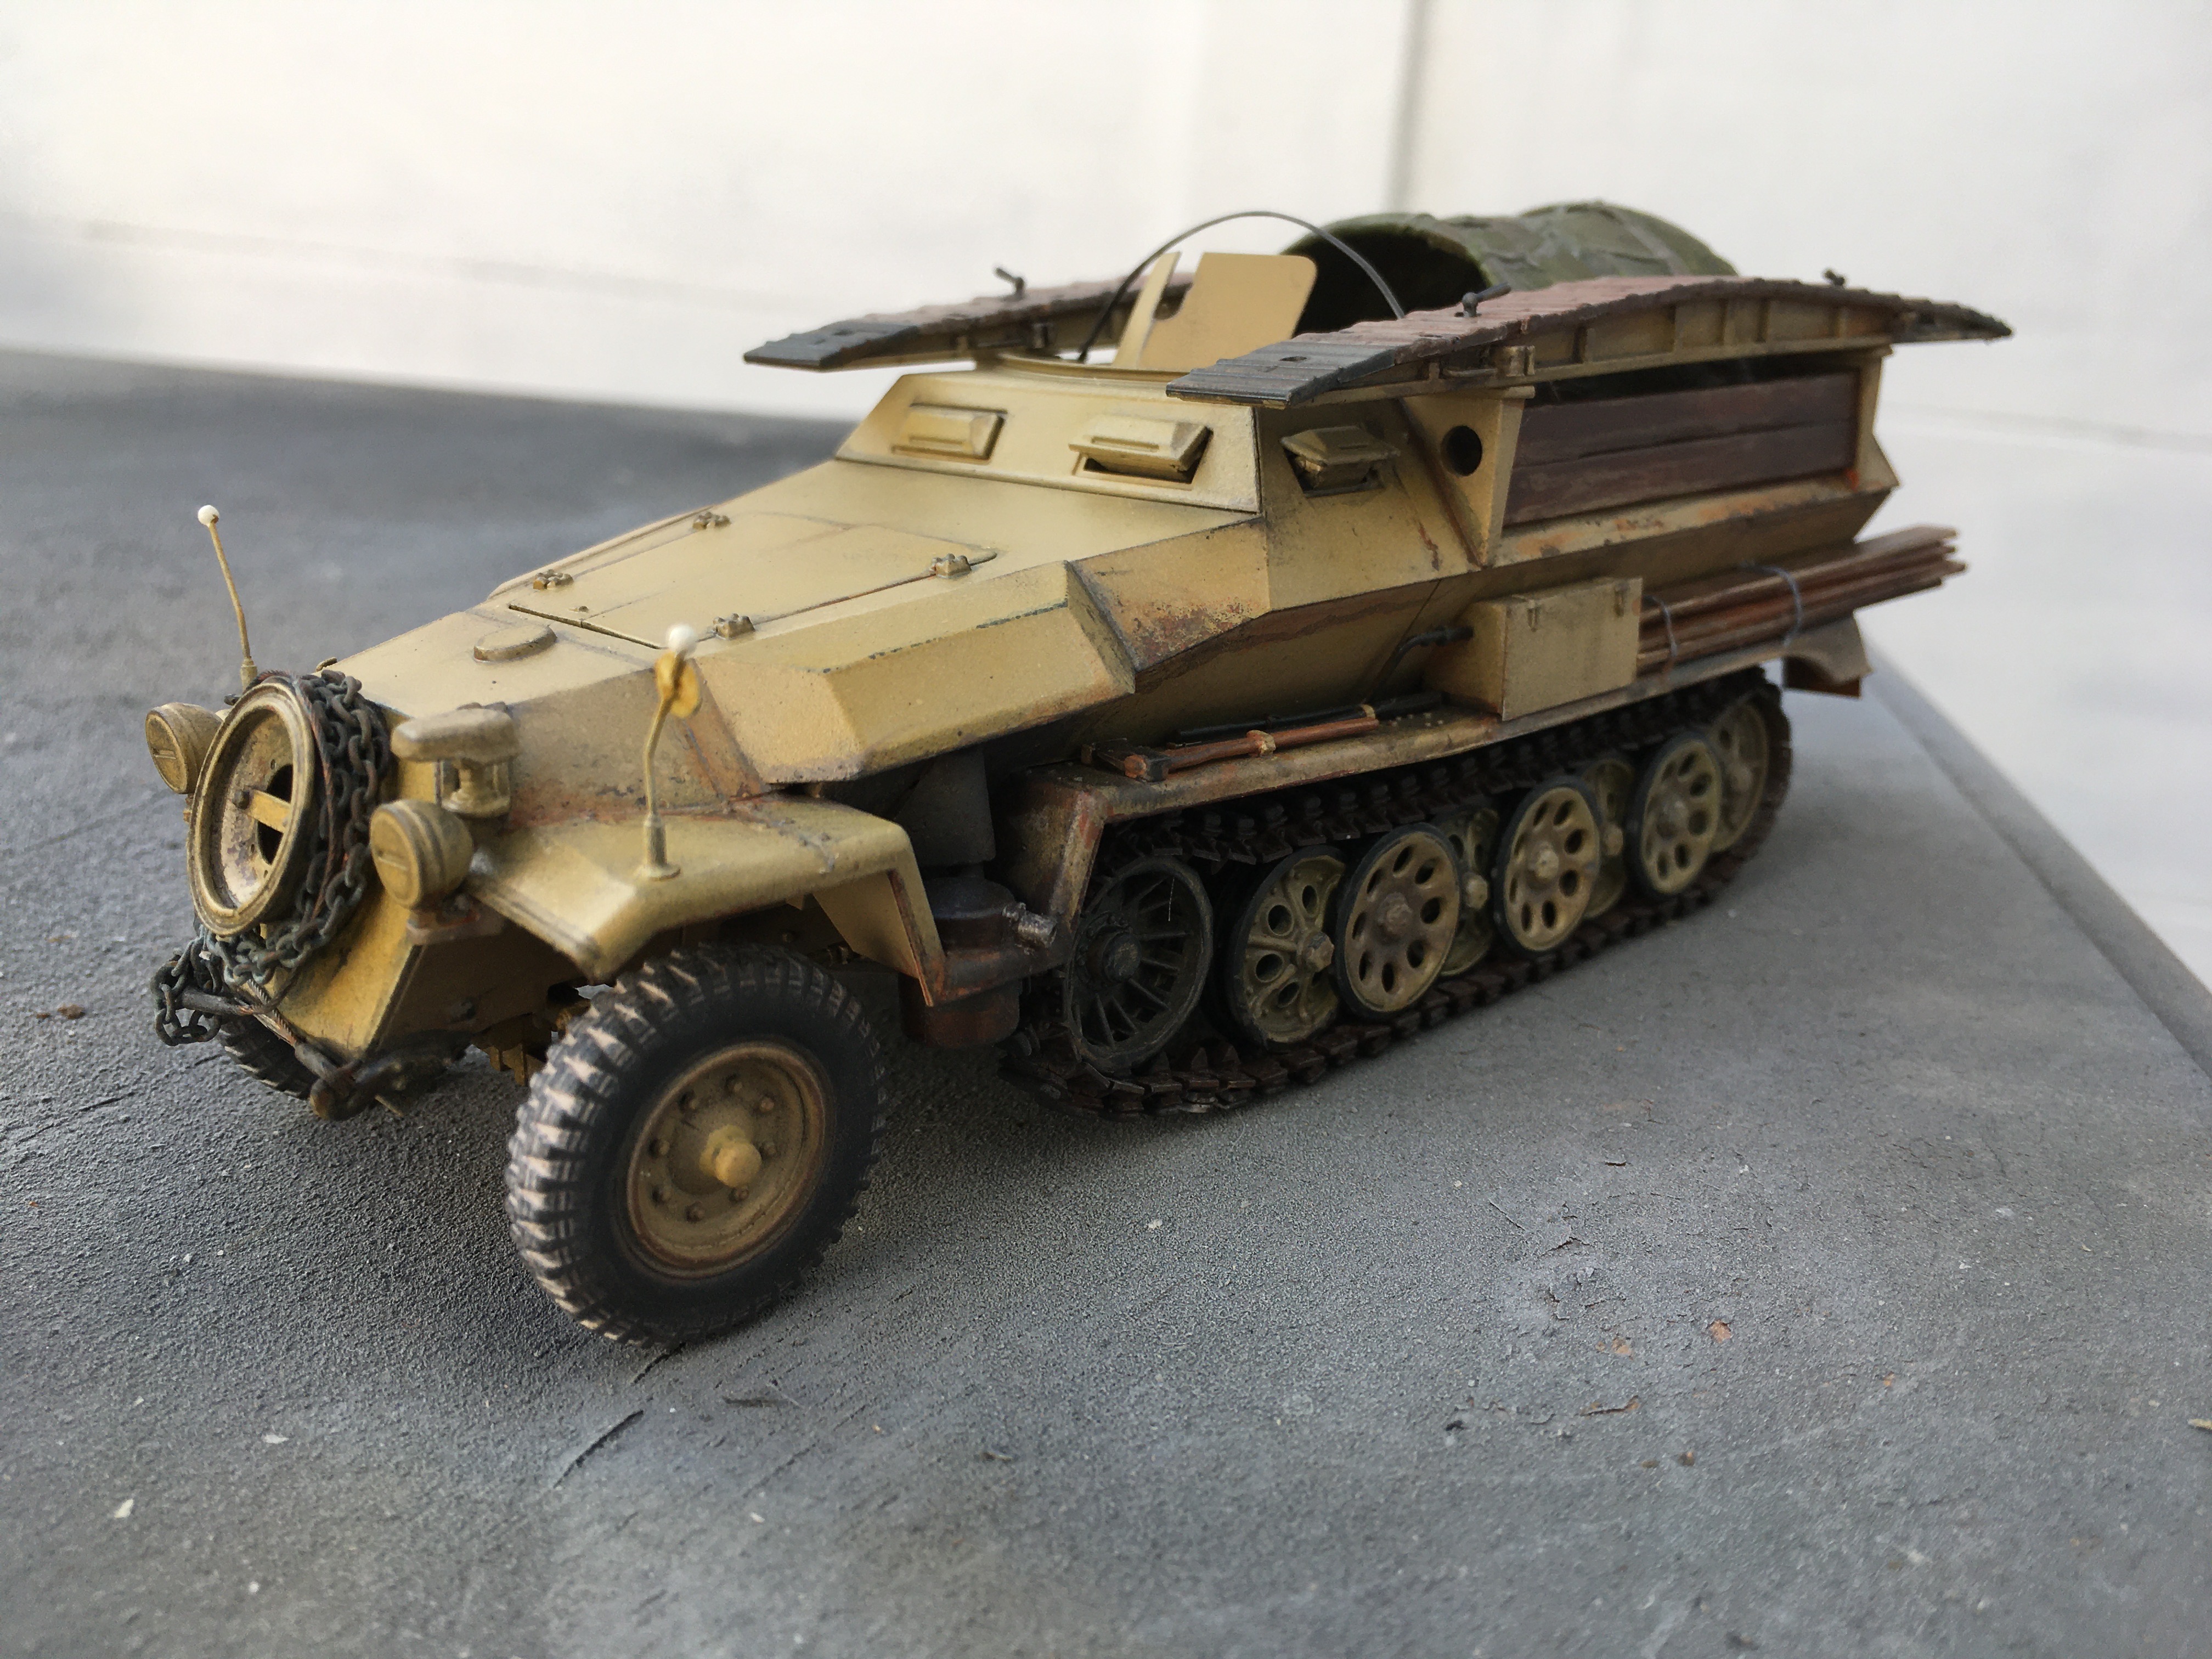
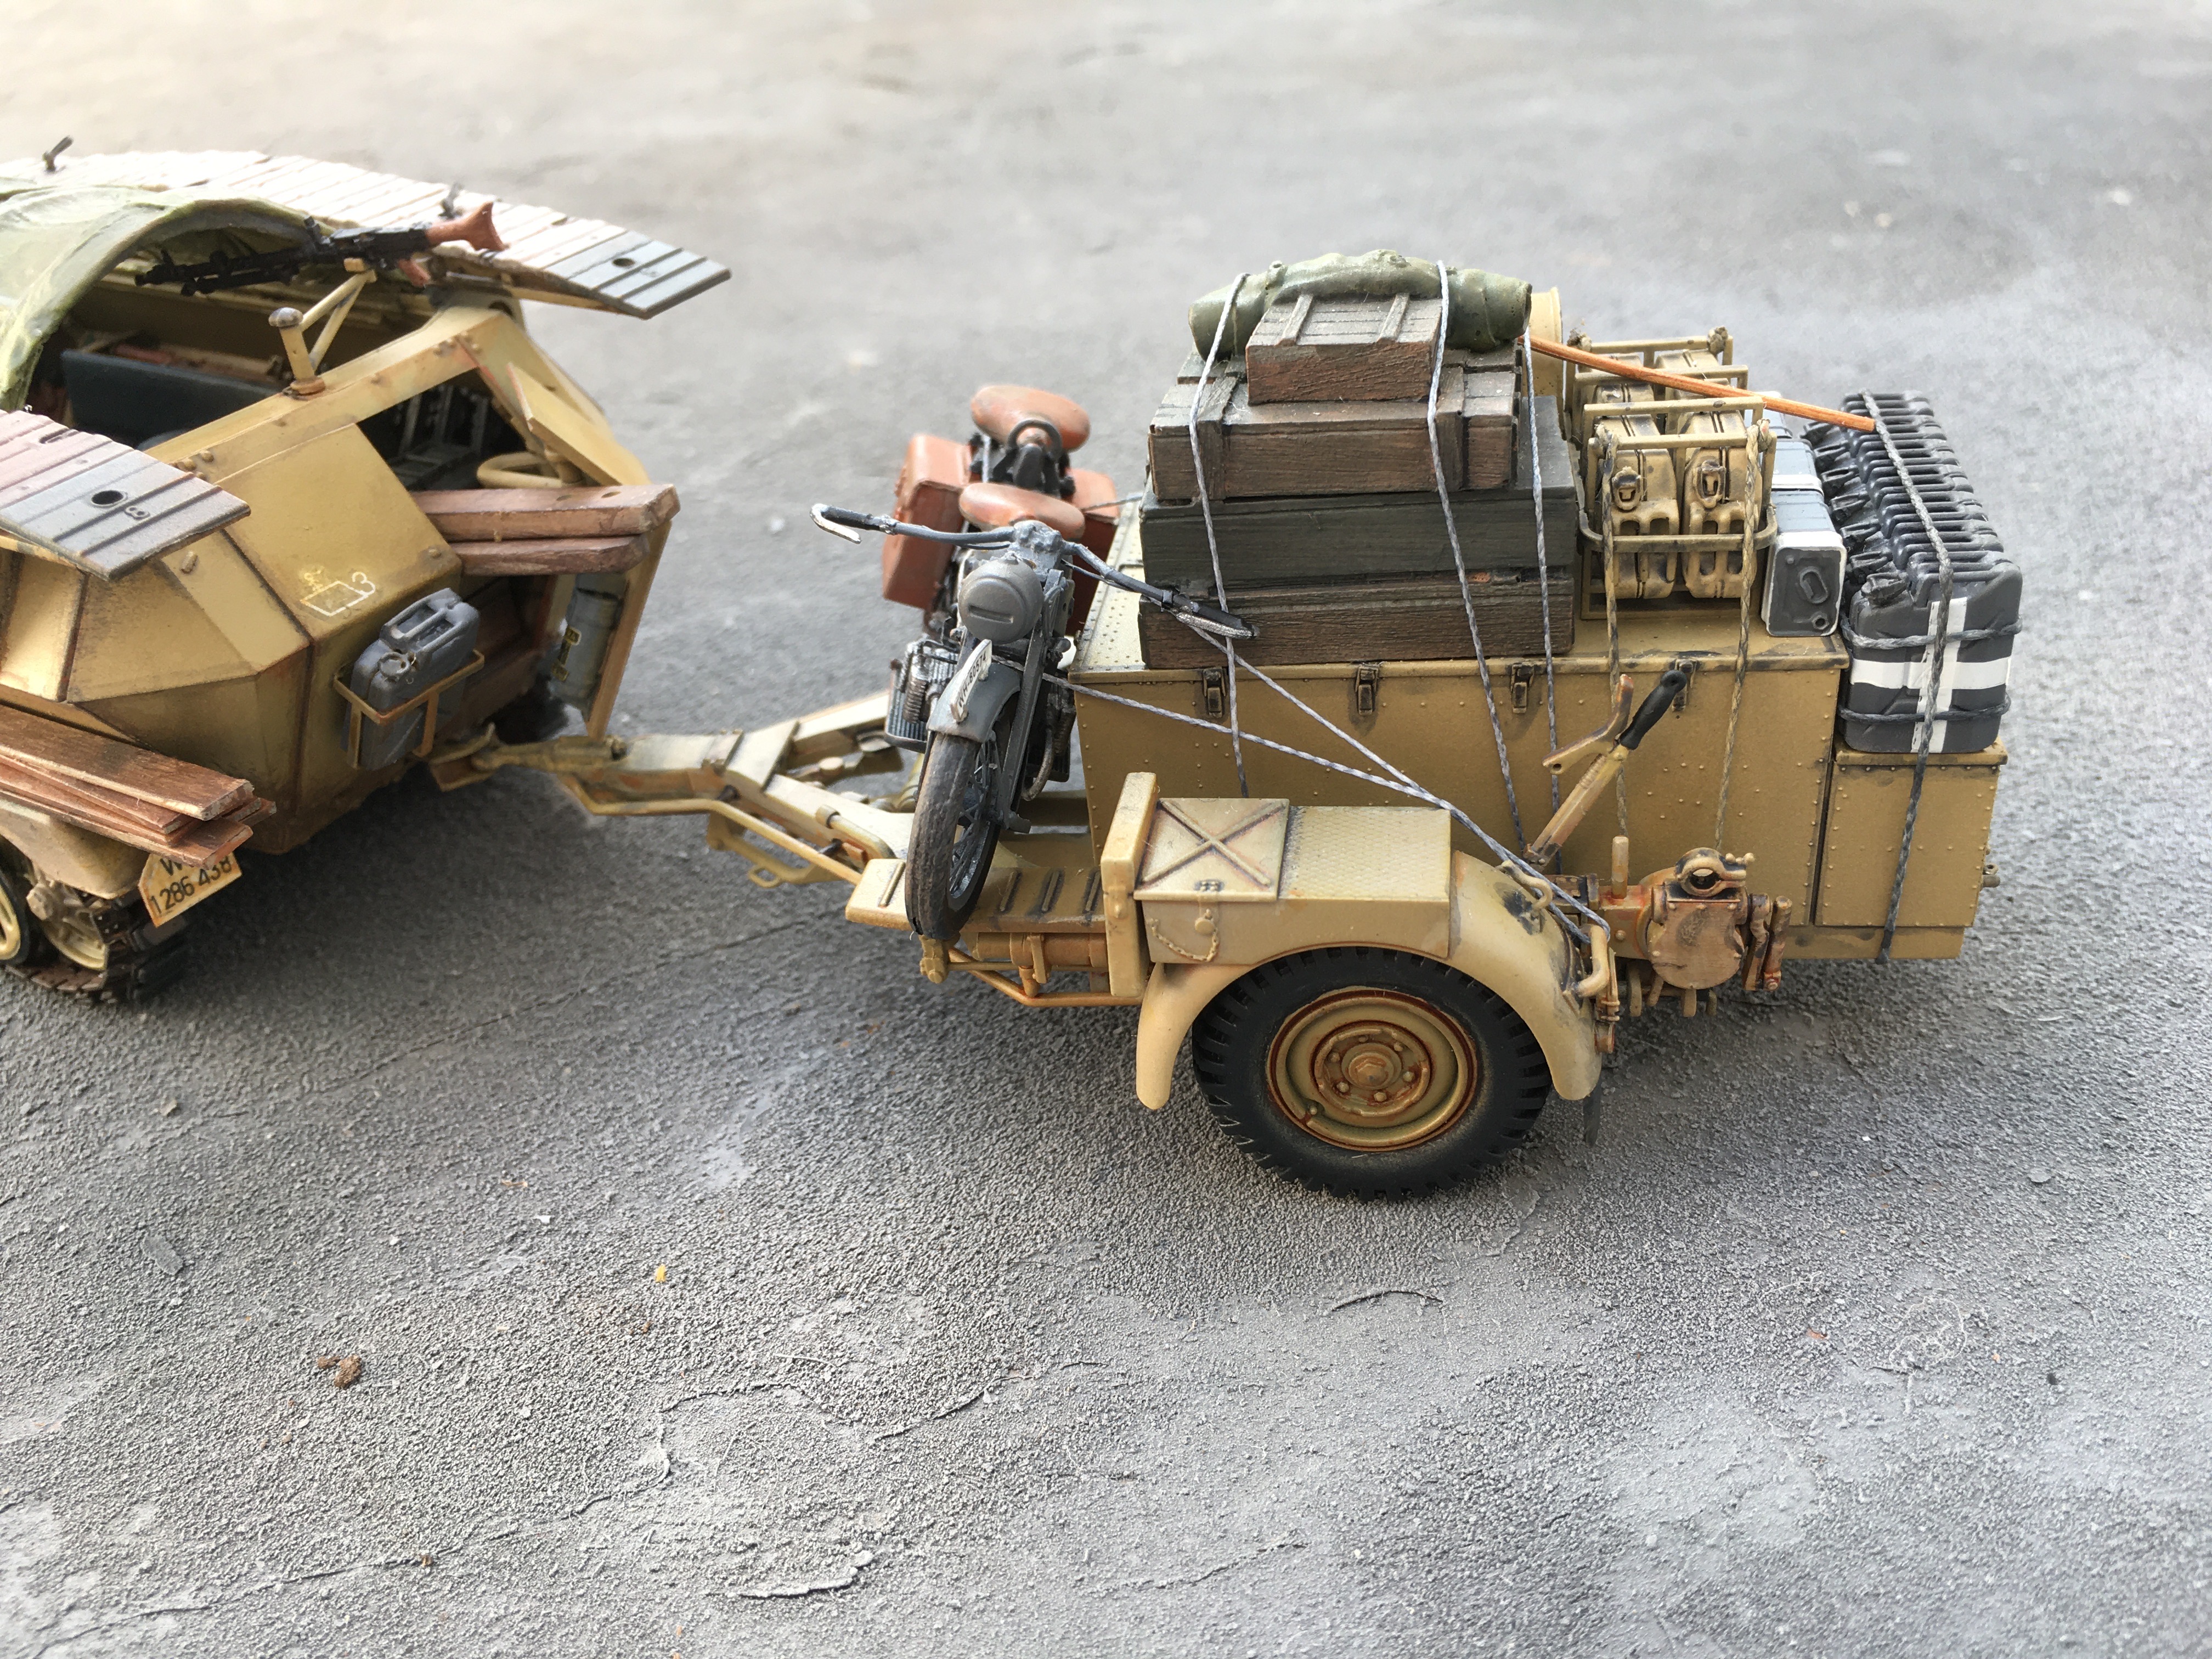
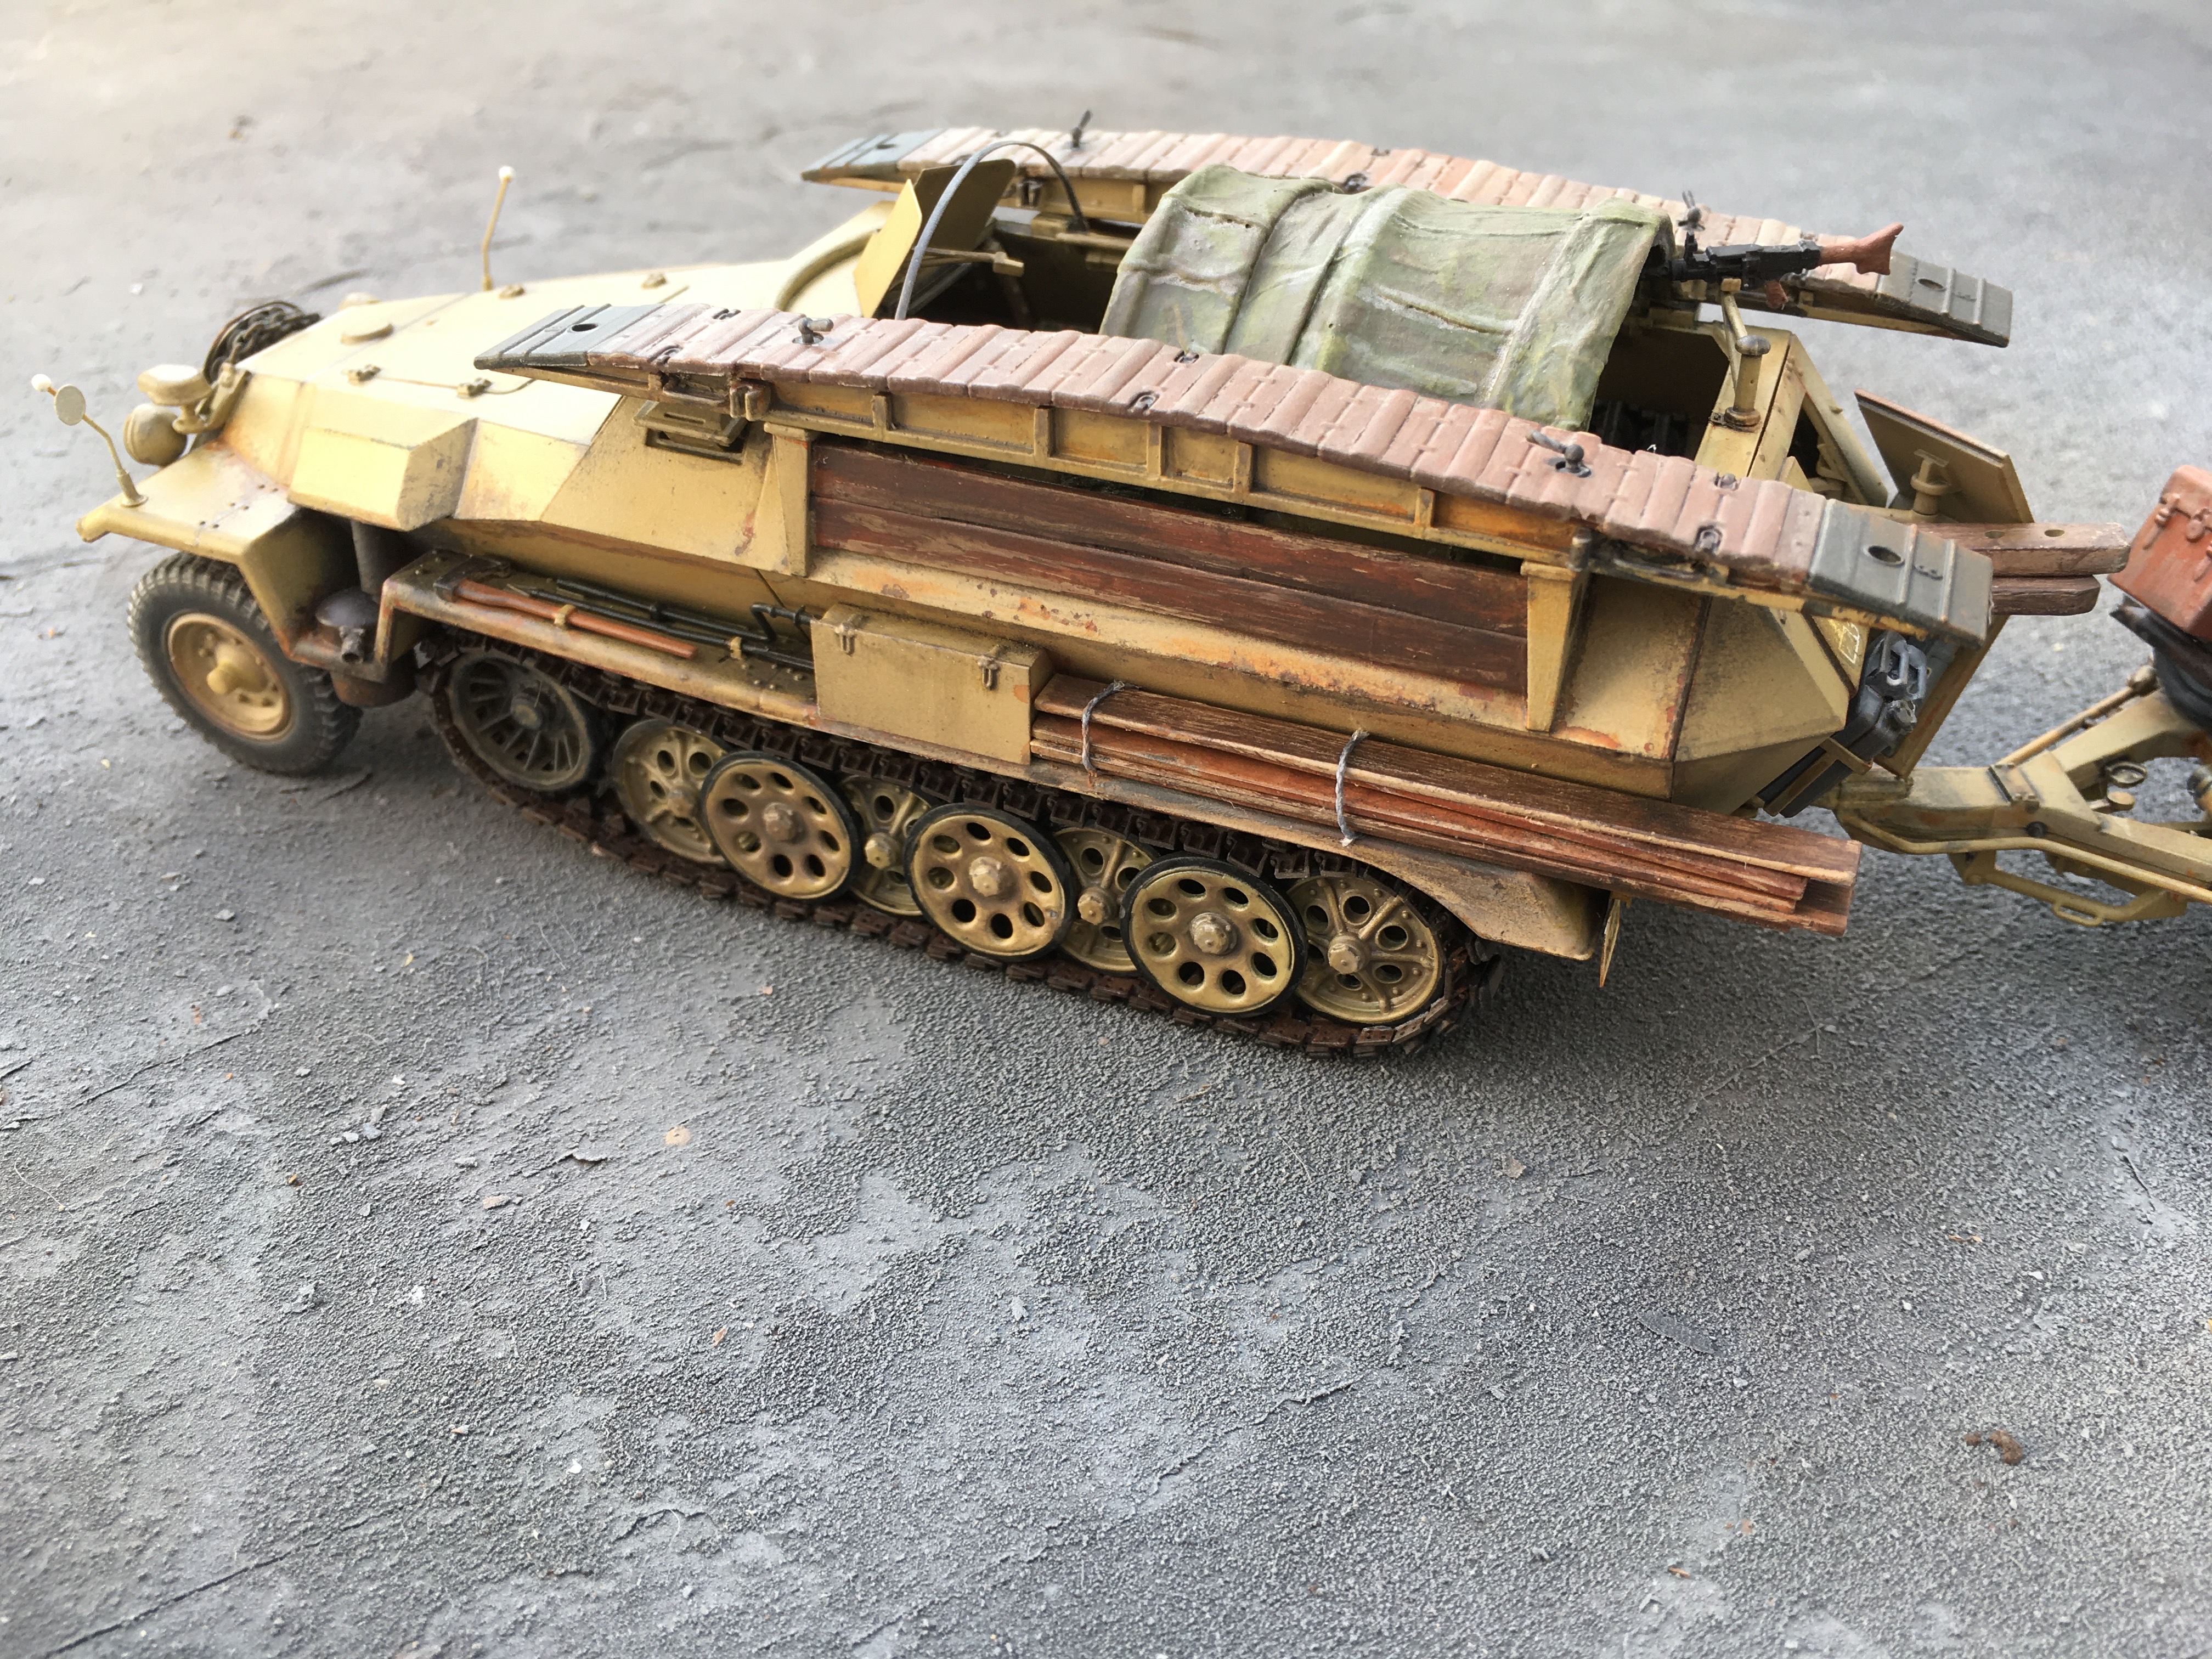
More to come later this afternoon.
Hope you all like it.
Edit; I need to paint the locks on the Motorcycle side bags.
Cheers


Robert Jan
Have to examine some pictures to see if I need to correct something, but overall it call these done.
Have to make selection for the Campaign Gallery, but here is a first shot of what I finished:


More to come later this afternoon.
Hope you all like it.
Edit; I need to paint the locks on the Motorcycle side bags.
Cheers


Robert Jan

SpeedyJ

Joined: September 17, 2013
KitMaker: 1,617 posts
Armorama: 1,150 posts

Posted: Monday, December 30, 2019 - 09:52 PM UTC
Another trailer in the works:
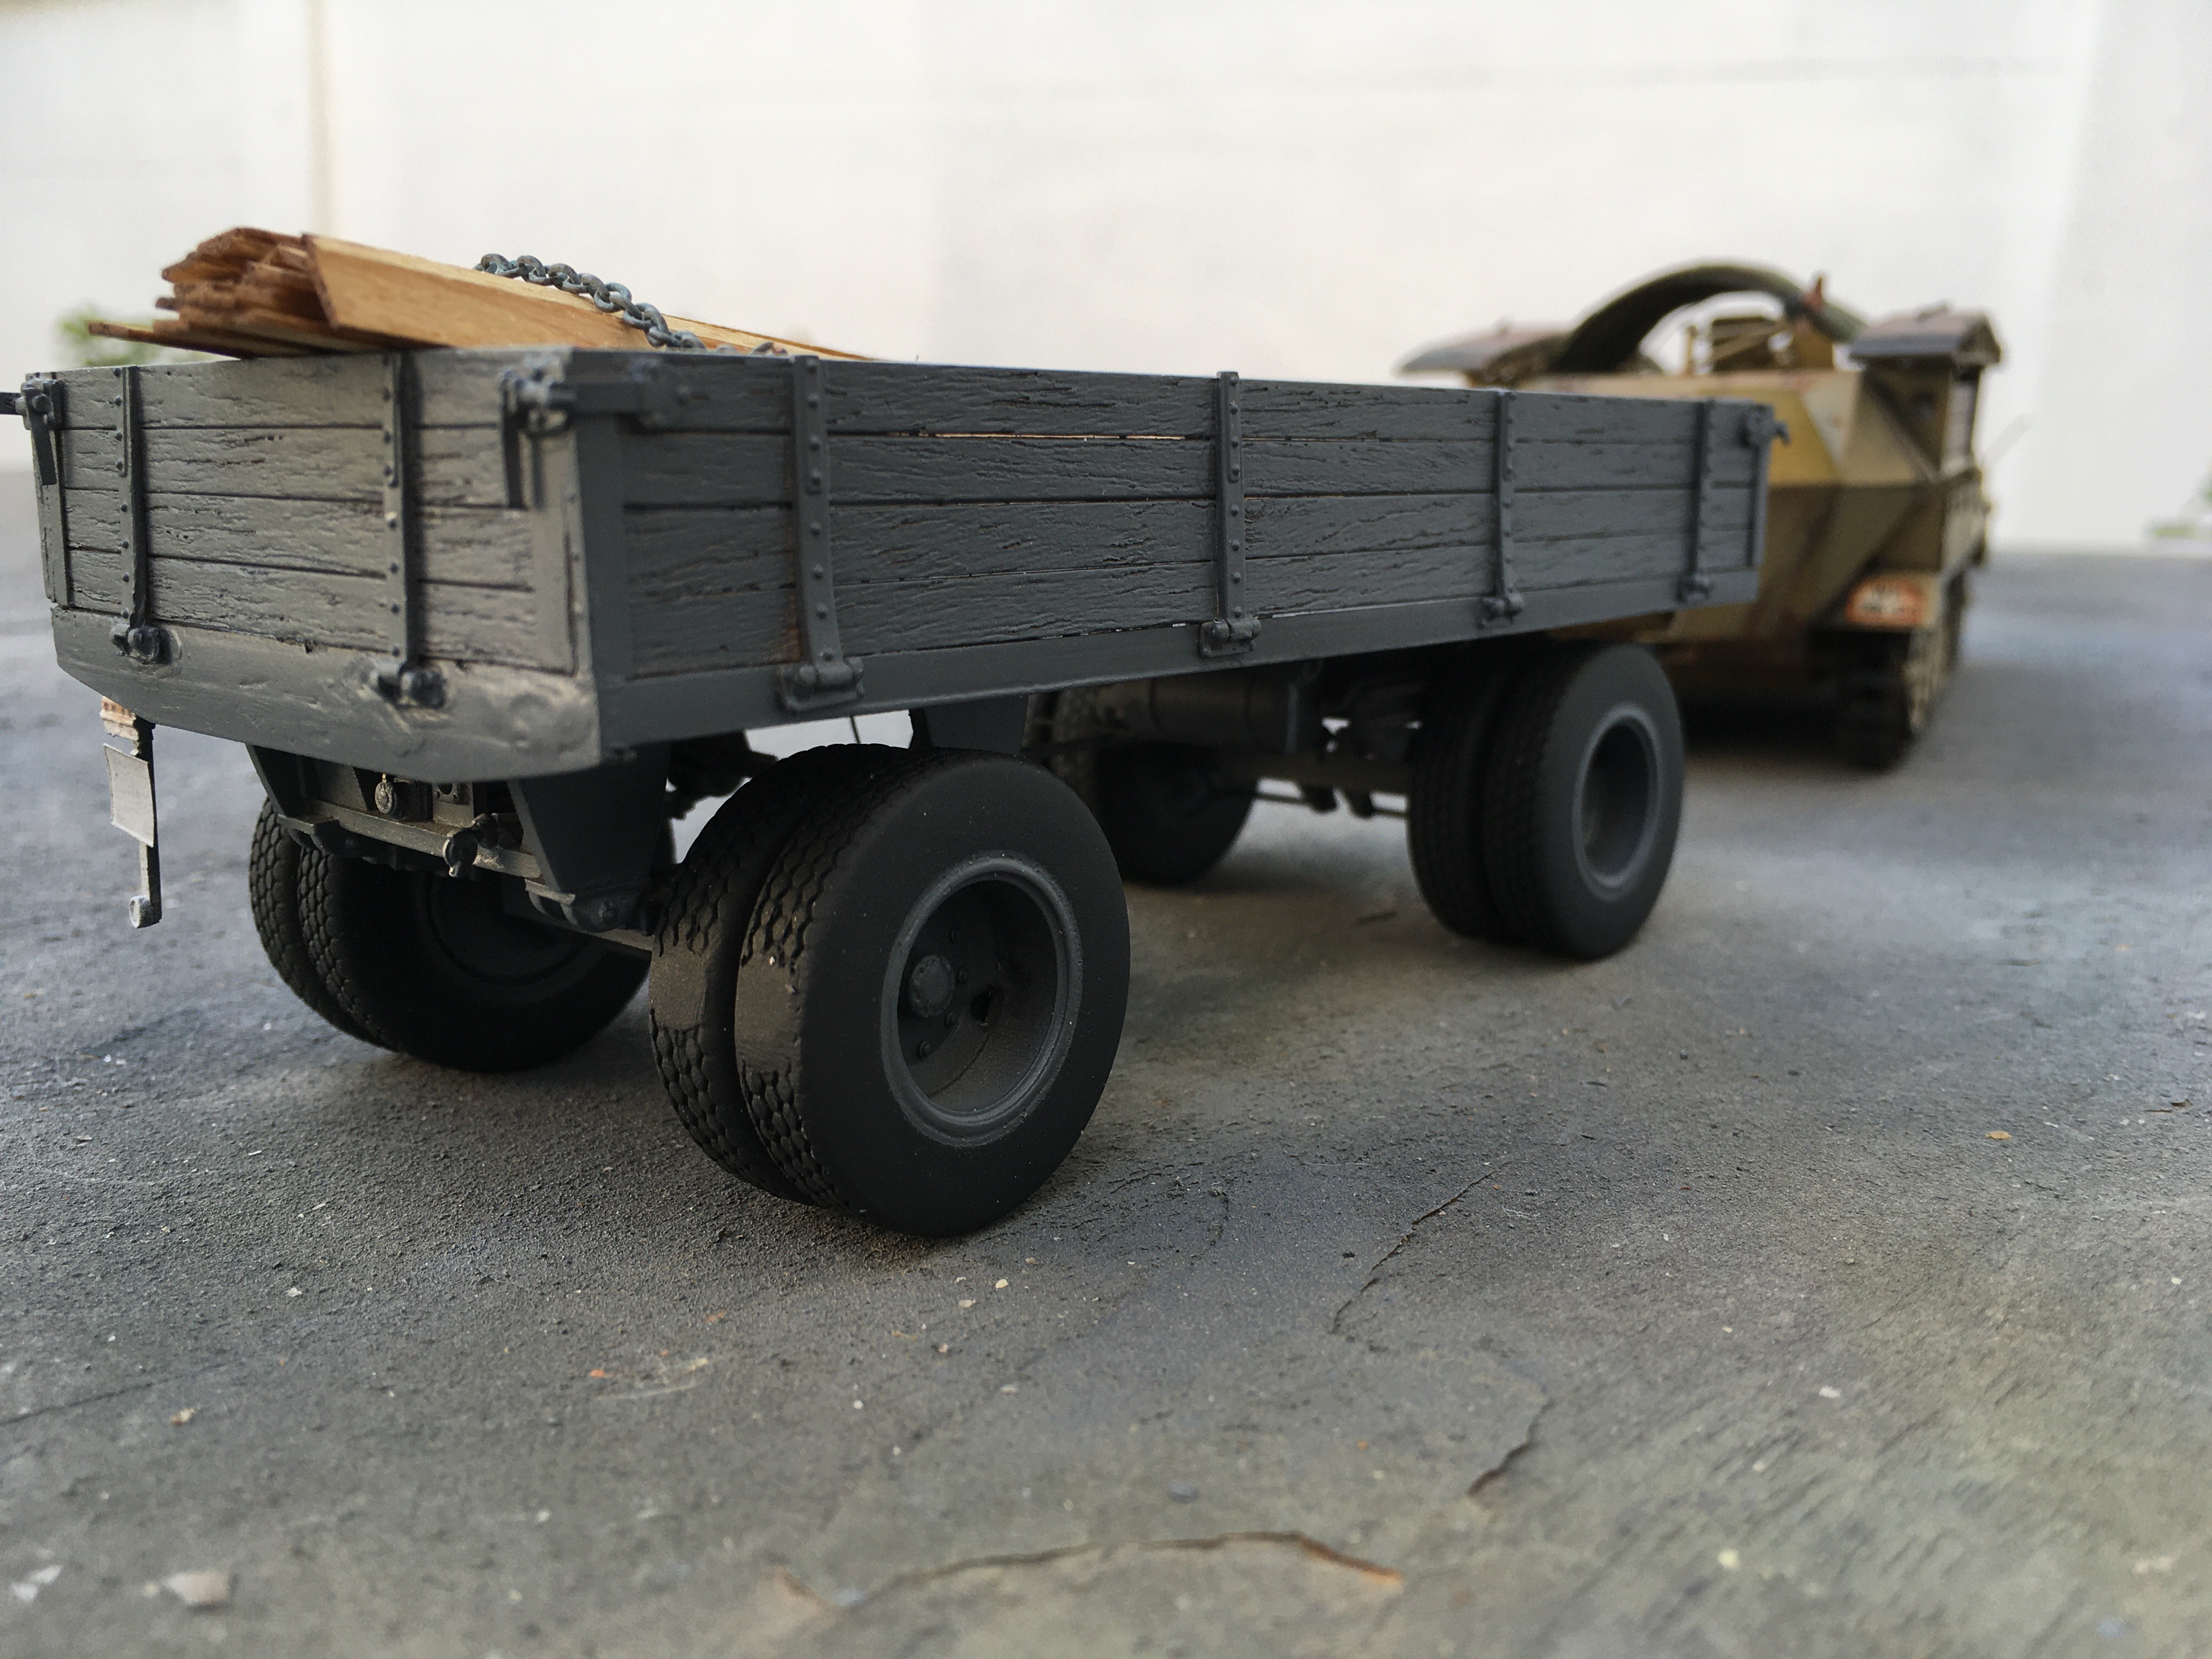
Improved and added a lot of details over the last week
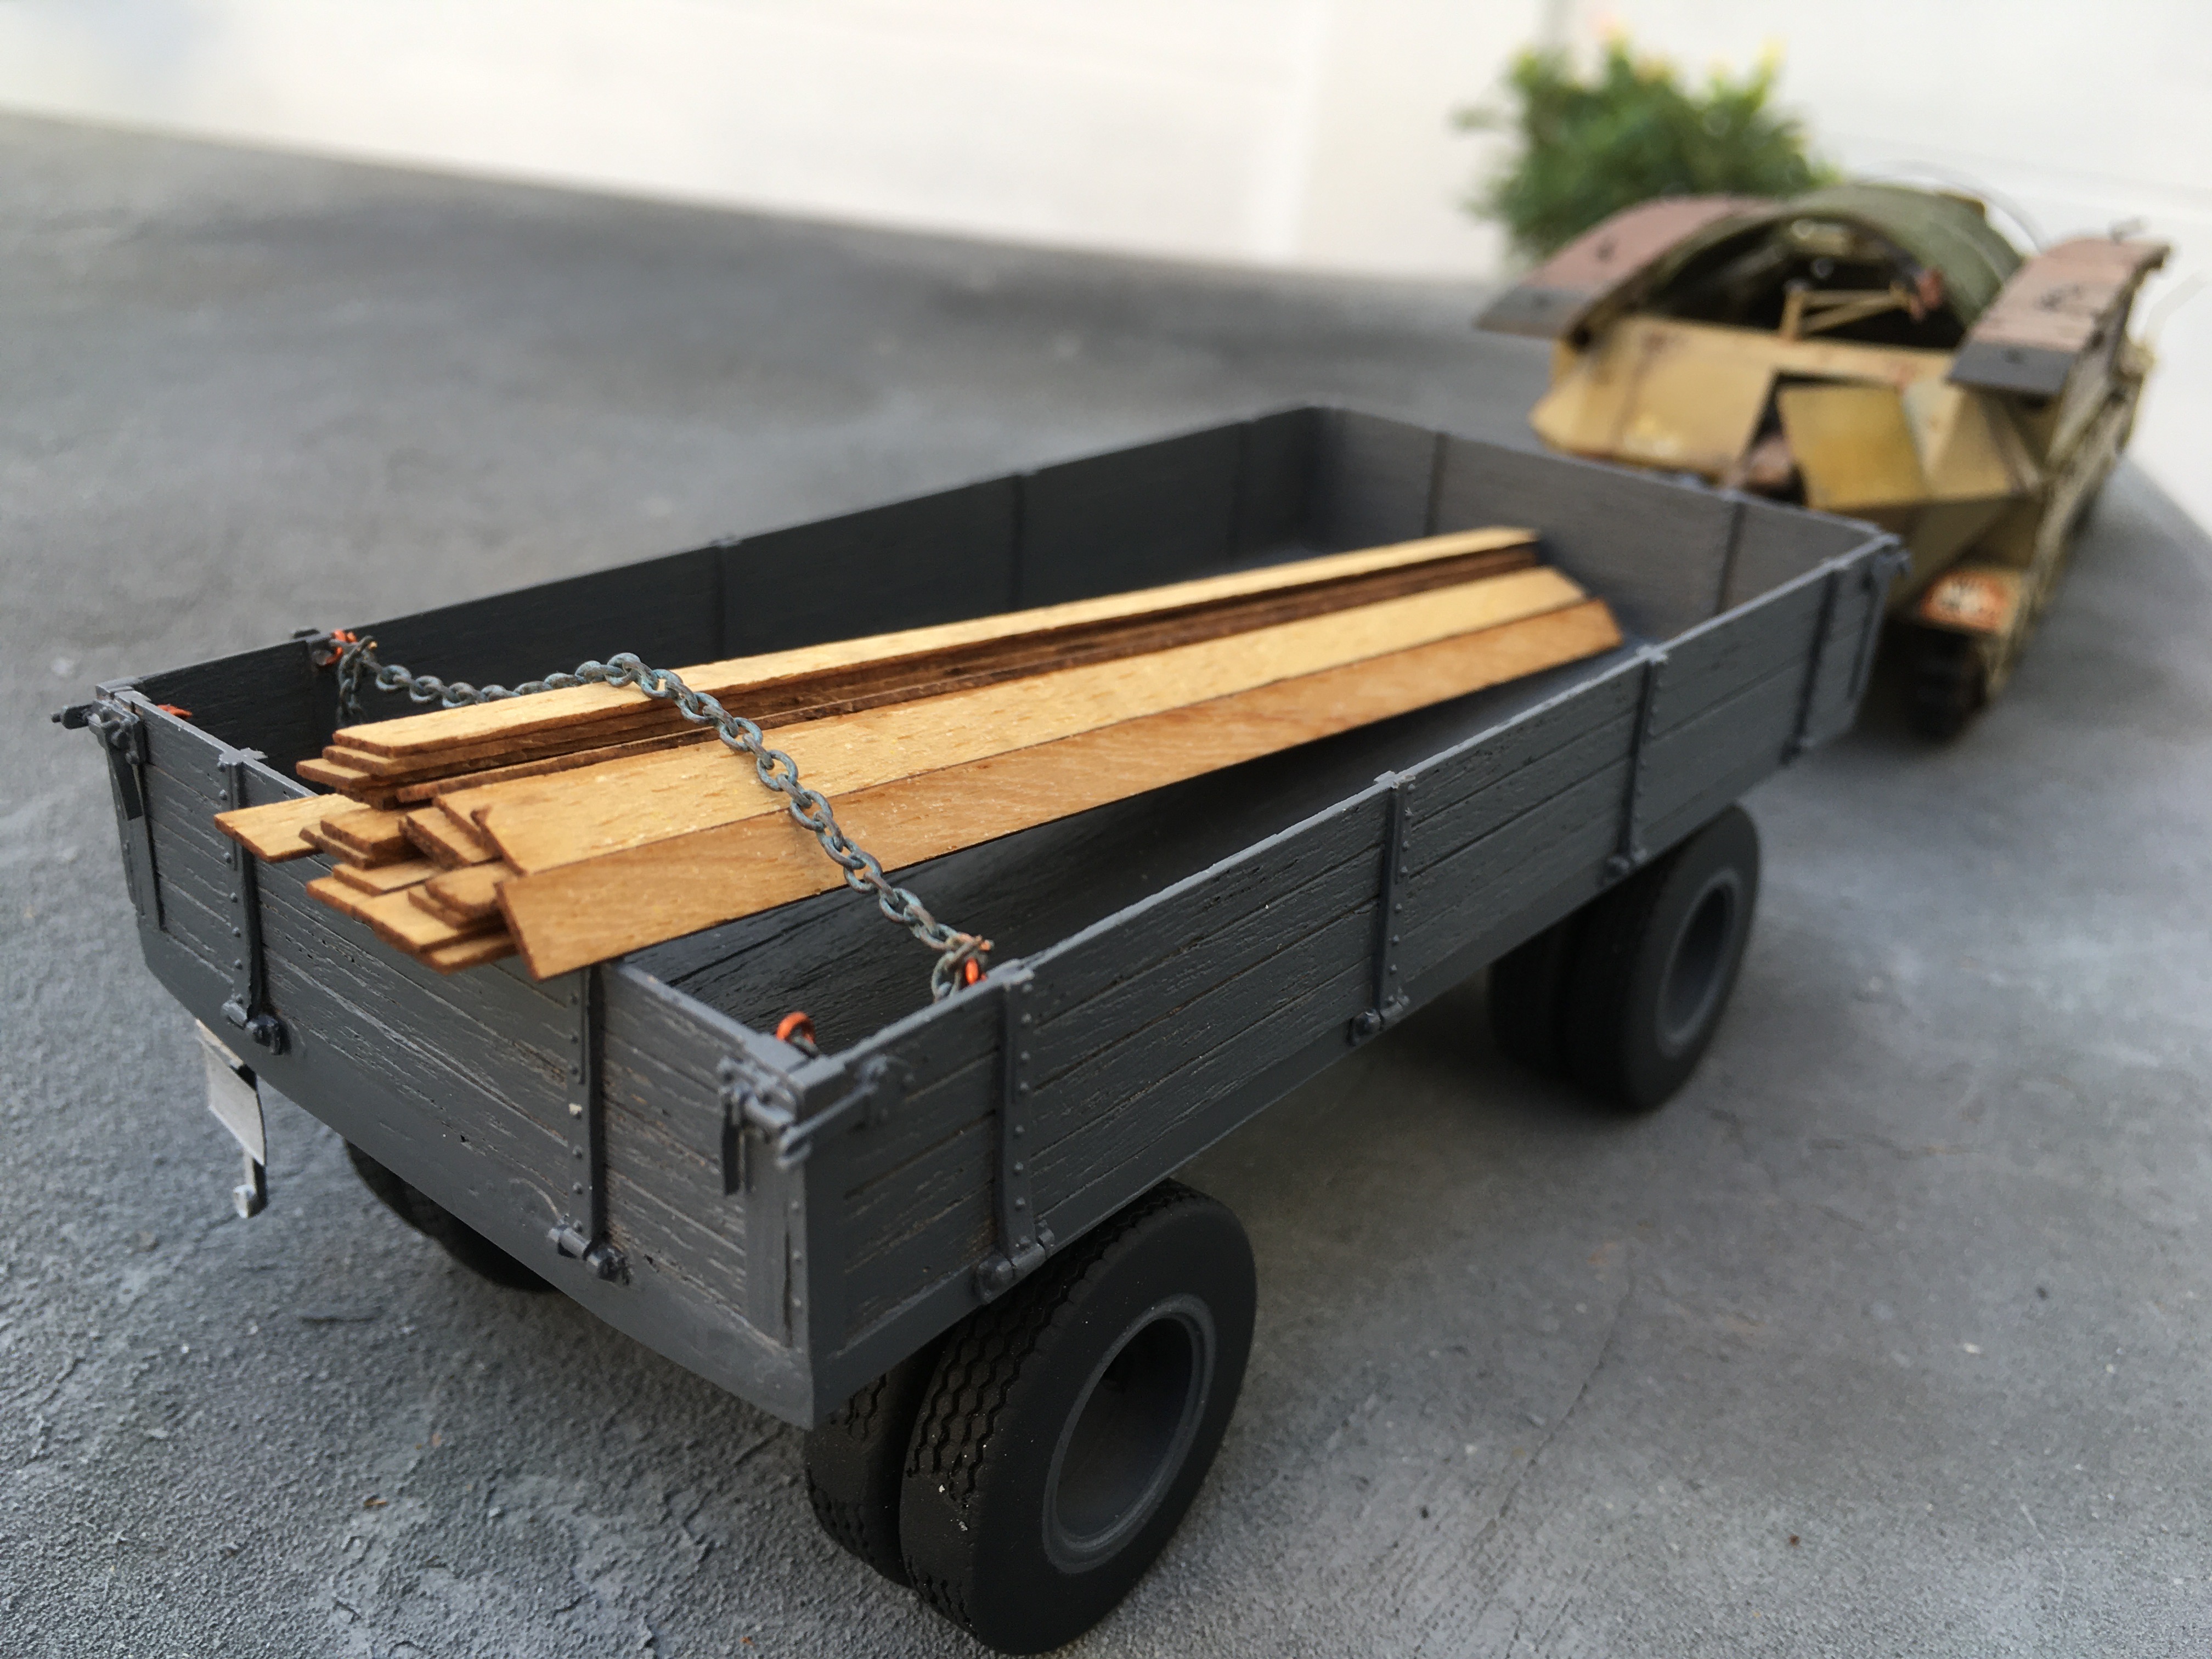
Busy with the wheels now, originals are to fat, so need to replace them.
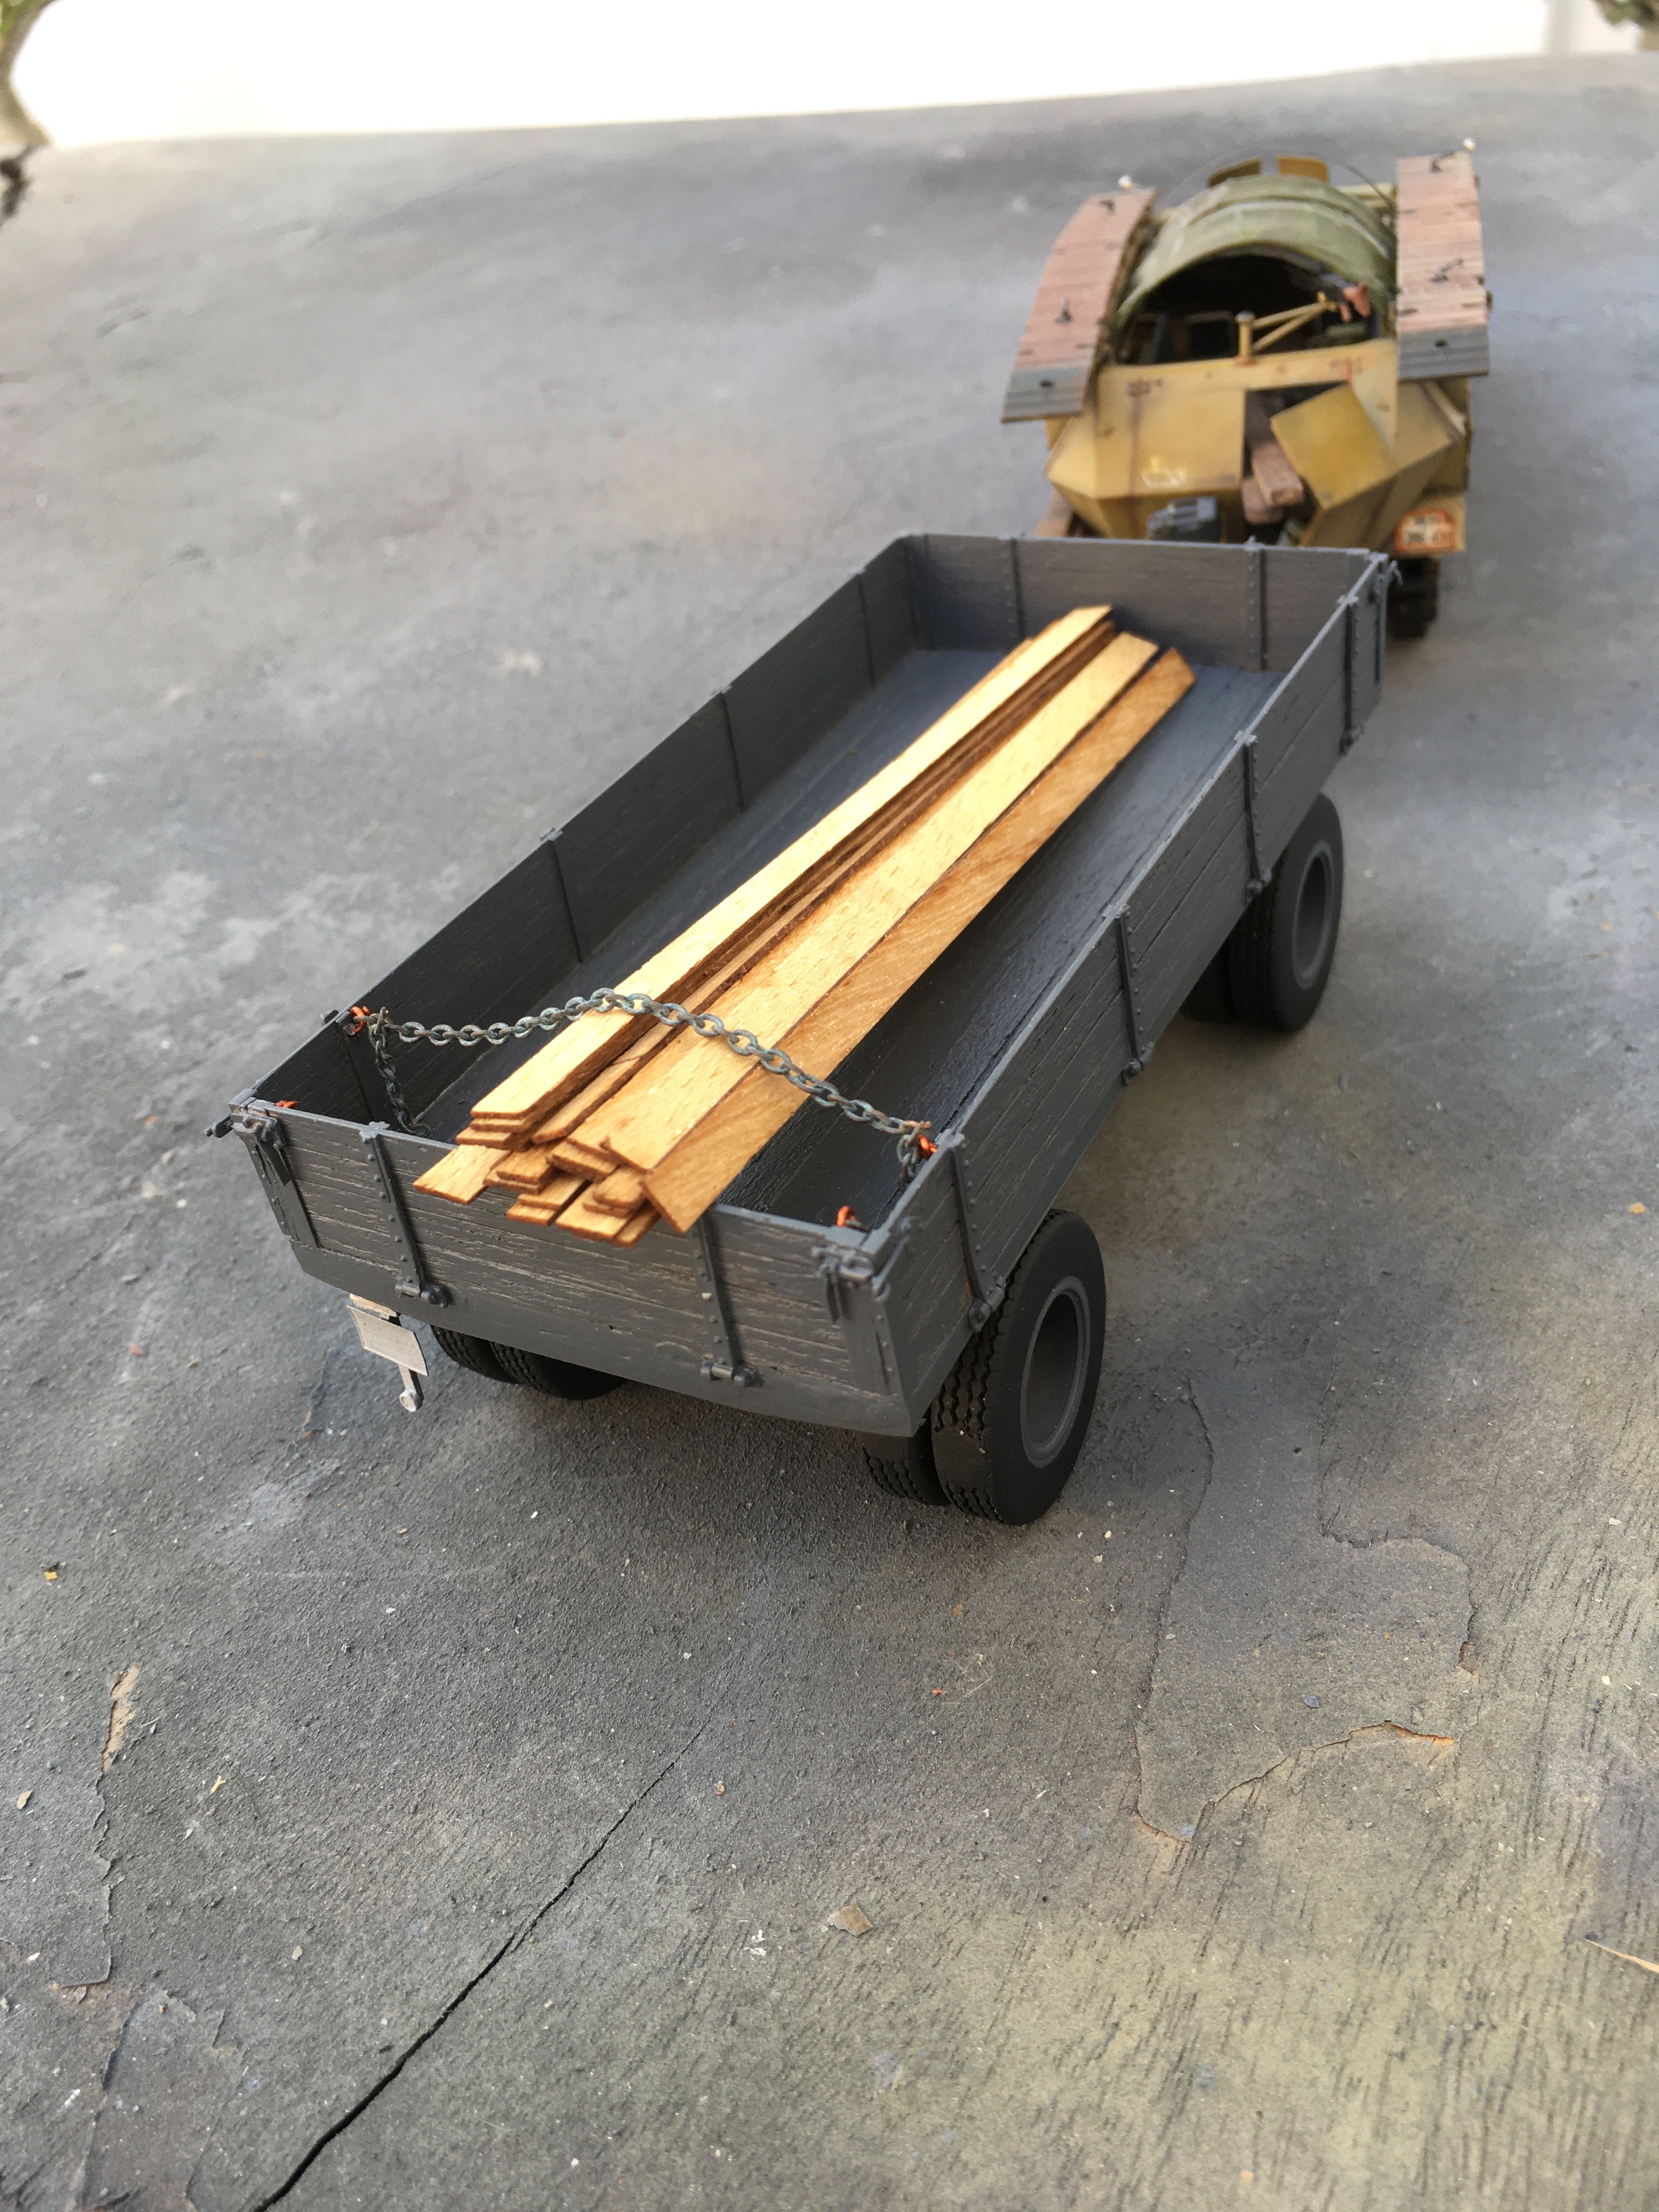
5 tons Anhänger - Einheitsbauart: http://armorama.kitmaker.net/forums/275542
On to the Campaign Gallery.
Robert Jan


Improved and added a lot of details over the last week

Busy with the wheels now, originals are to fat, so need to replace them.

5 tons Anhänger - Einheitsbauart: http://armorama.kitmaker.net/forums/275542
On to the Campaign Gallery.
Robert Jan


SpeedyJ

Joined: September 17, 2013
KitMaker: 1,617 posts
Armorama: 1,150 posts

Posted: Monday, December 30, 2019 - 10:16 PM UTC
Uploaded to the Campaign Gallery, (6 photos), so I'm finished for the modeling year 2019.
Have a good one and I hope to see you all in 2020.
Take care!
Cheers


Robert Jan
Have a good one and I hope to see you all in 2020.
Take care!
Cheers


Robert Jan
petbat

Joined: August 06, 2005
KitMaker: 3,353 posts
Armorama: 3,121 posts

Posted: Monday, December 30, 2019 - 10:20 PM UTC
Sensational Robert. Well worth the effort you put in. Very well executed.
I hope the wheels on the trailer are not fixed so you can rotate the flat spots to the bottom.
I hope the wheels on the trailer are not fixed so you can rotate the flat spots to the bottom.

SpeedyJ

Joined: September 17, 2013
KitMaker: 1,617 posts
Armorama: 1,150 posts

Posted: Monday, December 30, 2019 - 10:46 PM UTC
The wheels are still dry fit for the grey trailer. These are the lumpy resins. I managed to get some kit bashed new ones, also resin, but with a very nice pattern.
You people out there, all have a great time today.
See You all in 2020, with loads of nice campaigns. Big Fun I can say!
Robert Jan

You people out there, all have a great time today.
See You all in 2020, with loads of nice campaigns. Big Fun I can say!
Robert Jan


k_mero4

Joined: November 26, 2017
KitMaker: 393 posts
Armorama: 369 posts

Posted: Tuesday, December 31, 2019 - 12:15 AM UTC
Robert, beautiful and impressive. I liked the idea of the trailer. Congratulations on a job well done.
Cheers to everyone for the new year and success.
Kalin
Cheers to everyone for the new year and success.
Kalin

SpeedyJ

Joined: September 17, 2013
KitMaker: 1,617 posts
Armorama: 1,150 posts

Posted: Tuesday, December 31, 2019 - 12:41 AM UTC
Thanks Peter and thank you also Kalin. MY Modeling MoJo really came back over the last 3 months of 2019.
Ready for 2020 with some nice kits waiting for even better Campaigns.
Starting tomorrow...
Cheers


Robert Jan
Ready for 2020 with some nice kits waiting for even better Campaigns.
Starting tomorrow...
Cheers


Robert Jan
Posted: Tuesday, December 31, 2019 - 01:22 AM UTC
Very nice job indeed Robert!
Glad to have you- and your modelling Mojo- back again bulding interesting models!
Have a good New Year's Eve(IIRC less than 3 hours away where you live) and a good start in the next one!
Here is the result from today's progress(97% finished construction):
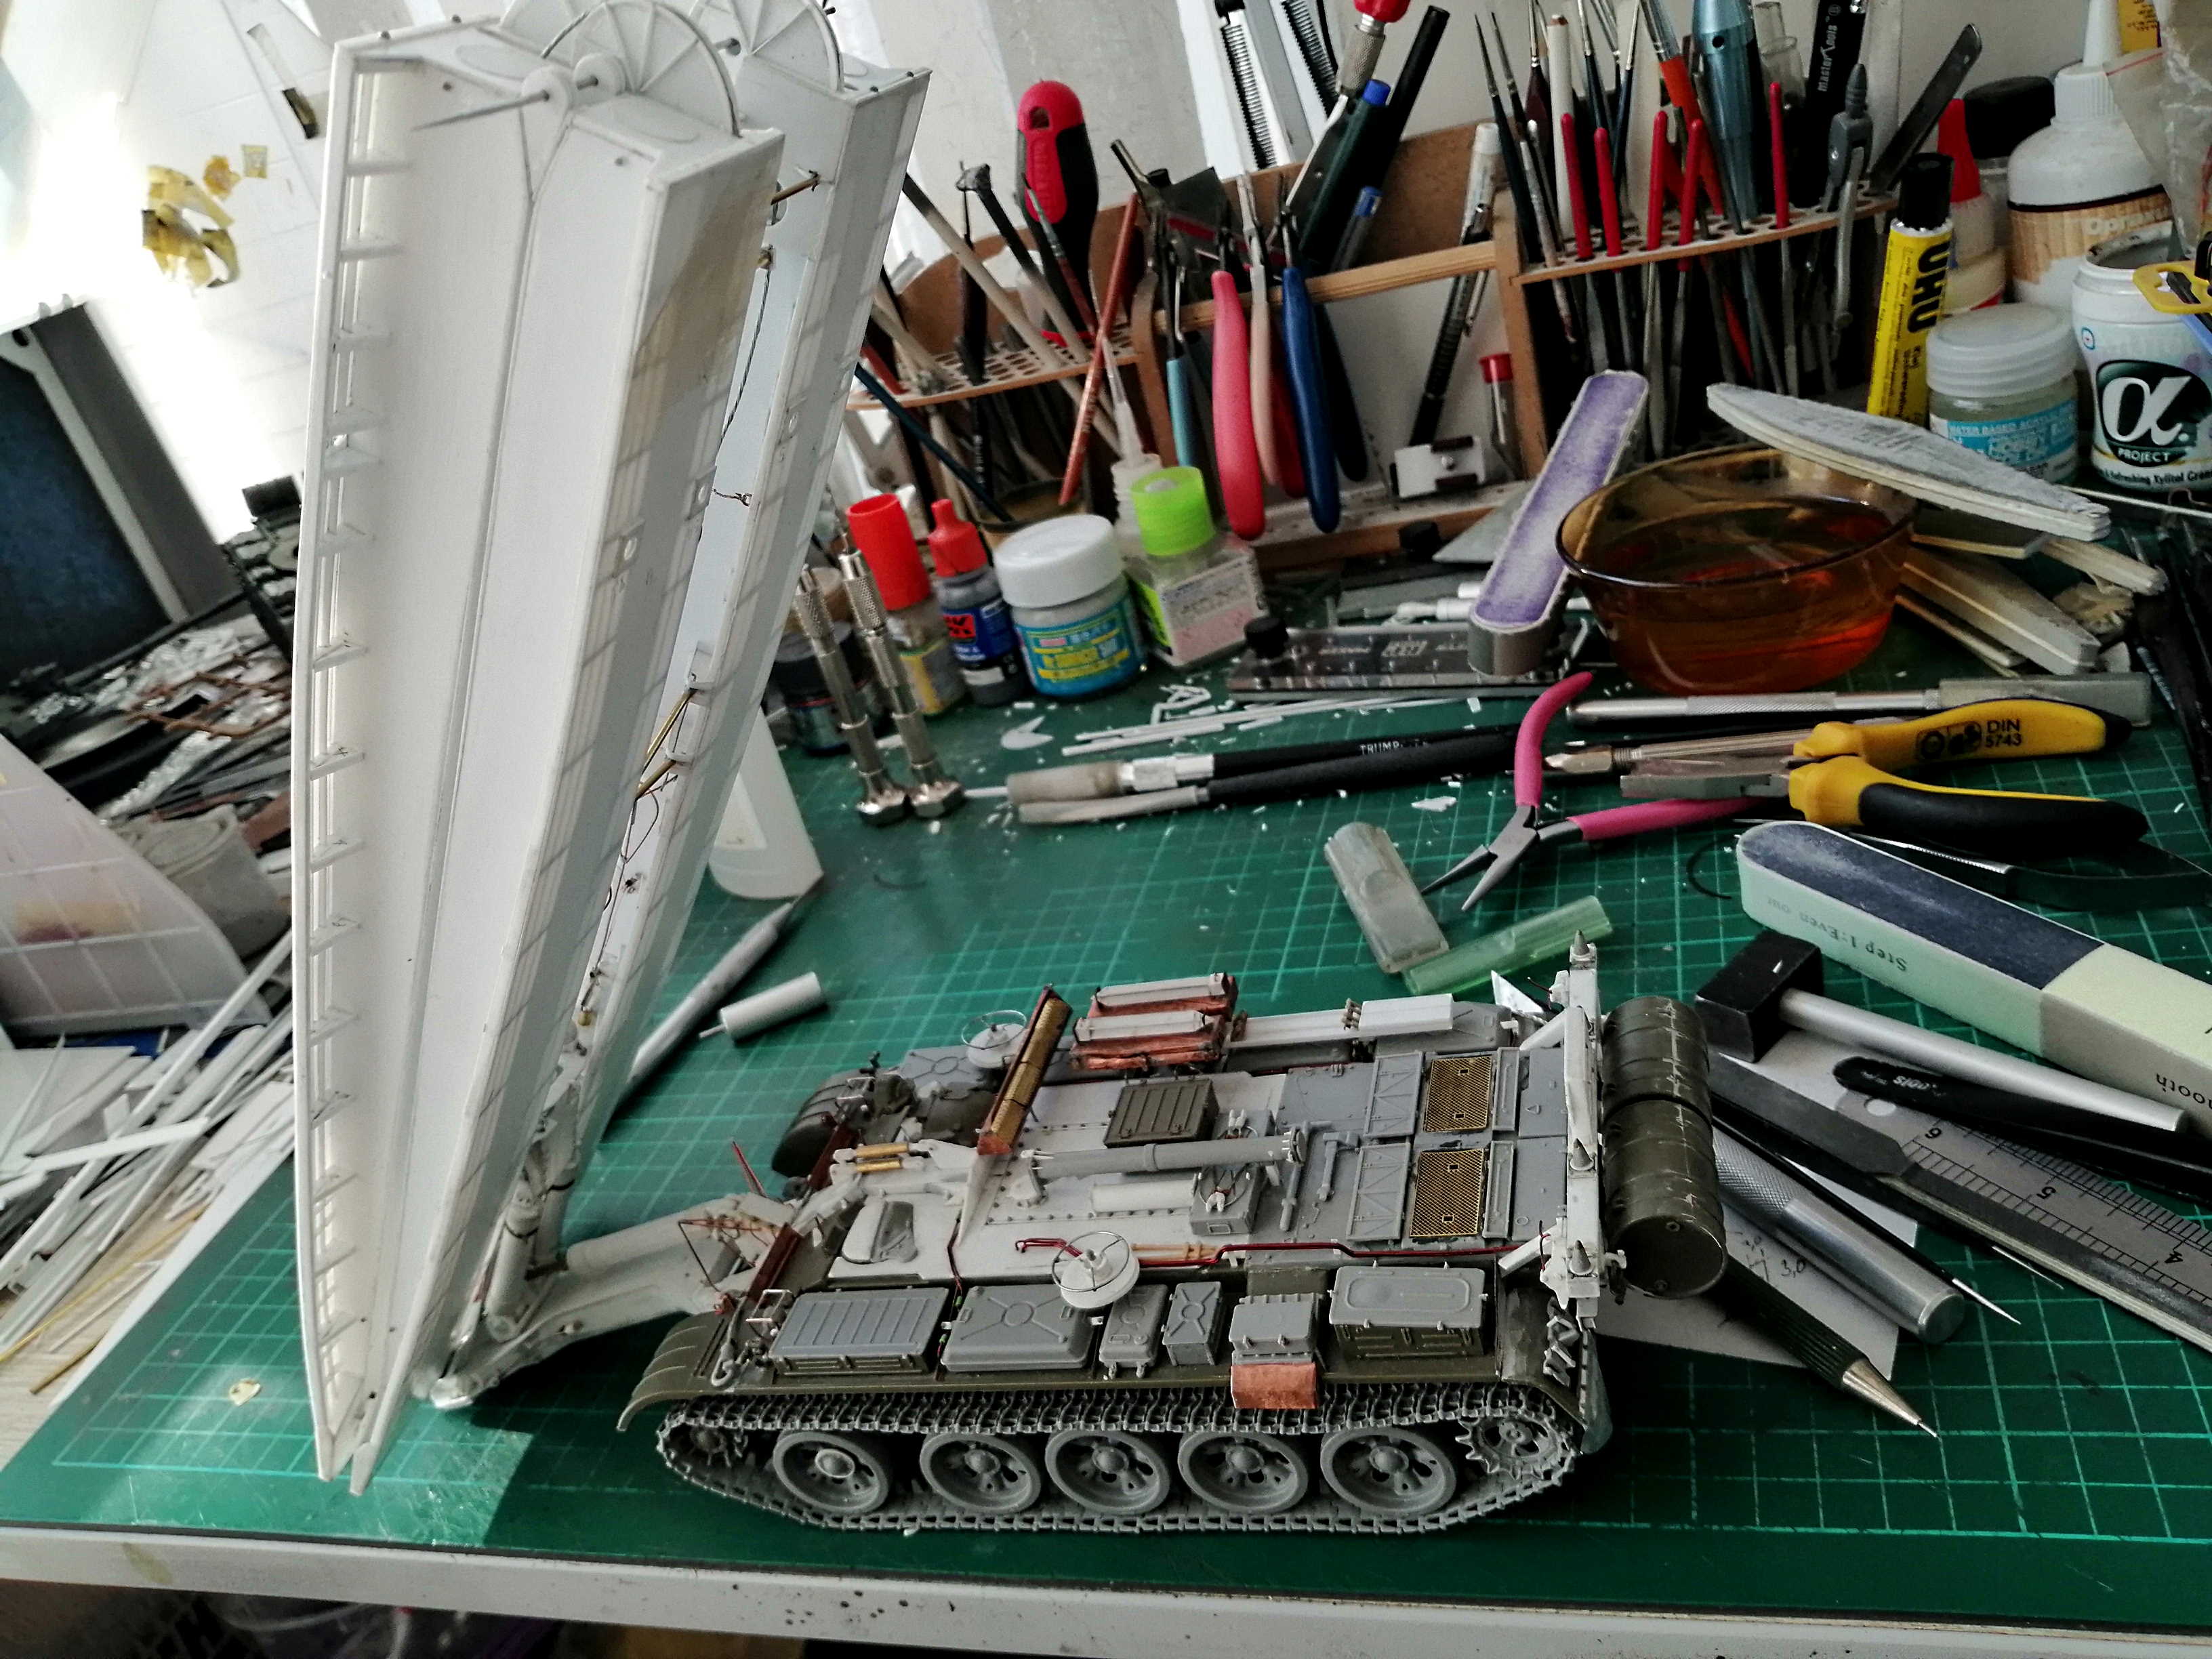
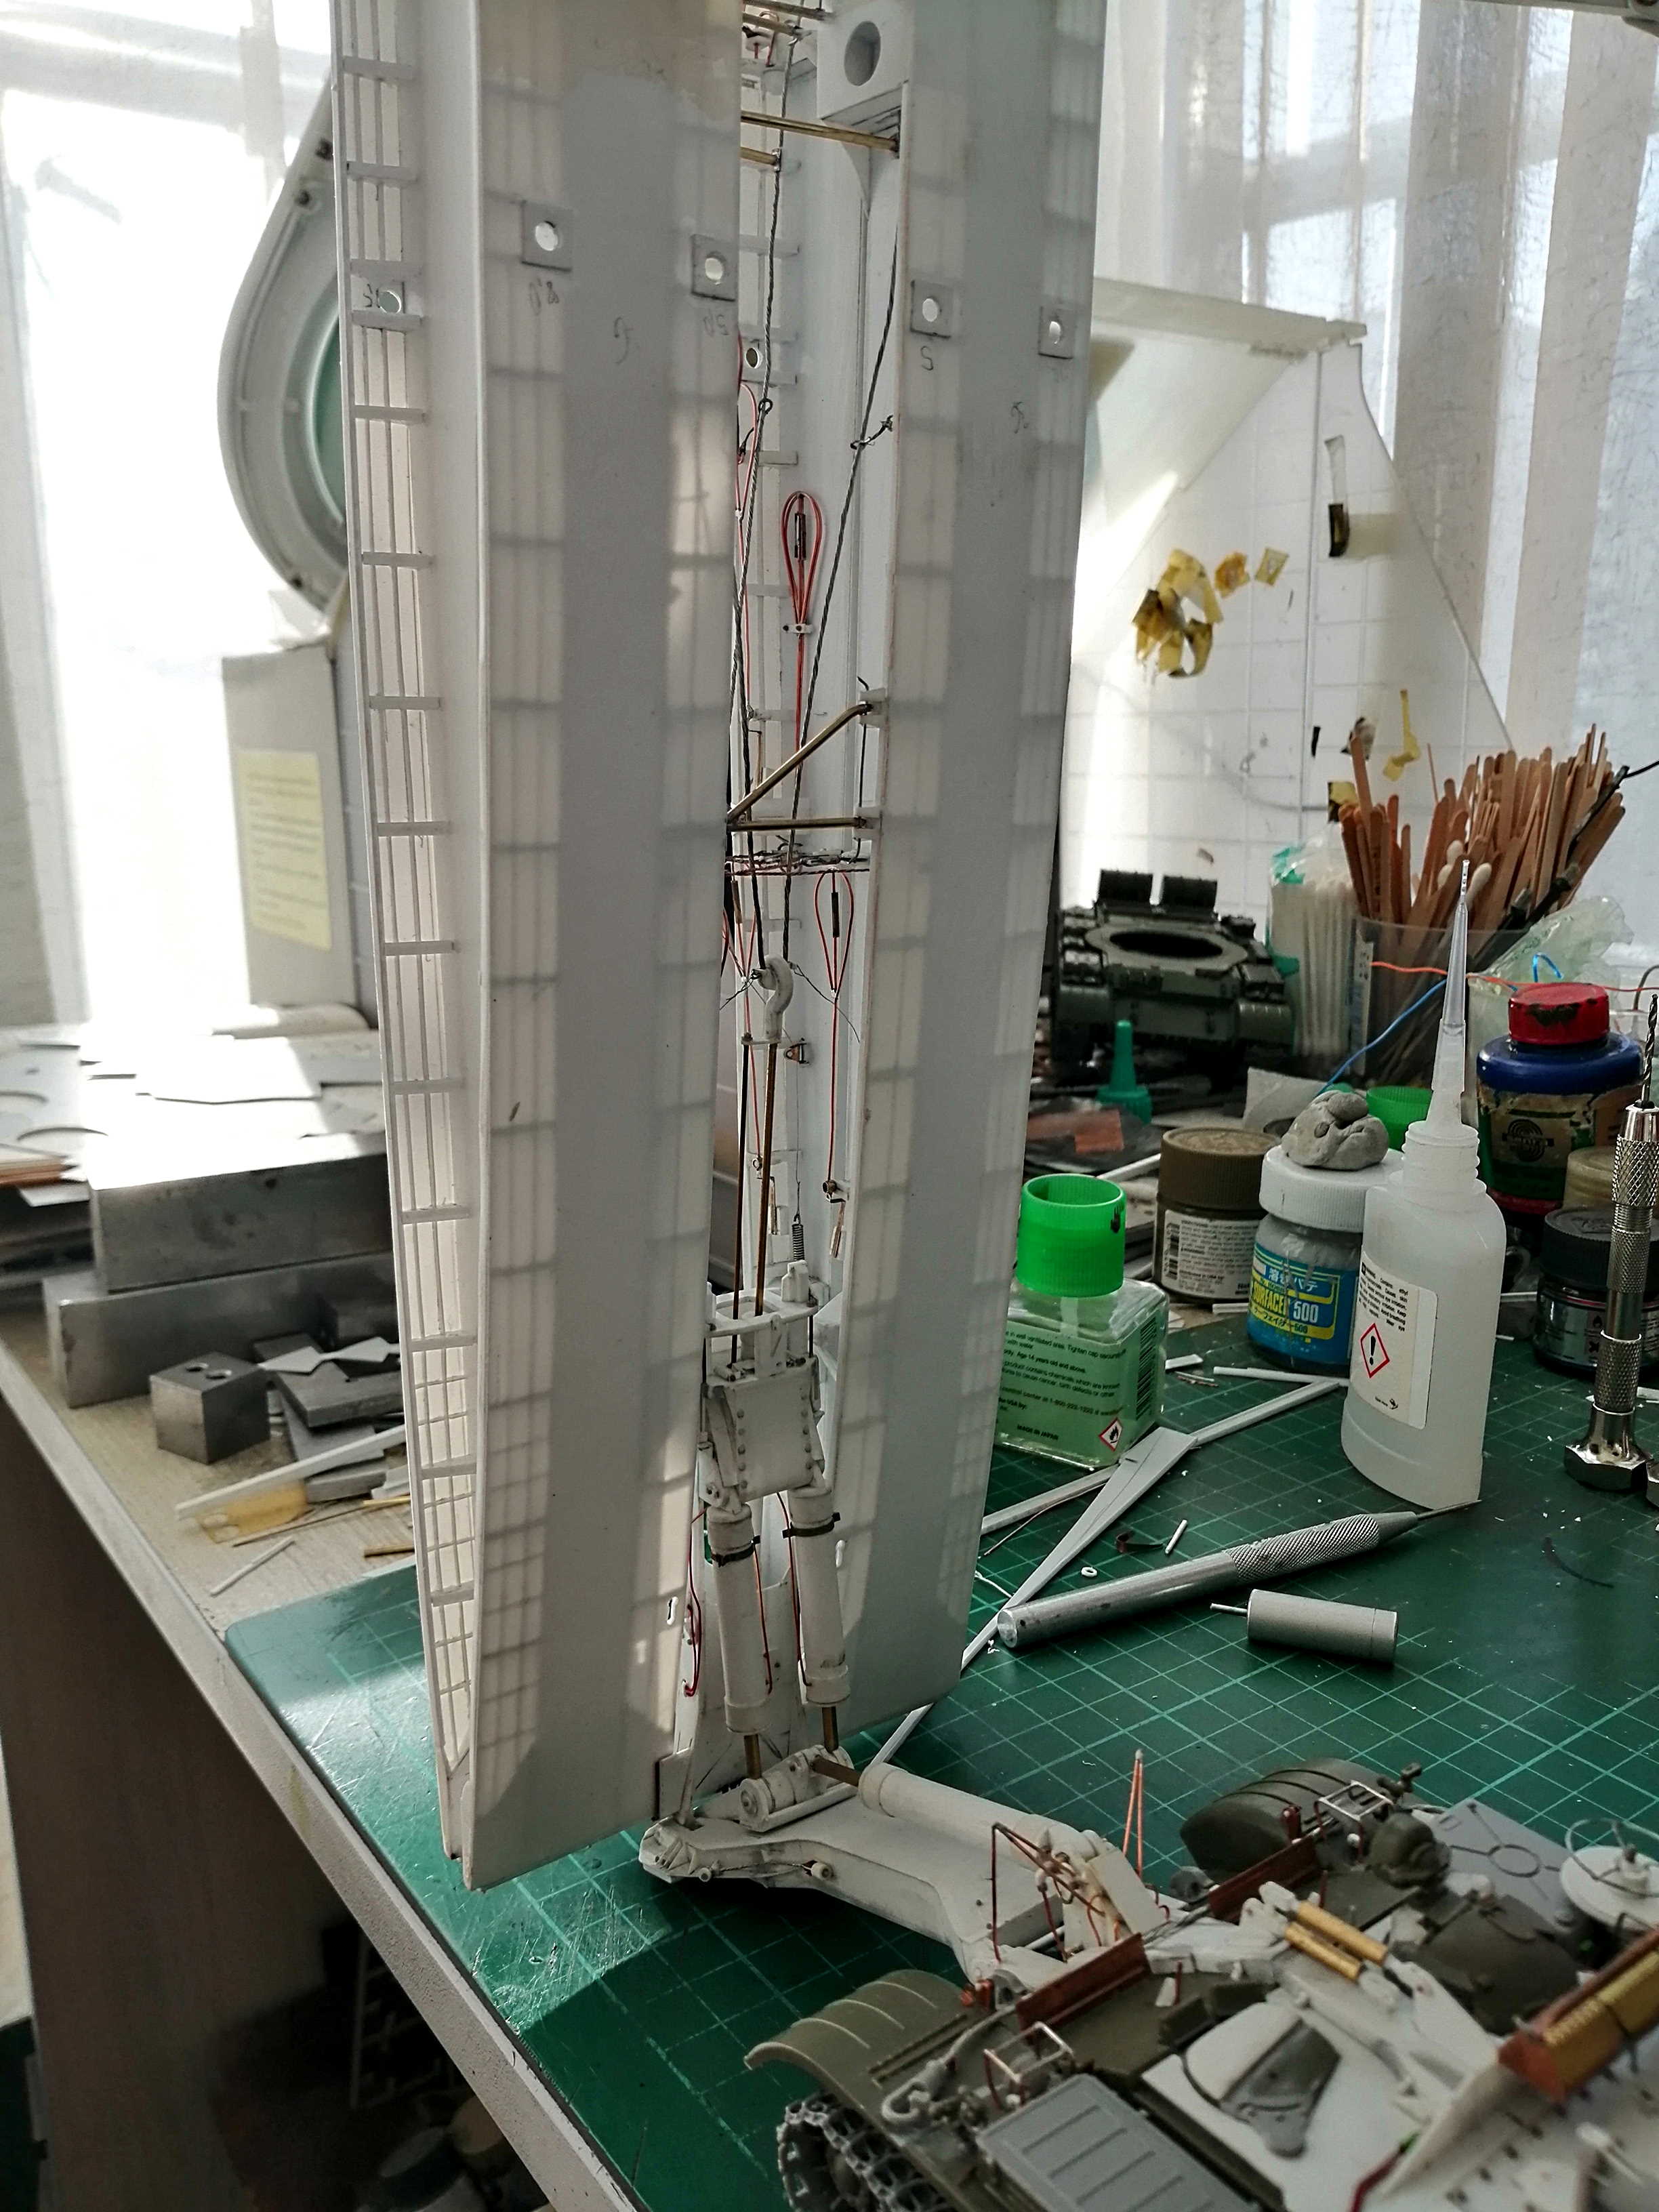
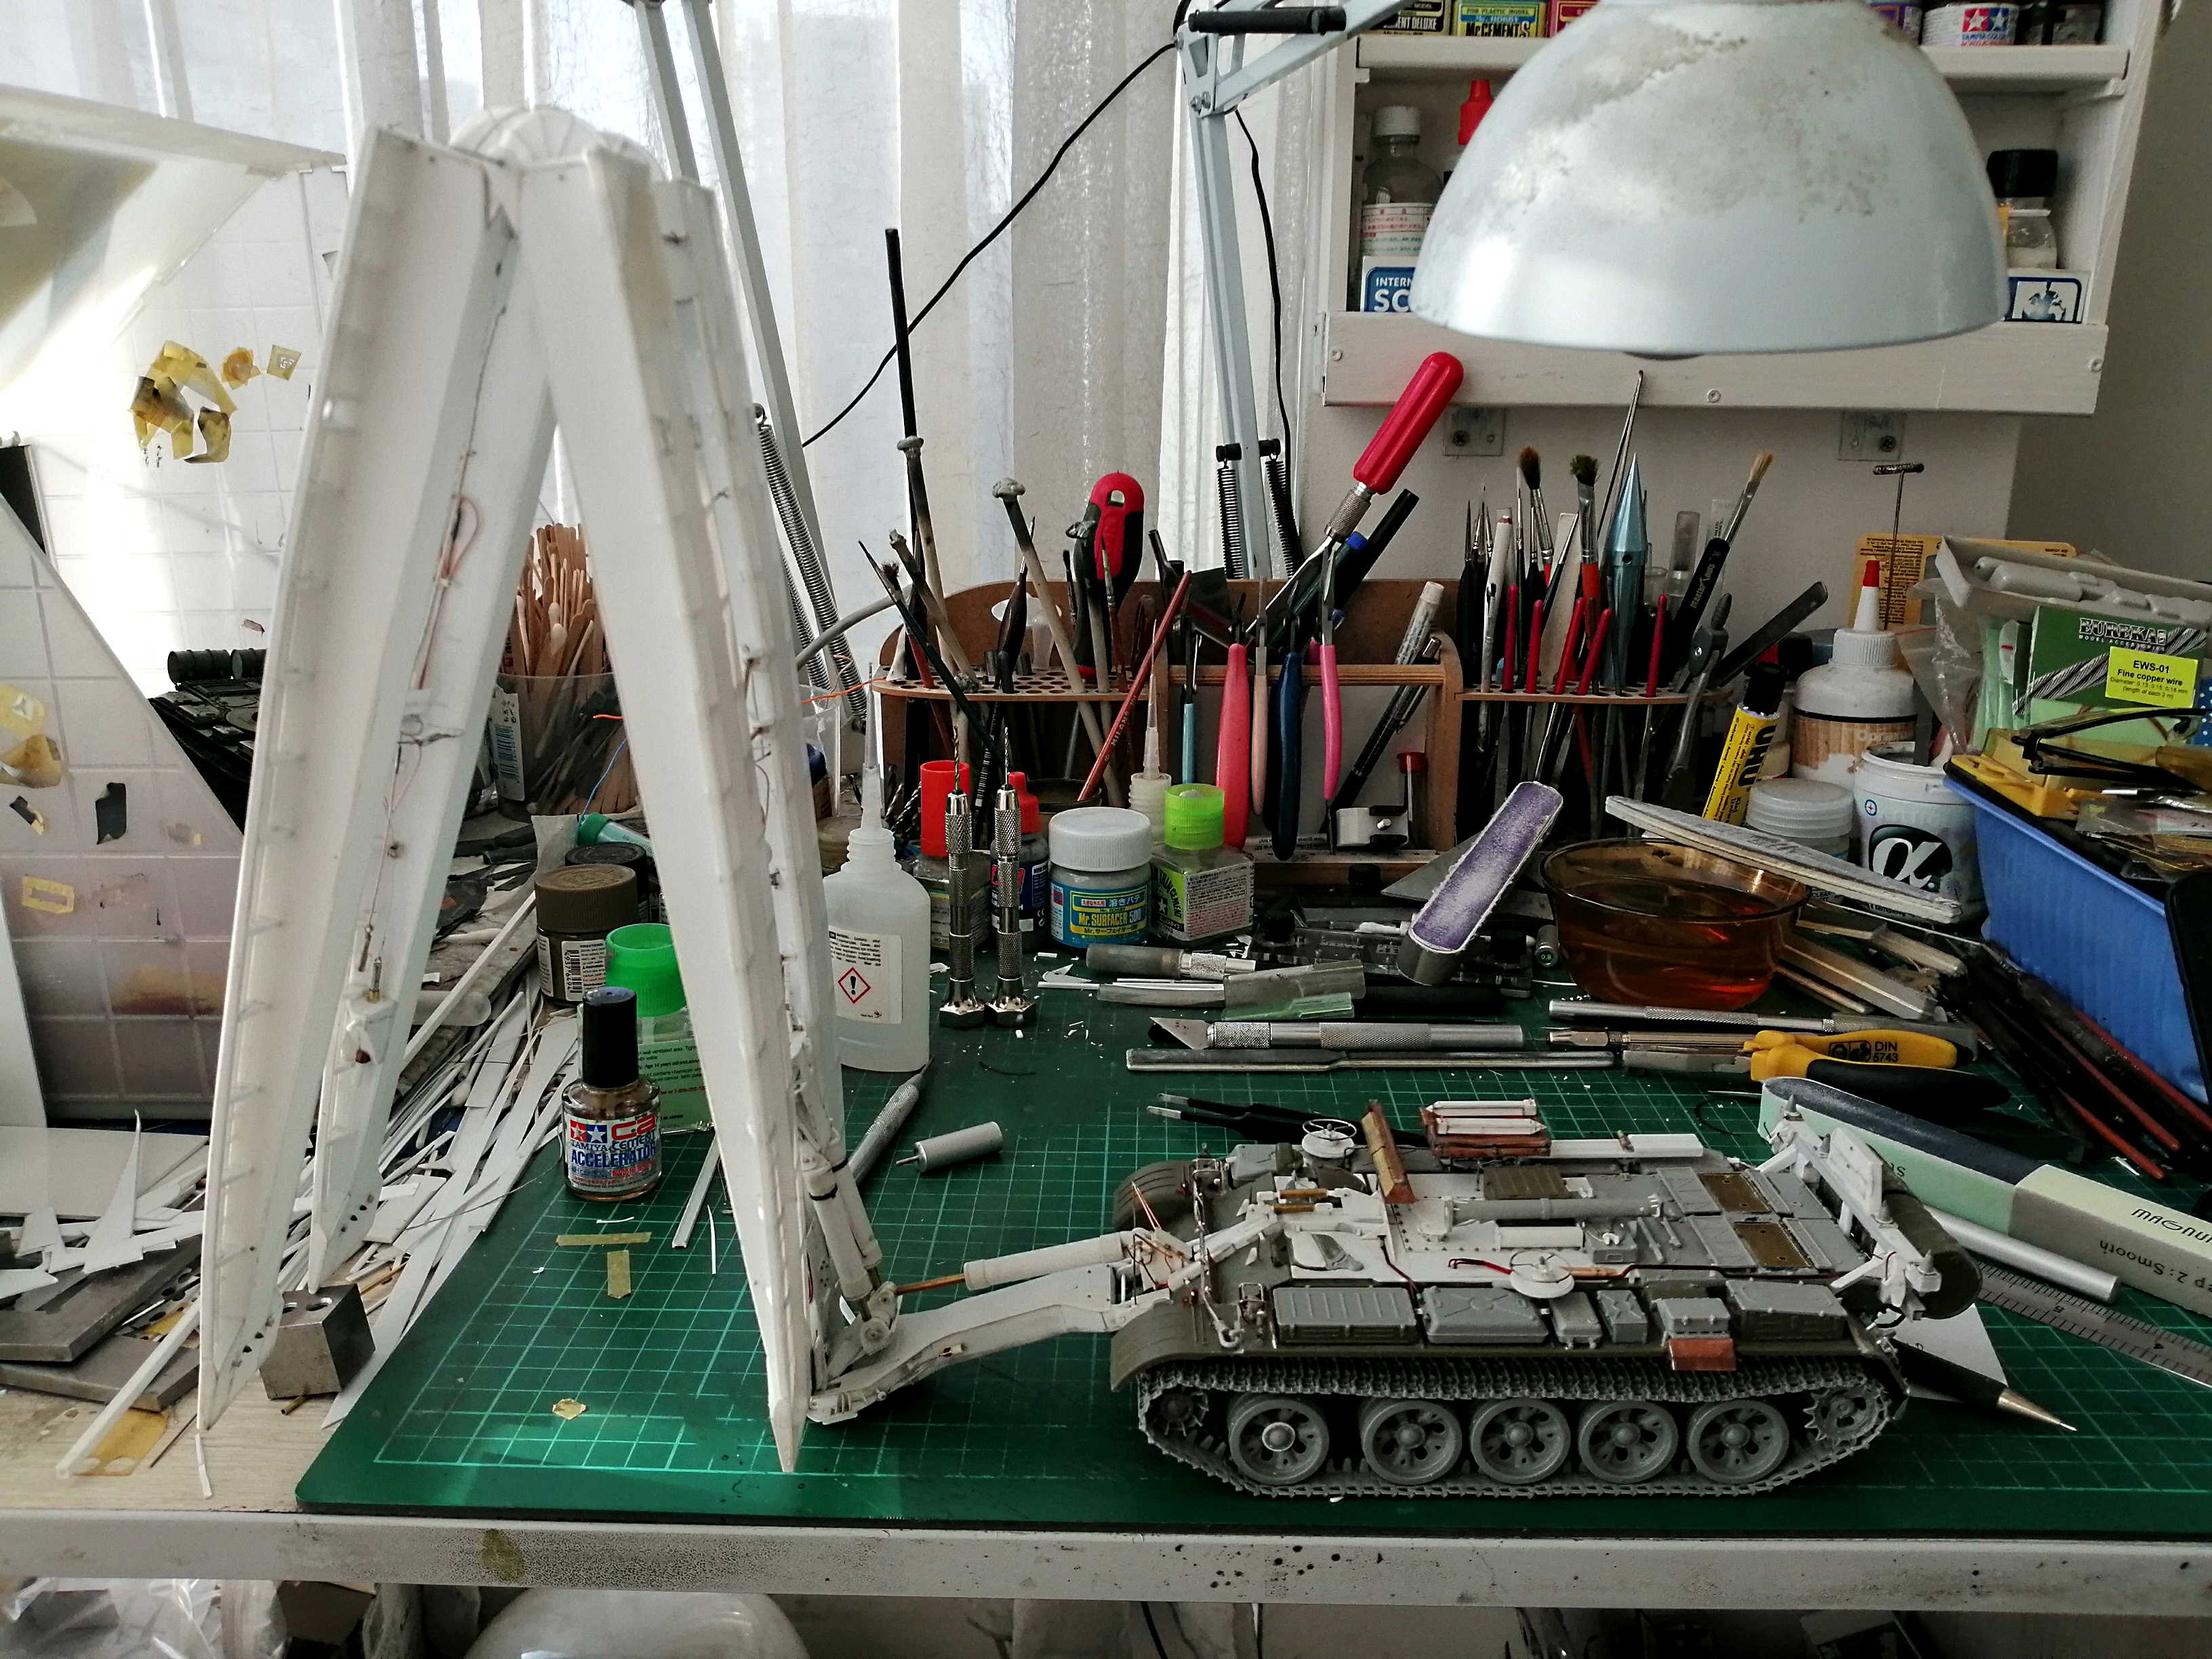
See you all again in 2020

Glad to have you- and your modelling Mojo- back again bulding interesting models!
Have a good New Year's Eve(IIRC less than 3 hours away where you live) and a good start in the next one!
Here is the result from today's progress(97% finished construction):


See you all again in 2020


SpeedyJ

Joined: September 17, 2013
KitMaker: 1,617 posts
Armorama: 1,150 posts

Posted: Tuesday, December 31, 2019 - 02:07 AM UTC
Thanks for the nice words Angel.
Your work is getting more spectacular after every finished model it seems.
Simply love the model / work you're busy with now.
Cheers for You and Yours.
Robert Jan


Your work is getting more spectacular after every finished model it seems.
Simply love the model / work you're busy with now.
Cheers for You and Yours.
Robert Jan


petbat

Joined: August 06, 2005
KitMaker: 3,353 posts
Armorama: 3,121 posts

Posted: Tuesday, December 31, 2019 - 12:18 PM UTC
Fantastic Angel. Love every pic you post of this.
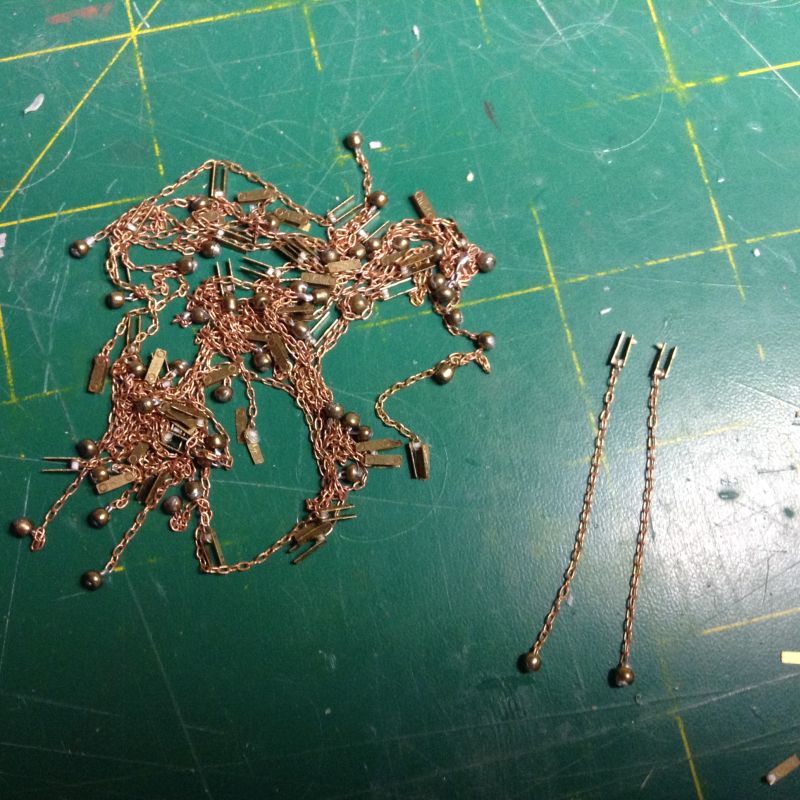
Well, missed the deadline. I seriously underestimated the amount of time required to assemble the Legend kit - these chain segments took at least 40 hours so far - the most in trying to get the solder to stick to the bijou ball weight. The two lengths on the right have the bolt and nut added, but still need the bolt head on the other side. The others are awaiting both.
Each link comprises a bijou ball, soldered to a length of brass bent into a U shape, which was passed through the chain first, a brass ring threaded through the end of the chain, slipped over a length of styrene rod, which was sandwiched between two brass 'plates'. A very tenuous hold on these parts, you can see one plate has been knocked off when you look at the one in the 'hole' in the piled chains - bottom of the pic.
The nut head and bolt will complete this assembly ready for priming, painting and attaching.
Bolts added to the stowage bin and the lights and PE guards have all been installed (including the front ones)
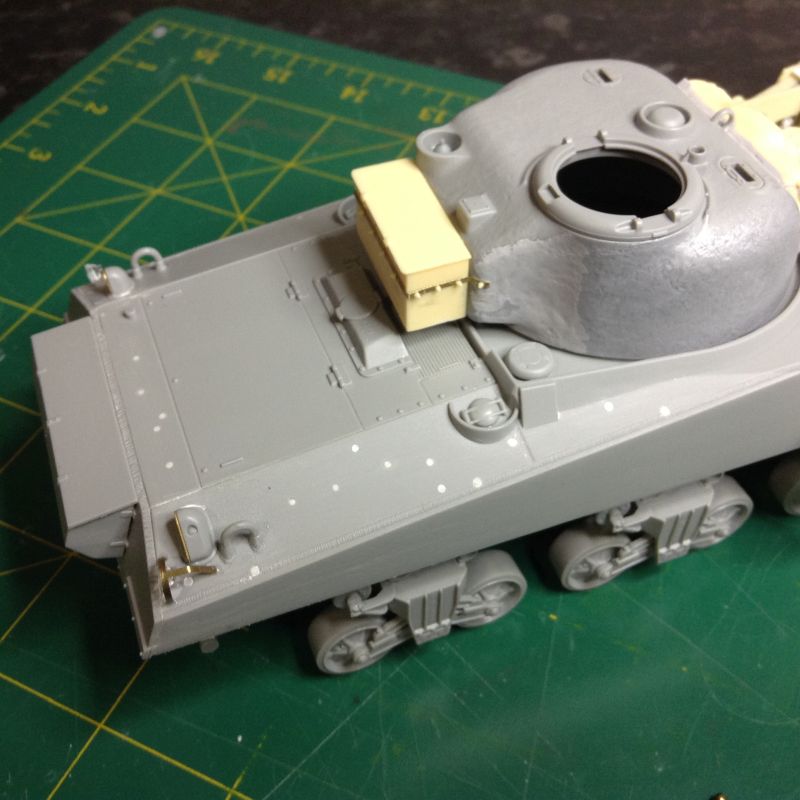
Had to remove the turret locking tabs and reposition them as Dragon have them arranged so the tabs slide in to the hull when the turret is facing straight forward/Backward and also had to glue a strip of styrene around the turret ring due to very sloppy fit (some engineering genius at work... not )
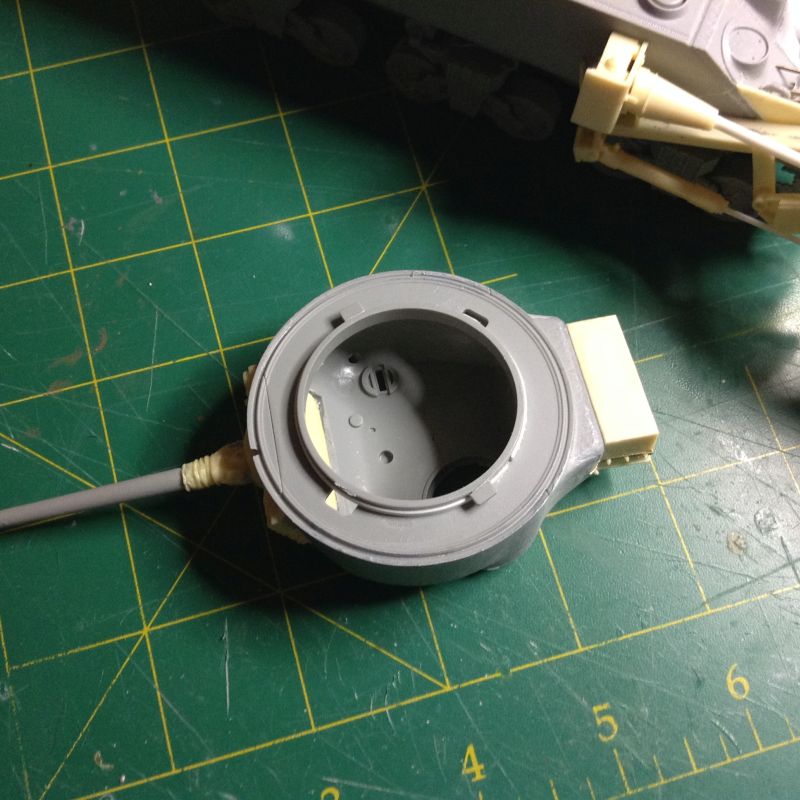
I'll keep pushing on and will post the final pics in a week or so (hopefully)
Thanks for hosting a great build Richard, it was a pleasure watching all these fantastic models come together. It was fun being a part of the group.
Happy New Year one and all


Well, missed the deadline. I seriously underestimated the amount of time required to assemble the Legend kit - these chain segments took at least 40 hours so far - the most in trying to get the solder to stick to the bijou ball weight. The two lengths on the right have the bolt and nut added, but still need the bolt head on the other side. The others are awaiting both.
Each link comprises a bijou ball, soldered to a length of brass bent into a U shape, which was passed through the chain first, a brass ring threaded through the end of the chain, slipped over a length of styrene rod, which was sandwiched between two brass 'plates'. A very tenuous hold on these parts, you can see one plate has been knocked off when you look at the one in the 'hole' in the piled chains - bottom of the pic.
The nut head and bolt will complete this assembly ready for priming, painting and attaching.

Bolts added to the stowage bin and the lights and PE guards have all been installed (including the front ones)

Had to remove the turret locking tabs and reposition them as Dragon have them arranged so the tabs slide in to the hull when the turret is facing straight forward/Backward and also had to glue a strip of styrene around the turret ring due to very sloppy fit (some engineering genius at work... not )

I'll keep pushing on and will post the final pics in a week or so (hopefully)
Thanks for hosting a great build Richard, it was a pleasure watching all these fantastic models come together. It was fun being a part of the group.
Happy New Year one and all


SpeedyJ

Joined: September 17, 2013
KitMaker: 1,617 posts
Armorama: 1,150 posts

Posted: Tuesday, December 31, 2019 - 12:27 PM UTC
Would have been a shame to hurry that kit to a dreaded finish Peter.
I'll copy Peter for a big thumbs up to Richard leading this campaign. I only jumped in the last 2 months of 2019,but followed from the side line a fantastic campaign with very high quality builds.
A Happy New Year to all of you
Robert Jan

I'll copy Peter for a big thumbs up to Richard leading this campaign. I only jumped in the last 2 months of 2019,but followed from the side line a fantastic campaign with very high quality builds.
A Happy New Year to all of you
Robert Jan



GulfWarrior

Joined: January 05, 2010
KitMaker: 1,051 posts
Armorama: 1,029 posts

Posted: Tuesday, December 31, 2019 - 04:55 PM UTC
Great work eveeryone! Make sure you've uploaded pics to the campaign gallery. I'll start handing out the awards starting tomorrow (US Central Time)


petbat

Joined: August 06, 2005
KitMaker: 3,353 posts
Armorama: 3,121 posts

Posted: Thursday, January 02, 2020 - 04:58 PM UTC
Just to show I am still moving on this one. Major construction complete. Ready for priming then painting.
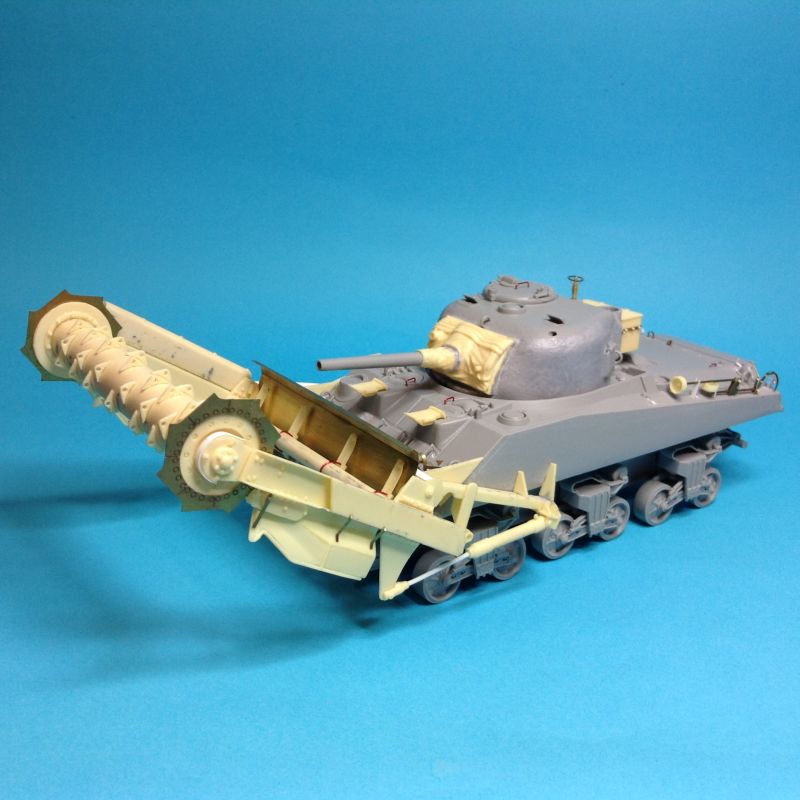
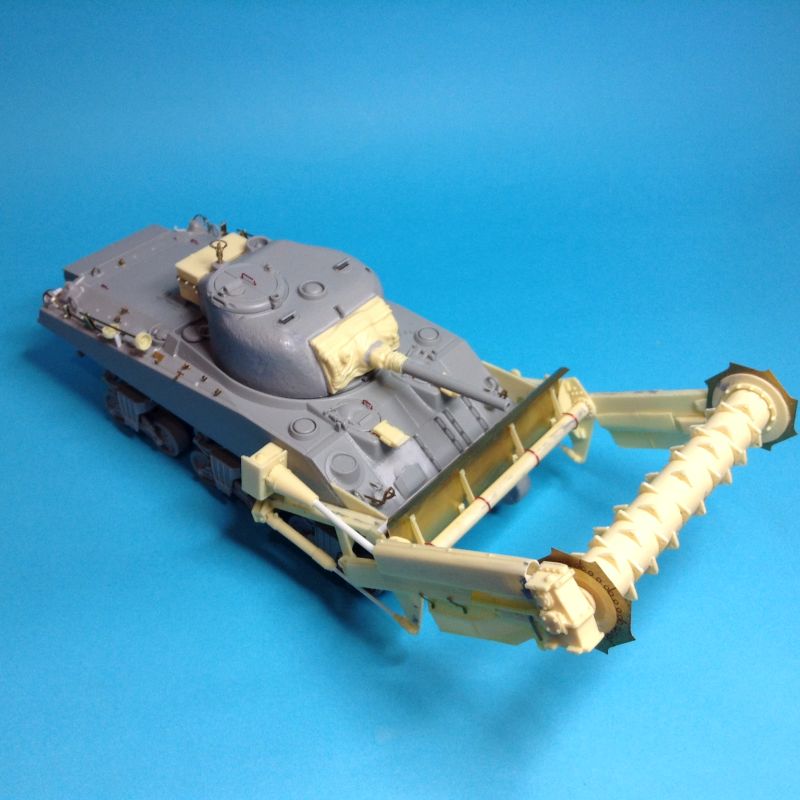
Fabricated the two posts in stowed configuration as they were only raised when the flail was in use. Also added a British standard fitting First Aid box on the rear.
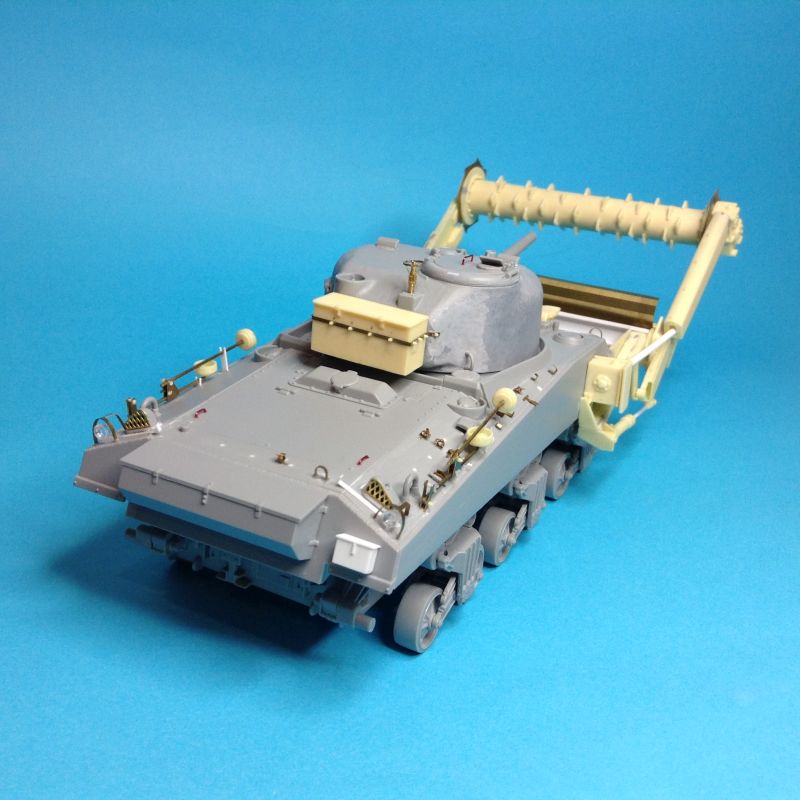


Fabricated the two posts in stowed configuration as they were only raised when the flail was in use. Also added a British standard fitting First Aid box on the rear.

Posted: Sunday, January 05, 2020 - 08:19 PM UTC

GulfWarrior

Joined: January 05, 2010
KitMaker: 1,051 posts
Armorama: 1,029 posts

Posted: Monday, January 06, 2020 - 04:59 AM UTC
Wow! That looks really good! 
Only a couple more days left, guys. Start getting those finished model pics uploaded to the campagin gallery. The campaign ends on the 8th. Ribbon will be handed out as soon as I've had my morning coffee on the 9th.


Only a couple more days left, guys. Start getting those finished model pics uploaded to the campagin gallery. The campaign ends on the 8th. Ribbon will be handed out as soon as I've had my morning coffee on the 9th.


Posted: Tuesday, January 07, 2020 - 08:18 AM UTC
My BLG-60M2 won't be finished by the time you'll have your morning coffee on the 9th, Richard...
But my Pf.11(Pontonwagen) will earn me a ribbon
This has been a Great Campaign!
It kicked me to start 2 of my most challenging builds sofar and although I finished just one on time, I had immense fun participating.
Just to show I'm still moving on my second build- I have less than 6 more features to build.Yet they are not quite simple(therefore left for the end)...
2 supports for the laying arm(used to fix it in transport mode):
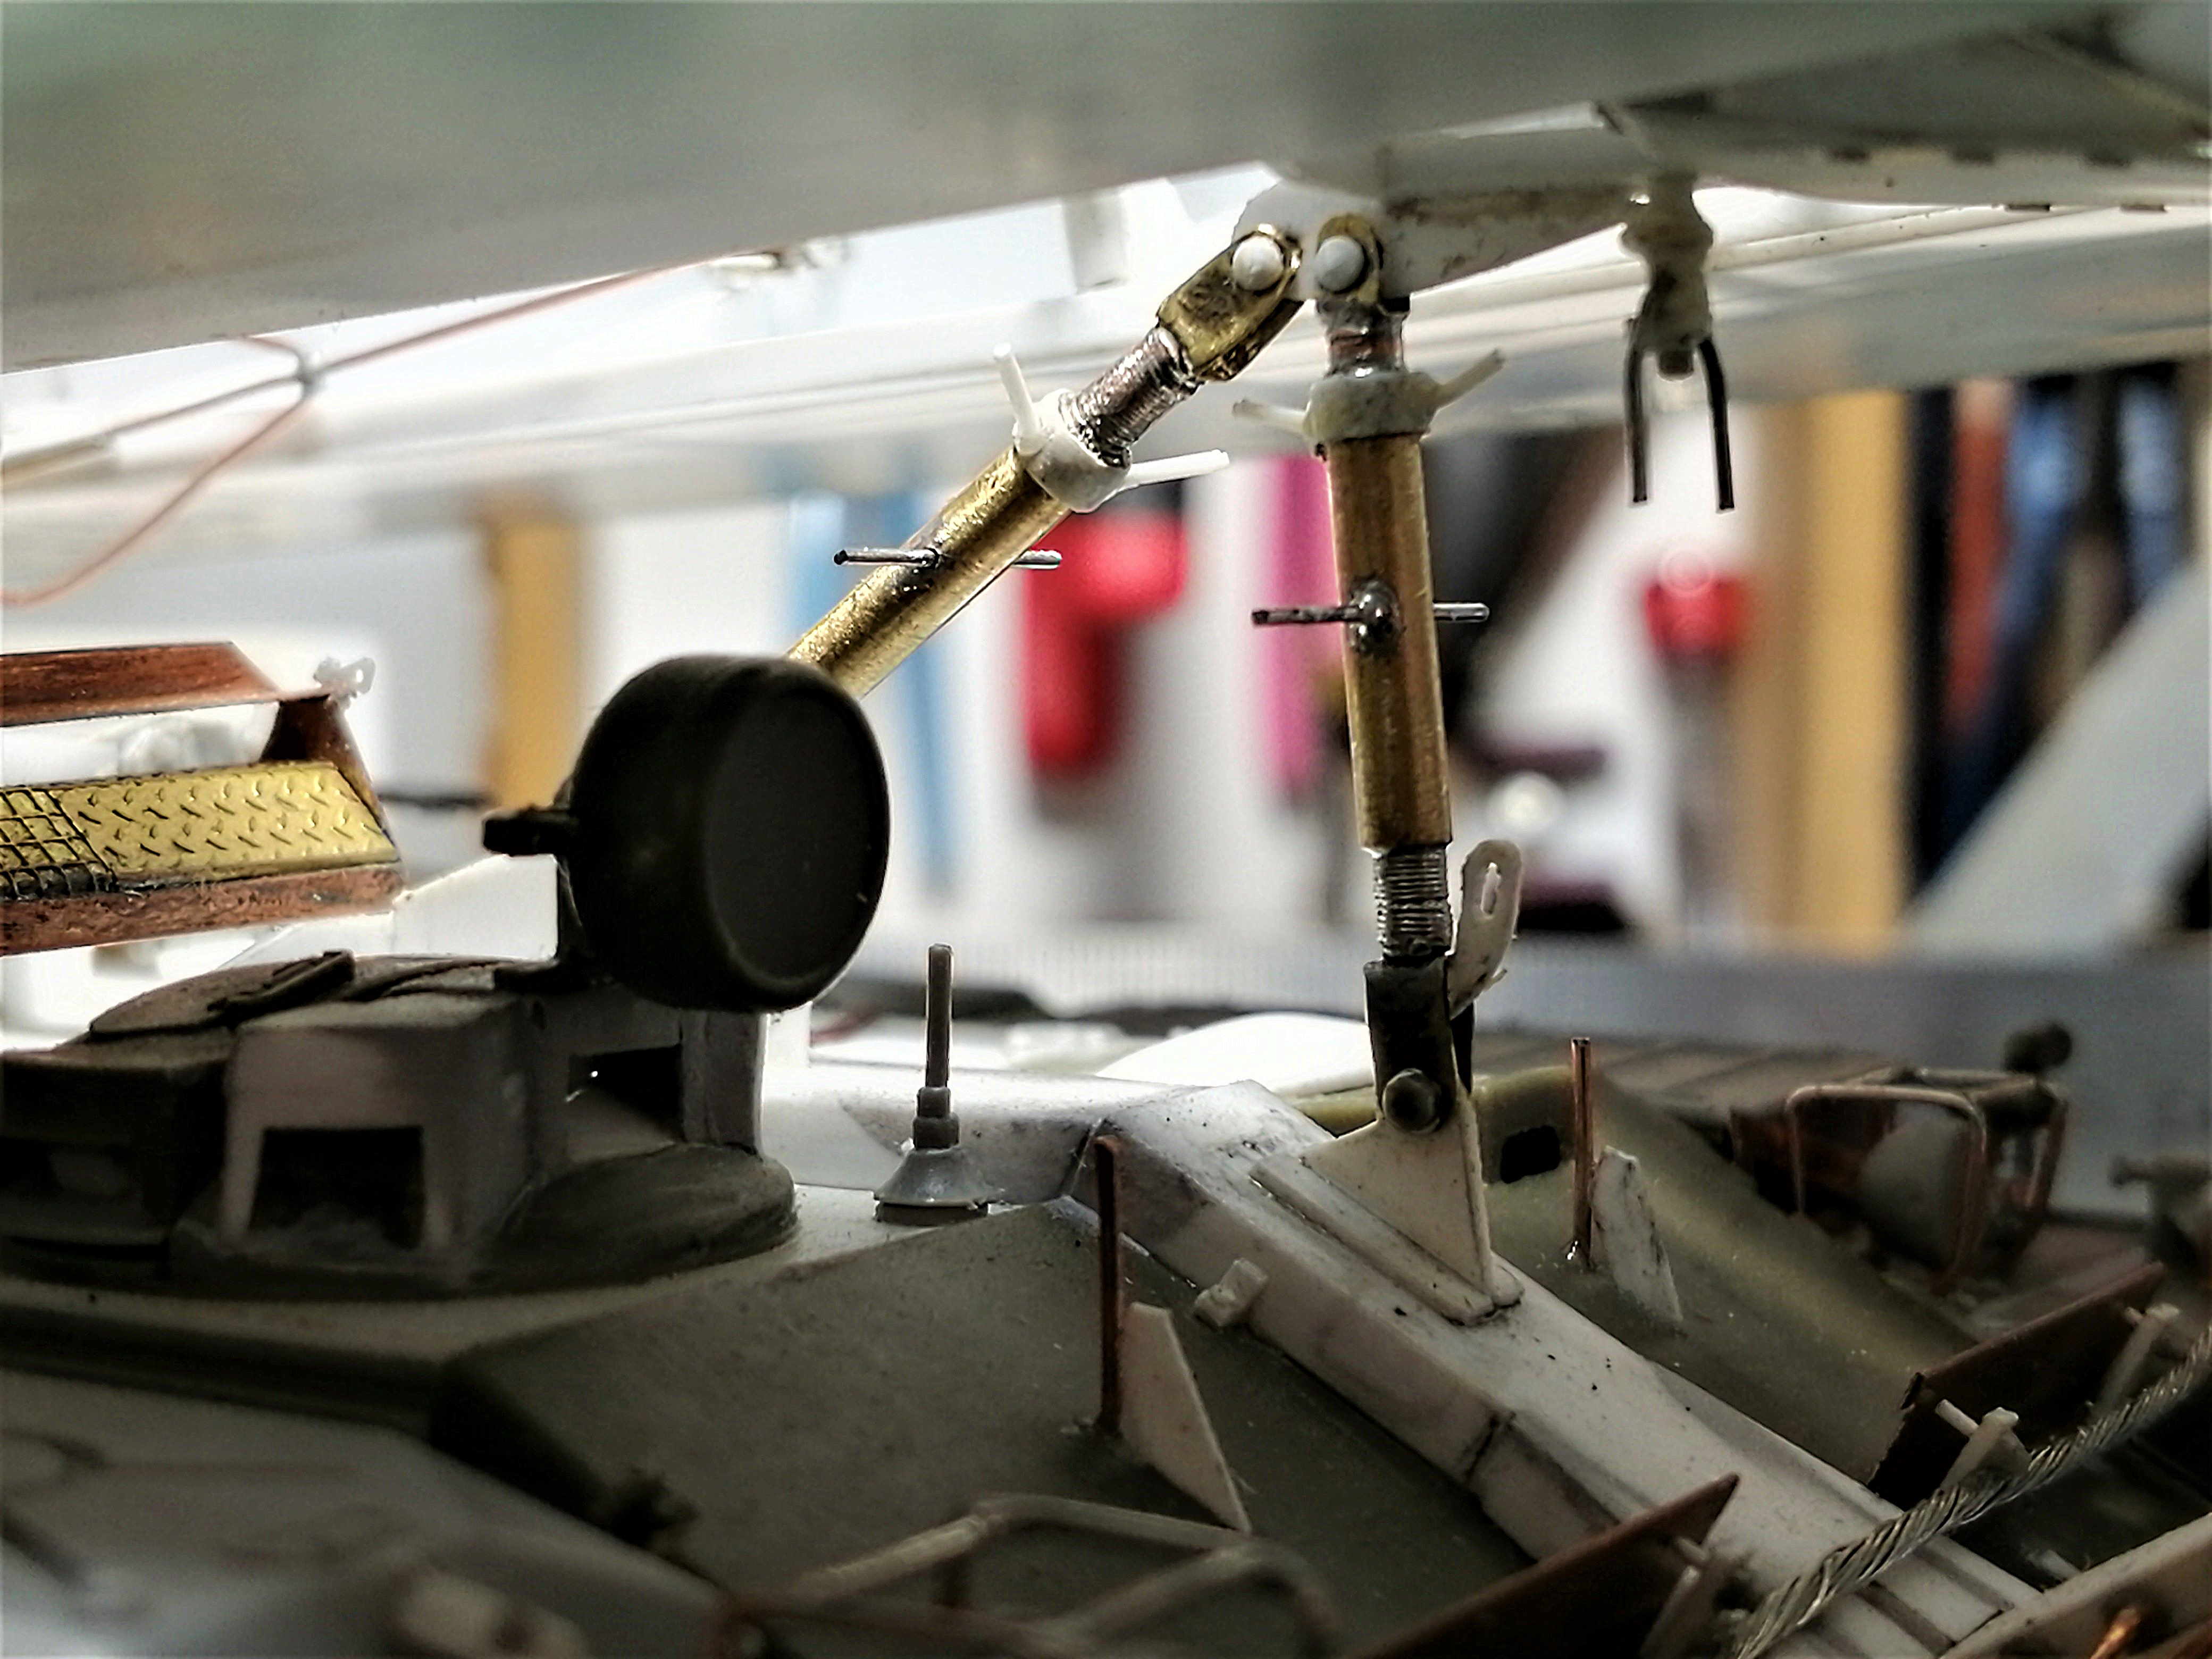
2 sizes of brass tubing, tiny copper wire to imitate the thread, another wire for the handles, some styrene strip and rods, plus a lot of solder and CA- 3 evenings spent.
But-the supports work and fix the laying arm!
2 forward aiming guides for the driver and vehicle commander:
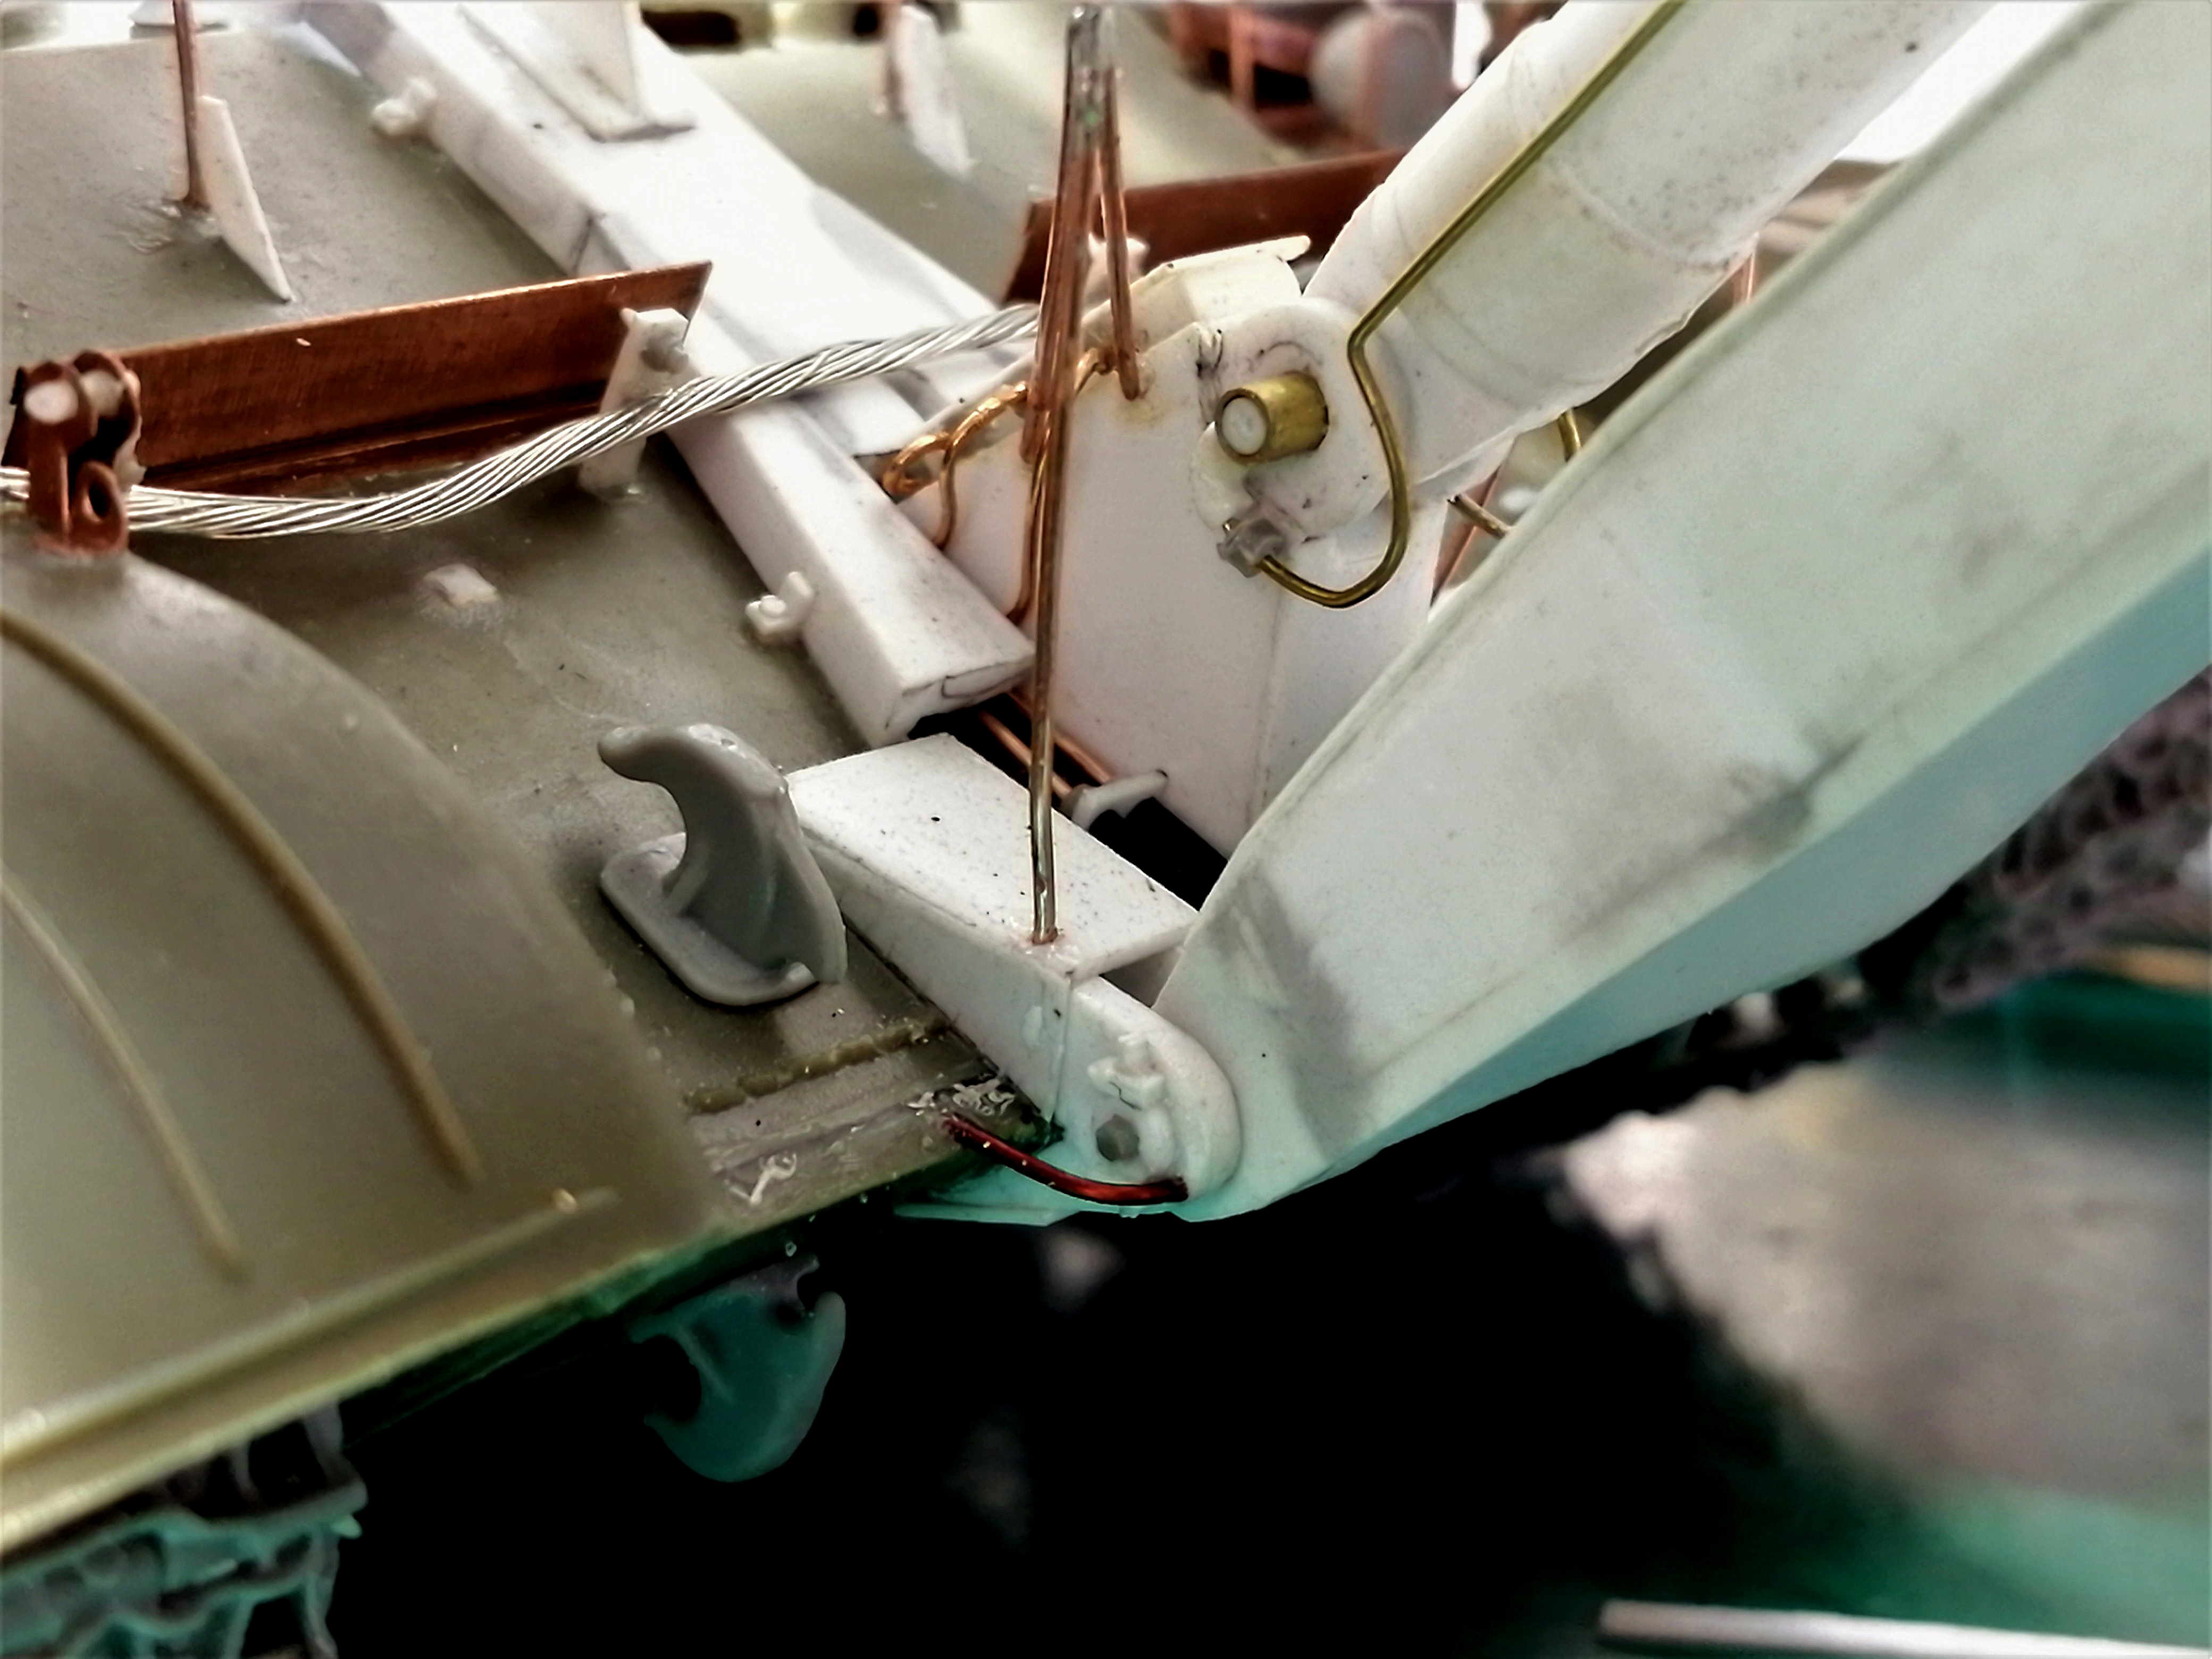
Together with the rear aiming guides(one is visible on the first picture in front of commanders cupola), they helped both crewmen to steer the vehicle in the right alignment for launching or retrieving the bridge.
Together with the underwater guides, these were further used when multiple bridges were layed- when the BLG was supposed to move in perfect alignment on an already launched, and partially submerged bridge, to lay its own bridge further midstream.
Several attempts to first solder the 3 rods( each forward aiming guide consists of) and then mount them on the vehicle failed, so finaly I glued the rods on the vehicle and soldered them, using some heat disspating tricks.
Bridge deck surface finishing.
The BLG-60 bridge decks were covered with a mix of epoxy and small sized cobblestones, aimed at improving both friction and durability.I will use 240 grit sandpaper to imitate the surface:
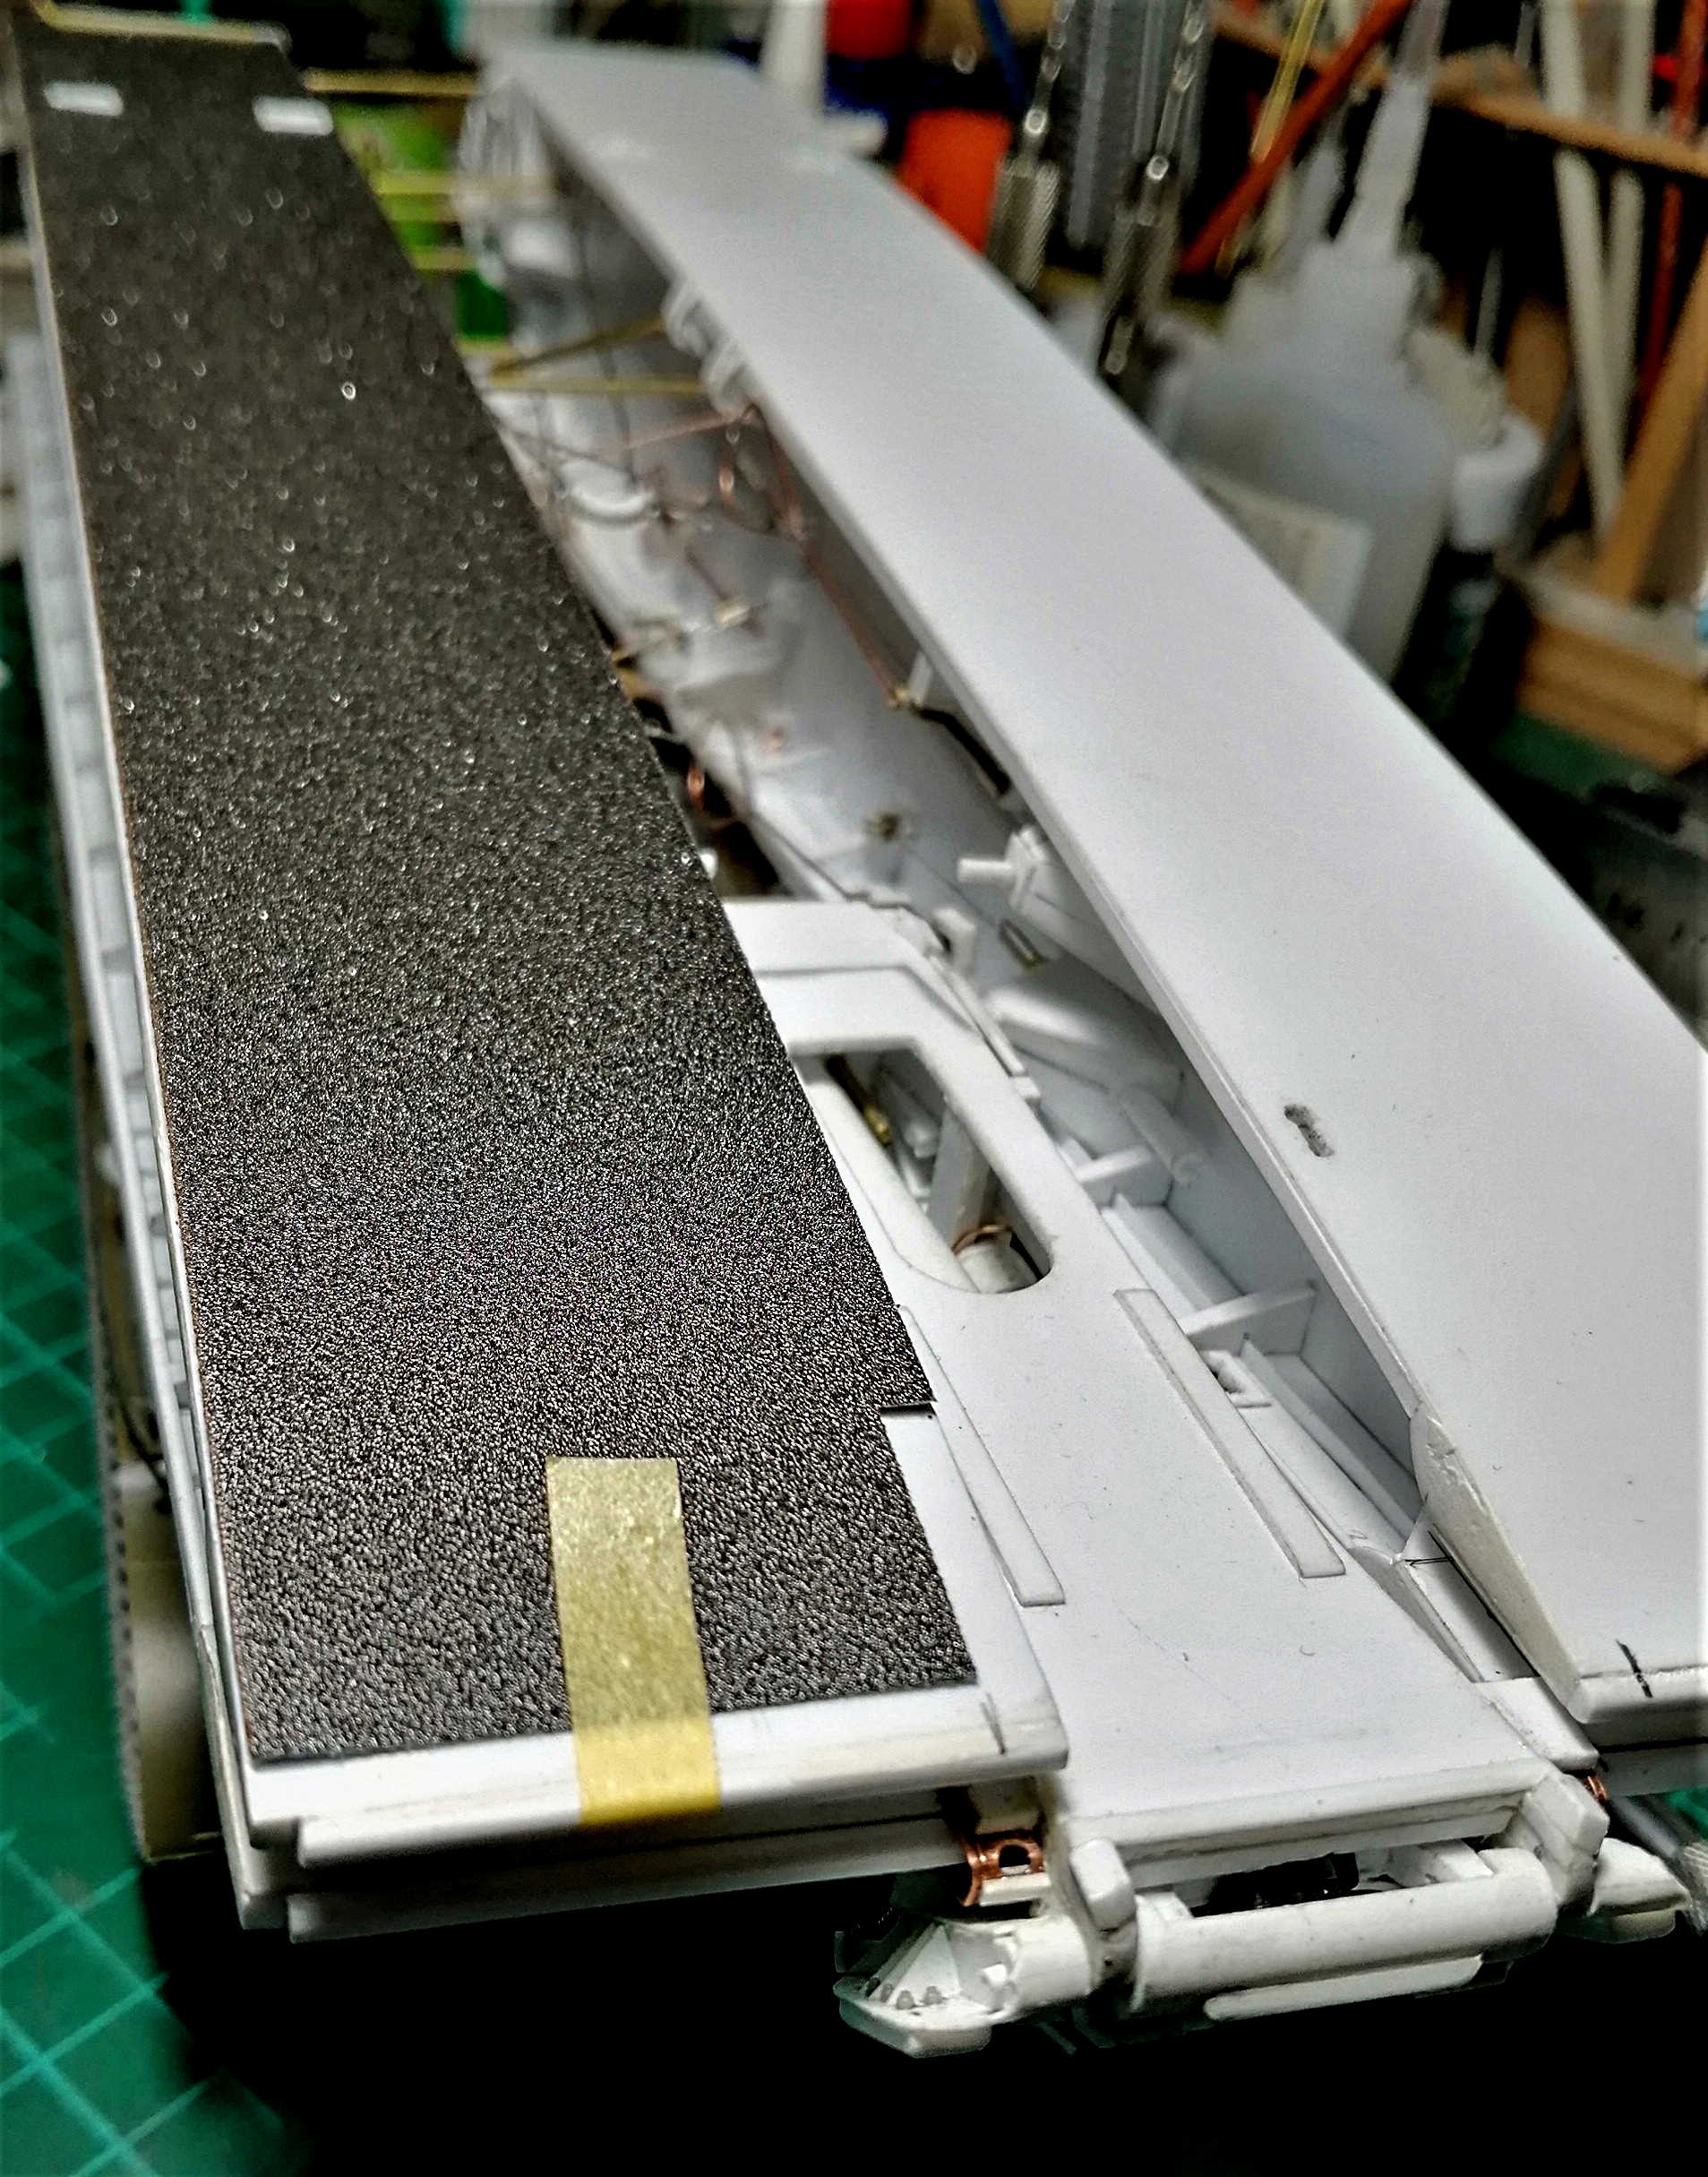
The sandpaper will get some grayish and earth tones airbrushed(for worn look) and some matt to reduce its shine.
I continue working on the BLG and will continue showing my progress here,

But my Pf.11(Pontonwagen) will earn me a ribbon

This has been a Great Campaign!
It kicked me to start 2 of my most challenging builds sofar and although I finished just one on time, I had immense fun participating.
Just to show I'm still moving on my second build- I have less than 6 more features to build.Yet they are not quite simple(therefore left for the end)...
2 supports for the laying arm(used to fix it in transport mode):

2 sizes of brass tubing, tiny copper wire to imitate the thread, another wire for the handles, some styrene strip and rods, plus a lot of solder and CA- 3 evenings spent.
But-the supports work and fix the laying arm!
2 forward aiming guides for the driver and vehicle commander:

Together with the rear aiming guides(one is visible on the first picture in front of commanders cupola), they helped both crewmen to steer the vehicle in the right alignment for launching or retrieving the bridge.
Together with the underwater guides, these were further used when multiple bridges were layed- when the BLG was supposed to move in perfect alignment on an already launched, and partially submerged bridge, to lay its own bridge further midstream.
Several attempts to first solder the 3 rods( each forward aiming guide consists of) and then mount them on the vehicle failed, so finaly I glued the rods on the vehicle and soldered them, using some heat disspating tricks.
Bridge deck surface finishing.
The BLG-60 bridge decks were covered with a mix of epoxy and small sized cobblestones, aimed at improving both friction and durability.I will use 240 grit sandpaper to imitate the surface:

The sandpaper will get some grayish and earth tones airbrushed(for worn look) and some matt to reduce its shine.
I continue working on the BLG and will continue showing my progress here,


GulfWarrior

Joined: January 05, 2010
KitMaker: 1,051 posts
Armorama: 1,029 posts

Posted: Tuesday, January 07, 2020 - 09:45 AM UTC
Amazing work, Angel! 
I can't wait to see the finished product!


I can't wait to see the finished product!


Posted: Wednesday, January 08, 2020 - 04:40 AM UTC

GulfWarrior

Joined: January 05, 2010
KitMaker: 1,051 posts
Armorama: 1,029 posts

Posted: Wednesday, January 08, 2020 - 04:56 AM UTC
Looks awesome!
Be sure to upload it to the campaign gallery.


Be sure to upload it to the campaign gallery.


 |


