Campaigns
Where Armorama group builds can be discussed, organized, and updates posted.
Once More Unto the Breach
Hangelafette
Visit this Community
Pennsylvania, United States
Joined: April 22, 2012
KitMaker: 344 posts
Armorama: 315 posts
Posted: Monday, June 10, 2019 - 01:36 PM UTC
Hi All,

Entering in with Meng's BMR-3M.


-Nate
GulfWarrior
Staff MemberCampaigns Administrator
ARMORAMA
Visit this Community
Texas, United States
Joined: January 05, 2010
KitMaker: 1,051 posts
Armorama: 1,029 posts
Posted: Monday, June 10, 2019 - 01:38 PM UTC
Wow! That looks awesome, Nate! We'll definitely be watching your work on this one!

Welcome to the campaign!


GulfWarrior
Staff MemberCampaigns Administrator
ARMORAMA
Visit this Community
Texas, United States
Joined: January 05, 2010
KitMaker: 1,051 posts
Armorama: 1,029 posts
Posted: Tuesday, June 11, 2019 - 02:24 PM UTC
Here's the non-slip surface added to the horizontal surfaces on the engine compartment and driver's hatch.


Hopefully this weekend I'll get to sling some paint...


petbat
Visit this Community
Queensland, Australia
Joined: August 06, 2005
KitMaker: 3,353 posts
Armorama: 3,121 posts
Posted: Tuesday, June 11, 2019 - 08:38 PM UTC
Should have applied the sun block Richard, the lil Dozer got burnt.
GulfWarrior
Staff MemberCampaigns Administrator
ARMORAMA
Visit this Community
Texas, United States
Joined: January 05, 2010
KitMaker: 1,051 posts
Armorama: 1,029 posts
Posted: Wednesday, June 12, 2019 - 01:05 AM UTC

Quoted Text

Should have applied the sun block Richard, the lil Dozer got burnt.


LOL!! Funny, Peter!
Illini
Visit this Community
Colorado, United States
Joined: March 27, 2003
KitMaker: 345 posts
Armorama: 247 posts
Posted: Saturday, June 22, 2019 - 12:24 PM UTC
recent progress. It's getting really finicky, and most of it ends up hidden
GulfWarrior
Staff MemberCampaigns Administrator
ARMORAMA
Visit this Community
Texas, United States
Joined: January 05, 2010
KitMaker: 1,051 posts
Armorama: 1,029 posts
Posted: Saturday, June 22, 2019 - 02:20 PM UTC
Lookin' good, Dave! Looks like it's almost ready for the paint booth!

ayovtshev
#490
Visit this Community
Sofiya, Bulgaria
Joined: September 22, 2016
KitMaker: 1,432 posts
Armorama: 1,390 posts
Posted: Sunday, June 30, 2019 - 11:16 PM UTC
With another 6 months till the end of this Campaign, I decided to start another build.

I felt like building some Bulgarian engineer vehicle, based on T-54/55.
Studied some refferencies and this is what I found:

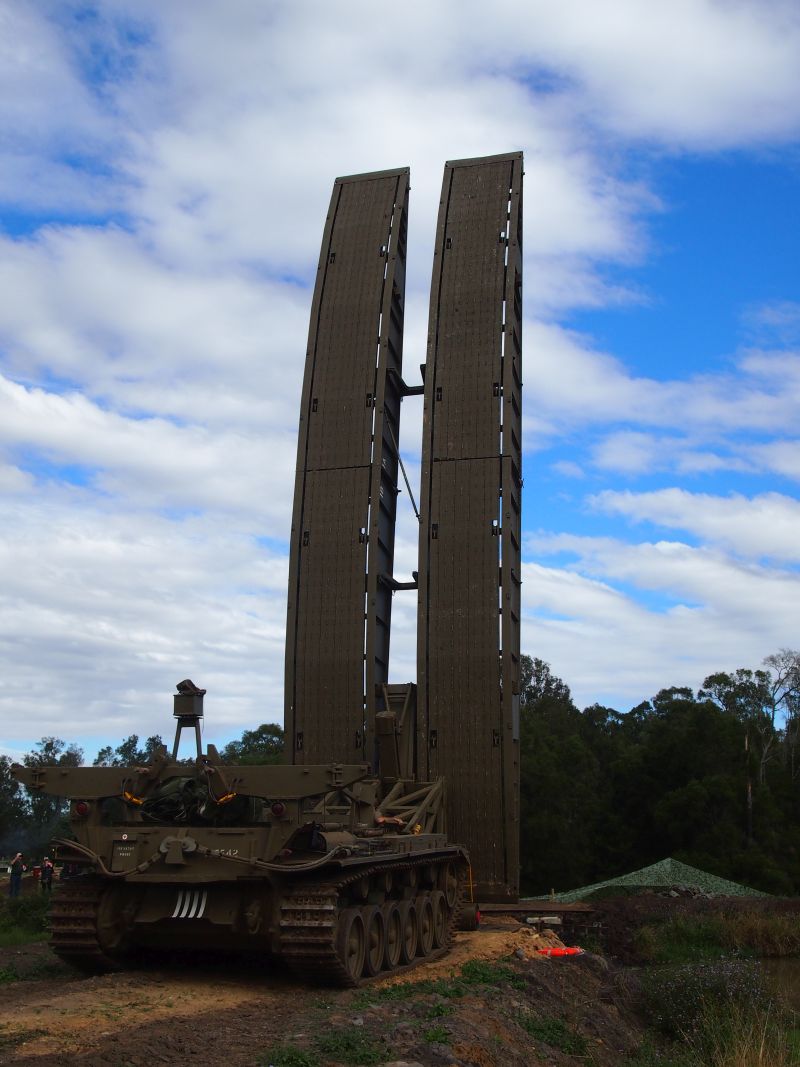
The BLG-60(BrueckenLegeGeraet-60) was an East German tank bridgelayer, mounted on Czechoslovakian T-55 chassy.

The MT-55 tank bridgelayer, based on the same chassy-but using sligthly different bridge-was built entirely in Czechoslovakia.

Poland also produced a tank bridgelayer. Designated BLG-67, it combined a Bumar Labedy T-55 chassy with the East German scissor bridge,that was also used in BG-60M2.

Should you already think this is a bit complicated, wait to read the following:
Bulgarian People's Army 24th Tank Brigade received tanka bridgelayers as follows:
in 1972- MT-55(Czechoslovakian tank bridgelayer, used also by the Soviet Union);
in 1984- all available MT-55's were upgraded to BLG-60M2 in East Germany.
I found a Bulgarian Manual for BLG-67, printed in 1974(unfortunately I cannot get my hands on it right now-the seller seems to be on vacation):

which proves the Polish tank bridgelayer was also in the inventory.

In other words- my country bought bridgelaying equipment from all possible WP suppliers...What exactly was I supposed to build?

After spending 2 days collecting information, I decided I'll build an East German made BLG-60M2 in service with the Bulgarian Army:

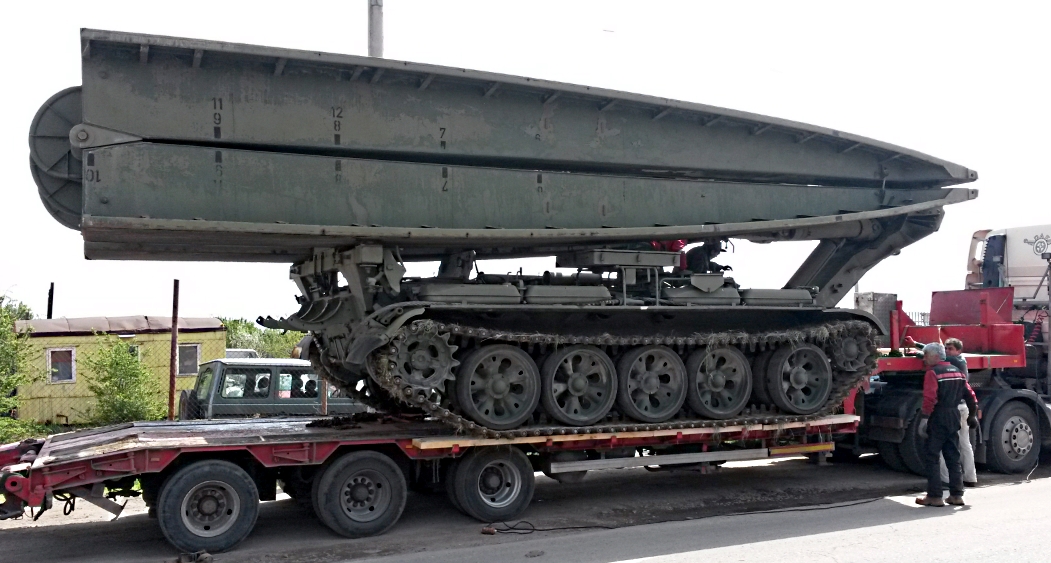
My BLG-60M2 will be from the early 1980's.

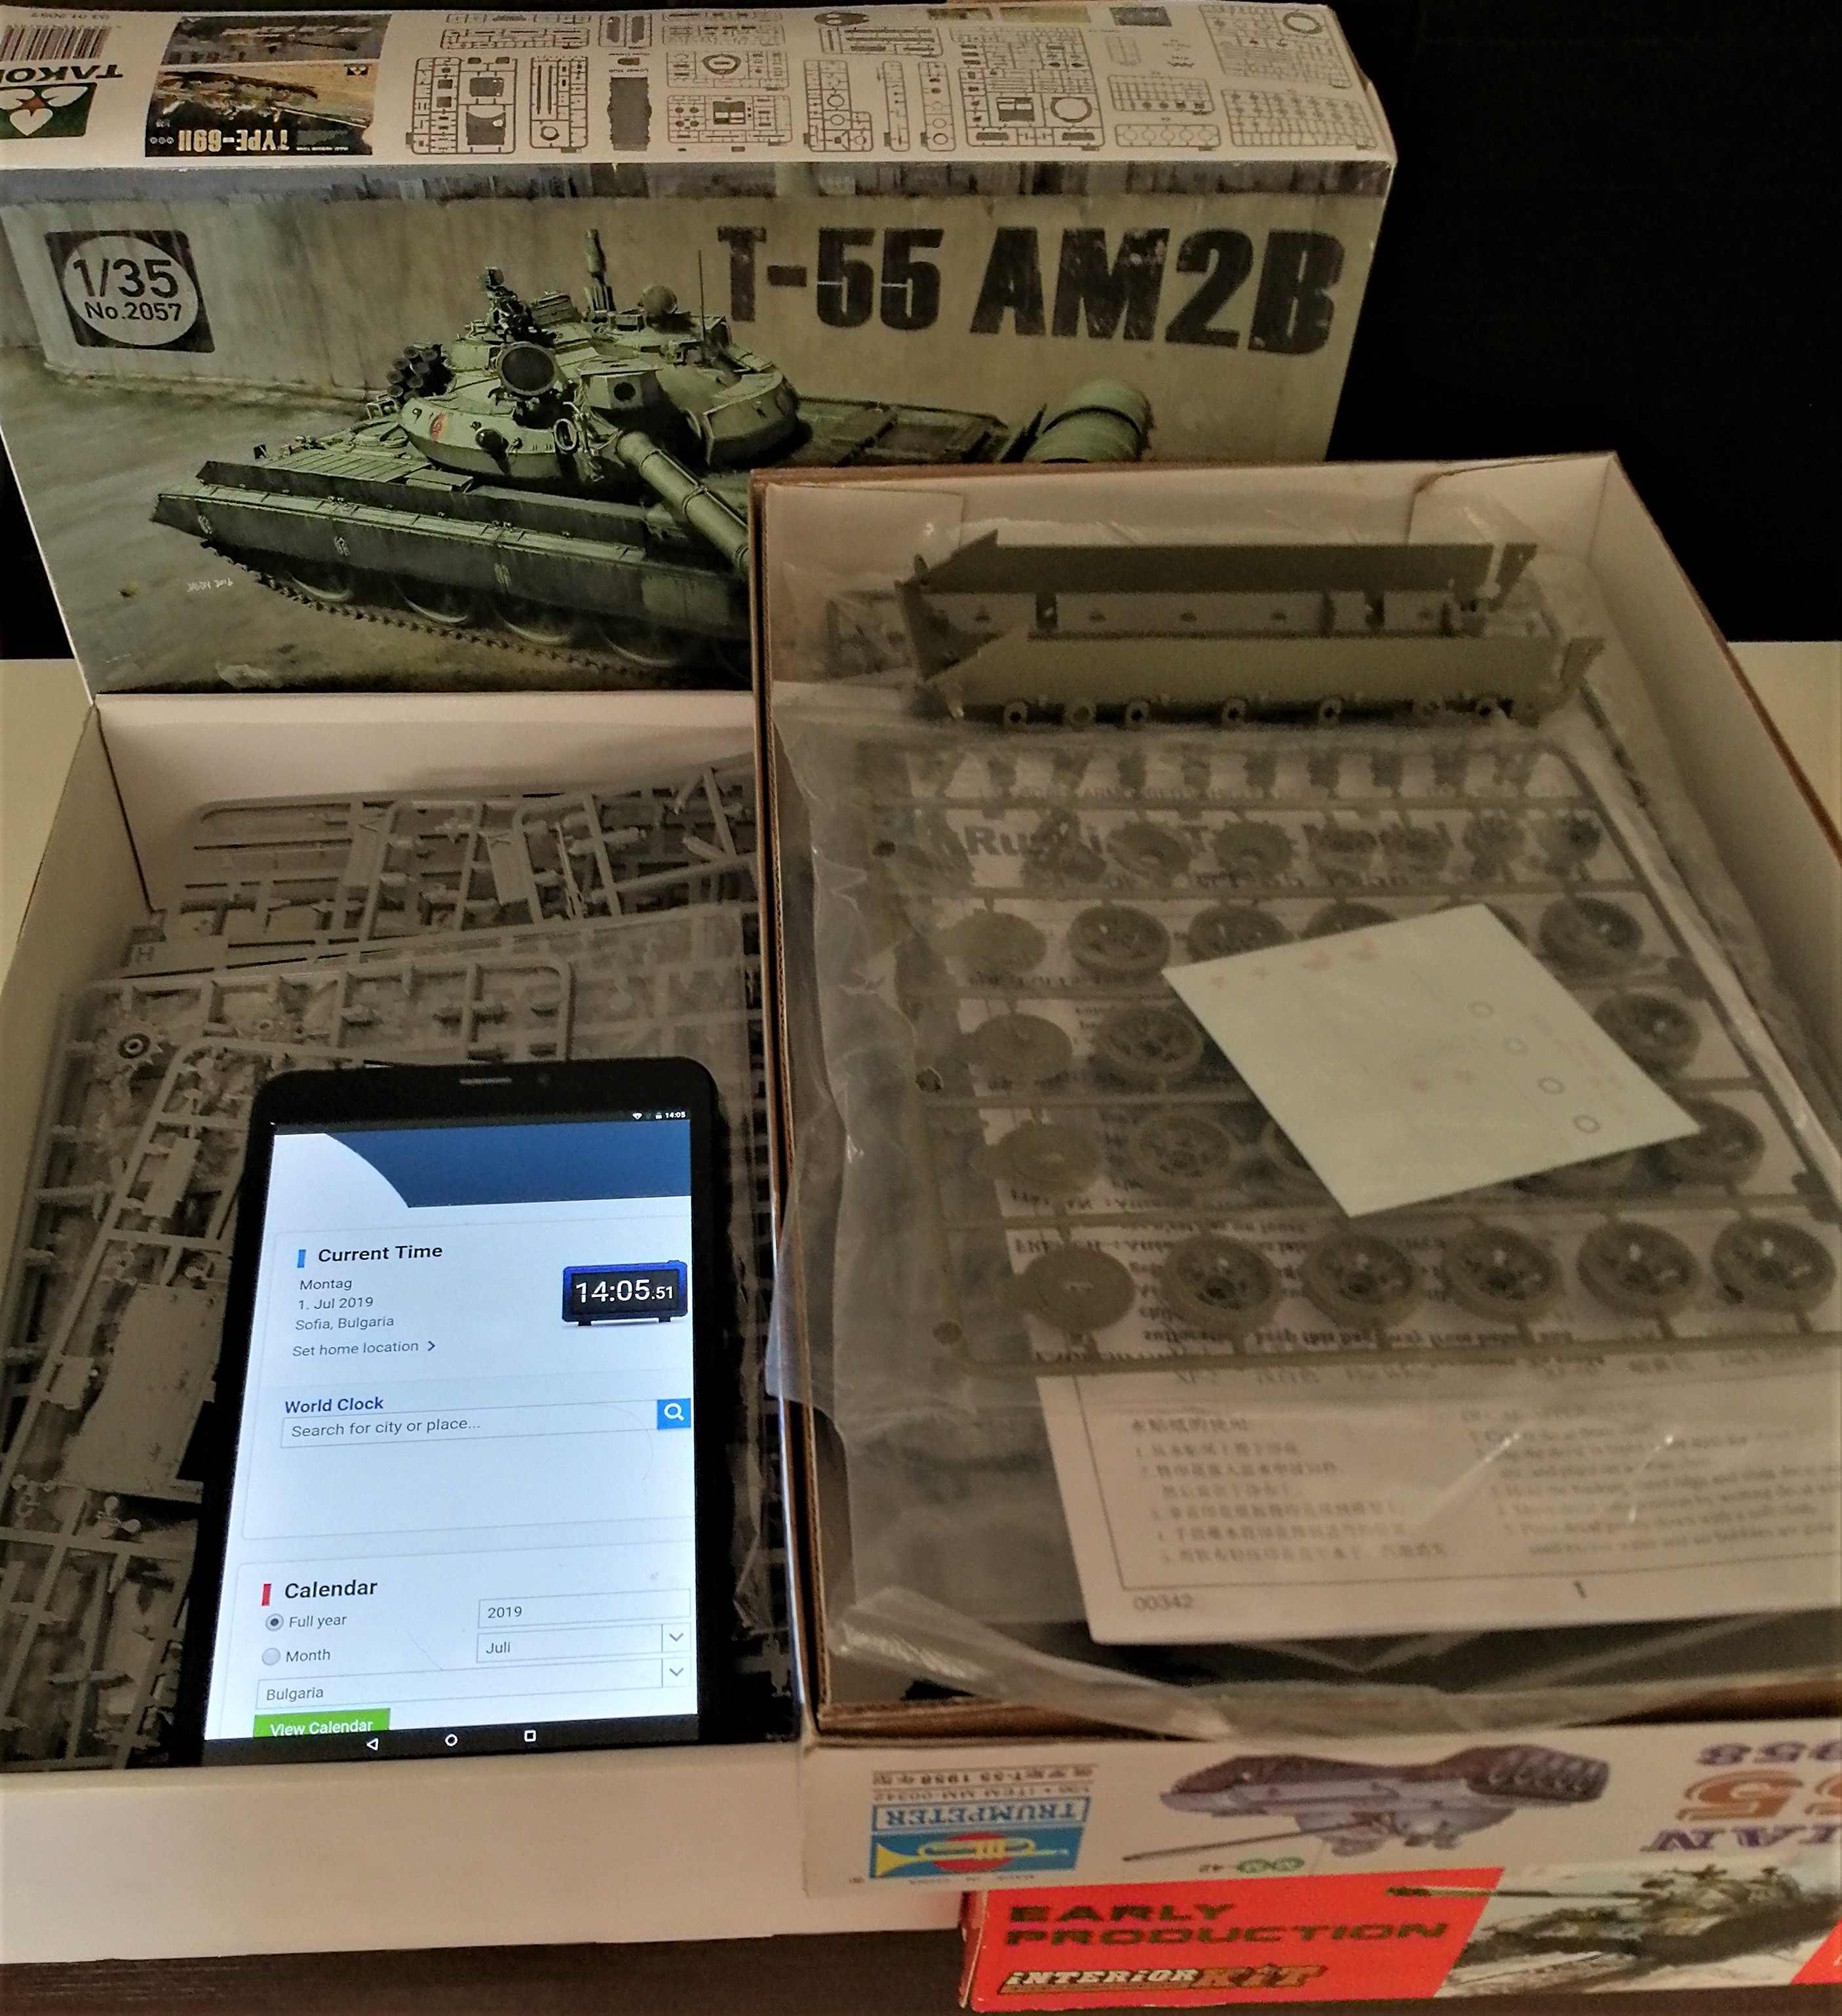
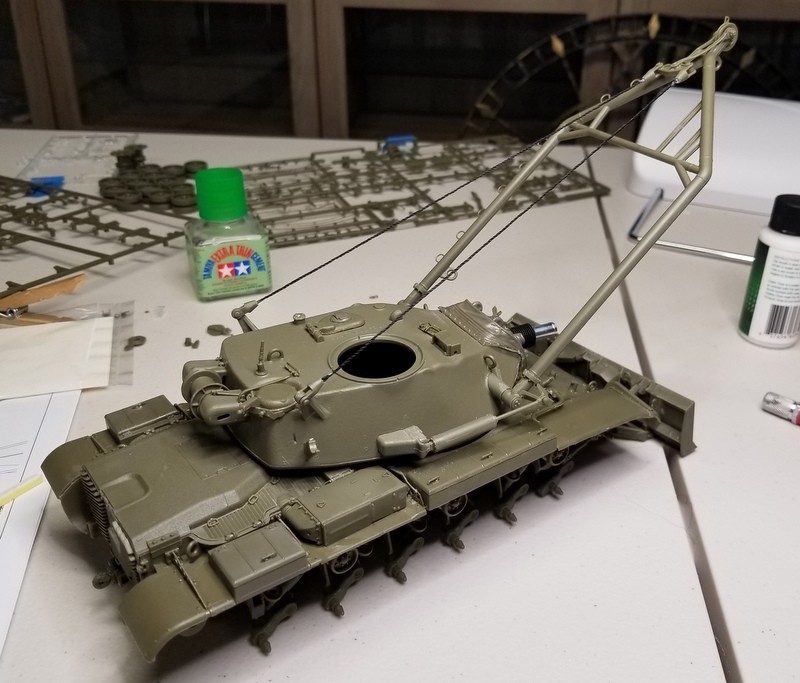
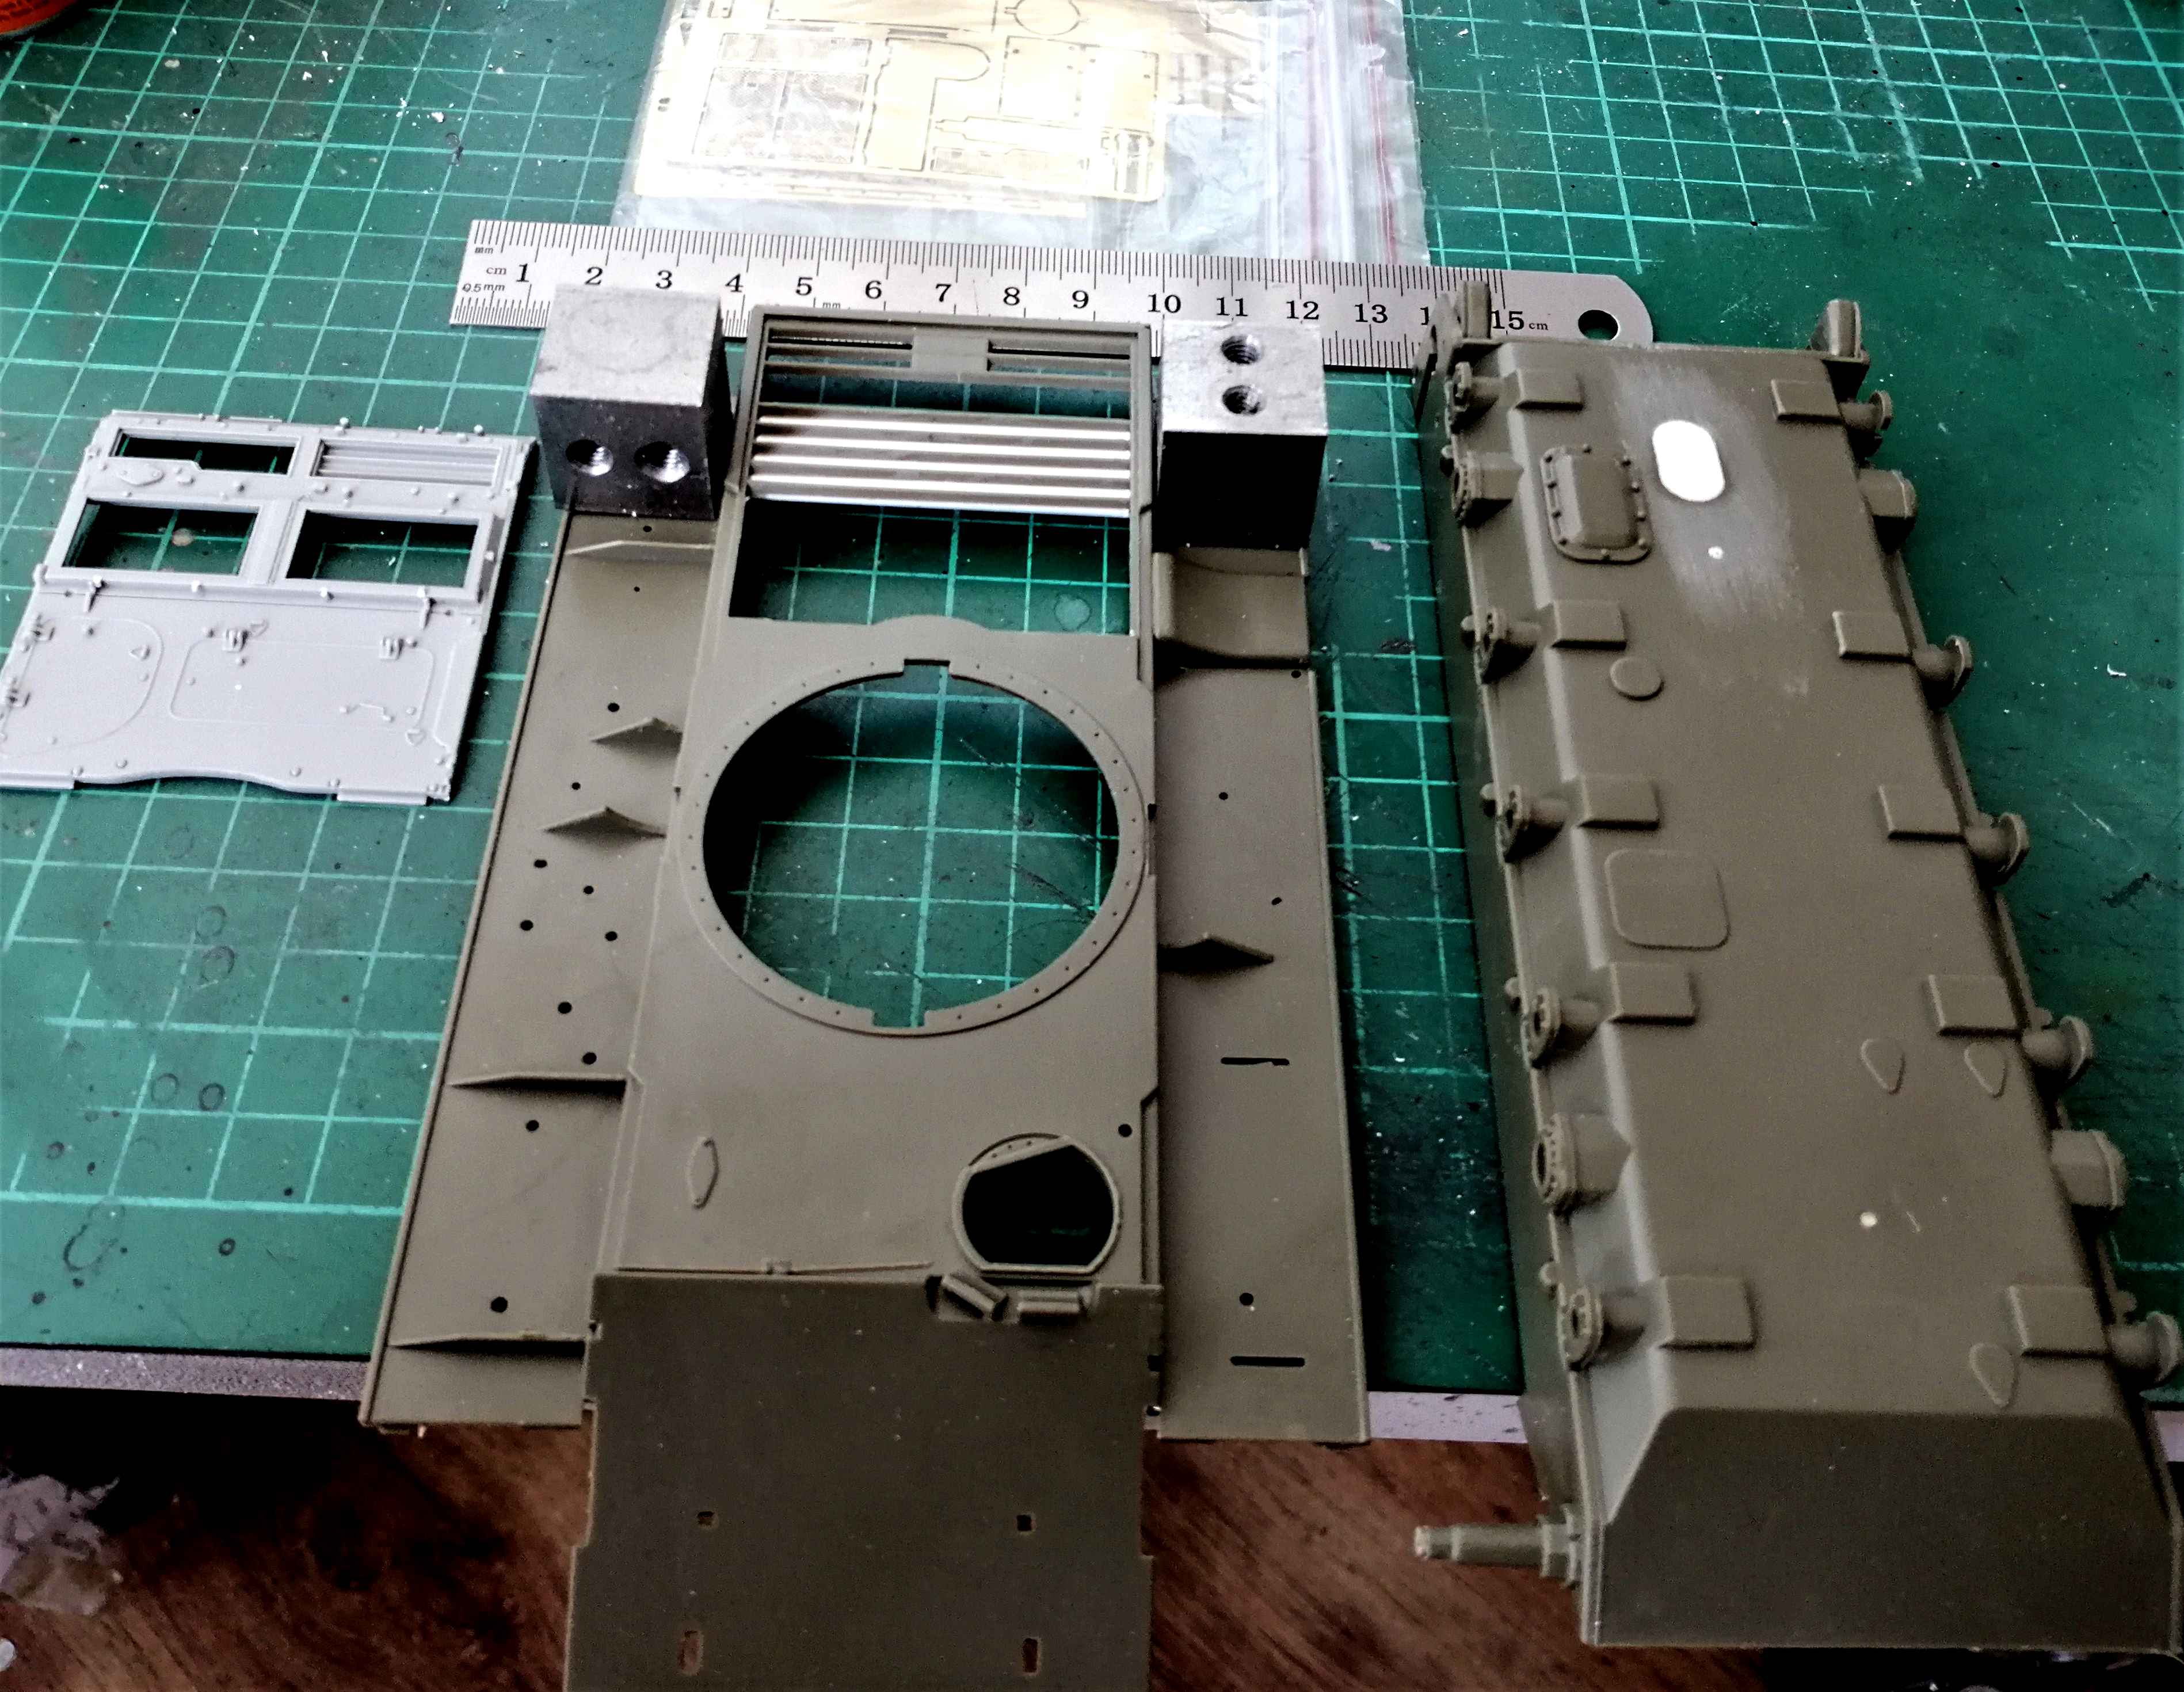
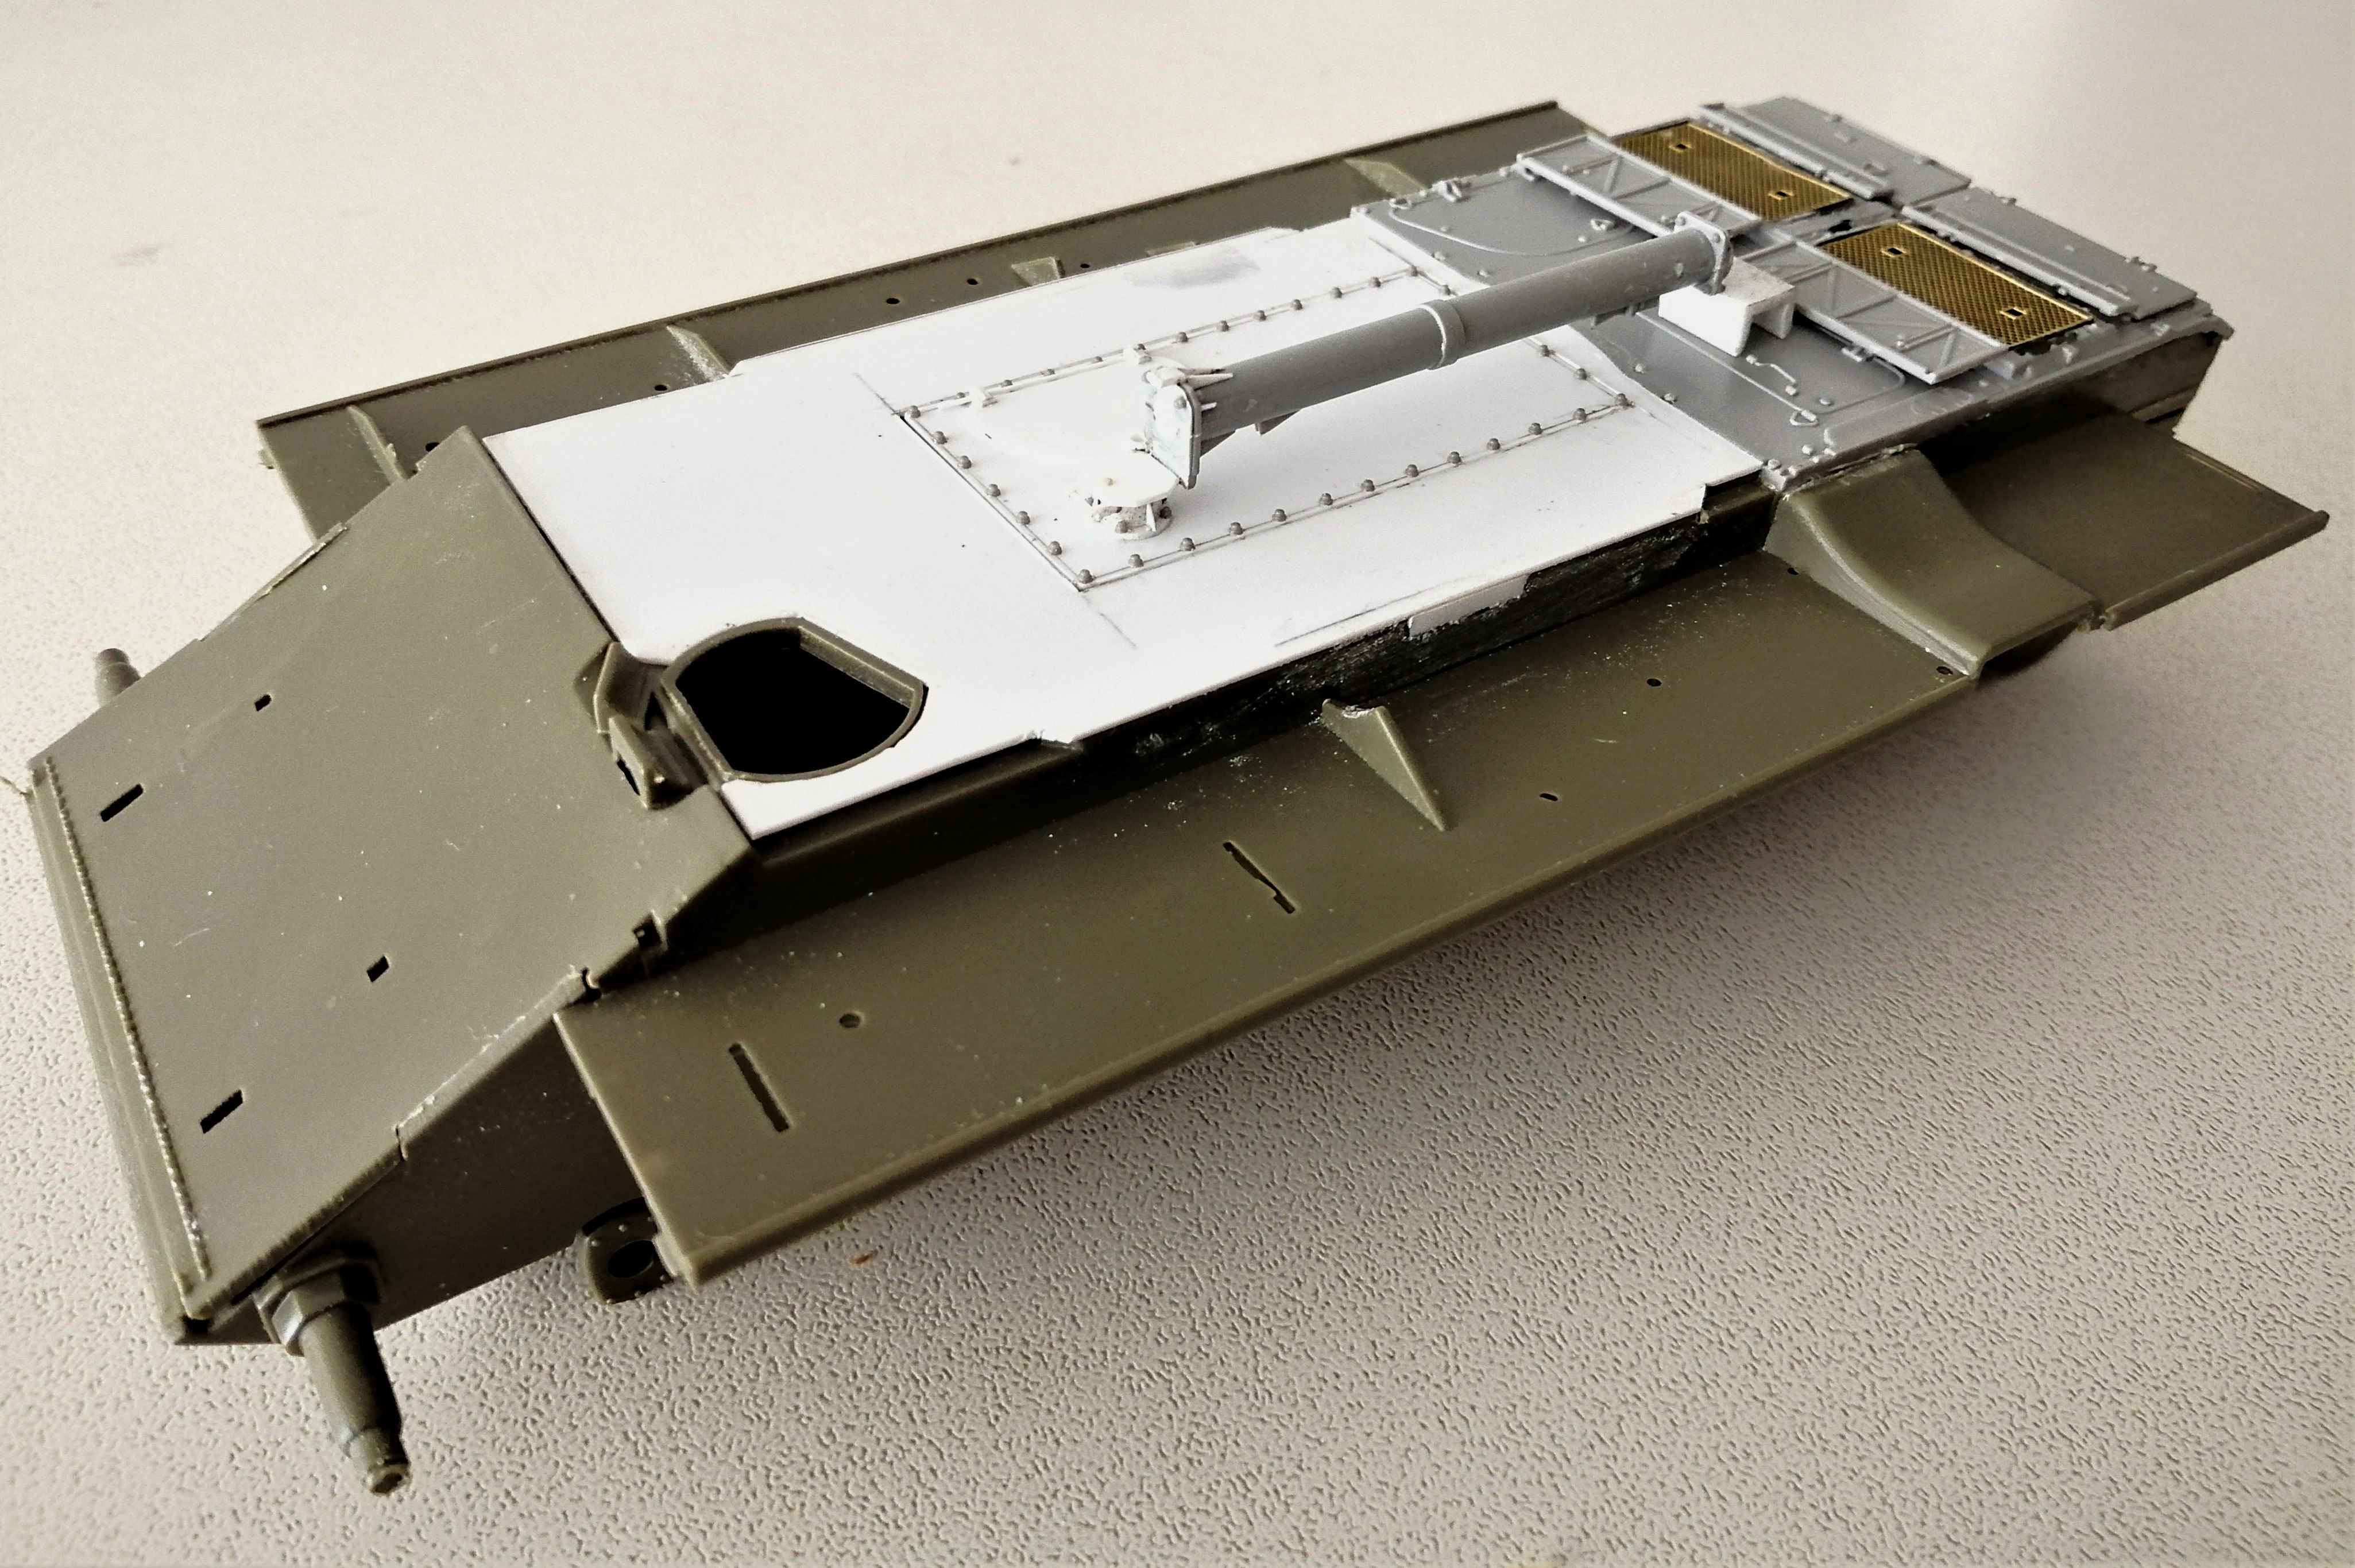
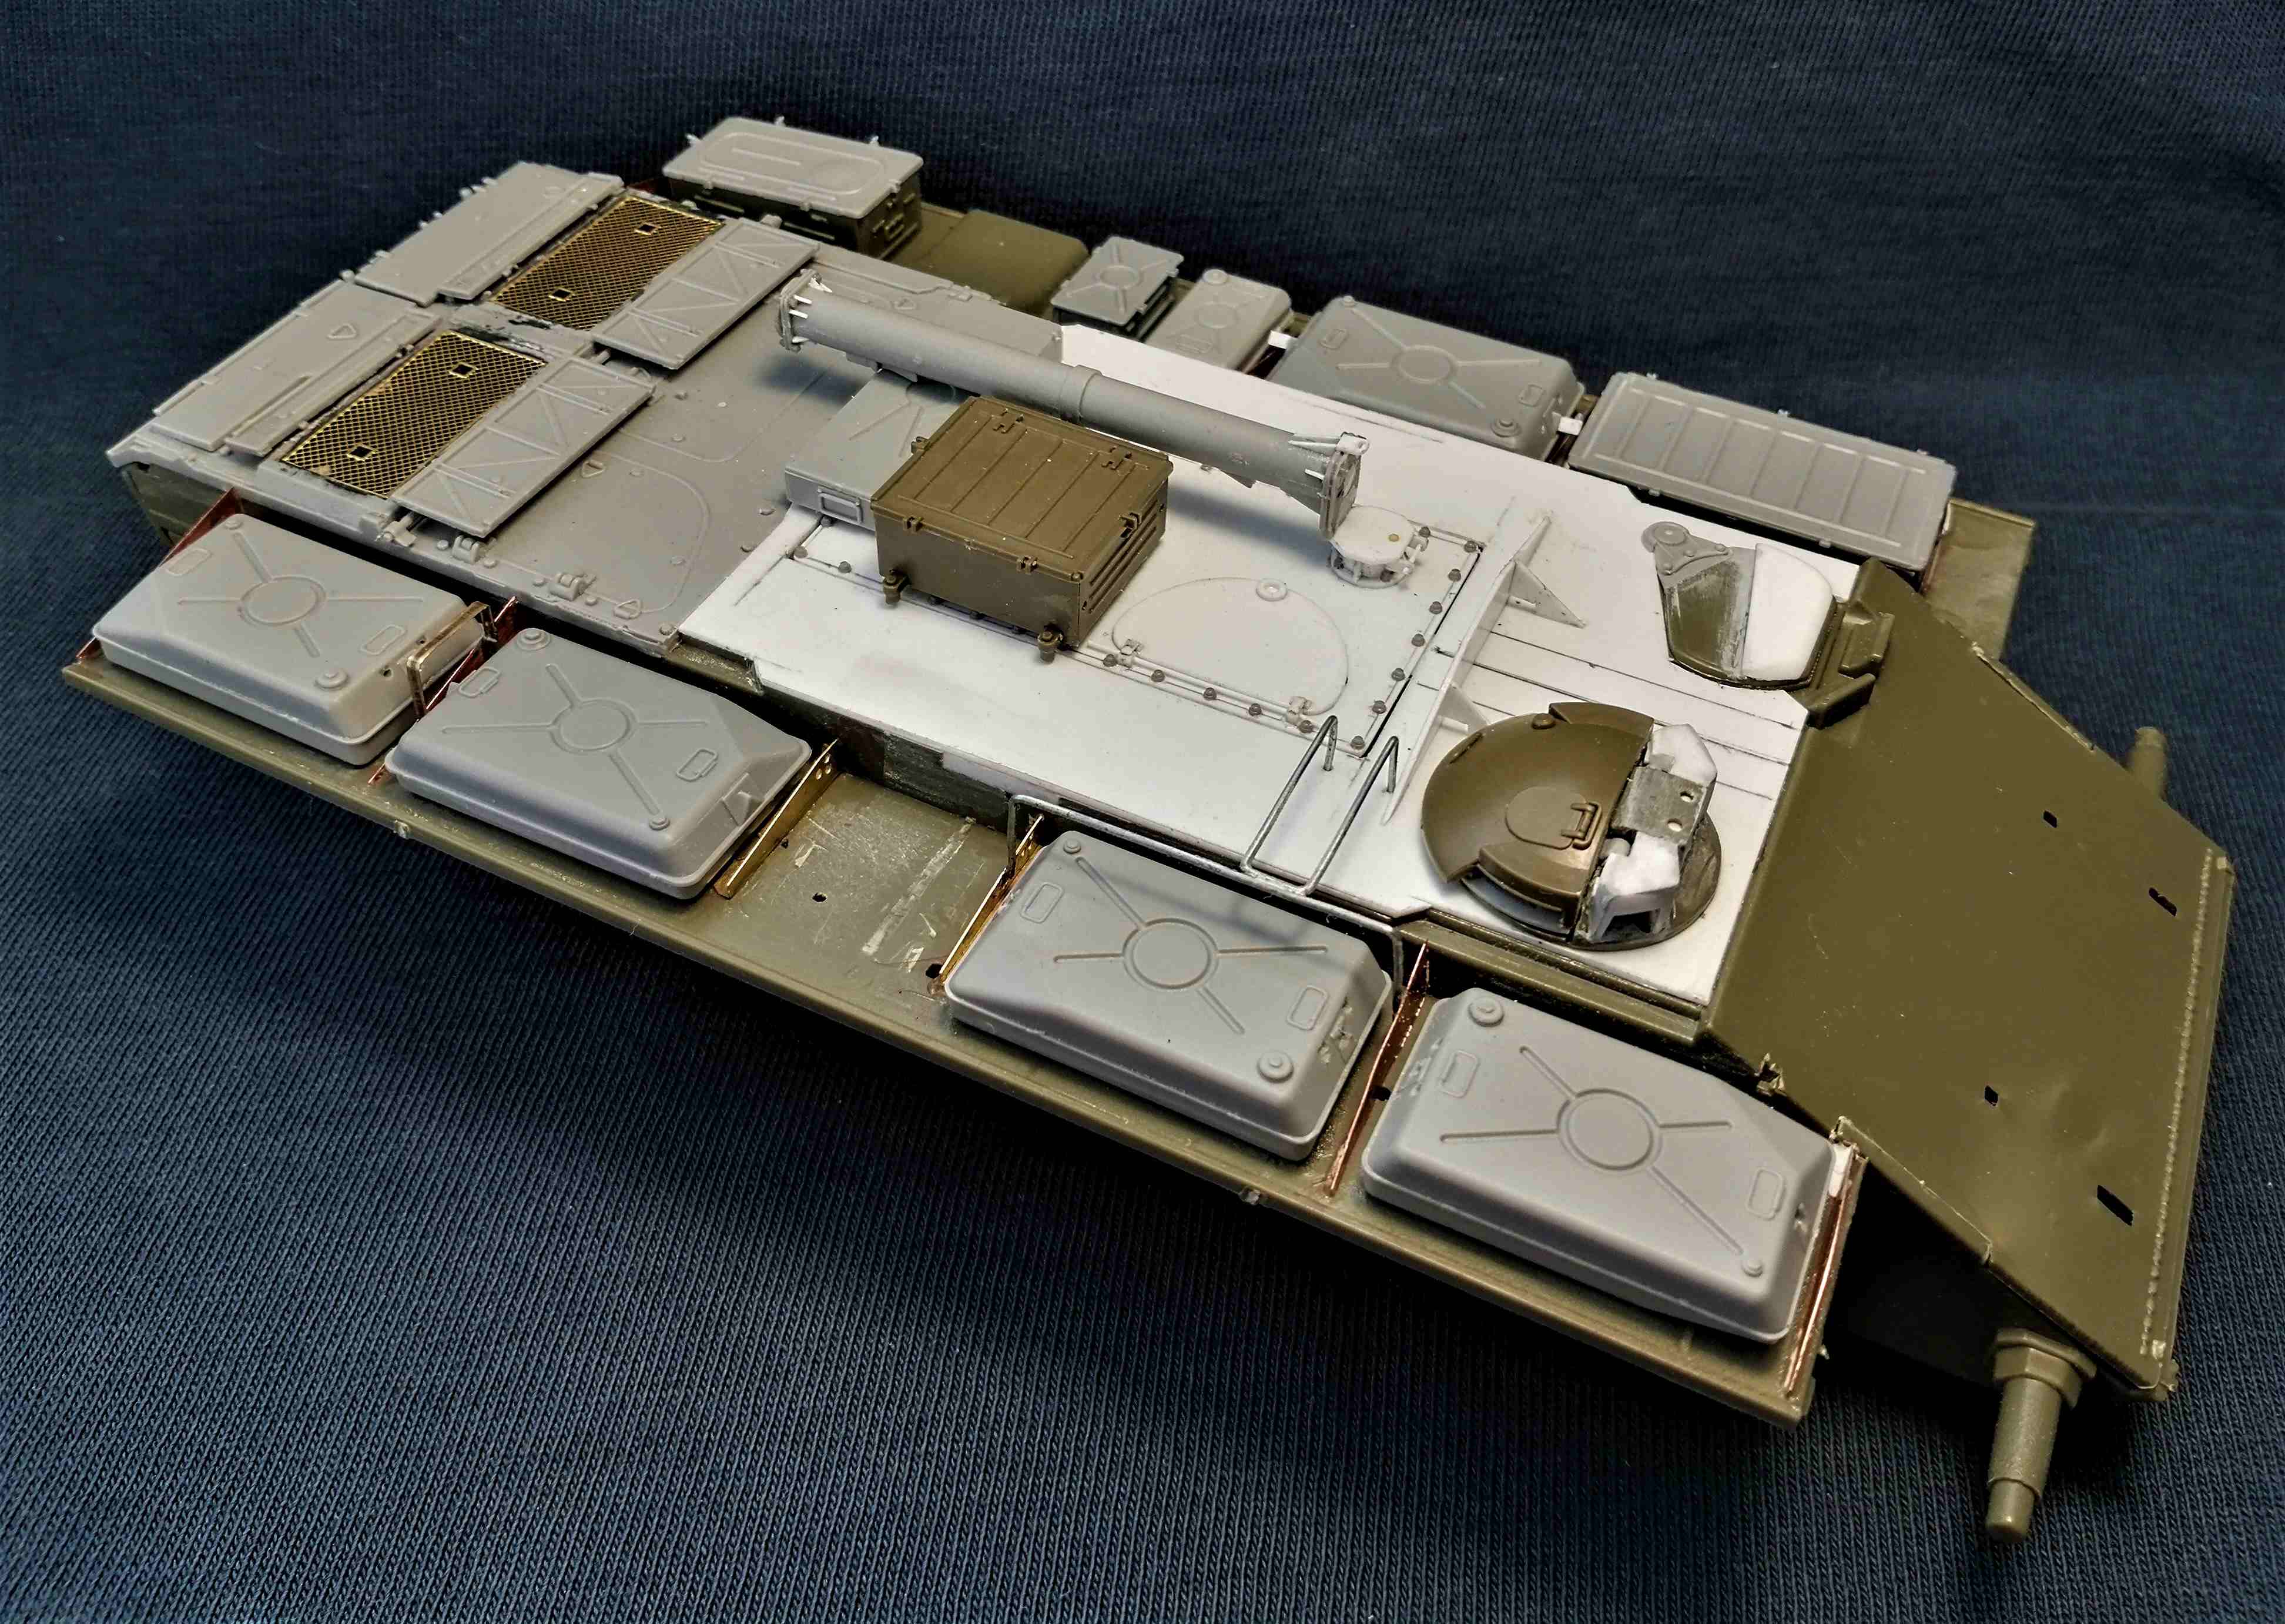
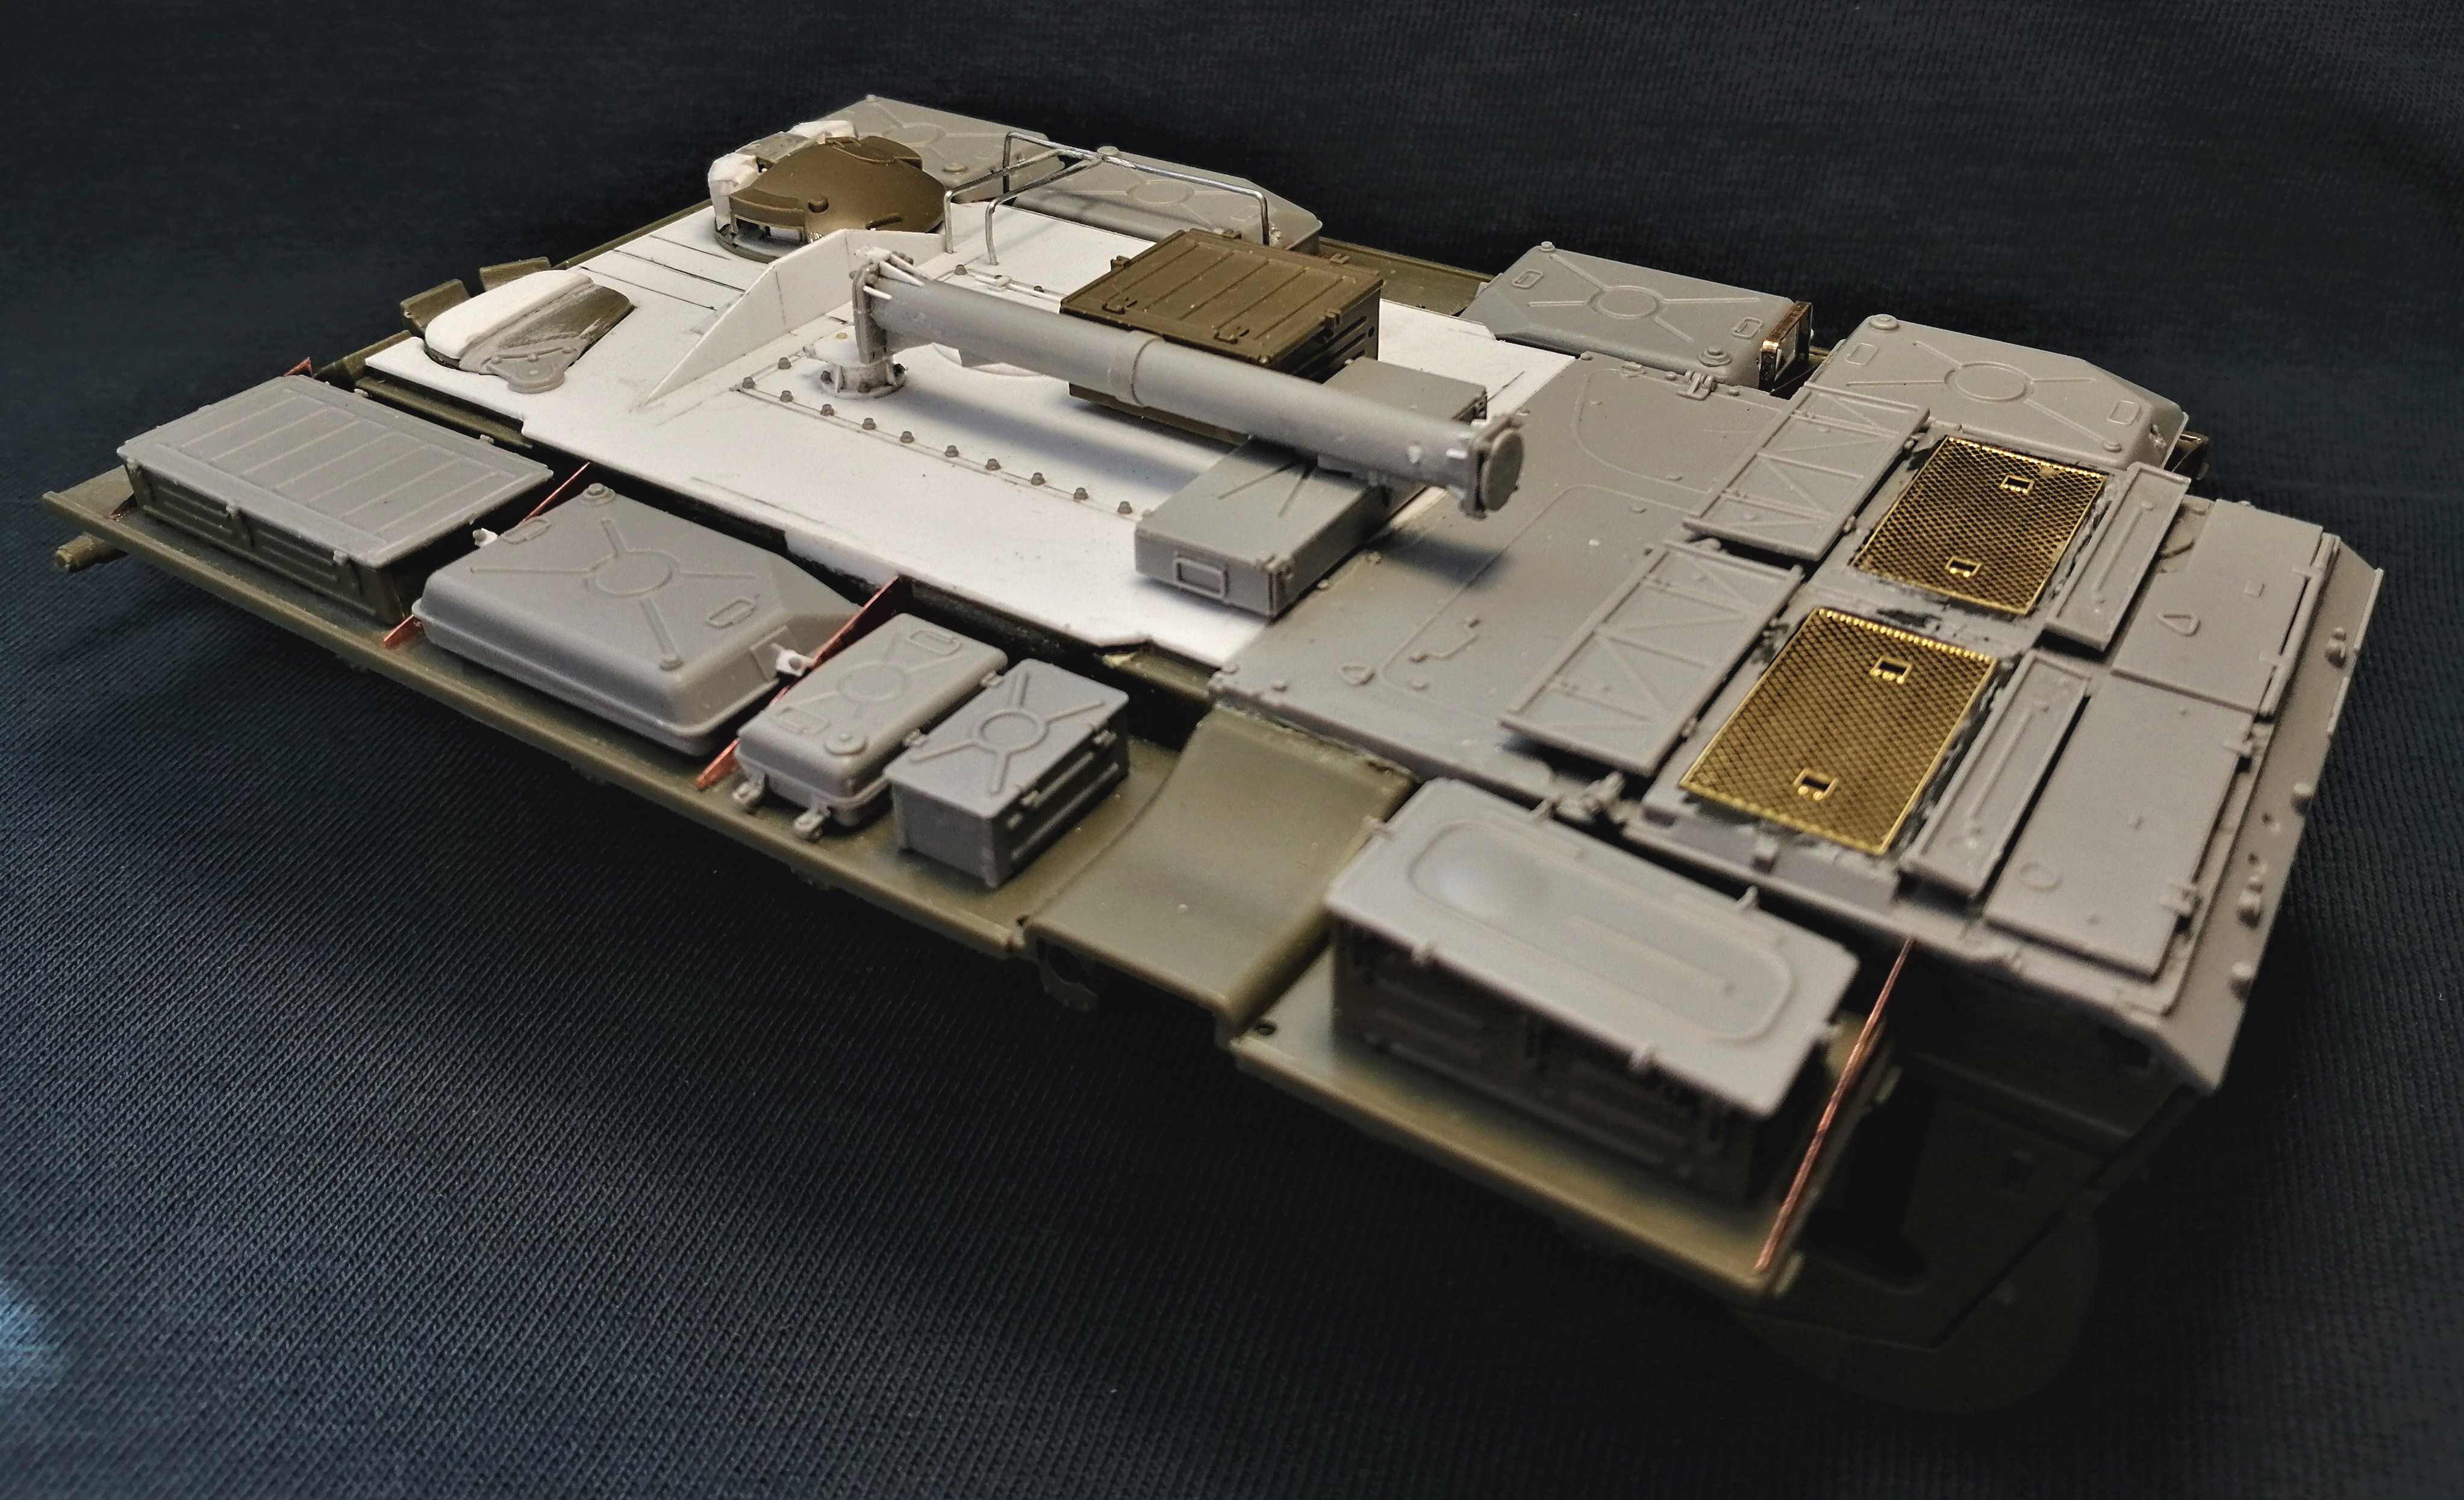
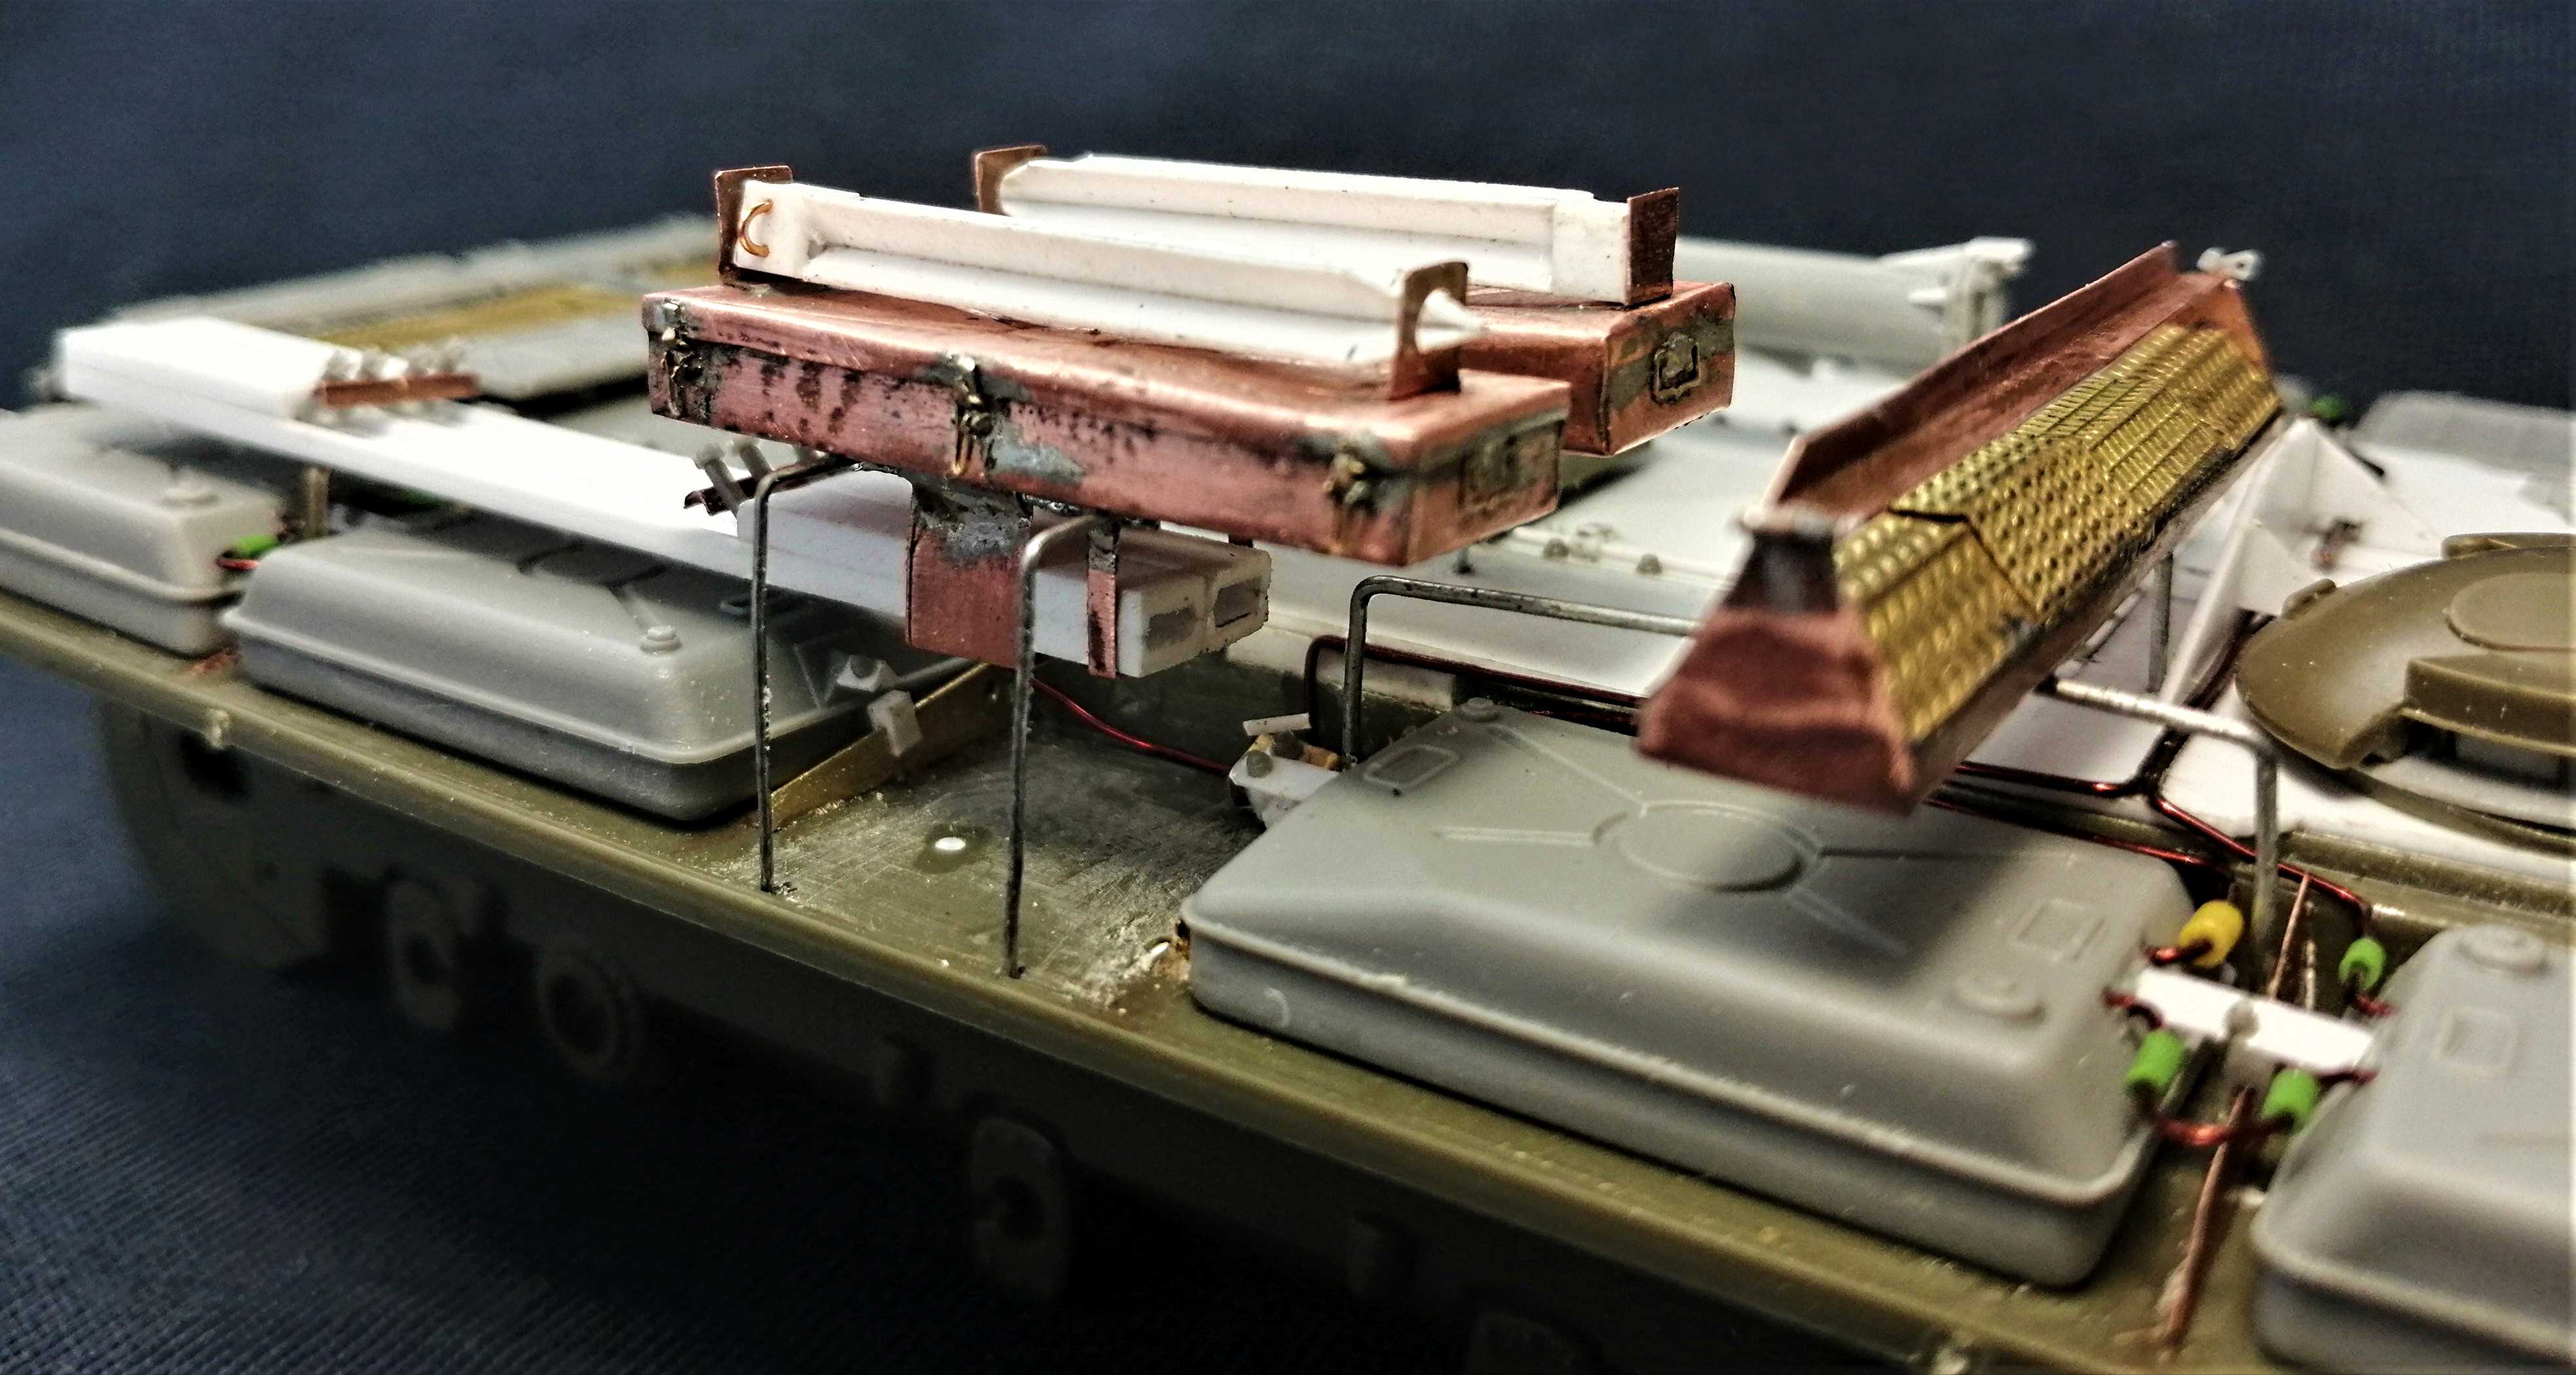
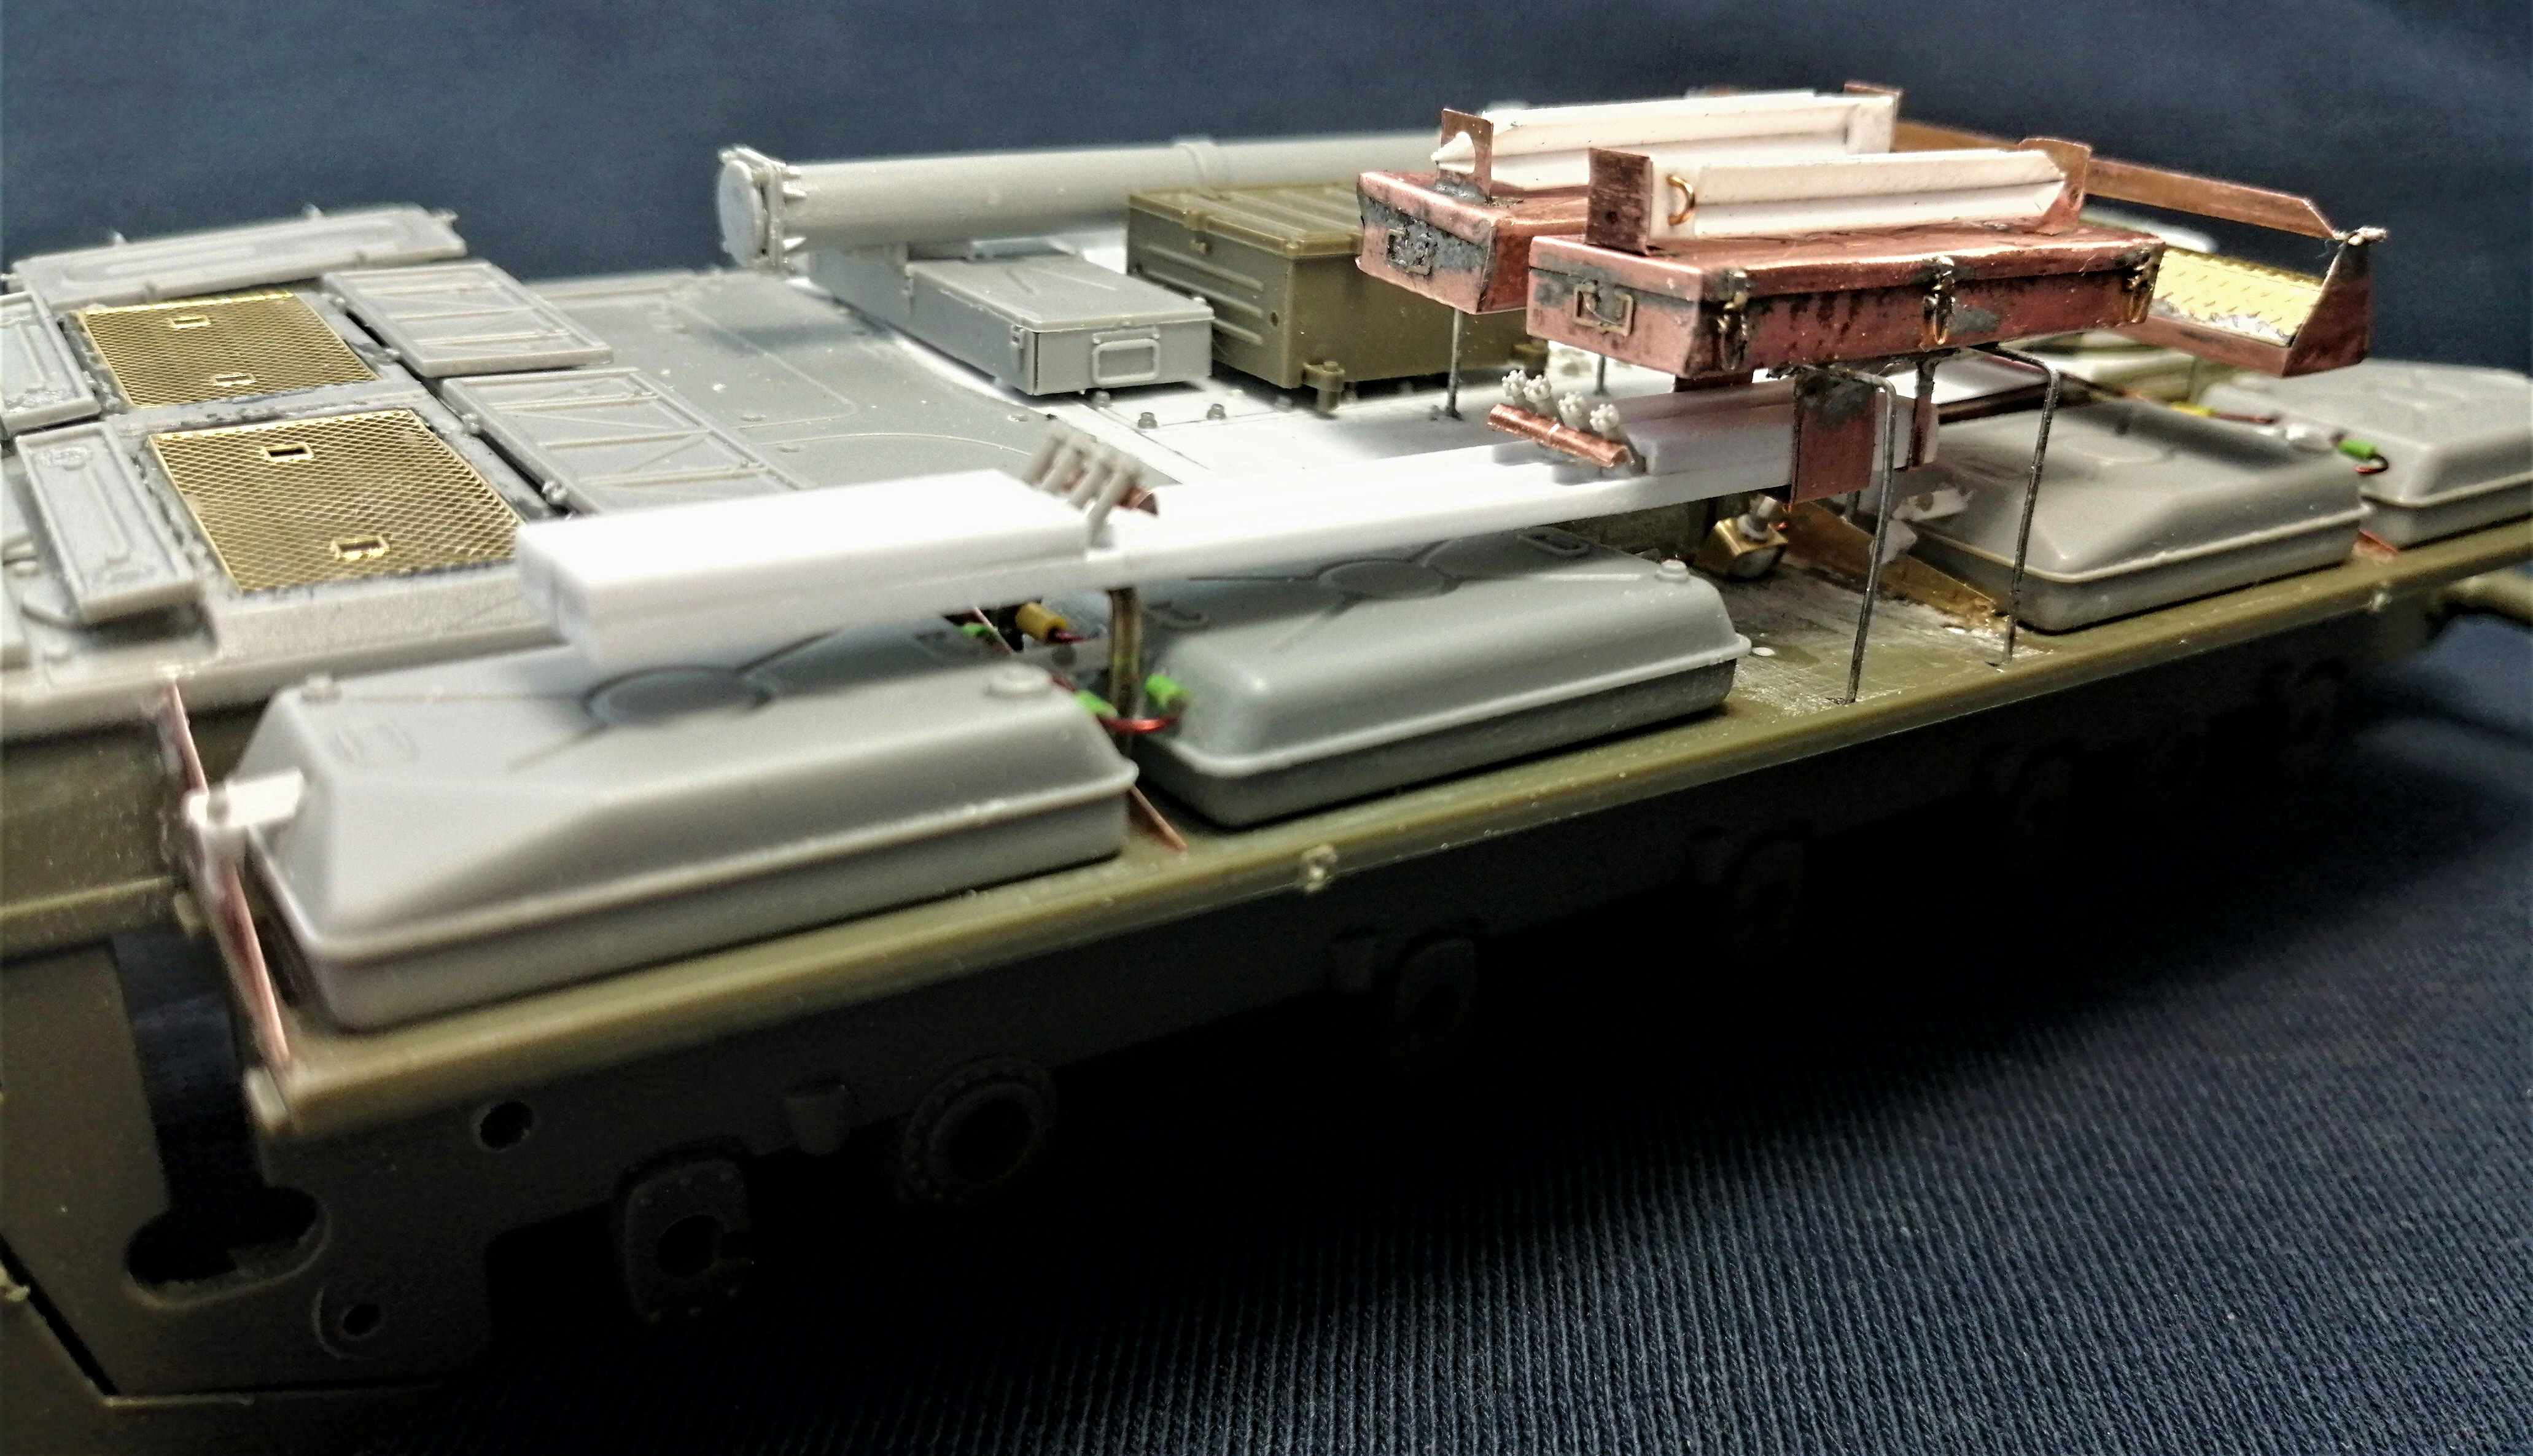
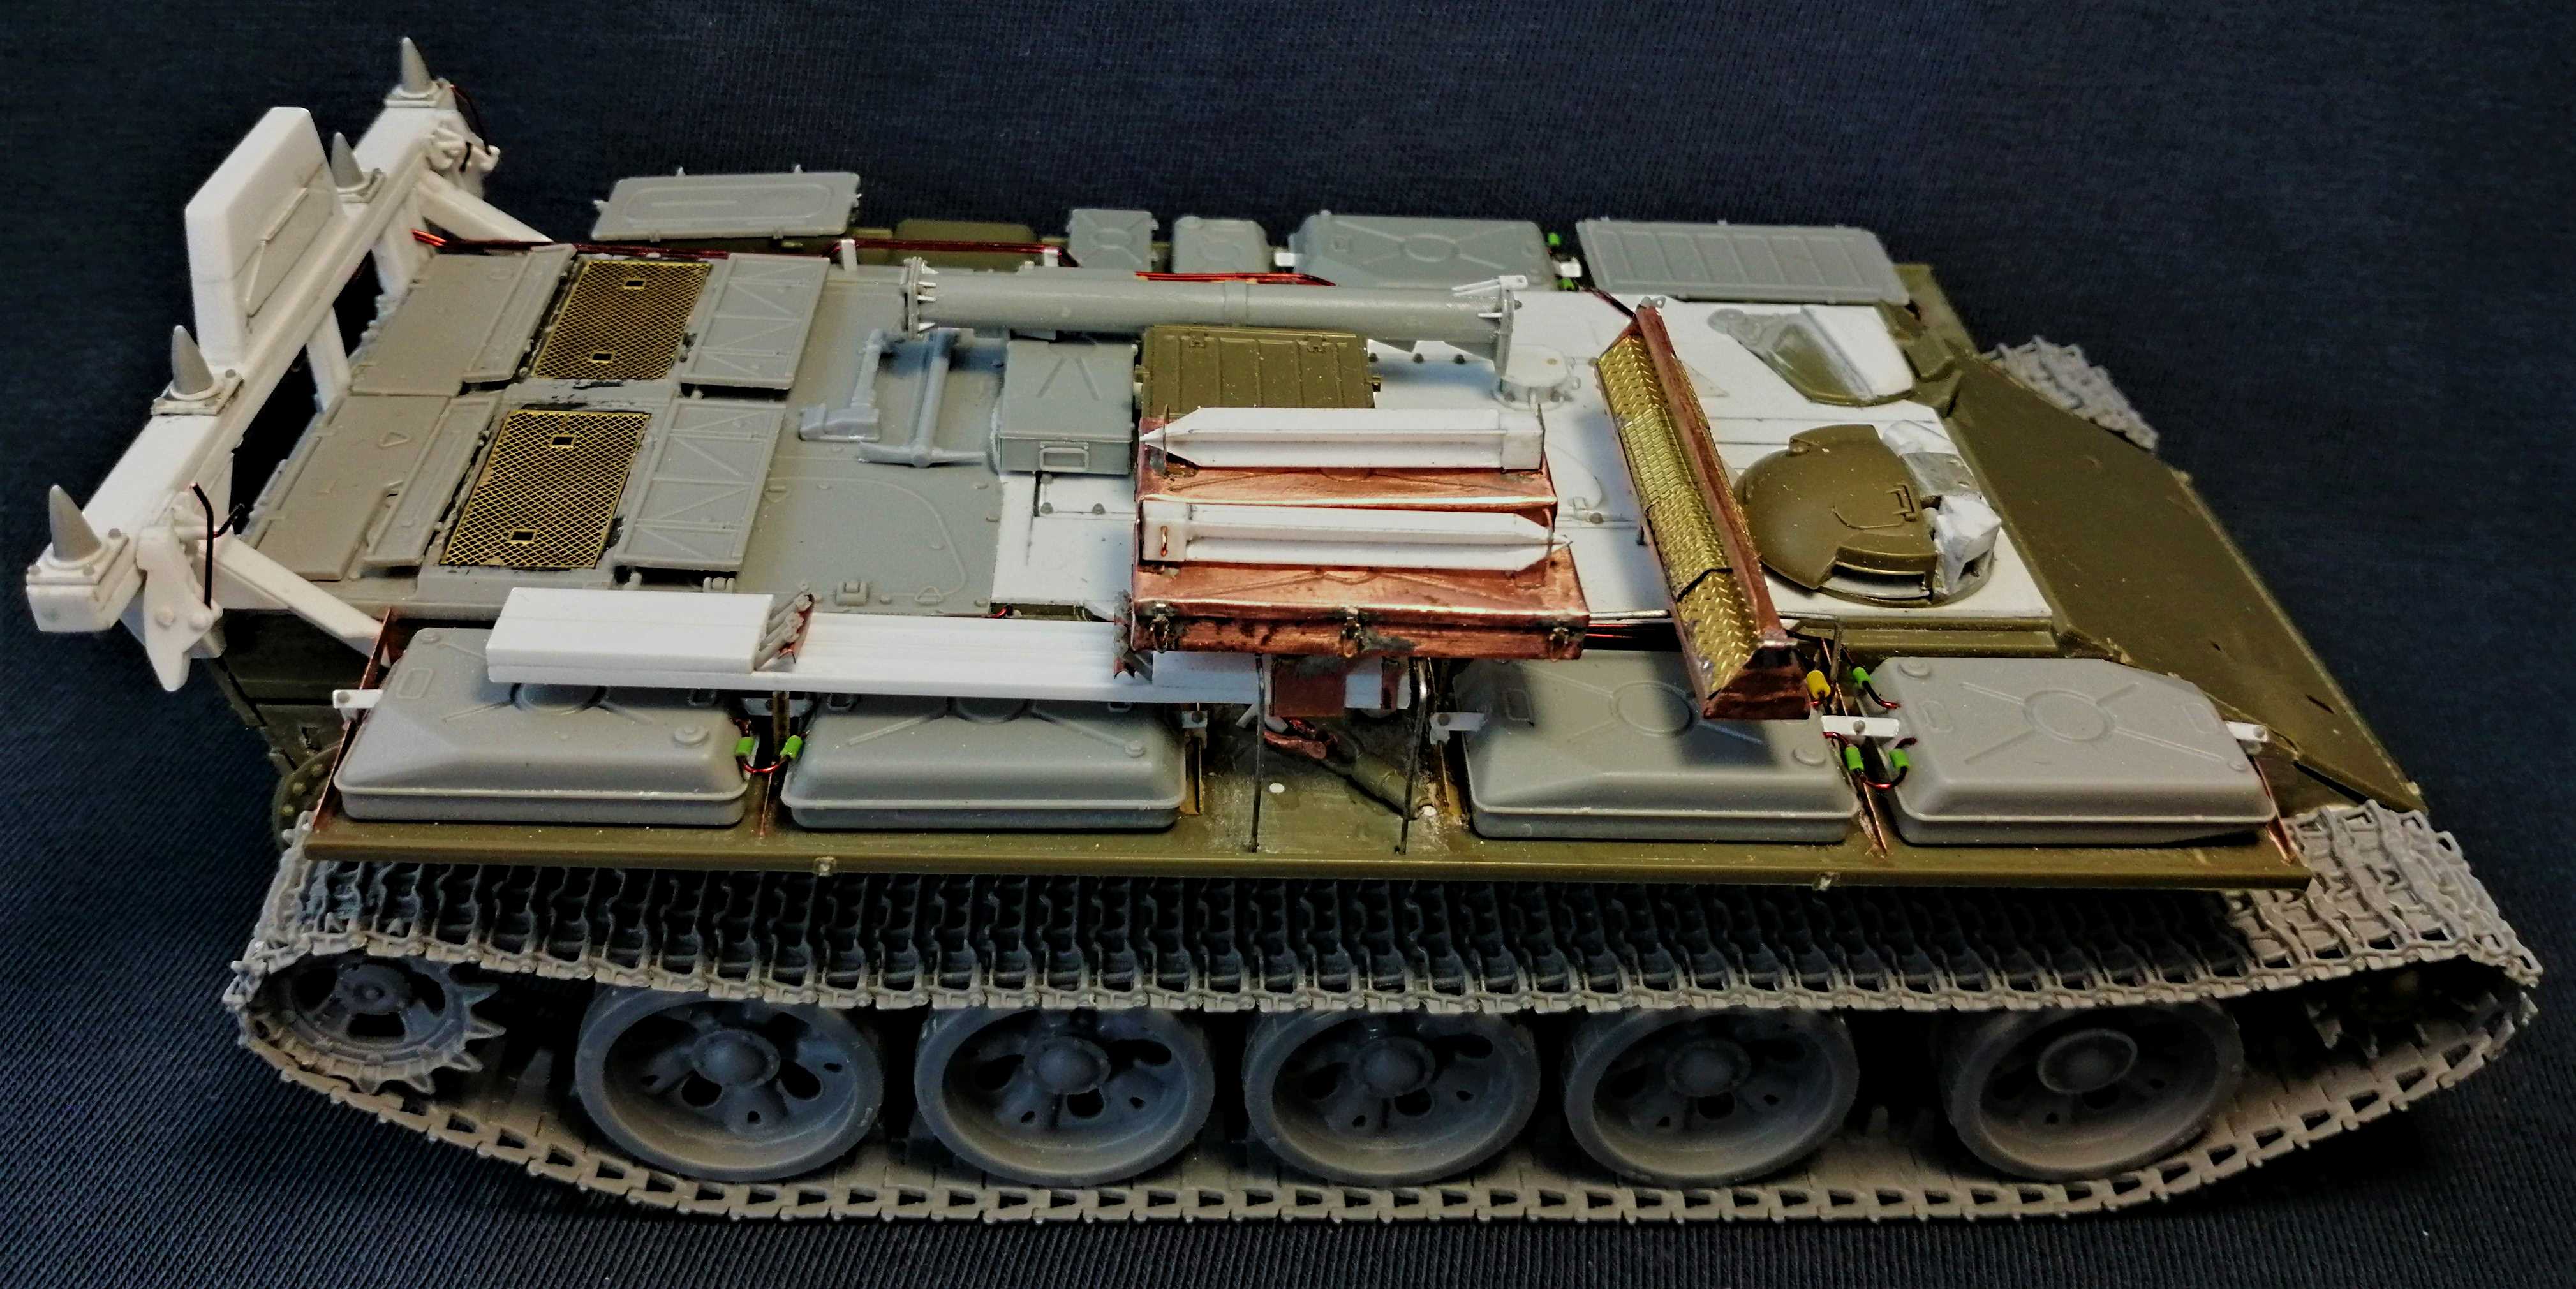
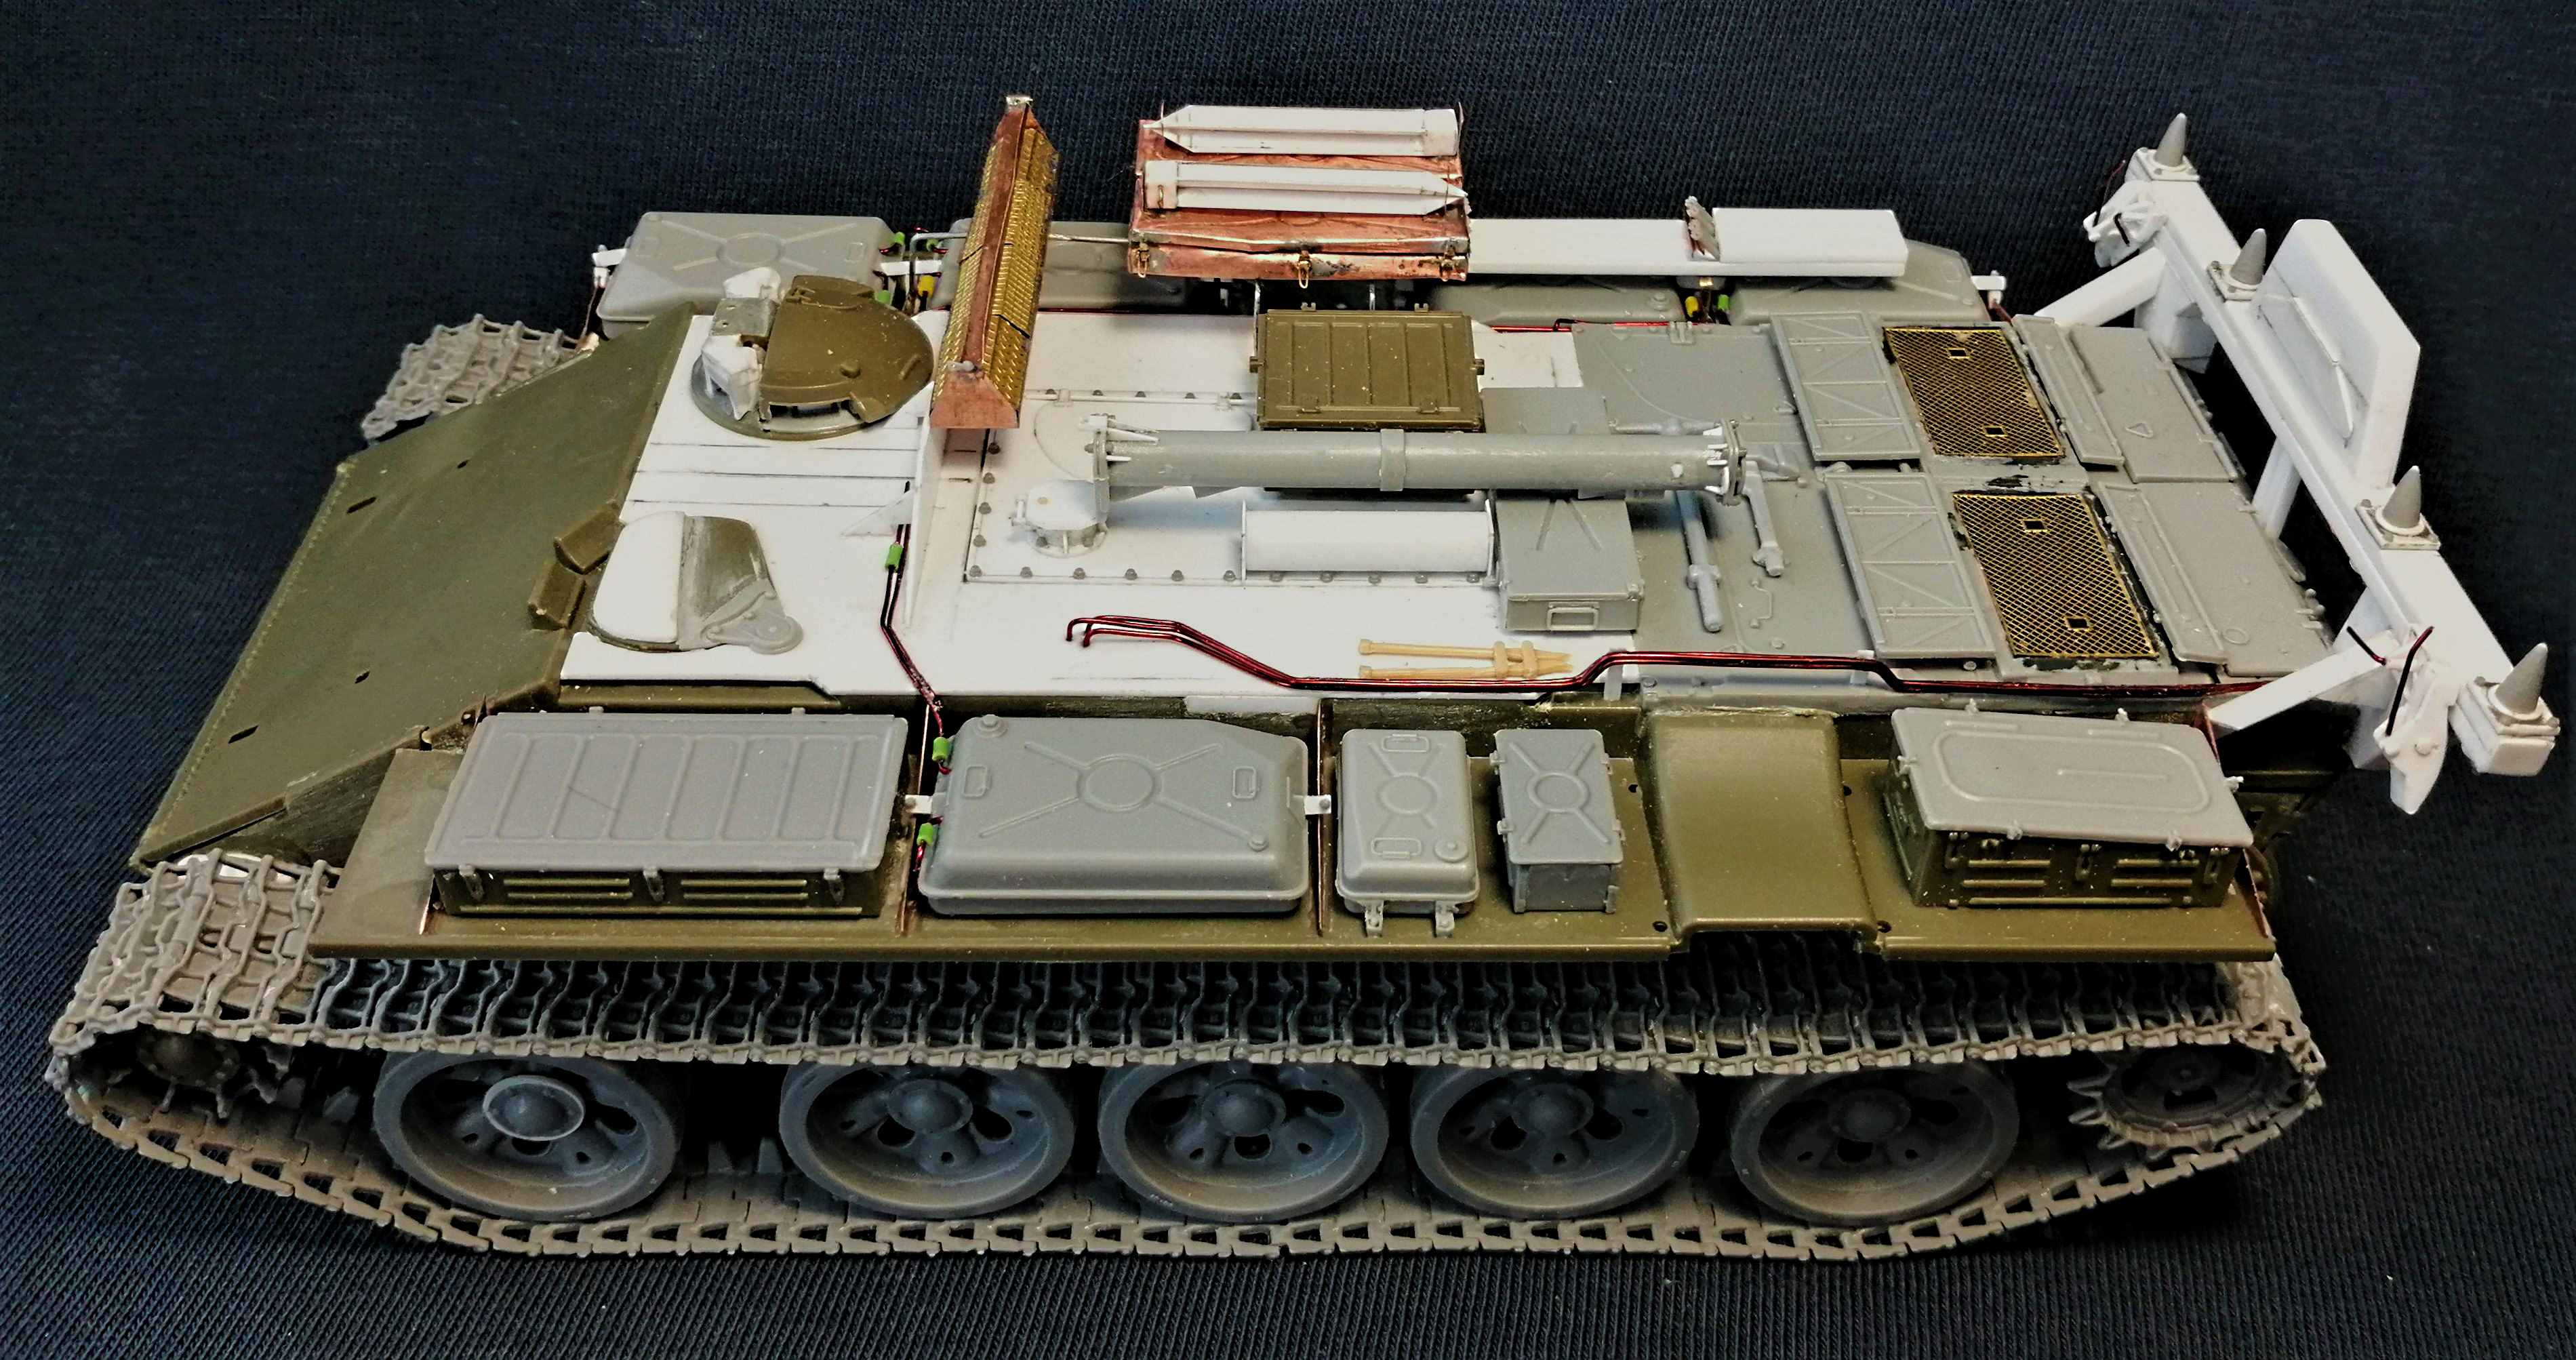
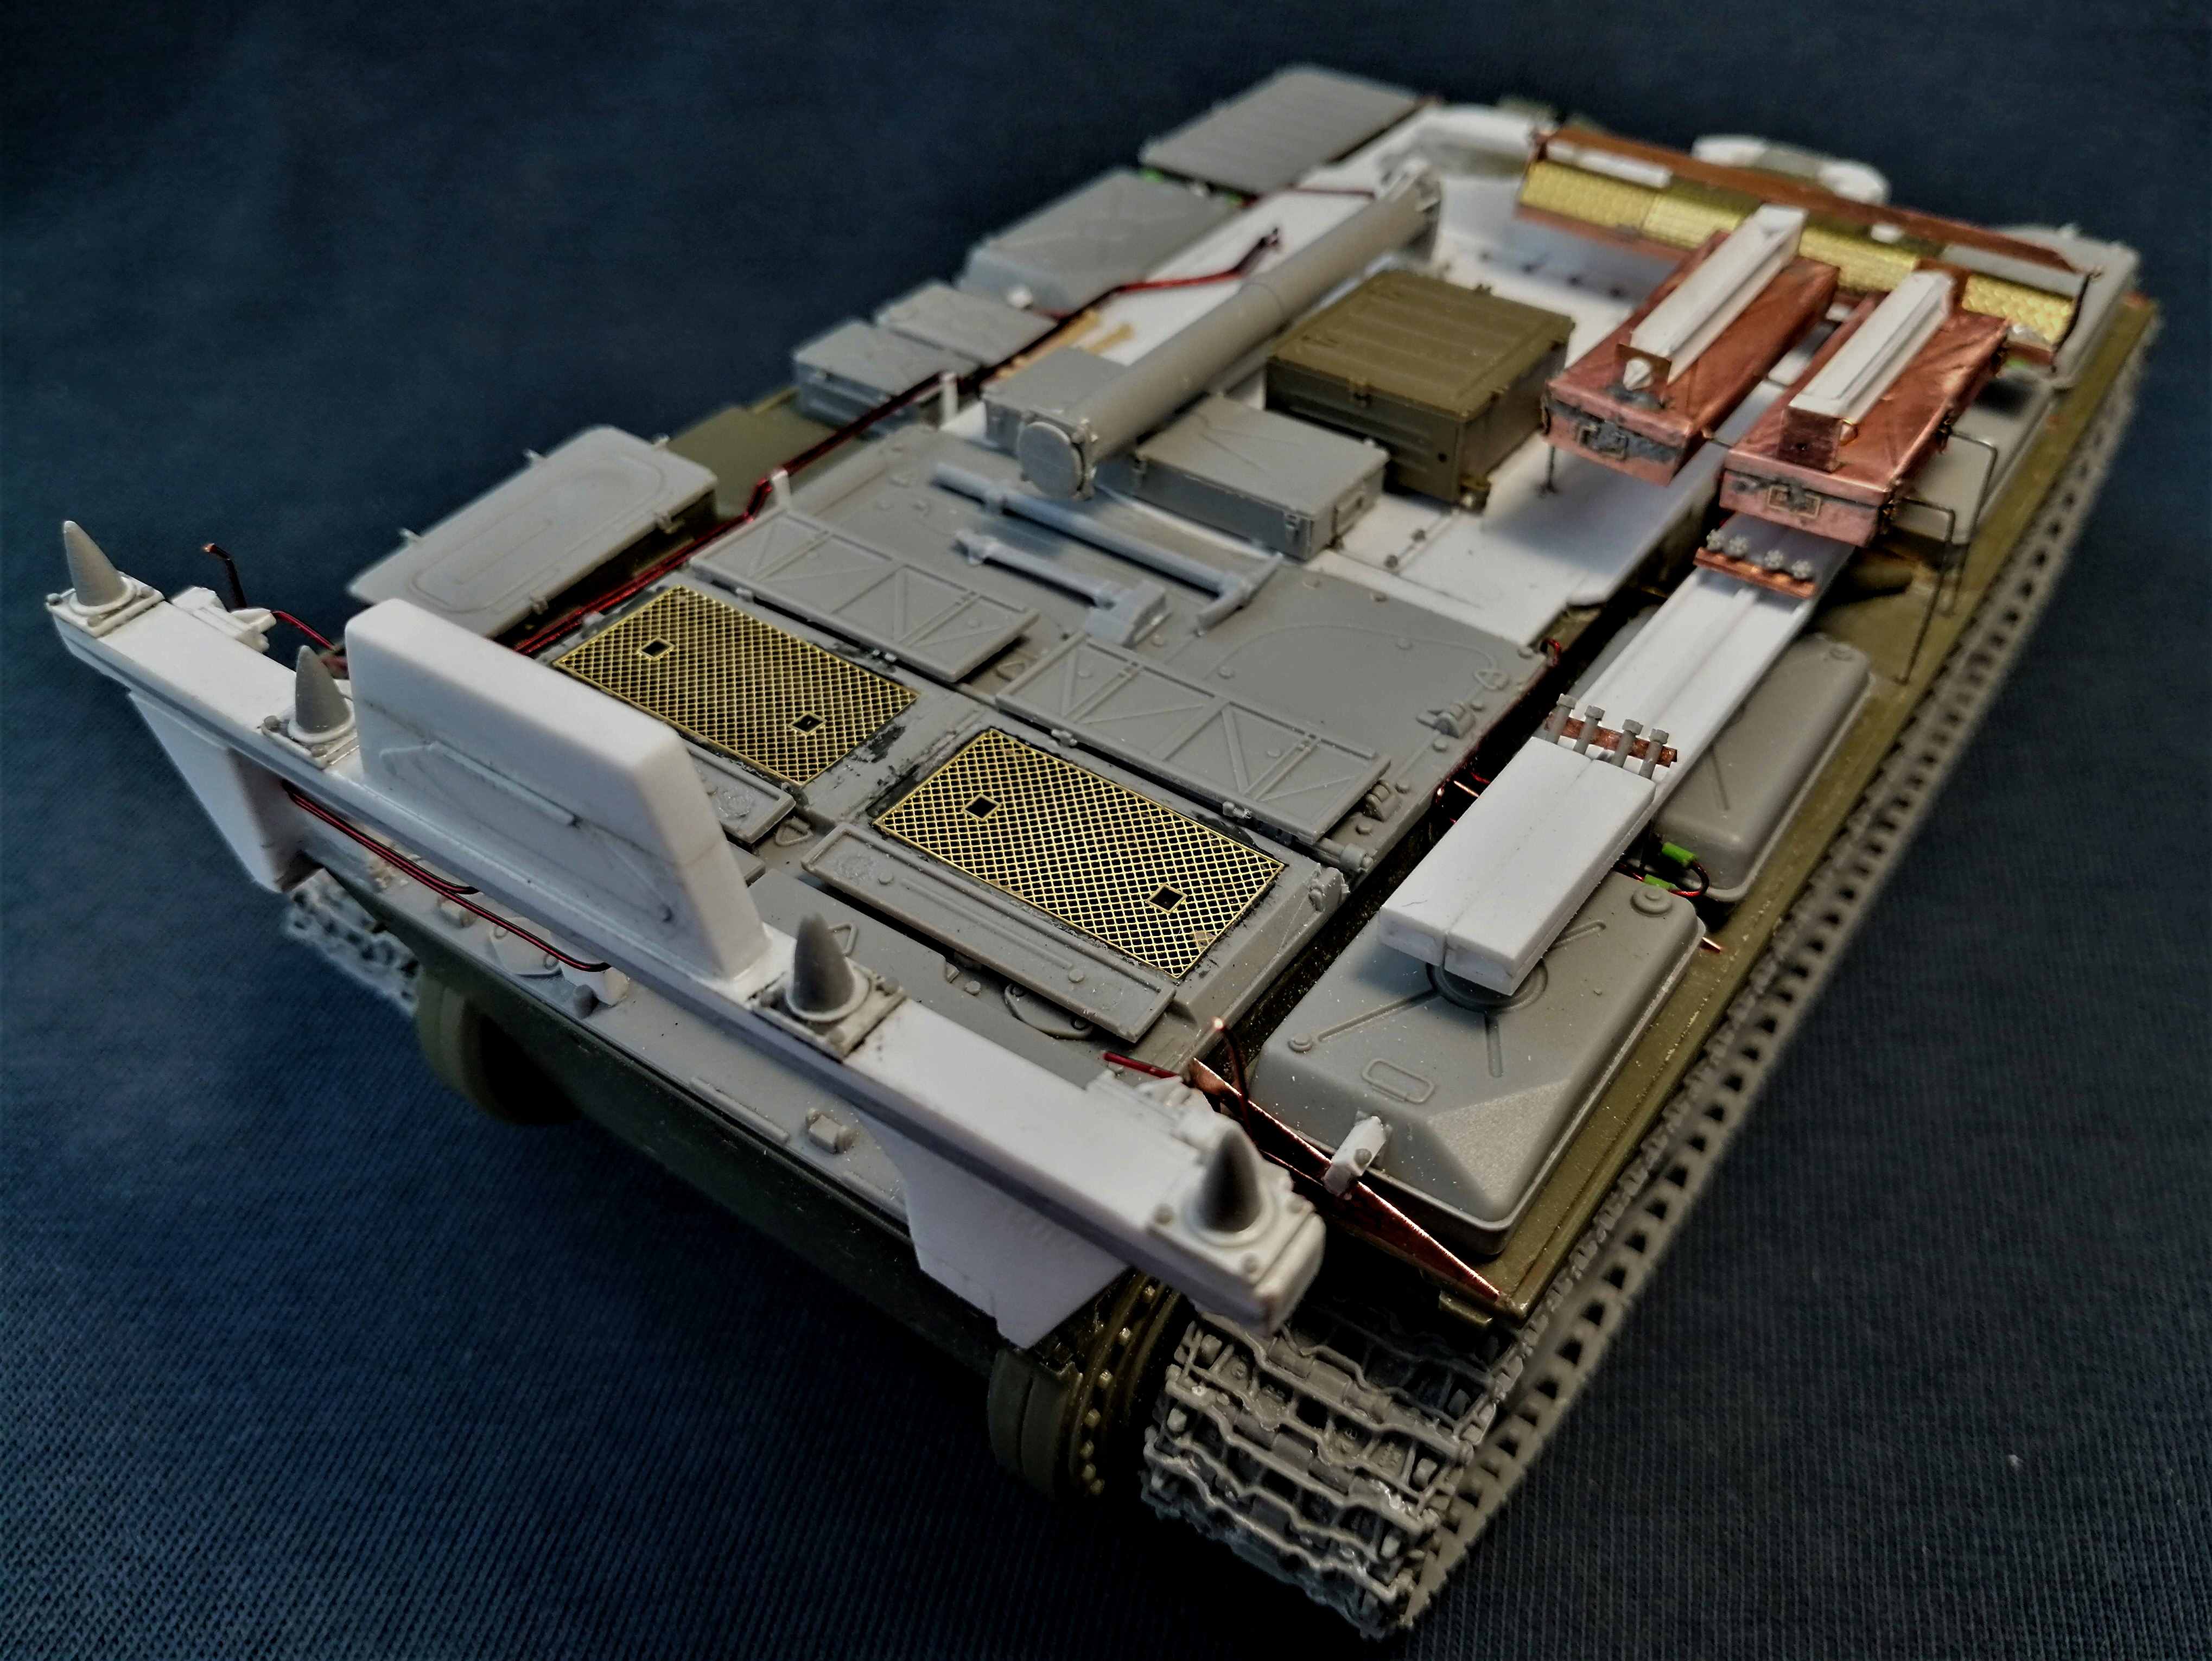
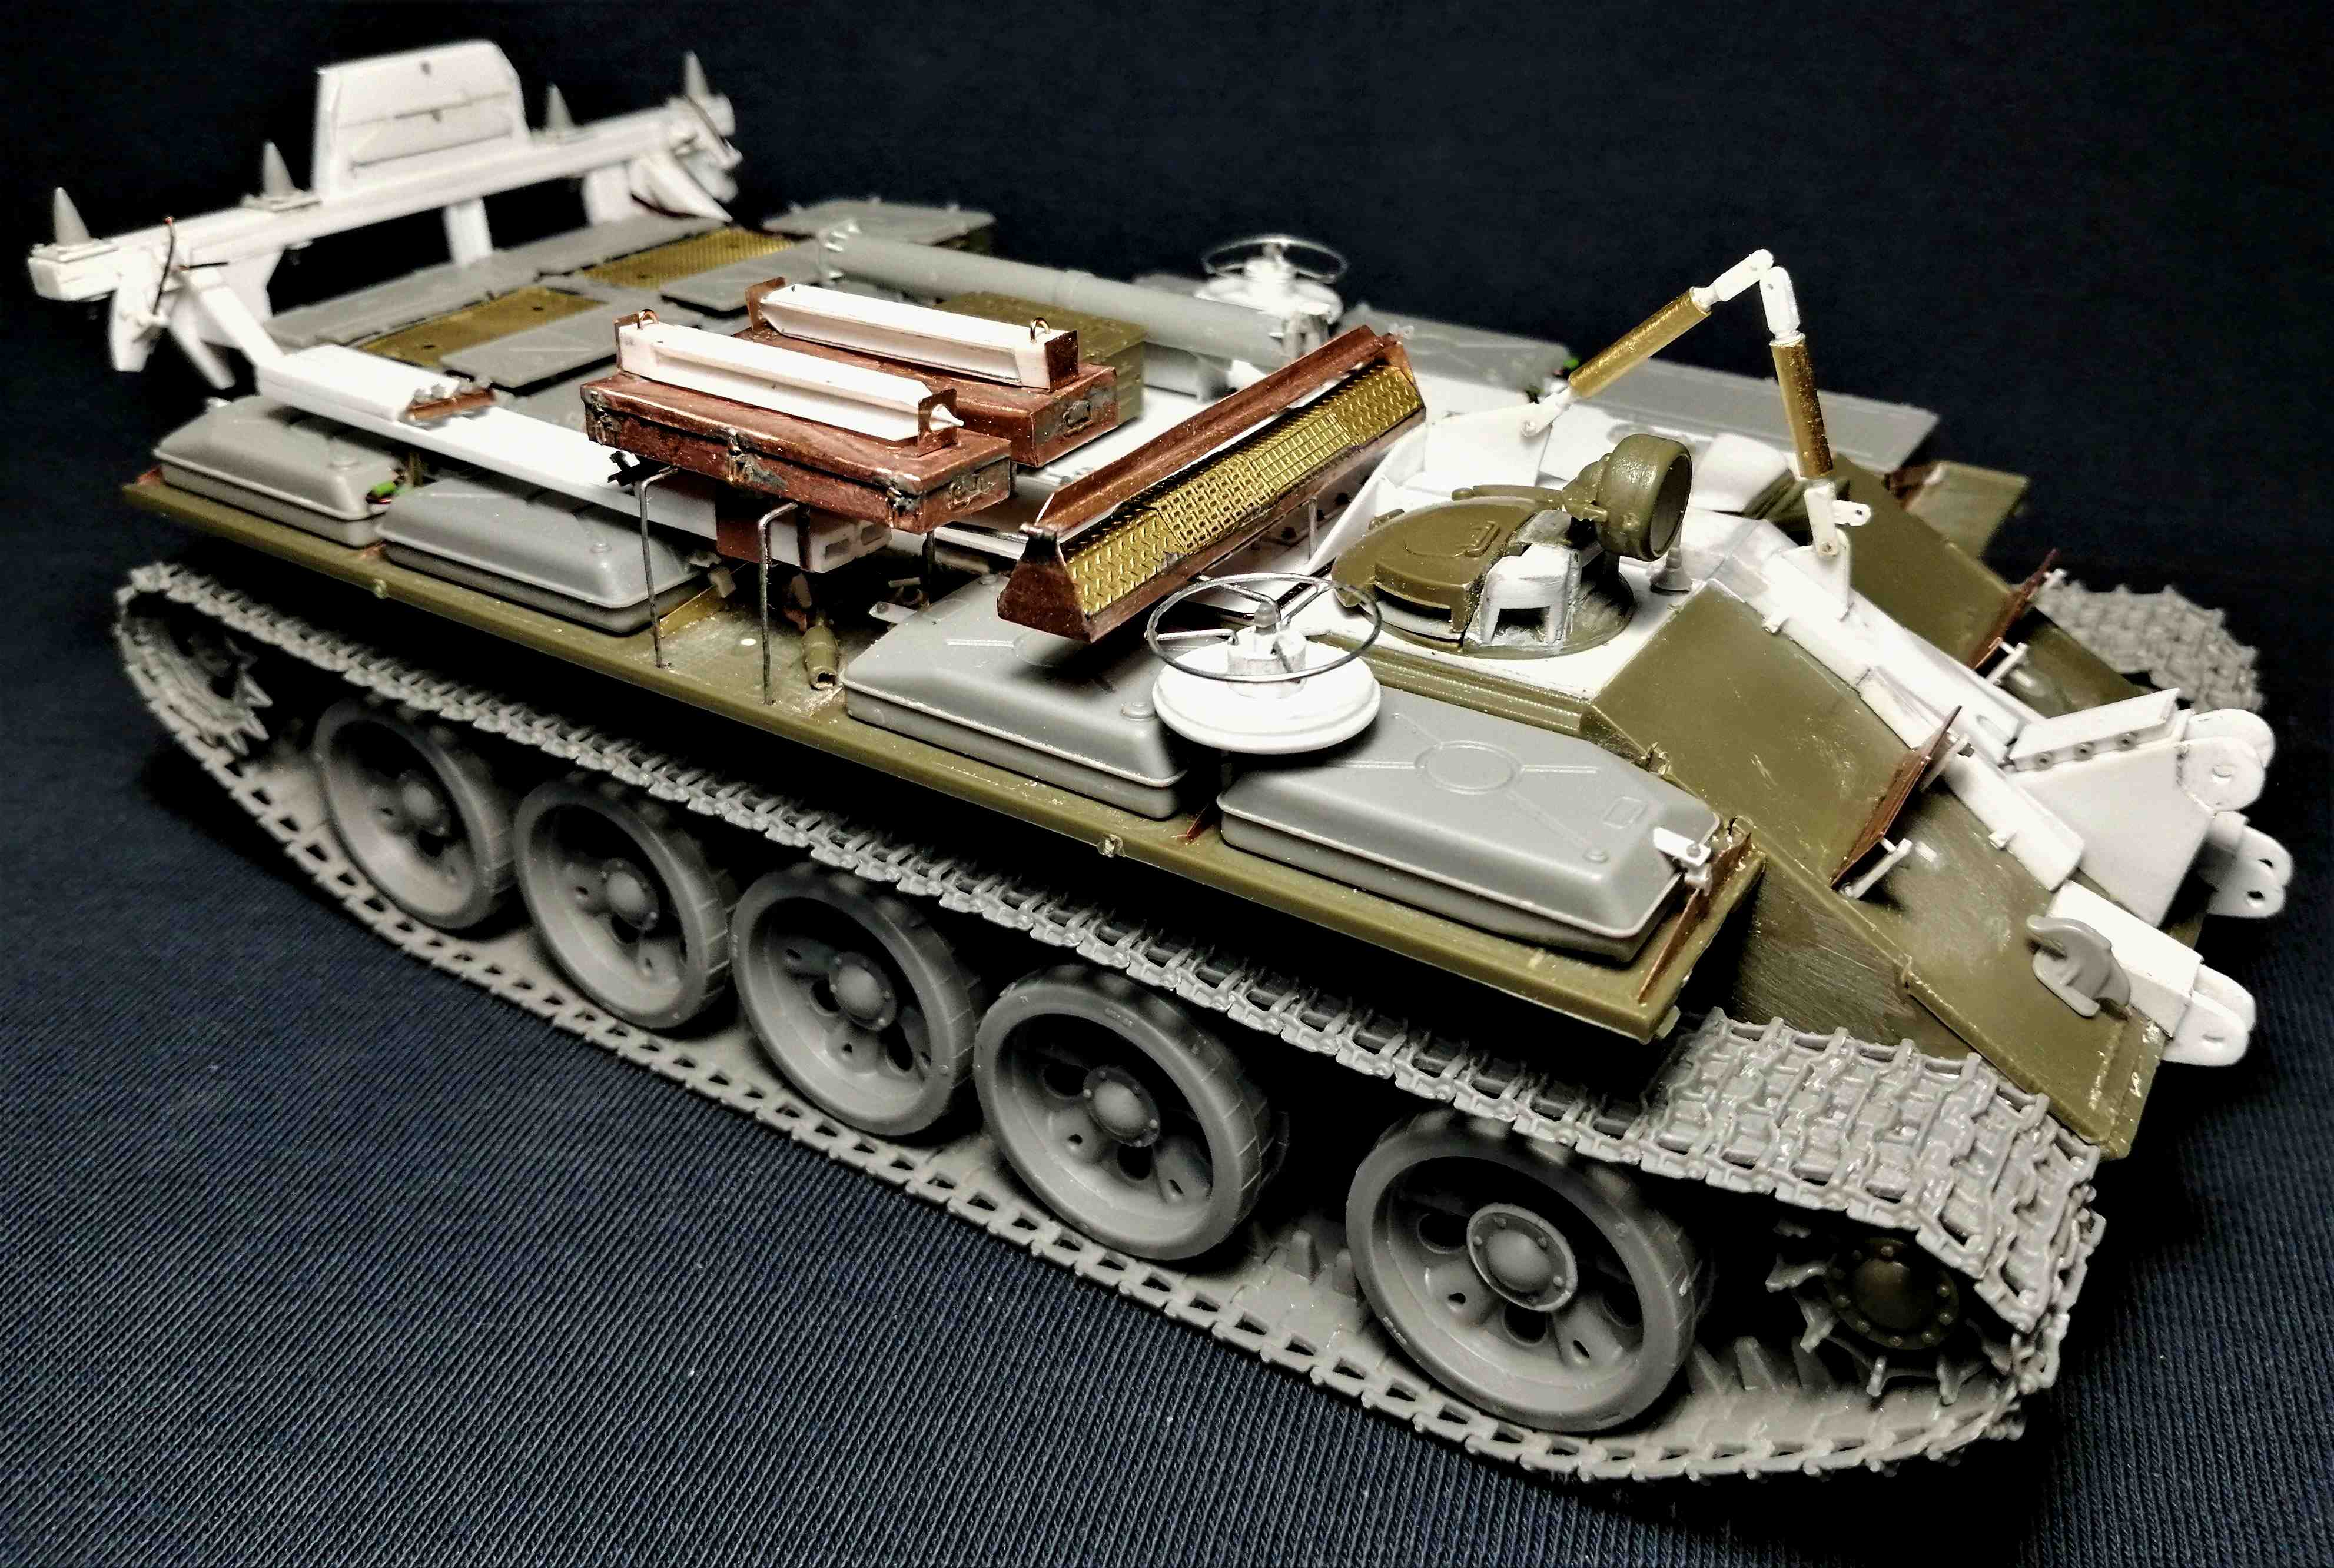
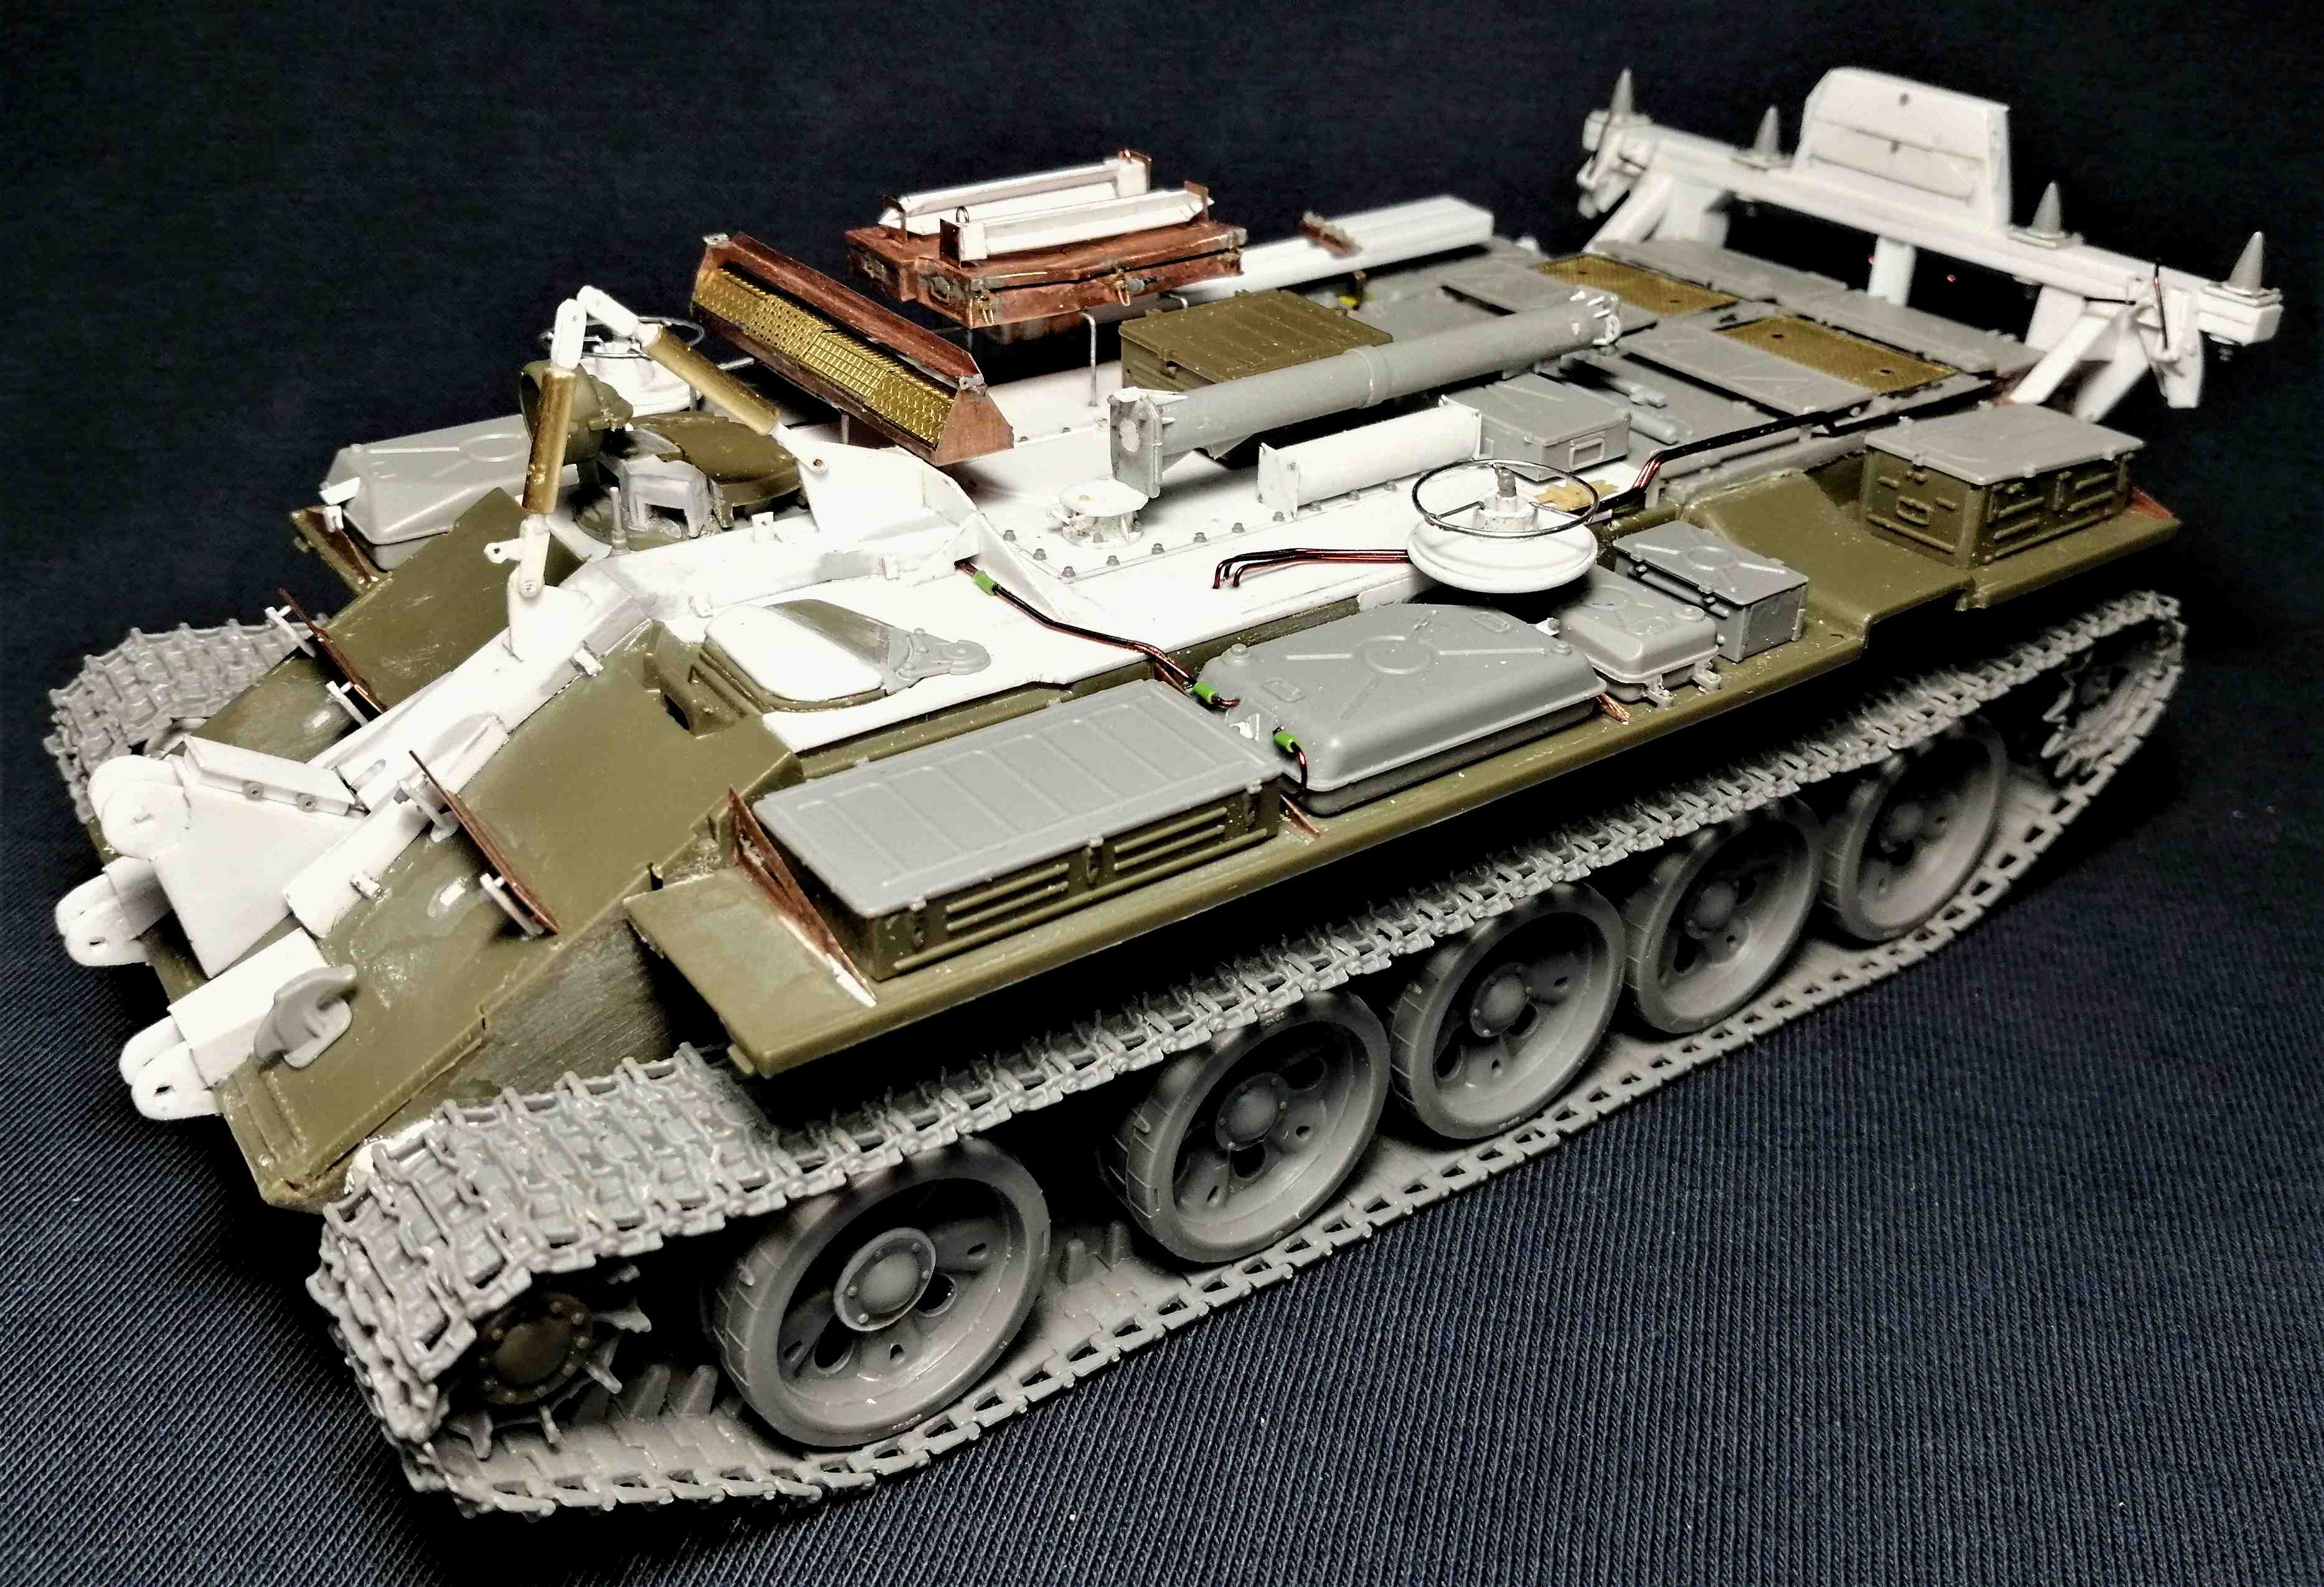
I'll use the super old Trumpeter's T-55 kit as a starting point, will install some leftover parts from the Takom's T-55AM2B, I built as a Soviet T-55AM with Kladivo FCS(another Bulgarian People's Army hybrid), and hope to make good use of some optional parts from MiniArt's T-54B interior kit.

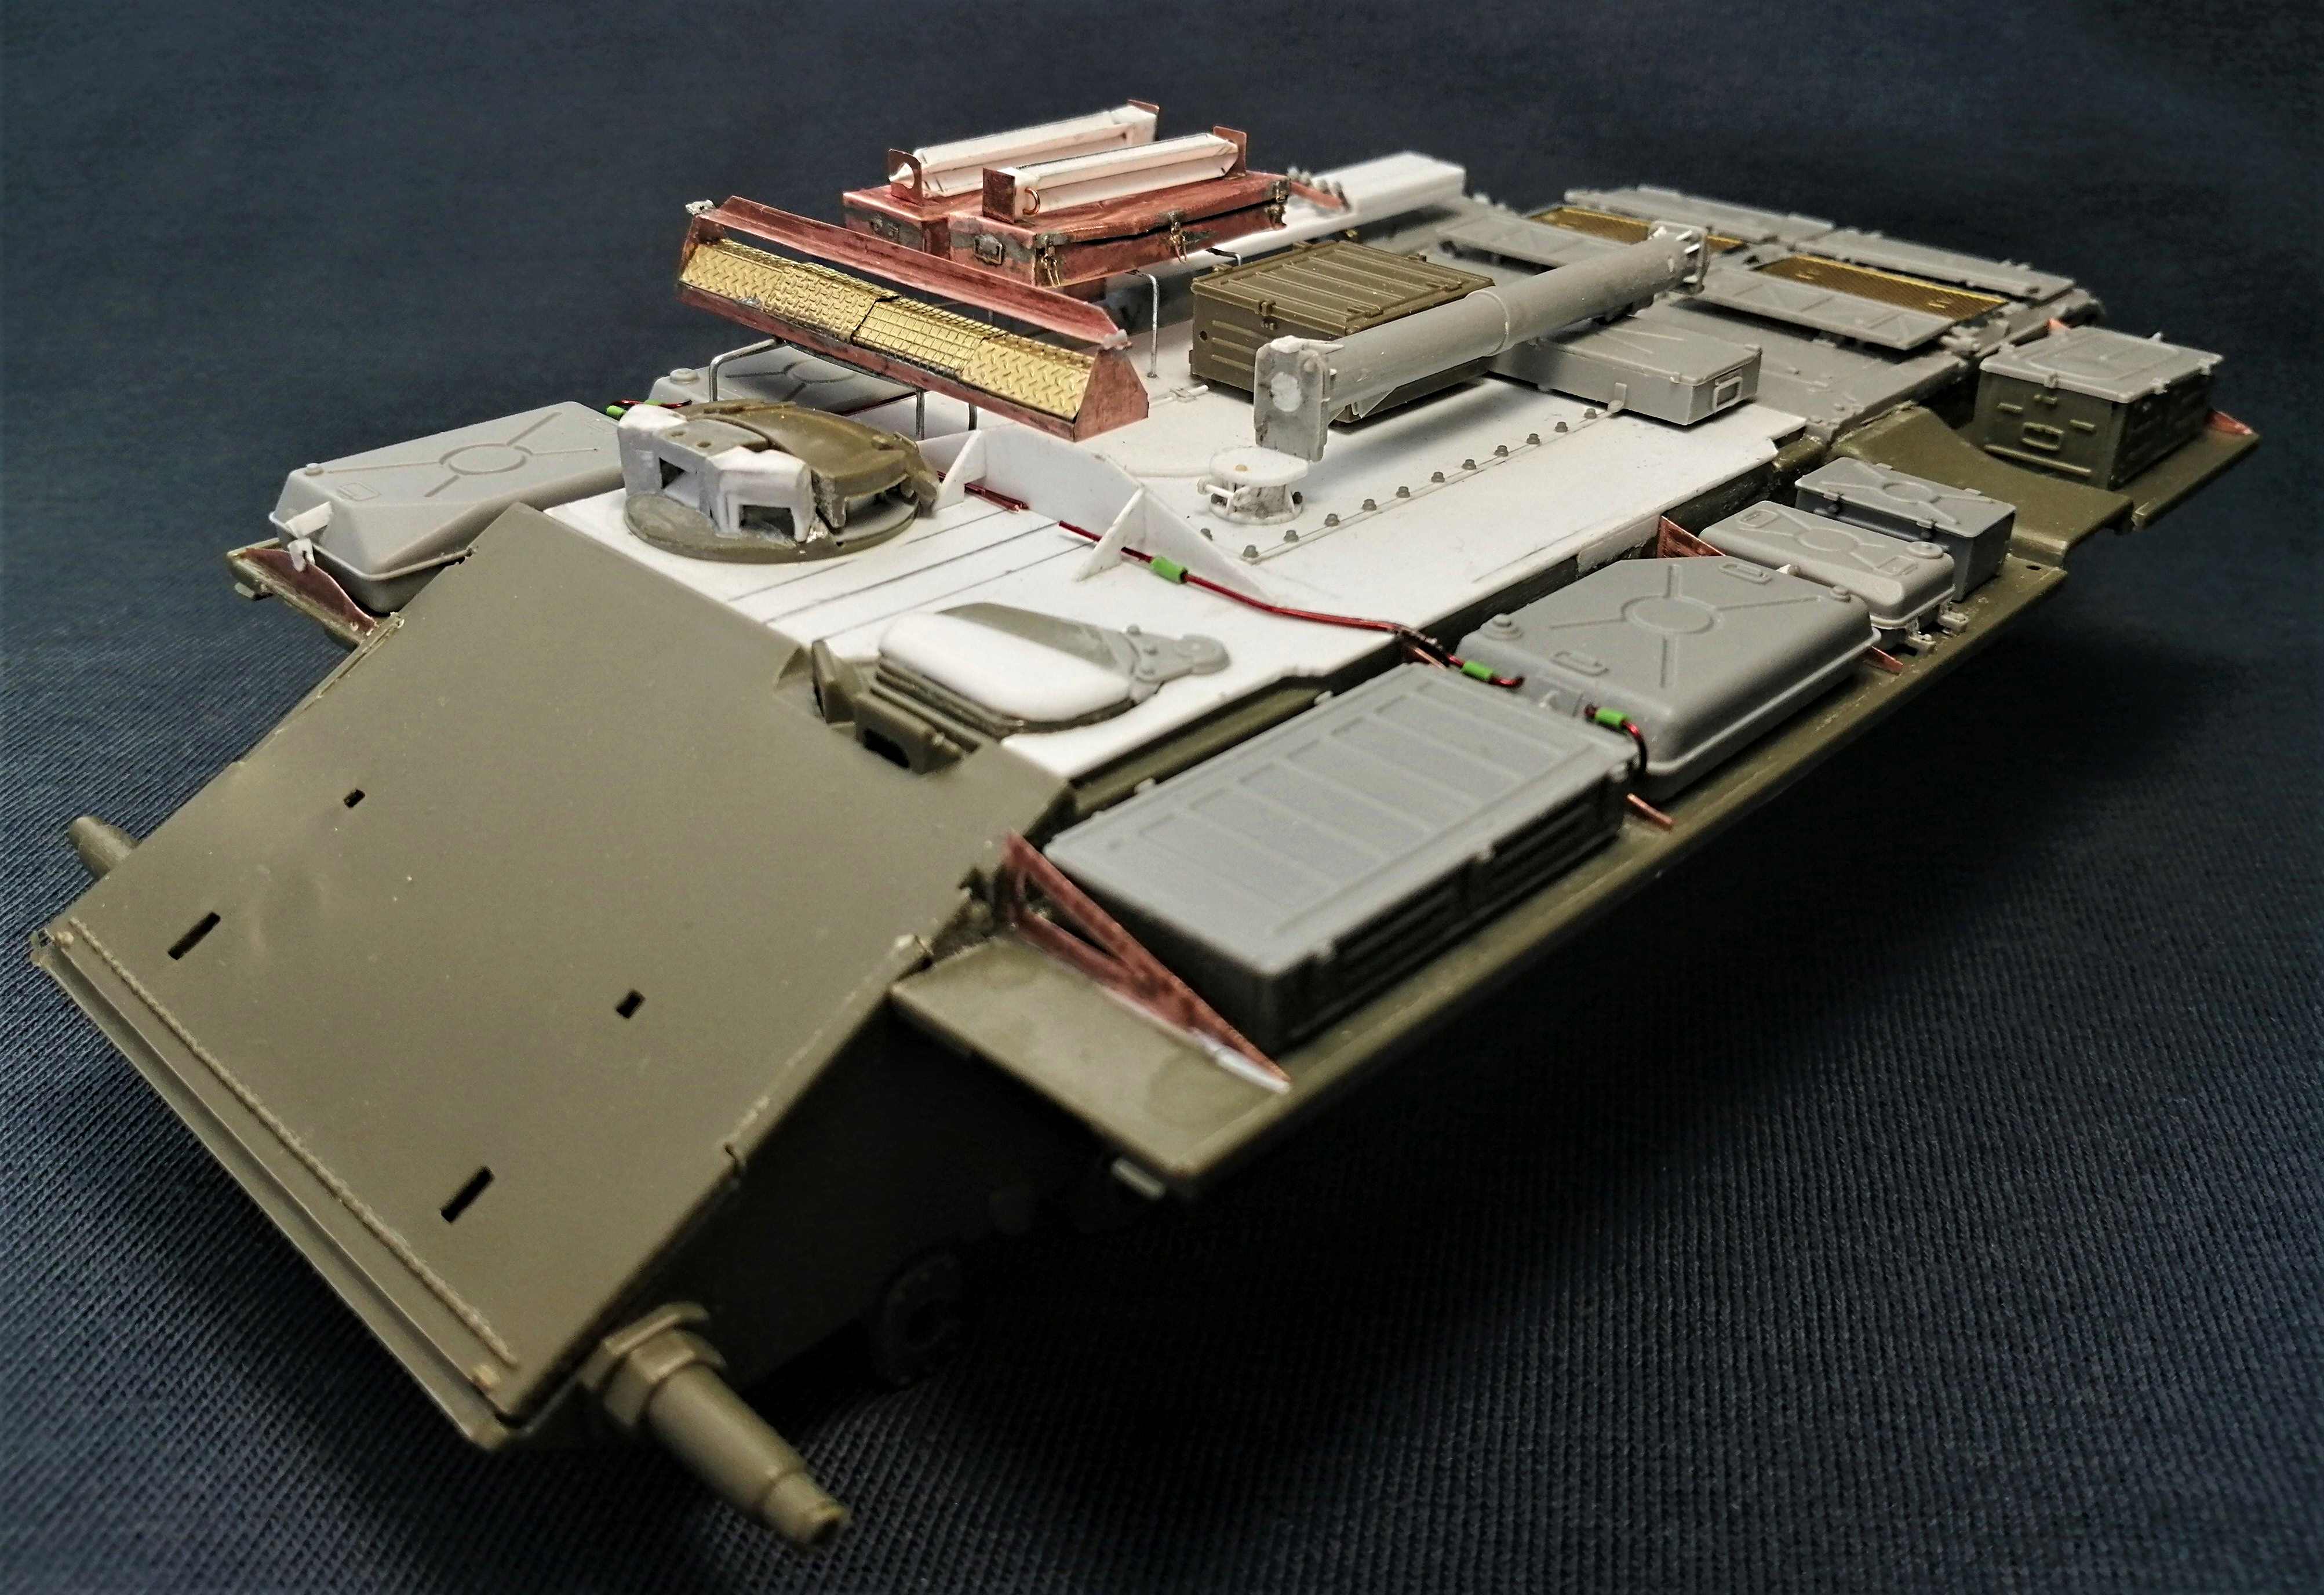
The scissor bridge, its laying arm and some parts/components on the upper hull will be scratchbuilt.

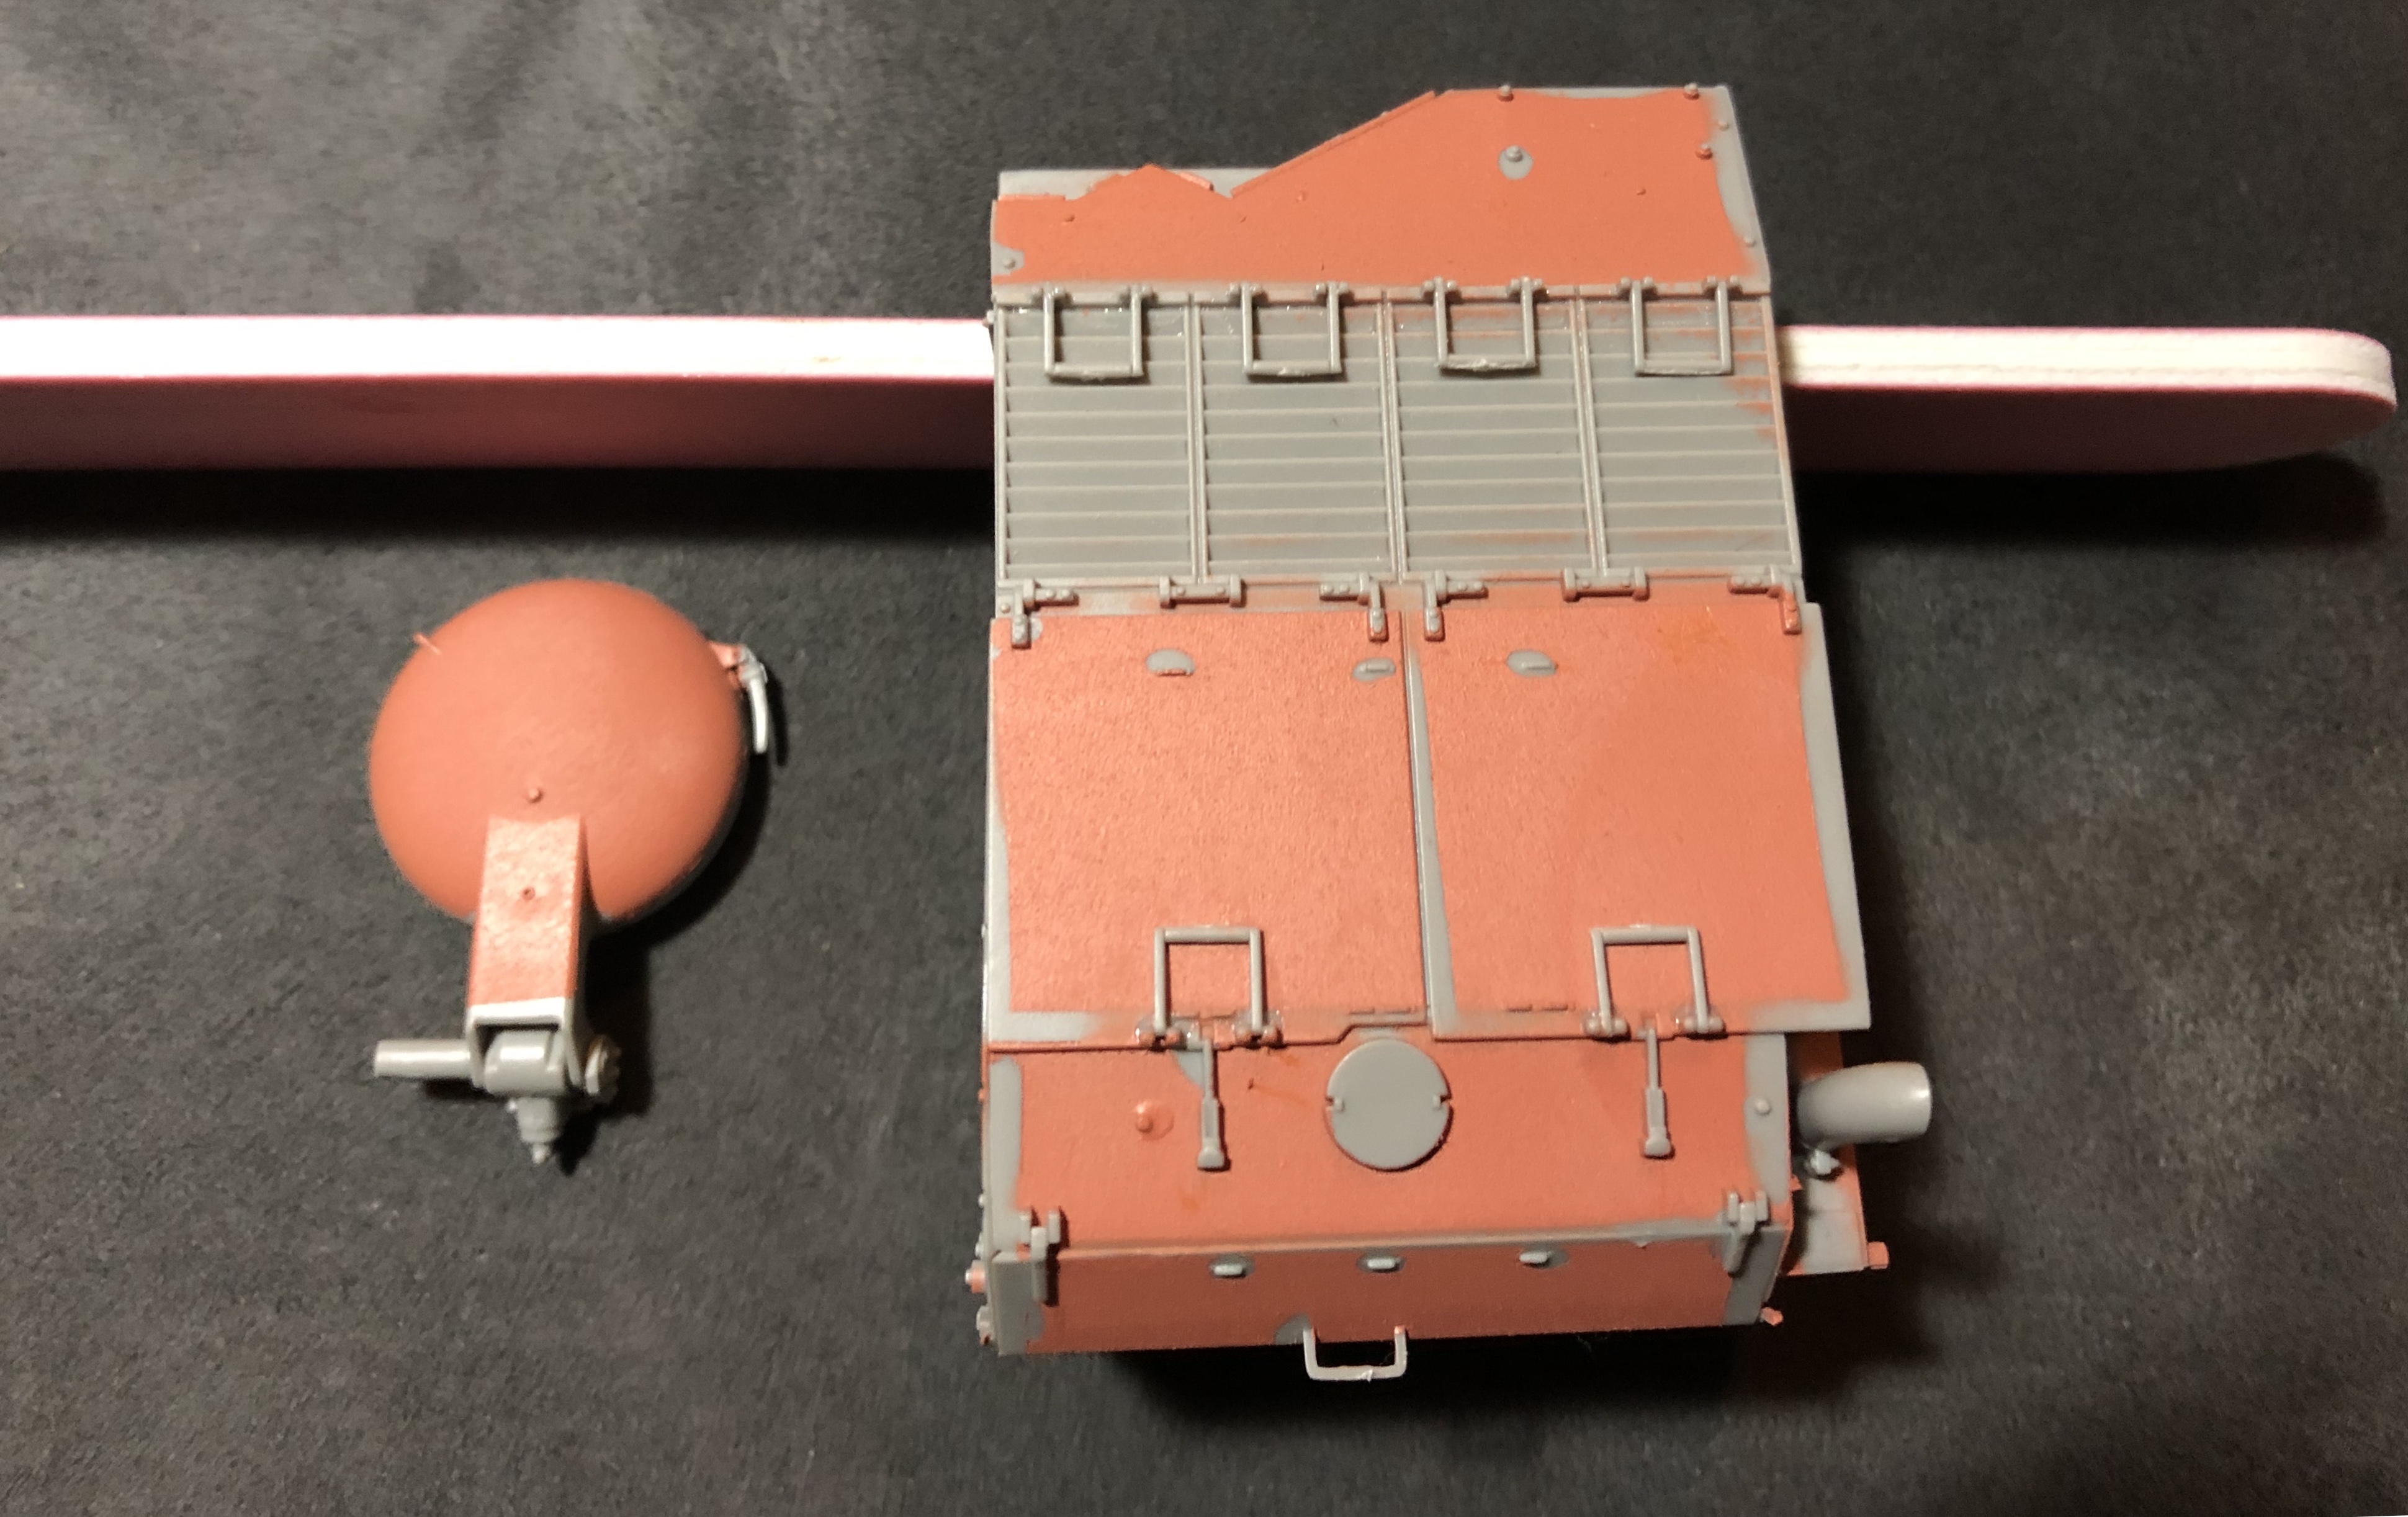
Here is my starting picture:


GulfWarrior
Staff MemberCampaigns Administrator
ARMORAMA
Visit this Community
Texas, United States
Joined: January 05, 2010
KitMaker: 1,051 posts
Armorama: 1,029 posts
Posted: Monday, July 01, 2019 - 01:32 AM UTC
That's gonna look really cool, Angel!

I'm sure we'll all be watching this one really closely.


k_mero4
Visit this Community
Sofiya, Bulgaria
Joined: November 26, 2017
KitMaker: 393 posts
Armorama: 369 posts
Posted: Monday, July 01, 2019 - 05:10 AM UTC
Excellently Angel! Good luck with the new project. I'll follow you closely. .... and
GulfWarrior
Staff MemberCampaigns Administrator
ARMORAMA
Visit this Community
Texas, United States
Joined: January 05, 2010
KitMaker: 1,051 posts
Armorama: 1,029 posts
Posted: Monday, July 01, 2019 - 06:54 AM UTC
And for those who have been watching, yes the campaign is now extended until the end of 2019. I had to do it! Otherwise, I wouldn't have been able to complete a build in my own campaign before the deadline passed!

I'm also tossing around a couple ideas for a couple different campaigns.


petbat
Visit this Community
Queensland, Australia
Joined: August 06, 2005
KitMaker: 3,353 posts
Armorama: 3,121 posts
Posted: Monday, July 01, 2019 - 07:15 AM UTC
Nice and ambitious Angel.

Two weeks ago I had the opportunity to climb all over and photograph this:


Australian Centurion Bridgelayer. The only example in the world that is fully operational. It is at Tankride at Tambourine Queensland,
http://tankride.com.au/
and yes I watched the bridge being laid... and have video.

I have the reference photos I need, but forgot to bring a tape measure so I could do plans for a scratch build project. Tim the owner will let me do that next time I visit. It won't be my build here as I am not as fast scratch building as you!
ayovtshev
#490
Visit this Community
Sofiya, Bulgaria
Joined: September 22, 2016
KitMaker: 1,432 posts
Armorama: 1,390 posts
Posted: Monday, July 01, 2019 - 07:24 AM UTC
Richard, thanks!


Thanks Kalin!
Will keep you posted-including some previews.


Thanks Peter!
What a piece of machinery, isn't it?
Hope my build inspires you to scratch this mighty beast one day

k_mero4
Visit this Community
Sofiya, Bulgaria
Joined: November 26, 2017
KitMaker: 393 posts
Armorama: 369 posts
Posted: Tuesday, July 02, 2019 - 03:48 AM UTC
Yes, Peter. Angel's idea is not bad. You would get a great model.
Angel, I'll take advantage of it.
petbat
Visit this Community
Queensland, Australia
Joined: August 06, 2005
KitMaker: 3,353 posts
Armorama: 3,121 posts
Posted: Tuesday, July 02, 2019 - 08:51 PM UTC
I am in the process of doing rough drawings to put measurements on. It is a project I want to finish next year....
ayovtshev
#490
Visit this Community
Sofiya, Bulgaria
Joined: September 22, 2016
KitMaker: 1,432 posts
Armorama: 1,390 posts
Posted: Tuesday, July 02, 2019 - 11:03 PM UTC
I have some progress to report.

I decided to "marry" Takom's T-55AM2B engine cover to Trumpeter's hull.Some cutting was needed, as Takom's part was wider that Trumpy's hull.Well, not anymore...

I also found the Czech version PE mesh-was quite happy about it, because I was spared at least an hour of soldering in the hot weather we have here now.

So, these were the main ingredients:


Upper hull was also reworked, some hatches and a lot of bolts were added.I'm dealing with the OPVT deep wading snorkel now:


petbat
Visit this Community
Queensland, Australia
Joined: August 06, 2005
KitMaker: 3,353 posts
Armorama: 3,121 posts
Posted: Wednesday, July 03, 2019 - 07:51 AM UTC
Yes, great work as usual Angel.
ayovtshev
#490
Visit this Community
Sofiya, Bulgaria
Joined: September 22, 2016
KitMaker: 1,432 posts
Armorama: 1,390 posts
Posted: Friday, July 05, 2019 - 02:39 AM UTC
Thanks Peter!

Bit more progress to report.

I received a bunch of pictures of a Bulgarian BLG-60M2 undergoing maintenance-they came very handy

Further-I received the leftover sprues from Kalin's T-55 mod.1981 kit, with some usefull parts.
Also- a Tamiya T-55 commander hatch with anti-radiation cladding.

I spent some time building the commander hatch.
It has a Trumpeter base, a Takom's hatch, some scratchbuilt parts and the Tamiya anti-radiation hatch cover.

Then I worked on the fenders, replacing all supports by copper sheet cut ones.
Managed to collect all required storage boxes and fuel tanks-except 2 small boxes, that I'll build from scratch.

This is how my build looks now:


Next I'll start piping the fuel tanks,

k_mero4
Visit this Community
Sofiya, Bulgaria
Joined: November 26, 2017
KitMaker: 393 posts
Armorama: 369 posts
Posted: Friday, July 05, 2019 - 05:48 AM UTC
Impressive!.................
petbat
Visit this Community
Queensland, Australia
Joined: August 06, 2005
KitMaker: 3,353 posts
Armorama: 3,121 posts
Posted: Friday, July 05, 2019 - 07:40 AM UTC
Yes impressive.

Great to have friends that let you raid their spares box hey!
ayovtshev
#490
Visit this Community
Sofiya, Bulgaria
Joined: September 22, 2016
KitMaker: 1,432 posts
Armorama: 1,390 posts
Posted: Sunday, July 07, 2019 - 05:01 AM UTC
Thanks Kalin, Peter!

Yeah, it's good to have friends (with spare boxes) you can count on!

Update on my BLG-60M2:
I have added the fuel piping with a fuel switch, a box with parking blocks, 2 boxes with accessories for OPVT(deep wading snorkel) and 2 bridge mounts for railway transport:


Crowded right side:


Next I need to make 2 shackles-1 for each towing rope.
Then I'll start building the rear bridge support.

petbat
Visit this Community
Queensland, Australia
Joined: August 06, 2005
KitMaker: 3,353 posts
Armorama: 3,121 posts
Posted: Sunday, July 07, 2019 - 08:04 PM UTC
Sweeeeetttt….
ayovtshev
#490
Visit this Community
Sofiya, Bulgaria
Joined: September 22, 2016
KitMaker: 1,432 posts
Armorama: 1,390 posts
Posted: Wednesday, July 10, 2019 - 03:28 AM UTC
Thanks Peter!

Rear bridge support is ready.
I worked on the suspension-tracks, wheels, idlers e.t.c.
Used mainly MiniArt parts-besides a Trumpeter wheel hub on both idler wheels.
MiniArt wheels did not match Trumpeter axles so I had to find a way around.
I also scratchbuilt the housings of the idler wheels- what Trumpeter offers(because of the motorization of this old kit) had nothing to do with T-55 idler wheel housing.
Some pictures:


Next I'll build the bridge laying arm base,

GulfWarrior
Staff MemberCampaigns Administrator
ARMORAMA
Visit this Community
Texas, United States
Joined: January 05, 2010
KitMaker: 1,051 posts
Armorama: 1,029 posts
Posted: Wednesday, July 10, 2019 - 03:31 AM UTC
That looks awesome, Angel!

I've been working on some of the sub-assemblies for the M9 ACE. Hopefully I'll have some pics up tonight or tomorrow.


ayovtshev
#490
Visit this Community
Sofiya, Bulgaria
Joined: September 22, 2016
KitMaker: 1,432 posts
Armorama: 1,390 posts
Posted: Saturday, July 13, 2019 - 07:13 AM UTC
Thanks Richard!

Some more progress-anchor rope reels were installed, laying arm base was built and some minor details were added:


Next will be the laying arm...or the scissor bridge...
I haven't decided yet, but I must build both parts very precisely- I want the bridge of my AVLB to be deployable.