United States
Joined: December 26, 2008
KitMaker: 288 posts
Armorama: 92 posts
Posted: Saturday, May 18, 2019 - 02:40 AM UTC
Thanks Russ! That makes a lot of sense. Your comments on how Revell worked with the equipment developers fits in well with how those kits came out.
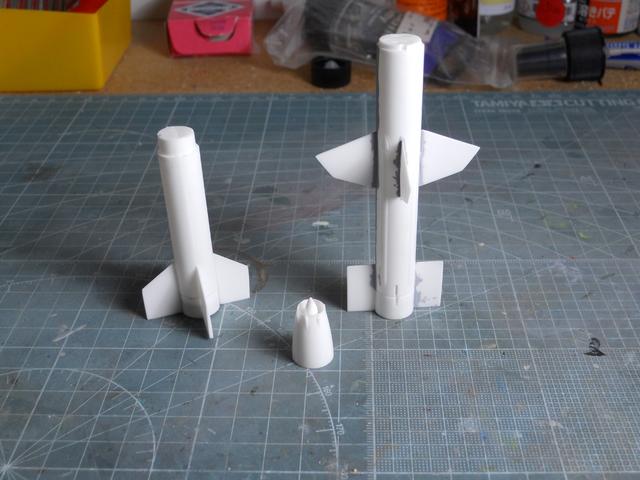
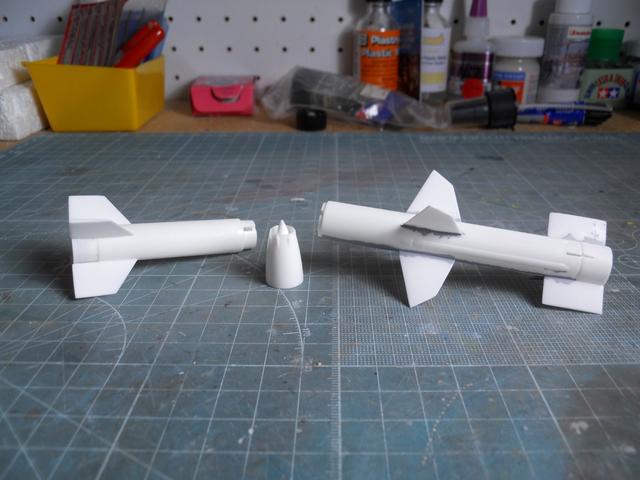
I now have the main bodies of the Talos rocket and ram jet stages together and am working on eliminating the seams and sink holes. The front of the missile is the ram jet inlet and will be painted gloss white. I primed and painted the inlet while it was separate as this simplified matters. Here are a few shots of the Talos body as I start the clean-up. I still need to add a pair of fins on the ram jet stage.
Have fun modeling!
Mike

Queensland, Australia
Joined: August 06, 2005
KitMaker: 3,353 posts
Armorama: 3,121 posts
Posted: Saturday, May 18, 2019 - 07:07 AM UTC
A lot of work Mike, but it should be worth it.
On the Bench:
Dust, styrene scraps, paint splotches and tears.
barkingdigger
 Associate Editor
#013
England - East Anglia, United Kingdom
Joined: June 20, 2008
KitMaker: 3,981 posts
Armorama: 3,403 posts
Posted: Sunday, May 19, 2019 - 03:17 AM UTC
"Glue, or Glue Not - there is no Dry-Fit" - Yoda (original script from Return of the Jedi...)
North Carolina, United States
Joined: September 16, 2004
KitMaker: 1,281 posts
Armorama: 1,222 posts
Posted: Sunday, May 19, 2019 - 04:22 AM UTC
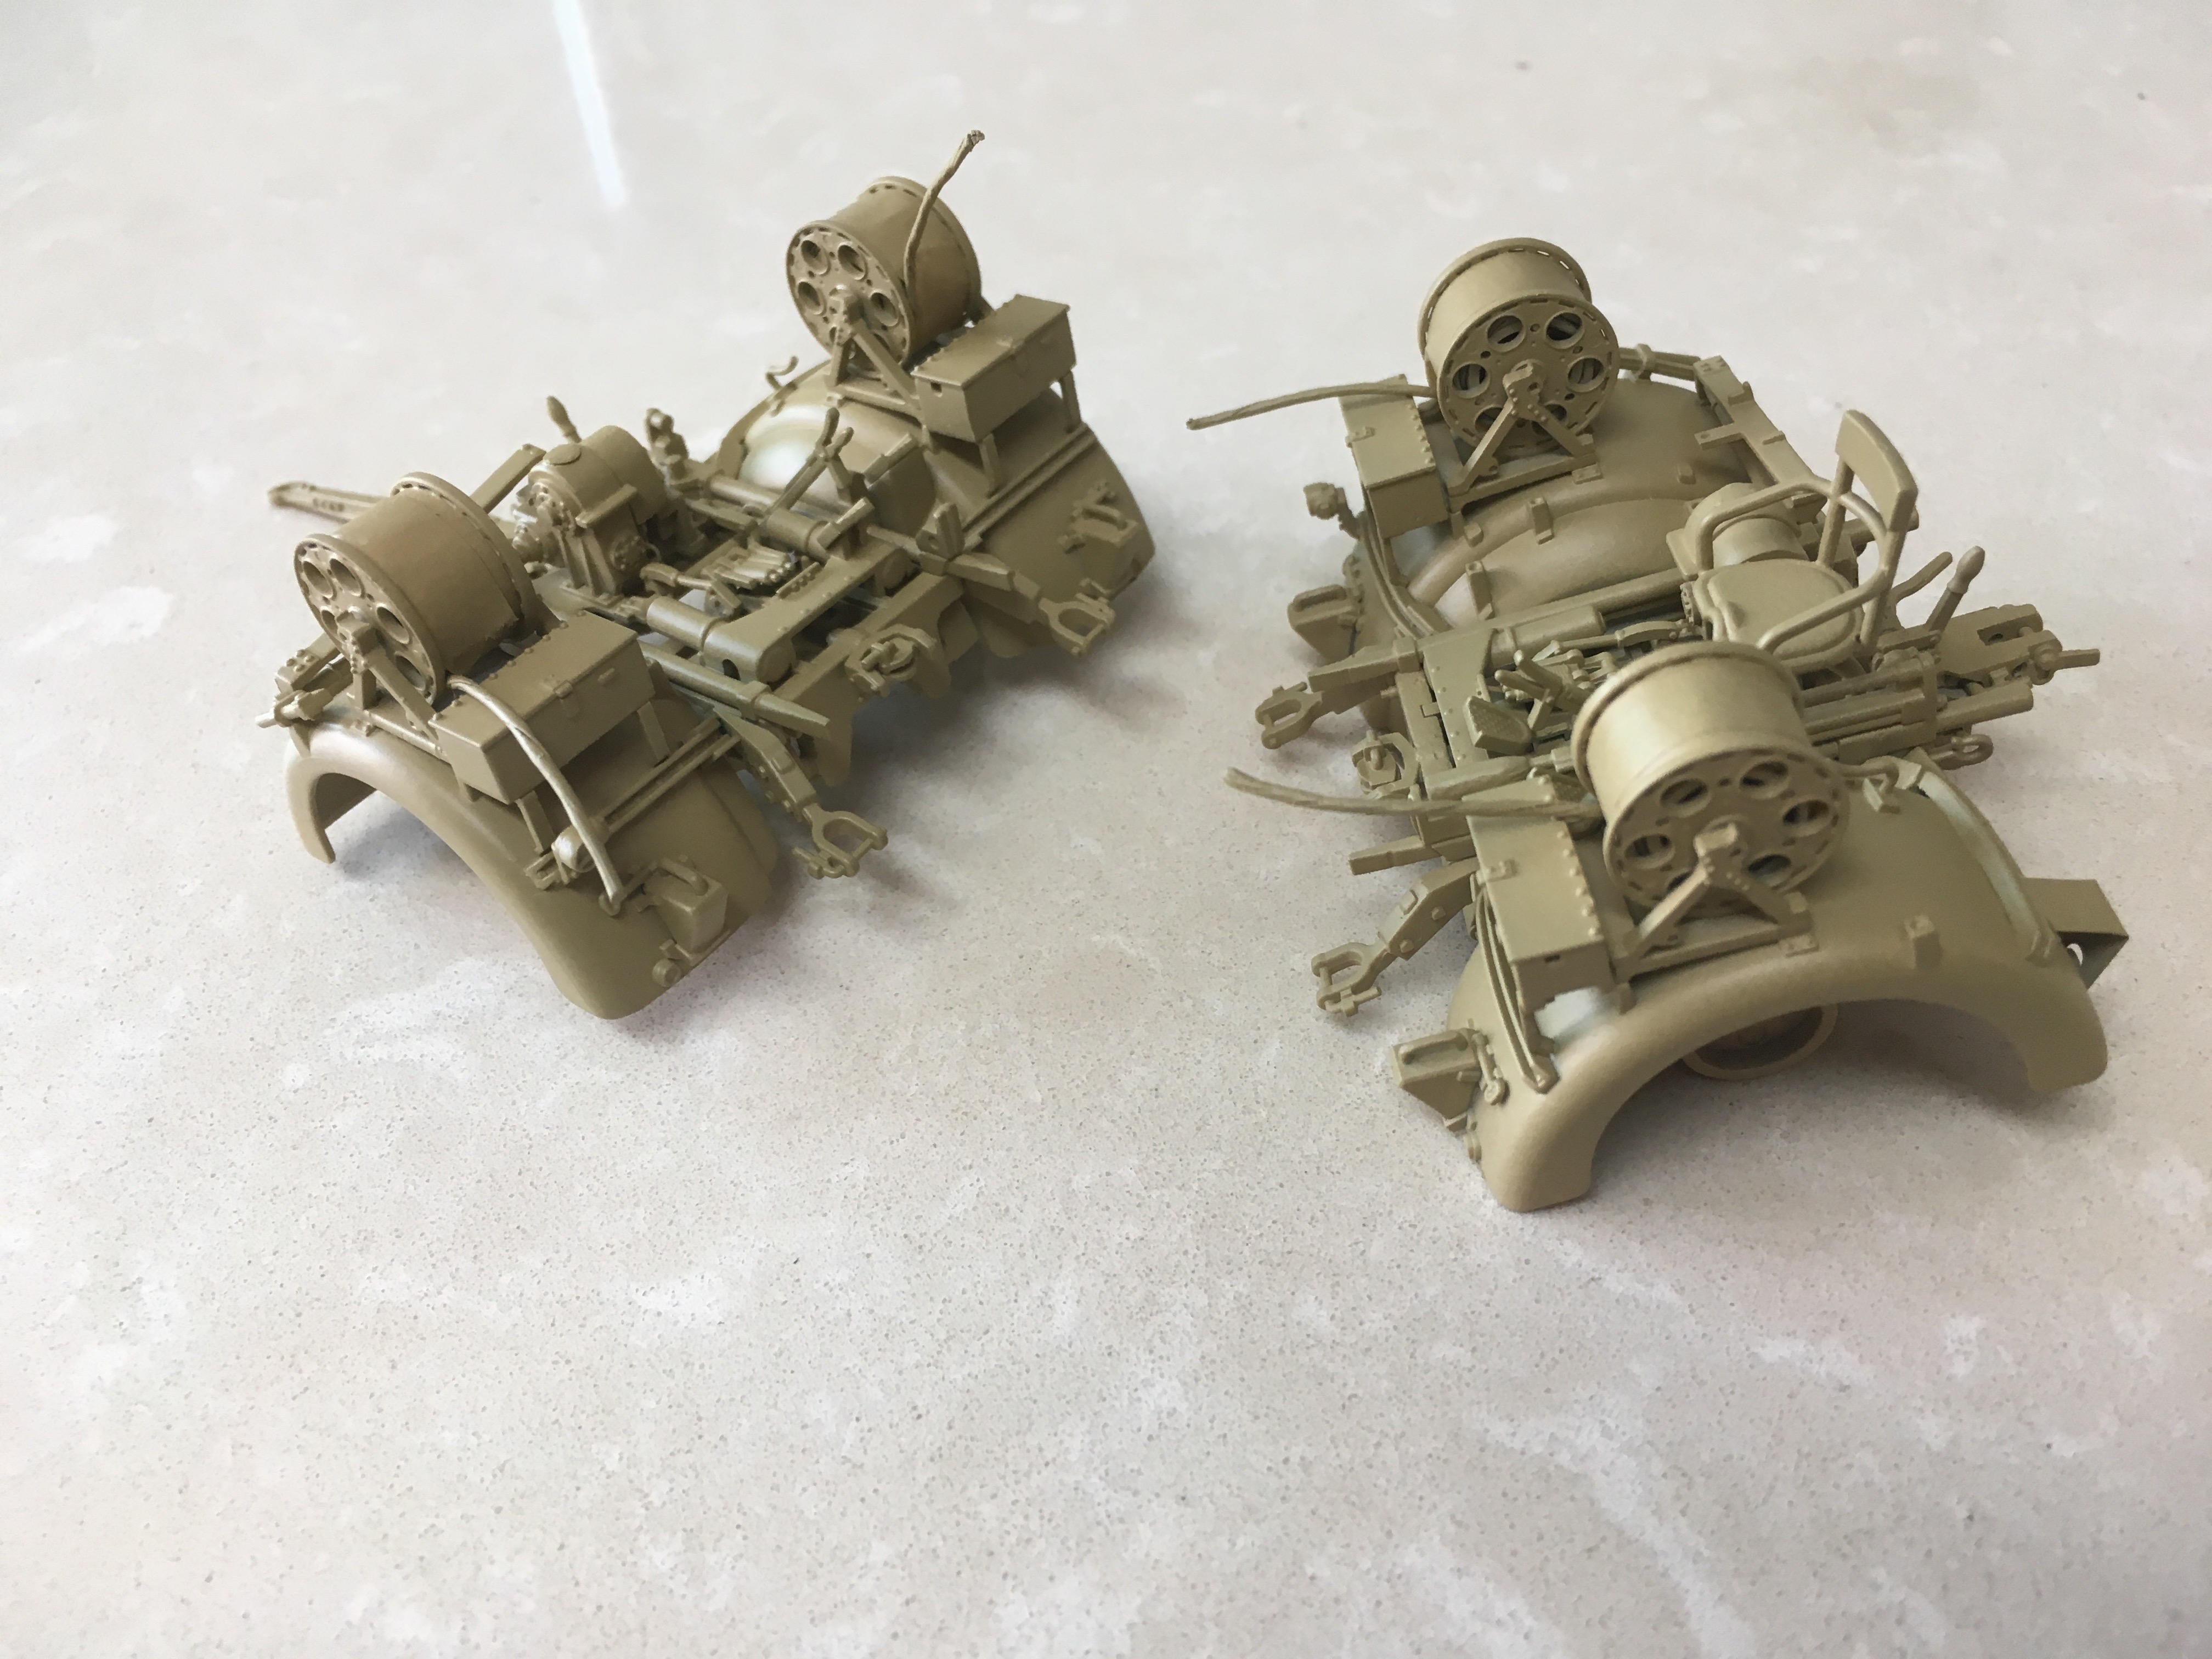
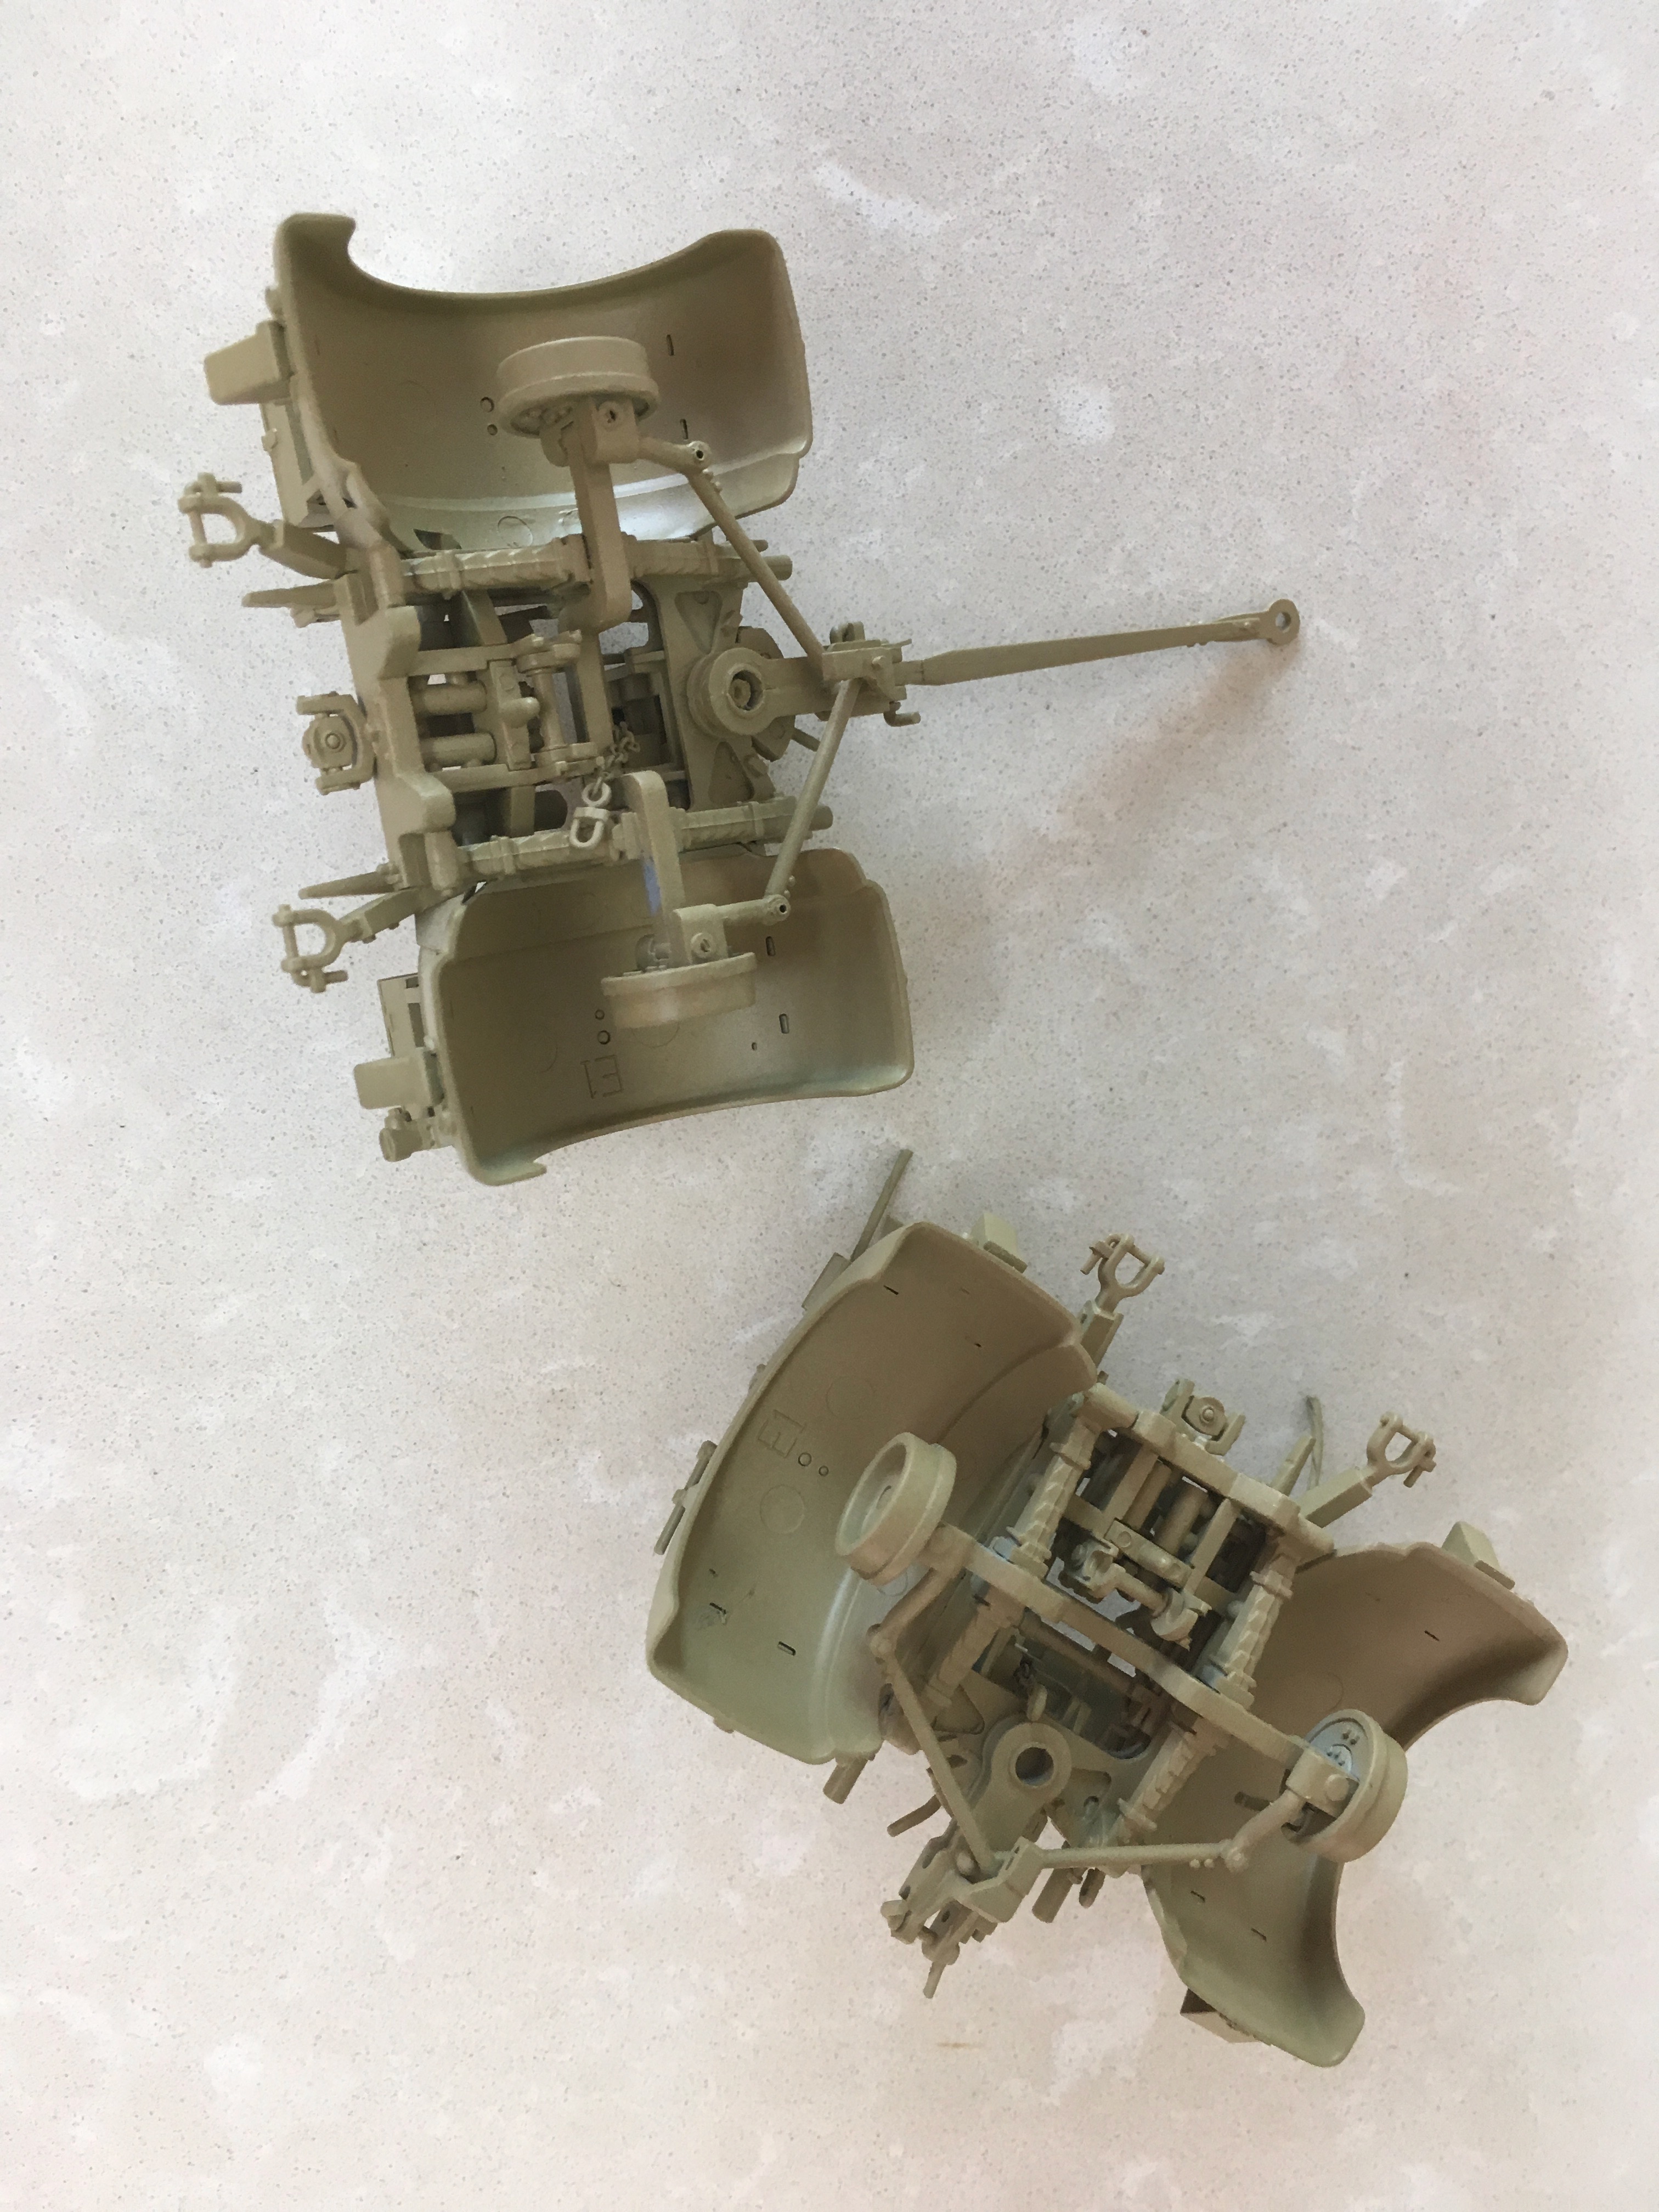
Everything with a nice coat of Stynylrez black primer. First time using this stuff and am quite impressed.

Bangkok, Thailand / ไทย
Joined: September 17, 2013
KitMaker: 1,617 posts
Armorama: 1,150 posts
Posted: Sunday, May 19, 2019 - 06:02 PM UTC
North Carolina, United States
Joined: September 16, 2004
KitMaker: 1,281 posts
Armorama: 1,222 posts
Posted: Monday, May 20, 2019 - 11:28 AM UTC
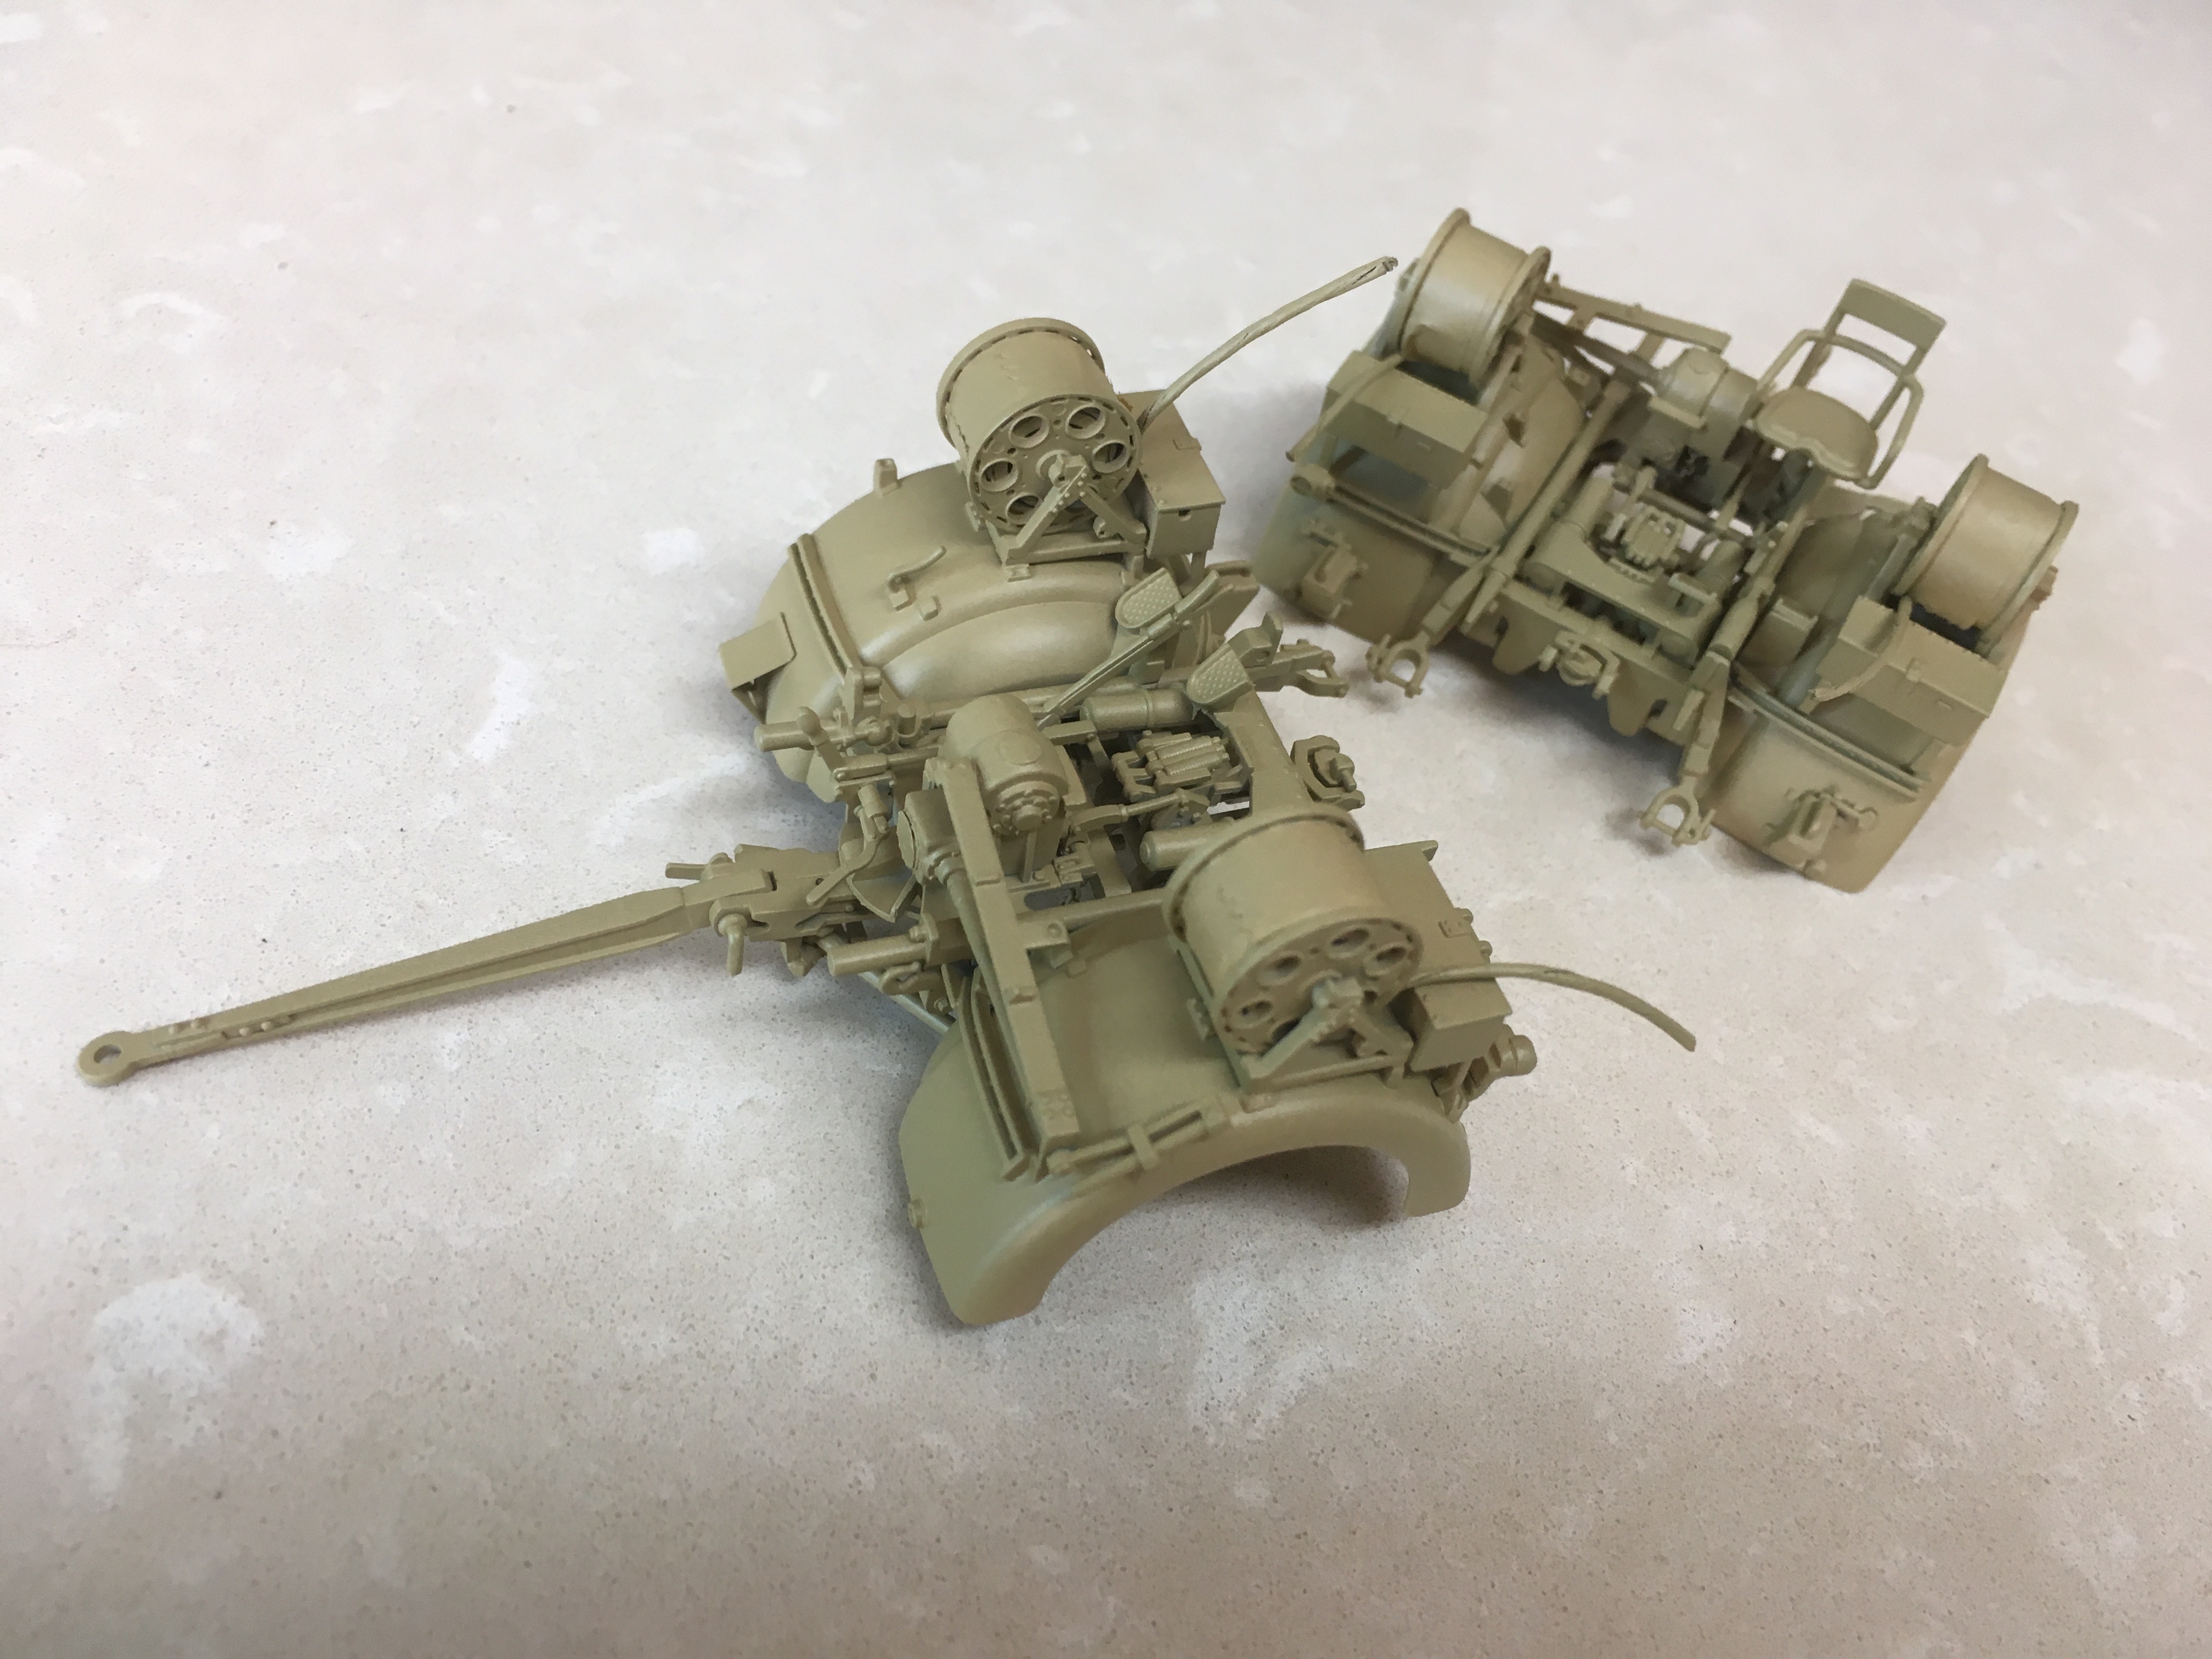
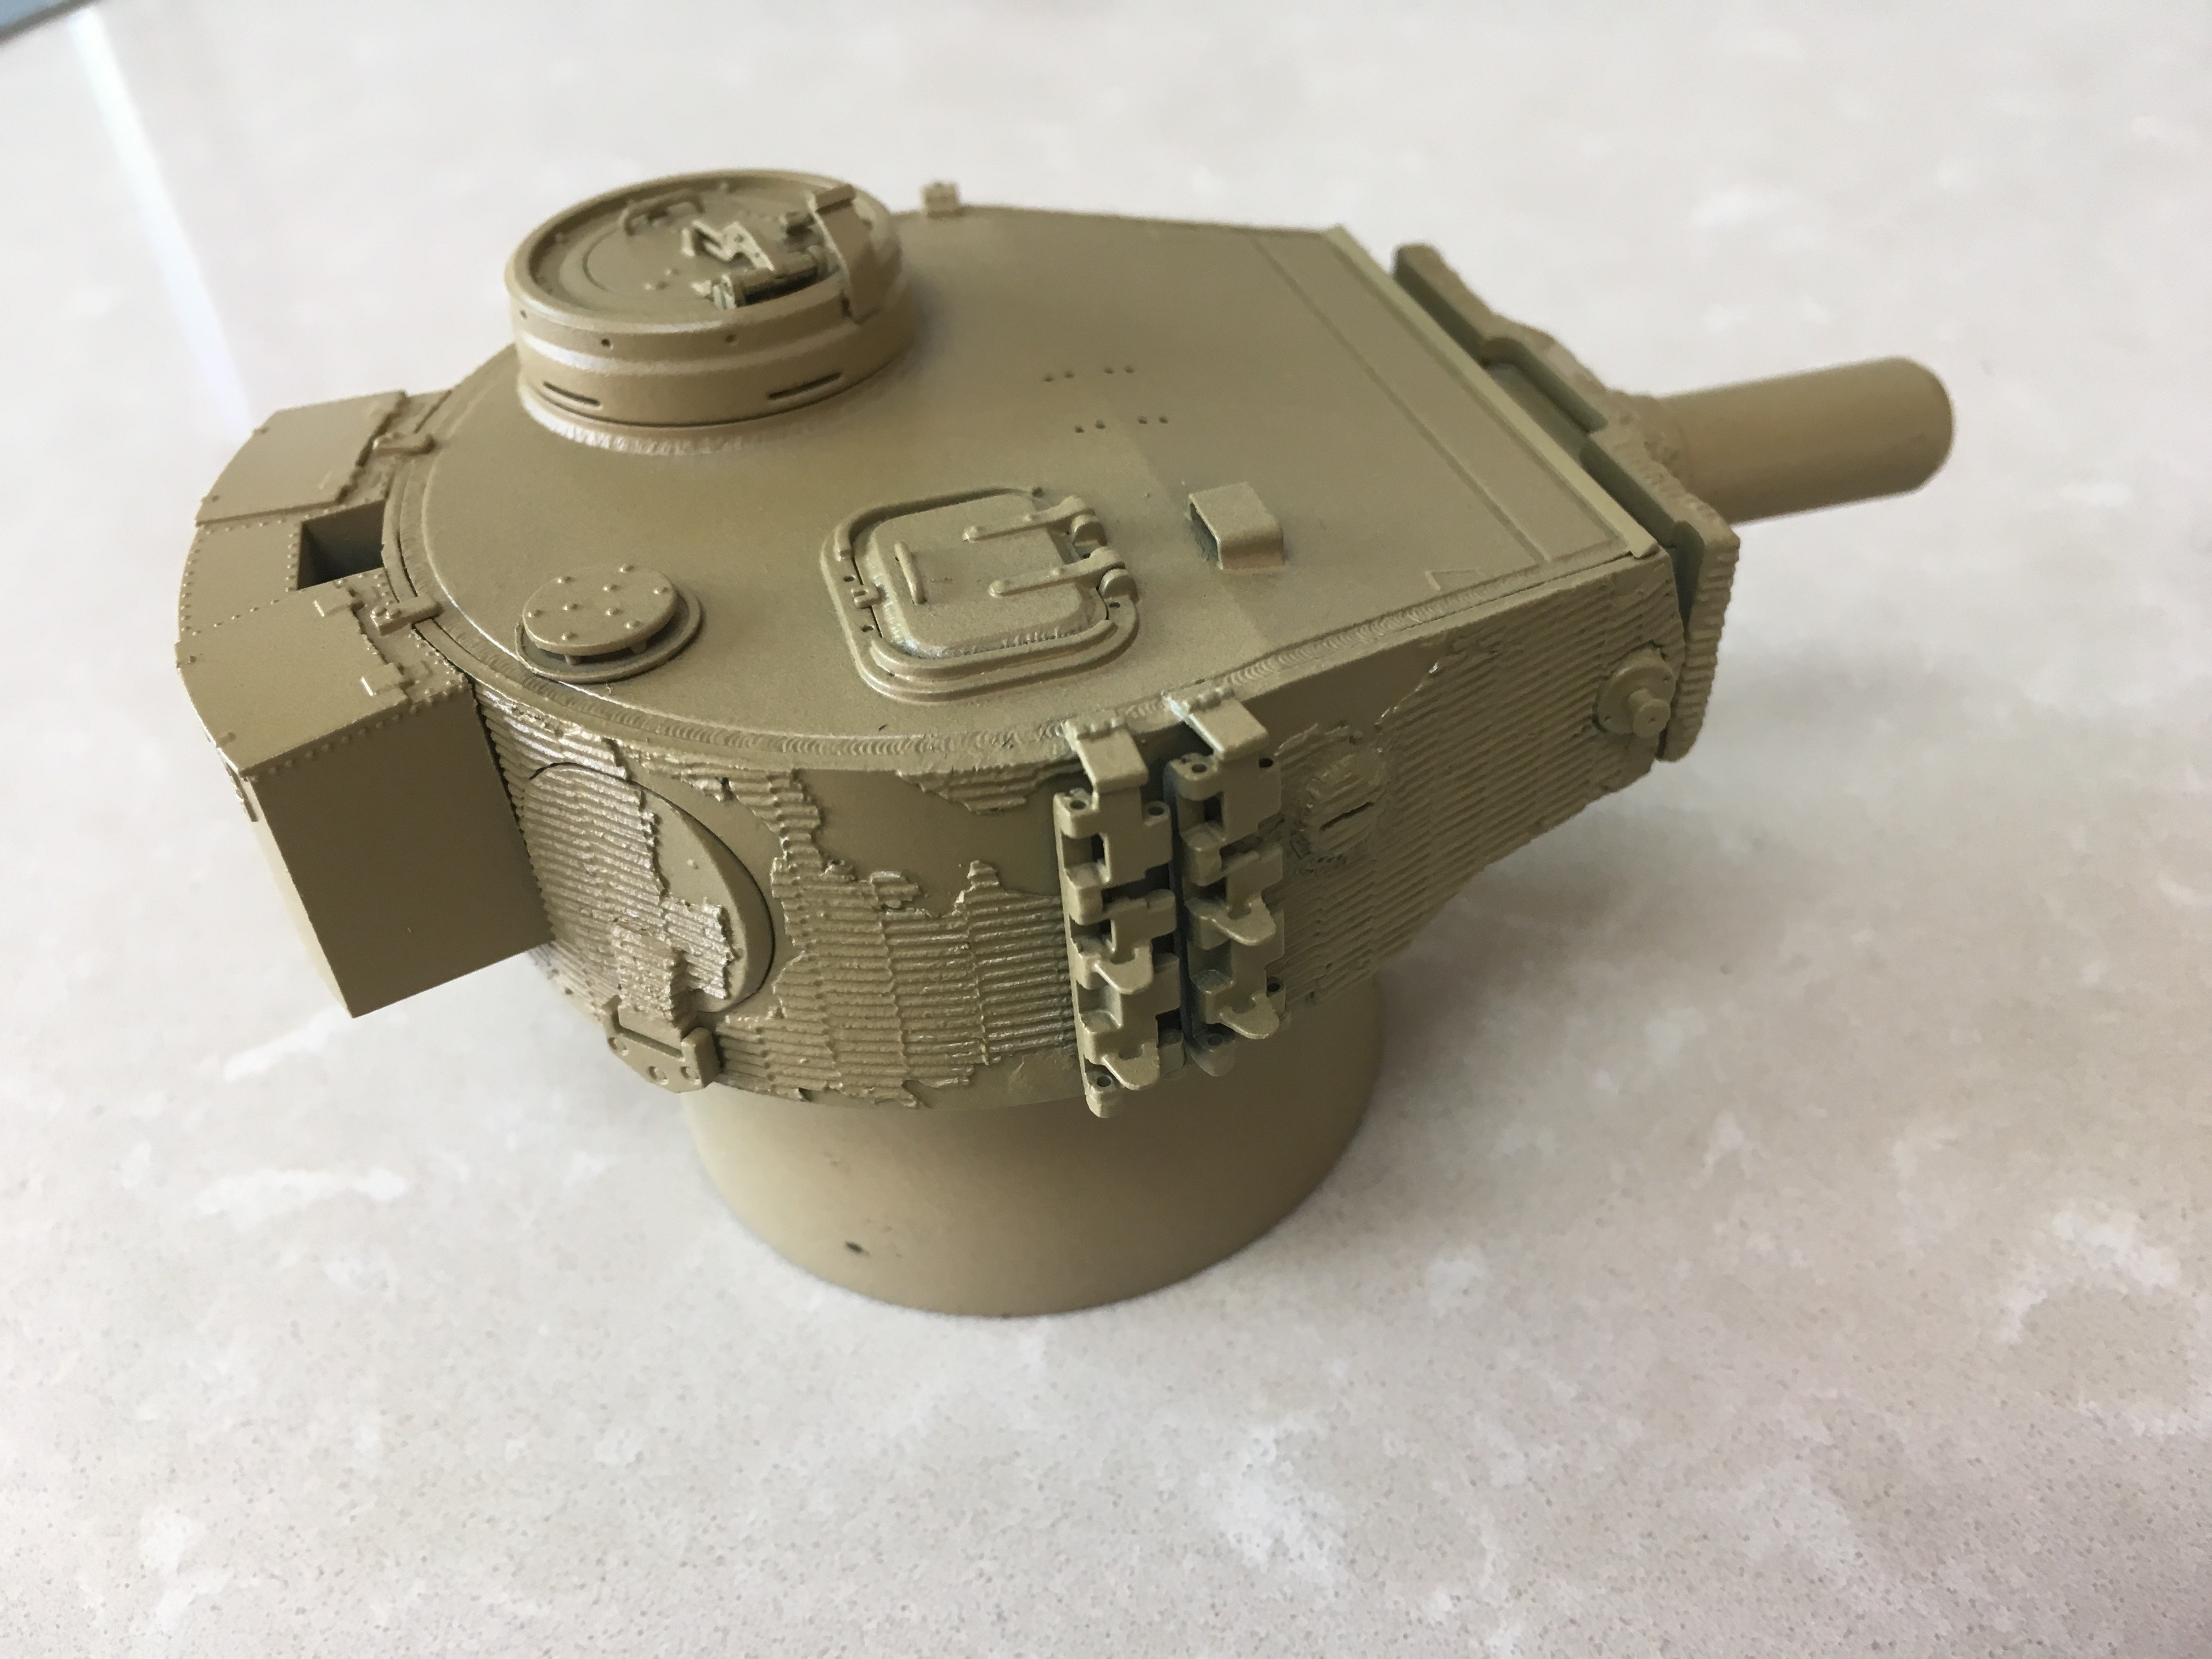
and a home brew Panzer Grey base coat. Washes and filters should darken it up a bit.


Colorado, United States
Joined: December 25, 2004
KitMaker: 3,770 posts
Armorama: 2,263 posts
Posted: Tuesday, May 21, 2019 - 03:45 AM UTC
I'll have a really late entry. I've spent the last few months totally renovating (sheetrock, mud, texture, window, paint, new LED ceiling lights, floor, etc.) my "shop."
I've ordered an Italian AA gun that may take as long as mid-June to arrive.
In the meantime, emptying the boxes I put everything in and, as I promised my son, first kit on the bench will be Legend's MRAP done up as my son's vehicle in Iraq.
Looking forward to starting and posting the AA gun once it arrives.

Mike
Queensland, Australia
Joined: August 06, 2005
KitMaker: 3,353 posts
Armorama: 3,121 posts
Posted: Tuesday, May 21, 2019 - 07:57 AM UTC
Some great work guys. Tom you are not kidding about the height - wow.
Robert and Chris. Nice to see some paint down on your builds.
On the Bench:
Dust, styrene scraps, paint splotches and tears.
France
Joined: February 20, 2012
KitMaker: 1,932 posts
Armorama: 1,907 posts
Posted: Wednesday, May 22, 2019 - 07:44 AM UTC
GulfWarrior
Campaigns Administrator Texas, United States
Joined: January 05, 2010
KitMaker: 1,051 posts
Armorama: 1,029 posts
Posted: Wednesday, May 22, 2019 - 08:14 AM UTC
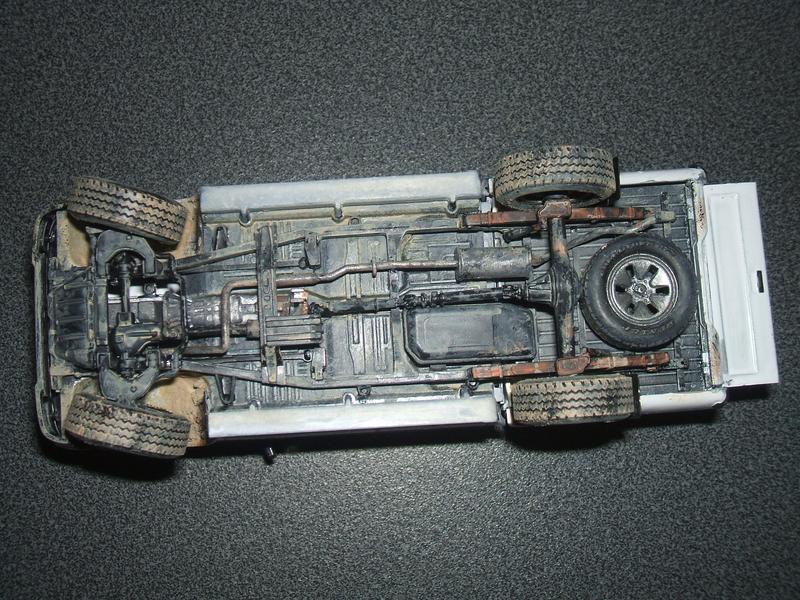
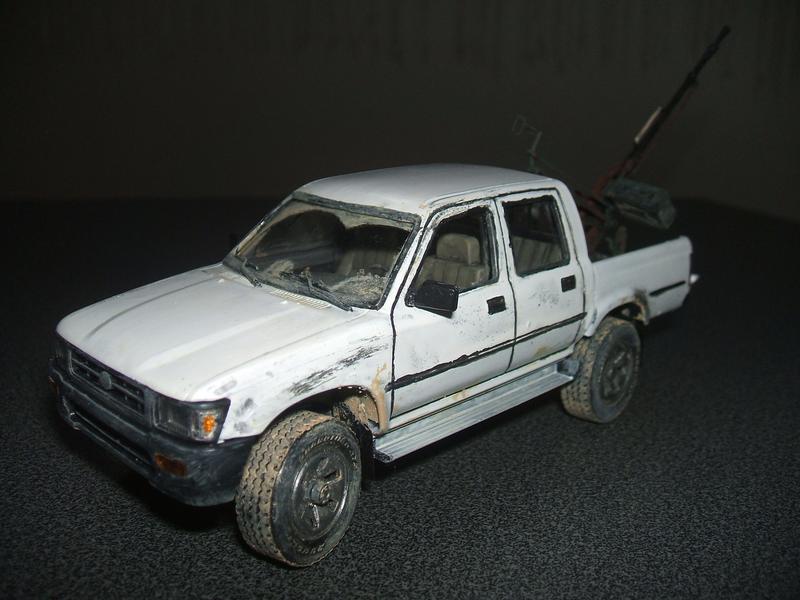
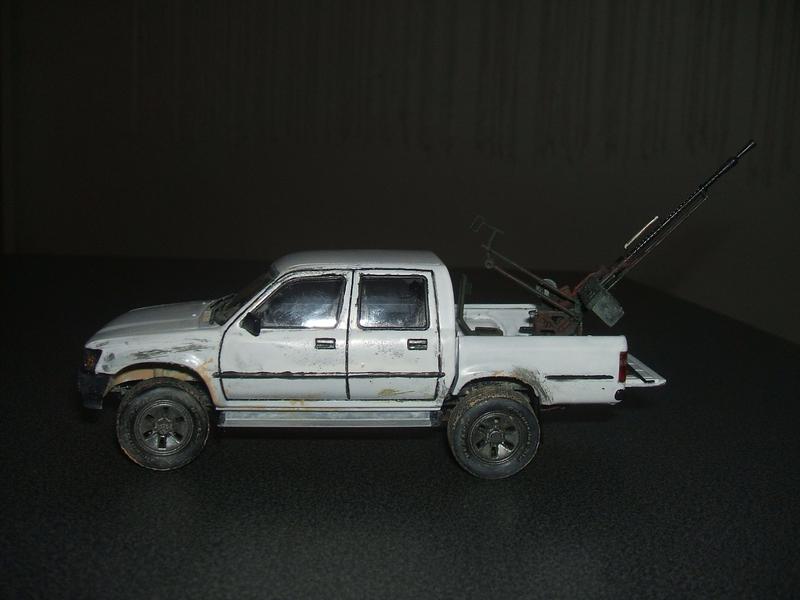
Looks good, Alex! I like the weathering of the underside!

Current campaigns:
I Like Big GUNS...And I Cannot Lie (2S1 Gvozdika)
Operation Snow White (Maultier w/ 37mm Flak Gun)
Stryker Campaign (AFV Club Stryker Dragoon)
1st Gulf War, 30th Anniversary (Dragon MLRS)
North Carolina, United States
Joined: September 16, 2004
KitMaker: 1,281 posts
Armorama: 1,222 posts
Posted: Thursday, May 23, 2019 - 01:09 AM UTC
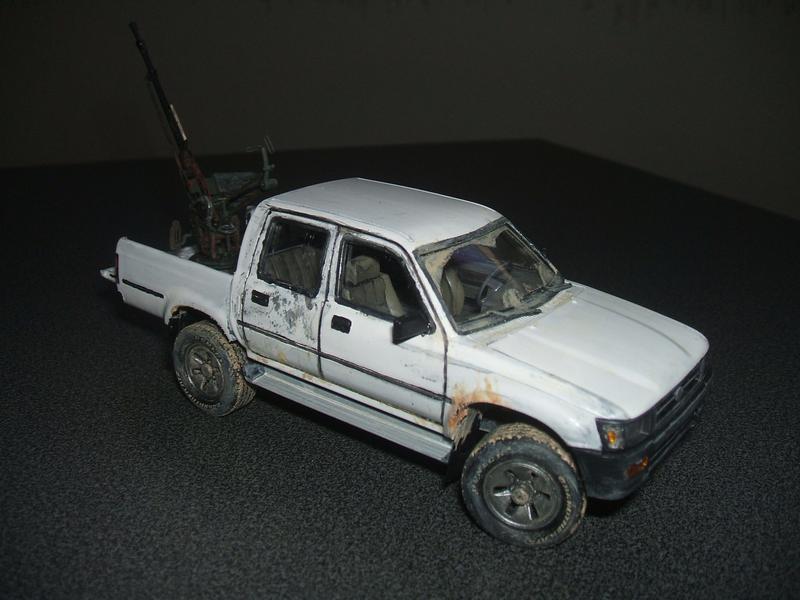
Truck looks great Alex. Very nice build.
North Carolina, United States
Joined: September 16, 2004
KitMaker: 1,281 posts
Armorama: 1,222 posts
Posted: Thursday, May 23, 2019 - 01:13 AM UTC
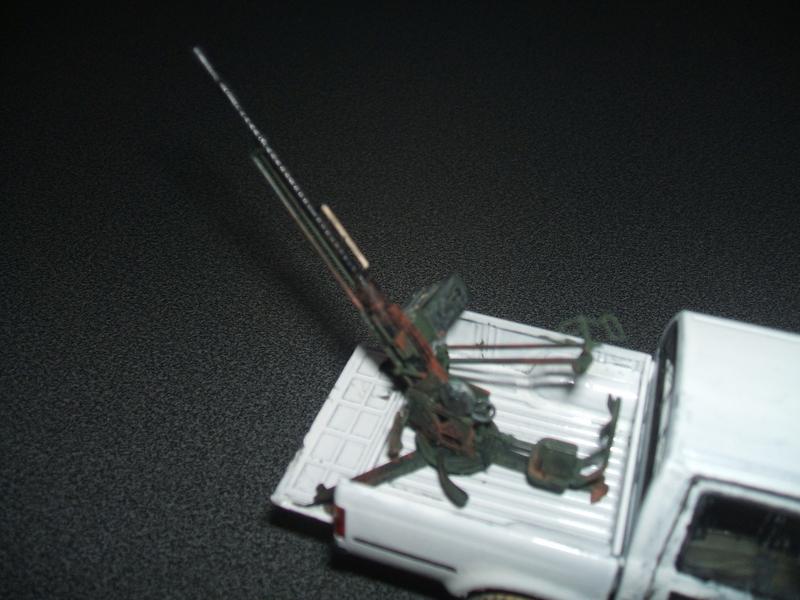
Basing this on a very grainy photograph. Lots of sandy colored spots. The darker spots will be overcoated with the light sand color. Really hope some filters, washes and dust will tone this thing down


France
Joined: February 20, 2012
KitMaker: 1,932 posts
Armorama: 1,907 posts
Posted: Thursday, May 23, 2019 - 04:23 AM UTC
Richard, Chris thank you. The underside was nice to made, I found pics on vehicles sales website (beforward), it was very usefull.
Chris nice progress, the camouflage will be cool with colored spots. Kits look very detailled as usuall with Dragon.
United States
Joined: December 26, 2008
KitMaker: 288 posts
Armorama: 92 posts
Posted: Saturday, May 25, 2019 - 01:49 AM UTC
Alex
I love the weathering you have done and the overall look of your model! Very well done!!
Have fun modeling
Mike
United States
Joined: December 26, 2008
KitMaker: 288 posts
Armorama: 92 posts
Posted: Saturday, May 25, 2019 - 02:04 AM UTC
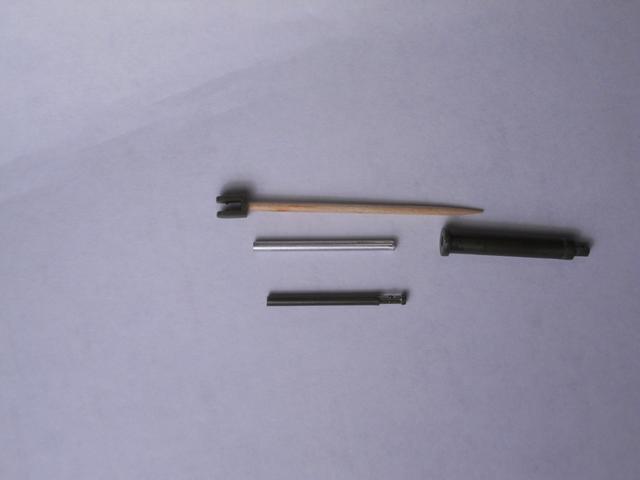
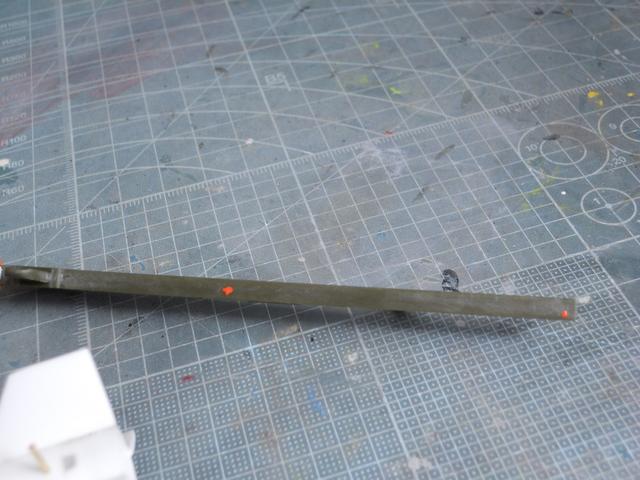
Been rather busy for work these past few weeks so not a lot of progress to show on the Talos. I did some work cleaning up a hydraulic ram that positions the launch arm. I tried to clean up the internal ram but it was not looking good. I cut off the ram part from the launch attachment. You can see the kit ram as the straight bottom piece in the photo. I then found an aluminum tube with the correct diameter and cut a piece that I could use as a replacement. My plan is to epoxy the connector piece to the aluminum tube after painting to give a more realistic ram unit. At least that should work in theory!
Have fun modeling
Mike
France
Joined: February 20, 2012
KitMaker: 1,932 posts
Armorama: 1,907 posts
Posted: Sunday, May 26, 2019 - 08:03 AM UTC
Thank you Mike, it was my first kit in white color.

United States
Joined: December 26, 2008
KitMaker: 288 posts
Armorama: 92 posts
Posted: Monday, May 27, 2019 - 01:41 AM UTC
Quoted Text
Thank you Mike, it was my first kit in white color.
Wow Alex, that is great for your first time with a white paint job. That is always a very challenging color to successfully paint.
Have fun modeling!
Mike
Removed by original poster on 05/27/19 - 13:49:07 (GMT).
United States
Joined: December 26, 2008
KitMaker: 288 posts
Armorama: 92 posts
Posted: Monday, May 27, 2019 - 02:00 AM UTC
One of the small problems I needed to solve with my Talos build was how to attach the missile to the launch stand. The kit has you glue 2 large "U" shaped forms that allow you to slide the missile onto the launch arm. I have never seen any photos of the guide pieces on any Talos plus it does not make sense from an aerodynamic perspective. Here's how I solved this:
I first drilled holes in the two Talos stages and inserted small pieces of brass wire.
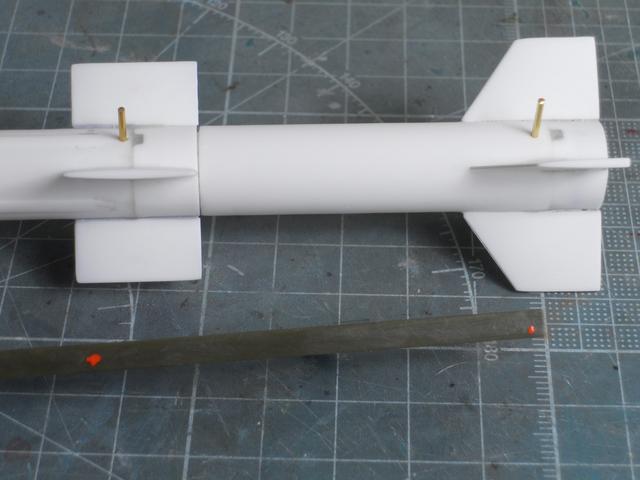
I then placed small drops of orange paint on the top ends of the brass wires. Carefully, I then touched the bottom of the launch rail to those brass wires in the location where I wanted the missile to be positioned. This gave me two orange dots on the guide rail where the corresponding holes should be drilled. I was not so concerned to get the dots dead centered on the launch rail as I could do that when I drilled the holes.
I then drilled the holes (very carefully!) and this is how it will now look mounted. The brass wires are a bit long and I'll trim them s there is no gap between the missile and launch rail later in the build.
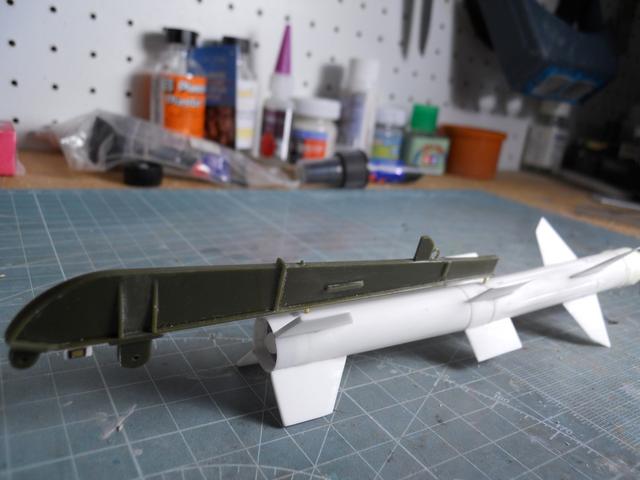
Have fun modeling!
Mike
France
Joined: February 20, 2012
KitMaker: 1,932 posts
Armorama: 1,907 posts
Posted: Monday, May 27, 2019 - 07:13 AM UTC
Your kit looks more difficult to built that it sounds.
Great updates.
Queensland, Australia
Joined: August 06, 2005
KitMaker: 3,353 posts
Armorama: 3,121 posts
Posted: Monday, May 27, 2019 - 08:00 AM UTC
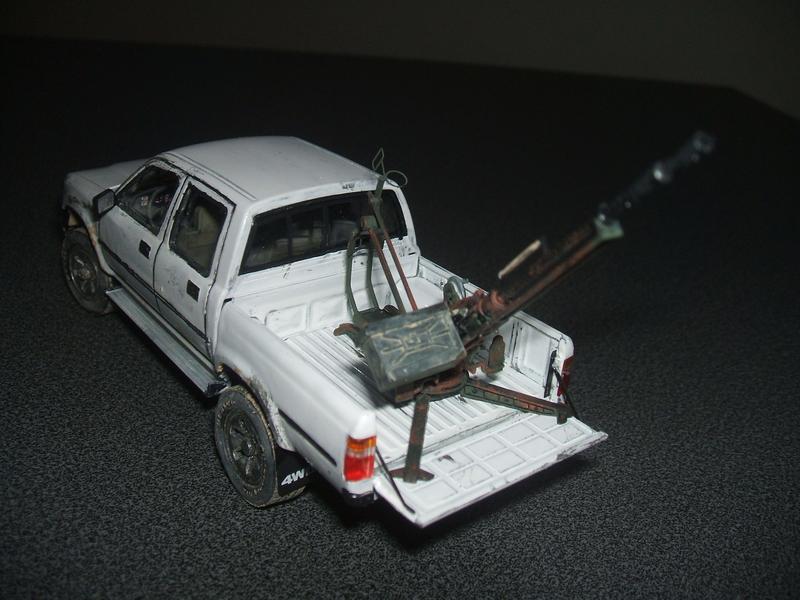
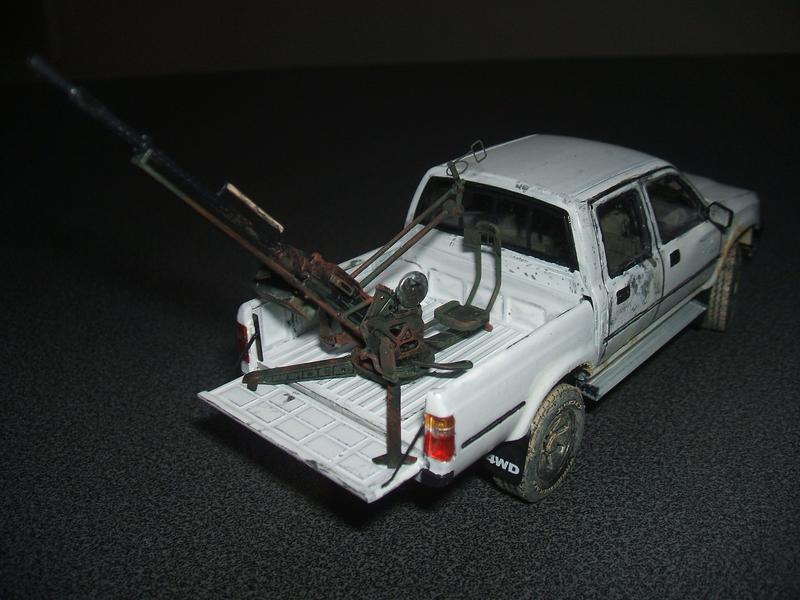
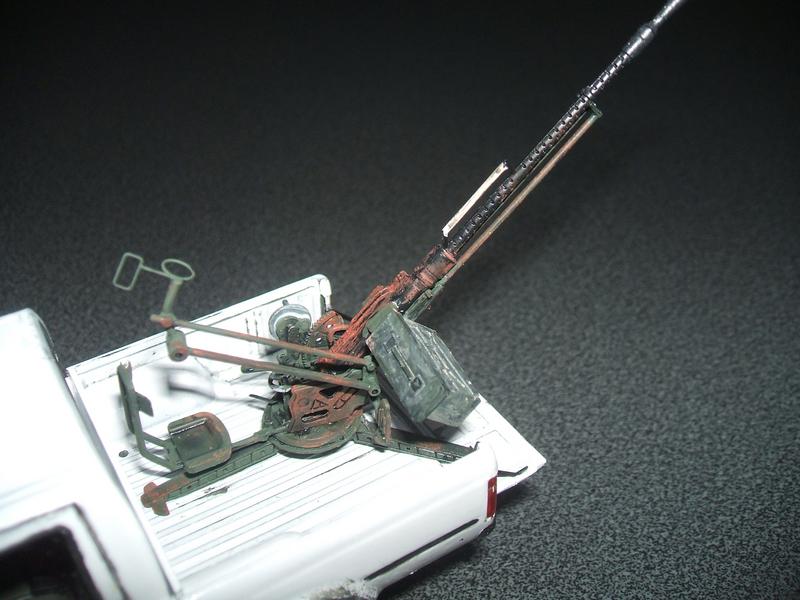
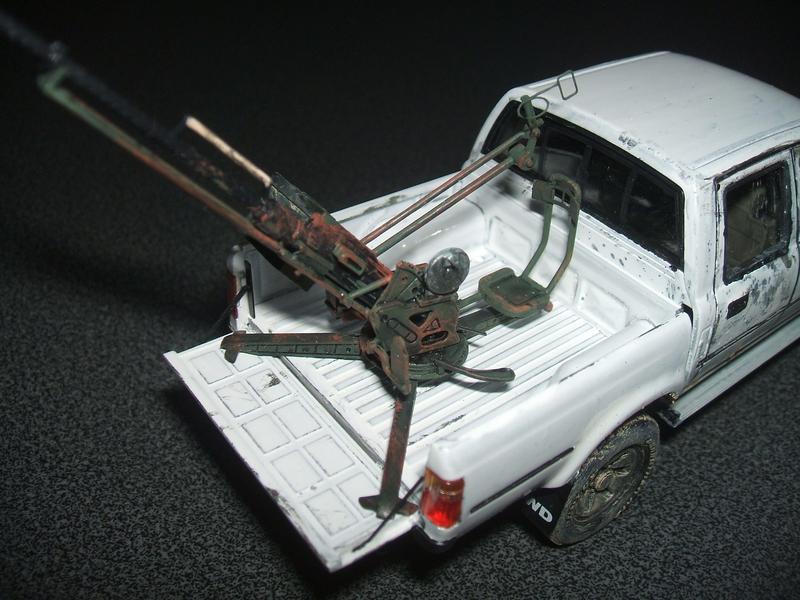
You have done a great job there Alex. The underneath is weathered very nicely. Have you considered adding some sand/dust into the cargo area? I kind of picture these pretty gritty inside too.
I am sure it will tone down Chris. A very thin, light overspray of buff should help tone it down. Then if you apply a wash (filter) it will also help blend the demarcation a bit.
Perhaps the intention was a little toy like, so you could slide the missile off the rail Mike? Simple but effective solution. I used to do this with the armament of my aircraft kits - trying to glue a round tube to a flat plate and have it centred without glue showing was my issue back then... way back when.... a long time ago, in a galaxy far, far away.....
On the Bench:
Dust, styrene scraps, paint splotches and tears.
France
Joined: February 20, 2012
KitMaker: 1,932 posts
Armorama: 1,907 posts
Posted: Tuesday, May 28, 2019 - 05:31 AM UTC
Mike thank you for your encouragments.
Peter, I agree, I think the cargo bed need to be a little more dirty.
barkingdigger
Associate Editor #013
England - East Anglia, United Kingdom
Joined: June 20, 2008
KitMaker: 3,981 posts
Armorama: 3,403 posts
Posted: Tuesday, May 28, 2019 - 06:46 AM UTC
Alex, that Technical is pretty awesome, but I'd add a fair amount of dirt & sand in that cargo bed - real pickups get grubby even if they aren't made into gun-trucks!
Chris, that's a very dramatic paint scheme! Can't wait to see it when you've added several layers of weathering.
Mike, I love what you're doing with that missile kit!
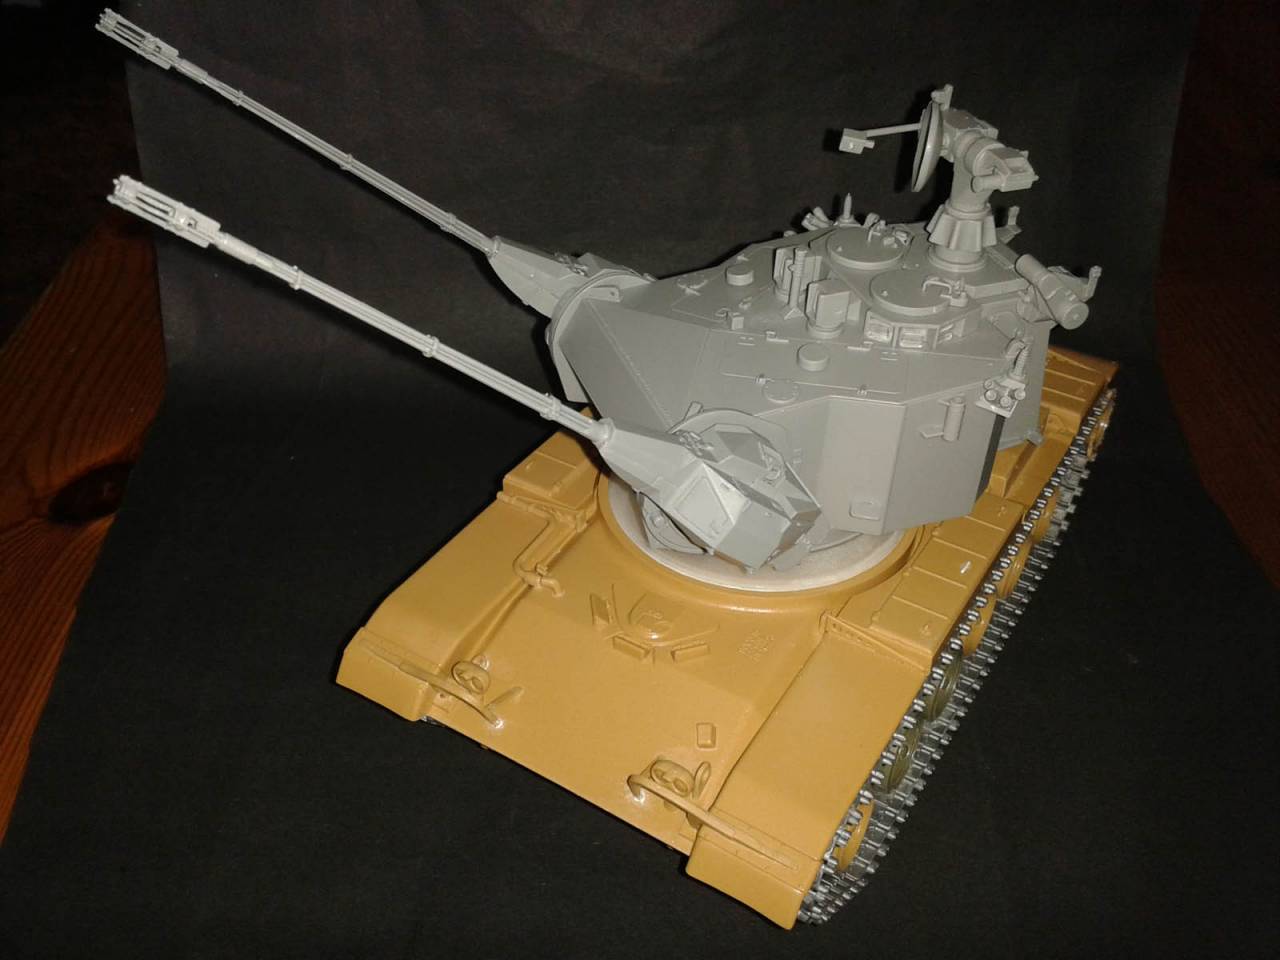
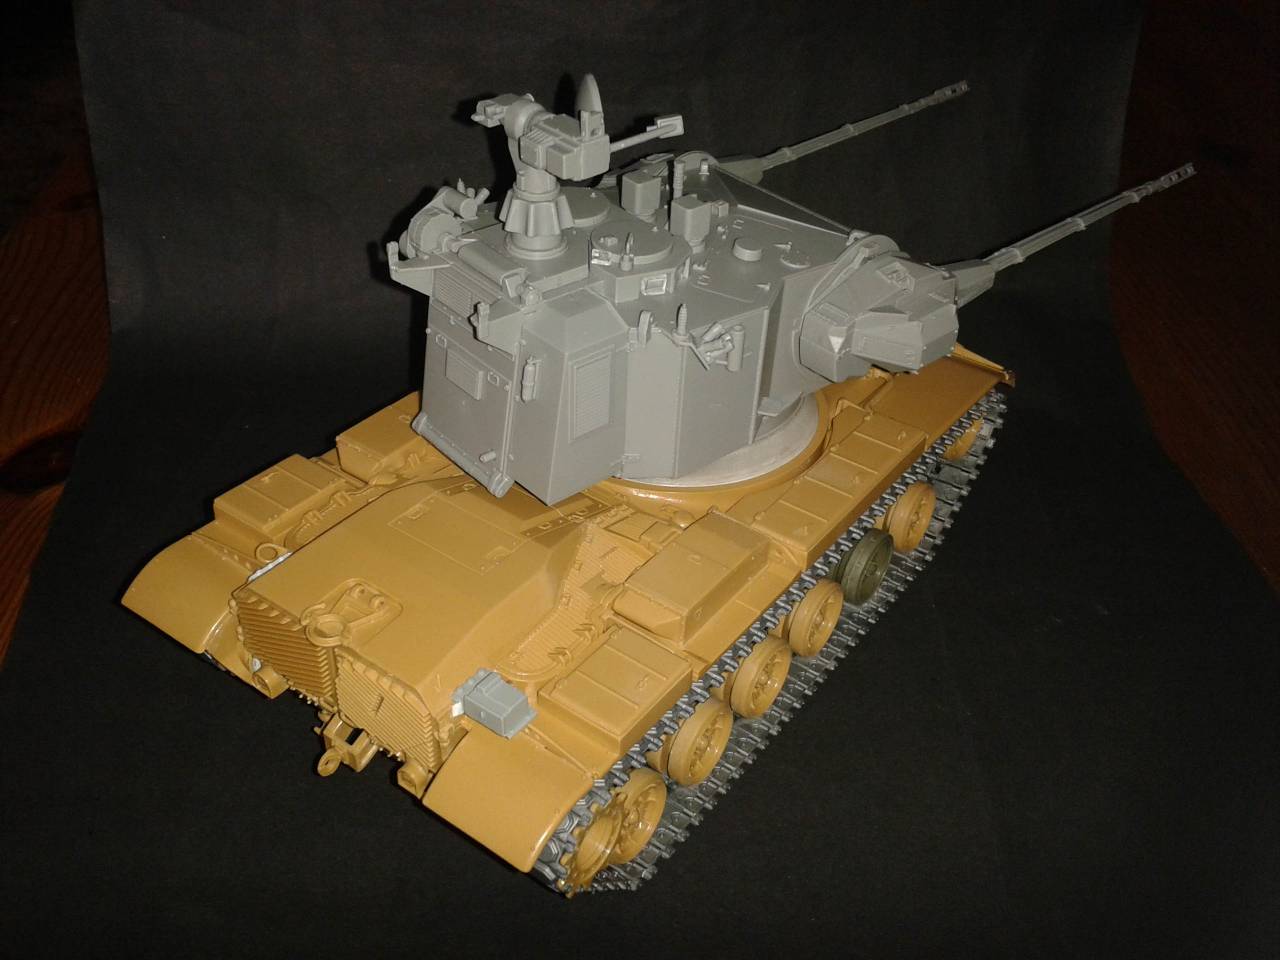
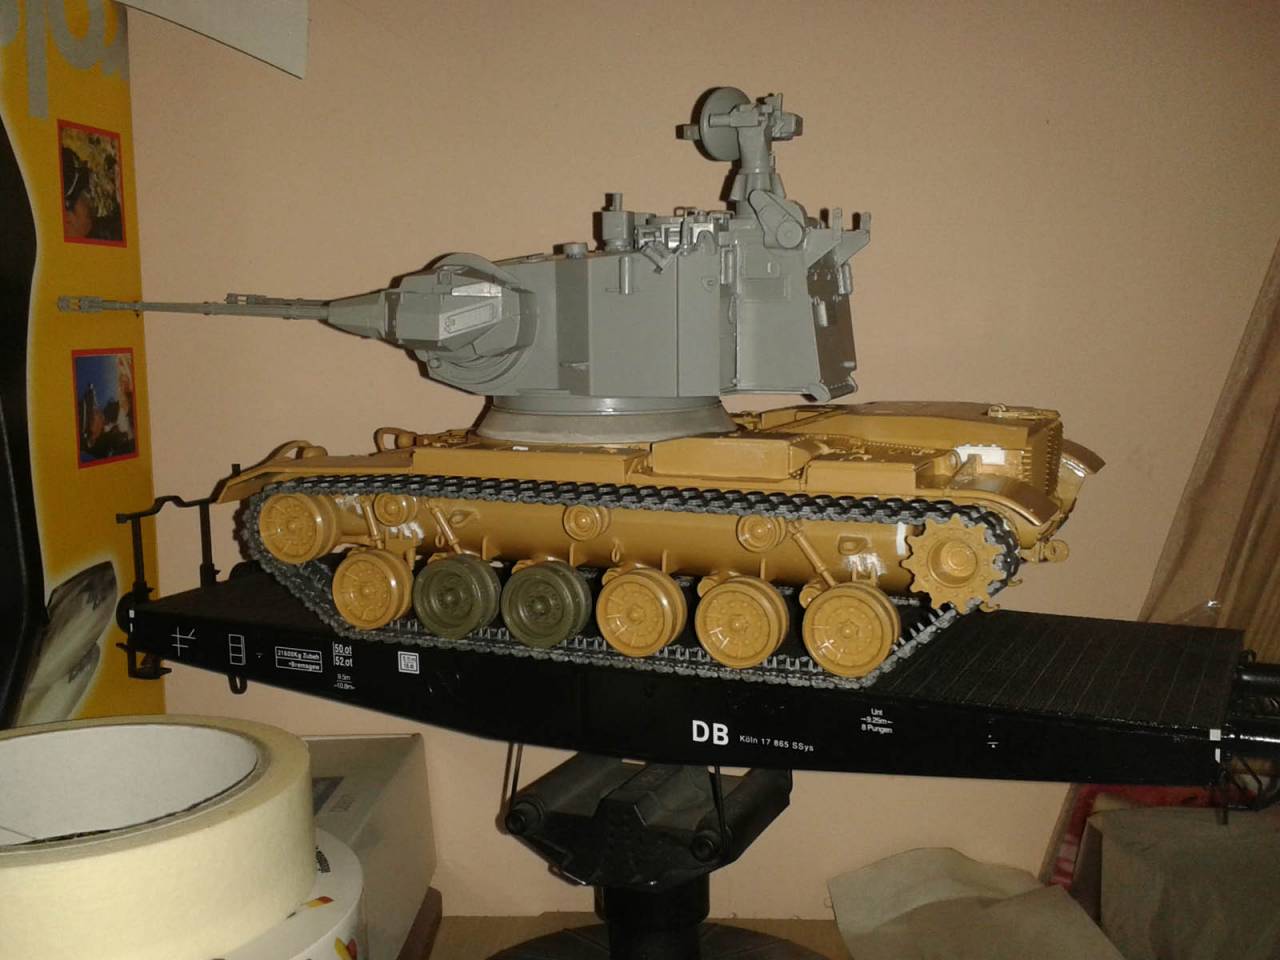
As for me, my build rolled into the spray booth at the weekend. The hull is a tad darker and yellower than I wanted, but it's growing on me! The real one is a slightly darker colour to the turret, and was obviously a tank pulled from the depot and washed (but not repainted) for its new temporary role. The steel roadwheels are meant to be green, with only a cursory thin overspray of yellow, so when it's all weathered they will really stand out. And I got my first use of the old Future/Klear courtesy of a friend who filled a handful of old Tamiya jars from the big bottle in his stash - thanks John! Based on how much I used they'll see me for at least four or five years, based on my build rate...
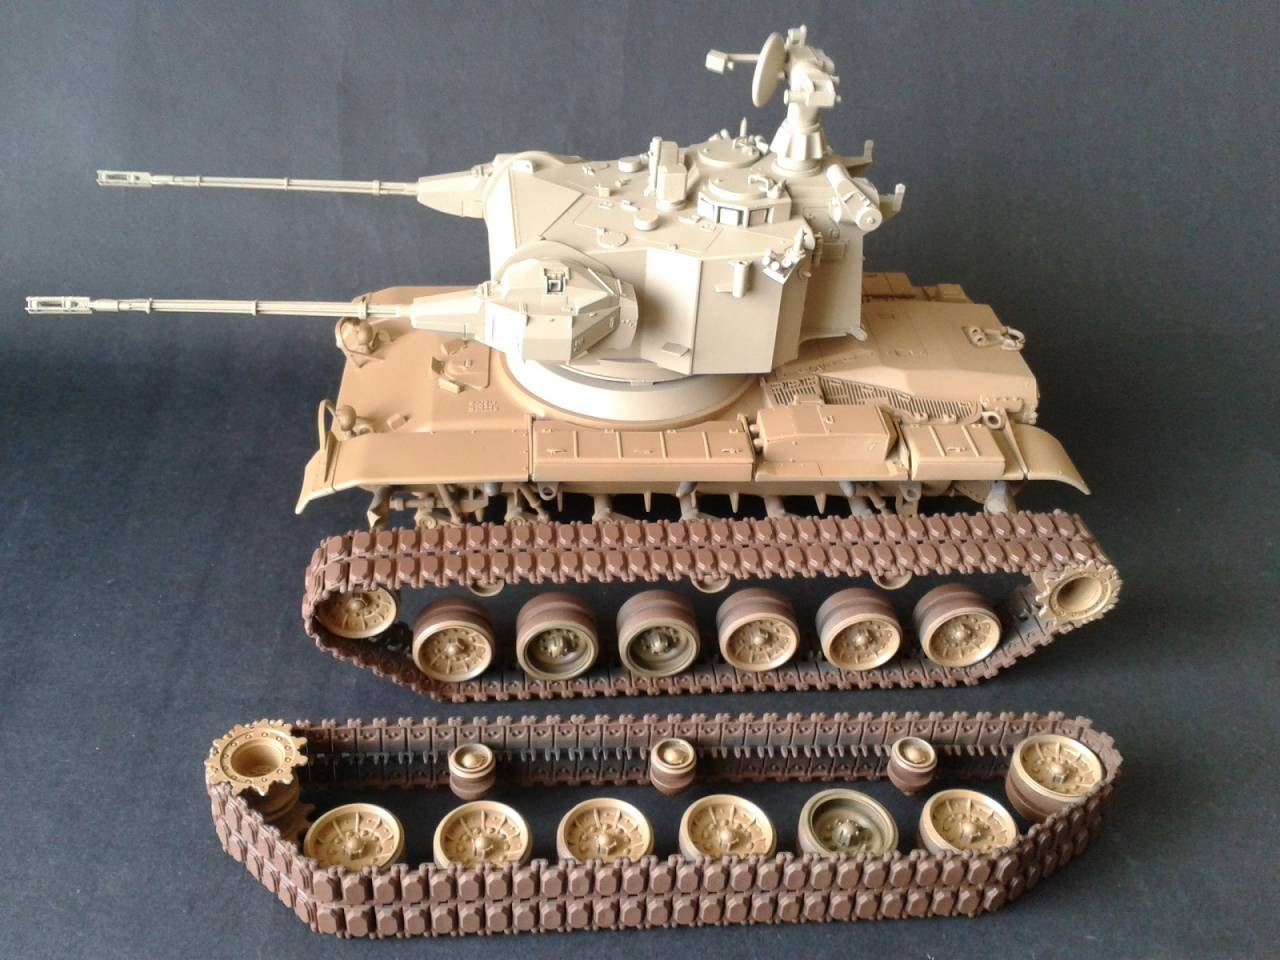
"Glue, or Glue Not - there is no Dry-Fit" - Yoda (original script from Return of the Jedi...)
United States
Joined: December 26, 2008
KitMaker: 288 posts
Armorama: 92 posts
Posted: Wednesday, May 29, 2019 - 01:09 AM UTC
Hi Peter
I think you are spot on with your idea that the brackets on the missile were to allow the missile to be taken on and off after the kit was built. No need to do that with my build!
Have fun modeling
Mike
Quoted Text
Perhaps the intention was a little toy like, so you could slide the missile off the rail Mike? Simple but effective solution. I used to do this with the armament of my aircraft kits - trying to glue a round tube to a flat plate and have it centred without glue showing was my issue back then... way back when.... a long time ago, in a galaxy far, far away.....
C[ ]
Queensland, Australia
Joined: August 06, 2005
KitMaker: 3,353 posts
Armorama: 3,121 posts
Posted: Wednesday, May 29, 2019 - 08:10 AM UTC
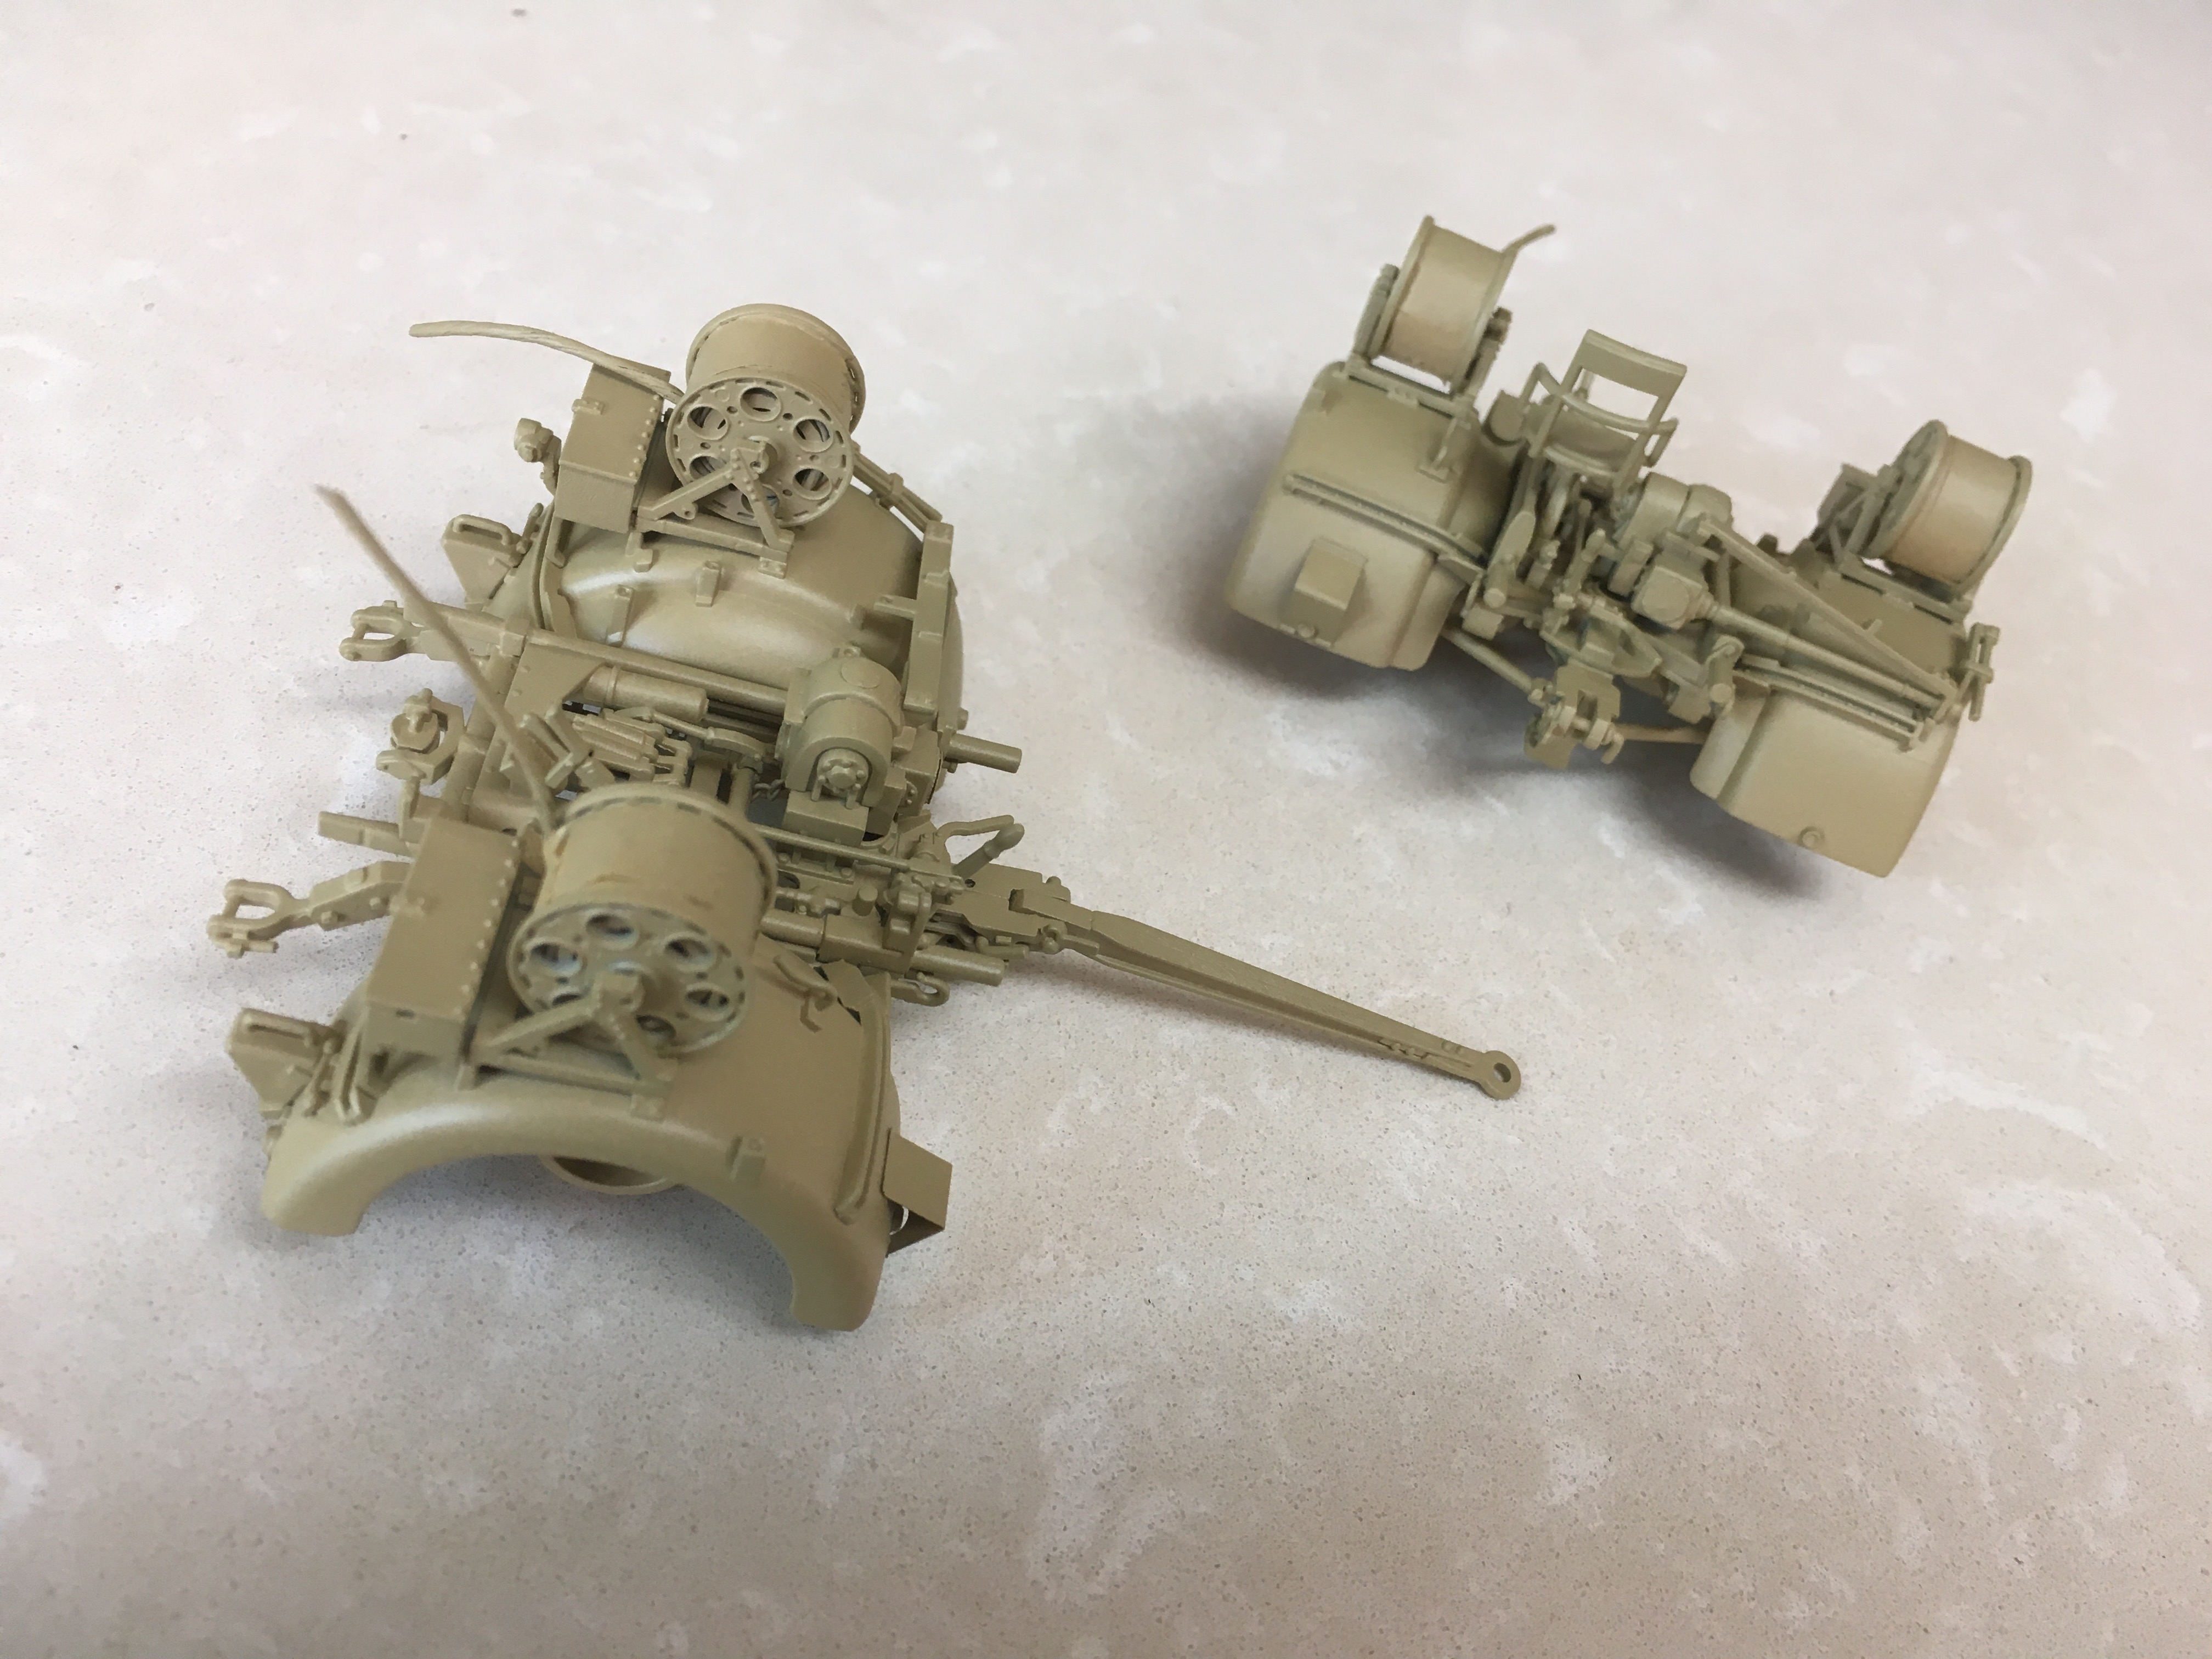
Love the way that you are keeping components different shades Tom. Will look great when finished.
On the Bench:
Dust, styrene scraps, paint splotches and tears.


