


Campaigns: Active Campaigns
Campaigns that are either in planning or underway should be grouped here.
Campaigns that are either in planning or underway should be grouped here.
Hosted by Richard S.
Trumpeter Mk VI Campaign - Active

Panzer_Modeler

Joined: May 19, 2020
KitMaker: 419 posts
Armorama: 217 posts
Posted: Friday, July 03, 2020 - 07:25 AM UTC
Thanks! Its actually easier then I expected!
petbat

Joined: August 06, 2005
KitMaker: 3,353 posts
Armorama: 3,121 posts
Posted: Friday, July 03, 2020 - 07:42 AM UTC
Love the camo work you are doing Ezra.
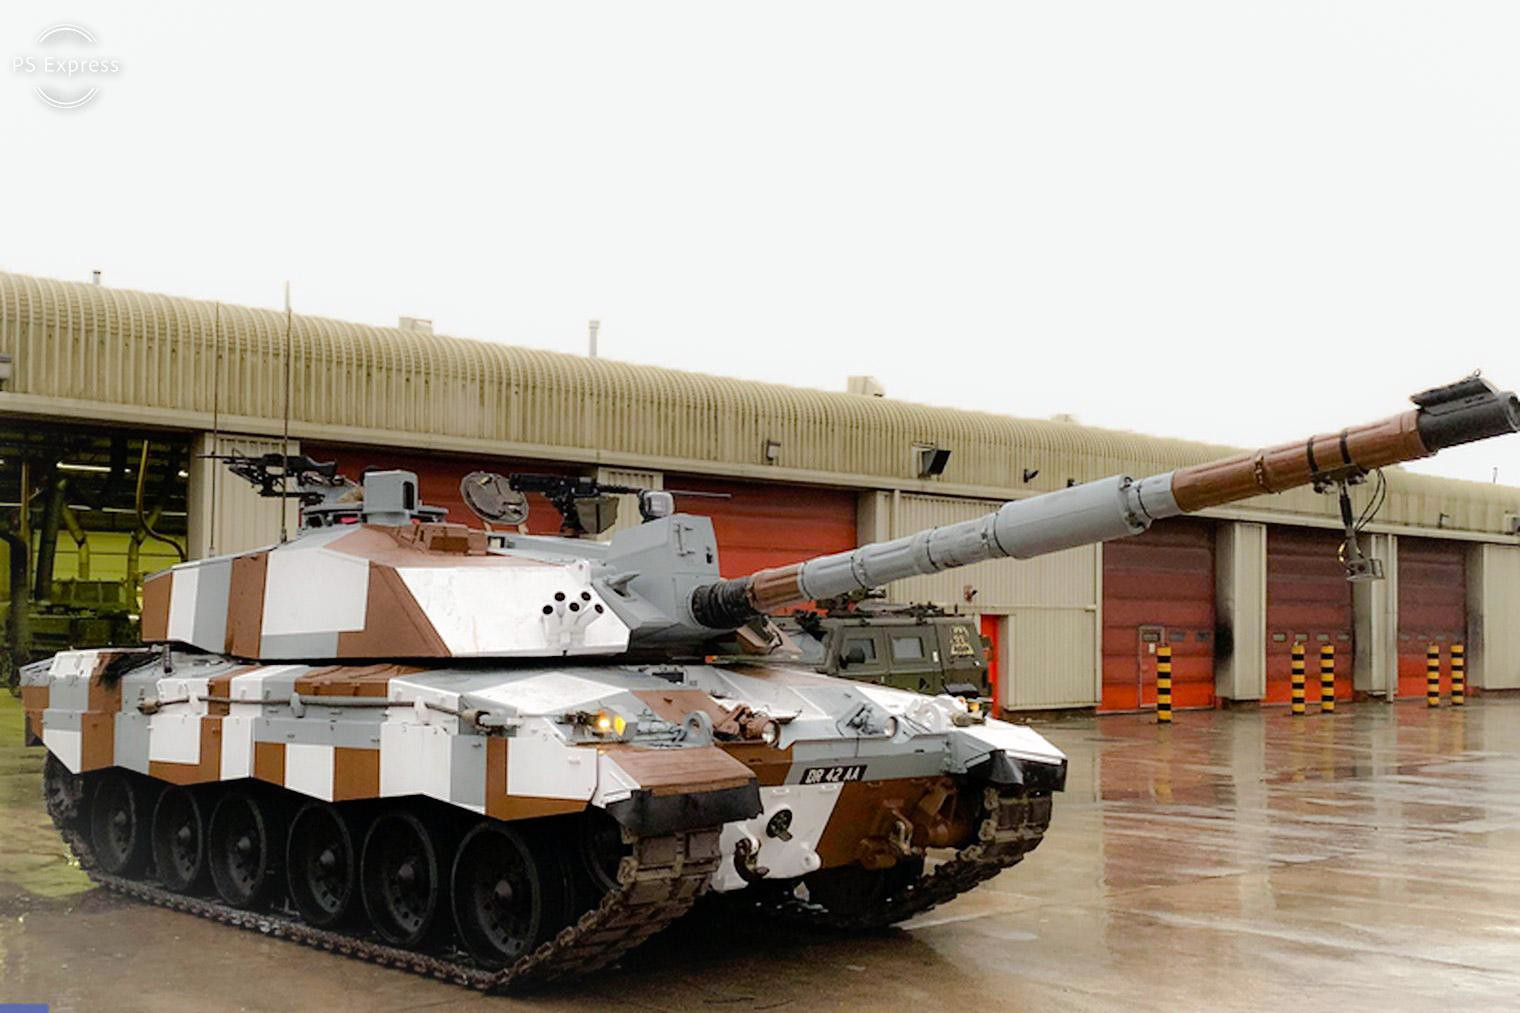
Here is a pic of the turret top. Best I could find sorry.
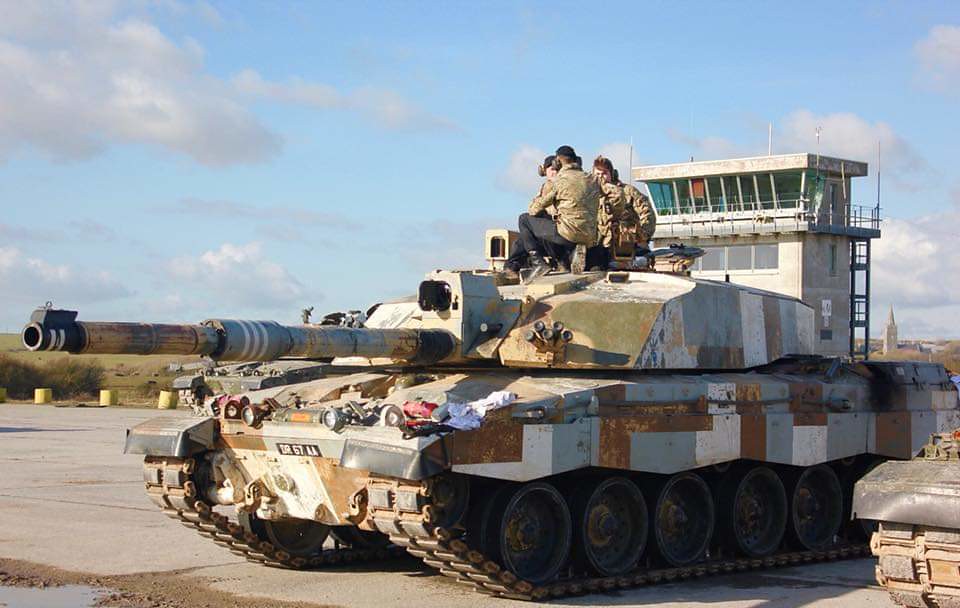
For the 'Heavy Weathering, very chipped" guys out there, some pics previously found by Andreas Kirchhoff and posted in Armorama in 2018 :
https://www.facebook.com/RoyalTankRegt/photos/pcb.801558566710344/801771210022413/?type=3&theater
https://www.facebook.com/RoyalTankRegt/photos/pcb.800666603466207/800666136799587/?type=3&theater
Here is a pic of the turret top. Best I could find sorry.
For the 'Heavy Weathering, very chipped" guys out there, some pics previously found by Andreas Kirchhoff and posted in Armorama in 2018 :
https://www.facebook.com/RoyalTankRegt/photos/pcb.801558566710344/801771210022413/?type=3&theater
https://www.facebook.com/RoyalTankRegt/photos/pcb.800666603466207/800666136799587/?type=3&theater

Panzer_Modeler
Joined: May 19, 2020
KitMaker: 419 posts
Armorama: 217 posts
Posted: Friday, July 03, 2020 - 08:23 AM UTC
Hehhehe! Heavy weathering!!!! Big choice guys: should it be clean or fairly dirty? 
( thanks peter for the pics, they were great!)
( thanks peter for the pics, they were great!)
Panzer_Modeler
Joined: May 19, 2020
KitMaker: 419 posts
Armorama: 217 posts
Posted: Friday, July 03, 2020 - 11:55 AM UTC
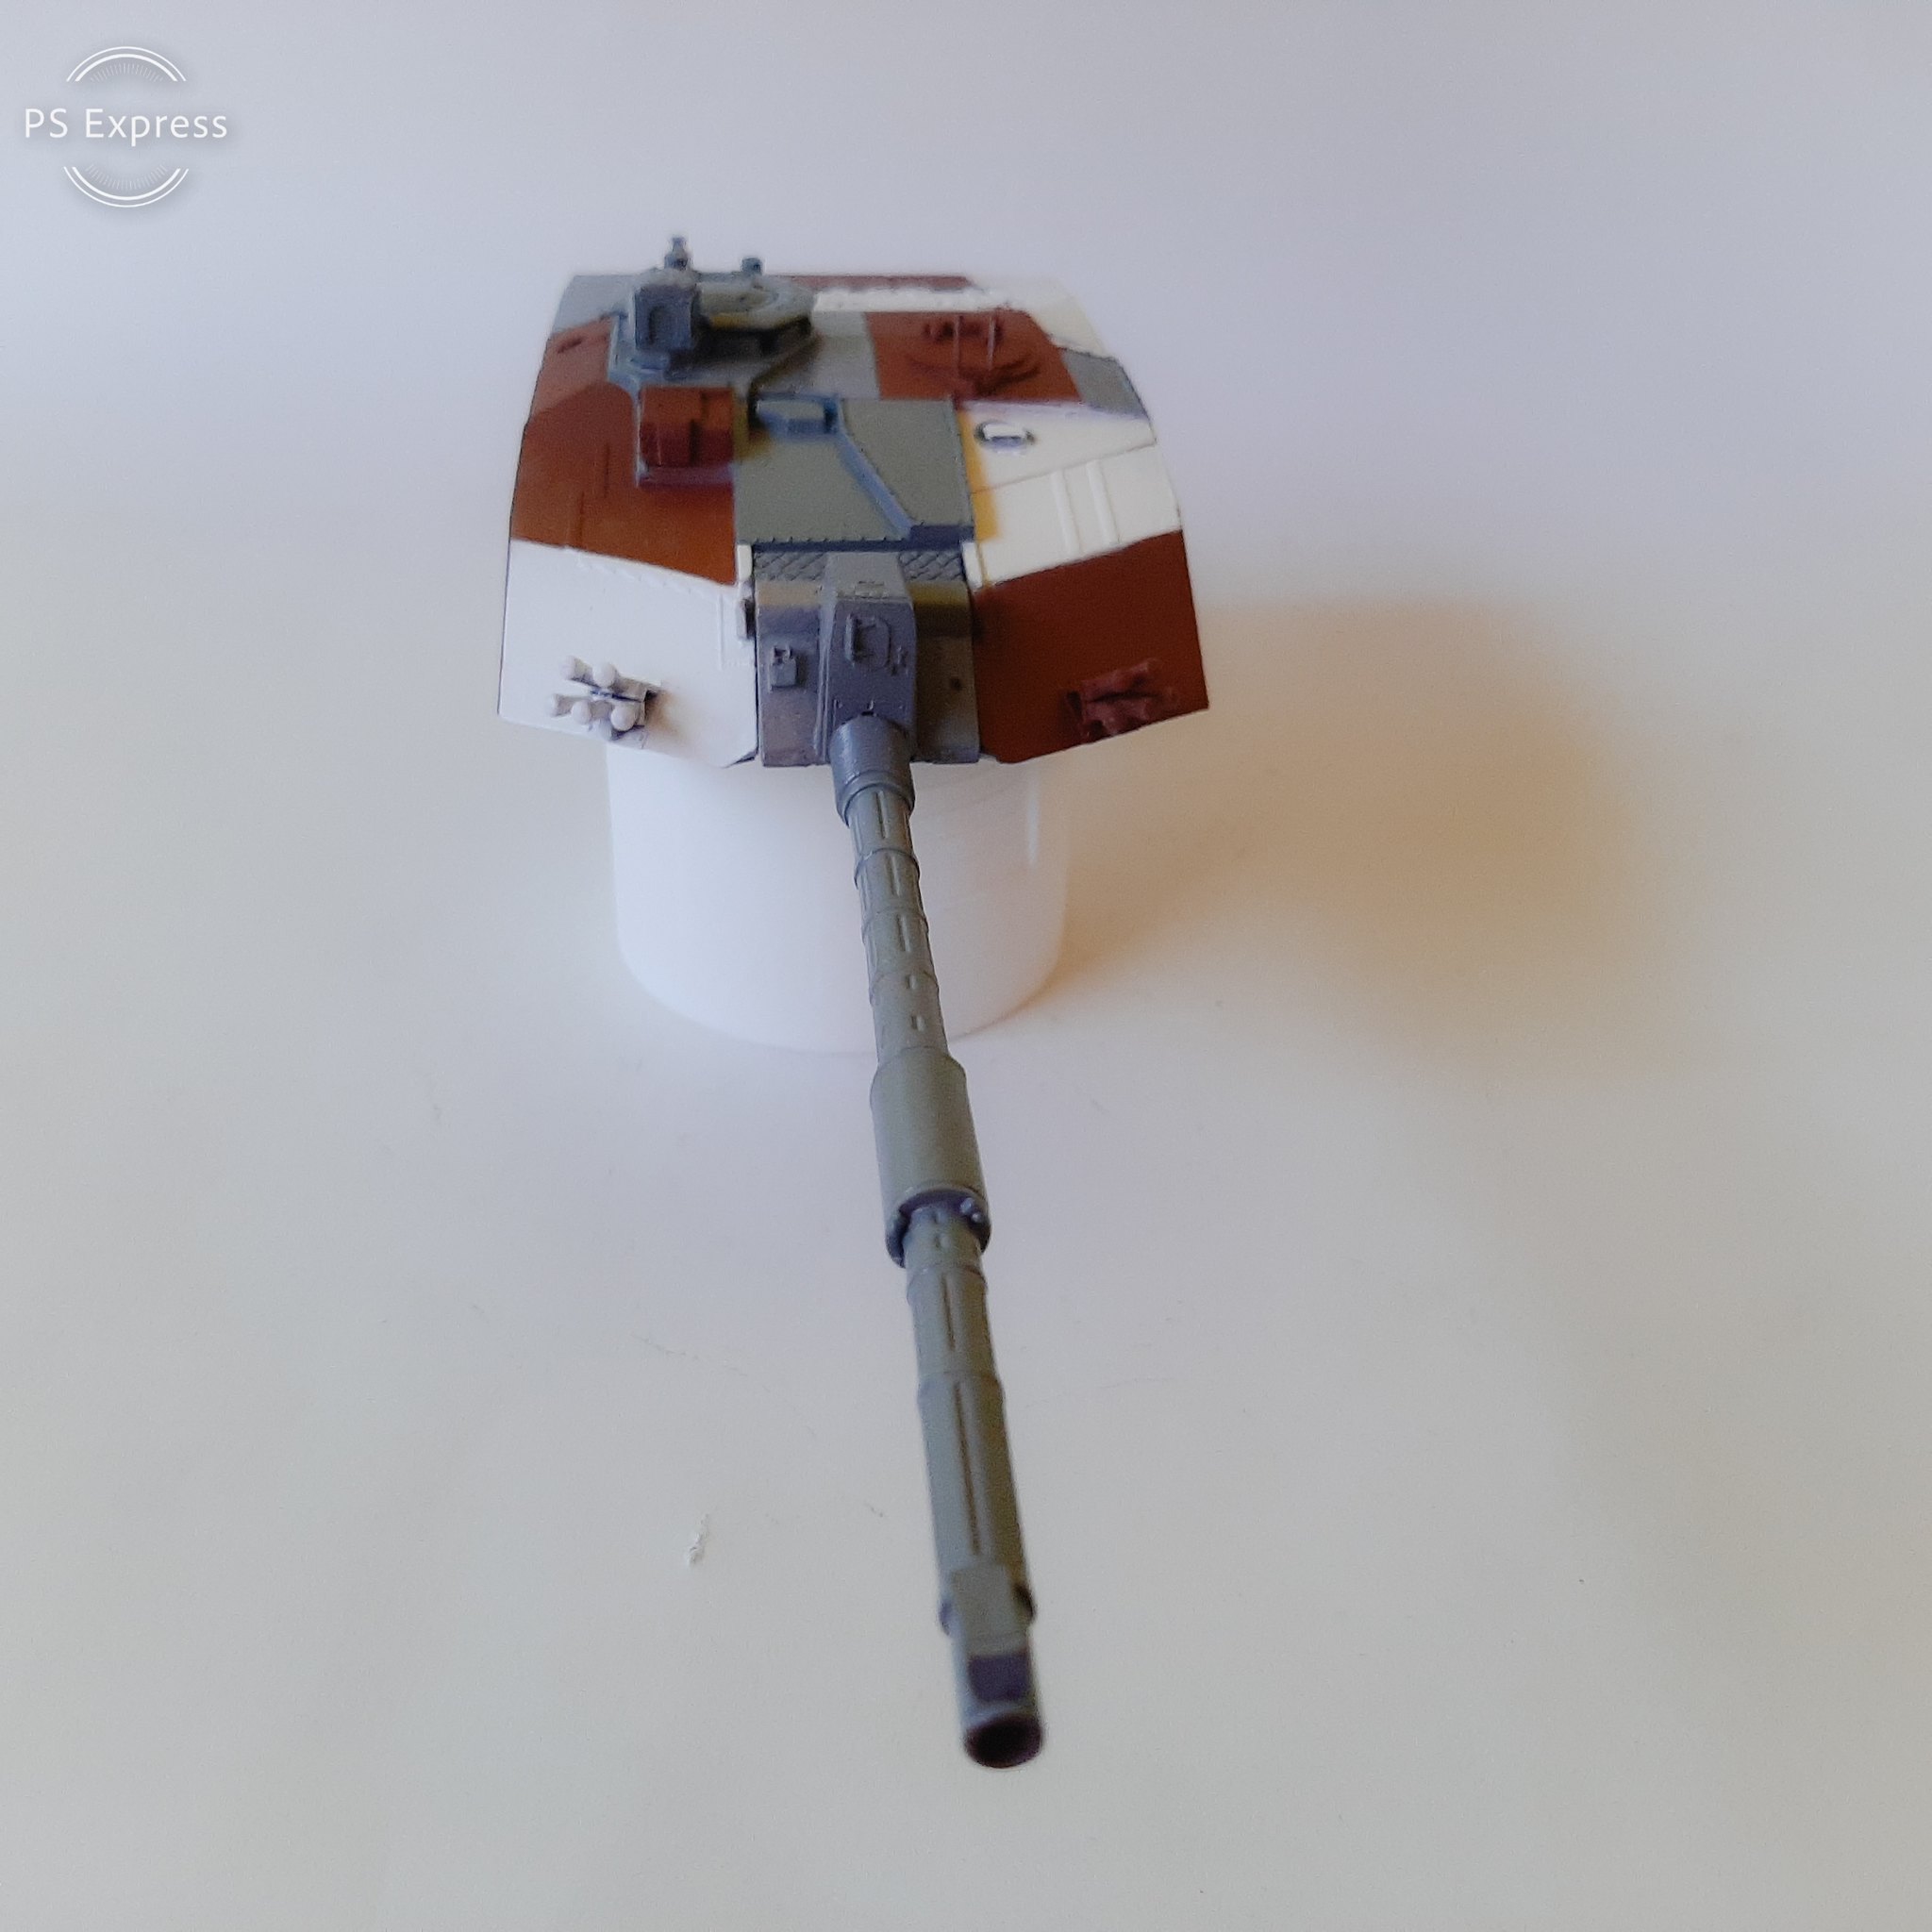
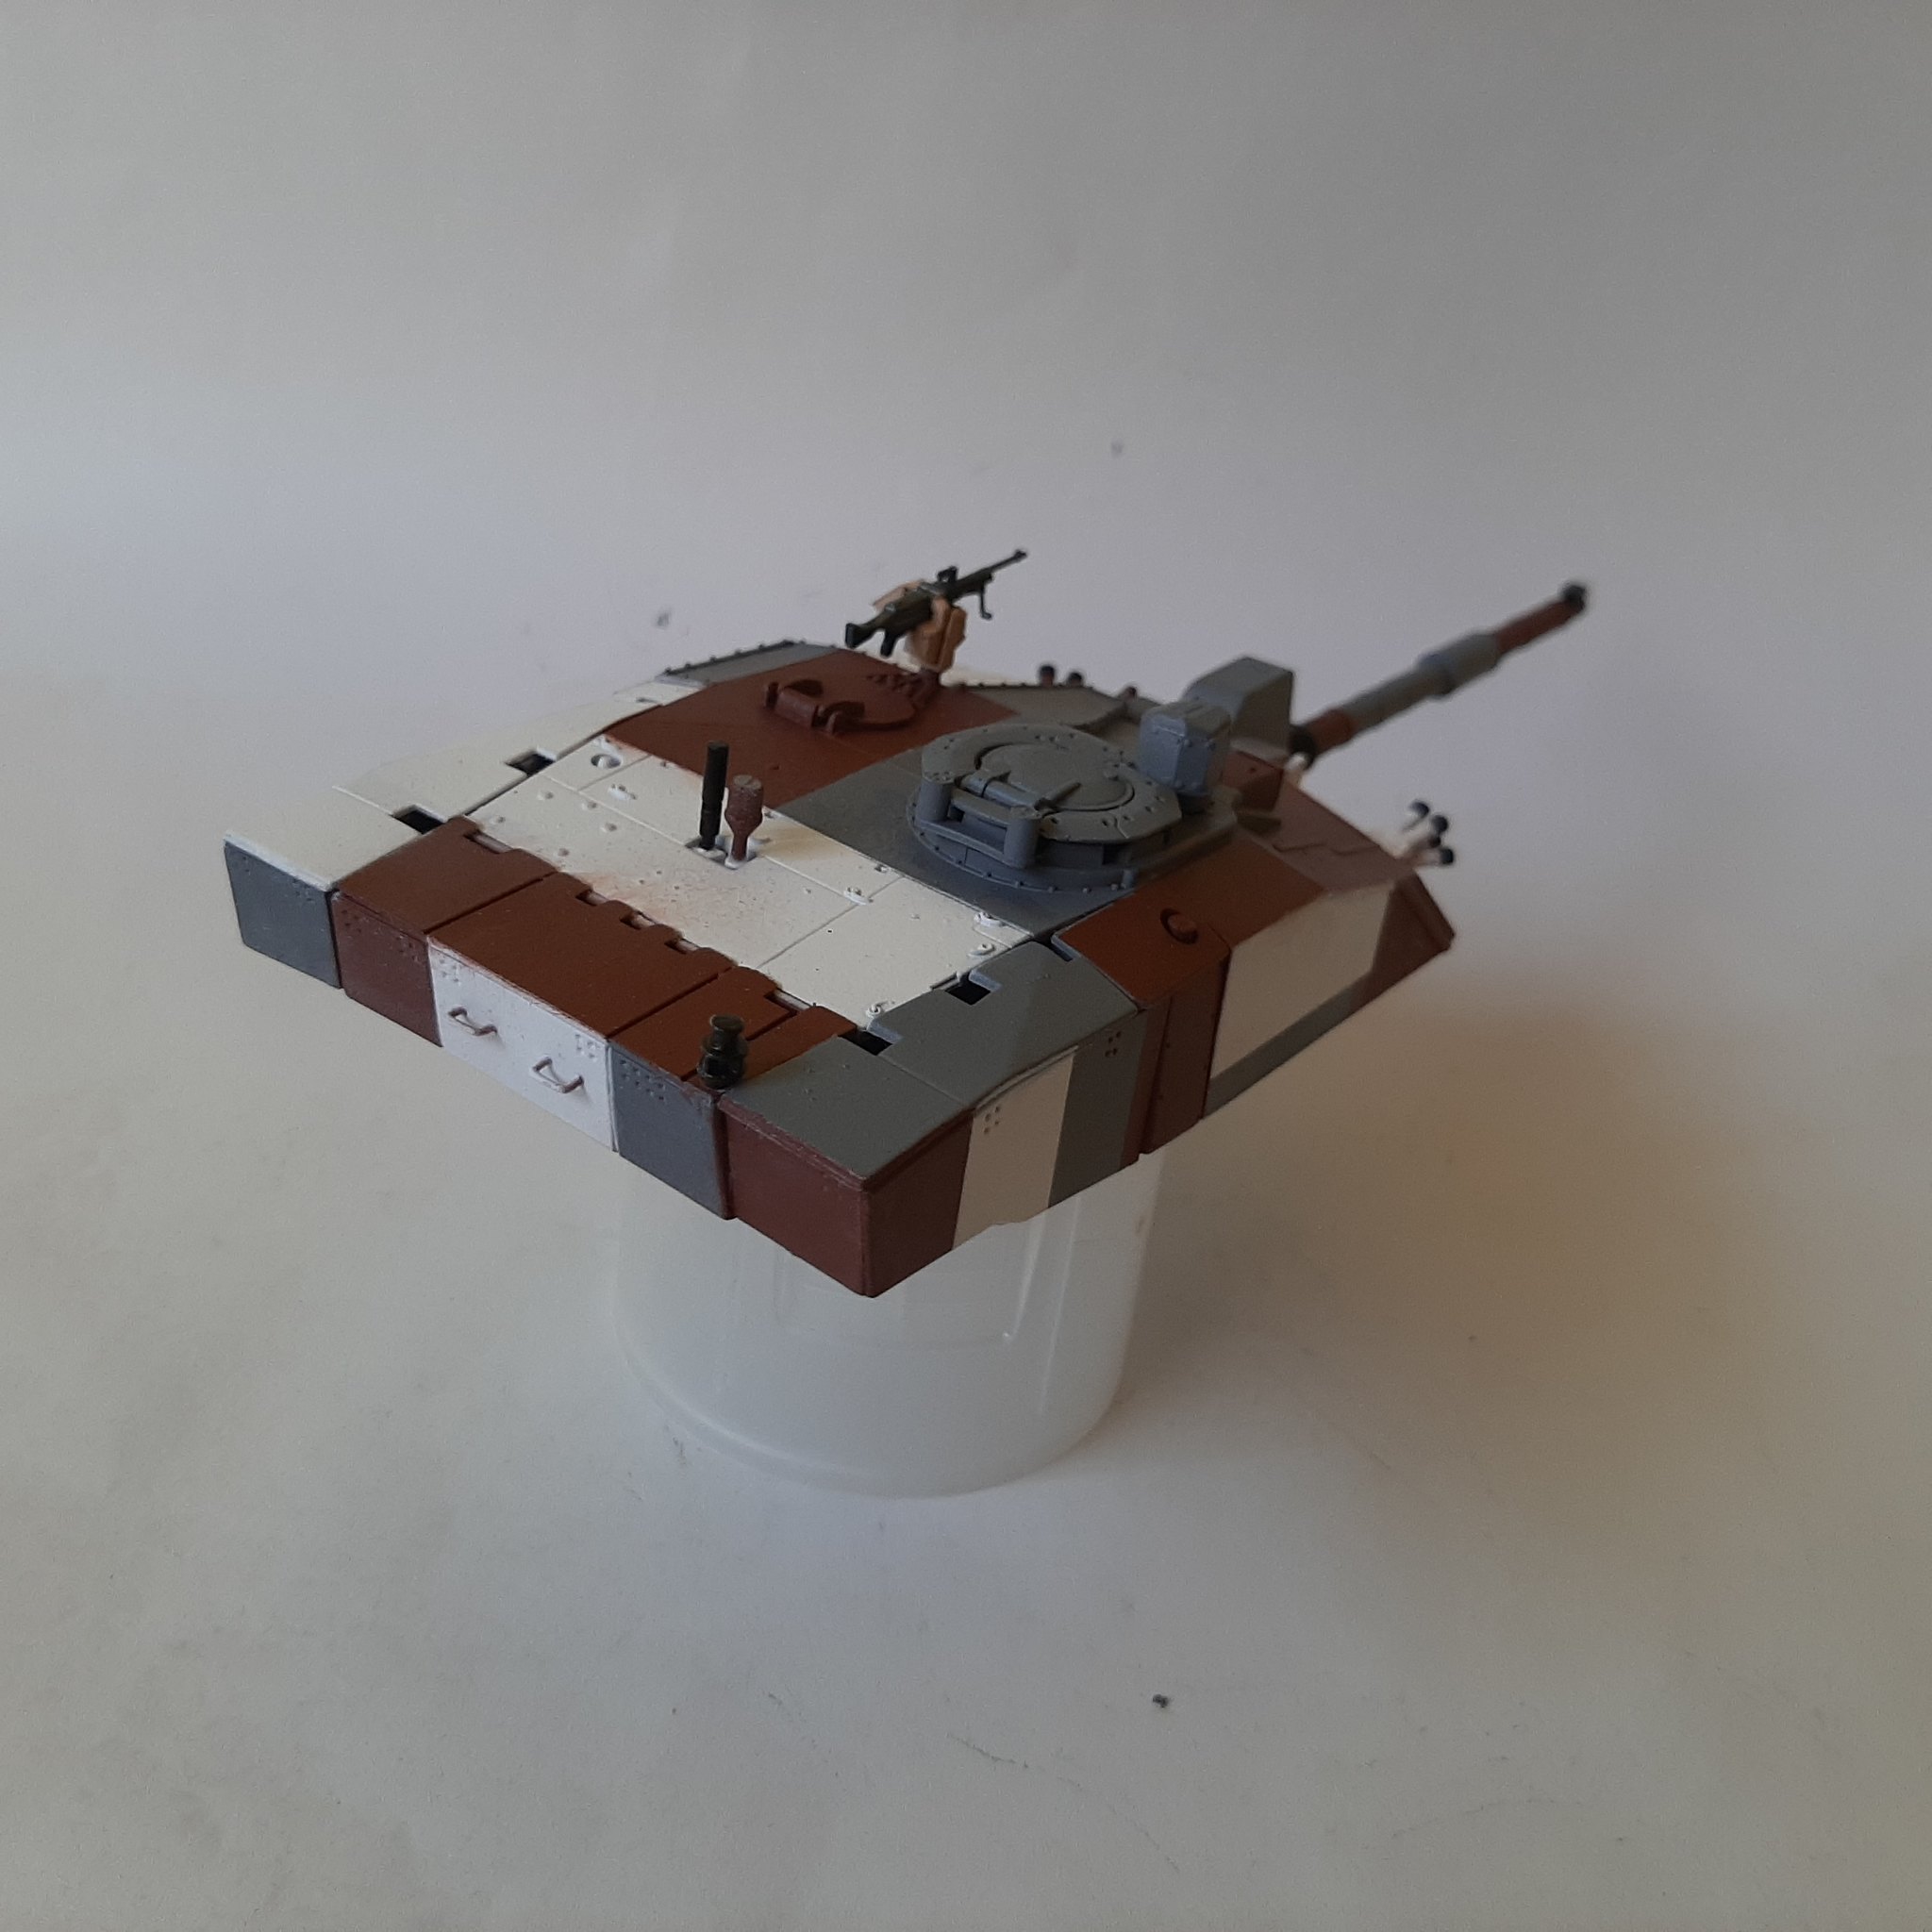
Heres where the turret stands now, pattern is all on and only some touch ups need to be done on the turret top. ( or maybe Ill leave some imperfections because I read somewhere that the crew painted it.) As well as the barrel needs to be repainted.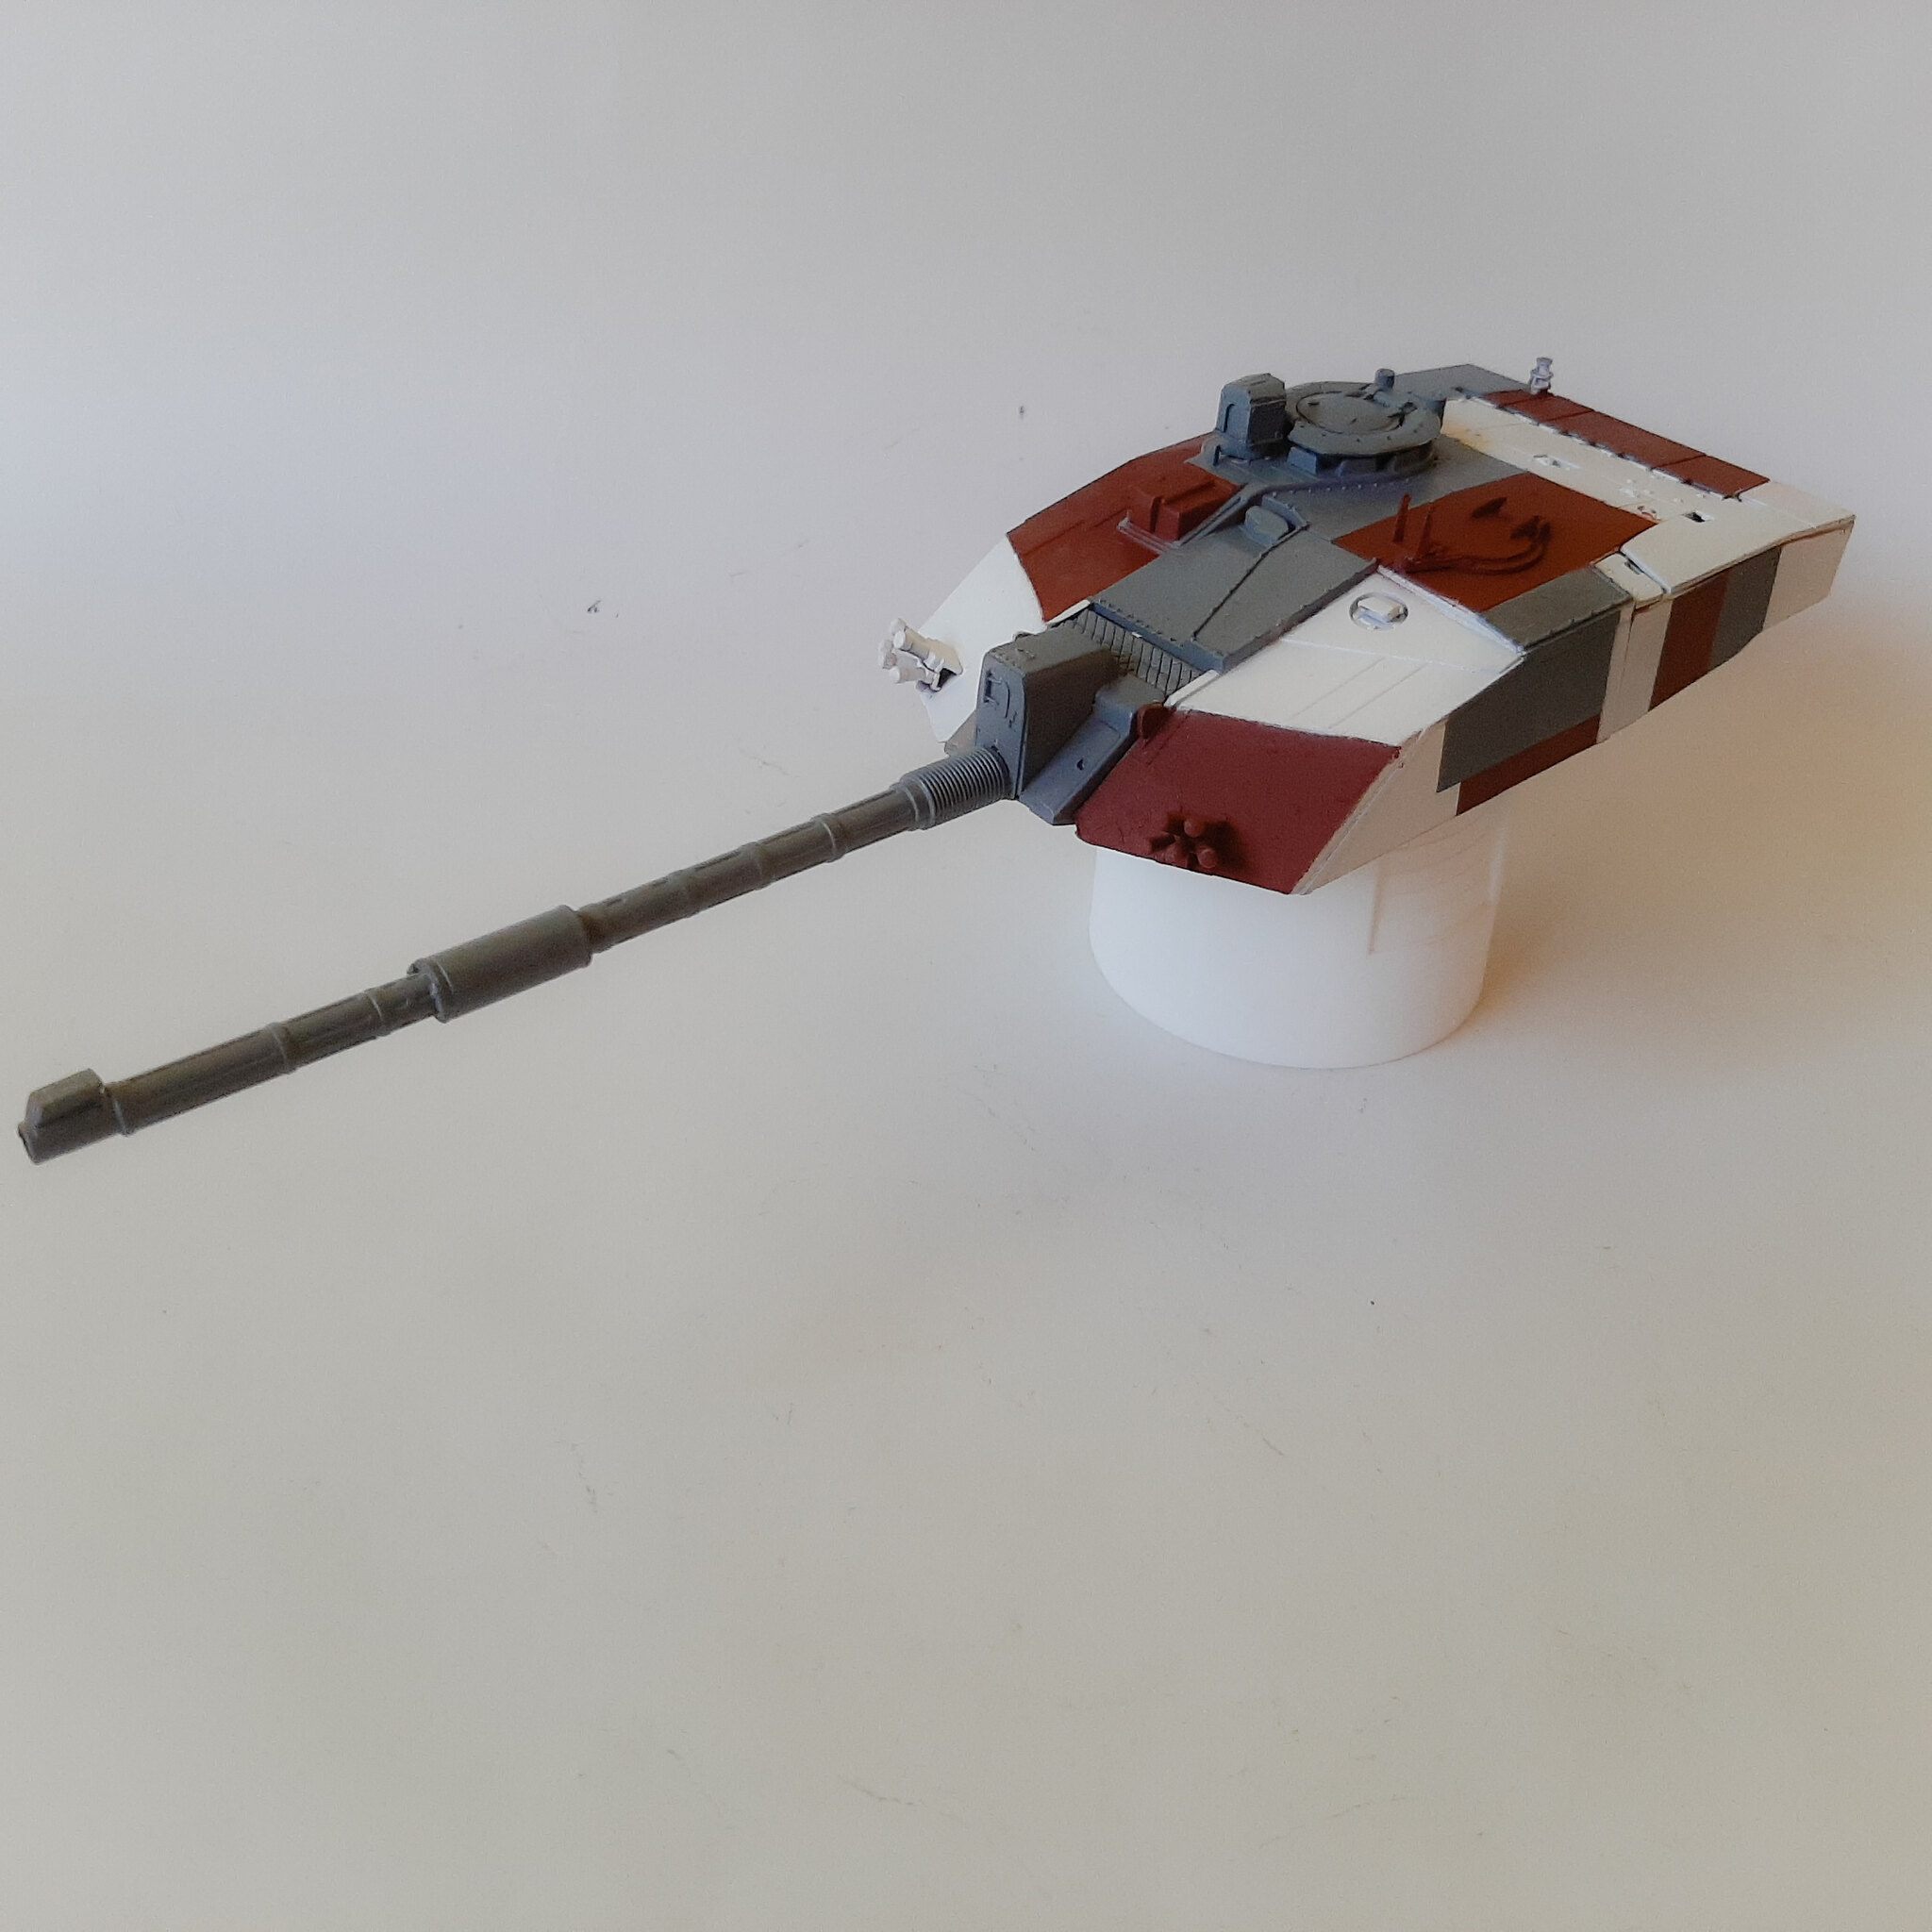
Panzer_Modeler
Joined: May 19, 2020
KitMaker: 419 posts
Armorama: 217 posts
Posted: Saturday, July 04, 2020 - 06:13 AM UTC
I want a vote guys: fresh paint job with a light pin wash, or heavily chipped and streaked like in peters pic? ( the second one.)
Ok maybe not THIS weathered...
Ok maybe not THIS weathered...

robw_uk

Joined: June 22, 2010
KitMaker: 1,224 posts
Armorama: 1,207 posts

Posted: Sunday, July 05, 2020 - 02:59 AM UTC
First round of building COMPLETE. Final section of slat built (decided to not do the front or anything extra on the turret). Next off will be primer but that may be 3 weeks as should be heading for a well deserved week away soon....
Panzer_Modeler
Joined: May 19, 2020
KitMaker: 419 posts
Armorama: 217 posts
Posted: Sunday, July 05, 2020 - 03:31 AM UTC
Looks great! 
Panzer_Modeler
Joined: May 19, 2020
KitMaker: 419 posts
Armorama: 217 posts
Posted: Sunday, July 05, 2020 - 06:47 AM UTC
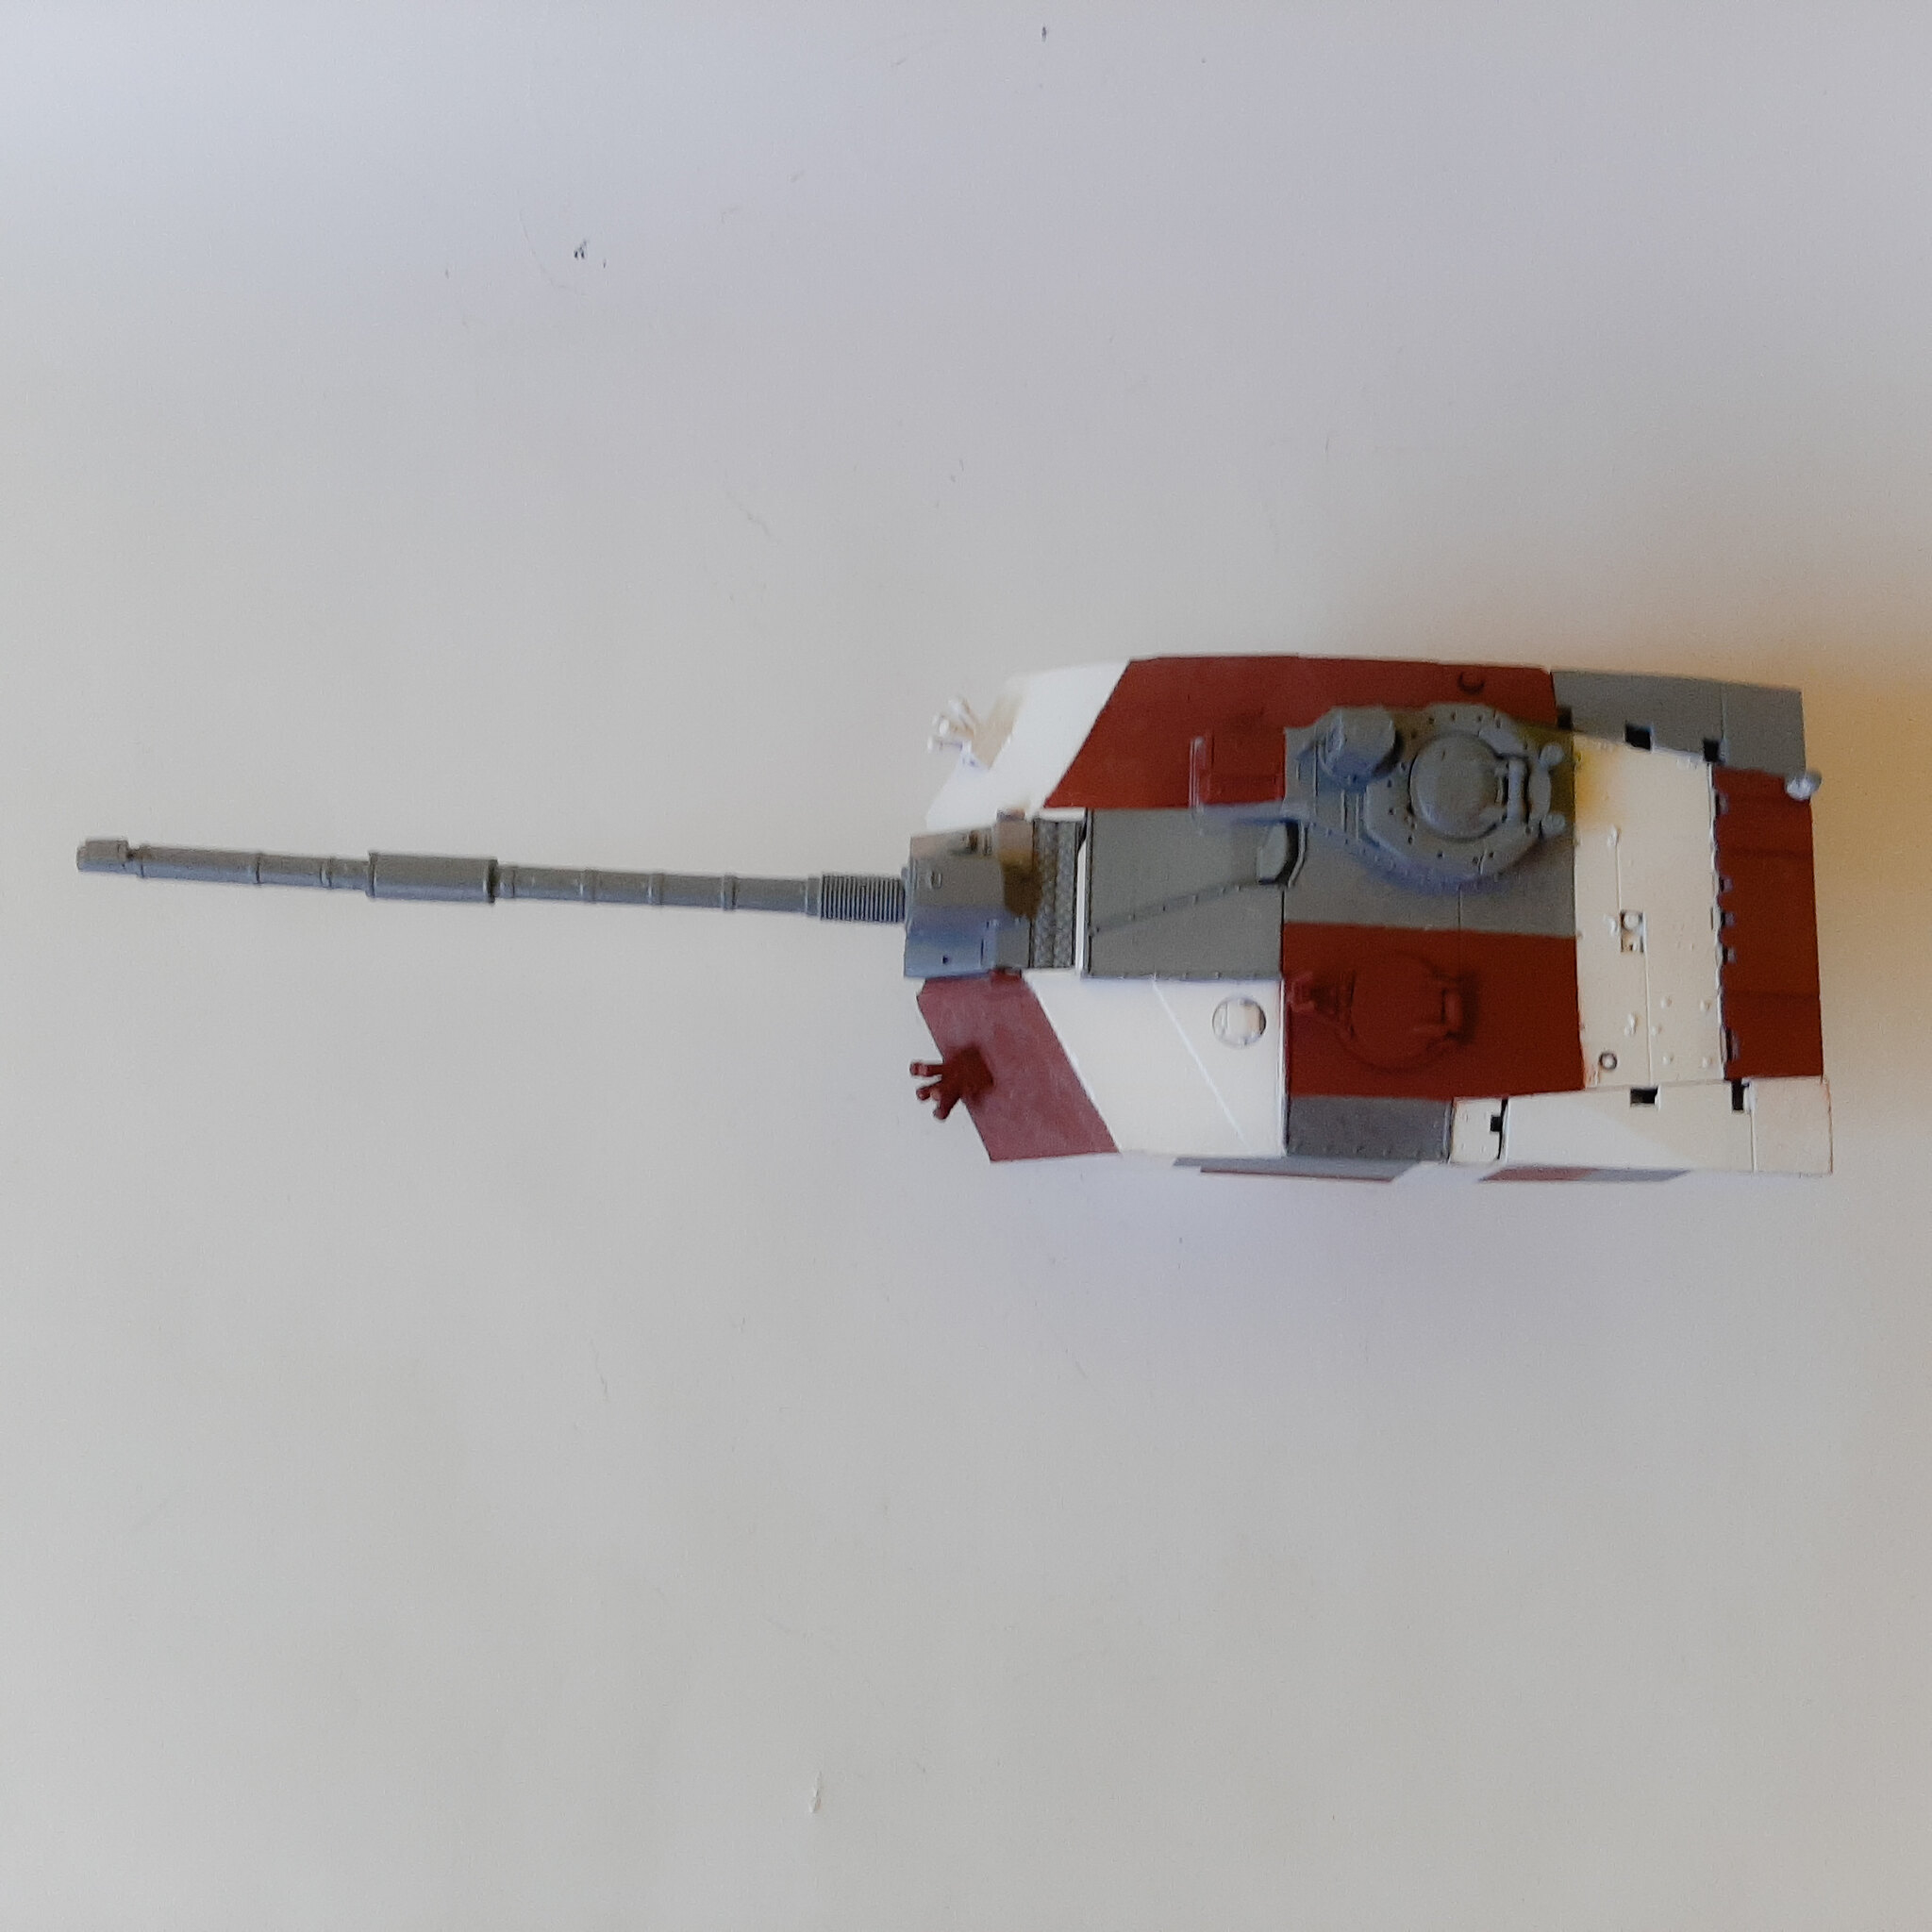
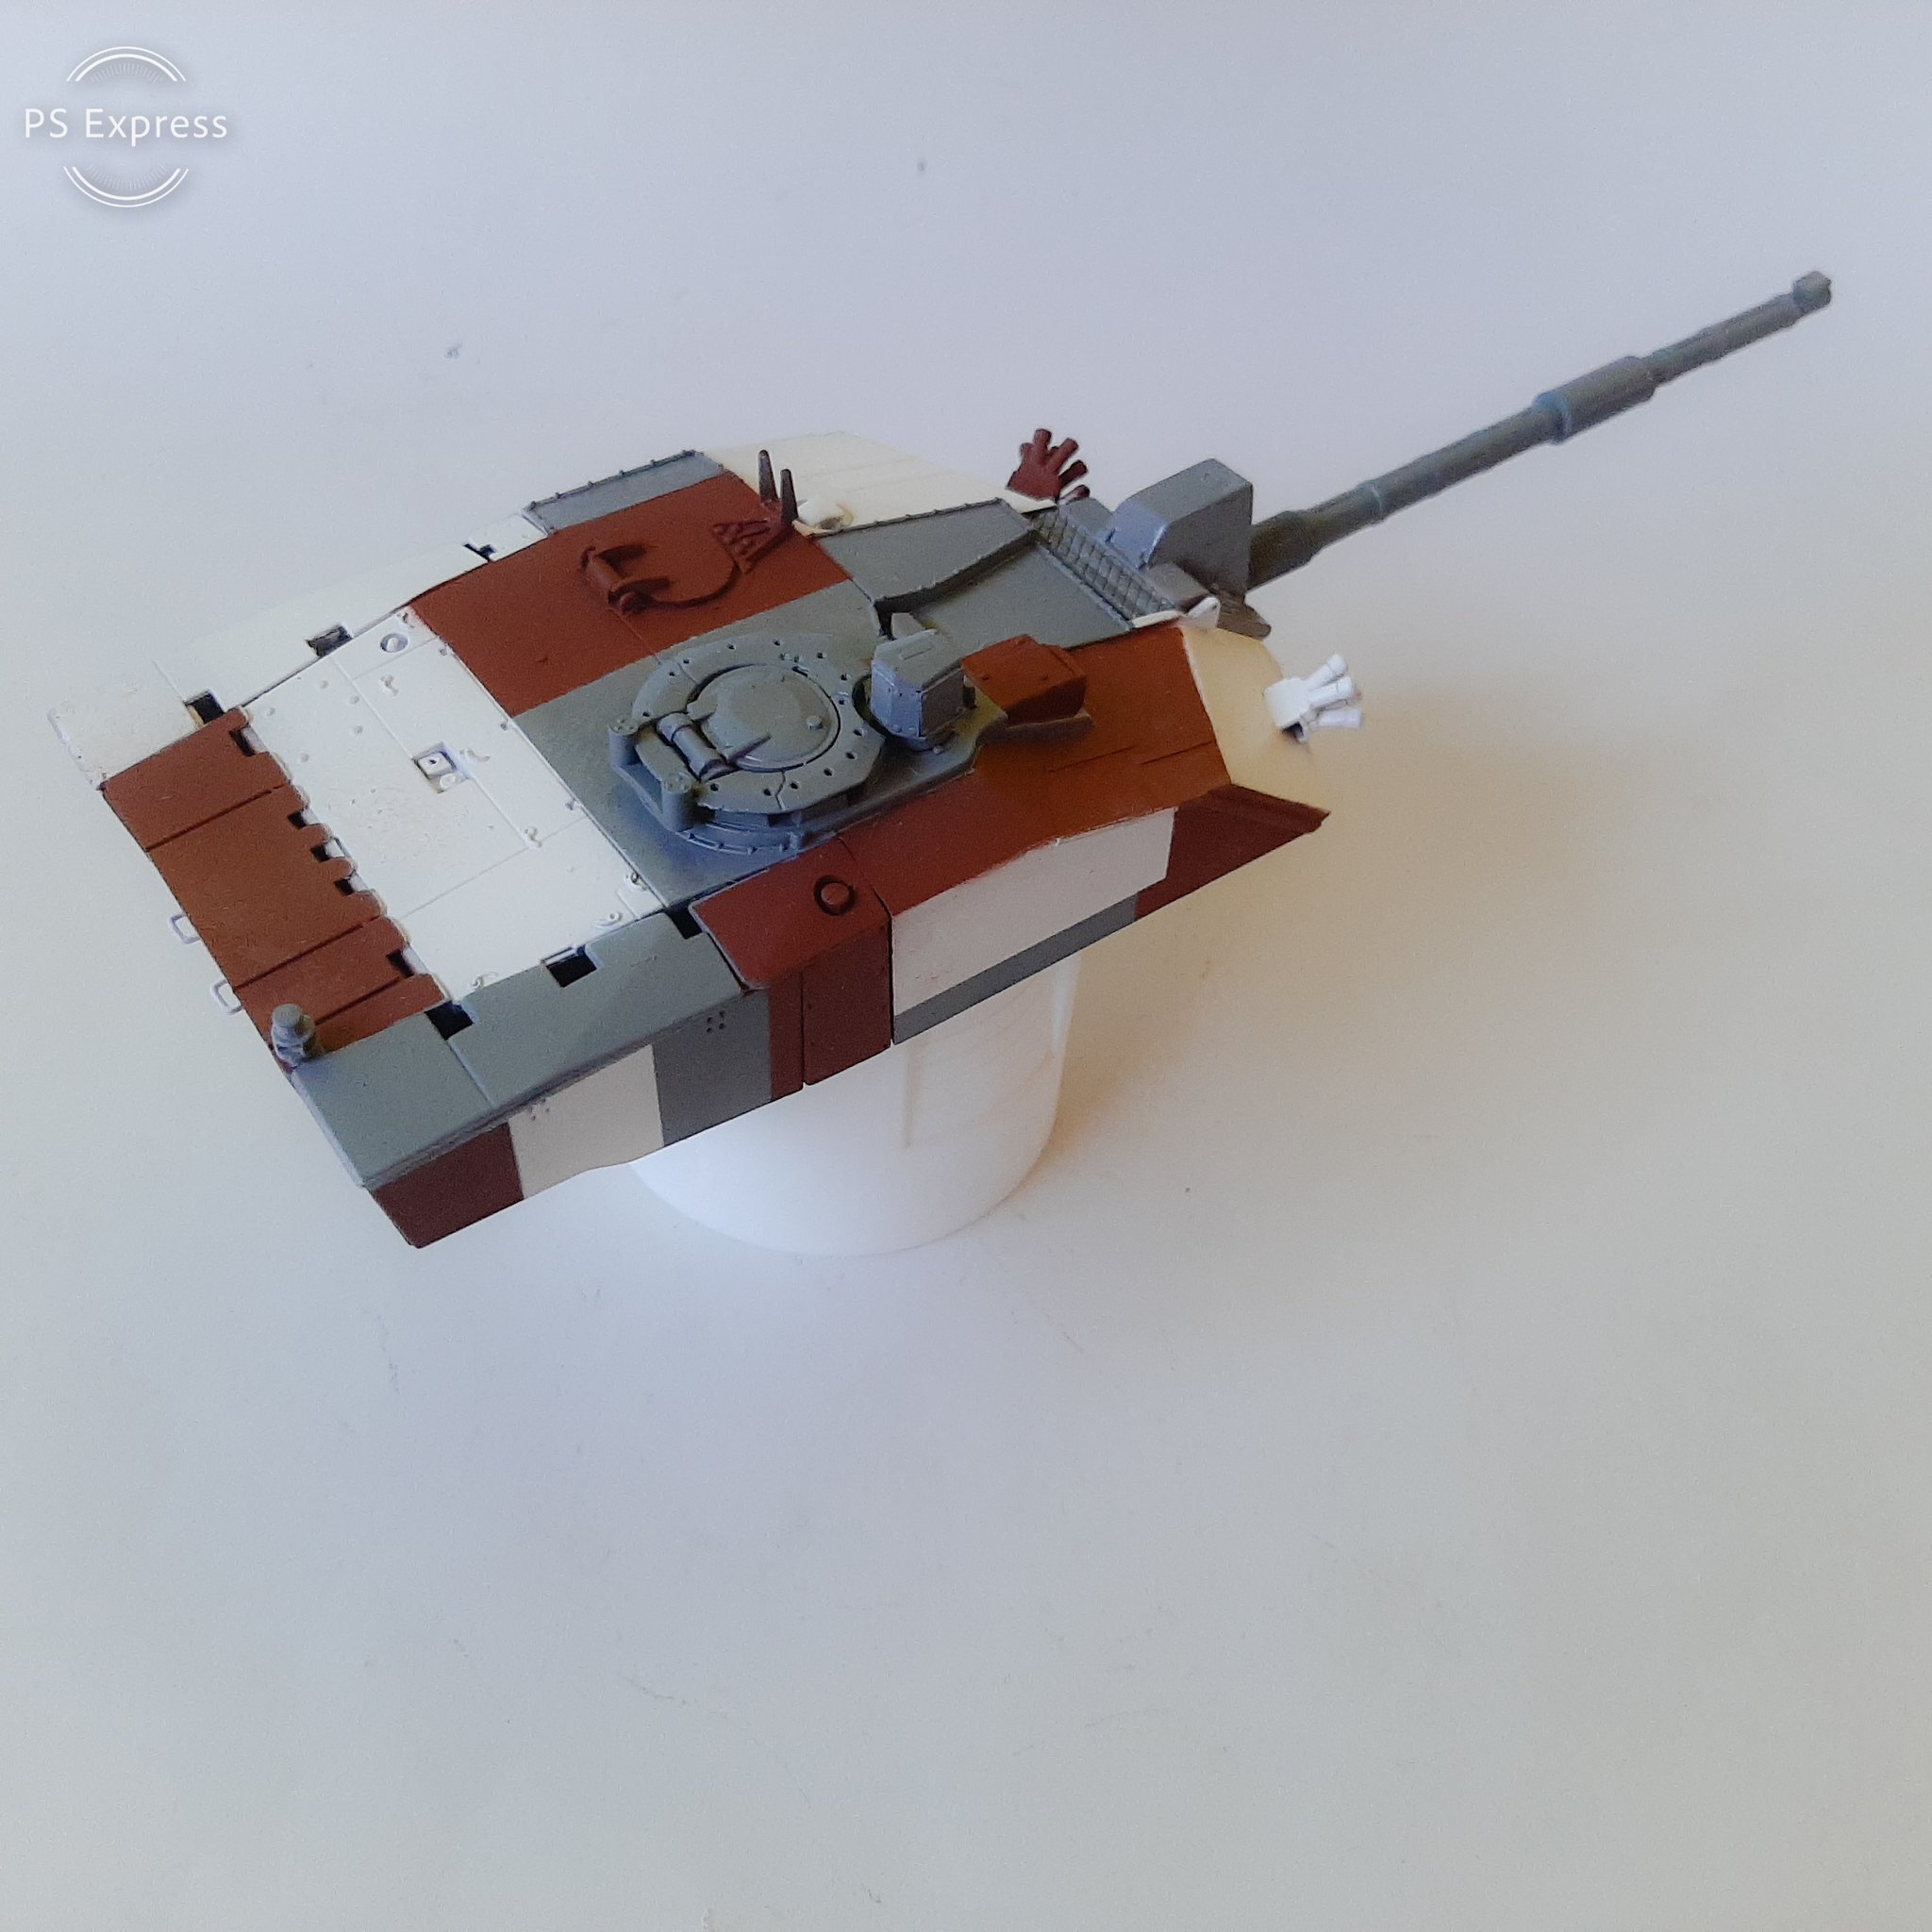
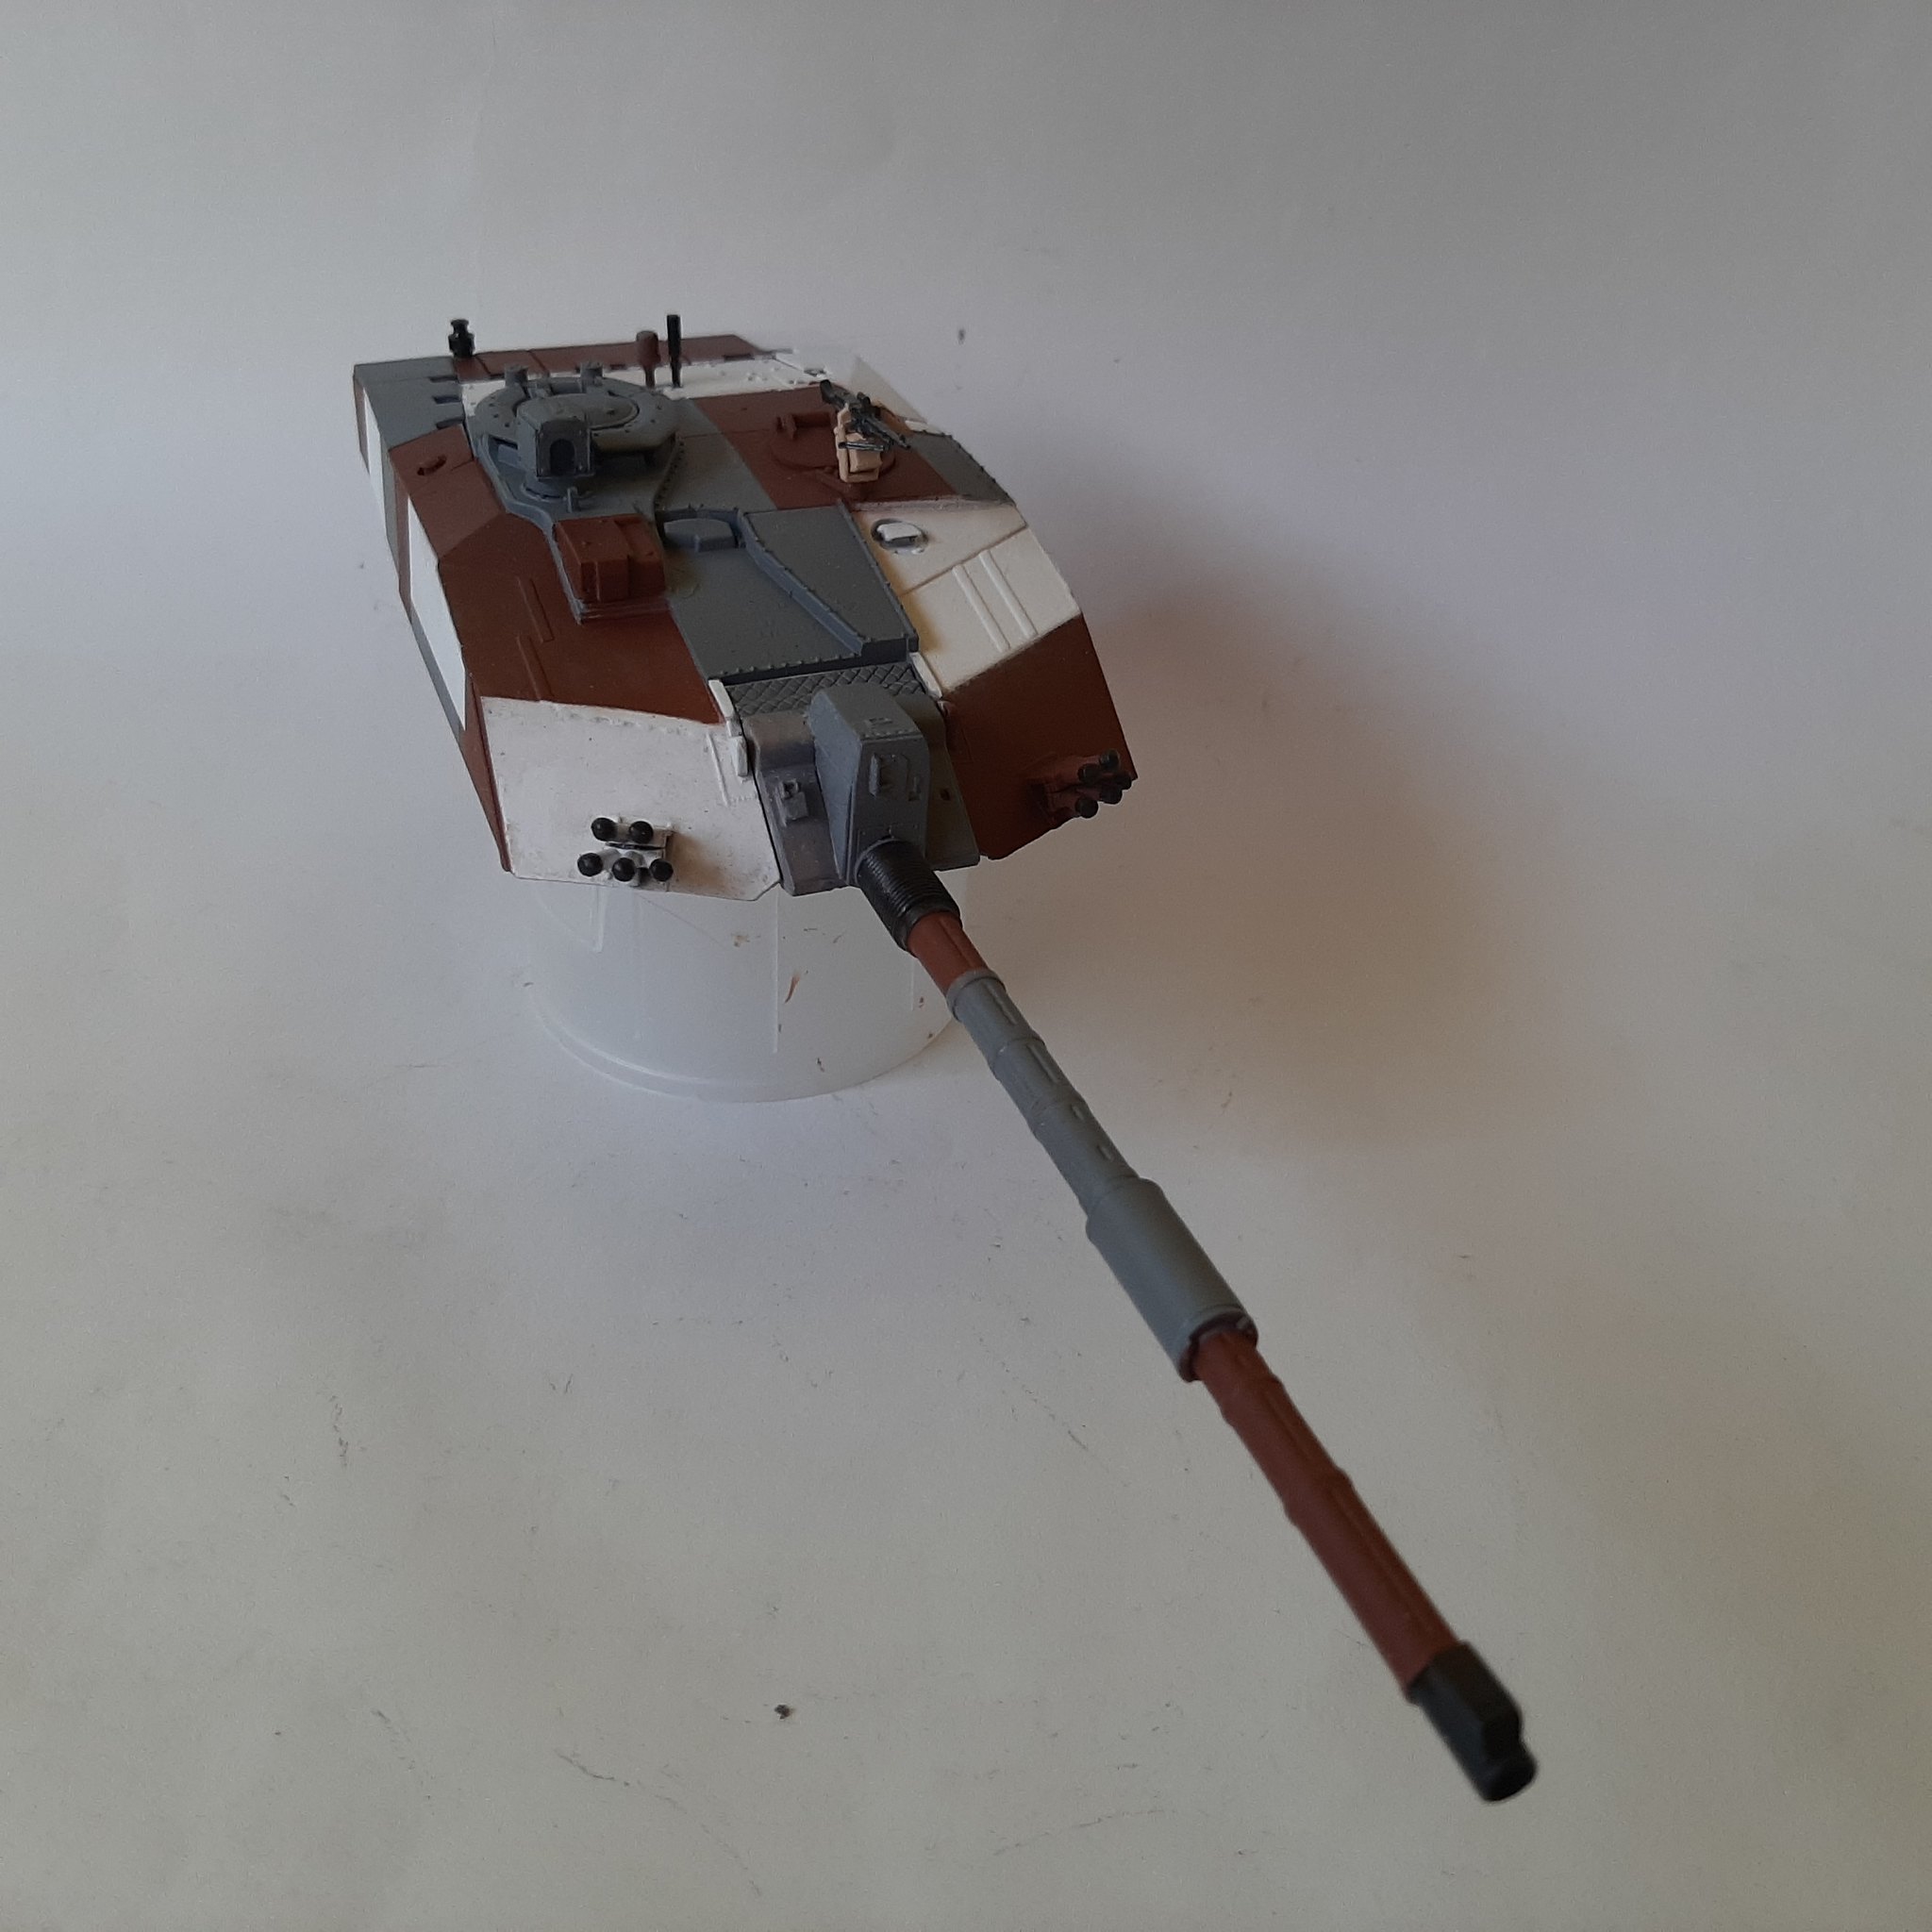
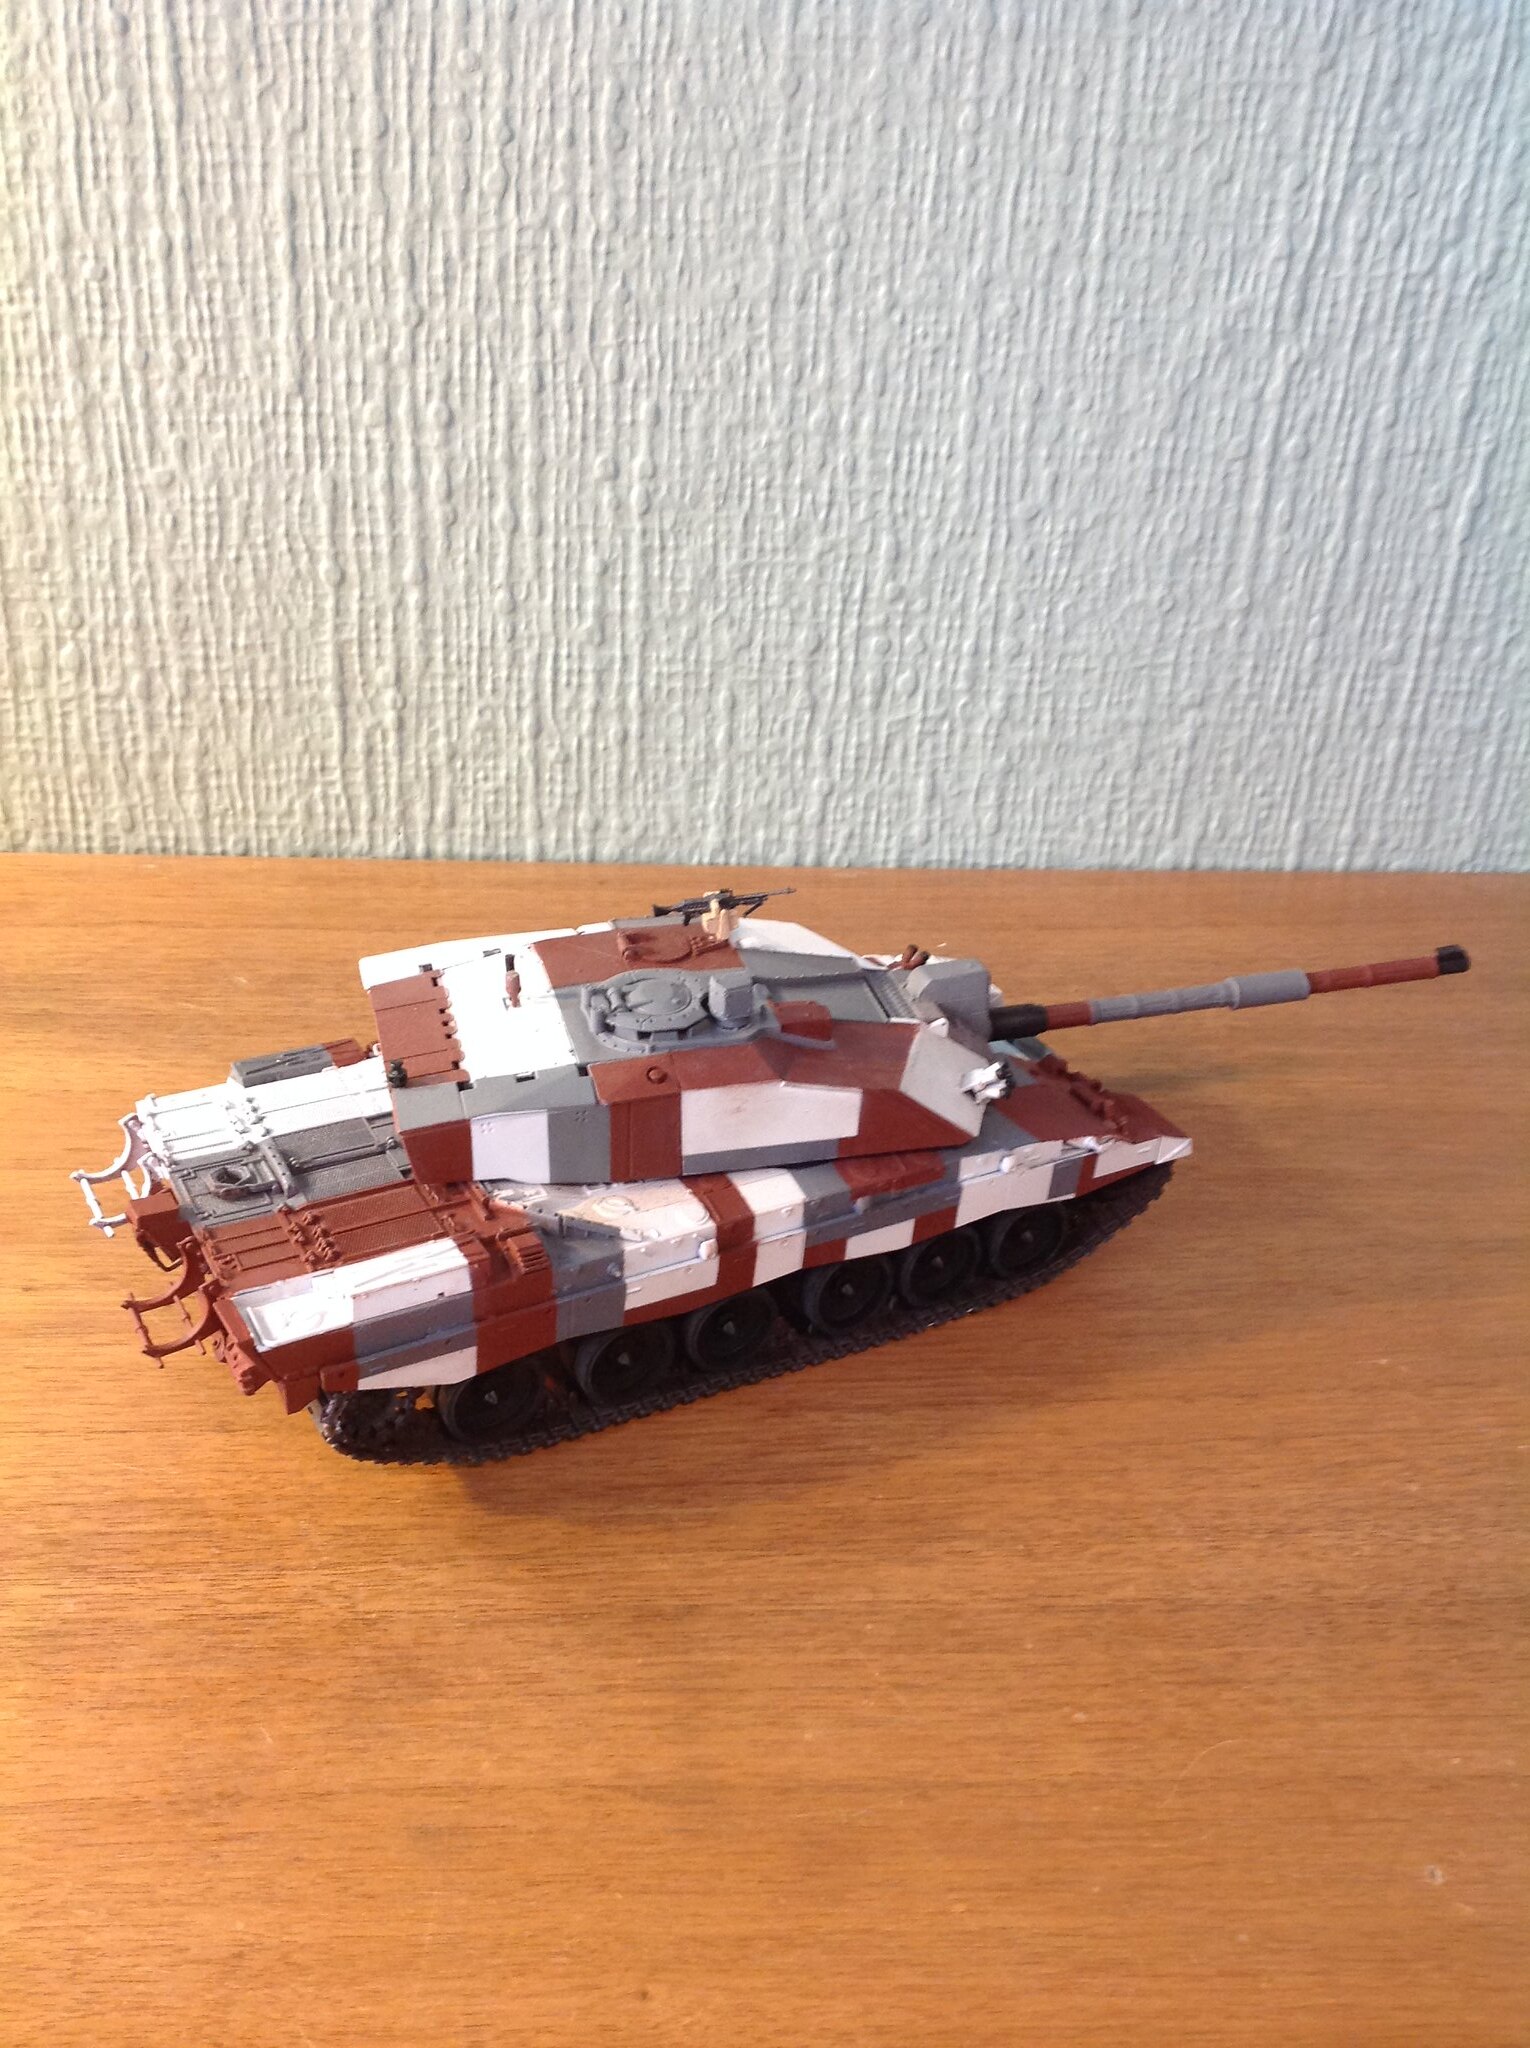
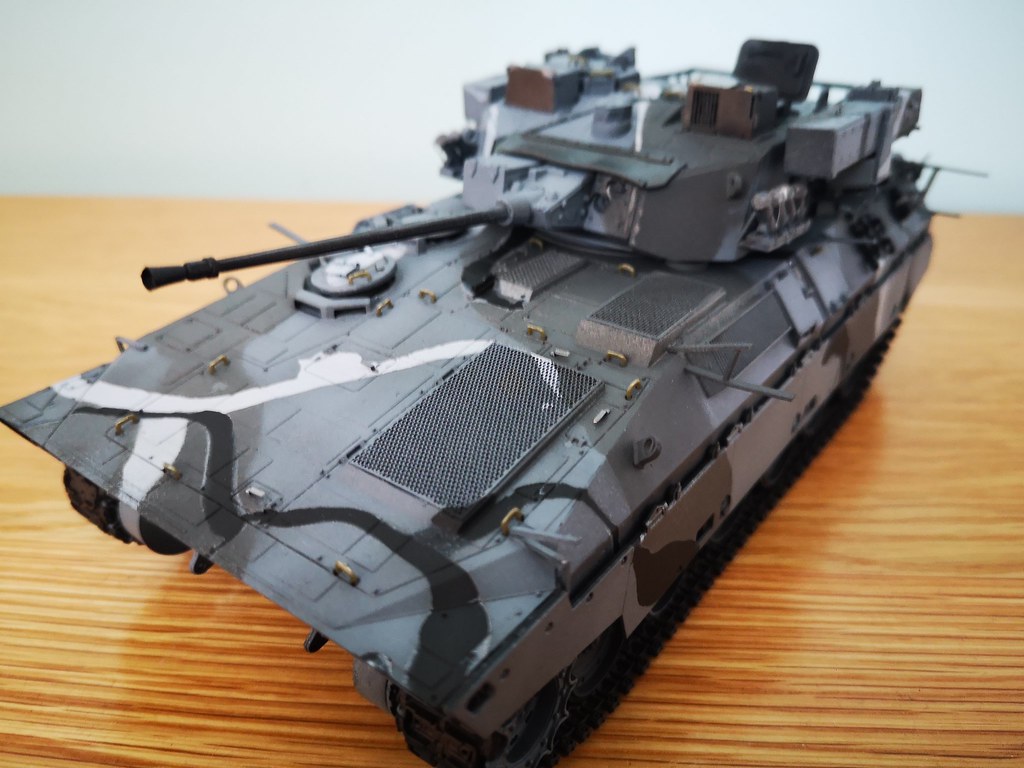
Turret camouflage totally done moving on to the hull!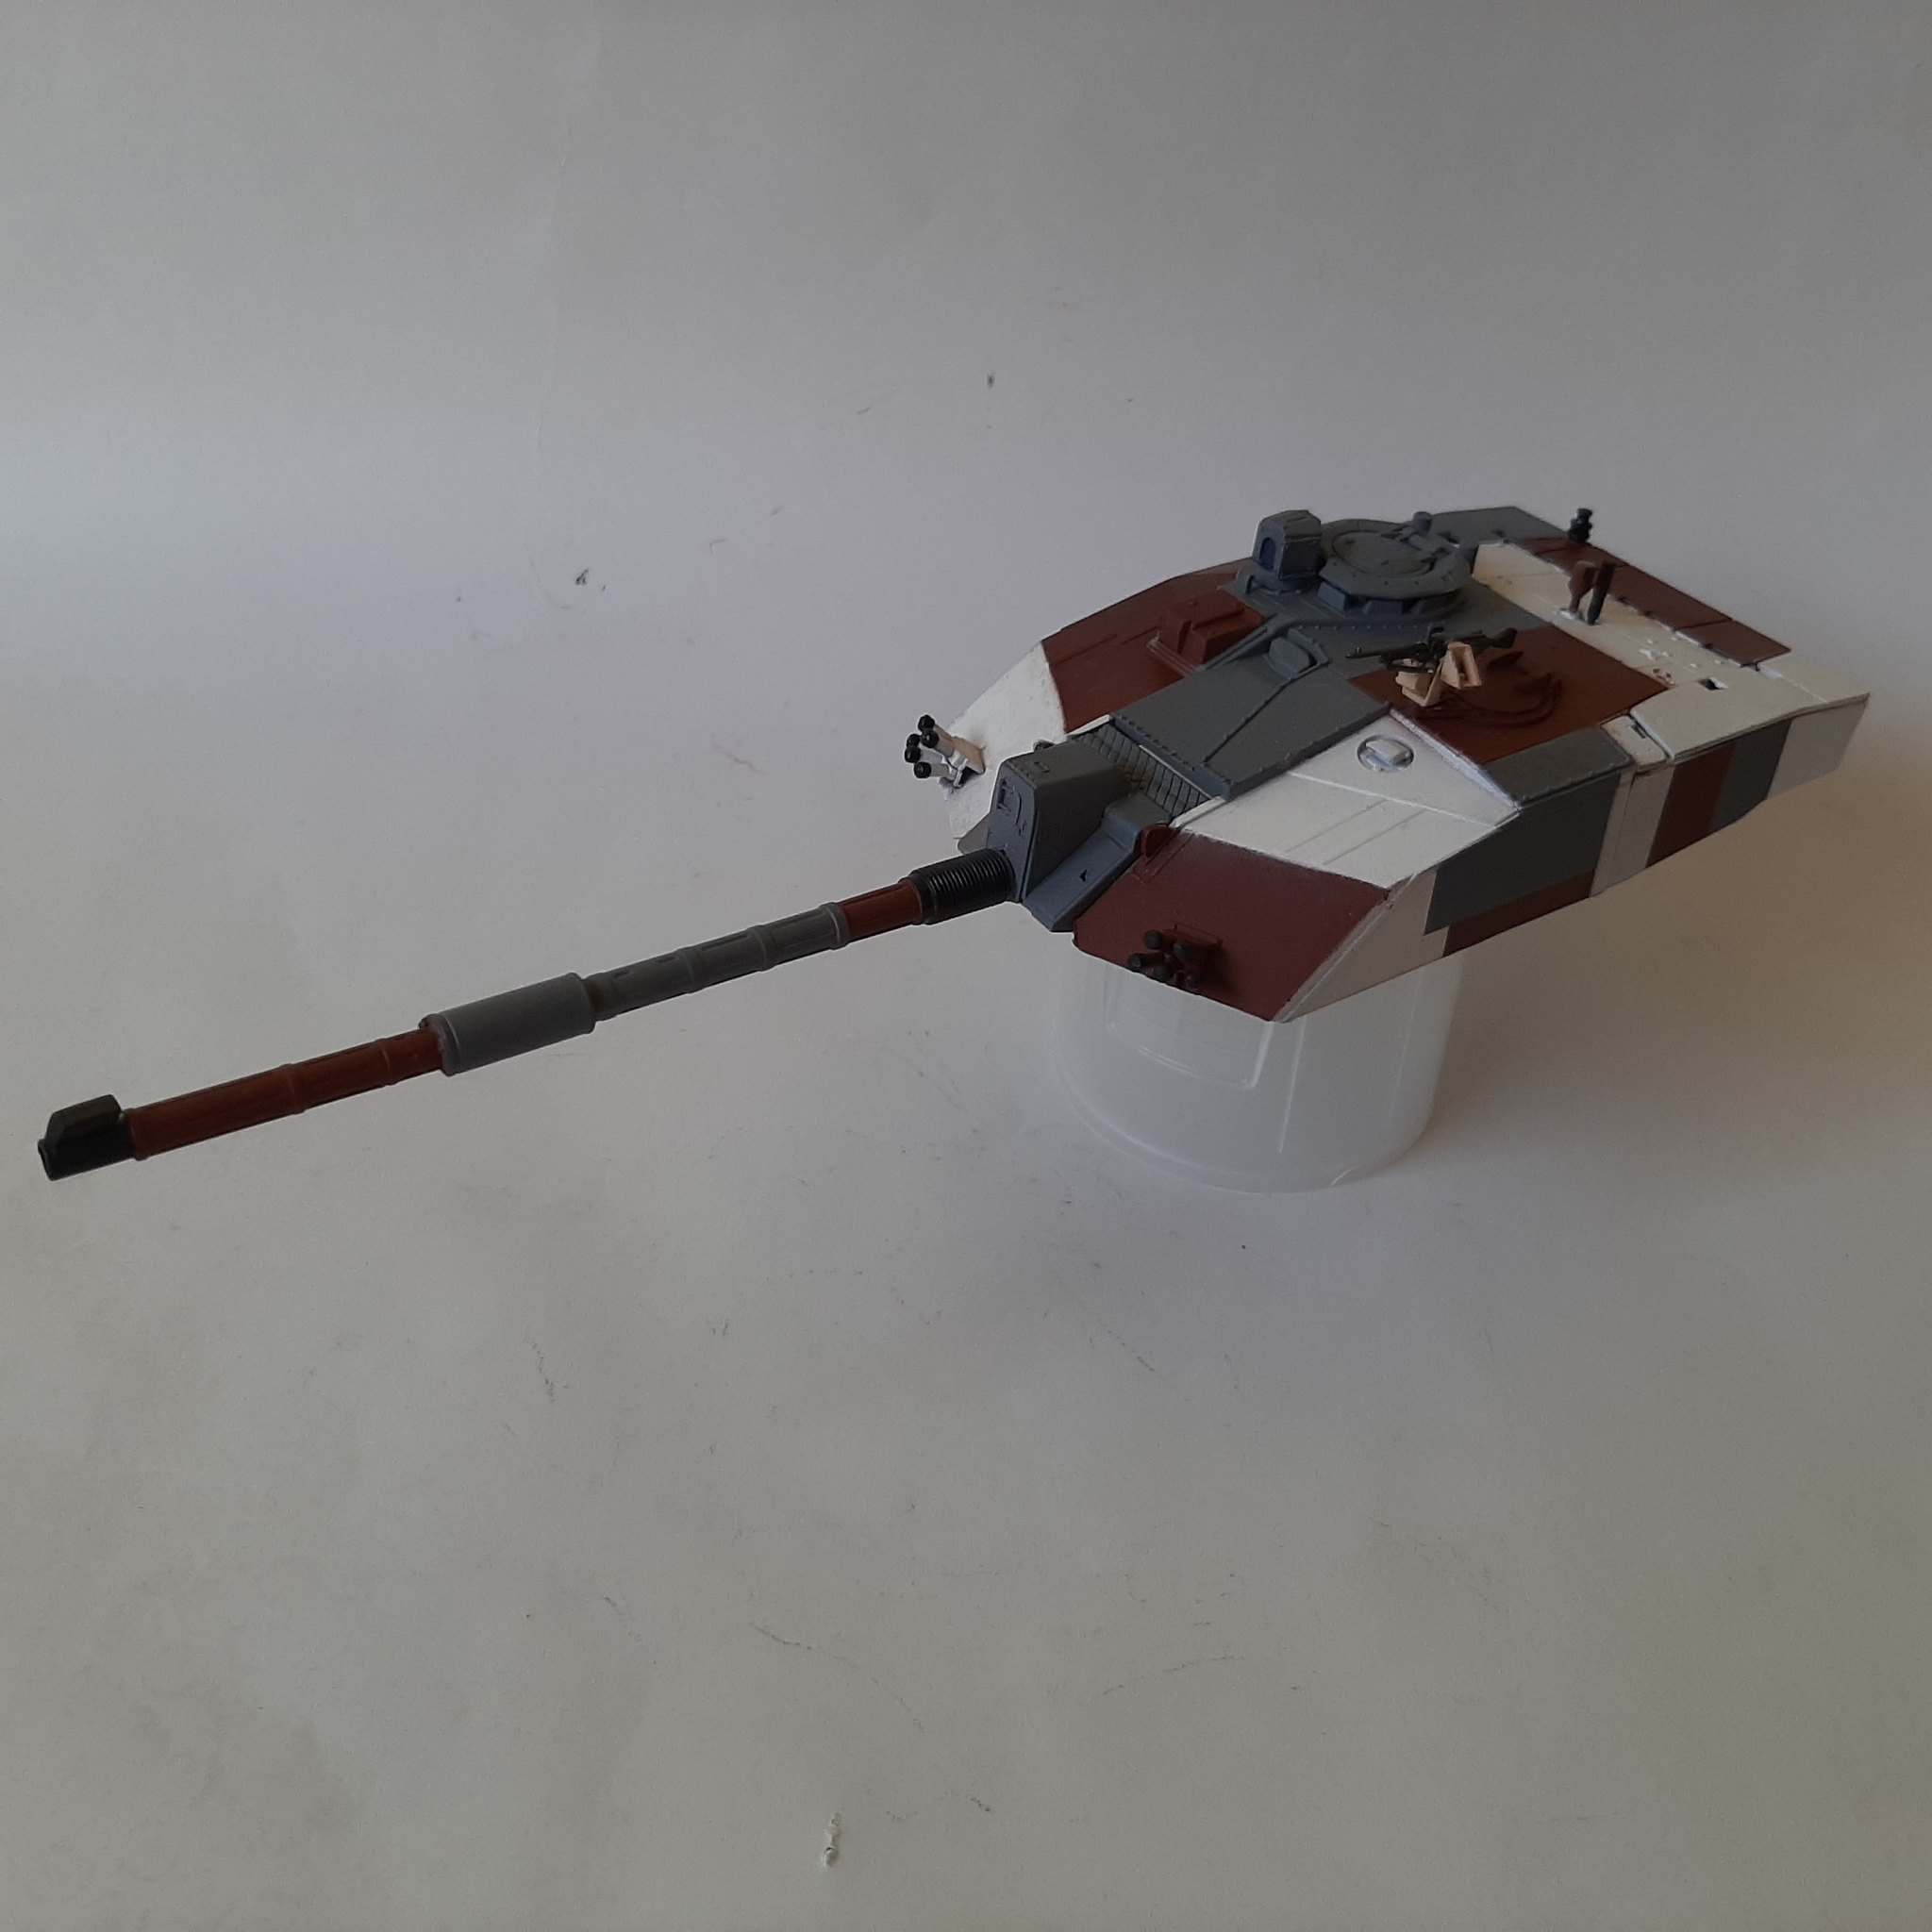
Panzer_Modeler
Joined: May 19, 2020
KitMaker: 419 posts
Armorama: 217 posts
Posted: Sunday, July 05, 2020 - 11:17 AM UTC
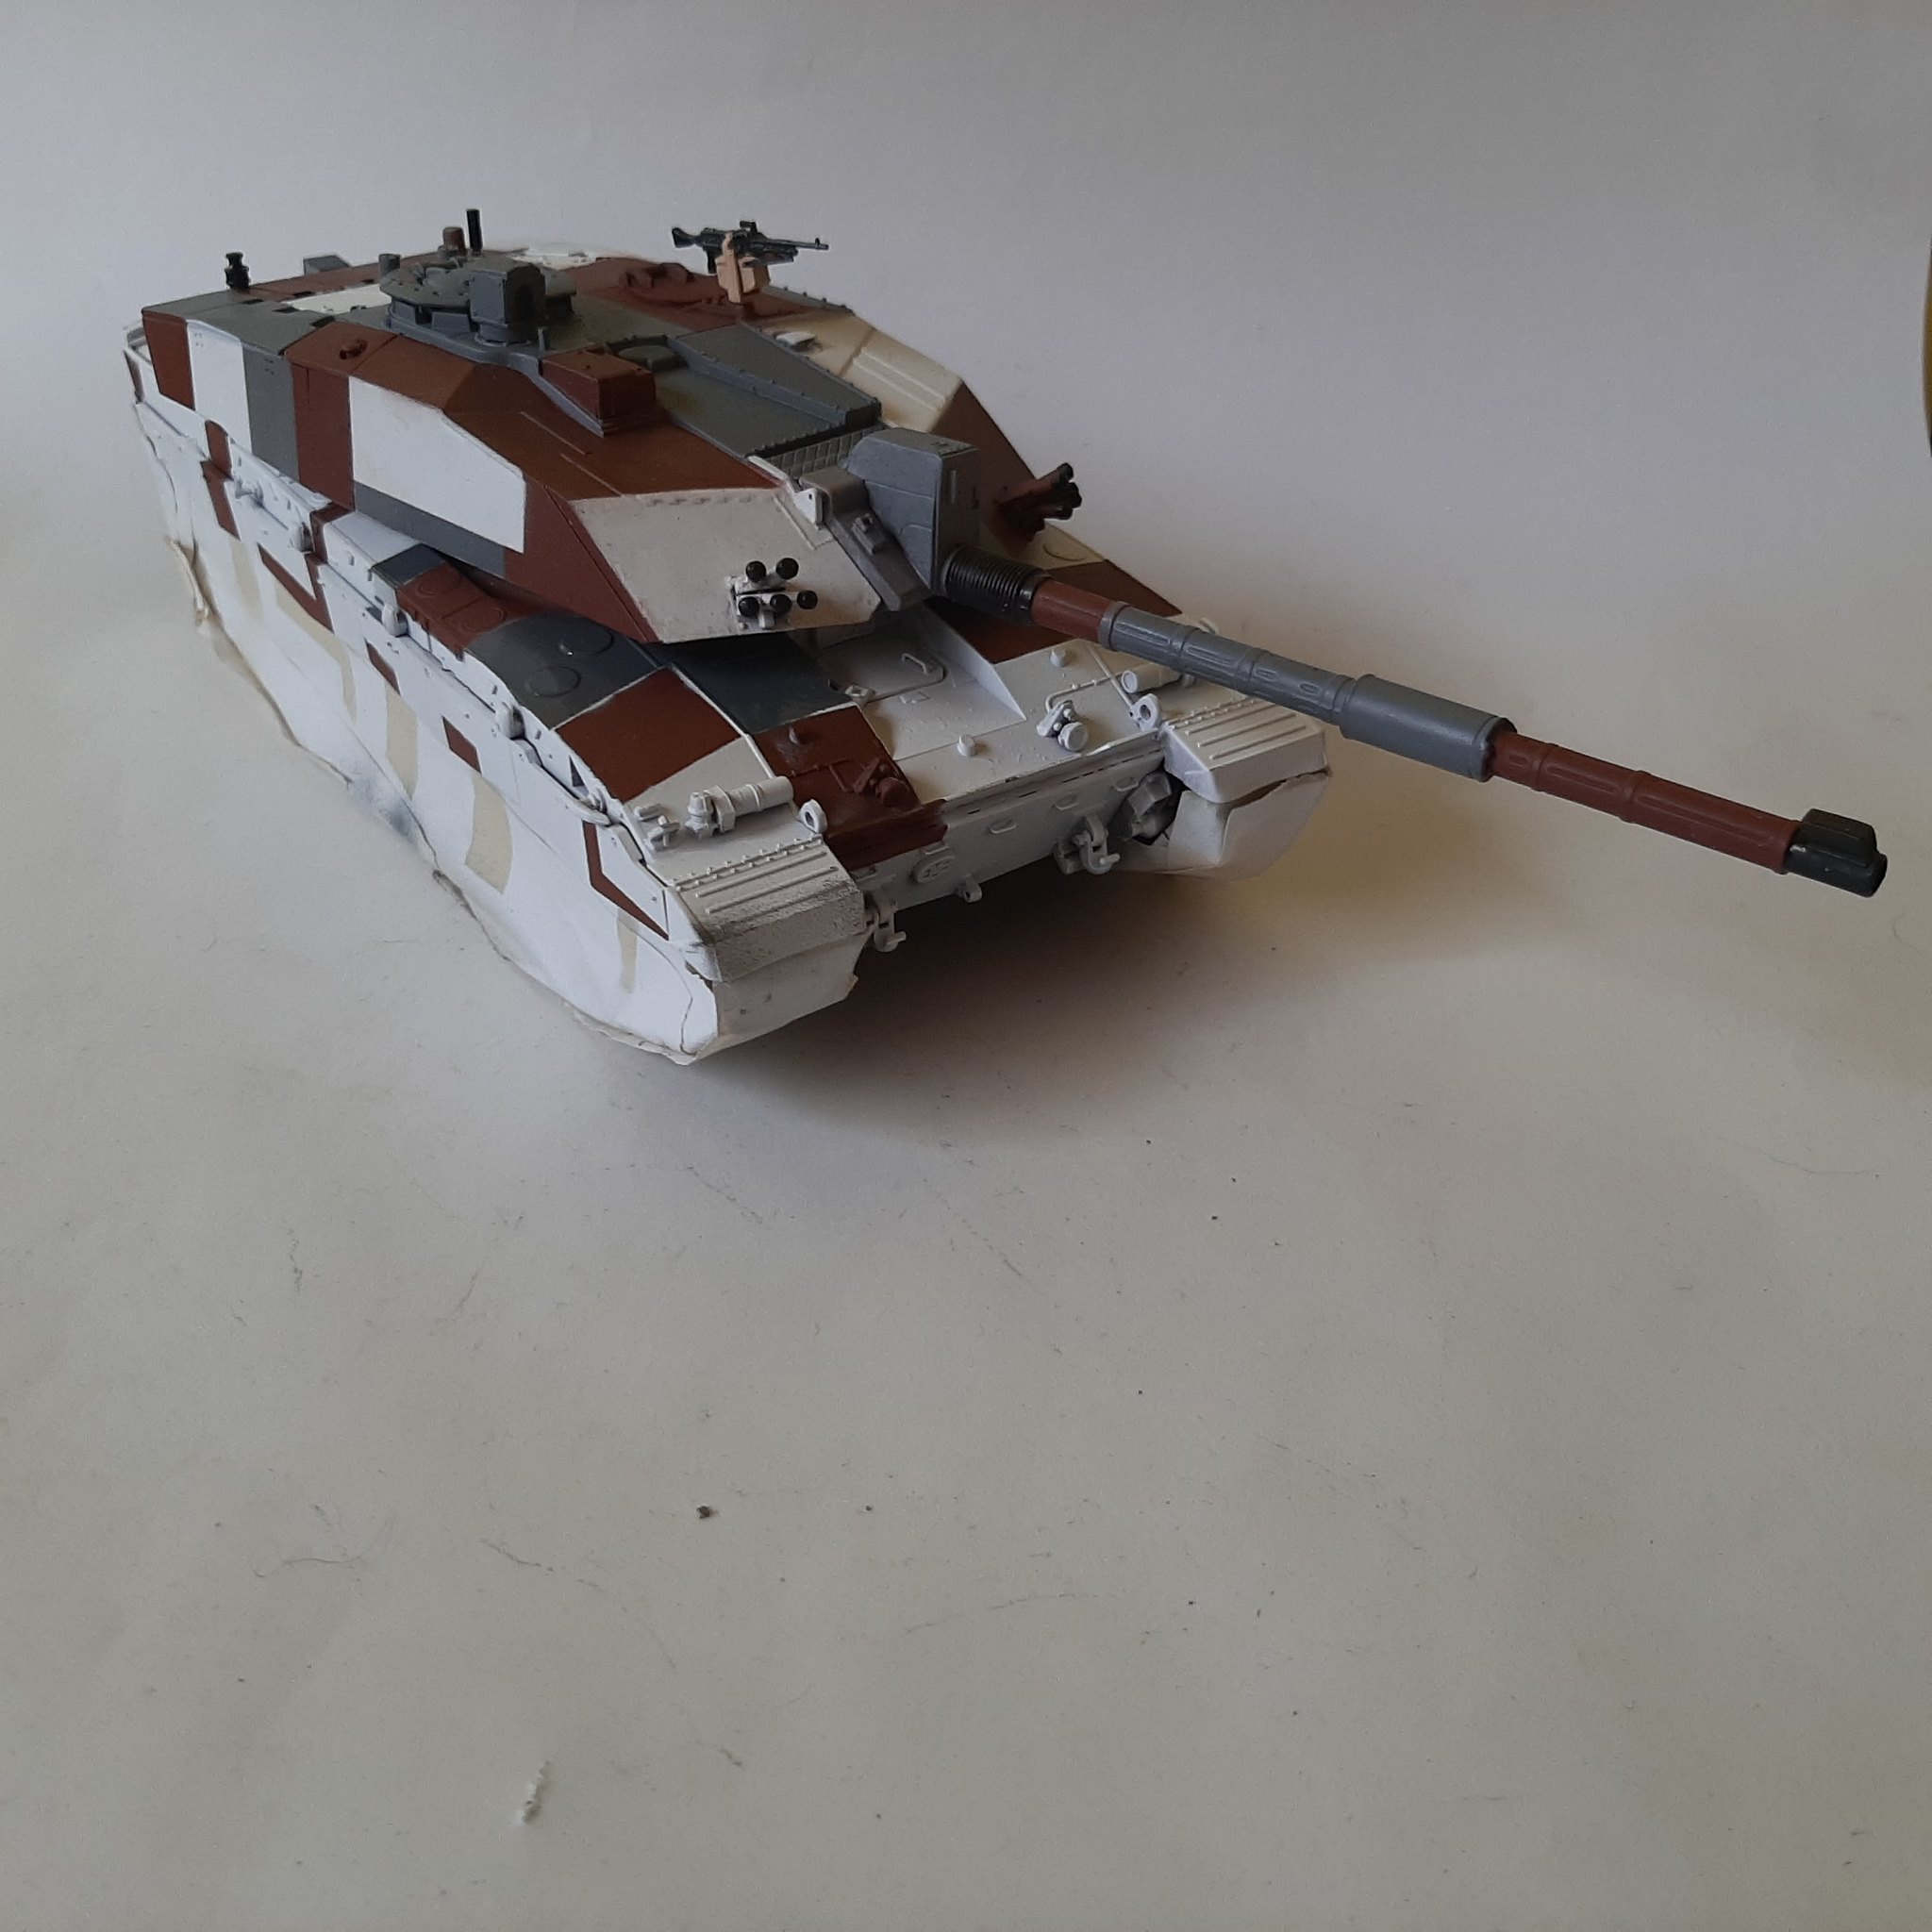
Test fitting turret to hull. As you can see I very crudely masked off the white and red and then as I was painting the grey I realised it was the wrong color....deep breaths...deep breaths... DEEP BREATHS... (aham) now thats out of the way back to the tape! 

ColinEdm


Joined: October 15, 2013
KitMaker: 1,355 posts
Armorama: 1,229 posts
Posted: Sunday, July 05, 2020 - 12:06 PM UTC
Looking great Ezra, I prefer the heavily weathered look myself, it has more character.
Robert, great job on the additional armour.
Robert, great job on the additional armour.
Panzer_Modeler
Joined: May 19, 2020
KitMaker: 419 posts
Armorama: 217 posts
Posted: Sunday, July 05, 2020 - 12:16 PM UTC
Quoted Text
Looking great Ezra, I prefer the heavily weathered look myself, it has more character.
I like heavily weathered armor too! I was thinking they were only clean until I saw those weathered photos, so heavily weathered it is!
Panzer_Modeler
Joined: May 19, 2020
KitMaker: 419 posts
Armorama: 217 posts
Posted: Monday, July 06, 2020 - 06:11 AM UTC
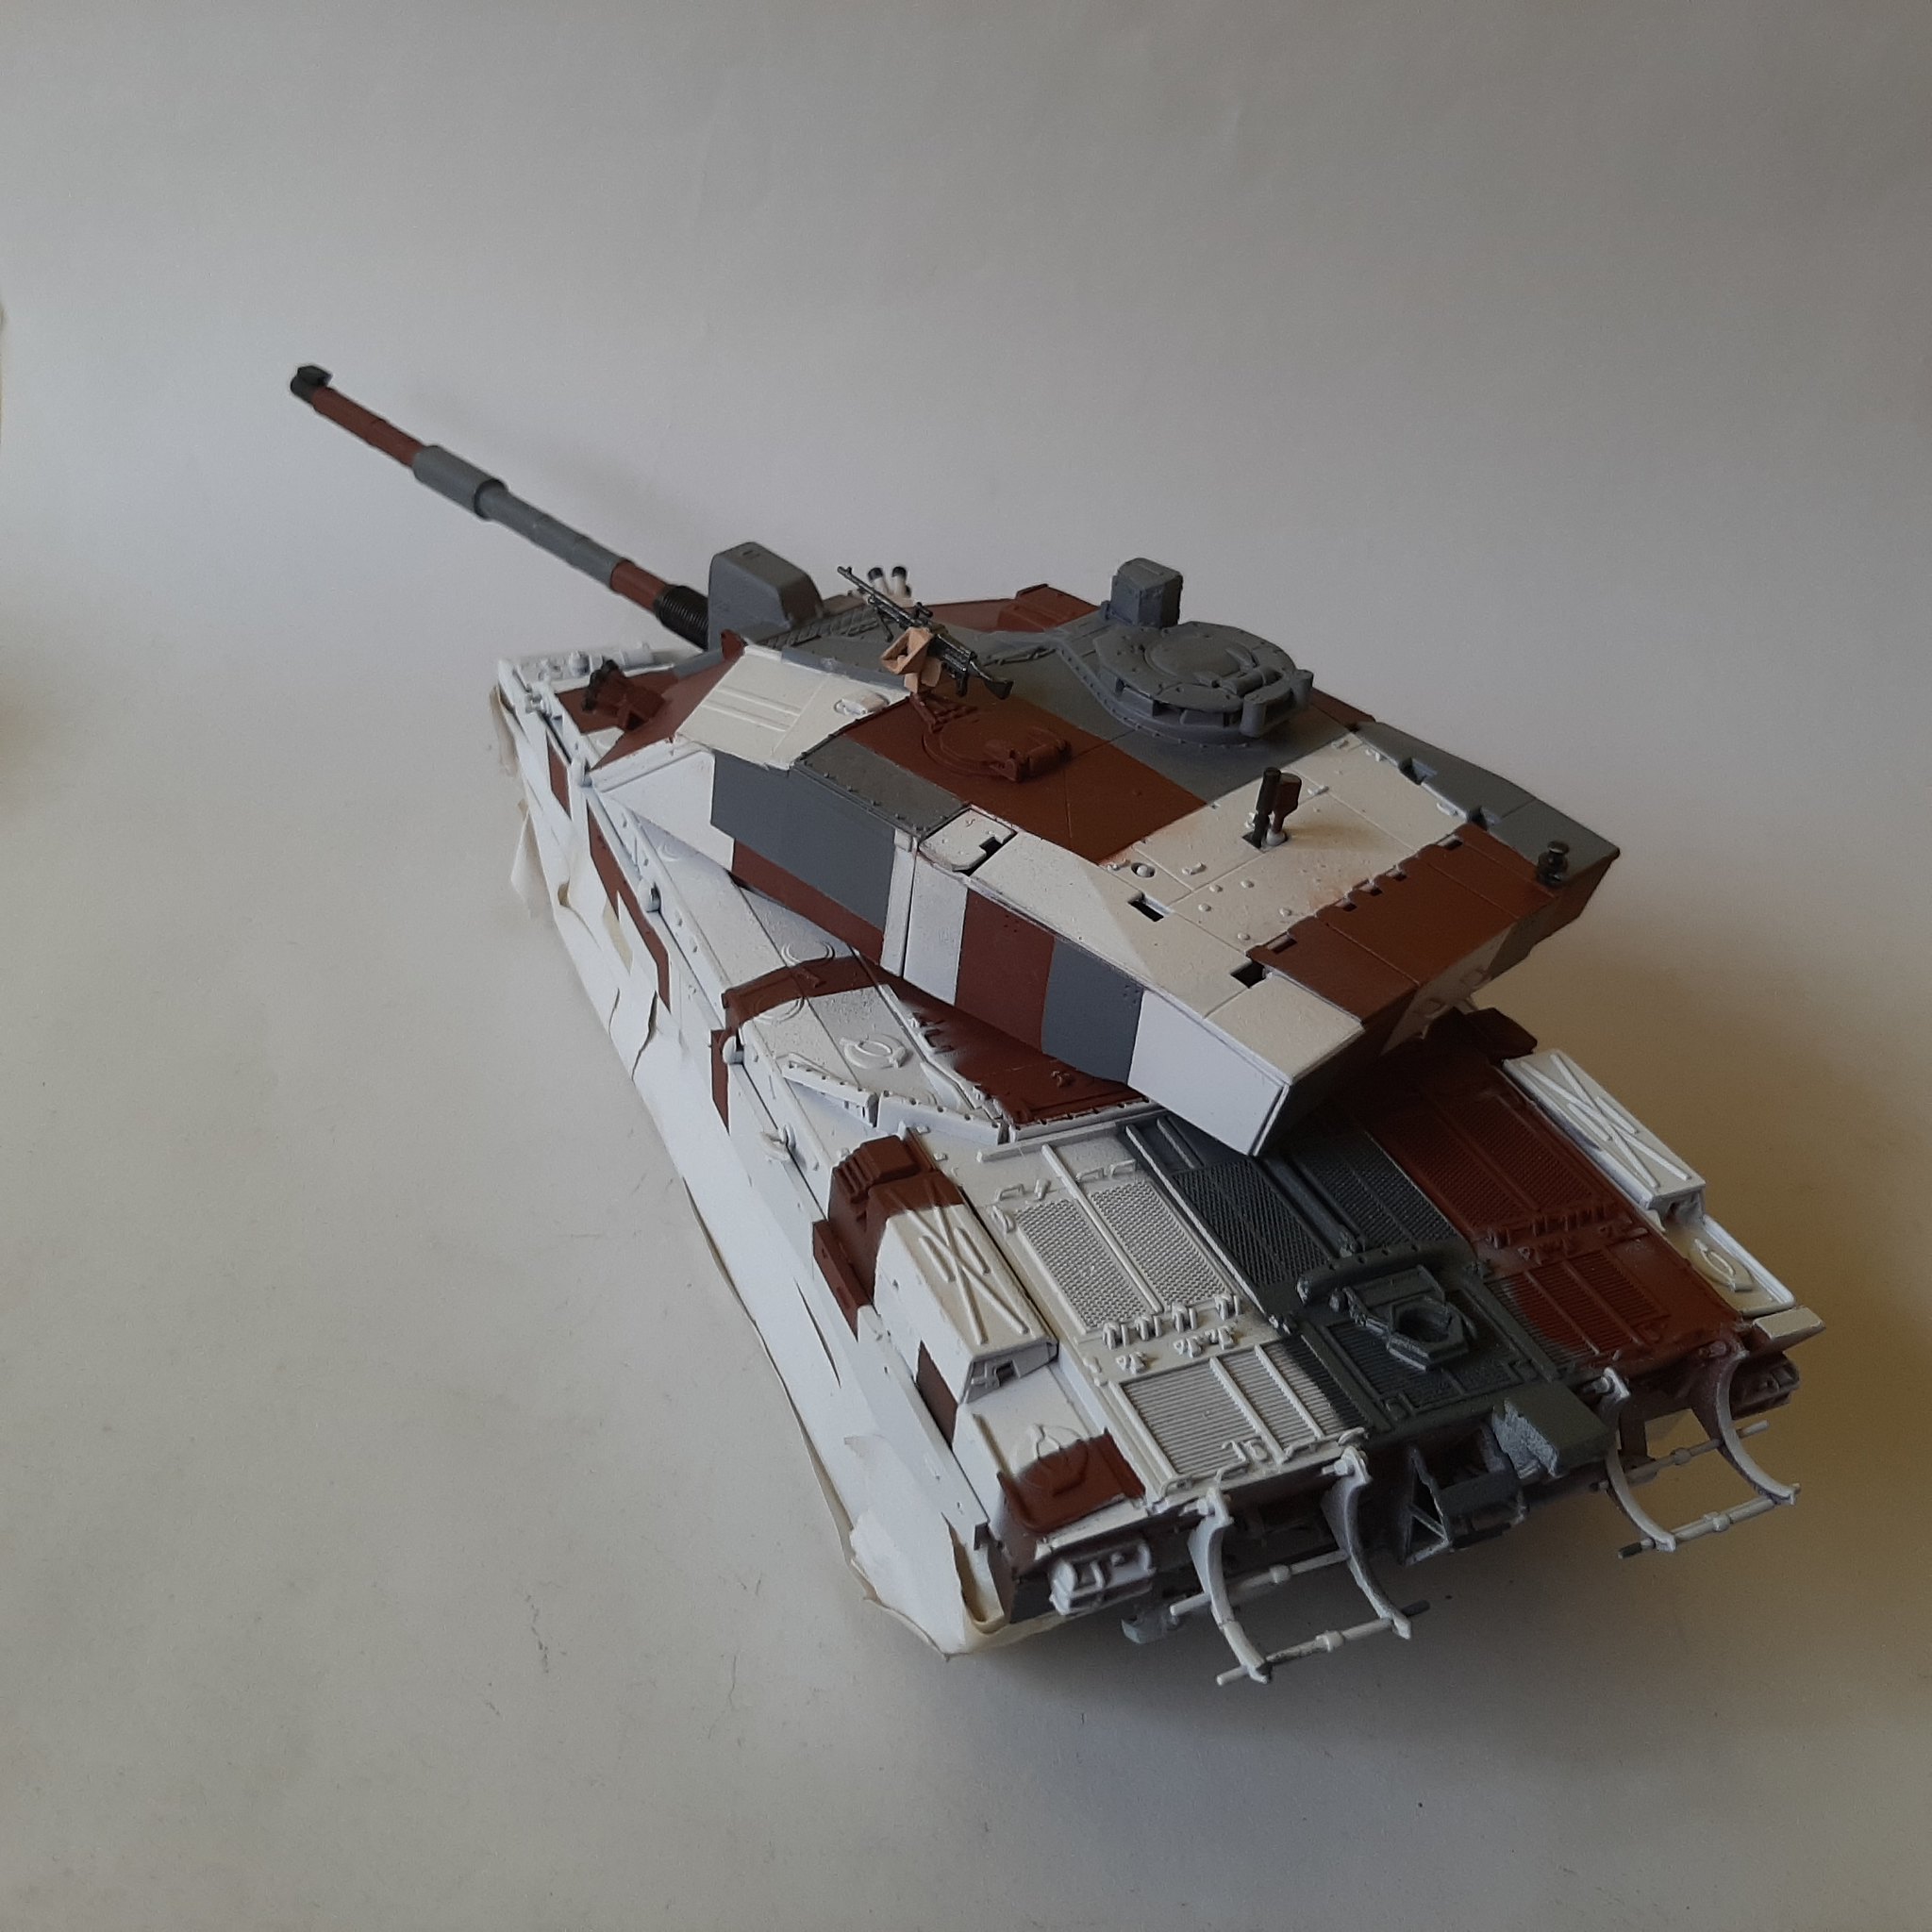
Heres most of one side done. still need to do touch ups. Im going to paint the back plate and glacis last.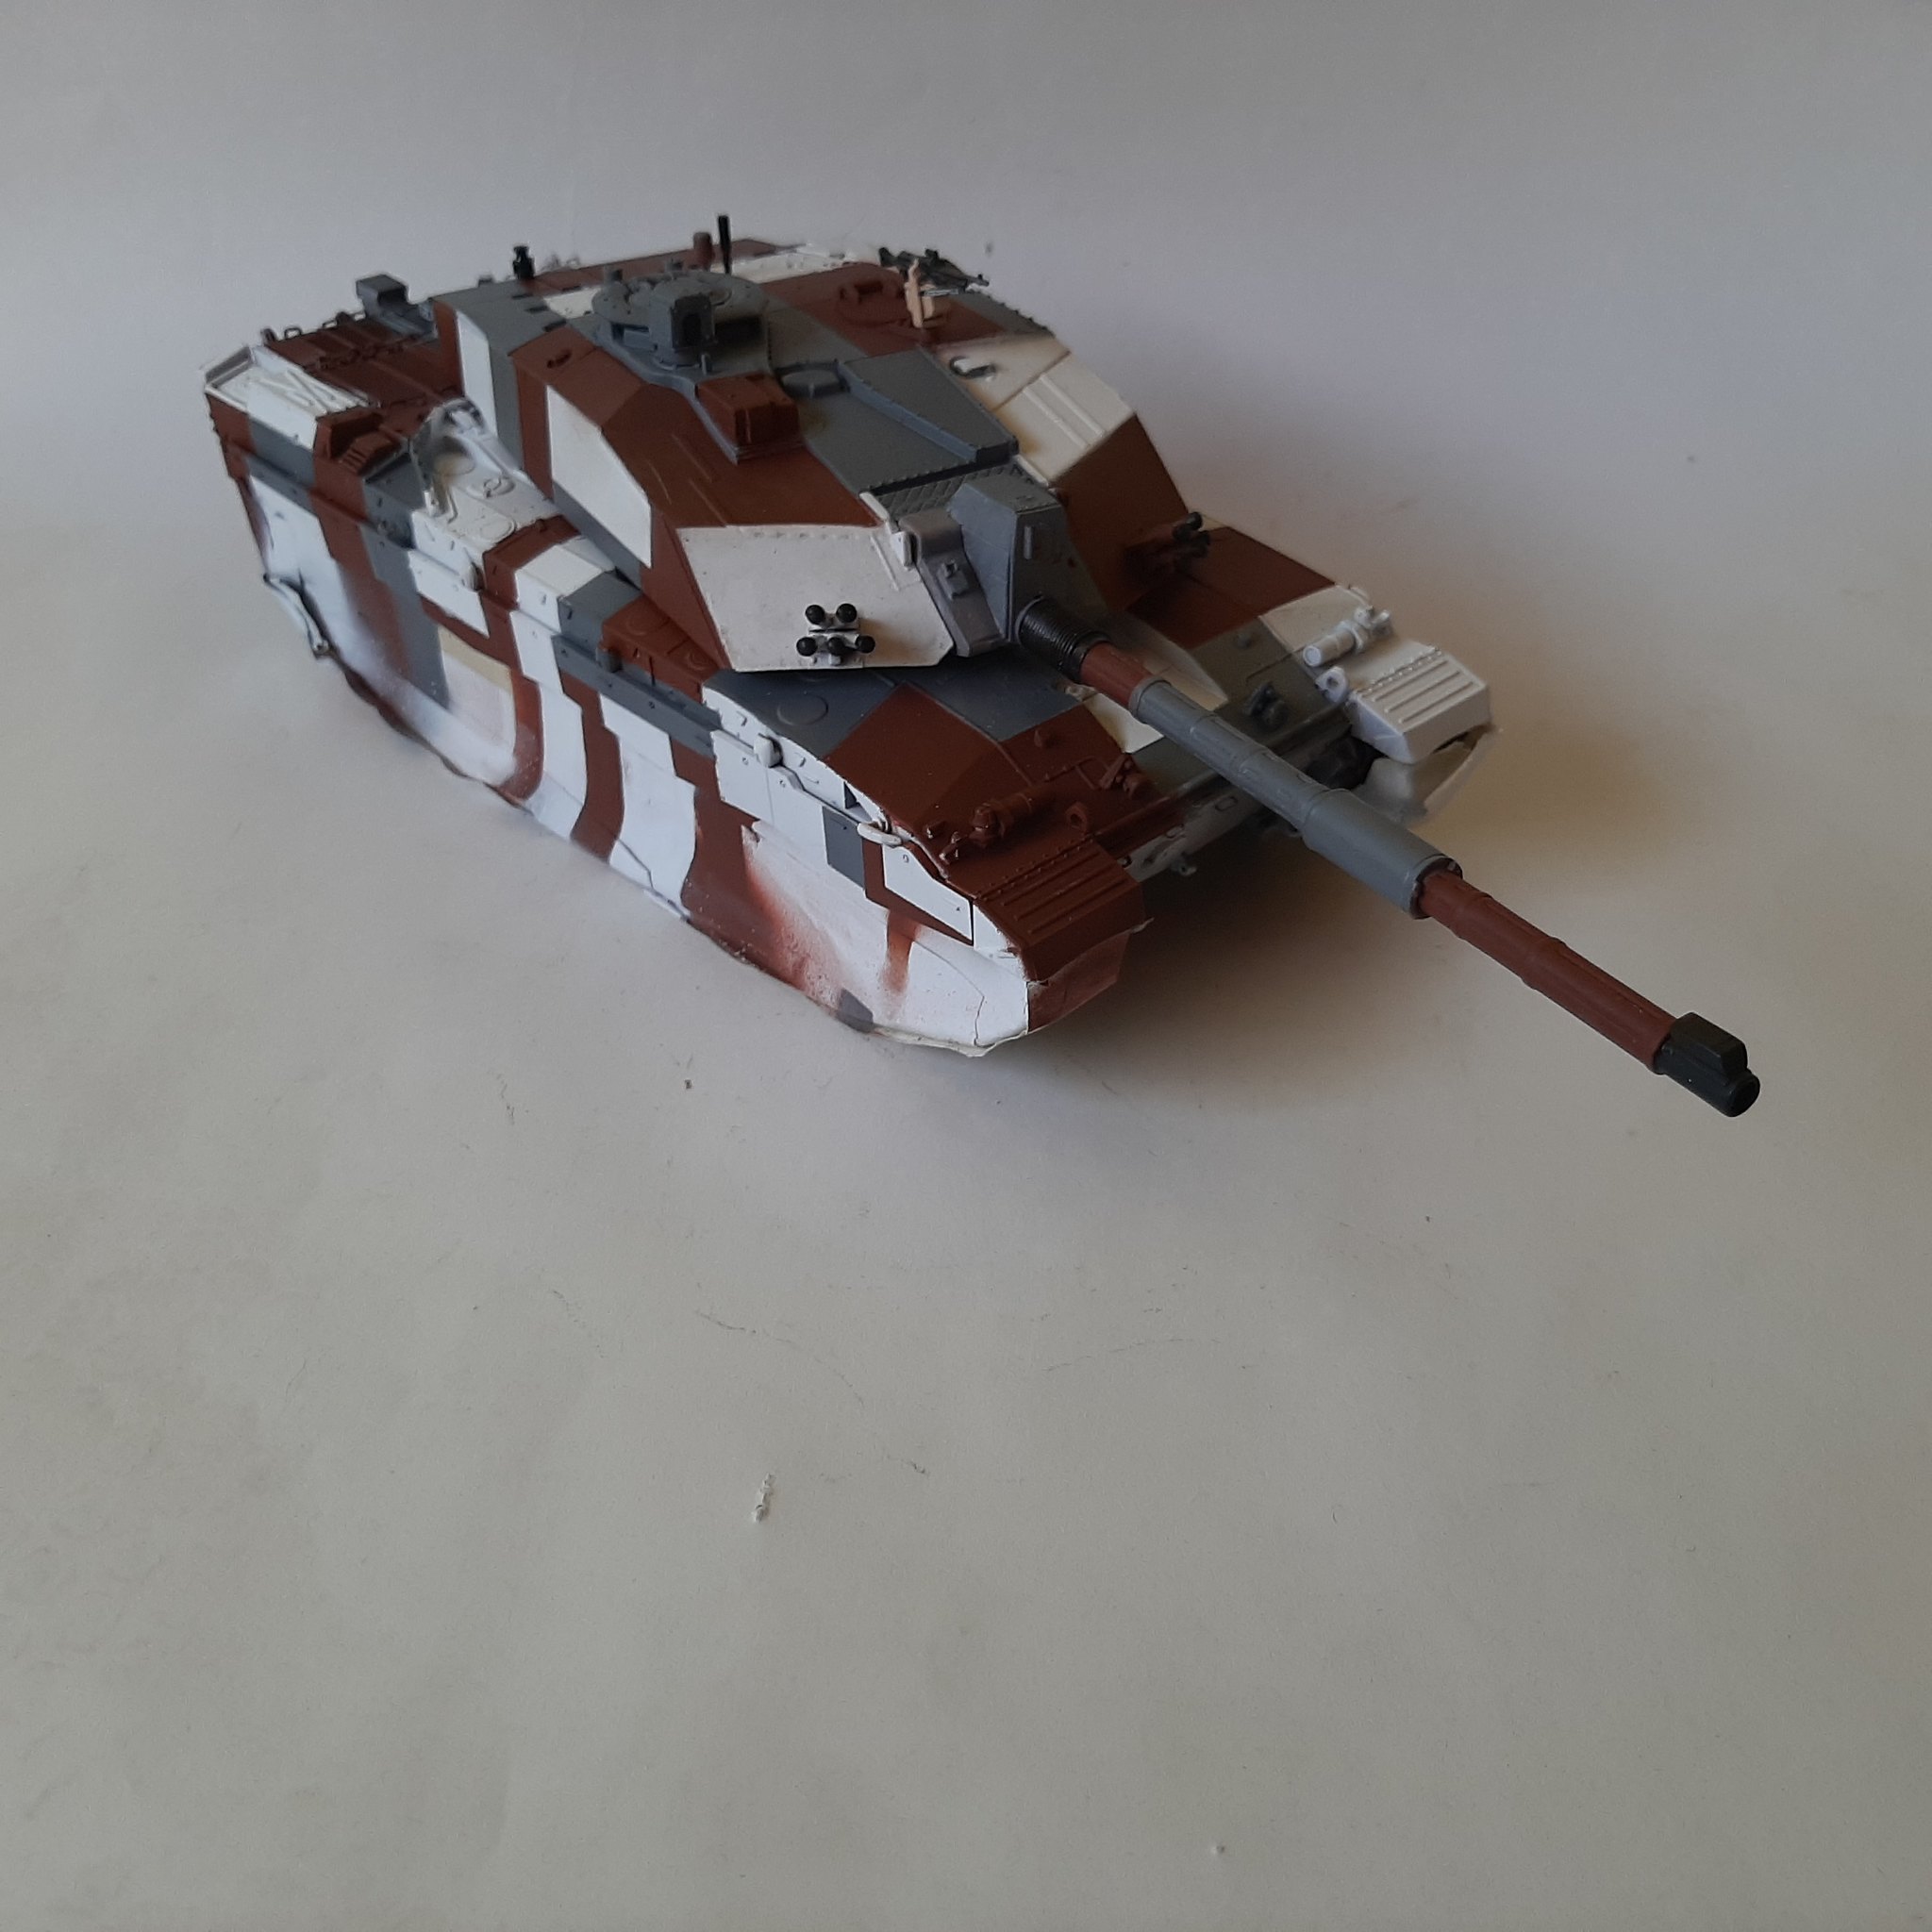
petbat
Joined: August 06, 2005
KitMaker: 3,353 posts
Armorama: 3,121 posts
Posted: Monday, July 06, 2020 - 08:38 AM UTC
Looks fantastic Robert. Enjoy your break.
Coming along very nicely indeed Ezra. The distressed paint job will set up a nice challenge for your skills. Good luck.
Coming along very nicely indeed Ezra. The distressed paint job will set up a nice challenge for your skills. Good luck.
Panzer_Modeler
Joined: May 19, 2020
KitMaker: 419 posts
Armorama: 217 posts
Posted: Monday, July 06, 2020 - 09:57 AM UTC
Quoted Text
Thanks Peter itll be interesting! The distressed paint job will set up a nice challenge for your skills. Good luck.


Panzer_Modeler
Joined: May 19, 2020
KitMaker: 419 posts
Armorama: 217 posts
Posted: Tuesday, July 07, 2020 - 12:21 PM UTC
Sorry all I ment to post some progress pics. today but pre high school tests thought otherwise! oh well hope to get some bench time in a day or so.
robw_uk
Joined: June 22, 2010
KitMaker: 1,224 posts
Armorama: 1,207 posts
Posted: Saturday, July 11, 2020 - 09:07 PM UTC
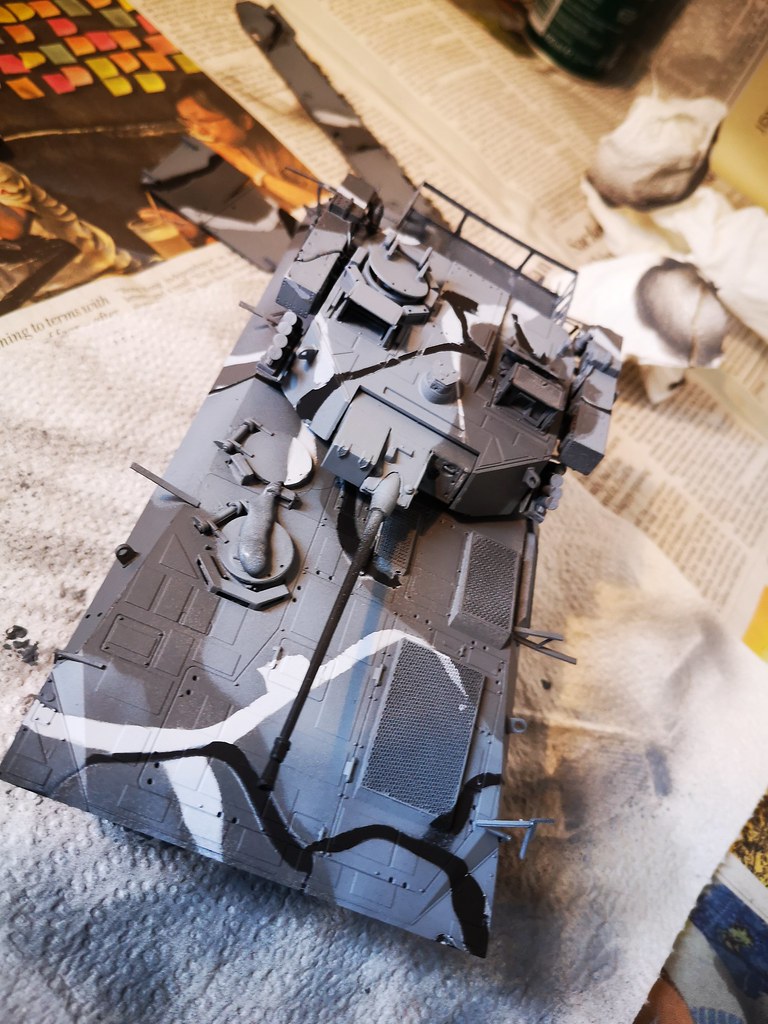
Type 89 has gone black... primer on. Now I have to guess on paint scheme - thinking tri-tone grey with black as a small part as well...
Panzer_Modeler
Joined: May 19, 2020
KitMaker: 419 posts
Armorama: 217 posts
Posted: Sunday, July 12, 2020 - 02:07 AM UTC
Cool!

agriamodeling

Joined: March 09, 2018
KitMaker: 206 posts
Armorama: 205 posts
Posted: Sunday, July 19, 2020 - 04:51 PM UTC
Hi Folks,
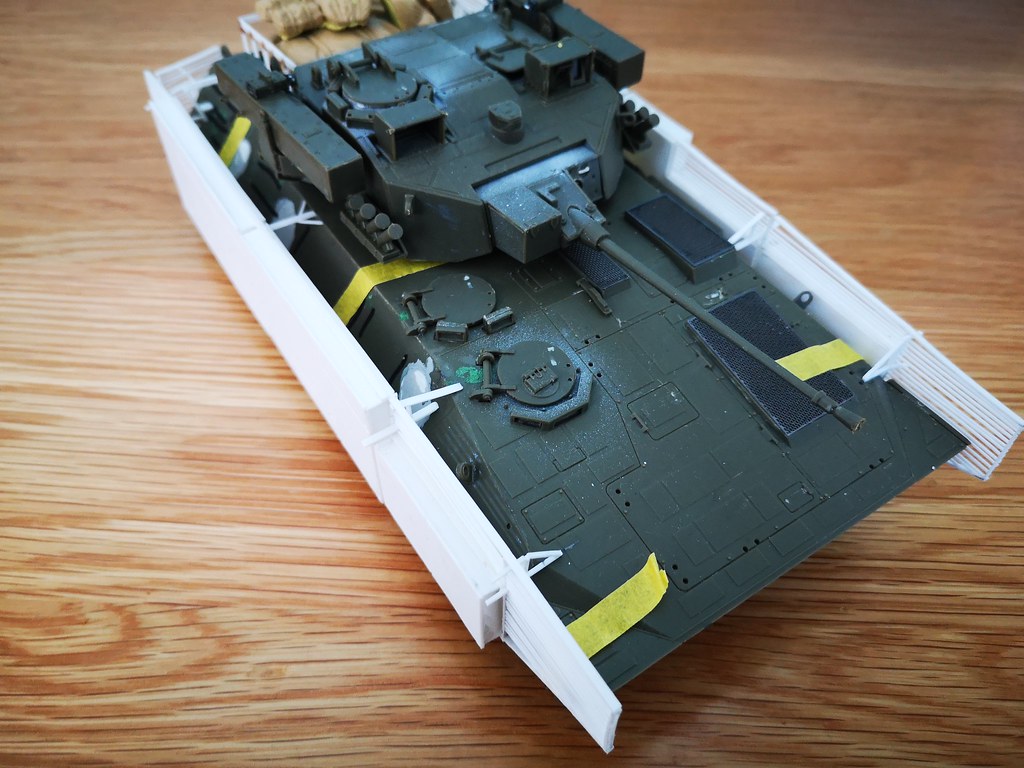
I had a significant time spent on the Type 89 IFV kit since my last post and proudly showing you the result now.
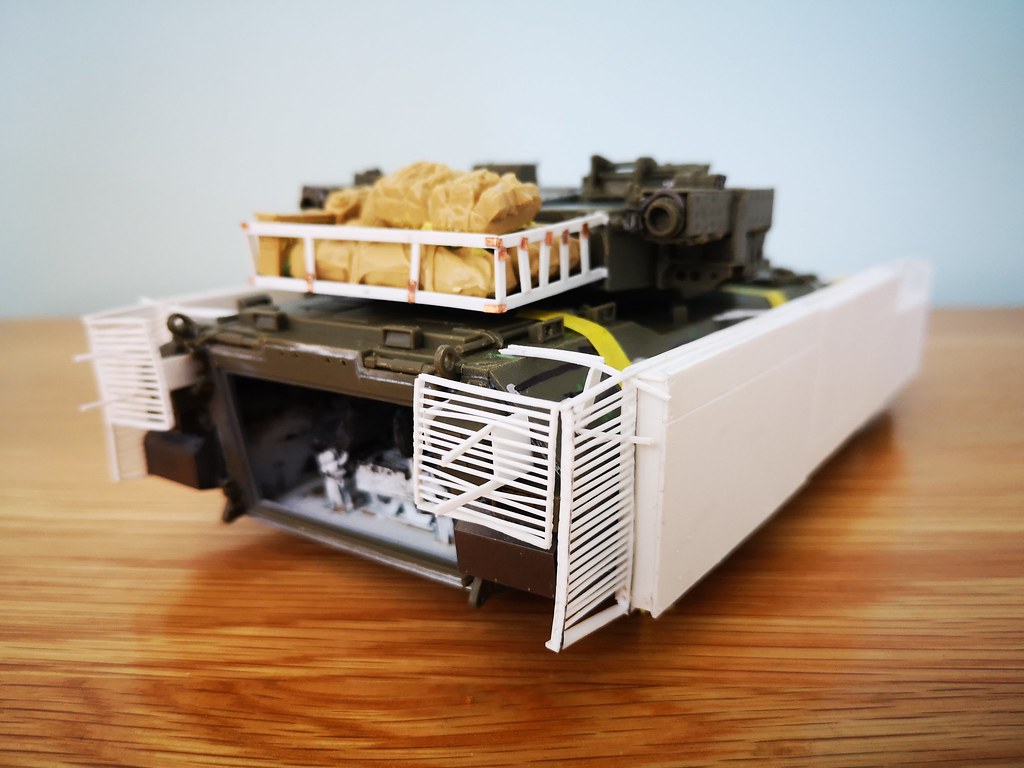
First of all, I could finish the building process which took quite longer than it should have been, taking in account the part numbers of the kit and the PE set. The reason is that the kit is old Trumpy, compared to their newest releases and it took me lot of efforts to smooth out the signs of its age. Not recommended to beginners, youngsters and anyone w/o enormous amount of patience. But at the end when the last bit of the PE was glued, the result looked promising, though like a patchwork:
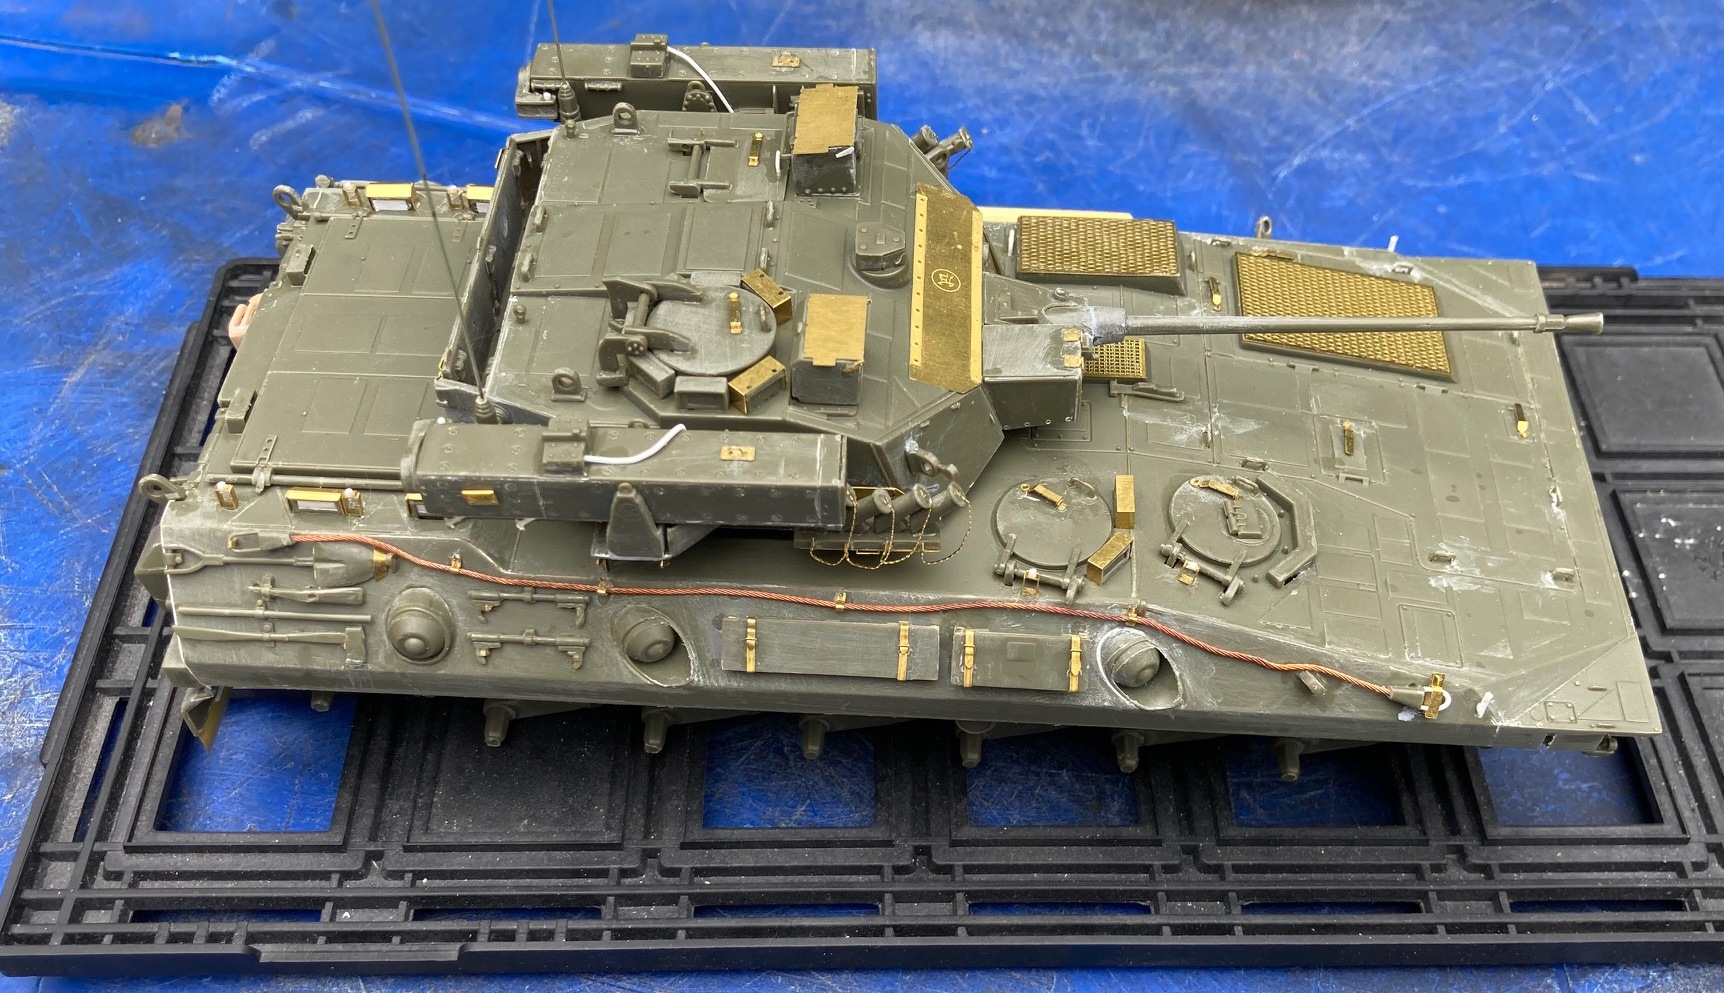
You can see how many places required sanding and filling. The white parts were added as replacement of tiny elements eaten by Carpet Monster's sister Floor-tile Monstress because I worked in the garden. Even worse, more brutal monster. Once a part fell, impossible to find.
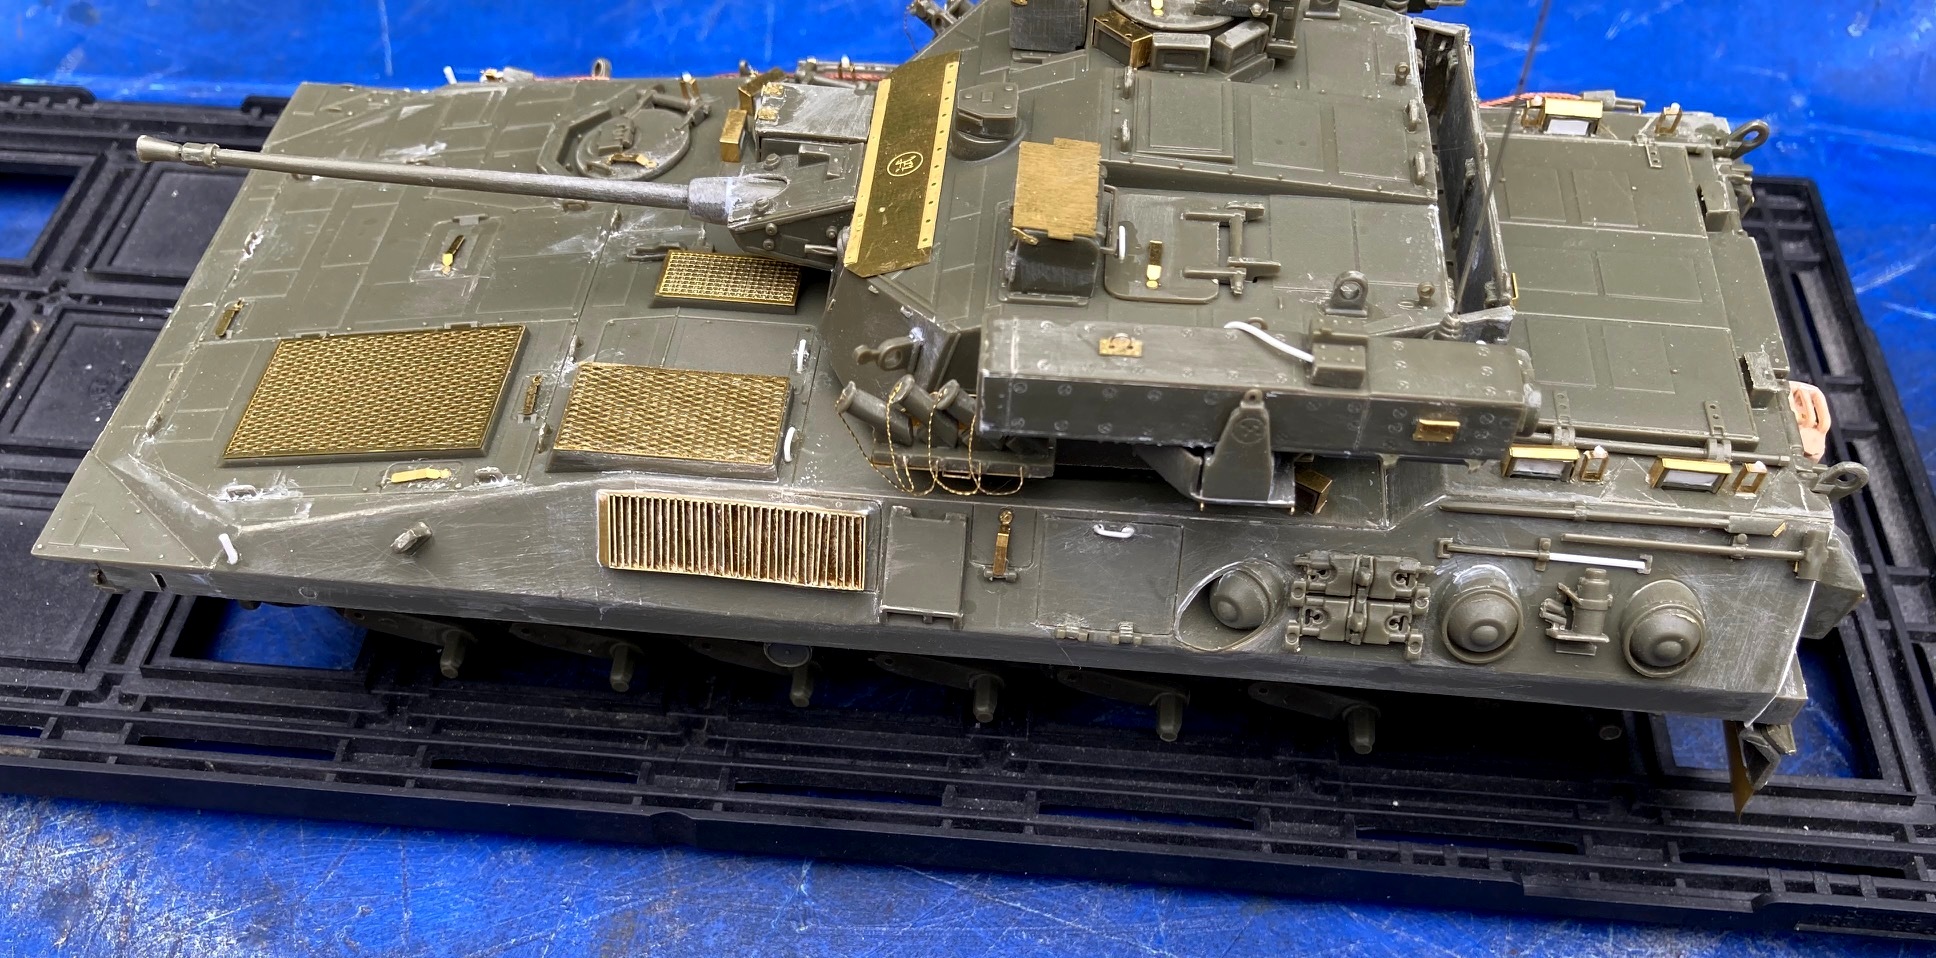
The original jerrycan was neglected due to poor details and I replaced it using one from Meng accessories set. It is a bit wider than the PE frame would enable so I had to sand off a bit on both sides. Cannot be seen on the photo now, but it is a great detail now on the backdoor. The PE exhaust was the greatest pain during the build but it was a must to use it as the plastic version from the kit is way more simple and lacks of any good detail. When I looked at it from close distance it is still not perfect - the reeds (laminas?) should be all parallel - some of them are a bit angled.
Also the kit provides some plastic covered very fine electric wire to be used on the ATGM launchers but after an attempt to apply them I decided to use Evergreen plastic rod with the smallest possible diameter. The funny point is that most of the tubes are not visible at all after the launchers are placed onto the turret.
The gun mantle very end part also gave me some extra work because the guys at Trumpeter decided to represent it using two parts: one cylindrical molded with the mantle and a conical molded with the gun barrel. The problem is that the matching area is not perfect and leaves a huge trench all around. I did not like it si filled up and sanded down - of course after the turret was 80% ready, just to show how little I read the assembly manual. It was a good challenge to smooth out the surface and avoiding to break off any part, but finally I could manage it.
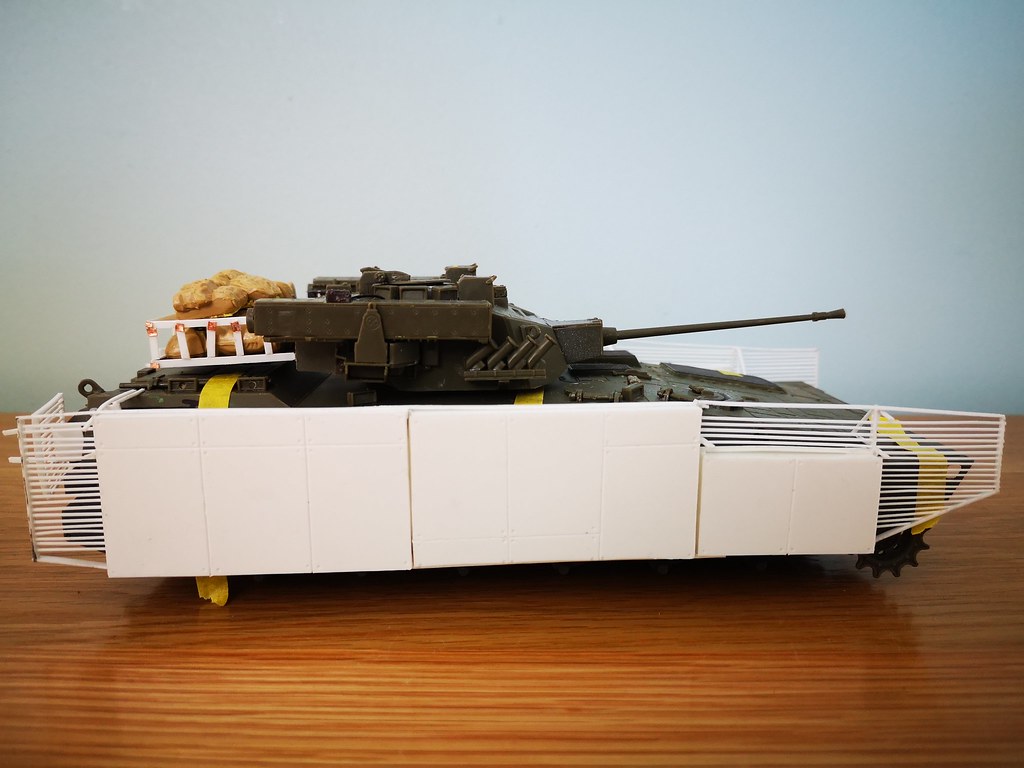
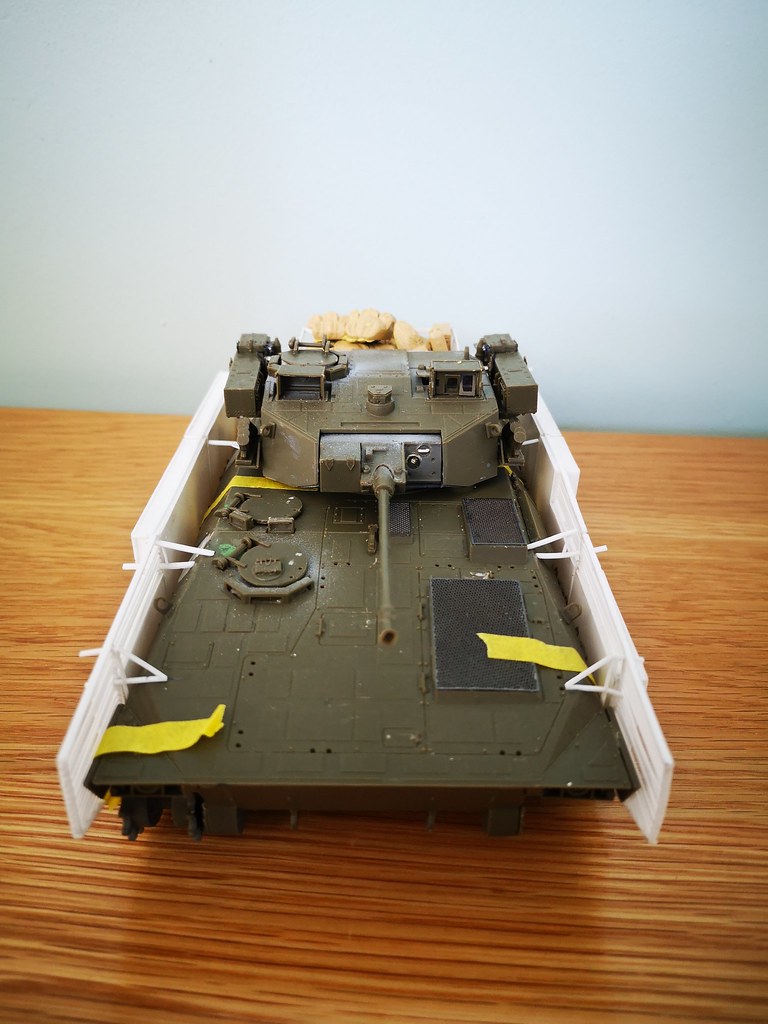
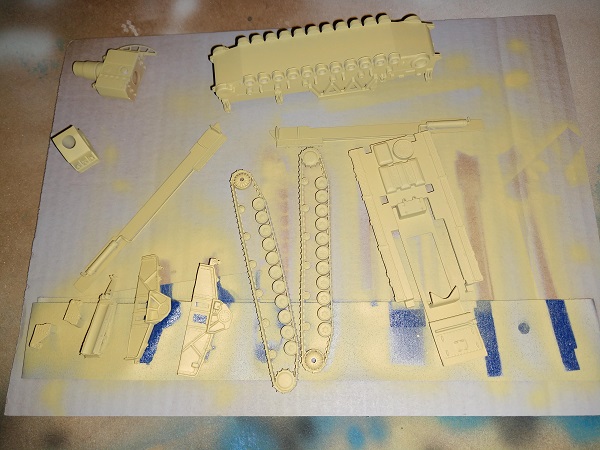
All in all, the model looked very colorful and dusty before primer applied:
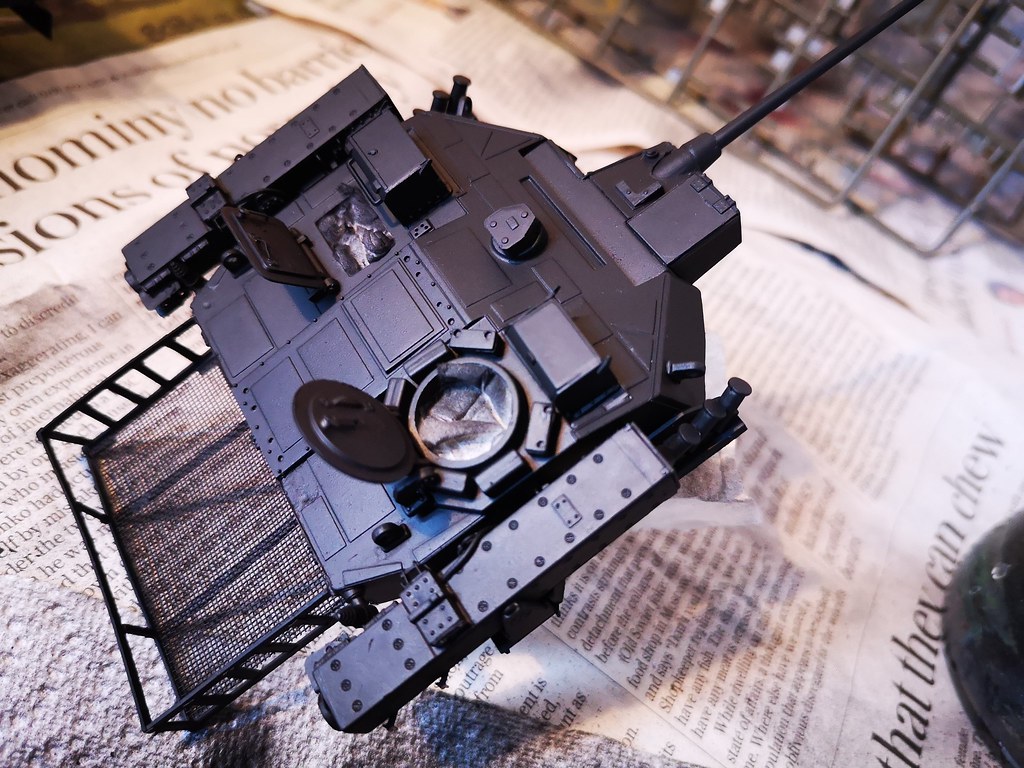
Black priming.
I applied my fav 1500 grade black primer from Gunze product line and the result looked like this:
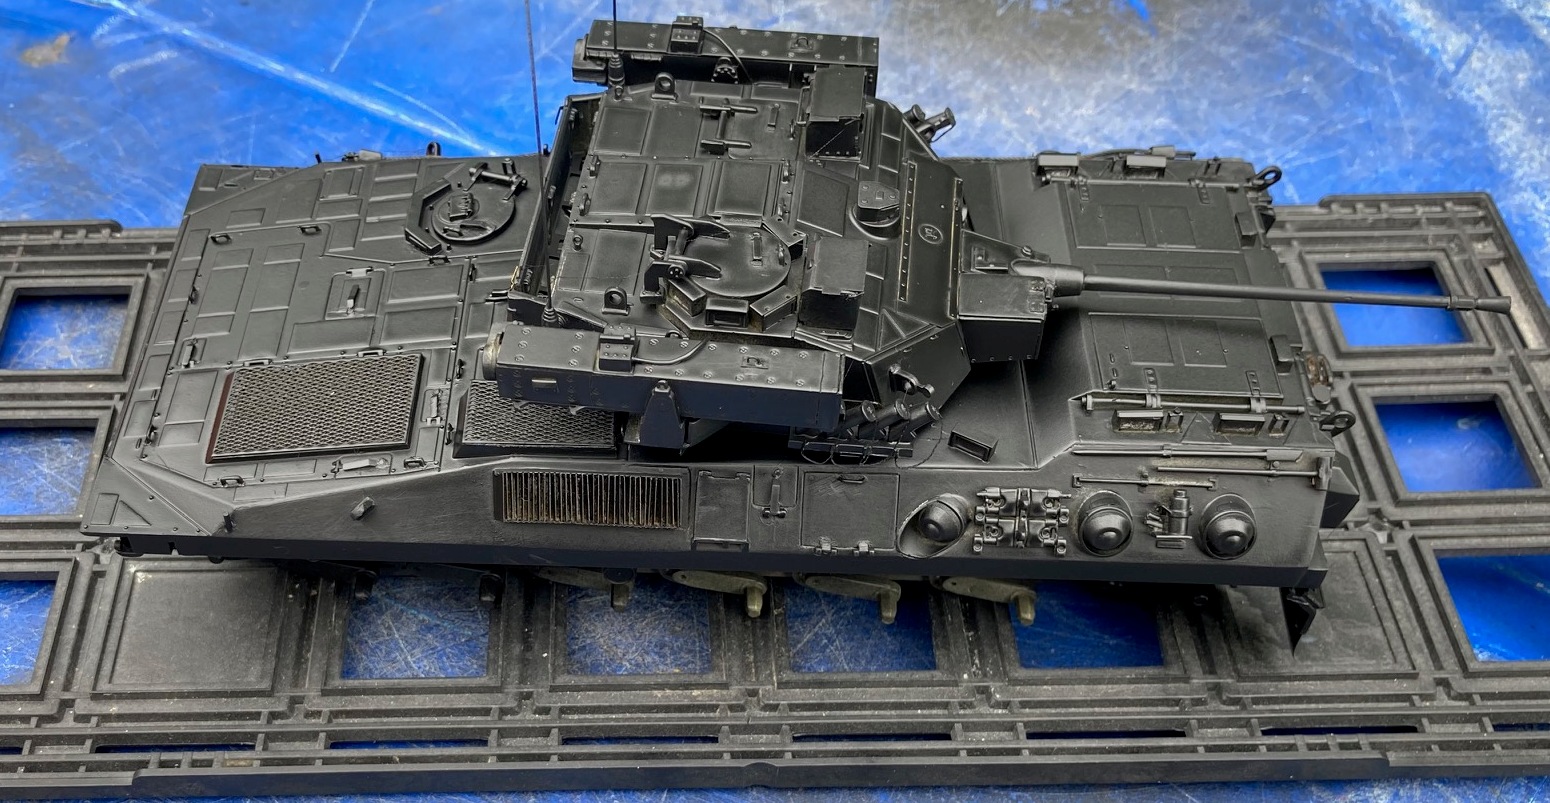
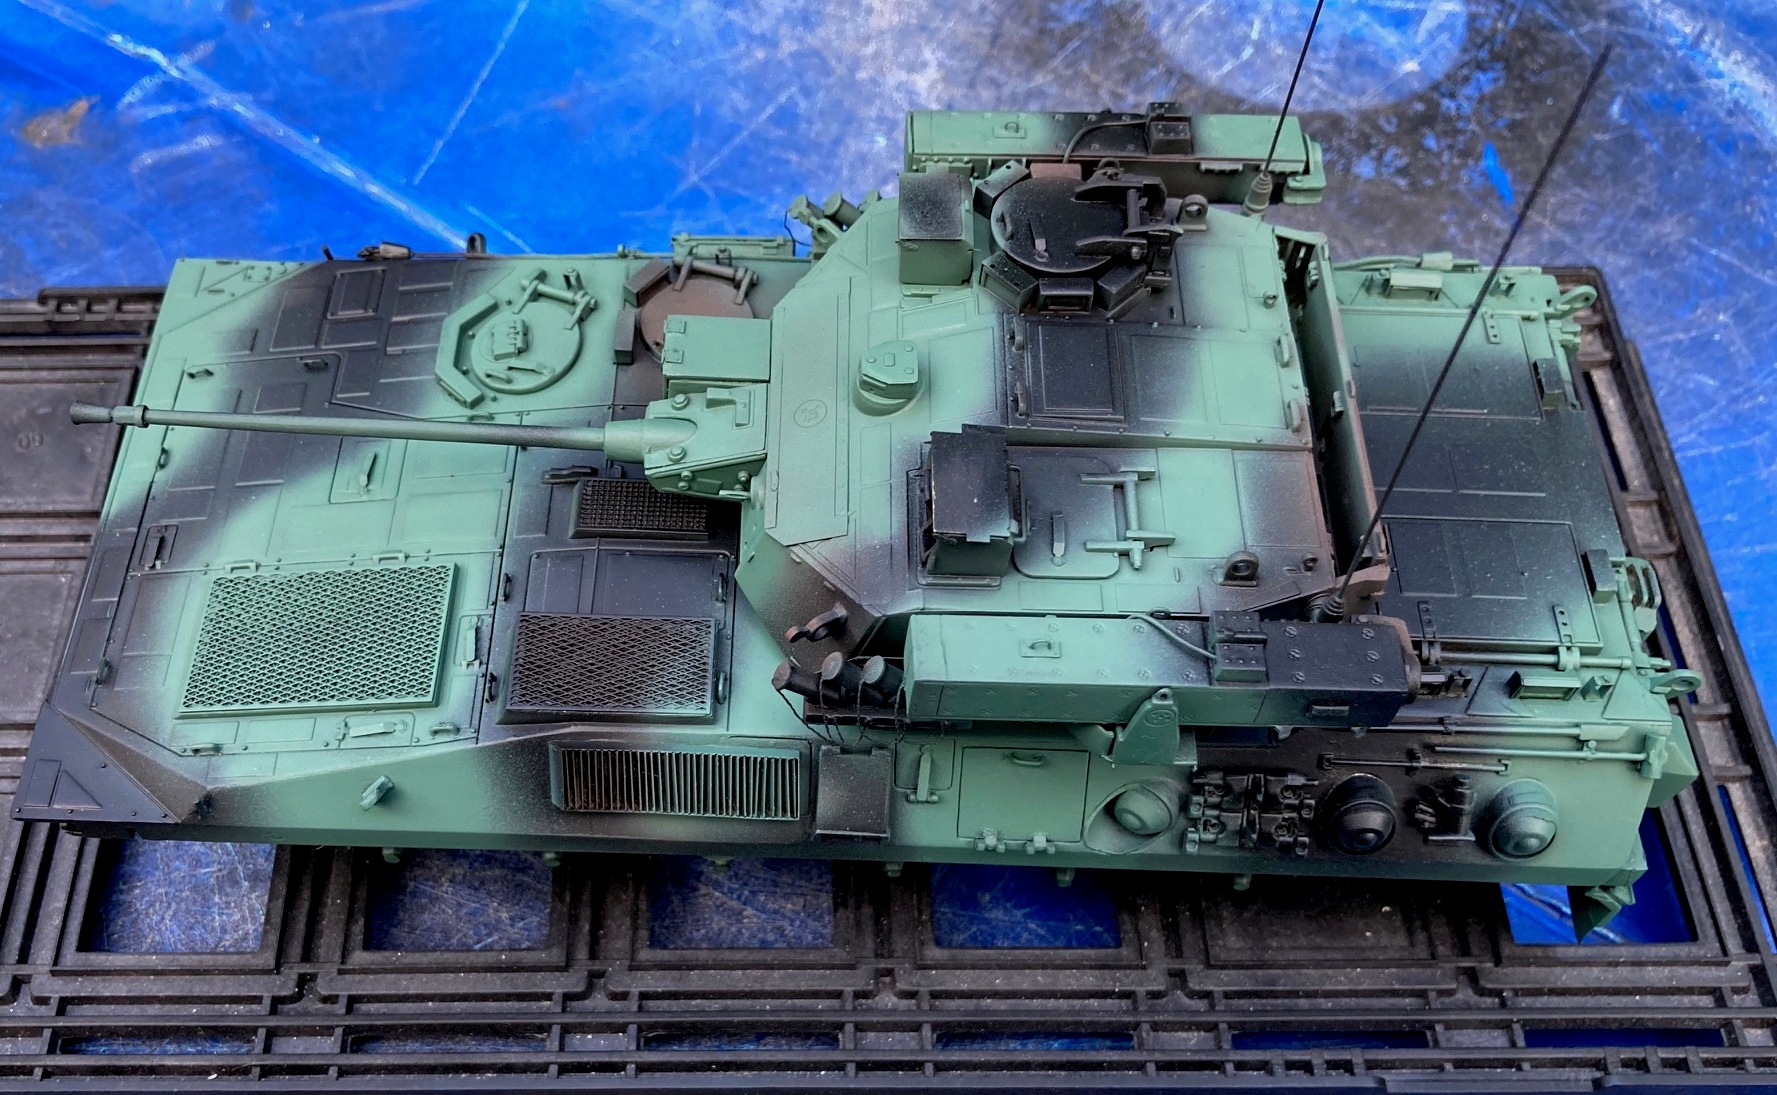
I liked it very much as the model was looking like a very mean subject from a Sci-Fi movie. As I already bought the green and brown paint I decide to continue the work and leave the "what-if a black tank" idea for another project. After a bit of light sanding the very flat surfaces (yes, there are) and some minor correction of 2-3 nasty glue marks and scratches here and there, I applied the green paint, leaving the brown areas free to avoid loosing fine details of the plastic being covered with multiple layer of paints (Trumpeter guys did not try to provide deep enough details on the ATGM launchers, for example).
Green on.
Do not worry, the mint color is not true, the photo was taken too late w/o any nice sunshine (we had a very English weather in Budapest last week), it is closer to the green I see on the photos taken from the original IFV.
I will post again after the brown will be painted, which is unlikely in the next 1-2 weeks. Any positive comments are warmly welcome, negatives are carefully read for correction on the model or in my written English :-)
Take care and happy modeling!
Tamás
I had a significant time spent on the Type 89 IFV kit since my last post and proudly showing you the result now.
First of all, I could finish the building process which took quite longer than it should have been, taking in account the part numbers of the kit and the PE set. The reason is that the kit is old Trumpy, compared to their newest releases and it took me lot of efforts to smooth out the signs of its age. Not recommended to beginners, youngsters and anyone w/o enormous amount of patience. But at the end when the last bit of the PE was glued, the result looked promising, though like a patchwork:
You can see how many places required sanding and filling. The white parts were added as replacement of tiny elements eaten by Carpet Monster's sister Floor-tile Monstress because I worked in the garden. Even worse, more brutal monster. Once a part fell, impossible to find.
The original jerrycan was neglected due to poor details and I replaced it using one from Meng accessories set. It is a bit wider than the PE frame would enable so I had to sand off a bit on both sides. Cannot be seen on the photo now, but it is a great detail now on the backdoor. The PE exhaust was the greatest pain during the build but it was a must to use it as the plastic version from the kit is way more simple and lacks of any good detail. When I looked at it from close distance it is still not perfect - the reeds (laminas?) should be all parallel - some of them are a bit angled.
Also the kit provides some plastic covered very fine electric wire to be used on the ATGM launchers but after an attempt to apply them I decided to use Evergreen plastic rod with the smallest possible diameter. The funny point is that most of the tubes are not visible at all after the launchers are placed onto the turret.
The gun mantle very end part also gave me some extra work because the guys at Trumpeter decided to represent it using two parts: one cylindrical molded with the mantle and a conical molded with the gun barrel. The problem is that the matching area is not perfect and leaves a huge trench all around. I did not like it si filled up and sanded down - of course after the turret was 80% ready, just to show how little I read the assembly manual. It was a good challenge to smooth out the surface and avoiding to break off any part, but finally I could manage it.
All in all, the model looked very colorful and dusty before primer applied:
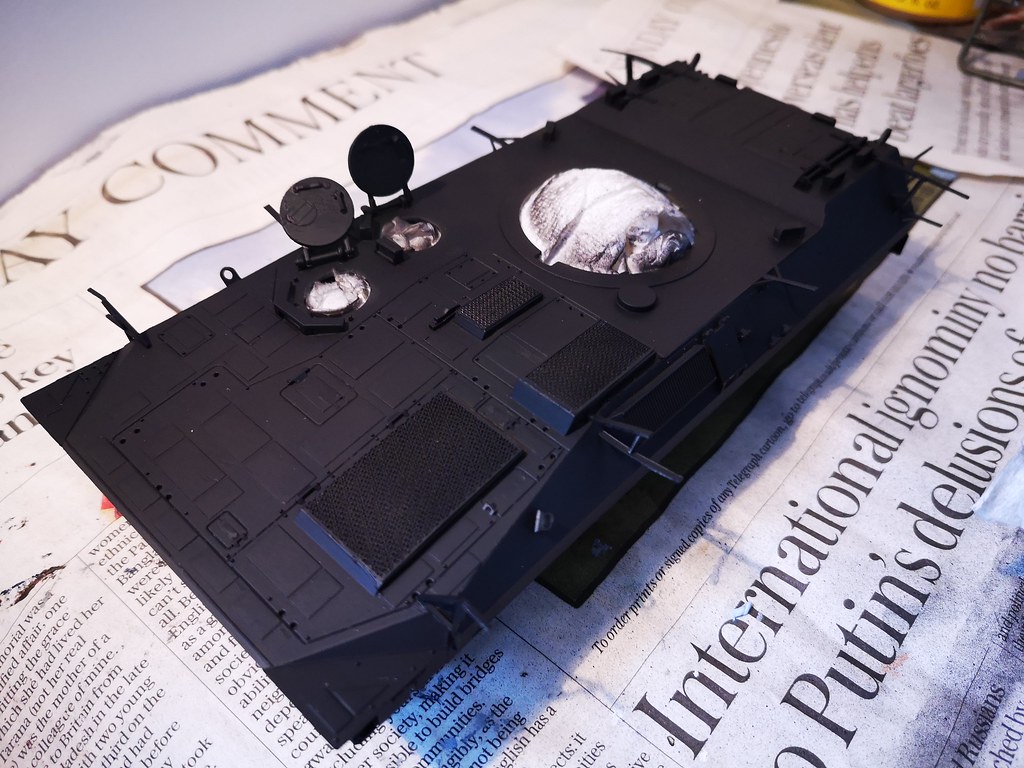
Black priming.
I applied my fav 1500 grade black primer from Gunze product line and the result looked like this:
I liked it very much as the model was looking like a very mean subject from a Sci-Fi movie. As I already bought the green and brown paint I decide to continue the work and leave the "what-if a black tank" idea for another project. After a bit of light sanding the very flat surfaces (yes, there are) and some minor correction of 2-3 nasty glue marks and scratches here and there, I applied the green paint, leaving the brown areas free to avoid loosing fine details of the plastic being covered with multiple layer of paints (Trumpeter guys did not try to provide deep enough details on the ATGM launchers, for example).
Green on.
Do not worry, the mint color is not true, the photo was taken too late w/o any nice sunshine (we had a very English weather in Budapest last week), it is closer to the green I see on the photos taken from the original IFV.
I will post again after the brown will be painted, which is unlikely in the next 1-2 weeks. Any positive comments are warmly welcome, negatives are carefully read for correction on the model or in my written English :-)
Take care and happy modeling!
Tamás
Panzer_Modeler
Joined: May 19, 2020
KitMaker: 419 posts
Armorama: 217 posts
Posted: Monday, July 20, 2020 - 01:41 AM UTC
Wow! You really made a beauty there! 
Panzer_Modeler
Joined: May 19, 2020
KitMaker: 419 posts
Armorama: 217 posts
Posted: Thursday, July 23, 2020 - 06:31 AM UTC
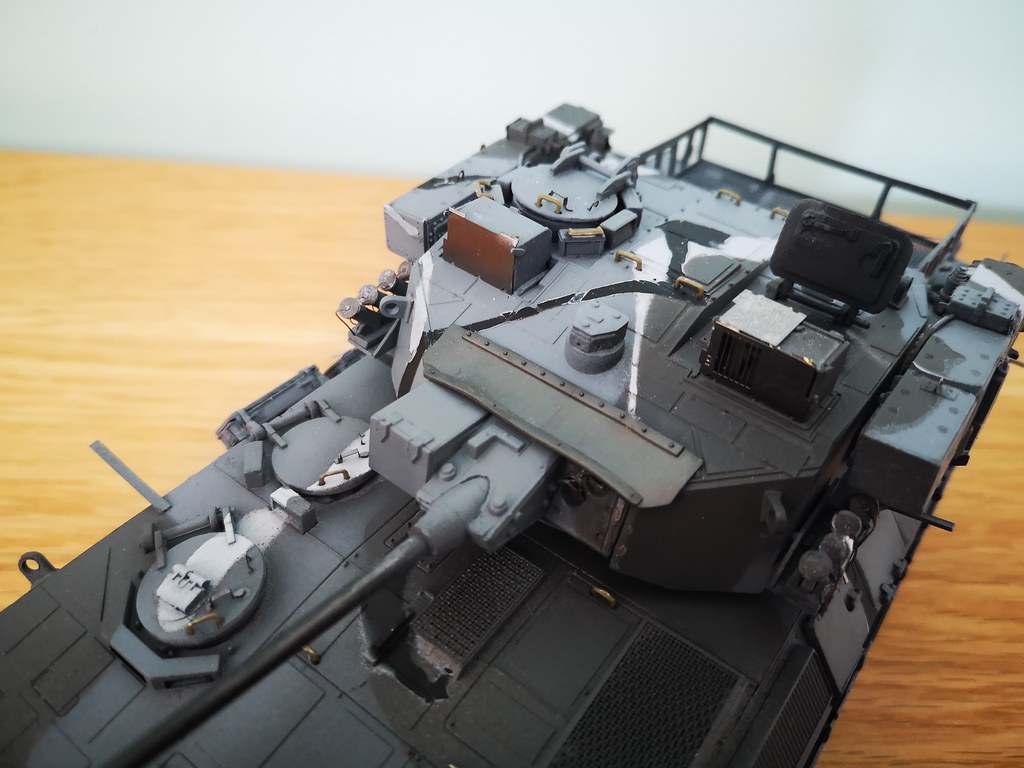
I know its been awhile since ive posted a progress shot so......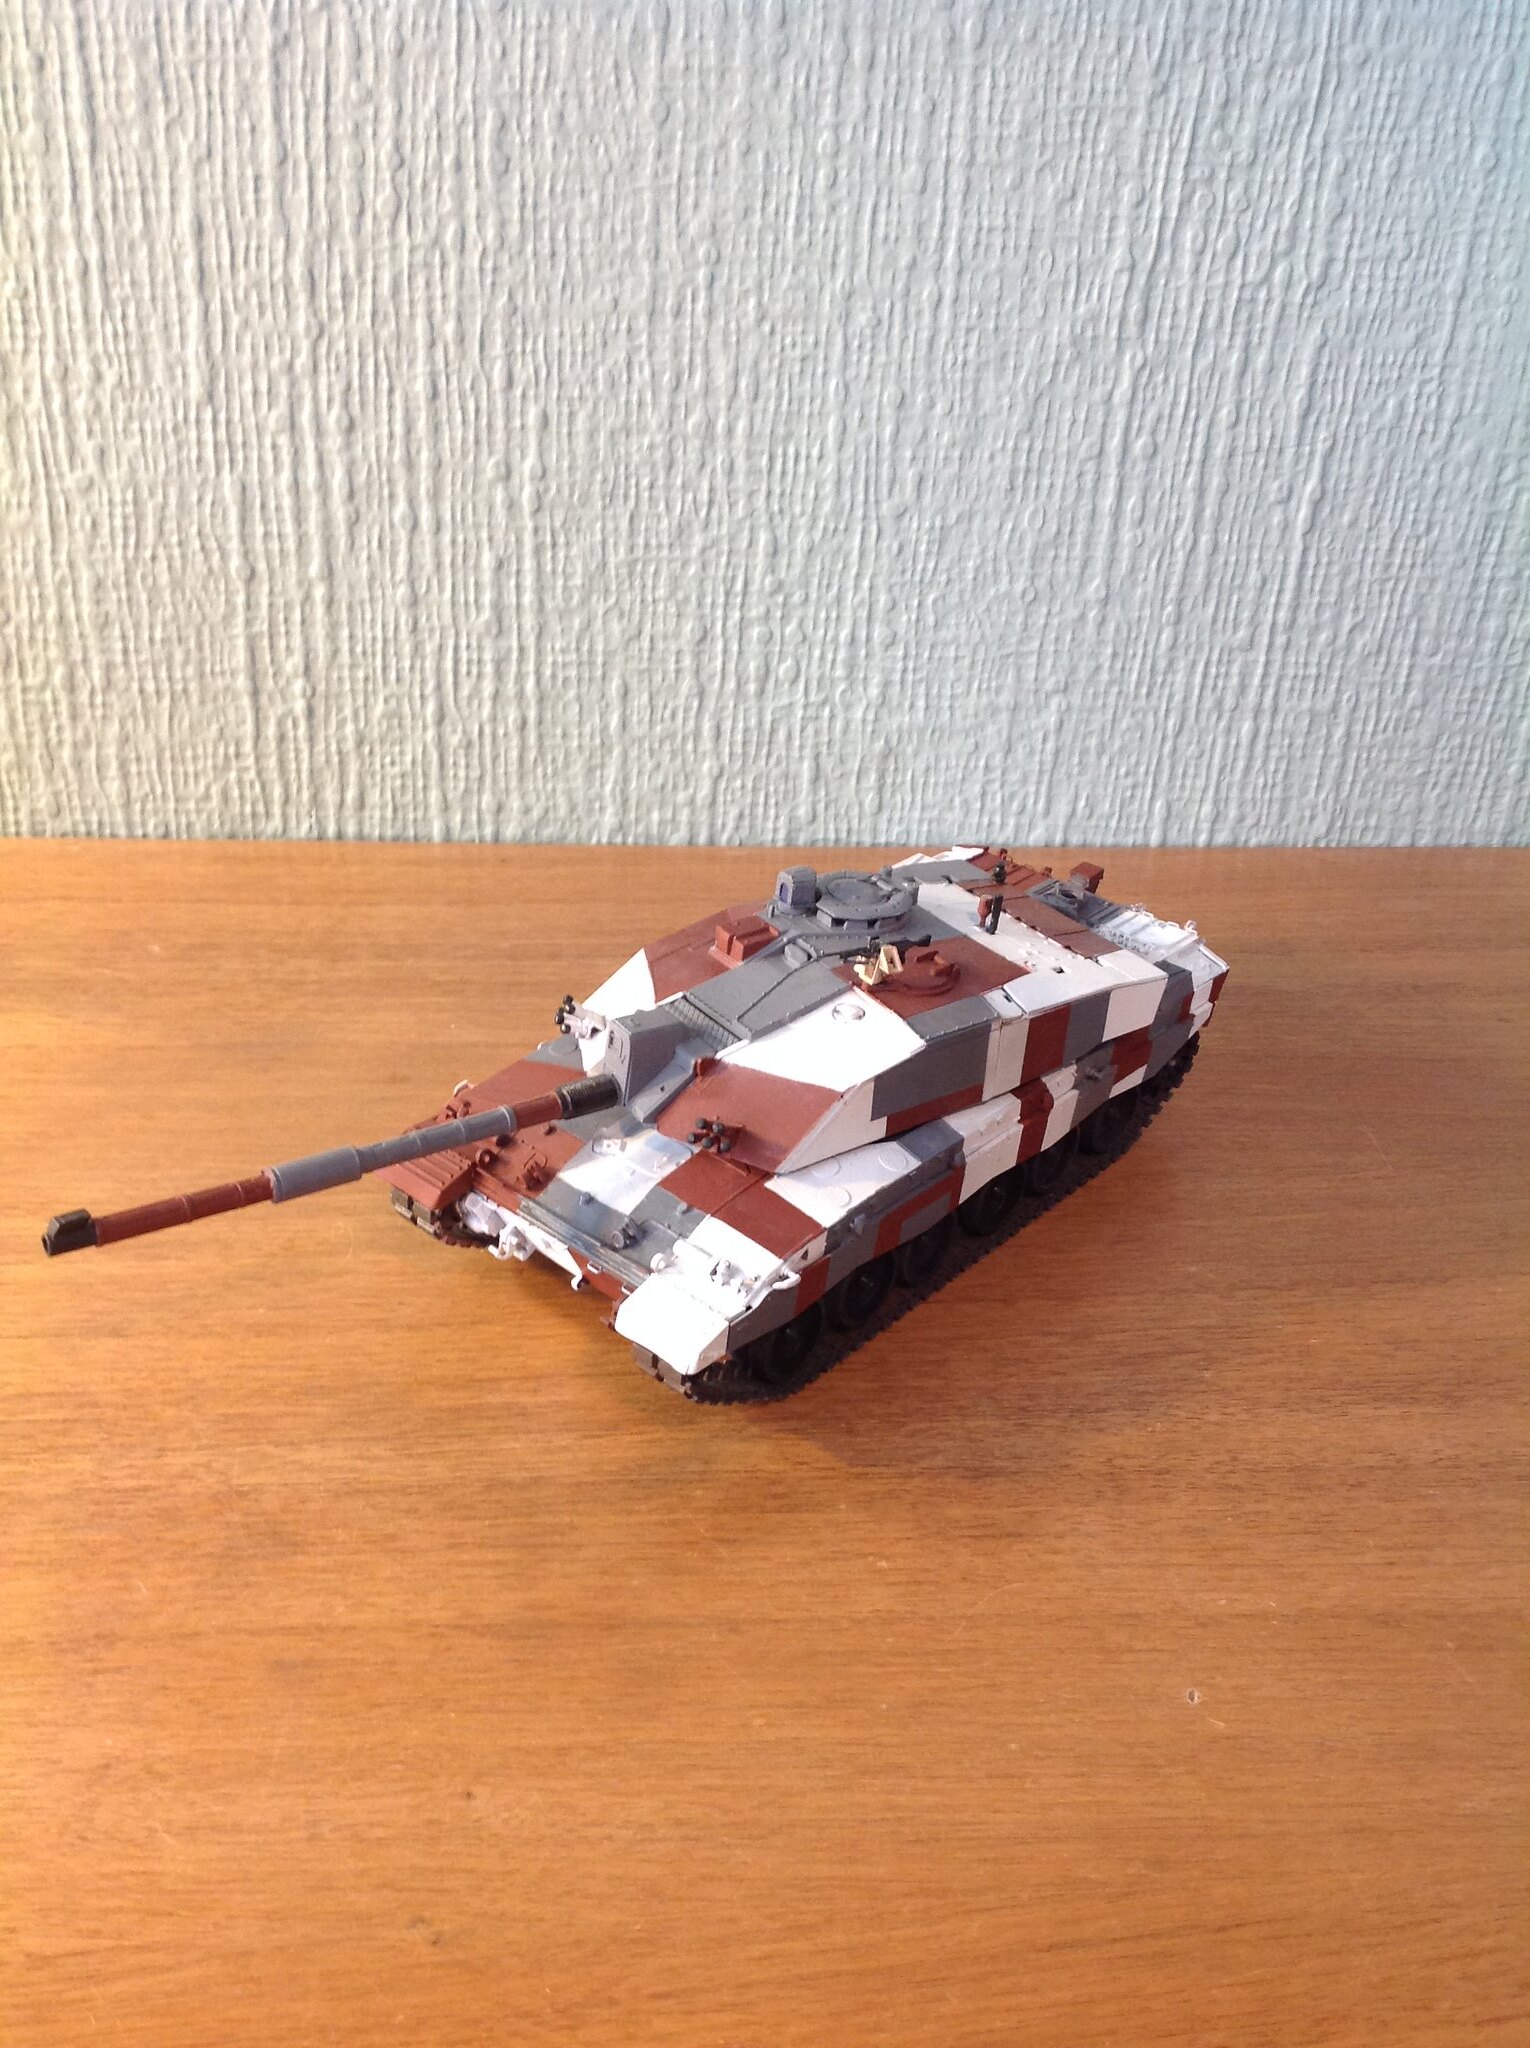
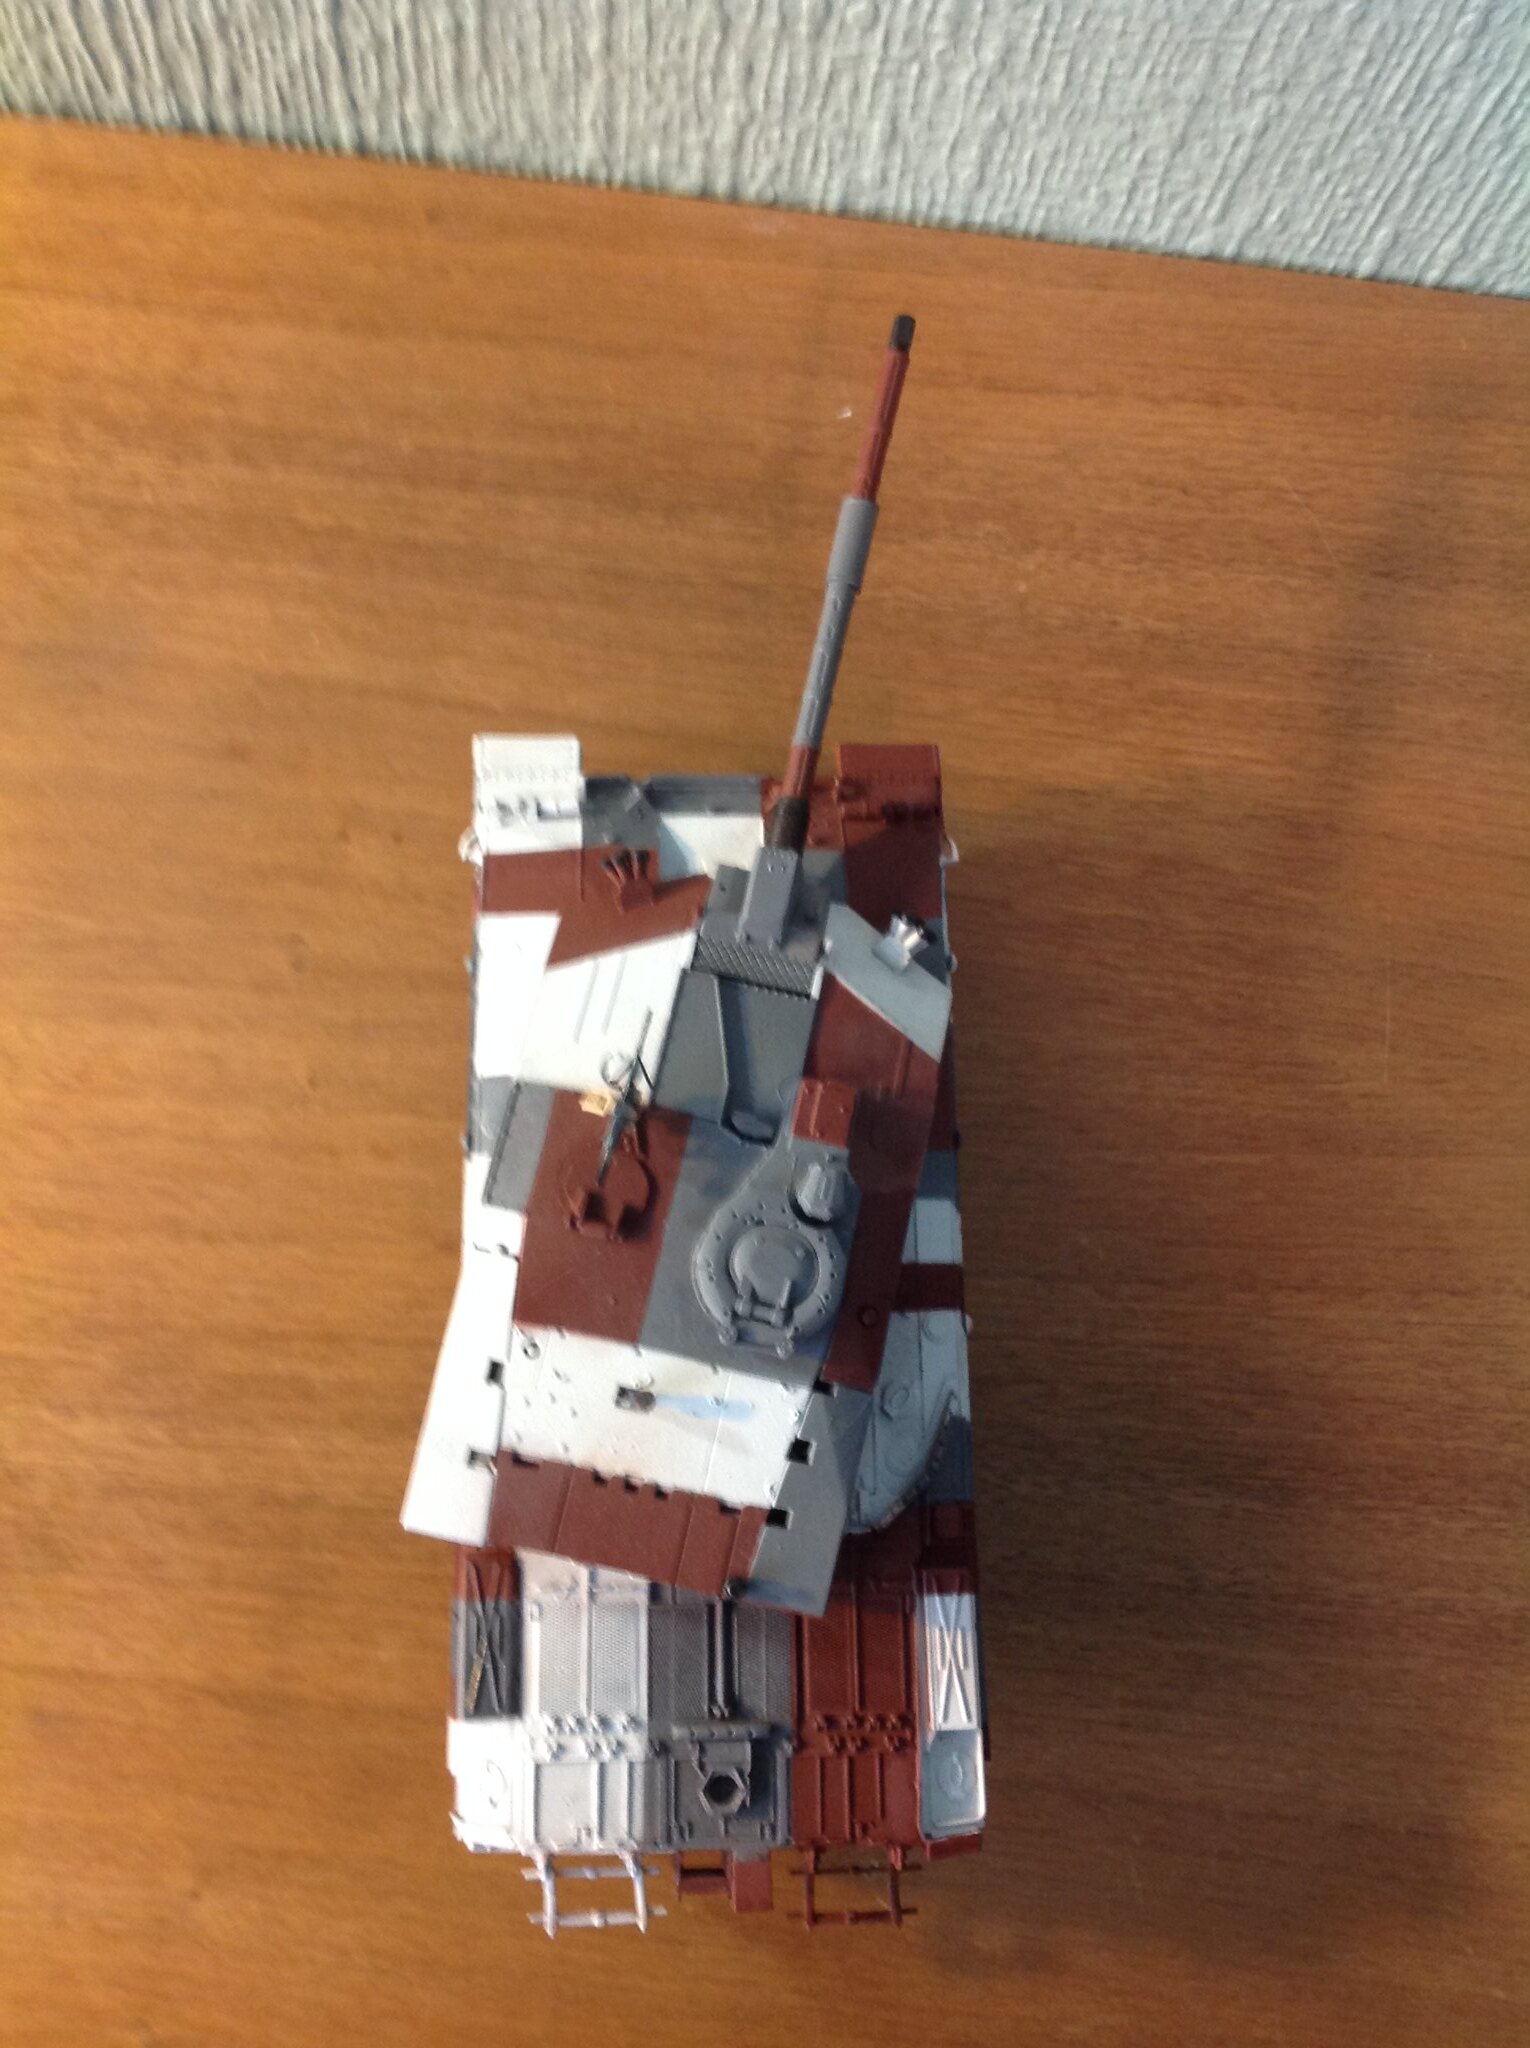 ( sorry its kinda blurry...)Most of the camo is on except the back plate so that next!
( sorry its kinda blurry...)Most of the camo is on except the back plate so that next! agriamodeling
Joined: March 09, 2018
KitMaker: 206 posts
Armorama: 205 posts
Posted: Saturday, July 25, 2020 - 09:54 PM UTC
Quoted Text
I know its been awhile since ive posted a progress shot so......
Hi Ezra,
I am sure it looks very nice in the real life. May I suggest to crop off the background (desktop and the wallpaper seen below and above the model) as it is now a small subject in a big world when you will finish the paint and upload new set of photos. I always make sure to show only the main theme on the uploaded pics to have a good impression.
You know how it works: put a new food in front of a small kid and he will judge it by the look without even tasting it. My grandson does not eat any new meal if does not like the look on the plate.
Make some pictures, select the best one (color, angle, perspective etc...) and edit it until the result looks like the front page of a well know modeler magazine.
Cheers,
Tamás
Panzer_Modeler
Joined: May 19, 2020
KitMaker: 419 posts
Armorama: 217 posts
Posted: Monday, July 27, 2020 - 02:37 AM UTC
yeah your right. Ill keep that in mind. Thanks!
robw_uk
Joined: June 22, 2010
KitMaker: 1,224 posts
Armorama: 1,207 posts
Posted: Thursday, July 30, 2020 - 03:53 AM UTC
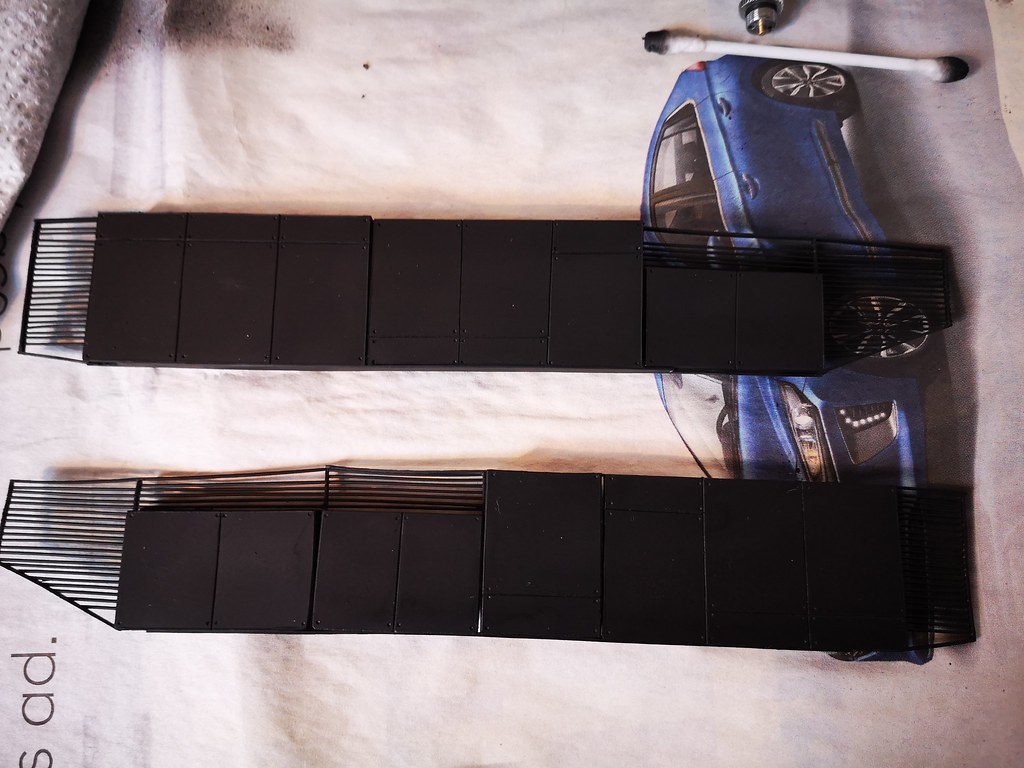
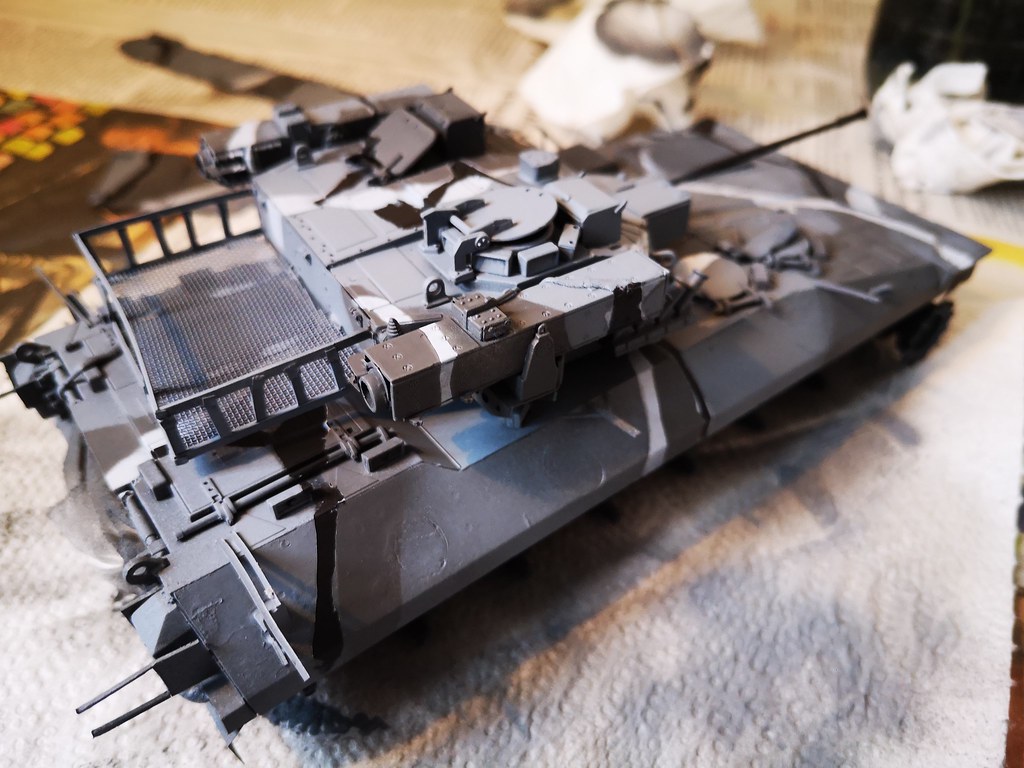
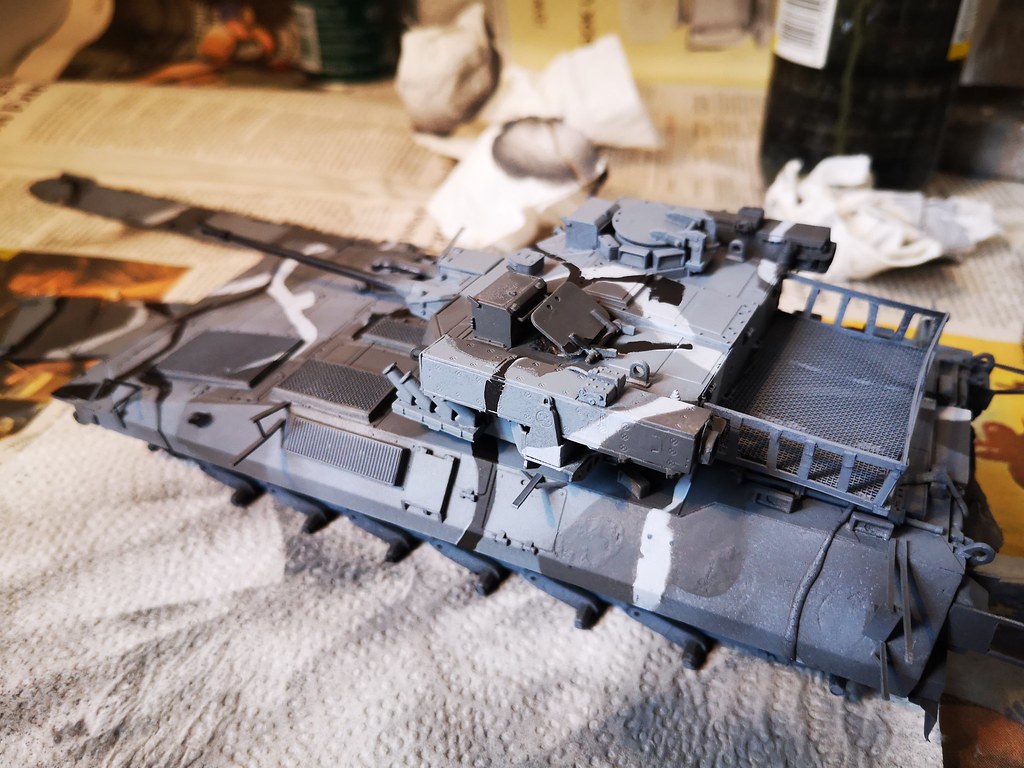
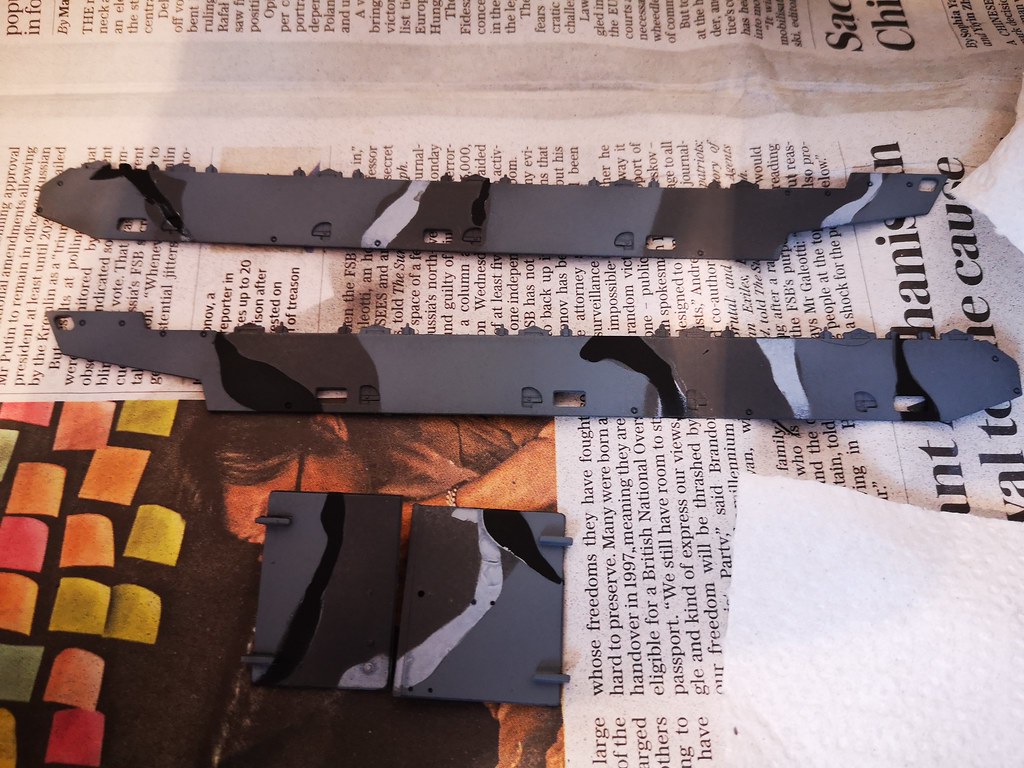
an afternoon with the airbrush and panzer putty... some damage to the supports for the add-on armour needs repairing plus a LOT of PE handles need to be put on then hand painted. Quite like the way the Panzer Putty worked, no lifting even though eac coat only had about 20 minutes drying time
robw_uk
Joined: June 22, 2010
KitMaker: 1,224 posts
Armorama: 1,207 posts
Posted: Saturday, August 08, 2020 - 03:10 AM UTC
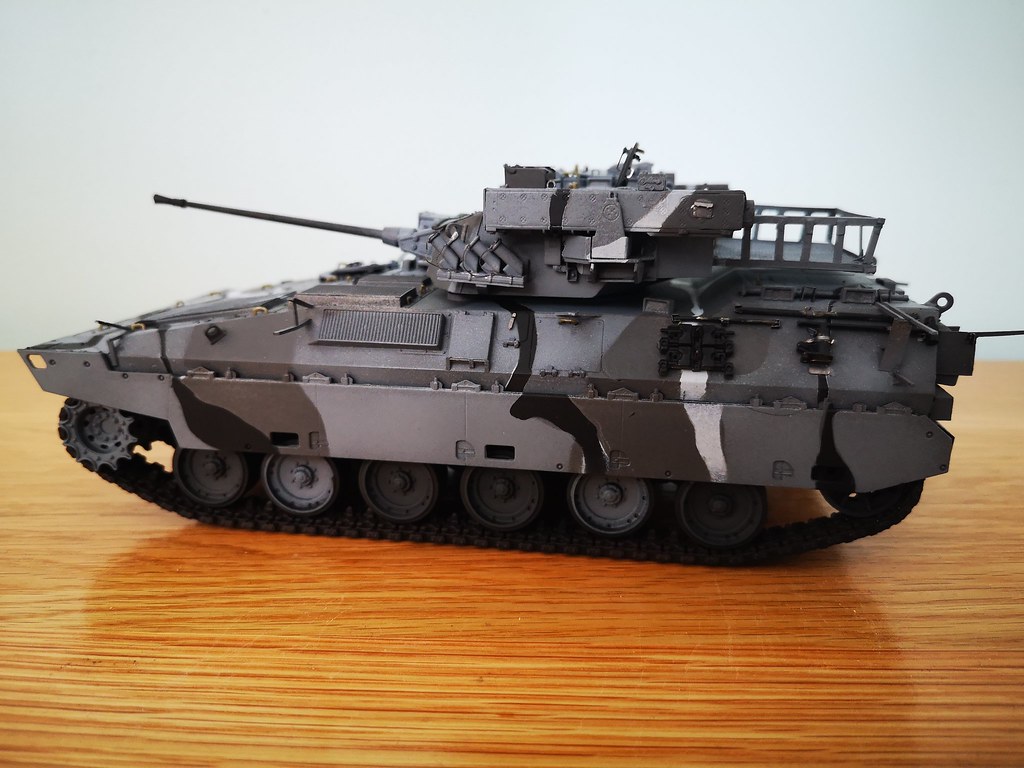
Have now moved on to adding the detail and fiddly PE. Taking it slowly

TheDiggs
Joined: April 25, 2008
KitMaker: 338 posts
Armorama: 75 posts

Posted: Sunday, August 09, 2020 - 10:28 PM UTC
I finally have some progress. I spent 2 rounds ordering paint for the camo scheme, only to find out that the color is either way too dark or way too bright. I finally broke down and just mixed a couple of my old paints to make one I like. I now have the base coat on. Now for some assembly.
 |

WEB HOSTING BY


Copyright ©2021 Armorama and Kitmaker Network, a subsidiary of Silver Star Enterprises
All Rights Reserved. Please read our Conditions of Use and Privacy Policy.
All Rights Reserved. Please read our Conditions of Use and Privacy Policy.