Constructive Feedback
For in-progress or completed build photos. Give and get contructive feedback!
For in-progress or completed build photos. Give and get contructive feedback!
Hosted by Darren Baker, Dave O'Meara
Berlin Brigade Mk10 Chieftain, Takom OOB.
phil2015

Joined: July 27, 2015
KitMaker: 502 posts
Armorama: 325 posts

Posted: Tuesday, July 28, 2020 - 03:19 AM UTC
Luv it! That's some seriously great looking paintwork!

UpperCanadian

Joined: June 28, 2020
KitMaker: 152 posts
Armorama: 133 posts

Posted: Tuesday, July 28, 2020 - 06:45 AM UTC
Jim, what do you think of the Takom Chieftain? I want to build one, and I know the Tamiya kit is really old and not well regarded.
iwatajim

Joined: December 15, 2008
KitMaker: 246 posts
Armorama: 171 posts

Posted: Tuesday, July 28, 2020 - 08:28 AM UTC
Thanks Phil, I am thinking of highlighting the brown, but might just live with it as is for fear of messing up the finish so far. Have just masked and painted the front rubber fenders with Tamiya rubber black.
Dan, I think the kit is pretty good. The parts have some quite large spruce gates but careful cutting and sharp blades and patience deals with that. The running gear goes together fairly well with a bit of care taken over alignment. The indi-link tracks actually went together quite well, I glued the whole length with Tamiya extra thin, without unseen top part, in one go then waited for five or ten minutes then bent them round the gear and left them to fully set. The rest of the build is fairly straight forward. I could probably of filled some seams, etc, but I’m fairly happy with how it went together. The detail is nice and crisp on the whole I think. I had all the parts bluetacked onto the turret and it really does look good put together. So, I would certainly recommend the kit. I would maybe have left some of the hull parts off for painting this scheme if I was doing it again, although that would make matching up lines harder!
Thanks again, Jim.
shirkesk

Joined: July 29, 2020
KitMaker: 1 posts
Armorama: 1 posts

Posted: Tuesday, July 28, 2020 - 10:48 PM UTC
very niceeeeee
iwatajim

Joined: December 15, 2008
KitMaker: 246 posts
Armorama: 171 posts

Posted: Wednesday, August 05, 2020 - 02:30 AM UTC
Hello again all. Thanks Kunal!
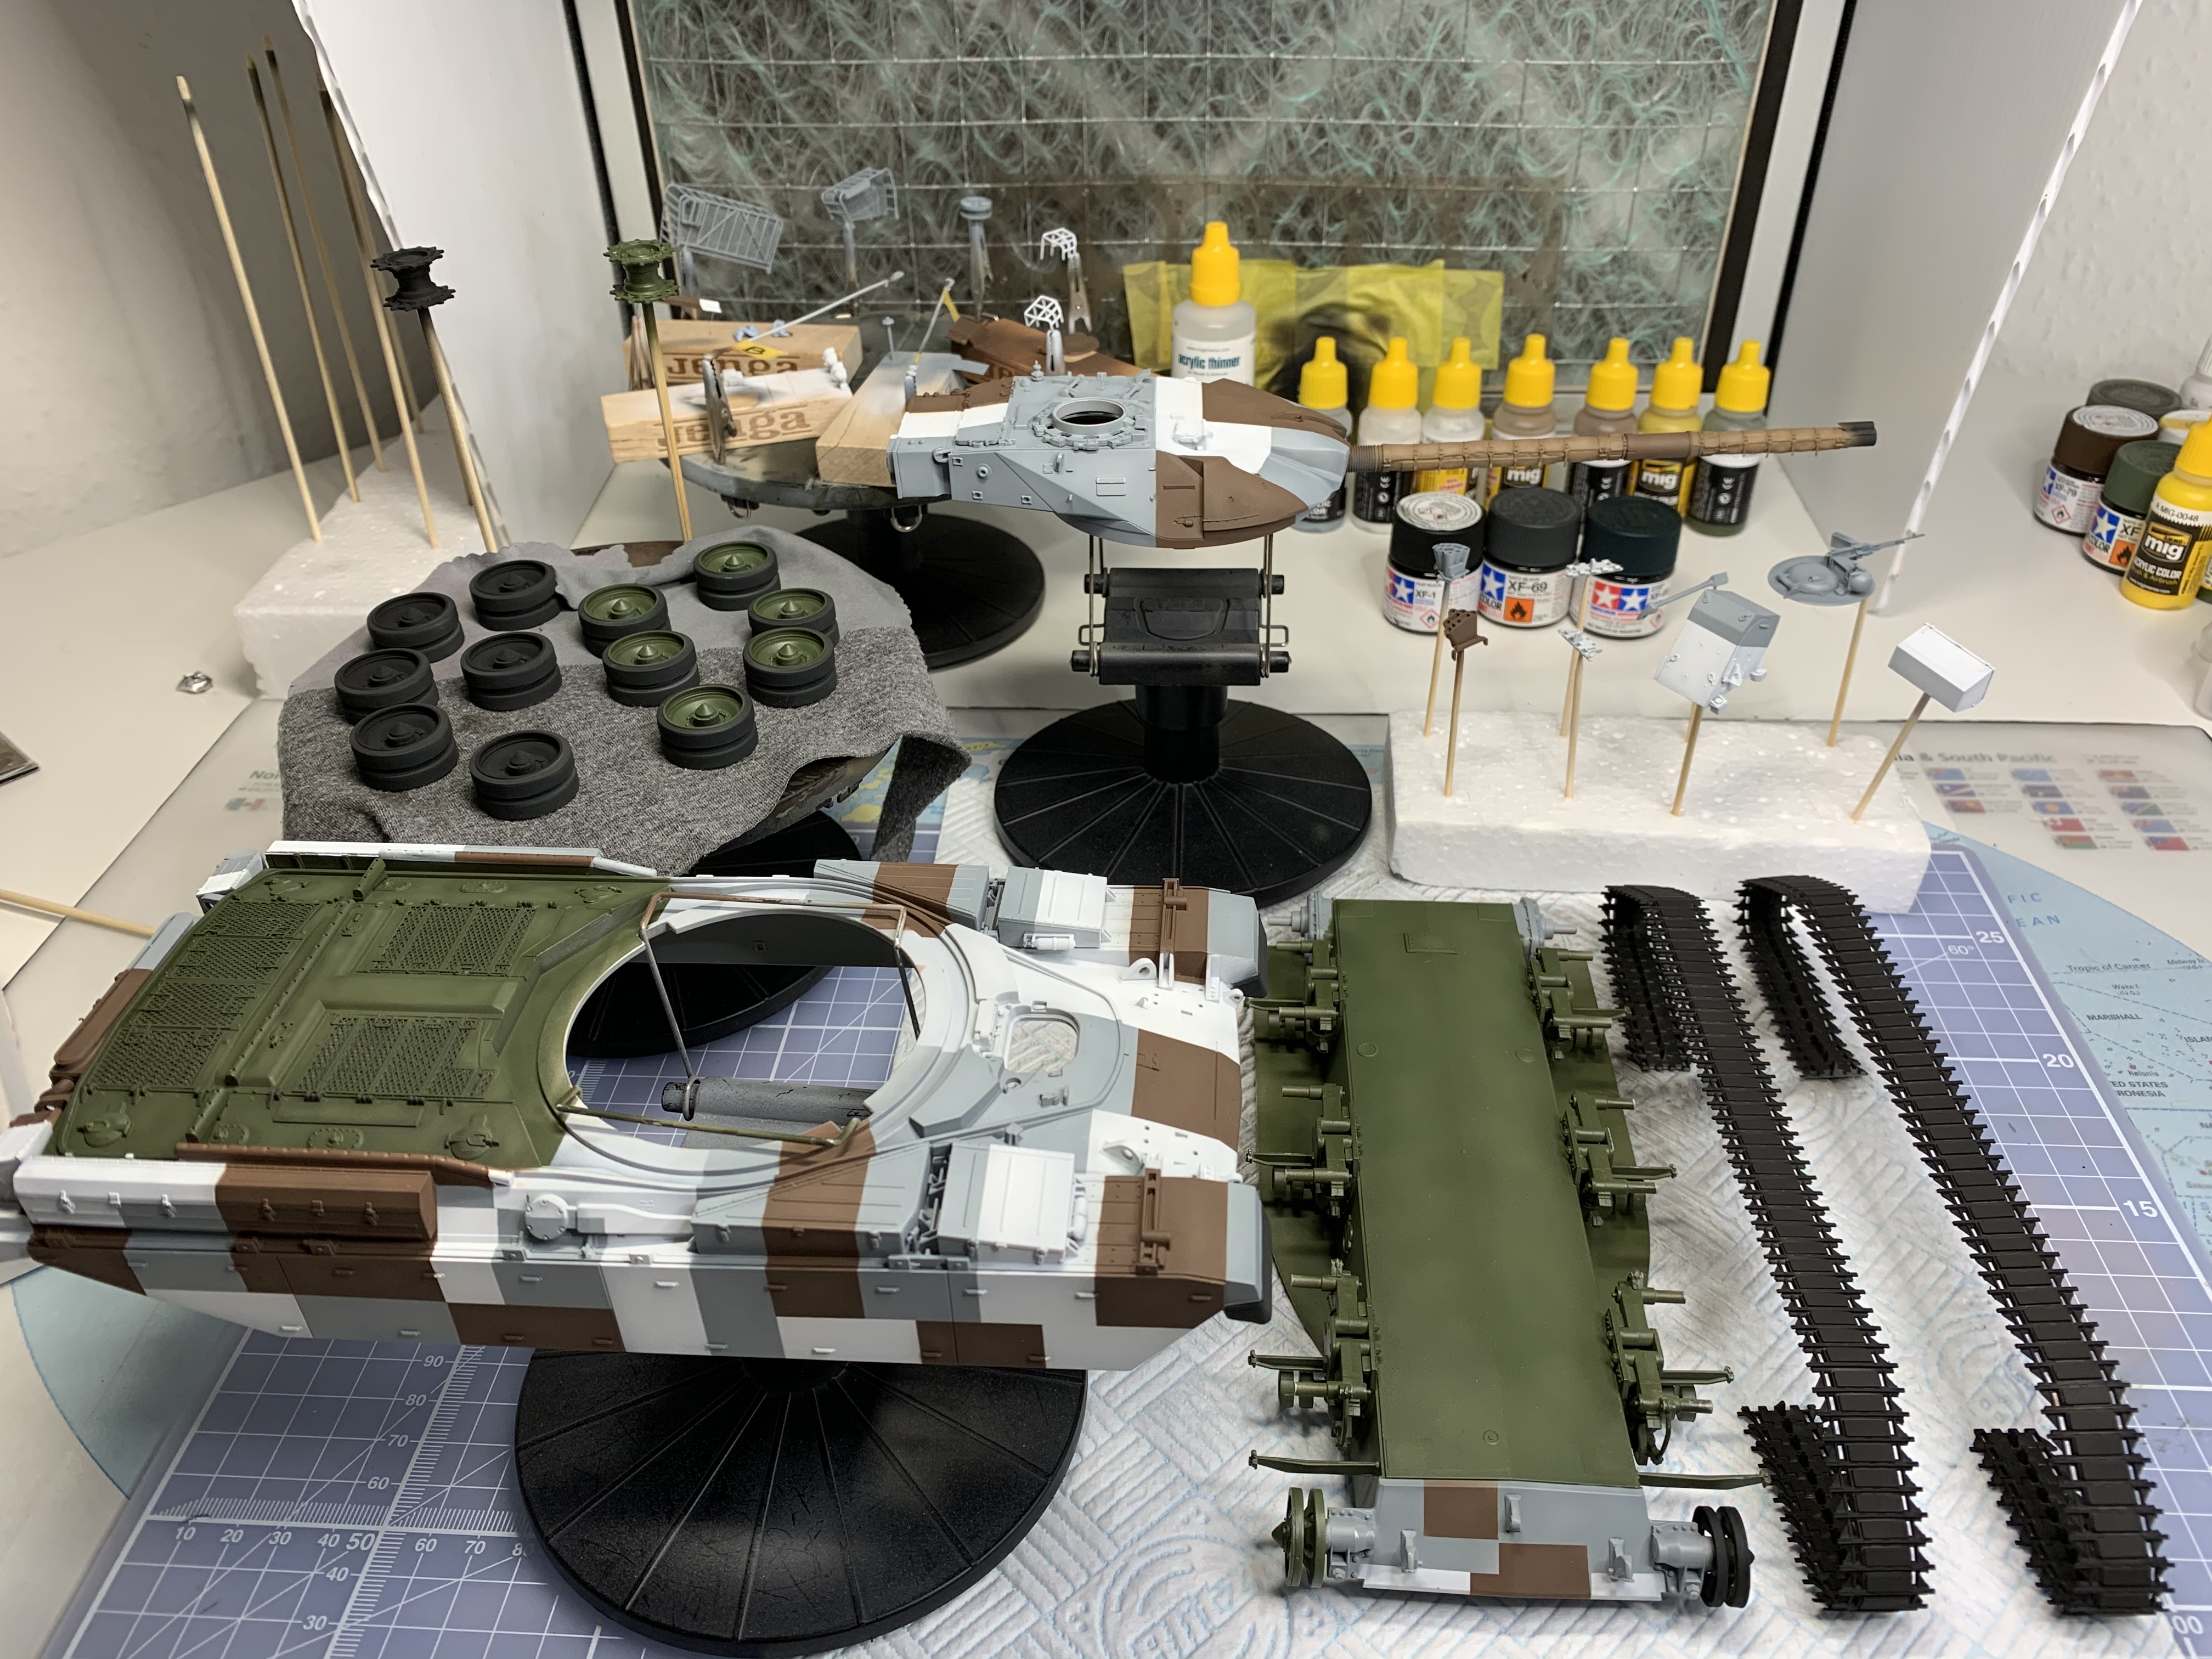
A quick update today with one pic of the various pieces. So, I’ve painted the lower hull with the nato green. I have decided to go with one side drivetrain green and one black after all. Just imagine the crew are half way through the job. The black wheels have three colours on them, all Tamiya, rubber black on the rubber parts funnily enough, them xf1 black on the metal parts followed by nato black highlighting. All of that was probably a waste of time but I enjoyed myself. The thermal jacket on the barrel has mig khaki with some highlights with a little bit of white added. The tracks have their black first coat on and will be getting shot with Tamiya red brown next then a dark wash once I’ve picked out the rubber parts by hand.
I did put some highlights on the brown parts and am planning on doing some more work on the grey parts next. All in all I’m fairly happy with the progress. Only four months in, this is light speed for me!
Thanks for looking, J.

Johnnych01

Joined: June 29, 2019
KitMaker: 604 posts
Armorama: 506 posts

Posted: Wednesday, August 05, 2020 - 04:11 AM UTC
Looking very good Jim. The end is now in site. You've gone a great crisp job on that cam. Well done
phil2015

Joined: July 27, 2015
KitMaker: 502 posts
Armorama: 325 posts

Posted: Wednesday, August 05, 2020 - 04:55 AM UTC
That looks terrific!
phil2015

Joined: July 27, 2015
KitMaker: 502 posts
Armorama: 325 posts

Posted: Wednesday, August 05, 2020 - 10:44 AM UTC
This build log kind of pushed me over to doing a Chieftain. I ordered the Takom Mk V kit and plan to do it in Iranian service....
iwatajim

Joined: December 15, 2008
KitMaker: 246 posts
Armorama: 171 posts

Posted: Wednesday, August 05, 2020 - 11:55 PM UTC
Thanks John, got lots of small jobs to do, I just wrote out a list and stopped myself at twelve steps! One thing at a time and it will be finished before we know it!
Thanks Phil. I’m very glad that my build has inspired someone into a new project, good luck with it Phil. I’m looking forward to a more straightforward paint job after this!
Thanks,J.
Thanks Phil. I’m very glad that my build has inspired someone into a new project, good luck with it Phil. I’m looking forward to a more straightforward paint job after this!
Thanks,J.
Johnnych01

Joined: June 29, 2019
KitMaker: 604 posts
Armorama: 506 posts

Posted: Thursday, August 06, 2020 - 12:28 AM UTC
You've doing great Jim, and you can't beat a list lol.
I just received a fantastic package from Andreas Kirchoff in Germany whom I've been in contact with for a while.
Inside was (my August birthday present) was the Accurate armour CVRT Striker which he kindly sold me. Will be doing that as a review/ build feature here modelled after my old Striker C/S 34b, and he added in an extra gift .. his tankograd book on the Berlin Brigade vehicles, with some amazing detailed Chieftain pics..
I know you've done yours now... But the rear deck shots you can see in it are all brown....and both sides of the running gear were in black....
Not sure how you want to play that one.
The book and your build here has definitely inspired me to get a 432 or chieftain and do this paint scheme though.
iwatajim

Joined: December 15, 2008
KitMaker: 246 posts
Armorama: 171 posts

Posted: Thursday, August 06, 2020 - 01:20 AM UTC
Nice one John, and a happy birthday to you! I must say I was rather chuffed when Andreas posted on this thread, so lucky you to have him as a friend.
If I had to do this again I would go with the brown on the deck and black wheels all round. However I am interested to see the difference with the running gear, which I think will show the reasoning for going for the black, but I may still overpaint the port side black after all. The engine deck is staying in green as there is evidence that at least the earlier marks had this colour, plus I really quite like the contrast, and I don’t think I could cope with the “which brown is correct” dilemma! I think Takom and Mig, should maybe look at the paint scheme for any further runs of the kit, and the paint set that mig sells, but won’t hold my breath.
Thanks again and I look forward to seeing your striker build and you really must give this scheme a shot, go for the Chieftain, you know you want to!
Cheers, J.
Johnnych01

Joined: June 29, 2019
KitMaker: 604 posts
Armorama: 506 posts

Posted: Thursday, August 06, 2020 - 04:18 AM UTC
I agree Jim, it's great knowing Andreas, we have had a few laughs and good chats about our old stomping grounds etc over in what was then W Germany. He lives in the same areas I was based and exercised in and also served on Gepard's for a while.
It's good to chat about the old places and how they have changed, and he is a font of knowledge as well.
I also actually agree about the Chieftain engine decks. I prefer them in the green, makes them look a bit more normal although that may sound odd.
B-day is end of the month, but thank you... And Mr Jack Daniels will be visiting me then lol.
iwatajim

Joined: December 15, 2008
KitMaker: 246 posts
Armorama: 171 posts

Posted: Sunday, August 16, 2020 - 04:18 AM UTC
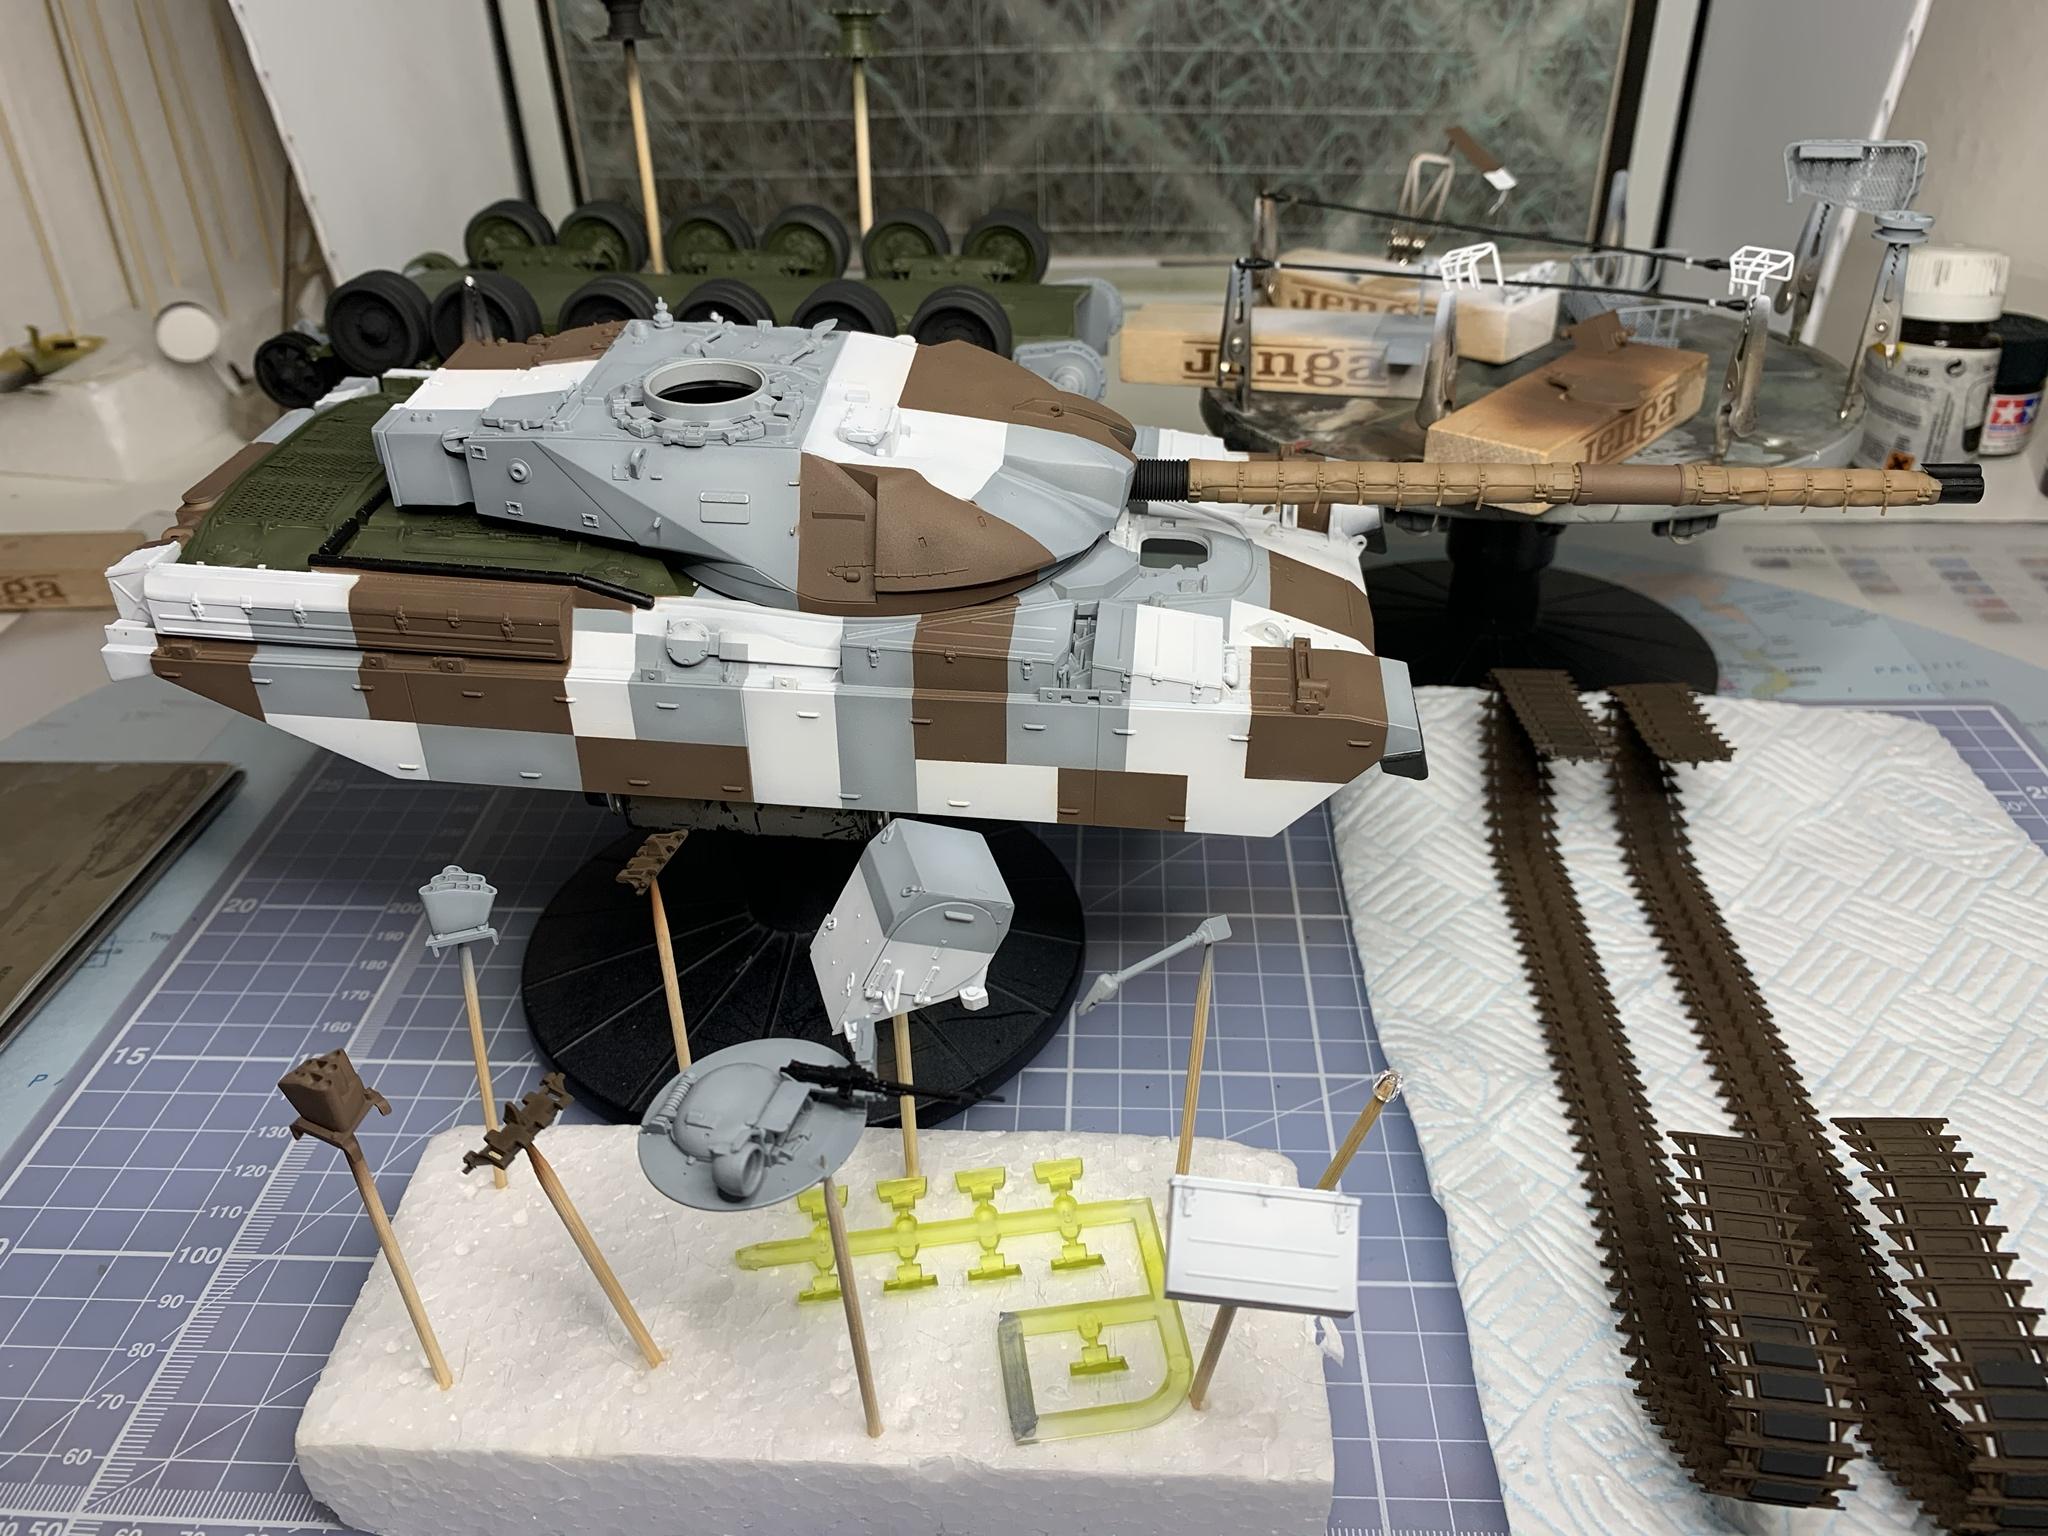
I have just realised it’s been 10 days since I’ve updated this. I have a question for those in the know, what colour for the fire extinguishers? They look green in some pics I can make them out.
I have been progressing though, here’s what I have done since last time with a pic to prove it!
Highlight grey areas for more depth
Black on resistant strips on engine deck
Barrel “gaiter” painted
Barrel and painted black
Red brown on tracks and track pads in rubber black
Some touch ups on the white and black
Cables painted black initially(now realise ends should be camo colour)
Drivers cupola glass painted periscope green

Johnnych01

Joined: June 29, 2019
KitMaker: 604 posts
Armorama: 506 posts

Posted: Sunday, August 16, 2020 - 05:38 AM UTC
Hi Jim, it's looking cracking mate. You are doing it proud.
Extinguishers are standard BCF green colour. Just checked in Andreas's Berlin tankograd book. One odd point, the Fox's in Berlin, (green and black cam and Berlin cam) had the extinguisher nozzles painted red for some reason.
When you are near the final stages, if you need any steers on finishes or colours, give me a shout in a PM and it will come through to my email and I can check the book then get right back to you.
Things like the red fixed fire extinguisher handles sometimes get overlooked, and all the track guide horn images I have seen, they have a very silvered finish.
I have a good story about chieftain tracks in Berlin which I may relate a bit later lol.
What are the included decals like ?
Johnnych01

Joined: June 29, 2019
KitMaker: 604 posts
Armorama: 506 posts

Posted: Sunday, August 16, 2020 - 06:50 AM UTC
Jim, not to be a party pooper, but I was looking again at your last pic and the thermal sleeve .... It looks a to brown. I have seen alot of images and pics of Chieftains and Chally 1 thermal sleeves and a lot do look brown. I can only put it down to a very heavy fading in some instances or cameras playing tricks with the light. I have never seen a T sleeve in brown. They came in an overall green ( xf13 j a green / MIG russian green / khaki drab and a mix of khaki / or similar ) with a few of the pads on the bottom in a more khaki colour.
I have looked at the ones in the Berlin book at they all are either green or very faded green.
In real life they would never be painted as this hampers and negates the actual thermal sleeve properties.
The only thing which is seen as brown on the Berlin wagons is the fume extractor in the middle between the front and rear sleeve sections.
iwatajim

Joined: December 15, 2008
KitMaker: 246 posts
Armorama: 171 posts

Posted: Sunday, August 16, 2020 - 07:13 AM UTC
Thanks John, great info as always. I will certainly pm you with any other queries, thanks. I will see if I can mix up a suitable green from the paints I have for the extinguishers. As for the thermal sleeve, I have just looked at the images on the tankograd site page for the book and can see that a faded green, as you say, would be accurate. I will look at mixing up a shade for that and maybe do some test shots.
The decals aren’t very comprehensive but they should cover most markings. I can see they miss out quite a few small markings though. Check out the option for the zombie tank, as used in the first series of The Walking Dead!
Thanks again bud.

The decals aren’t very comprehensive but they should cover most markings. I can see they miss out quite a few small markings though. Check out the option for the zombie tank, as used in the first series of The Walking Dead!
Thanks again bud.

Johnnych01

Joined: June 29, 2019
KitMaker: 604 posts
Armorama: 506 posts

Posted: Sunday, August 16, 2020 - 08:37 AM UTC
Jim, no problems and I'm happy to help.
I had a look through the Berlin book and the only confirmed pic to number plate on your decal sheet is 03EB20.
After checking all the pics the only decals you will need are 2, 9 and 15 that's it. There are no bridge classification markings on any wagons apart from the REME ARRV.
The images of EB20 in the book show a lefthand mudguard unit emblem which I think is for the Royal Hussars which you don't have. The decal you have for the 14/20 Kings Hussars which goes on the searchlight side.
The wagon in the book is down as C/S 13 which white numbers (possibly faded yellow) on a solid black square with no Squadron tac sign surrounding the numbers. You don't have that but it is very easy to scratch one. Hope that sheds some light on marking options you have. All is not lost lol.
iwatajim

Joined: December 15, 2008
KitMaker: 246 posts
Armorama: 171 posts

Posted: Sunday, August 16, 2020 - 08:56 AM UTC
Thanks John, that at least saves me some work! I like the look of the “barber pole” decals for the rear but would have been an ordeal to get them to settle. That tank is the one Max posted on the first page of this blog, and I never noticed the matching plate, too busy thinking about the camo! The marking you mention with the 13 on a black background, is that on the side of the searchlight? Or is it like the plate on the back on those pics? Thanks again.
Johnnych01

Joined: June 29, 2019
KitMaker: 604 posts
Armorama: 506 posts

Posted: Sunday, August 16, 2020 - 09:52 AM UTC
The C/S plate is only on the back of the NBC pack. The numbers look like hand painted or done with the local made stencil like we used to use. I haven't seen any Berlin chieftains with C/S plates other than on the NBC pack or small convoy light Tac signs on rear hull, however EB20 had no convoy Tac sign - this could of been because it was being repainted. I have seen a few other wagons with no convoy Tac sign.
The only thing I would consider putting on the searchlight side is the decal 8 and in that place only. The 2nd emblem wasn't used.
I will try and email Andreas over the next few days and ask him if I can take a pic of 13 from his tankograd book and post it here for you for reference.
The only thing I would consider putting on the searchlight side is the decal 8 and in that place only. The 2nd emblem wasn't used.
I will try and email Andreas over the next few days and ask him if I can take a pic of 13 from his tankograd book and post it here for you for reference.
iwatajim

Joined: December 15, 2008
KitMaker: 246 posts
Armorama: 171 posts

Posted: Sunday, August 16, 2020 - 10:32 AM UTC
Ah I see what you mean. The pics are available on the tankograd site in the preview for the book so no need to bother Andreas and post it, I can make up something to represent that for sure. I will use decal 8 on the side of the searchlight and leave the front clear as you say. Was just about to klear everything for decals and pin washing but going to tackle the thermal sleeve first. Thanks again for all your help, I really do appreciate it and hopefully this build has plenty of info for anyone else tackling the same thing.
So off to paint the m1a1 barrel khaki then mix up some heavily thinned Tamiya khaki drab and see what happens before committing to the real thing!
So off to paint the m1a1 barrel khaki then mix up some heavily thinned Tamiya khaki drab and see what happens before committing to the real thing!
joepanzer

Joined: January 21, 2004
KitMaker: 803 posts
Armorama: 740 posts

Posted: Sunday, August 16, 2020 - 01:47 PM UTC
Not really a modern Armor guy, but that beast looks sexy!!
Excellent work!
Excellent work!
iwatajim

Joined: December 15, 2008
KitMaker: 246 posts
Armorama: 171 posts

Posted: Monday, August 17, 2020 - 02:45 AM UTC
Thanks Joe! It is getting there I think.
Now, that tricksy thermal sleeve colour. The three images of this tank seem to show green. But this image of the tanks on parade, with the same markings, seems to show green on the turret end and khaki on the other. I have sprayed out some colour on the practice piece in the other photo, which will end up much darker after weathering. Have also sprayed the top orange beacon, the smoked headlights and the rear “brake” lights. Decisions, decisions...
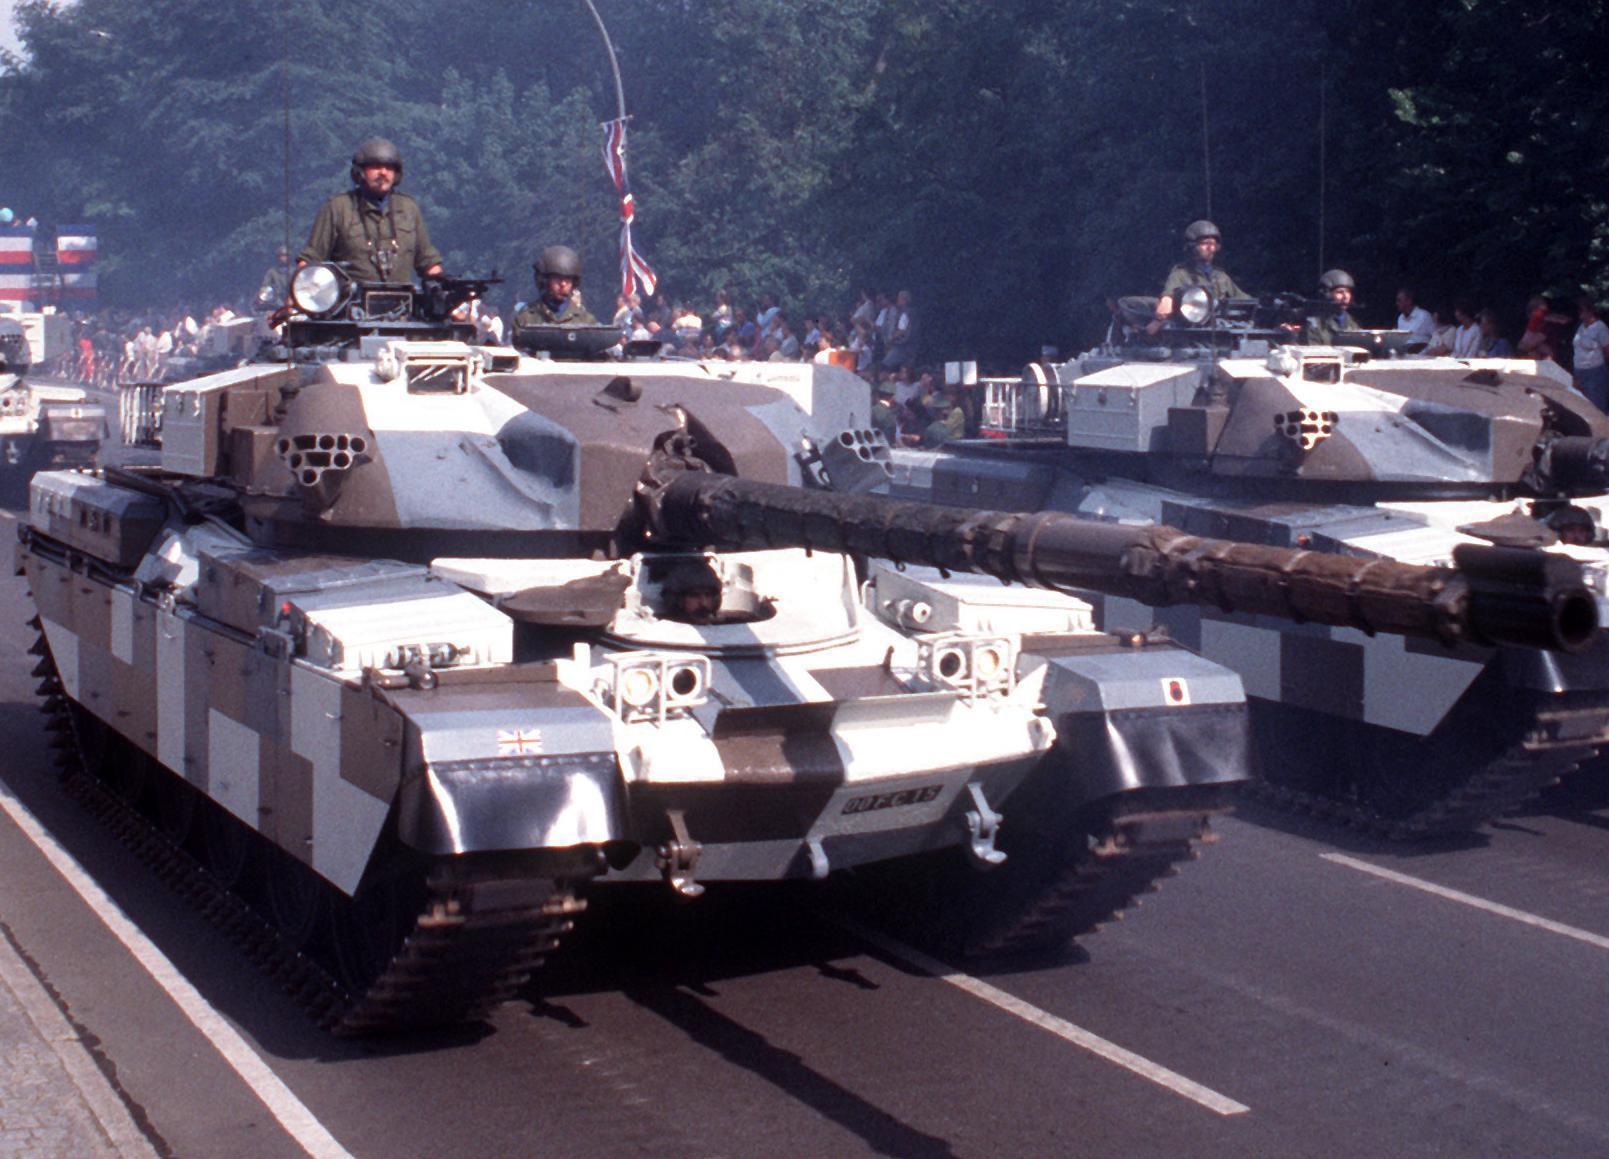
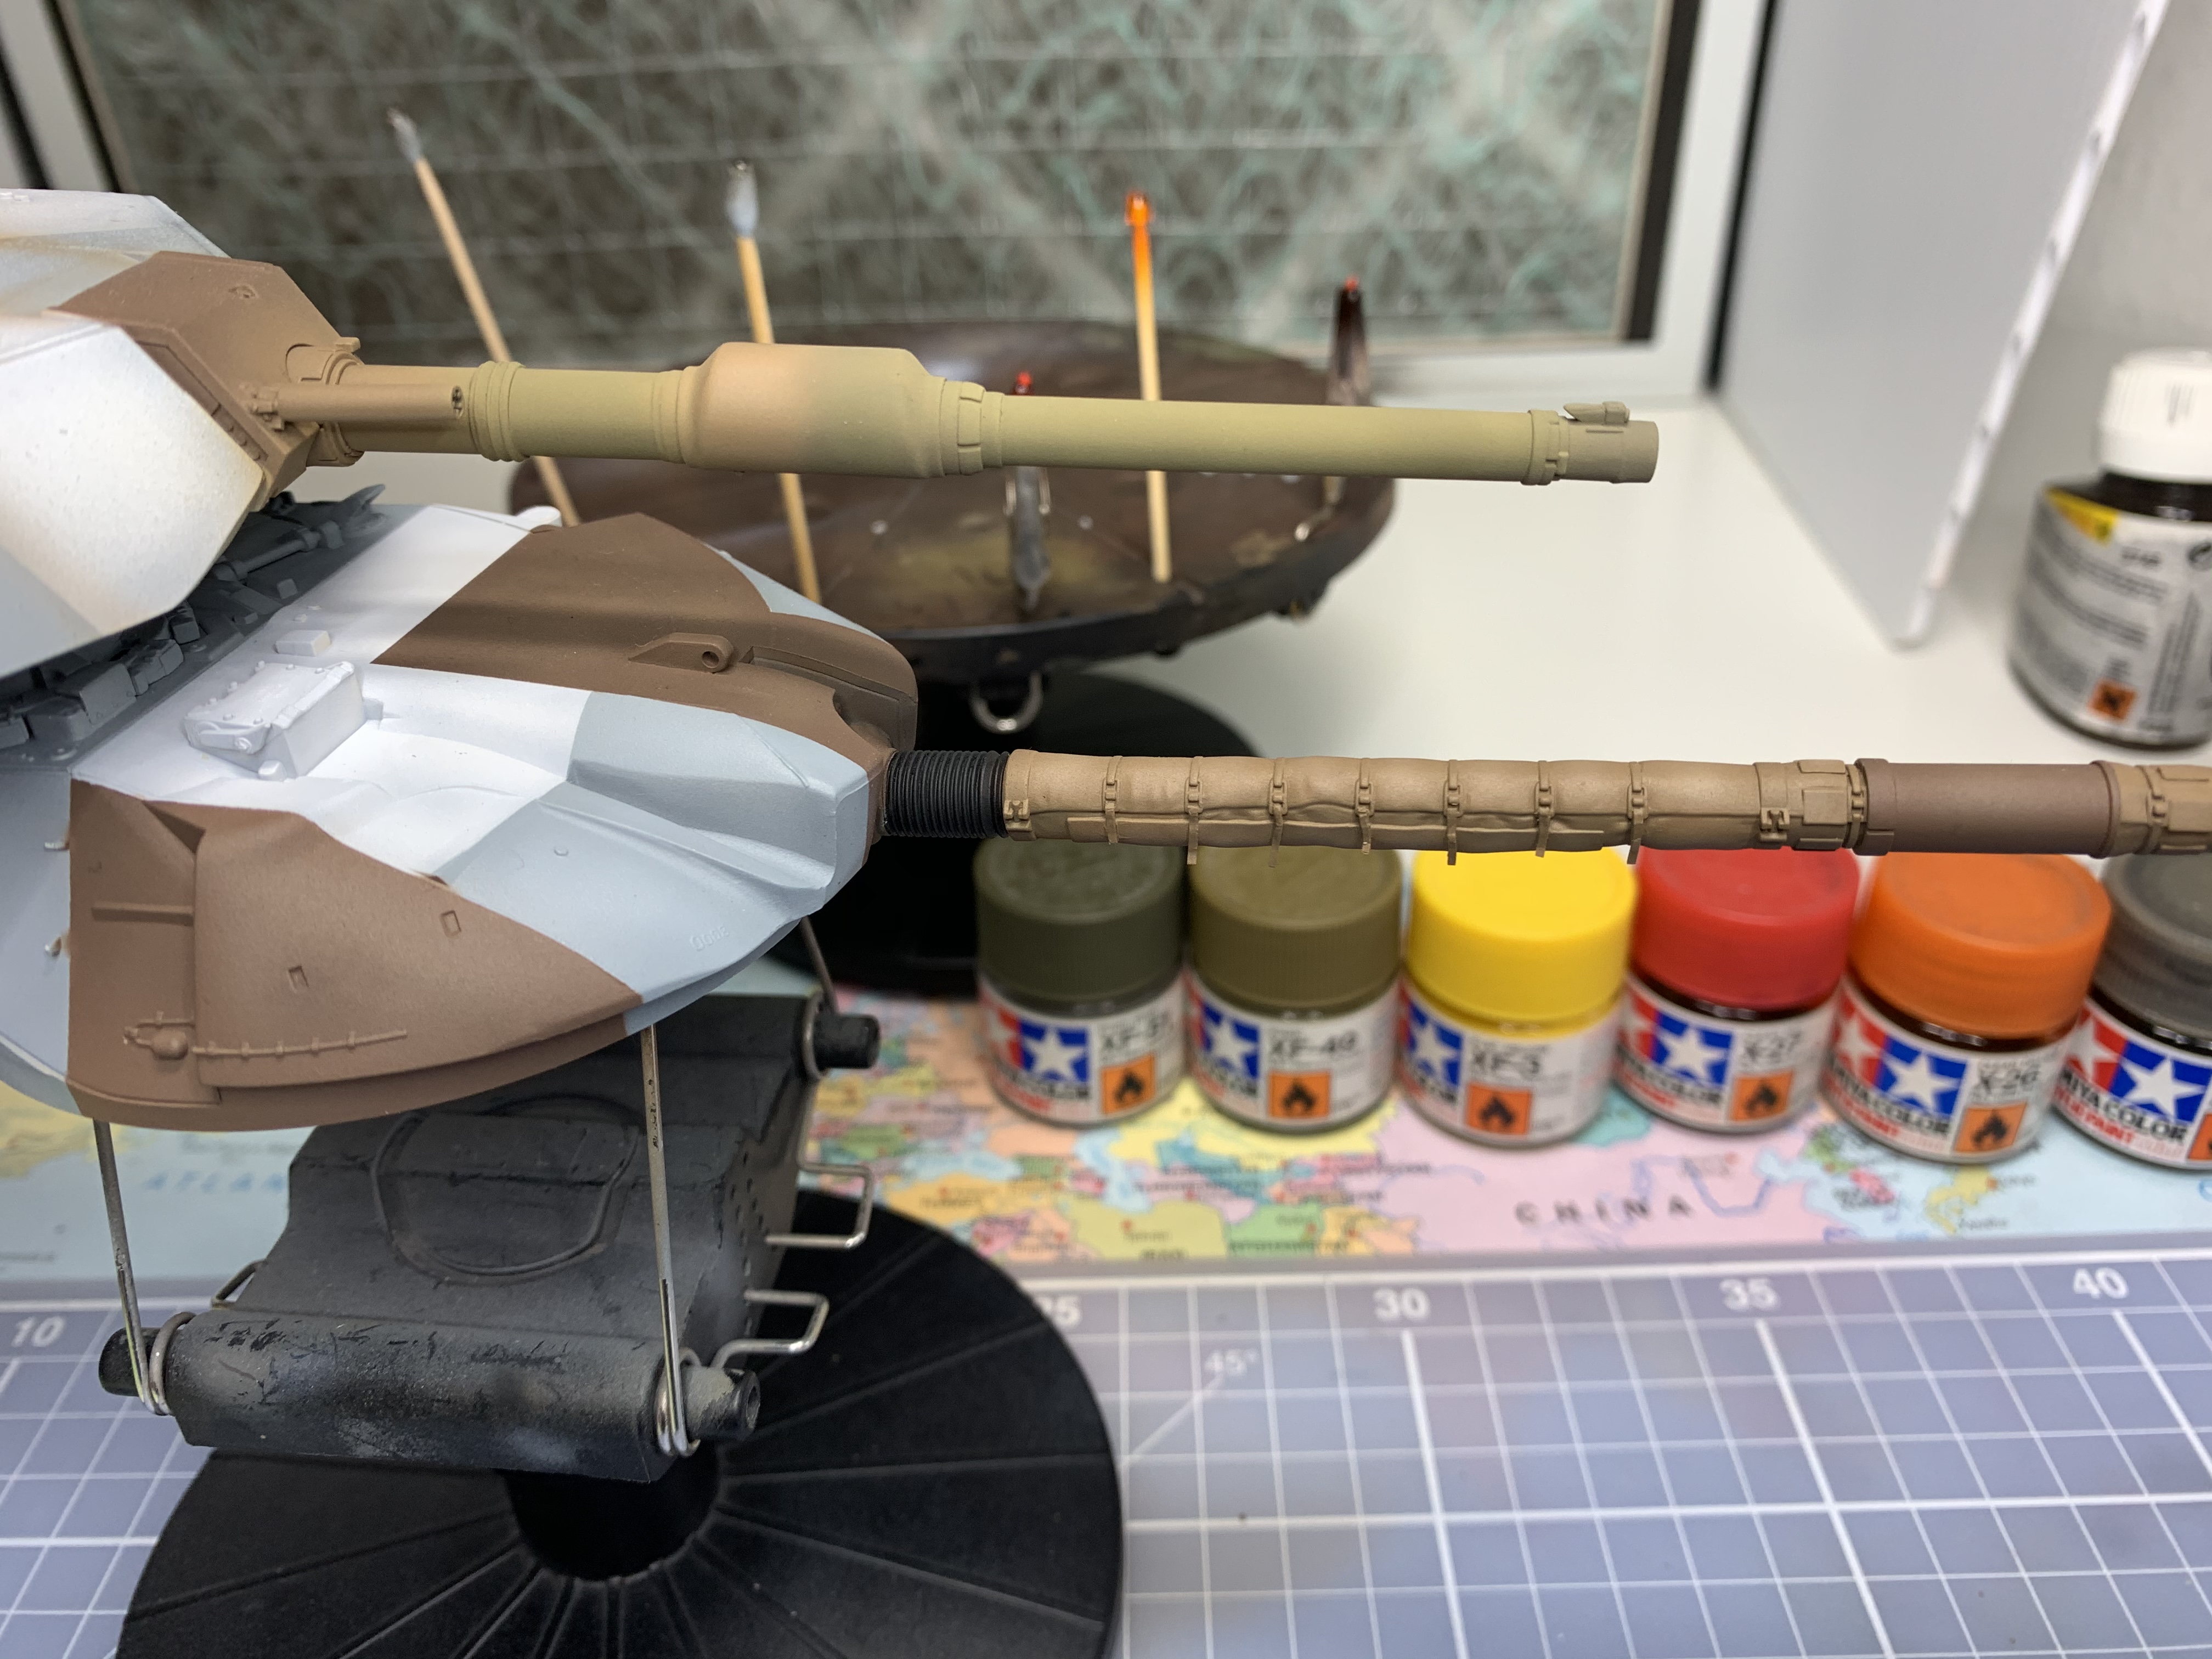
Now, that tricksy thermal sleeve colour. The three images of this tank seem to show green. But this image of the tanks on parade, with the same markings, seems to show green on the turret end and khaki on the other. I have sprayed out some colour on the practice piece in the other photo, which will end up much darker after weathering. Have also sprayed the top orange beacon, the smoked headlights and the rear “brake” lights. Decisions, decisions...


Johnnych01

Joined: June 29, 2019
KitMaker: 604 posts
Armorama: 506 posts

Posted: Monday, August 17, 2020 - 03:42 AM UTC
I know the doubt is there, but trust me .. that brown appearance is just a very faded green.
The colour on the practice M1 barrel should be fine with a weathering to make it a bit darker. The smoked headlights are the drivers IR headlights. He had his own IR night sight located in his driver's compartment. A decent colour for those would be a semi gloss black as per the real ones.
The colour on the practice M1 barrel should be fine with a weathering to make it a bit darker. The smoked headlights are the drivers IR headlights. He had his own IR night sight located in his driver's compartment. A decent colour for those would be a semi gloss black as per the real ones.
iwatajim

Joined: December 15, 2008
KitMaker: 246 posts
Armorama: 171 posts

Posted: Monday, August 17, 2020 - 08:42 AM UTC
Thanks John, green it shall be. Wasn’t too happy with first colour then found this RAF green and tried that with yellow(tiny amount) added for highlights. I think it looks much better, more British, Ha!
Once again great info about the drivers IR. I had painted the lenses with smoke but will now go with semi gloss black as you say. I must say I am really enjoying this whole process!
Thanks again, J.
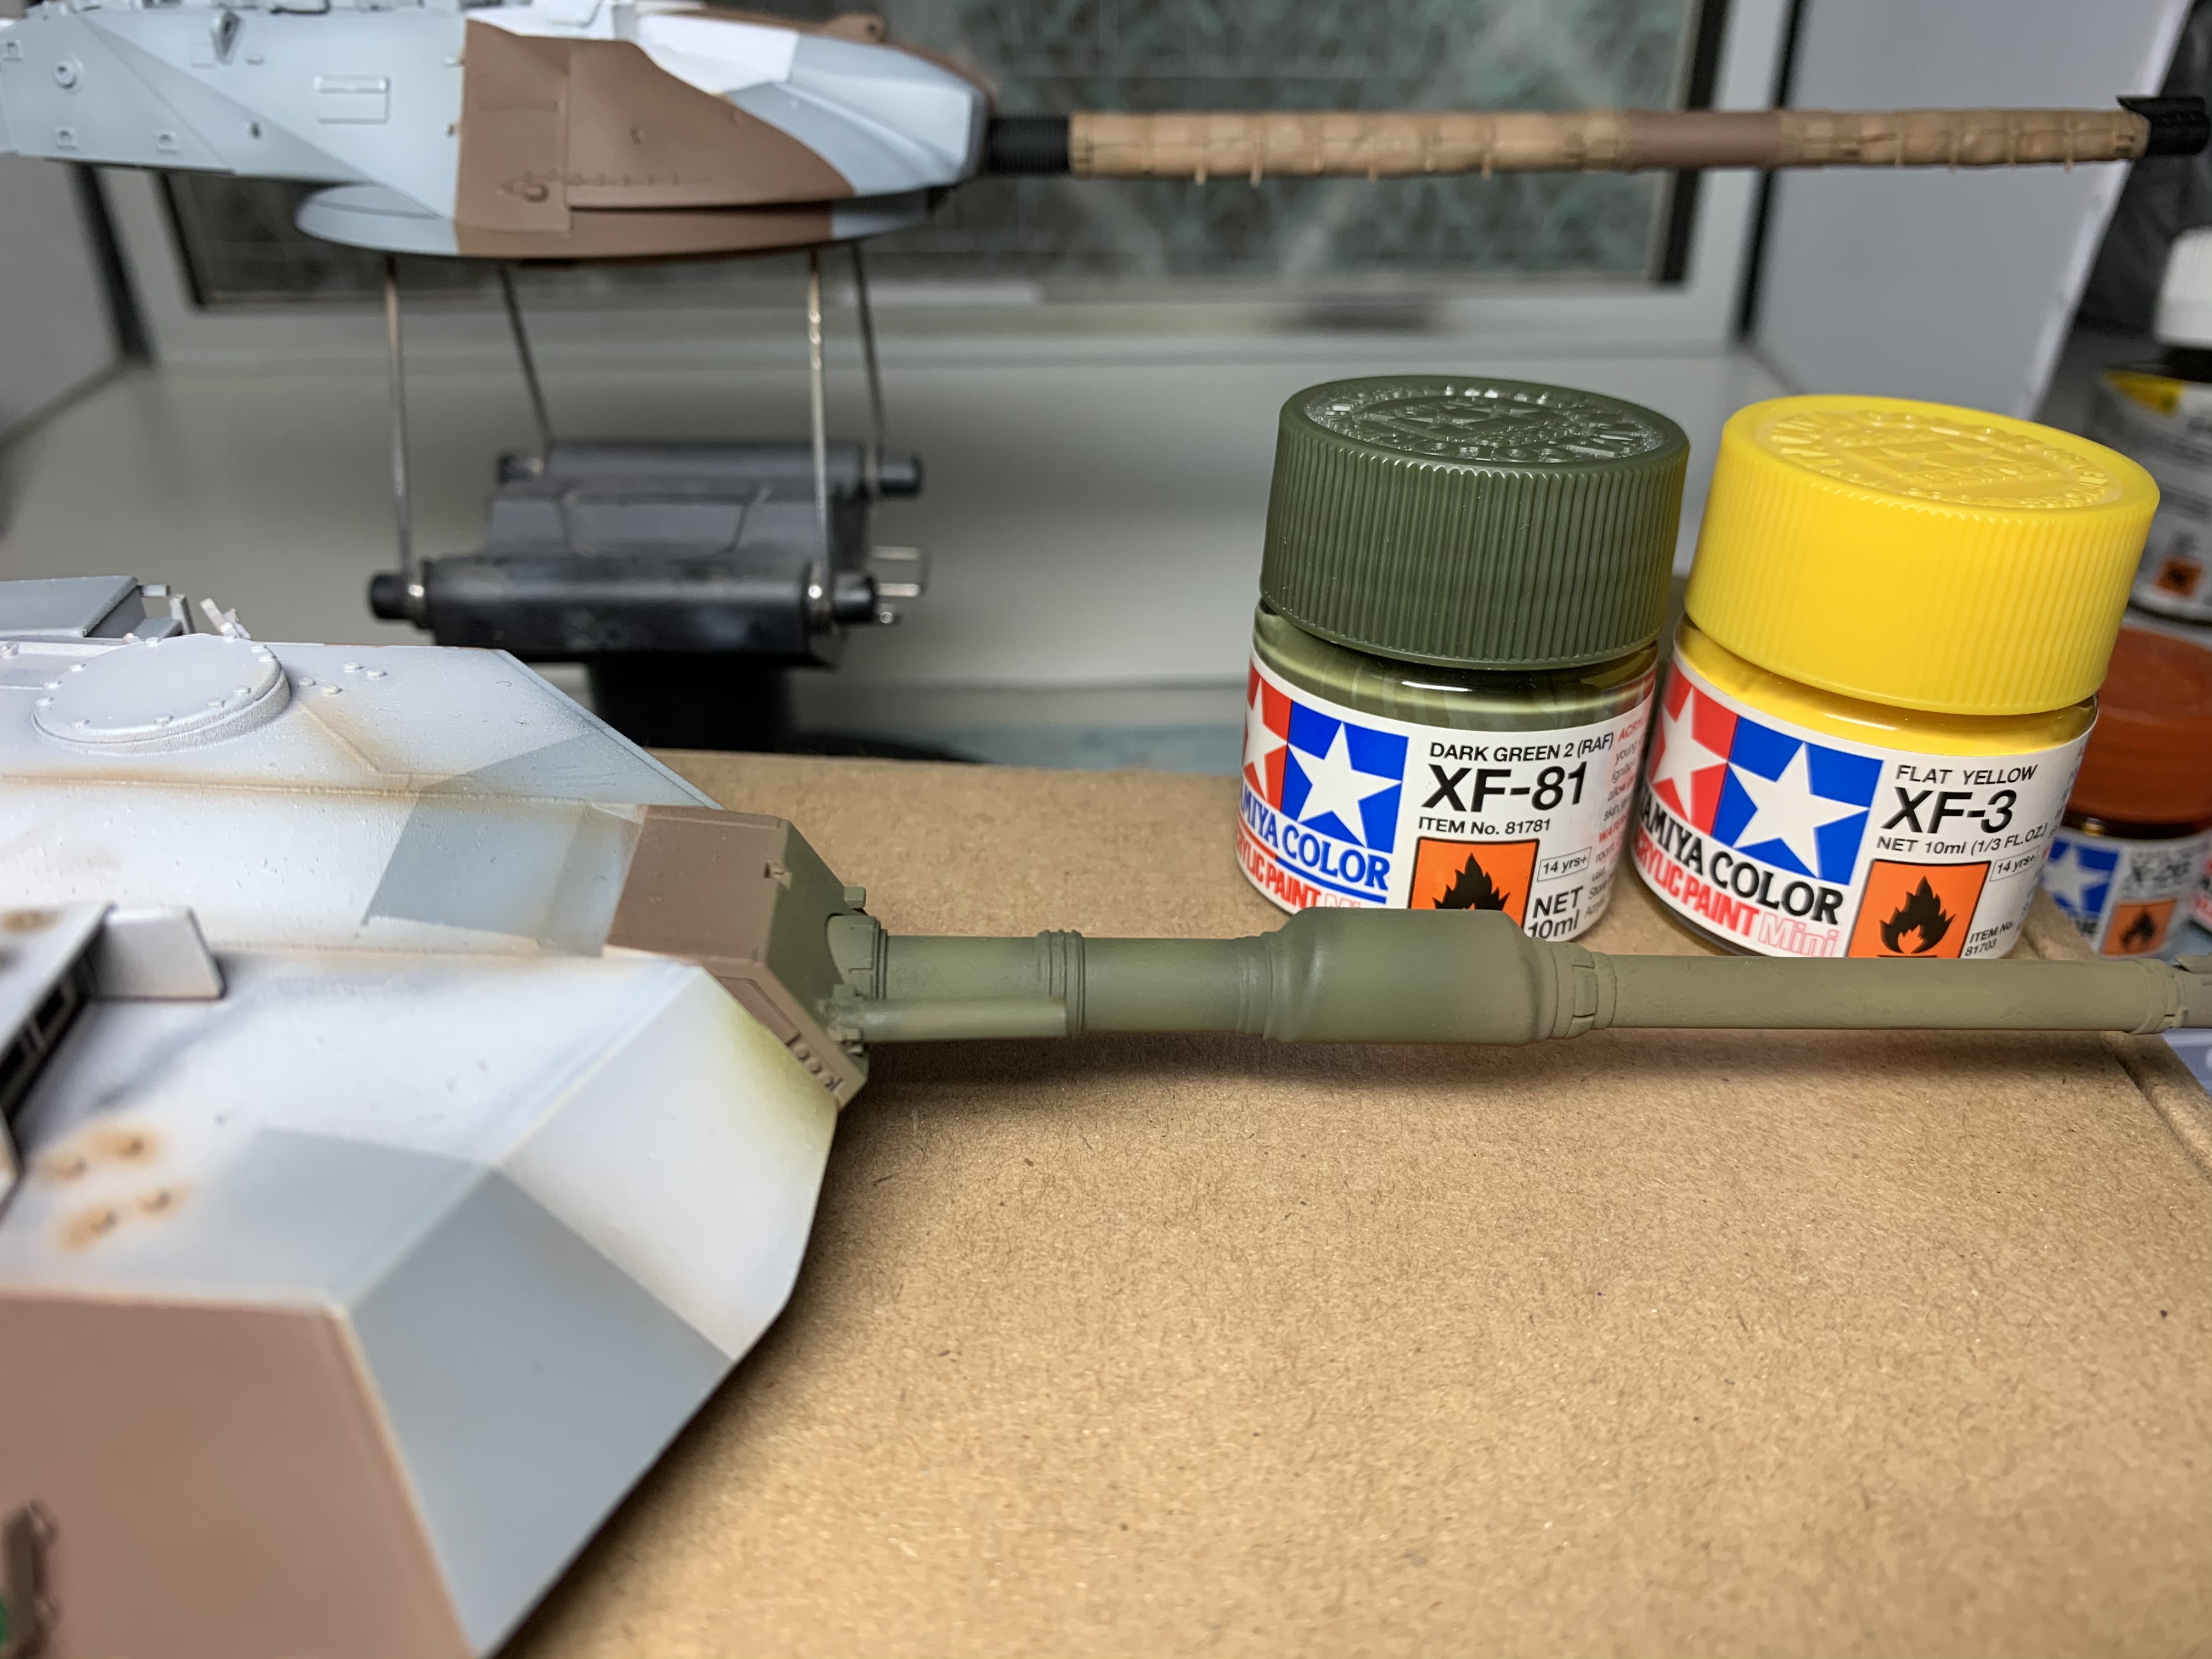
Once again great info about the drivers IR. I had painted the lenses with smoke but will now go with semi gloss black as you say. I must say I am really enjoying this whole process!
Thanks again, J.

Johnnych01

Joined: June 29, 2019
KitMaker: 604 posts
Armorama: 506 posts

Posted: Monday, August 17, 2020 - 09:59 AM UTC
That RAF green with the yellow has pretty much nailed it Jim, looking very good.
 |


