Campaigns
Where Armorama group builds can be discussed, organized, and updates posted.
Operation Market Garden
AlanL
Visit this Community
England - East Anglia, United Kingdom
Joined: August 12, 2005
KitMaker: 14,499 posts
Armorama: 11,675 posts
Posted: Saturday, May 16, 2009 - 11:45 PM UTC

Quoted Text

ALAN, I will only have 3 or 4 figures with my halftrack, hope mine turn out 1/2 as well as yours did. I am terrible at painting figures especially faces. Your figures are very Stunning. Well Done ! milvehfan


Thanks mvf, I have varying degrees of success with faces, sometimes they are reasonable OK and others not so. The figures are very detailed so almost paint themselves lol, lol. Only down side with these chaps are the small entrenching tools for the webbing that lack a bit of detail and seem just a bit small. I'm not a fan of hands moudled onto weapons as it limits choice and if the weapon is warped or gets broken replacing them is a pain.

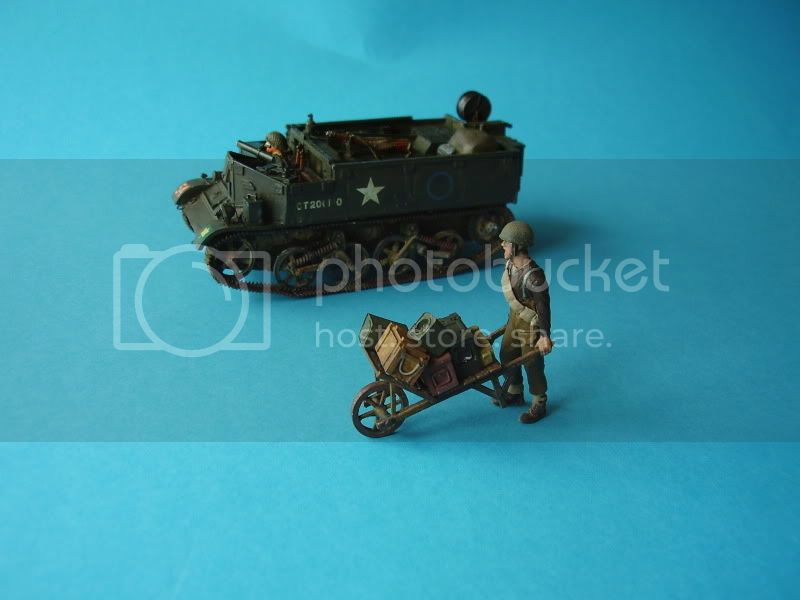
That said these guys were a lot of fun. I'm working on a chap pushing a barrow load of ammo/stores so that should be fun.

I recently got a set of the lifecolour face paints, I haven't cracked the combination completely but they seem well, although it is easy to over do it.

Cheers

Al
AlanL
Visit this Community
England - East Anglia, United Kingdom
Joined: August 12, 2005
KitMaker: 14,499 posts
Armorama: 11,675 posts
Posted: Sunday, May 17, 2009 - 01:54 AM UTC
Hi Guys,

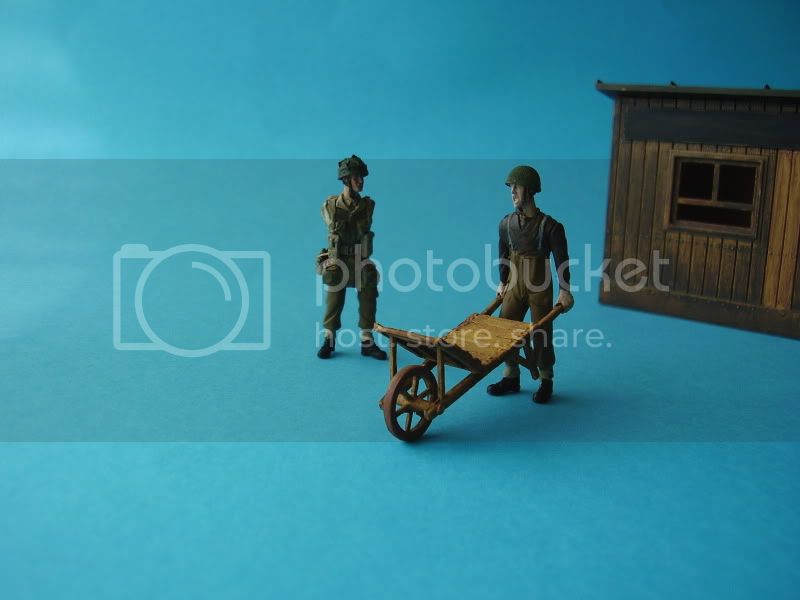
Two more I'm working on. The chap with the barrow is from the POW set. I originally bought it thinking I could use the figures as takners loading ammo, but when I started on the Paras I though he would fit in well with the barrrow loaded with stores/ammo wheeling it to a gun or mortar pit.

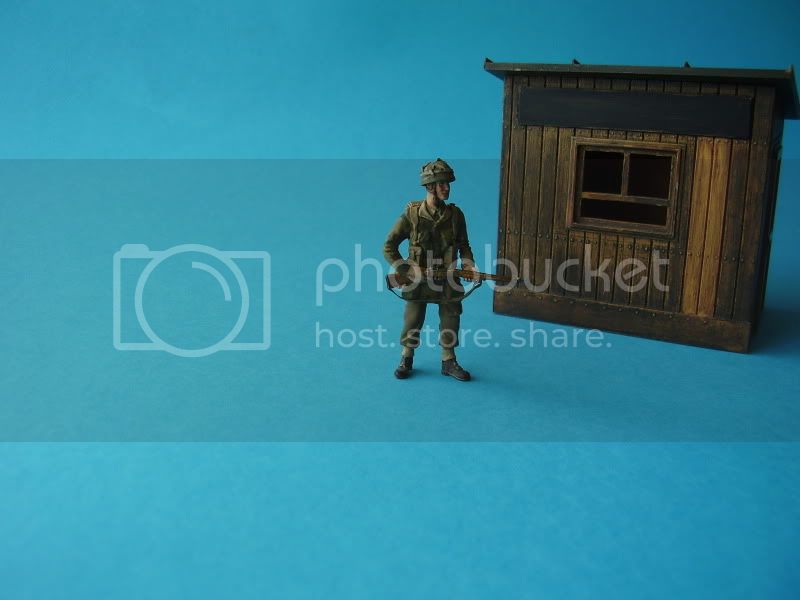
The second chap is awaiting a hand, his rifle was a bit warped and I broke the end off the barrel so will have to be replaced. Hand moulded to weapon


Al
tracklink2
Visit this Community
Pennsylvania, United States
Joined: March 07, 2007
KitMaker: 131 posts
Armorama: 120 posts
Posted: Sunday, May 17, 2009 - 02:19 PM UTC


What I have done so far, I still have a long way to go.

Ron the drawings have been received- thanks ever so much.
milvehfan
Visit this Community
North Carolina, United States
Joined: June 26, 2007
KitMaker: 2,116 posts
Armorama: 1,080 posts
Posted: Monday, May 18, 2009 - 01:34 AM UTC
Cody, some really good progress on that Sherman. milvehfan
exer
Visit this Community
Dublin, Ireland
Joined: November 27, 2004
KitMaker: 6,048 posts
Armorama: 4,619 posts
Posted: Monday, May 18, 2009 - 01:59 AM UTC
I'm wondering can I use the Tamiya Marder III in this campaign either at Arnhem or holding up The Guards Armoured Div on the road.
tracklink2
Visit this Community
Pennsylvania, United States
Joined: March 07, 2007
KitMaker: 131 posts
Armorama: 120 posts
Posted: Monday, May 18, 2009 - 05:52 AM UTC
Well I did read in A Bridge Too Far that SP guns were used to stop XXX corps between the Nijmegen Highway bridge and Arnhem but I don't know what type of SP guns they were, but maybe this should give you someplace to start.
Mobious
Visit this Community
Indiana, United States
Joined: May 18, 2008
KitMaker: 210 posts
Armorama: 126 posts
Posted: Monday, May 18, 2009 - 12:01 PM UTC
I'm planning a small viginette, something I can finish. Using the DML Fallshirmjaeger 8cm Mortar Team(Sicily 1944) kit. I'm not to positive on the camo smocks, but would that kit work for this GB?
tracklink2
Visit this Community
Pennsylvania, United States
Joined: March 07, 2007
KitMaker: 131 posts
Armorama: 120 posts
Posted: Monday, May 18, 2009 - 03:30 PM UTC
Those figures should be ok as the 1st parachute army under General Student most certainly would have had fallschirmjaeger and those fallschrimjaeger would have had their support weapons.

The camo is no problem as those figures wear the type 3 smock, which was made in a wide variety of camo patterns. The only fallschrimjaeger smock that didn't have a camo pattern was the type 1 which was a green olive color smock that you stepped into like a pair of coveralls. The type 2 was just like the type 1 except it was made of camouflage pattern materials. The type 3 was camo like the type 2 but it was more like a jacket that you didn't step into, it had snaps to enclose the leg portions but those same snaps could be and were usually left open.
I don't see why they won't work, go for it.

Mobious
Visit this Community
Indiana, United States
Joined: May 18, 2008
KitMaker: 210 posts
Armorama: 126 posts
Posted: Monday, May 18, 2009 - 09:19 PM UTC
Hey thanks Cody for the info on the Fallshirmjaeger smocks. I had no idea there were 3 different types. I'm looking forward to getting started on the figures. Thanks again on the green light.
yeahwiggie
Visit this Community
Dalarnas, Sweden
Joined: March 24, 2006
KitMaker: 2,093 posts
Armorama: 1,359 posts
Posted: Tuesday, May 19, 2009 - 01:30 AM UTC
@ Alan: great looking figures! I (probably) missed their manufacturer. Who does them?
All you have to do is add a base or dio to them and you are done!
@ Cody: did you redo the Sherman's surface or is it like that OOTB?
@ Pat: The Germans used practically anything they could lay their hands on, but the only SP's I know of are JgdPz IV and StuG III's (for the 9.SS.Pz.Div and 10. SS.Pz.Div).
@Mobious: I guess in those days they did care much about clothing regulations and used whatever was available at the time.

And here's my progress so far.


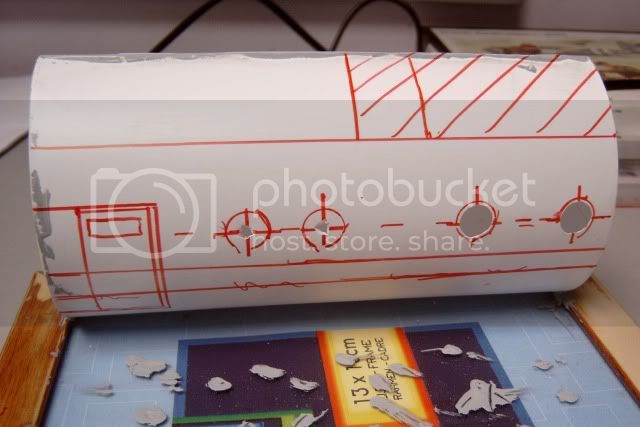
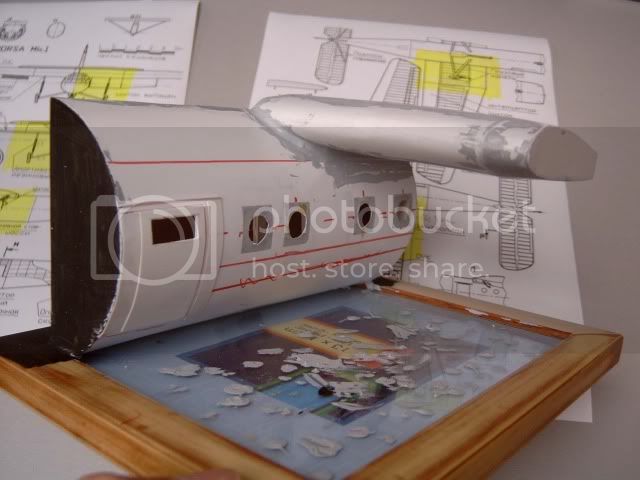
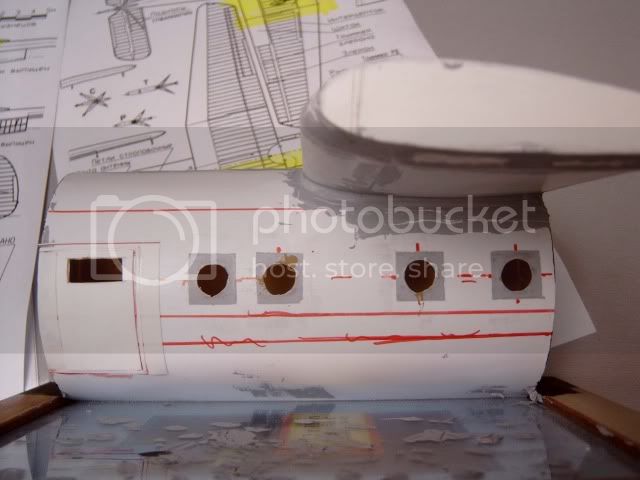
I started by marking the door, windows and wingposition, hence the happy bright red markings
After that I opened up the windows.


Next I took up the windwos themselves. For these I used caps and siliconlenses which often come with furniture. These happened to have the exact measurements required!
I cut off the exces part of the caps, glued in the lenses with the rounded side facing outward.


I came across a picture, showing squares around the windows, which I guess were to fasten the windows into the fuselage.
I tried recreating this by taping of the body and applying a thin layer of filler, hoping this would raise the surface enough to be visible after painting.


Here is said picture:


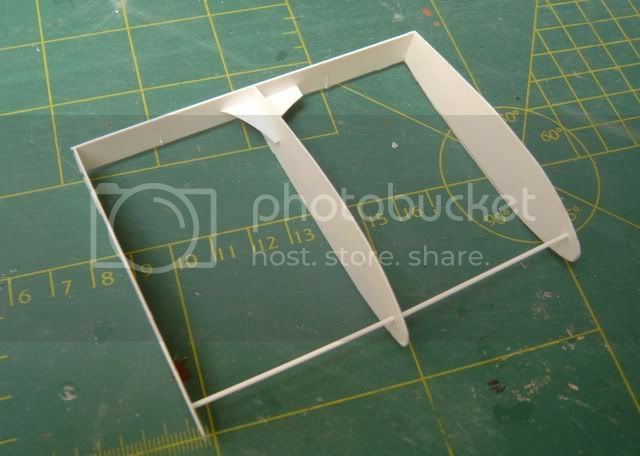
Finally I stared with the first steps building the wing.
I made 3 identical ribs, using general measurements and the naked eye/estimated guesswork.
I then aligned them and fixed them.

tracklink2
Visit this Community
Pennsylvania, United States
Joined: March 07, 2007
KitMaker: 131 posts
Armorama: 120 posts
Posted: Tuesday, May 19, 2009 - 01:56 AM UTC
Ron I wasn't quite happy with the cast detail, looked a bit off so i took some testors contour putty to it to enhance the cast effect, the weld seam on the side wasn't that great (almost non-existent) so I took some .020 evergreen styrene rod and used Tamiya plastic cement to soften it and I used my hobby knife to add the weld detail to it. so the surface detail on the hull are mostly my creation. I also had to patch a gap using the contour putty across the front between the transmission cover and the hull.

The horsa is looking fantastic.
docdios
#036
Visit this Community
England - West Midlands, United Kingdom
Joined: December 01, 2001
KitMaker: 1,998 posts
Armorama: 1,236 posts
Posted: Tuesday, May 19, 2009 - 02:33 AM UTC
Hi all

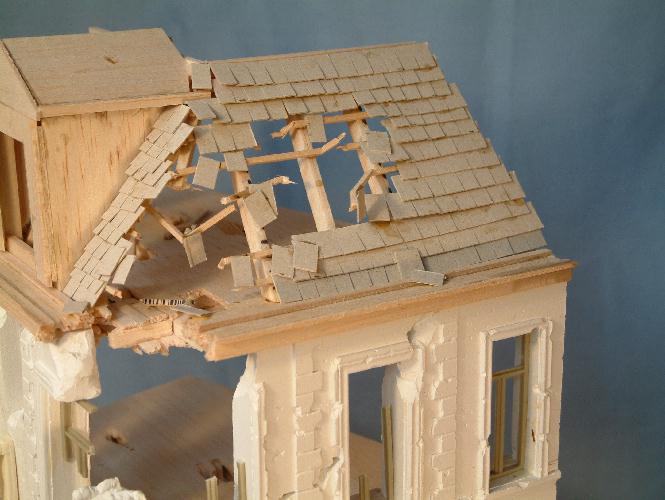
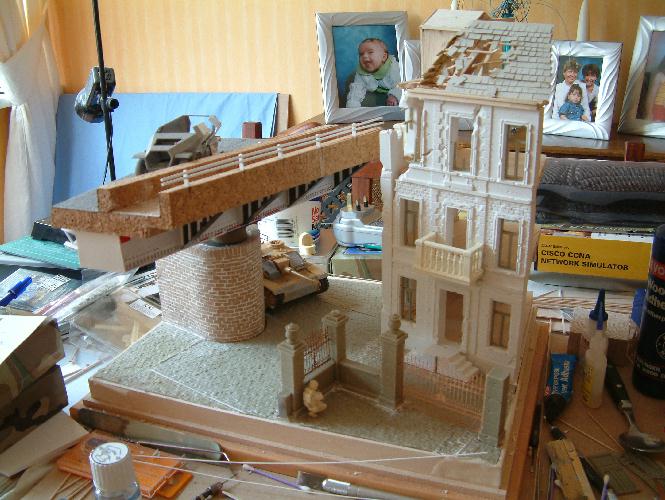
This Campaign is an ideal chance for me to finish a long over due diorama, I have reposted some pictures of the build and will add some more up to date ones as we go.


The diorama is further advanced than this, so I will get some more up pictures up, for some reason the build came to a grinding halt, but I feel ready to have another go at it now

thanks for looking

Cheers

Keith
AlanL
Visit this Community
England - East Anglia, United Kingdom
Joined: August 12, 2005
KitMaker: 14,499 posts
Armorama: 11,675 posts
Posted: Tuesday, May 19, 2009 - 05:17 AM UTC
Hi Keith,

Excellent to see this one coming out again and hopefull a chance for you to get a bit more done.

Work looks excellent, I like your style.

Al

Hi Guys,

a bit more work on the barrow boy


Al
milvehfan
Visit this Community
North Carolina, United States
Joined: June 26, 2007
KitMaker: 2,116 posts
Armorama: 1,080 posts
Posted: Tuesday, May 19, 2009 - 06:38 AM UTC
WOW ! Hey Guys, Some really Nice Work so far. Cant wait to see them progress and finished. milvehfan
tracklink2
Visit this Community
Pennsylvania, United States
Joined: March 07, 2007
KitMaker: 131 posts
Armorama: 120 posts
Posted: Tuesday, May 19, 2009 - 11:16 AM UTC
Keith I was wondering what ever happened with that dio, I remember seeing it before I registered here, the German half track, I can't remember what make it is, is just astounding the way you have it rendered in its destroyed state. It's awesome that it's back on the bench.
erichvon
Visit this Community
England - East Midlands, United Kingdom
Joined: January 17, 2006
KitMaker: 1,694 posts
Armorama: 1,584 posts
Posted: Tuesday, May 19, 2009 - 01:38 PM UTC
Bloody hell! Everybody is in warp speed...LOL. Finished a load or paras(photos to come) and picked up a couple of bits off e-bay at silly prices. Got the DML 250/1 Neu for £18 instead of £30 plus and the Resicast POW's Alan's built for £20 instead of £38. Bargain! Still ferreting about for stuff.
There's some excellent builds going on here from what I've seen so far. Glad I suggested this as it looks to be one of the most interesting campaigns for ages and the work so far is top notch!
SGTJKJ
#041
Visit this Community
Kobenhavn, Denmark
Joined: July 20, 2006
KitMaker: 10,069 posts
Armorama: 4,677 posts
Posted: Tuesday, May 19, 2009 - 10:38 PM UTC
That is going to be one hell of a diorama, Keith! Looking forward to follow that one. It is going to be very impressive.

Looking forward to see more
AlanL
Visit this Community
England - East Anglia, United Kingdom
Joined: August 12, 2005
KitMaker: 14,499 posts
Armorama: 11,675 posts
Posted: Wednesday, May 20, 2009 - 04:37 AM UTC
one more.


Al
yeahwiggie
Visit this Community
Dalarnas, Sweden
Joined: March 24, 2006
KitMaker: 2,093 posts
Armorama: 1,359 posts
Posted: Thursday, May 21, 2009 - 03:50 AM UTC
@ Keith: your dio rocks!!
It is looking like a phantastic build and captures the entire Arnhem-story in one setting. Magnificent!!
@ Alan: progress is steady and looking good!

I have made some progress too. Being sick does have its little advantages..
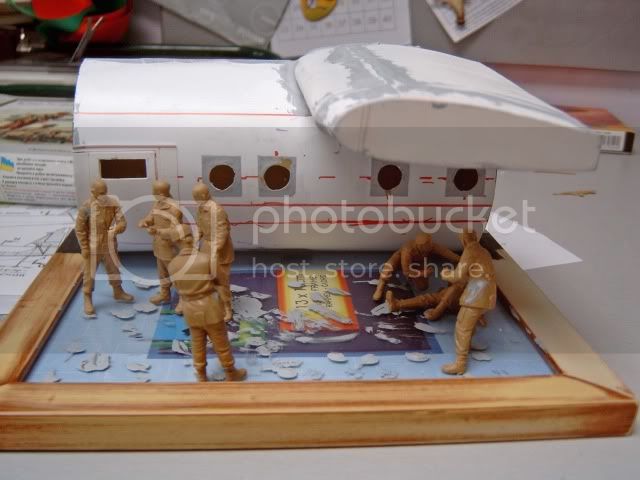
It turned out to be quite a job getting the wing and hull to look acceptable! It took a lot of glueing, measuring, cutting, sanding, measuring and above all filling!!
I actually wanted to attach the wing under a different angle, but I somehow made a mistake with the location of doors and windows, so it had to be moved up a lot. This meant that the fuselage had to be re-build to take the wing.
BUMMER!!

well, see for yourself:


To see the hole thing in perspective I added the figures oncemore.... and all of a sudden the Horsa doesn't look that big anymore!


AlanL
Visit this Community
England - East Anglia, United Kingdom
Joined: August 12, 2005
KitMaker: 14,499 posts
Armorama: 11,675 posts
Posted: Thursday, May 21, 2009 - 04:11 AM UTC
Hi Ron,

Thanks. Your progress is looking good, excellent idea on the glider.

Al
tracklink2
Visit this Community
Pennsylvania, United States
Joined: March 07, 2007
KitMaker: 131 posts
Armorama: 120 posts
Posted: Friday, May 22, 2009 - 05:23 AM UTC
very nice progress Ron that Horsa and the scene are fantastic.
Blade48mrd
Visit this Community
Washington, United States
Joined: September 03, 2004
KitMaker: 1,185 posts
Armorama: 810 posts
Posted: Friday, May 22, 2009 - 07:35 AM UTC
Karl -

Old age/bad eyesight must have caused me to not see this earlier, but I'll jump on board now at any rate if alright. Great idea and one of my favorite areas. Thanks for the extended timeframe also. Baseball season here has me coaching two teams so not much modeling time til later in Summer, but think I should have plenty of time to finish. Been wanting to do one of the Tiger-B 'King Tigers' in my stash so thought I'd go for the s.PzAbt 506;

The Schwere Panzer Abteilung 506 was one of the last units to arrive to reinforce the Germans fighting in Arnhem and Oosterbeek. On the night of the 23/24 Sept. 1944 the whole unit arrived by Train in Zevenaar. It was here where the 2nd and 3rd Companies of the unit were unloaded and sent to Arnhem. On arrival in Arnhem, the 2./s.Pz.Abt. 506 commanded by Hauptmann Wacker was attached to the 9. SS Pz. Div. 'Hohenstaufen' and sent to Oosterbeek to finish off the British Paratroopers holding out in the pocket. The 3./s.Pz.Abt. 506 commanded by Hauptmann Otto was attached to the 10. SS Pz. Div. 'Frundsberg' which was fighting south of the Rhine in and around Elst.

Blade48mrd
tracklink2
Visit this Community
Pennsylvania, United States
Joined: March 07, 2007
KitMaker: 131 posts
Armorama: 120 posts
Posted: Friday, May 22, 2009 - 11:57 AM UTC
Mike- if you need any help with pics or markings or anything I have a book "Tigers In Combat"
which has a nice section on S.PZ. Abt. 506 , So I am more than happy to lend any assistance necessary.
milvehfan
Visit this Community
North Carolina, United States
Joined: June 26, 2007
KitMaker: 2,116 posts
Armorama: 1,080 posts
Posted: Friday, May 22, 2009 - 12:51 PM UTC
WOW !!! It appears most of the builds here are moving along nicely "Some Really Cool Modeling". I havent gotten very far along with my build & I hope to get a few pics of my progress posted shortly.

Again, I.d like to Thank Exer & Jesper for the Decals and those who have helped me along with my research. Keep On Modelin, milvehfan
AlanL
Visit this Community
England - East Anglia, United Kingdom
Joined: August 12, 2005
KitMaker: 14,499 posts
Armorama: 11,675 posts
Posted: Saturday, May 23, 2009 - 04:23 AM UTC
Hi Guys,

i thought the chap in the background might work in a small supply type area.


Al