Ahhh... there's still life here!
Nice looking camo on that Sherman!
I got everything home in one piece... well more pieces actually, but not a thing is broken!
I am thinking about the colours, though.
Rommel's Greif should be a yellow-brown (RAL 8000) and grey-green (RAL 7008), according to the specifications, but on the pictures I have it looks like it has been painted over yet again with a much brighter colour... or is that just a dust and watermix?
I am also tinkering around with the figures and trying to figure out if I should be putting both kits in 1 dio or heep them seperately??
Campaigns
Where Armorama group builds can be discussed, organized, and updates posted.
Where Armorama group builds can be discussed, organized, and updates posted.
Hosted by Darren Baker, Richard S.
Blitz II Africa

yeahwiggie

Joined: March 24, 2006
KitMaker: 2,093 posts
Armorama: 1,359 posts

Posted: Sunday, September 06, 2009 - 07:24 AM UTC
roman

Joined: July 20, 2004
KitMaker: 99 posts
Armorama: 95 posts

Posted: Sunday, September 06, 2009 - 07:49 PM UTC
small progress


warreni

Joined: August 14, 2007
KitMaker: 5,926 posts
Armorama: 712 posts

Posted: Sunday, September 06, 2009 - 09:48 PM UTC
Hi Everyone.
Here is my Dragon Panzer I Ausf A in 1/35 scale, completely OOB.

With flash
 3
3
Without flash..
The model was a pleasure to build as I have found all Dragon stuff to be.. well except the Valentine which isn't really a Dragon kit anyway..
Thanks for the Campaign. We need a Part 2 as I still have lots of models that fit into this category.

Here is my Dragon Panzer I Ausf A in 1/35 scale, completely OOB.

With flash
 3
3Without flash..
The model was a pleasure to build as I have found all Dragon stuff to be.. well except the Valentine which isn't really a Dragon kit anyway..

Thanks for the Campaign. We need a Part 2 as I still have lots of models that fit into this category.

Posted: Monday, September 07, 2009 - 11:04 AM UTC
Quoted Text
Hi Everyone.
Here is my Dragon Panzer I Ausf A in 1/35 scale, completely OOB.
With flash3
Without flash..
The model was a pleasure to build as I have found all Dragon stuff to be.. well except the Valentine which isn't really a Dragon kit anyway..
Thanks for the Campaign. We need a Part 2 as I still have lots of models that fit into this category.

Hello Warren,
The next Blitz Campaign will be next spring/summer. It will encompass the Italian Campaign from the invasion of Sicily to the end of the war in 1945.
I will submitt it in January to MarkM.
Cheers,
Bruce

jointhepit

Joined: May 14, 2006
KitMaker: 3,829 posts
Armorama: 881 posts

Posted: Monday, September 07, 2009 - 11:54 AM UTC
hey guys, I was starting wrking on a M13/40 ,hope that's no problem, but I decided to finnish the kit within this campaign topic.
the following has been done all ready,
assembly and cleanup of all parts, i must say the kit appears to be of better mould/plastic then the Zvesda version.
I have found a site blog on how to improve the Italeri version into a somewhat more correct version , the Italeri has some issues (and I'm not starting to talk about them tracks)
first all has been given coat of black satin , then i sprayed Dark green Revell Aquacolour on the whole
after that I sprayed the whole with Sols ( clear )
let dry, then applied (not enough) hairspray on
en then a coat of Beige again aqua Revell (love those cubes)
then scrub with old brush, dentalstick (no not the one for your dog )
)
and this is the result so far
tomorrow i'll be doing some more paint chipping, and painting some details,giving the underside a good coat of "dust", and hoping the tension wheel or other part doesn't fly off
Ps can anybody tell me what the turretless version for witch there is a hatch/covercirkel on the sprue's is called, all info tell the hatch to be a 4 folding type not a "normal" turret hatch.
wrong ventilation grill

slightly improved version (I know , should be 19 grilles, but I , euh, have big fingers )
)

side strip removed, bolts first shaved off, then put back

other side

closed underside,somewhat:_|

added some bolts on "splash"ring

and some on the rest of the hull, note the one's on the top of enginecompartement are incorrect, my bad


added the shortened fenders, apparently only the first batch had the long fenders

painted black

and painted green

and this is tonight under the table lamp


Greetz
Tha Pit
the following has been done all ready,
assembly and cleanup of all parts, i must say the kit appears to be of better mould/plastic then the Zvesda version.
I have found a site blog on how to improve the Italeri version into a somewhat more correct version , the Italeri has some issues (and I'm not starting to talk about them tracks)
first all has been given coat of black satin , then i sprayed Dark green Revell Aquacolour on the whole
after that I sprayed the whole with Sols ( clear )
let dry, then applied (not enough) hairspray on
en then a coat of Beige again aqua Revell (love those cubes)
then scrub with old brush, dentalstick (no not the one for your dog
 )
)and this is the result so far
tomorrow i'll be doing some more paint chipping, and painting some details,giving the underside a good coat of "dust", and hoping the tension wheel or other part doesn't fly off

Ps can anybody tell me what the turretless version for witch there is a hatch/covercirkel on the sprue's is called, all info tell the hatch to be a 4 folding type not a "normal" turret hatch.
wrong ventilation grill

slightly improved version (I know , should be 19 grilles, but I , euh, have big fingers
 )
)
side strip removed, bolts first shaved off, then put back

other side

closed underside,somewhat:_|

added some bolts on "splash"ring

and some on the rest of the hull, note the one's on the top of enginecompartement are incorrect, my bad


added the shortened fenders, apparently only the first batch had the long fenders

painted black


and painted green

and this is tonight under the table lamp


Greetz
Tha Pit
Posted: Tuesday, September 08, 2009 - 09:17 AM UTC
Hello The Pit,
Great build!!!
Great job explaining how and why you improved your build. The photo's with the arrows that show what you removed and added helped to explain a lot of it. I would suggest that you keep explaining what you are doing and submit it for a How to Feature here at Armorama.
I think that it would help a lot of builders who struggle to improve a kit that they are building.
Again, Great Job.
Thanks for the update and photo's.
Cheers,
Bruce
Great build!!!
Great job explaining how and why you improved your build. The photo's with the arrows that show what you removed and added helped to explain a lot of it. I would suggest that you keep explaining what you are doing and submit it for a How to Feature here at Armorama.
I think that it would help a lot of builders who struggle to improve a kit that they are building.
Again, Great Job.
Thanks for the update and photo's.

Cheers,
Bruce

jointhepit

Joined: May 14, 2006
KitMaker: 3,829 posts
Armorama: 881 posts

Posted: Wednesday, September 09, 2009 - 09:49 AM UTC
thanks Bruce, I am fond of the DAK and other desert "things " 
here are some update pics
just some mad day of chipping,first started out with the base colour dark green, but the paint kept drying faster then I could apply so I went back to the old ways and used lampblack and burned sienna mix to make the chips,using a verry small brush, just trembling away, luckely in this way you can also put right some unwanted big chips ,just use a piece of wet (with white spirit) cloth or tissue and wipe off the excess.
hope I haven't gone postal on the chips, but knowing the Italian fear of rust protection combined with hot days, and boen chilling damp nights, the build using bolts and rivets, all that held in mind, the rust build on those vehicles must have been awesome
,I'll be thinking of adding some sandbags, or extra tracks, and I'm off to coat it with some future, then put some gravy on it, probably burned sienna, all around, and some dot's of white yellows and reds all around blending those in for good measure
hoping all keeps hanging on, because some parts have the sudden urge of self deconstructing ! especially the bogie springs!
well nothing a good dot of CA can't fix
foto's over a period of time today
you will notice the chipping getting intenser


greetz Tha Pit

here are some update pics
just some mad day of chipping,first started out with the base colour dark green, but the paint kept drying faster then I could apply so I went back to the old ways and used lampblack and burned sienna mix to make the chips,using a verry small brush, just trembling away, luckely in this way you can also put right some unwanted big chips ,just use a piece of wet (with white spirit) cloth or tissue and wipe off the excess.
hope I haven't gone postal on the chips, but knowing the Italian fear of rust protection combined with hot days, and boen chilling damp nights, the build using bolts and rivets, all that held in mind, the rust build on those vehicles must have been awesome

,I'll be thinking of adding some sandbags, or extra tracks, and I'm off to coat it with some future, then put some gravy on it, probably burned sienna, all around, and some dot's of white yellows and reds all around blending those in for good measure

hoping all keeps hanging on, because some parts have the sudden urge of self deconstructing ! especially the bogie springs!
well nothing a good dot of CA can't fix

foto's over a period of time today
you will notice the chipping getting intenser


greetz Tha Pit


warreni

Joined: August 14, 2007
KitMaker: 5,926 posts
Armorama: 712 posts

Posted: Wednesday, September 09, 2009 - 09:57 AM UTC
Just to give another point of view, I have lived and operated with AFVs in the desert and we found that even though the desert dust and sand is very alkaline in this country, which should promote heaps of rust, it is so dry there is very little to no rust at all. Any moisture that settles on the vehicle at night is burnt off very quickly once the sun rises.
You still get chips etc, but they stay as normal metal, no rust. That is in the desert anyway.

You still get chips etc, but they stay as normal metal, no rust. That is in the desert anyway.

Posted: Wednesday, September 09, 2009 - 11:41 AM UTC
Hello All,
Well it looks like the supplies have reached the combat troops and they are now ready to start another round of fighting.
@ The Pit,
Your chipping is looking great. Thanks for the photo update.
@ Warren,
I have worked and lived in the desert for a few years (Death Valley) and I agree with you. Most vehicles had chipped paint but very little if any rust on them. That is not to say that a tank near the sea would not get rust after the paint was chipped, I think that there would be some. Thanks for the insight on vehicle wear and tear in the desert.
Cheers,
Bruce


warreni

Joined: August 14, 2007
KitMaker: 5,926 posts
Armorama: 712 posts

Posted: Wednesday, September 09, 2009 - 11:48 AM UTC
I agree Bruce... Anything will rust by the sea, if it is made of ferrous stuff anyway! 

Removed by original poster on 09/10/09 - 00:17:29 (GMT).
Ruffus

Joined: April 12, 2005
KitMaker: 343 posts
Armorama: 223 posts

Posted: Thursday, September 10, 2009 - 07:25 AM UTC
Hi, I will try to post again, this is my Bedford QL from Revell Germany, I begin this model about 15 years ago, just finnish it this year, too many ejection marks, but the kit turn out looking good, for the detail master this is a great canvas.


Hope you like it
Byron


Hope you like it
Byron

yeahwiggie

Joined: March 24, 2006
KitMaker: 2,093 posts
Armorama: 1,359 posts

Posted: Friday, September 11, 2009 - 03:20 AM UTC
Allright!
Lots of action here!!
@ Roman; great looking scoutcar and your dio will look cool too! You managed to get 2 vehicles into a small area and make sure they both are very well visible.
@ Warren; nice looking Pz.Kfw.I. Is there a base coming for it, too?
@ Pit; Very good build with loads of improvements. The clear pictures sure help a lot. Paintjob looks very good, too.
@ Byron; That is a vehicle I am not familiar with. The build looks good. Planning on adding figures or a base?
My update is as follows.
I got myself a woodturningmachine and I tried it allready.
Somehow the wooden disk was not centred correctly, so getting it to look right wasn't easy. Low quality and maintainance-chissels don't help either...
I did manage to create a base for the leFH18, though. Here's what it looks like now.

The rocks are glued on and the extra grooves are there to create an extra hold for the filler to recreate the desertsoil.
I also did some work on the figures, which are a standard Dragonset. The officer in the back comes from the Dragon-Greif and is a mix of the 2 figures therein.

I also made a crew for the Greif, which will be Rommel himself and an adjutant.
These figures are from the Revellbox and, surprise, surprise, are the exact same figures as the Revellfigures.
I made Rommel as per instructions, but he doesn't really look the part. He's too round. The adjutant has a pointing stance, but I changed that a bit by eliminating the pointing hand and adding a flat hand, as in a waving kind of gesture. The other hand will receive a map.

Lots of action here!!
@ Roman; great looking scoutcar and your dio will look cool too! You managed to get 2 vehicles into a small area and make sure they both are very well visible.
@ Warren; nice looking Pz.Kfw.I. Is there a base coming for it, too?
@ Pit; Very good build with loads of improvements. The clear pictures sure help a lot. Paintjob looks very good, too.
@ Byron; That is a vehicle I am not familiar with. The build looks good. Planning on adding figures or a base?
My update is as follows.
I got myself a woodturningmachine and I tried it allready.
Somehow the wooden disk was not centred correctly, so getting it to look right wasn't easy. Low quality and maintainance-chissels don't help either...

I did manage to create a base for the leFH18, though. Here's what it looks like now.

The rocks are glued on and the extra grooves are there to create an extra hold for the filler to recreate the desertsoil.
I also did some work on the figures, which are a standard Dragonset. The officer in the back comes from the Dragon-Greif and is a mix of the 2 figures therein.

I also made a crew for the Greif, which will be Rommel himself and an adjutant.
These figures are from the Revellbox and, surprise, surprise, are the exact same figures as the Revellfigures.

I made Rommel as per instructions, but he doesn't really look the part. He's too round. The adjutant has a pointing stance, but I changed that a bit by eliminating the pointing hand and adding a flat hand, as in a waving kind of gesture. The other hand will receive a map.


warreni

Joined: August 14, 2007
KitMaker: 5,926 posts
Armorama: 712 posts

Posted: Friday, September 11, 2009 - 08:07 AM UTC
Base? What is this base thing? 
Building too many models to make a base..

Building too many models to make a base..

Ruffus

Joined: April 12, 2005
KitMaker: 343 posts
Armorama: 223 posts

Posted: Friday, September 11, 2009 - 02:41 PM UTC
Quoted Text
@ Byron; That is a vehicle I am not familiar with. The build looks good. Planning on adding figures or a base?
Planning on adding some bits & pieces to give it a more used look, maybe a base; figures Of 8th Army are hard to come by. besides I have not much experience with figure painting.
Happy Modeling
Byron

yeahwiggie

Joined: March 24, 2006
KitMaker: 2,093 posts
Armorama: 1,359 posts

Posted: Friday, September 11, 2009 - 11:06 PM UTC
Here's another update from me.
Ik finished the construction of the wall and added a layer of sandbags out of milliput on top. This was harder then I had expected! The bags will be partially covered by the terrain and sand later on. The outer walls will be filled up to an allmost stand.
In the middle I will add a bed out of wooden planking, so the gun has more stability then when standing on loose sand.


jointhepit

Joined: May 14, 2006
KitMaker: 3,829 posts
Armorama: 881 posts

Posted: Saturday, September 12, 2009 - 01:47 AM UTC
@ yeahwiggie dinges  Dak virus te pakken, sterk!
@Byron; got the same kit on the shelf, did a great job, and yes mine is on hold because I just get stressed from the ejection marks,sad it's a nice kit.

 Dak virus te pakken, sterk!
@Byron; got the same kit on the shelf, did a great job, and yes mine is on hold because I just get stressed from the ejection marks,sad it's a nice kit.


yeahwiggie

Joined: March 24, 2006
KitMaker: 2,093 posts
Armorama: 1,359 posts

Posted: Sunday, September 13, 2009 - 02:15 AM UTC
Hey Pit... I'm D.A.K.'ed all over!! Change of climate (from Western Europe and the Eastern front to Africa) makes a man breathe again!! 
The Gunpit base is done, except for the coats of paint and this is it;


And while I was at it, I did "Rommel's sandbox too!


The Gunpit base is done, except for the coats of paint and this is it;


And while I was at it, I did "Rommel's sandbox too!



PanzerGeek

Joined: February 10, 2008
KitMaker: 221 posts
Armorama: 217 posts

Posted: Monday, September 14, 2009 - 01:06 PM UTC
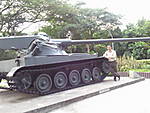
Hi all.
This is my entry, not totally complete but close. Just have to finish the crew, and a bit of weathering.


Cheers.
Todd.
This is my entry, not totally complete but close. Just have to finish the crew, and a bit of weathering.


Cheers.
Todd.

musicwerks

Joined: August 09, 2005
KitMaker: 375 posts
Armorama: 335 posts

Posted: Monday, September 14, 2009 - 05:26 PM UTC
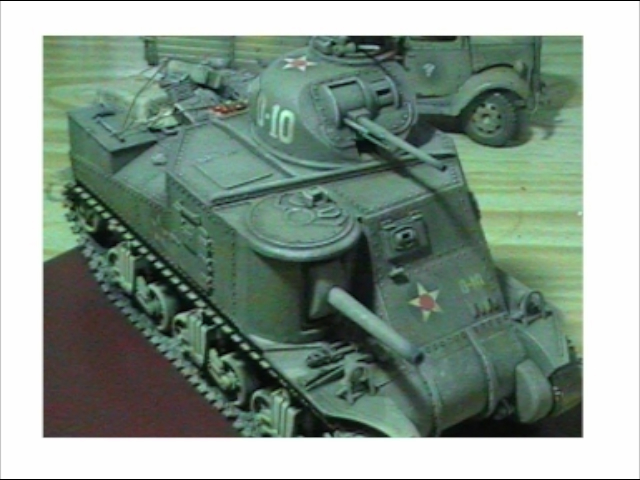
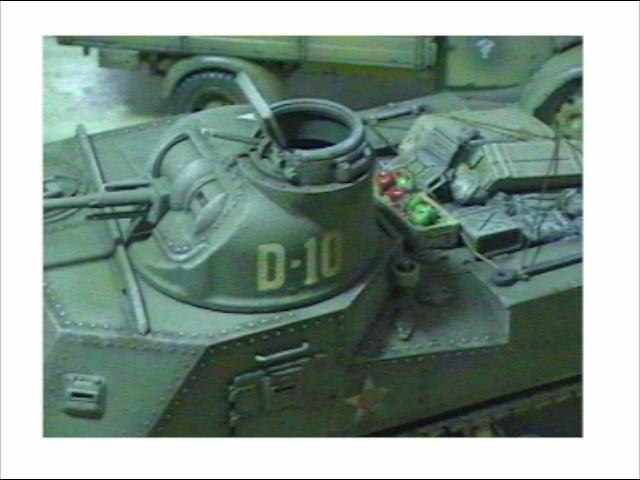
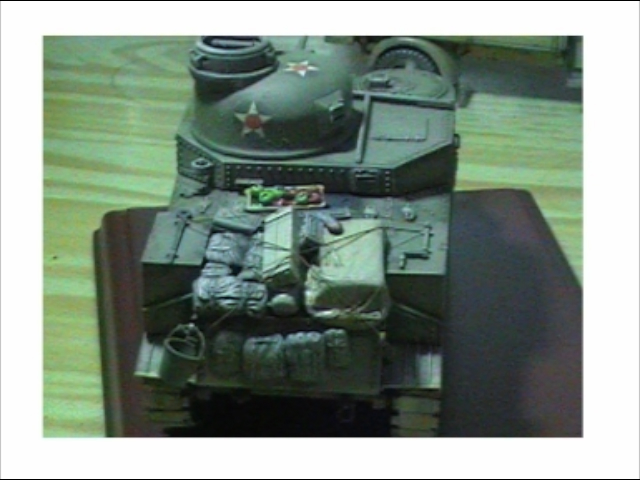
Hi,
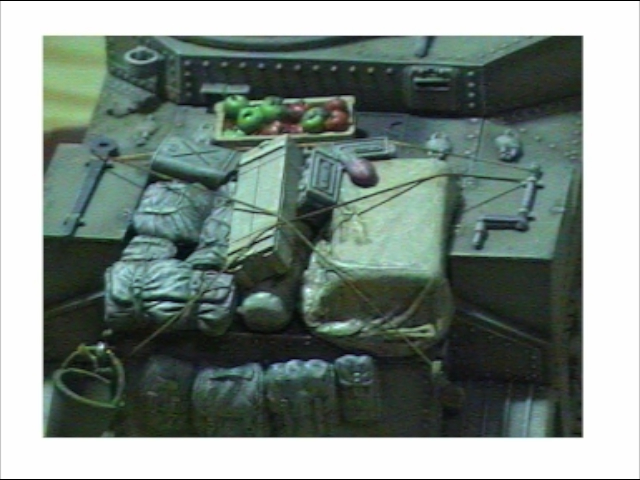
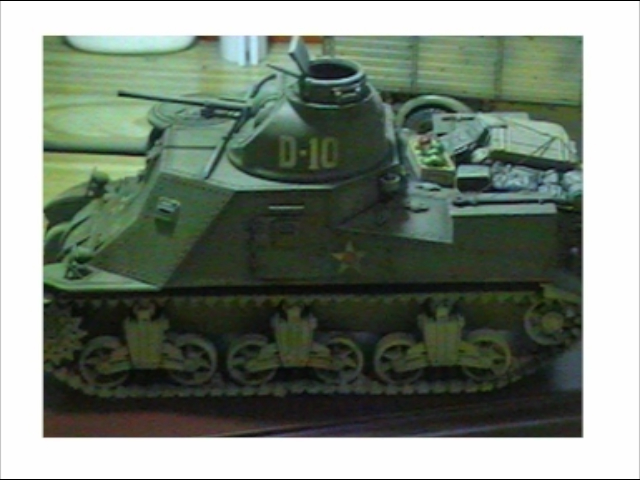
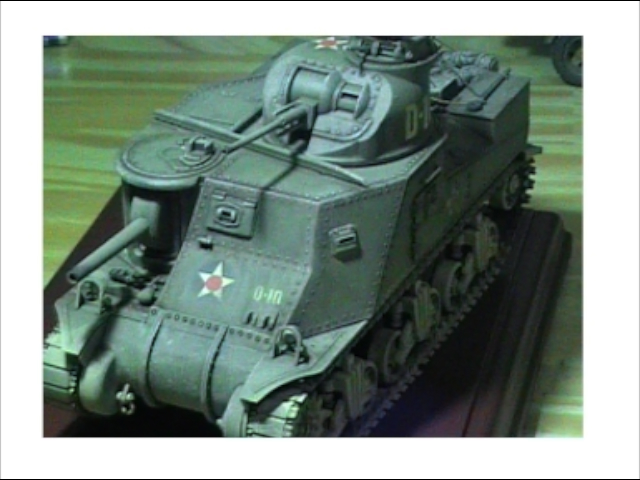
My submission- "Hell on Wheels", North Africa 1943. Old Tamiya kit, a very enjoyable build.

Musicwerks
My submission- "Hell on Wheels", North Africa 1943. Old Tamiya kit, a very enjoyable build.


Musicwerks

yeahwiggie

Joined: March 24, 2006
KitMaker: 2,093 posts
Armorama: 1,359 posts

Posted: Tuesday, September 15, 2009 - 03:40 AM UTC
More entries! Great!!
But I would have liked to see more W.I.P.-pics, too...
Here's my progress;
I gave both basese their basics coats of paint, followed by the first drybrushes and washes. Once everything has fully dried I will put on a coat of clear finish and after that add the final washes, powders etc.


The gunpit will be a "bright" desert. On pictures it is a very bright beige, sometimes allmost white, because of the limestone, I guess.
The Greif will be in a red desert. Just to do something different.
Unfortunately the colour and its varieties have proven to be more difficult then anticipated and right now look plain awfull.
I should be a bit of a mix between these two;


But I would have liked to see more W.I.P.-pics, too...
Here's my progress;
I gave both basese their basics coats of paint, followed by the first drybrushes and washes. Once everything has fully dried I will put on a coat of clear finish and after that add the final washes, powders etc.


The gunpit will be a "bright" desert. On pictures it is a very bright beige, sometimes allmost white, because of the limestone, I guess.
The Greif will be in a red desert. Just to do something different.
Unfortunately the colour and its varieties have proven to be more difficult then anticipated and right now look plain awfull.
I should be a bit of a mix between these two;


jointhepit

Joined: May 14, 2006
KitMaker: 3,829 posts
Armorama: 881 posts

Posted: Tuesday, September 15, 2009 - 05:24 AM UTC
@ yeahwiggie; the "zetduivel" at work
you must mean, the dragon figs
I just bought the same kit at KMK and I had the choice of either the Dragon version at 20Euro's and the Revell version at 15 Euro's
guess what I bought?
after opening the box I didn't want to give 5 euro's extra for the boxart
@tjbear66 verry nice "clean "Tiger , hope you'll be dusting this beast like it's been sitting there for the past 60 years
@musicwerks ; wow, but sadly the pictures are not up to the task of bringing out the fine details, or work you must have put in.
please give us some clear pics
greetz Guys,
I'll be eating some more sand now!
greetz Tha Pit

Quoted Text
These figures are from the Revellbox and, surprise, surprise, are the exact same figures as the Revellfigures.
you must mean, the dragon figs

I just bought the same kit at KMK and I had the choice of either the Dragon version at 20Euro's and the Revell version at 15 Euro's
guess what I bought?
after opening the box I didn't want to give 5 euro's extra for the boxart

@tjbear66 verry nice "clean "Tiger , hope you'll be dusting this beast like it's been sitting there for the past 60 years

@musicwerks ; wow, but sadly the pictures are not up to the task of bringing out the fine details, or work you must have put in.
please give us some clear pics

greetz Guys,
I'll be eating some more sand now!
greetz Tha Pit


endrju007

Joined: December 05, 2007
KitMaker: 2,435 posts
Armorama: 1,256 posts

Posted: Tuesday, September 15, 2009 - 10:16 AM UTC
Hi Guys!
I haven't been here for a while and I've missed a lot nice builds.
Tha Pit, I really like your weathering style!
Due to the fact that I had to deal with some matt coating disaster I had to overdose the weathering a little and ended with a tank that would have had to spend at least 20 years on the desert to look like this...
Anyway: to prove that I'm alive and still working on my PzIV:


I hope to finish it not later than this weekend.
A.
I haven't been here for a while and I've missed a lot nice builds.
Tha Pit, I really like your weathering style!
Due to the fact that I had to deal with some matt coating disaster I had to overdose the weathering a little and ended with a tank that would have had to spend at least 20 years on the desert to look like this...

Anyway: to prove that I'm alive and still working on my PzIV:


I hope to finish it not later than this weekend.
A.

jointhepit

Joined: May 14, 2006
KitMaker: 3,829 posts
Armorama: 881 posts

Posted: Friday, September 18, 2009 - 07:39 AM UTC
thank you for the praise 
the trick is to use oil paint, burned umber/lampblack,sometimes a little tiny bit of alu for the more worn parts, a small brush, and only start after you've been deprived of sleep for about 24 to 30 hours,gives you the right amount of tremble

and a lot of time
I agree with your own opinion, it looks a little ,euh, "overcooked"
but any proof of you being still alive, is good enough proof fot me
thanks for sharing

the trick is to use oil paint, burned umber/lampblack,sometimes a little tiny bit of alu for the more worn parts, a small brush, and only start after you've been deprived of sleep for about 24 to 30 hours,gives you the right amount of tremble


and a lot of time

I agree with your own opinion, it looks a little ,euh, "overcooked"

but any proof of you being still alive, is good enough proof fot me

thanks for sharing

yeahwiggie

Joined: March 24, 2006
KitMaker: 2,093 posts
Armorama: 1,359 posts

Posted: Saturday, September 19, 2009 - 03:49 AM UTC
Hi Andrzej,
The weathering indeed looks more like a camo-pattern, but I'm sure you'll get it fixed.
I'd loose the flague if I were you. It is too pinkish and really doesn't match the Panzer.
I've been struggling with my little patch of red desert.
I added more structure to the surface and more variety in the colours.
This is how it was;

And this is how it is now;


I know it looks very red, but I will tone it down, once the vehicle has been added, so I can blend it in at the same time.
The weathering indeed looks more like a camo-pattern, but I'm sure you'll get it fixed.
I'd loose the flague if I were you. It is too pinkish and really doesn't match the Panzer.
I've been struggling with my little patch of red desert.
I added more structure to the surface and more variety in the colours.
This is how it was;

And this is how it is now;


I know it looks very red, but I will tone it down, once the vehicle has been added, so I can blend it in at the same time.
 |


