Campaigns
Where Armorama group builds can be discussed, organized, and updates posted.
Miniart Dio Campaign
guille
Visit this Community
Oregon, United States
Joined: May 31, 2009
KitMaker: 98 posts
Armorama: 94 posts
Posted: Tuesday, February 09, 2010 - 10:05 PM UTC
Hi everyone,

Just getting around to posting my first pics for this campaign. Looks like some good progress going on.

Stef- that looks like some serious construction. Nice work. My first Miniart project is the German Shed, sort of a similar design in the sense that it is a bit more modular and complete than some of the ´ruin´ types.

My goal for this project is complete weathering. I want to make it look really wet! Like a cold winter rain, with lots of icky things collecting in pools. I haven´t decided on any figures, but I do have plenty of German Armor in my stash so who knows what will emerge from the ruins! Certainly NOT the Kuppelwagon I have in the photos below. I have other plans for that beasty. (See the Paint the Figures Campaign).

Ok, I got a shot of my German Shed in progress for the Bitter Taste of Defeat. Some of you gents may be familiar with the action in that neck of the woods (shout out to our fearless leadersˇ Andrzej) so sorry to bore you.

Looking forward to making more progress on the new project in upcoming days. I still haven´t learned to follow the instructions, but from this campaign, I did learn to put the insides together first. But I was sloppy and left a big glob of glue to clean up. I think you can see it gleaming.

Oh yeah, that is pure 100% sunshine, even if at an extremely low angle for photos. Check out my cat, Sylvia-Snapper in the background.

I wish it still looked like this. Kind of an older pic from BTOD.

IMAG0025

This piece is also from my previous set. But I am working on my weathering technique and have recently moved on to the salt technique for this piece. More updates will surely follow, even if these last two are not officially part of the campaign.

Rusted Sign Post

All new!

IMAG0014

IMAG0013

Sorry I don´t have a shot of the box yet, but this gives you some idea of where we are going.

IMAG0015

IMAG0016

Playing around a bit!!!

IMAG0020

I hate to repeat myself as I have shown this photo elseware in the Paint the Figures Campaign, but these are the gutters for the German Shed above. This build has the same parts, so I do look to improve on these. Not sure if I just need like one more layer of red-orange here, with lots of open spots to simulate the chipped paint around the connectors. Whatya think? I am not quite happy with these, but still overall satisfied with the progress. I think add the paint and then go to the heavy washes.

IMAG0017

ok, that is it for now. I hope to demonstrate the latest results of my practice with the salt technique next. I have been lagging a bit in my photography unfortunately with all the work I have been caught up in.

caio, and once again thanks for looking. It is a nice campaign we got going here and I am learning a lot!

guillermo
yeahwiggie
Visit this Community
Dalarnas, Sweden
Joined: March 24, 2006
KitMaker: 2,093 posts
Armorama: 1,359 posts
Posted: Friday, February 12, 2010 - 02:13 AM UTC
Here are the contents of my box...
Oh dear... what have I gotten myself into, here???


muddyfields
Visit this Community
Scotland, United Kingdom
Joined: February 04, 2006
KitMaker: 884 posts
Armorama: 622 posts
Posted: Friday, February 19, 2010 - 02:30 AM UTC
Hi
Have cut all of the building out. have started to glue the 2 main halves of the building together.
I added a small strip of Balsa to the edge of each straight so that when I joined the 2 halves together there was a bit more for the 2 sides to hold against.

I've started an album on photobucket.
http://s377.photobucket.com/albums/oo218/muddyfields/Miniart%20Campaign/
guille
Visit this Community
Oregon, United States
Joined: May 31, 2009
KitMaker: 98 posts
Armorama: 94 posts
Posted: Friday, February 19, 2010 - 08:48 PM UTC
Hey Shaun,
I like your use of the balsa backings around the window areas. That looks like it will provide some nice reinforcement.

I need to update my pictures, but the way I started dealing with this aspect was using Testers rubber cement and liberally gluing up the insides of the windows first. Once these are secure, and everything in position I move to the walls. At least that is what I have done with this build. I found that I had to cut out a bit of my inside wall to make everything fit. But again. I should get some pictures up.

good work so far though. I looked at your work on photobucket.

b
exer
Visit this Community
Dublin, Ireland
Joined: November 27, 2004
KitMaker: 6,048 posts
Armorama: 4,619 posts
Posted: Friday, February 19, 2010 - 11:30 PM UTC
Nice work Guillermo

Shaun I use a similar technique around the windows and doors but I use scrap plastic instead of Balsa.

It'll be interesting to see how Ron and Shaun's finishes turn out as they are modelling the same kit.

I hope to dig out my build today and get some work done.
muddyfields
Visit this Community
Scotland, United Kingdom
Joined: February 04, 2006
KitMaker: 884 posts
Armorama: 622 posts
Posted: Sunday, February 21, 2010 - 06:49 AM UTC
Hi
Both sides are together & have started to put the door & window frames in.
Filled the gaps down the broken brick edge.
Nothing much to show at the moment. Have added a couple of picks to my photobucket album.
Pat your right it Will be interesting to see Ron & Myself both build this building.
HeyLoad
Visit this Community
Illinois, United States
Joined: December 06, 2005
KitMaker: 64 posts
Armorama: 14 posts
Posted: Sunday, February 21, 2010 - 07:41 AM UTC
Glad to see all the progress here. I have probably the easiest MiniArt kit which is the Street w/ Park Wall. It was a Christmas gift so I thought I would use it for this campaign. I intend to add Dragon's 5cm PAK 38 with crew to the scene. The diorama has come together easily so far.

Tom


thomokiwi
Visit this Community
Christchurch, New Zealand
Joined: January 11, 2006
KitMaker: 438 posts
Armorama: 359 posts
Posted: Tuesday, February 23, 2010 - 04:54 PM UTC
Well, I am making progress. I am not liking the join seams and have filled the brick join with Mr Surfacer 1000 - not perfect but I'm pretty happy with them. The large inside seam I filled with squadron putty. I filled the base with Gypsum and I hope that will pay off in the end.

Overall I like the kit and will get more , after I get through this one.


Any pointers are most welcome
airborne1
Visit this Community
Queensland, Australia
Joined: April 15, 2006
KitMaker: 915 posts
Armorama: 797 posts
Posted: Tuesday, February 23, 2010 - 11:07 PM UTC
The buildings look great .
There has been some really good progress .Excellent effort to everyone who has
exhibited thier workmanship.
For me ,I have got a long way to go to catch up .With a few weeks holidays coming up shortly I plan to catch up and have the building ready for the base.

The layout is to show the building on the board for a diorama set in the early part of 1945.
The vehicle has been completed for a few months sitting idle waiting for me to commence an action based diorama with the Miniart building.
Here is the intro


more progress images to follow shortly.

Michael

thomokiwi
Visit this Community
Christchurch, New Zealand
Joined: January 11, 2006
KitMaker: 438 posts
Armorama: 359 posts
Posted: Wednesday, February 24, 2010 - 07:57 PM UTC
Finished filling and sanding. I placed on the windows and down pipes. The kit goes together well and has taught me a few lessons. Hopefully I will get the primer coat on tonight

Rattler
Visit this Community
Texas, United States
Joined: November 23, 2002
KitMaker: 512 posts
Armorama: 277 posts
Posted: Sunday, February 28, 2010 - 03:58 AM UTC
I'm a bit of a late start, but better late than never right.... lol

anyways I'll be going with the recent release # 35540 (North African House) ... got it the other day in the mail, will get photos of wip shots soon.

thomokiwi
Visit this Community
Christchurch, New Zealand
Joined: January 11, 2006
KitMaker: 438 posts
Armorama: 359 posts
Posted: Sunday, February 28, 2010 - 09:41 PM UTC
Well a week on sick leave and unable, well told, not get out and about. I have made progress.


Unfortunately I have never been to europe so any suggestions or on the colours, particularly the street lamp would be greatly appreciated.

Bit of pigment to go on after a few washes and a bit of rubble to close a few gaps as the wall isn't attached yet.

I have enjoyed this kit, not the joins though and will hopefully find another before this campaign closes.
exer
Visit this Community
Dublin, Ireland
Joined: November 27, 2004
KitMaker: 6,048 posts
Armorama: 4,619 posts
Posted: Sunday, February 28, 2010 - 10:26 PM UTC
Welcome aboard Chris, I'm waiting to get my hands on that kit myself.

Thomo that looks really good. How did you achieve the distressed paint look?

Are you going to mount a vehicle or some figures on it?
exer
Visit this Community
Dublin, Ireland
Joined: November 27, 2004
KitMaker: 6,048 posts
Armorama: 4,619 posts
Posted: Sunday, February 28, 2010 - 11:51 PM UTC
My ruined church is on hold while I wait for another kit to chop, change and add to it.

These are not for the campaign and none of them are finished but I thought I'd show them anyway. My plan is to include most if not all in a huge Diorama a la Dan Capuano.


Meanwhile I thought I'd show some of the other Minart and TM Diorama buildings in various stages of finish from my workbench (or the Kitchen table as it's known in our house)


TM Diorama 3517 - Hotel ruins


TM Diorama 3513 - Bank ruins


MiniArt 35023 - Hungarian Country House
I put a door in the side of this and built the floors and roof from coffee stirrers and plastic strip


MiniArt 35013 - Austrian City Building


This is the building from MiniArt 36002 Diorama - Russian Street. I added three layers of bricks from plaster and extra height using styrofoam. I'm going to add a lot of rubble and I might punch a hole in the middle of the base of the wall for one of the snipers
Rattler
Visit this Community
Texas, United States
Joined: November 23, 2002
KitMaker: 512 posts
Armorama: 277 posts
Posted: Monday, March 01, 2010 - 09:55 AM UTC
ok so the main building is finished. just a few lil touch up's here and there... still have to add the stair case and it's wall perm. but here are a couple shots...


Will get more done after class tonight.
exer
Visit this Community
Dublin, Ireland
Joined: November 27, 2004
KitMaker: 6,048 posts
Armorama: 4,619 posts
Posted: Monday, March 01, 2010 - 10:09 AM UTC
That looks really nice Chris. I'm going to check out my LHS tomorrow to see if he has one.
Rattler
Visit this Community
Texas, United States
Joined: November 23, 2002
KitMaker: 512 posts
Armorama: 277 posts
Posted: Monday, March 01, 2010 - 06:37 PM UTC
just be careful with the cutting... I fouled up alot of the corners but thank got for 2 part epoxy putty and the sprue box lol other wise I'd have blown it up... All in all though it's a neat kit, never having done a vac kit before... only thing I would really complain about is the edges are a bear to get glued up an in line. But I think I'll get a different one to try again.. tomorrow if weather is nice I'll prime it and see how it looks.
exer
Visit this Community
Dublin, Ireland
Joined: November 27, 2004
KitMaker: 6,048 posts
Armorama: 4,619 posts
Posted: Tuesday, March 02, 2010 - 06:57 AM UTC
Well my LHS had only one North African Building and it was being held for another modeler
They did however have my 2nd ruined church kit which I ordered before christmas so I can get on with my conversion--there's the makings of a pun there church/conversion but I can't think of one
exer
Visit this Community
Dublin, Ireland
Joined: November 27, 2004
KitMaker: 6,048 posts
Armorama: 4,619 posts
Posted: Wednesday, March 03, 2010 - 07:33 AM UTC
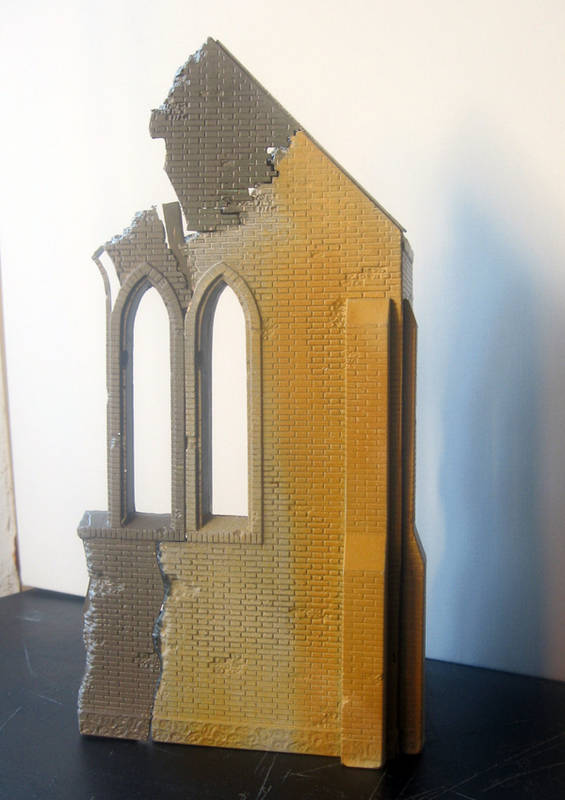
So I've begun to chop up the second ruined church kit. I used part of it to add some height to the gable wall. I found it tricky to do- hence the gaps, but that's why filler was invented.

Rattler
Visit this Community
Texas, United States
Joined: November 23, 2002
KitMaker: 512 posts
Armorama: 277 posts
Posted: Wednesday, March 03, 2010 - 04:38 PM UTC
Pat, Church is looking good... gotta love filler chuckles... and it smelllssss sooooo good ..


ok so I got a primer coat on... and added some wood bracing as well as 1 door frame so far. I will be doing the other door frame and window frames as well, but heres a look at what it looks like so far.


The kit supplied wood braces just didn't look right to Me so I hit up the local hobby lobby and LHS to see if I could find a good replacement and I did... I think they look nice.. what do yall think?

The last 2 points for the bracing I've left off till alil later so I can do the door frame on 2nd level and get some paint laid down first.. then I'll add the 2 remaining braces.
muddyfields
Visit this Community
Scotland, United Kingdom
Joined: February 04, 2006
KitMaker: 884 posts
Armorama: 622 posts
Posted: Thursday, March 04, 2010 - 04:04 AM UTC
Hi
Have added the windows & door. I'm now deciding how I want to make the 1st floor & the Bedroom ceiling. Cant decide wether to make a part roof or not.

Will add some pic's soon.
have put a few more into my photobucket album.

Shaun
exer
Visit this Community
Dublin, Ireland
Joined: November 27, 2004
KitMaker: 6,048 posts
Armorama: 4,619 posts
Posted: Thursday, March 04, 2010 - 06:16 AM UTC
Shaun & everyone else the Gallery is open so you can upload oneor two in progress shots there

http://gallery.kitmaker.net/showgallery.php/cat/25149

Chris I really like the sense of depth the North African building gives.

In between real life I have added another window to the church
endrju007
Visit this Community
Wojewodztwo Podkarpackie, Poland
Joined: December 05, 2007
KitMaker: 2,435 posts
Armorama: 1,256 posts
Posted: Saturday, March 06, 2010 - 02:47 AM UTC
Hi,
I just want to show you what I'm planning to join you with. I've managed to gather all kits I wanted to use and here they are:
.
I do hope to start soon but I have to finish three other builds I've started already .

It will be easier for me since you've presented many useful techniques here.

Andrzej
exer
Visit this Community
Dublin, Ireland
Joined: November 27, 2004
KitMaker: 6,048 posts
Armorama: 4,619 posts
Posted: Saturday, March 06, 2010 - 11:46 PM UTC
I look forward to seeing it Andrzej
trackpads
Visit this Community
England - South East, United Kingdom
Joined: December 17, 2008
KitMaker: 330 posts
Armorama: 284 posts
Posted: Sunday, March 07, 2010 - 05:49 AM UTC
Hi guys i am having a brain fart at the mo and having probs getting my build to come to life and looked used and forlorn.i stll need to add pigments.


Any help or advise here to point me in the right direction would be great.thanks.